Embed Size (px)
Citation preview
November 2014
- 1 - - 1-
T!"#$!%&'$(%&)"*& for
Museum to the ClassroomJoslyn Art Museum Comprehensive Study Lesson Plan
Created by Julie Daigle, Angie Fischer, Carter Leeka, Sue Oles, Trever Reeh & Laura Huntimer
CONTEMPORARY PRINTMAKING
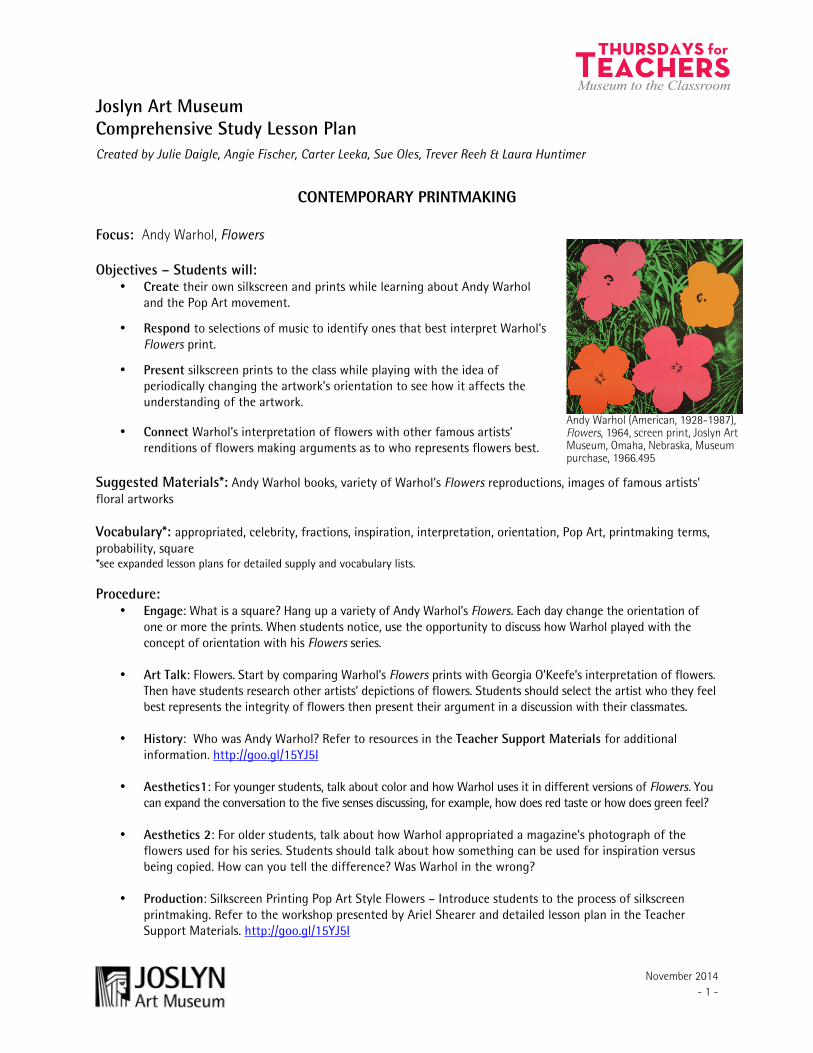
Focus: Andy Warhol, Flowers
Objectives – Students will: • Create their own silkscreen and prints while learning about Andy Warhol
and the Pop Art movement.
• Respond to selections of music to identify ones that best interpret Warhol’sFlowers print.
• Present silkscreen prints to the class while playing with the idea ofperiodically changing the artwork’s orientation to see how it affects theunderstanding of the artwork.
• Connect Warhol’s interpretation of flowers with other famous artists’renditions of flowers making arguments as to who represents flowers best.
Suggested Materials*: Andy Warhol books, variety of Warhol’s Flowers reproductions, images of famous artists’ floral artworks
Vocabulary*: appropriated, celebrity, fractions, inspiration, interpretation, orientation, Pop Art, printmaking terms, probability, square *see expanded lesson plans for detailed supply and vocabulary lists.
Procedure:• Engage: What is a square? Hang up a variety of Andy Warhol’s Flowers. Each day change the orientation of
one or more the prints. When students notice, use the opportunity to discuss how Warhol played with theconcept of orientation with his Flowers series. =
• Art Talk: Flowers. Start by comparing Warhol’s Flowers prints with Georgia O’Keefe’s interpretation of flowers.Then have students research other artists’ depictions of flowers. Students should select the artist who they feelbest represents the integrity of flowers then present their argument in a discussion with their classmates.
• History: Who was Andy Warhol? Refer to resources in the Teacher Support Materials for additionalinformation. http://goo.gl/15YJ5I
• Aesthetics1: For younger students, talk about color and how Warhol uses it in different versions of Flowers. Youcan expand the conversation to the five senses discussing, for example, how does red taste or how does green feel?
• Aesthetics 2: For older students, talk about how Warhol appropriated a magazine’s photograph of theflowers used for his series. Students should talk about how something can be used for inspiration versusbeing copied. How can you tell the difference? Was Warhol in the wrong?
• Production: Silkscreen Printing Pop Art Style Flowers – Introduce students to the process of silkscreenprintmaking. Refer to the workshop presented by Ariel Shearer and detailed lesson plan in the TeacherSupport Materials. http://goo.gl/15YJ5I
Andy Warhol (American, 1928-1987), Flowers, 1964, screen print, Joslyn Art Museum, Omaha, Nebraska, Museum purchase, 1966.495
November 2014
- 2 - - 2-
T!"#$!%&'$(%&)"*& for
Museum to the Classroom
• Other: Flowers Sound Activity. Have students select the music they feel is the best interpretation ofFlowers. Does the music selection change with the different color variations of Flowers? Refer to a list ofsuggested music in the Teacher Support Materials. http://goo.gl/15YJ5I This lesson is adapted from The AndyWarhol Museum’s “Camouflage Sound Activity.” http://goo.gl/tfNOVf
• Close: Take the prints created in production and display for the class. Remember to encourage students toplay with the orientation. In fact, have them cut up the image to create a new composition.
Extensions: • Cultural Connections: Advertising. Talk about how Pop Art has its roots in graphic design and how it
affected advertising. How has the field has evolved? Consider having students write a script for MadMen thinking about how the characters would react to Warhol’s point of view.
• Fine Arts 1: Monoprint Pop Portraits. Introduce students to Warhol’s fascination with celebrities and printsof famous people while teaching them a monoprint technique. Refer to the workshop presented by CareyHernandez and detailed lesson plan in the Teacher Support Materials. http://goo.gl/15YJ5I
• Fine Arts 2: Screen Printing: Paper Cut Stencils. Teach students about color layering, shape, line,transparency, and positive/negative space with this screen printing process. Refer to the workshoppresented by Joshua Norton and detailed lesson plan in the Teacher Support Materials. http://goo.gl/15YJ5I
• Language Arts 1: For younger students, discuss Warhol’s start in comics. Then give them a copy of Flowersand ask them to draw speech balloons or thought balloons for each flower to tell a story or perhaps a momentof a story. Share them with the class.
• Language Arts 2: For older students, share Warhol’s quote “Art is what you can get away with.” Have thembring a functional item from home. Students should write out an argument as to why the item’s design shouldbe considered art.
• Math 1: For younger students, use Flowers to discuss fractions by breaking up the image colors in 1/4 and 1/2.They could also divide up each individual flower’s petals.
• Math 2: For older students, use the artwork to discuss the concept of probability. How many different colorcombinations are possible with the Flowers composition?
• Science: The anatomy of a flower. Have students identify and research the flower Warhol featured in thissignificant print series. Discuss the difference between this version and a scientific illustration. Perhapsassign students to create a scientific illustration to display with their favorite version of Warhol’s Flowers.
Academic Standards & additional resources: Available on online version at www.joslyn.org/education/teachers/thursdays-for-teachers [select Lesson Plans, then Modern & Contemporary]
About the Artwork: In 1964 Metropolitan Museum of Art curator Henry Geldzahler allegedly suggested to Warhol that he paint something “fun and joyous.” Having spent the early 1960s feeding his predilection for the macabre by portraying fatal car crashes, assassinations, and race riots, Warhol took Geldzahler’s advice and shifted his attention to an entirely different theme: flowers. As he had done with the electric chair, Warhol turned to print media for inspiration for this new series, selecting an image from a June 1964 Modern Photography magazine article. After cropping and amplifying the contrast of the source image, Warhol applied a dizzying array of intense colors to the flowers. More psychedelic than naturalistic, these prints reflect the inauthentic experience of looking at an altered image, reminding viewers that a photograph, like any other art form, represents a specific point of view.
LESSON PLAN
November 2014 - 4-
T!"#$!%&'$(%&)"*& for
Museum to the Classroom
Silkscreen Printing Pop Art Style Flowers Inspired by Andy Warhol’s Flowers Created by Ariel Shearer, Artist/Instructor at Joslyn Art Museum [email protected] Grade Level Elementary
Overview This project is to introduce the steps of silkscreen printmaking for all ages. Students will create their own personal silkscreen while learning about artist Andy Warhol and Pop Art. They will use an unique color palette to their liking. Students will sign and mount artwork on a background to finish their project.
Anticipatory Set Andy Warhol was an artist ahead of his time. When he was young, he was bed ridden because of a disease he had. He spent a lot of time in this room surrounded by pictures of celebrities. He was known as the social outcast or the weird kid when his did get back to school. Later he worked as an illustrator in advertising. The combination of icon obsessed and marketing blossomed into what we call Pop Art or Popular Culture.
Objectives • Students will explore different not natural color schemes• Students will investigate what “Pop Art” Means• Students will study the steps and use vocabulary for silkscreen printing• Students will paint a watercolor piece• Students will create a silkscreen print over the watercolor piece
Resources • Pop Art Lesson for Kids and Teens 4:41 minutes, YouTube video posted by Christine Ale
http://goo.gl/fwLvta • Super Simple Screen Printing 4:09 minutes, YouTube video posted by Sylvia http://goo.gl/j46r6w• Andy Warhol (digitally) paints Debbie Harry on an Amiga, 1:41 minutes, YouTube video posted by
theisotope http://goo.gl/us9RSE• Kuhl, Isabel. Andy Warhol, 2013. Available at Omaha Public Library• Venezia, Mike. Andy Warhol, 1996*• Andy Warhol, Linda Bolton*
*Available via Joslyn’s Nelson Teacher Resource Center http://www.joslyn.org/education/teachers
Supplies • Mod Podge (water resistant glue)• Disposable Paintbrush (for Mod Podge)• Variety of paint brushes (for watercolors)• Embroidery Hoops• Printing Inks• Squeegees• Sheer fabric• Tempera cakes (watercolors)
• 6”x6” or 10”x10” watercolor paper• 9”x9” or 13”x13” colored paper for
mounting artwork• Sink to wash screen and squeegee• Pencils• Paper towels• Cup of water• Spoons
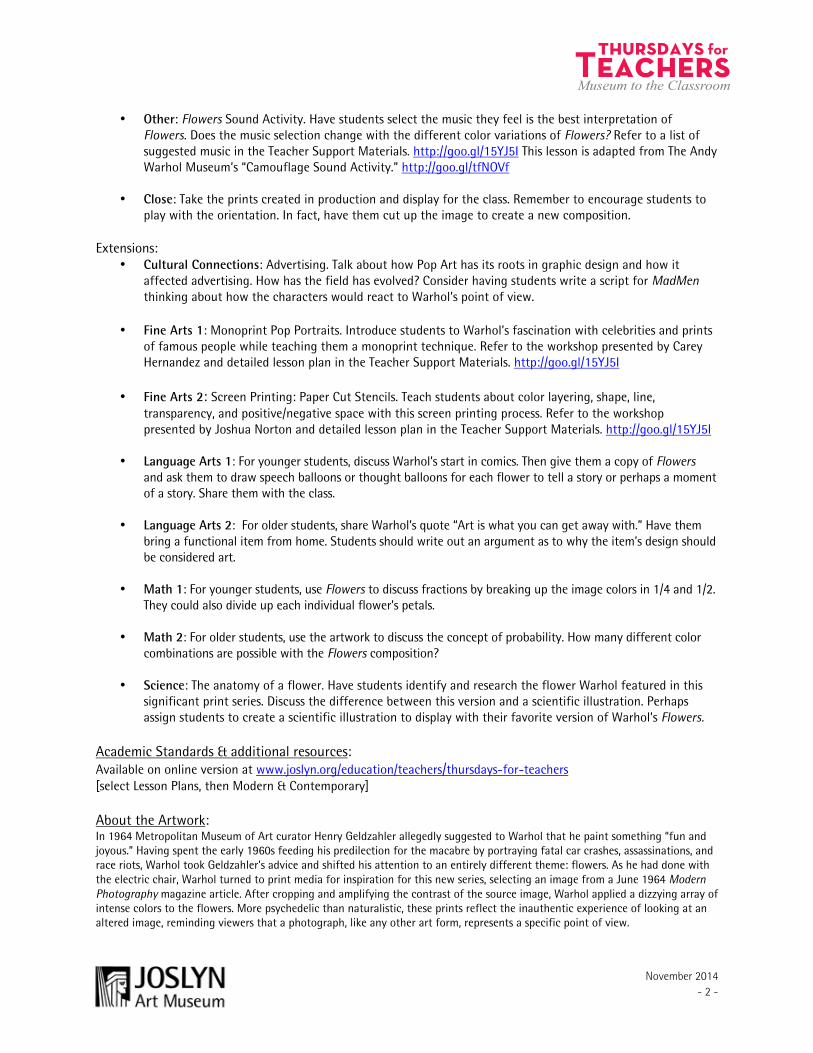
Andy Warhol (American, 1928-1987), Flowers, 1964, screen print, Joslyn Art Museum, Omaha, Nebraska, Museum purchase, 1966.495
LESSON PLAN
November 2014 - 5 -
T!"#$!%&'$(%&)"*& for
Museum to the Classroom
Vocabulary • Screen: This is a frame with a mesh stretched across it. It is where all the action takes place.
• Flooding the Screen: This is when you pour ink on the screen and spread the ink over the design.It is "flooding" your design with ink so on the next pass, the ink can go through the screen. Notdoing this will result in partial prints.
• Pulling a Screen: This is the second pass over the screen to transfer the ink through the screenonto the product.
Lesson Outline Day 1:
1. Discuss printmaking process (read books/show videos)2. Older kids: have them explore through books and the computer to find subject matter.
Younger kids: have a master silkscreen ready to go (By following steps below).3. Pick subject matter to use and begin by tracing onto pre stretched screen by placing the image
underneath screen.4. Once completely done tracing place screen on top of newspaper5. Use disposable paintbrush to paint Mod Podge onto screen. NOTE: You want the Mod Podge
where you DON”T want ink to be on your paper. Where you put the Mod Podge is where thepaper underneath will be on the touched by ink. Another way to think of it is that the Mod Podgeis blocking ink.
6. Frequently lift up to light to see any pin holes and re apply Mod Podge as necessary.7. Let dry 8 hours8. Paint 6”x6” or 10”x10” watercolor paper bright and bold. Remember to fill the paint brush with
color to get a more bright, bold, rich color. If you want a soft, dreamy look use less paint andmore water.
9. Let dry
Day 2: 1. Review last visits details and steps2. Begin with demonstration of printing. You will need your dried watercolored 6”x6” or 10”x10”
paper, ink, spoon, and squeegee.3. Place paper on a hard flat surface and the framed screen pressed flush against each other.4. Scoop a blob of ink at the edge of the frame OFF the main part of your artwork and spread it
around a little by the edge, keeping screen moving minimal as possible.5. Grab your squeegee with on hand and the other press firmly on the screen to keep from moving
around.6. Place squeegee inside the edge of the frame where you put the ink and pull the ink throughout
the screen covering it all up. (Flooding the screen)7. Lift squeegee up and begin to pull all ink to one side. Try to do this in as few pulls as possible.
Pulling squeegee at a 45 degree angle and pressing hard as you pull.8. Lift screen and WOWeeWOAHah!
LESSON PLAN
November 2014 - 6 -
T!"#$!%&'$(%&)"*& for
Museum to the Classroom
Ways to Modify the lesson: Change subject matter or theme for students to follow
Instead of a can of Campbell's soup could do a can of Fanta pop Have a theme be “Nebraska” or have the children pick a new icon
Change the color scheme to best fit your lesson. Primary colors Secondary colors Neon colors Monochromatic (one color, many values)
Change watercolor background to a different medium Markers Colored Pencils No background color at all-leave it blank
Change position or direction of screen Make image ying-yang Make image mirrored Make image overlap for a dramatic feel
Academic Standards Available on online version at www.joslyn.org/education/teachers/ [select Lesson Plans, then Modern & Contemporary]
About the Artist
Andy Warhol (1928–1987) once famously quipped, “I like boring things.” Indulging this predilection throughout his career, he depicted the mundane, the everyday, the obvious, and the overused:
“The pop artists did images that anybody walking down Broadway could recognize in a split second — comics, picnic tables, men’s trousers, celebrities, shower curtains, refrigerators, Coke bottles. All the great modern things that the Abstract Expressionists tried not to notice at all.”
The leading figure of American Pop Art, a movement that took shape in the 1950s, Warhol focused his attention on the social and political turbulence and unprecedented consumerism that emerged as the United States began to recover from World War II. Drawing inspiration from the rapidly changing world around him, Warhol pursued an approach to making art that was more inclusive and aware of the day-to-day conditions of contemporary life.
LESSON PLAN
November 2014 - 7 -
T!"#$!%&'$(%&)"*& for
Museum to the Classroom
Monoprint Pop Portraits Inspired by Andy Warhol’s prints of famous people Created by Carey Hernandez, artist / art educator at Joslyn Art Museum, [email protected] Grade Level 6th–12th grade
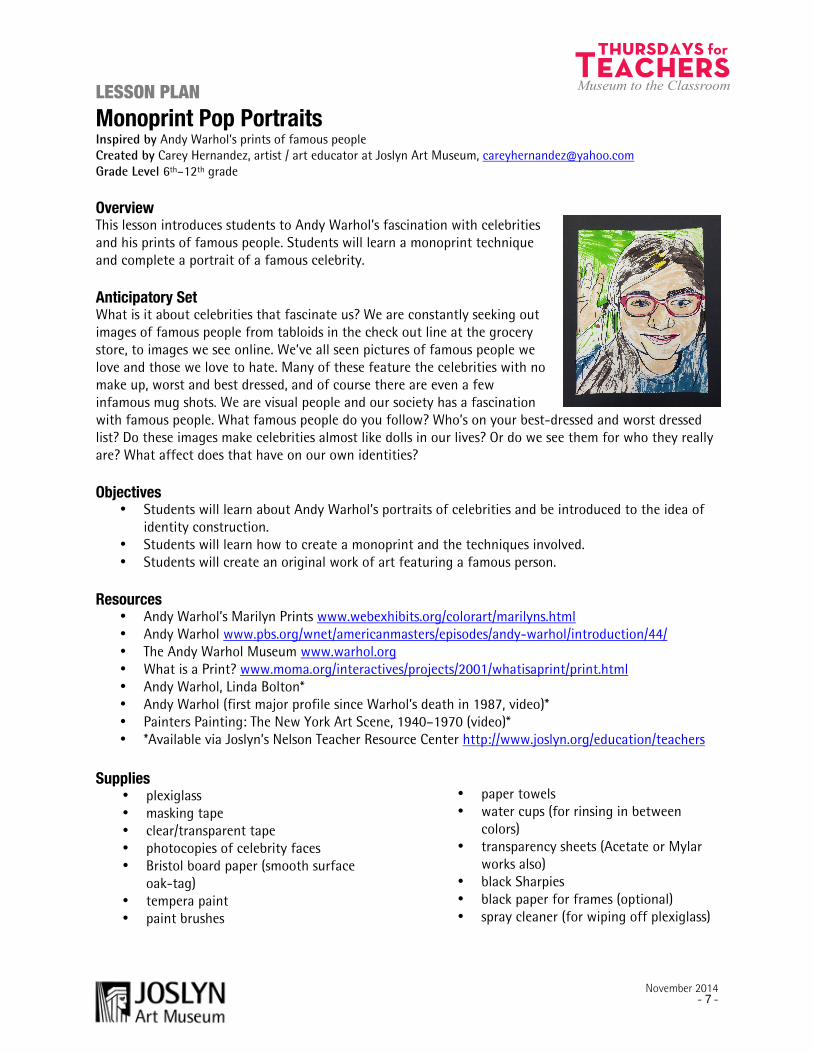
Overview This lesson introduces students to Andy Warhol’s fascination with celebrities and his prints of famous people. Students will learn a monoprint technique and complete a portrait of a famous celebrity.
Anticipatory Set What is it about celebrities that fascinate us? We are constantly seeking out images of famous people from tabloids in the check out line at the grocery store, to images we see online. We’ve all seen pictures of famous people we love and those we love to hate. Many of these feature the celebrities with no make up, worst and best dressed, and of course there are even a few infamous mug shots. We are visual people and our society has a fascination with famous people. What famous people do you follow? Who’s on your best-dressed and worst dressed list? Do these images make celebrities almost like dolls in our lives? Or do we see them for who they really are? What affect does that have on our own identities?
Objectives • Students will learn about Andy Warhol’s portraits of celebrities and be introduced to the idea of
identity construction. • Students will learn how to create a monoprint and the techniques involved.• Students will create an original work of art featuring a famous person.
Resources • Andy Warhol’s Marilyn Prints www.webexhibits.org/colorart/marilyns.html• Andy Warhol www.pbs.org/wnet/americanmasters/episodes/andy-warhol/introduction/44/• The Andy Warhol Museum www.warhol.org• What is a Print? www.moma.org/interactives/projects/2001/whatisaprint/print.html• Andy Warhol, Linda Bolton*• Andy Warhol (first major profile since Warhol’s death in 1987, video)*• Painters Painting: The New York Art Scene, 1940–1970 (video)*• *Available via Joslyn’s Nelson Teacher Resource Center http://www.joslyn.org/education/teachers
Supplies • plexiglass• masking tape• clear/transparent tape• photocopies of celebrity faces• Bristol board paper (smooth surface
oak-tag)• tempera paint• paint brushes
• paper towels• water cups (for rinsing in between
colors)• transparency sheets (Acetate or Mylar
works also)• black Sharpies• black paper for frames (optional)• spray cleaner (for wiping off plexiglass)
LESSON PLAN
November 2014 - 8 -
T!"#$!%&'$(%&)"*& for
Museum to the Classroom
Vocabulary • Printmaking: A process in art that transfers the image to create a print. Most types of
printmaking allow making multiple images. • Monoprint: One-off prints• Texture• Color• Contrast
Lesson Outline Introduction: Introduce students to Andy Warhol’s images of celebrities. Ask them questions about how color choices affect the mood or feeling of the image. Briefly talk about printmaking and how it provides a way for artists to produce more than one image from a plate or screen. Explain that monoprinting is only one print, but that the plate could be used again and again with the same image.
Demonstrate the monoprinting technique and have students follow along.
1. Place the photocopy under the plexiglass and secure it with tape on two sides.2. Place a piece of Bristol board paper on top of the plexiglass and secure the top only with tape.
The paper should be able to open and close with a hinge at the top.3. Lift the paper open and begin painting small sections of the face on the plexiglass with tempera
paint. It is important to work only in small sections so that the paint won’t dry before you print.4. Close the paper so that it covers the plexiglass and rub with the palm of your hand over the area
you just painted. This will cause the paint to transfer from the plexiglass to the paper.5. Continue painting in small sections of the face and repeat the above process until you have a
complete image on your paper.
Final Details
1. While prints are drying, place a clear transparency sheet over the photocopy you used. Trace theface and add any details with black Sharpie.
2. Once the prints are dry, take the transparency outline and flip it over so the image lines up withthe painted print. Secure with clear tape.
3. Optional step: Cut a black paper frame with a window cut slightly smaller than the print. Securethe print with the transparency with tape to the backside.
Extensions • Use the monoprinting technique with photos of students to create self-portraits.• Have the students make multiple prints of the same image using different colors. Discuss how
color choices affect the mood and feeling.• Create one print with realistic colors and one print with neon colors.• Use the monoprinting technique to create landscape prints or still life prints.• Write a paper or discuss about how our society uses images of celebrities and how much of this is
constructed. How does this affect our own image and feelings of self-worth?
Academic Standards Available on online version at www.joslyn.org/education/teachers/ [select Lesson Plans, then Modern & Contemporary]
LESSON PLAN
November 2014 - 9 -
T!"#$!%&'$(%&)"*& for
Museum to the Classroom
Screen Printing: Paper Cut Stencils Inspired by Andy Warhol’s from Joslyn’s In Living Color exhibition (October 11, 2014–January 11, 2015) Created by Joshua Norton, printmaking artist & facilities coordinator at The Union for Contemporary Arts Grade Level Jr/Sr High School
Overview This process helps introduce students to the art and process of screen printing. Students will learn about color layering, shape, line, transparency, and positive/negative space. Bold, graphic forms will be easily cut out and printed multiple times to create exciting, repeatable imagery. Our class will focus on portraiture.
Anticipatory Set Andy Warhol was a pop artist who created vivid, colorful works. Emulating some of his techniques, we will explore some of the bright colors, flat shapes, and strong compositions that make Warhol unique.
Objectives • Students will create a 2- 3 color screen print• Students will learn about positive/negative space• Students will learn proper printing technique• Students will engage with printmaking equipment/processes
Materials & Resources • Paper• screen ink• freezer paper (wax paper)• X-acto knives with sharp blades• masking tape• clean & open screens
• squeegees• hinge clamps• tables• pencils• clear mylar sheet• source material
Vocabulary • silkscreen• squeegee• positive/negative• pop• flat
• open/closed• shape• transparency• registration
Lesson Outline Create imagery. Use a photocopy of a portrait or create a drawing on a sheet of paper (approx 8" x 10")
Cut stencil: 1. Tape down your drawing to the table with two pieces of tape, then tape a piece of freezer paper
(at least twice the size of the drawing) on top of your drawing. 2. Using a sharp X-acto knife, gently cut out the outline shape of your form and remove. The first
stencil is complete, untape it and set it aside. 3. Tape a second sheet of wax paper over your drawing and cut out the detailed areas. Since we are
cutting our stencils out of paper, any interior spaces must be connected to the outside space (connect an island to a peninsula) so they don't fall out (think military stenciled letters).
LESSON PLAN
November 2014 - : -
T!"#$!%&'$(%&)"*& for
Museum to the Classroom
Printing: 1. Before we print on paper, we must first register our print (make sure it lines up properly).2. Put clean/open screen in hinge clamps. Place your clear mylar sheet underneath the screen and
tape one side of the mylar to the table. Place your printing paper underneath the mylar. Placeyour first wax paper stencil directly UNDER the screen and on top of the mylar. The proper ordershould be (from bottom to top): Table, printing paper, mylar, wax paper stencil, screen.
3. Place ink on top of screen. Using downward pressure and a slight angle, drag the squeegeetowards you and print the ink through the stencil on to the clear mylar sheet. Tilt screen up, thepaper should be adhered to the screen with the ink. The image should be printed on the mylar.From here, we can REGISTER the print, or make sure it prints to where we want it! Position yourprinting paper under the mylar. Using masking tape, place small pieces of tape on the table,surrounding two different corners of your printing table. We are making little corners that we canslide the paper into so it prints in the same area each time. When this is positioned, simply removethe mylar, position your paper in the taped corners on the table and print off five prints of yourfirst shape.
4. Clean screen with hose.5. Take new, clean and dry screen and repeat the previous step using a second stencil. Register it the
same way, using your previously printed paper. On this run, we print the details of the image.
Additional ideas / considerations Adding transparent medium to inks allow additional colors to be created when color layering occurs. Encourage your artists to explore this possibility.
Academic Standards Available on online version at www.joslyn.org/education/teachers/ [select Lesson Plans, then Modern & Contemporary]
About the Artist
Andy Warhol (1928–1987) once famously quipped, “I like boring things.” Indulging this predilection throughout his career, he depicted the mundane, the everyday, the obvious, and the overused:
“The pop artists did images that anybody walking down Broadway could recognize in a split second — comics, picnic tables, men’s trousers, celebrities, shower curtains, refrigerators, Coke bottles. All the great modern things that the Abstract Expressionists tried not to notice at all.”
The leading figure of American Pop Art, a movement that took shape in the 1950s, Warhol focused his attention on the social and political turbulence and unprecedented consumerism that emerged as the United States began to recover from World War II. Drawing inspiration from the rapidly changing world around him, Warhol pursued an approach to making art that was more inclusive and aware of the day-to-day conditions of contemporary life.