Embed Size (px)
Citation preview
September 2014
- 1 - - 1-
T!"#$!%&'$(%&)"*& for
Museum to the ClassroomJoslyn Art Museum Comprehensive Study Lesson Plan
Created by Josie Langbehn, Sue Oles, Trever Reeh & Laura Huntimer
DUTCH PORTRAITURE
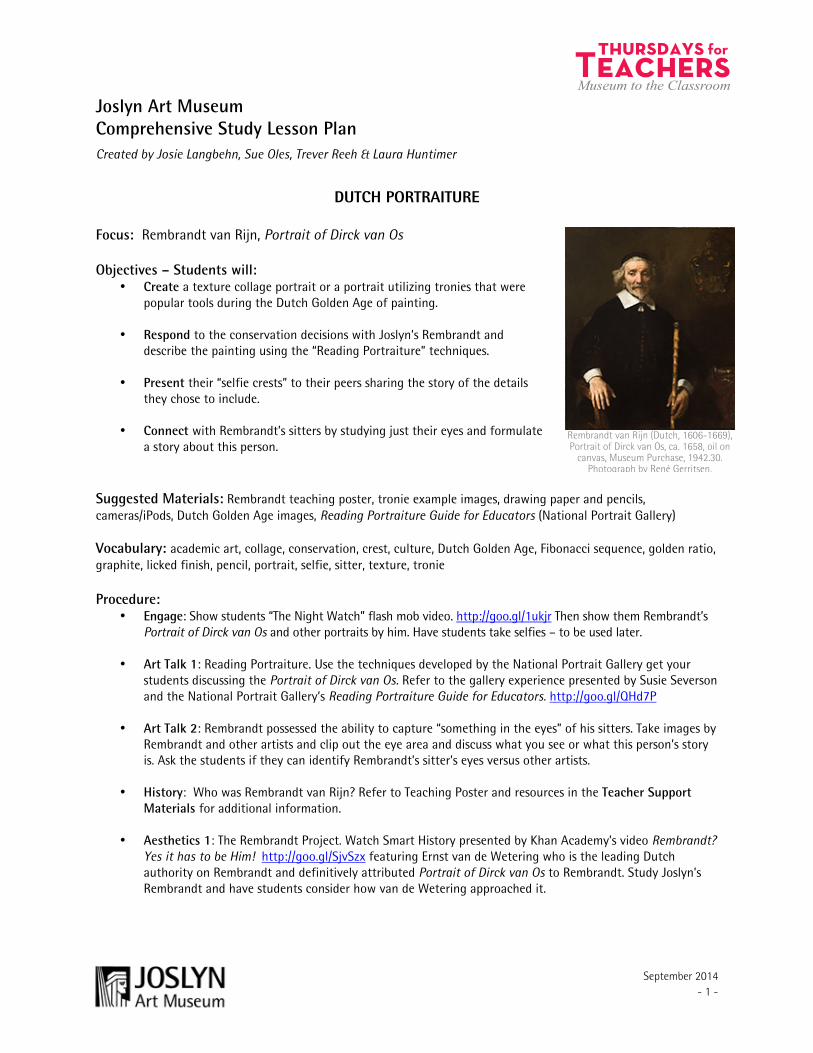
Focus: Rembrandt van Rijn, Portrait of Dirck van Os Objectives – Students will:
• Create a texture collage portrait or a portrait utilizing tronies that were popular tools during the Dutch Golden Age of painting.
• Respond to the conservation decisions with Joslyn’s Rembrandt and describe the painting using the “Reading Portraiture” techniques.
• Present their “selfie crests” to their peers sharing the story of the details
they chose to include.
• Connect with Rembrandt’s sitters by studying just their eyes and formulate a story about this person.
Suggested Materials: Rembrandt teaching poster, tronie example images, drawing paper and pencils, cameras/iPods, Dutch Golden Age images, Reading Portraiture Guide for Educators (National Portrait Gallery)
Vocabulary: academic art, collage, conservation, crest, culture, Dutch Golden Age, Fibonacci sequence, golden ratio, graphite, licked finish, pencil, portrait, selfie, sitter, texture, tronie
Procedure:
• Engage: Show students “The Night Watch” flash mob video. http://goo.gl/1ukjr Then show them Rembrandt’s Portrait of Dirck van Os and other portraits by him. Have students take selfies – to be used later.
• Art Talk 1: Reading Portraiture. Use the techniques developed by the National Portrait Gallery get your students discussing the Portrait of Dirck van Os. Refer to the gallery experience presented by Susie Severson and the National Portrait Gallery’s Reading Portraiture Guide for Educators. http://goo.gl/QHd7P
• Art Talk 2: Rembrandt possessed the ability to capture “something in the eyes” of his sitters. Take images by
Rembrandt and other artists and clip out the eye area and discuss what you see or what this person’s story is. Ask the students if they can identify Rembrandt’s sitter’s eyes versus other artists.
• History: Who was Rembrandt van Rijn? Refer to Teaching Poster and resources in the Teacher Support
Materials for additional information.
• Aesthetics 1: The Rembrandt Project. Watch Smart History presented by Khan Academy’s video Rembrandt? Yes it has to be Him! http://goo.gl/SjvSzx featuring Ernst van de Wetering who is the leading Dutch authority on Rembrandt and definitively attributed Portrait of Dirck van Os to Rembrandt. Study Joslyn’s Rembrandt and have students consider how van de Wetering approached it.
Rembrandt van Rijn (Dutch, 1606-1669), Portrait of Dirck van Os, ca. 1658, oil on
canvas, Museum Purchase, 1942.30. Photograph by René Gerritsen.
September 2014
- 2 - - 2-
T!"#$!%&'$(%&)"*& for
Museum to the Classroom• Aesthetics 2: Using the teaching poster, analyze the information regarding the conservation of the Portrait
of Dirck van Os. Discuss how it was decided to remove some details, but keep others. Consider the challenge of understanding the evolving style of Rembrandt from a licked finish to rough brush strokes.
• Production 1: Texture Collage Portraits – A new twist on the Masters. Refer to the workshop presented by
Therese Straseski and detailed lesson plan in the Teacher Support Materials. http://goo.gl/AIfAIS
• Production 2: Pencils & Portraits. Talk about how the pencil/graphite was first devised as a tool for problem-solving. Then talk about how artists like Rembrandt most likely used tronies or idealized images when creating their portraits. Refer to the workshop presented by Paul Otero.
• Other: Selfie Crests. The crest in the Portrait of Dirck van Os though determined to be added not by
Rembrandt, it was deemed important to the image for its historical information. Have students create a crest incorporating their selfie taken earlier. Option: have students interview each other and create crests based on the information gathered. [This project could be part of a Kagan Win-Win strategy.]
• Close: Share all the selfie crests in a mini-gallery show in your classroom.
Extensions:
• Cultural Connections: Compare and contrast the Portrait of Dirck van Os before and after conservation. How did the culture represented in the picture change when certain details such as the lace were removed. Why do you think those additions were made in the first place? Rembrandt was also known to use props in his studio so how would that affect the culture represented in his paintings?
• Fine Arts: Students should draw the eyes from the Language Arts project below. Then illustrate their story
in the pupil and/or iris of the eyes. You can show students René Magritte’s The False Mirror for inspiration.
• Language Arts: Have students take their selfie pic and only focus on the eyes. Fold or cut the selfie so you only have the slice of the face showing the eye/eyebrow area. Students should study their eyes or randomly switch with a classmate to then write a back-story for this person determined simply from studying their eyes.
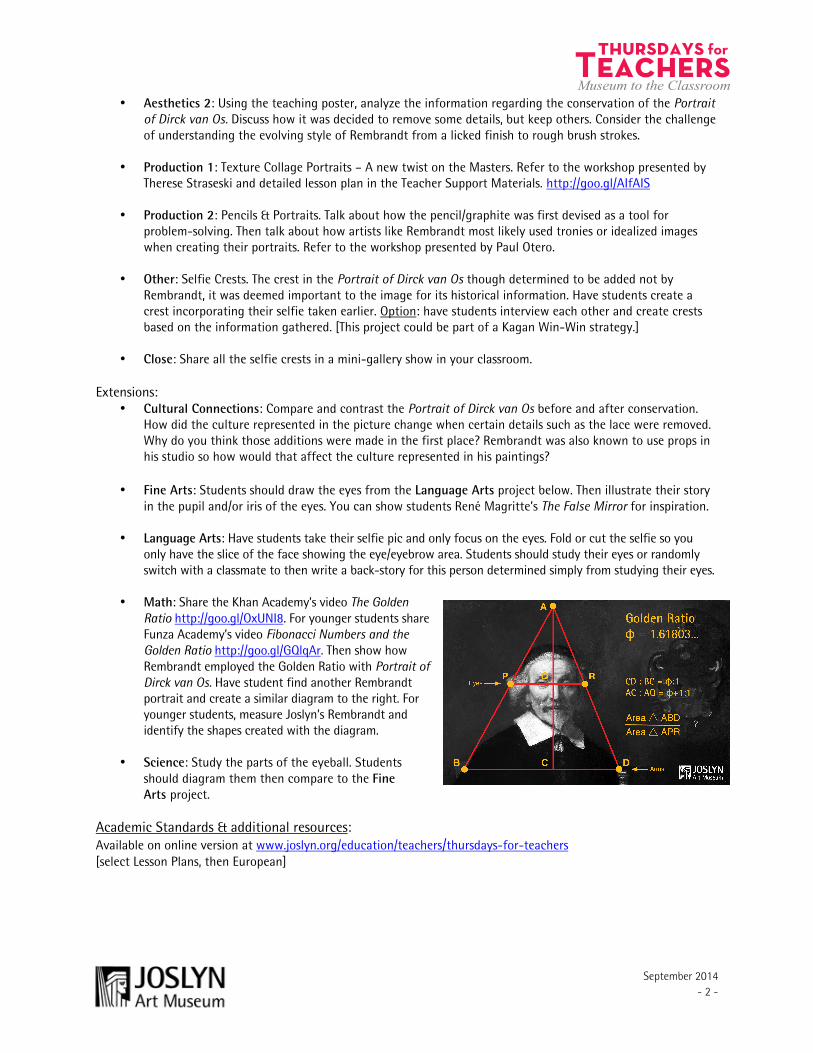
• Math: Share the Khan Academy’s video The Golden Ratio http://goo.gl/OxUNI8. For younger students share Funza Academy’s video Fibonacci Numbers and the Golden Ratio http://goo.gl/GQlqAr. Then show how Rembrandt employed the Golden Ratio with Portrait of Dirck van Os. Have student find another Rembrandt portrait and create a similar diagram to the right. For younger students, measure Joslyn’s Rembrandt and identify the shapes created with the diagram.
• Science: Study the parts of the eyeball. Students
should diagram them then compare to the Fine Arts project.
Academic Standards & additional resources: Available on online version at www.joslyn.org/education/teachers/thursdays-for-teachers [select Lesson Plans, then European]