Embed Size (px)
Citation preview

Very important! This document contains a detailed description
of all steps to be followed to install the software applications. Please read carefully!
PROWATCH (SetupDEIDE.exe, Version 2.2.1) will guide to carry out the required software installation in order to execute the DEIDE application. This software includes among other applications and configurations: - DATA BASE - MySQL Server and Clients 4.0.15 - DBS CREATION – Creates a MySQL DB: “DEIDE” - ODBC SERVICES - MySQL Connector/ODBC 3.51 - DBS MANAGEMENT - EMS MySQL Manager 2 Professional Edition Trial - VoIP - LakeOfSoft VCX 2.1 - VIDEO MANAGEMENT - SoftDVR Lite (*) - ACTIVEX – OCXHistogram + VAPGDecoder (*) - Optionally: Acrobat Reader, GPSViewer, PkUpdate and PkTools.
(*) Only for Video Streaming option.
INSTALLATION PROCESS PROWATCH – DEIDE V2.2.1:
In name of PROMAX ELECTRONICA we thank for the confidence that you have deposited in our product. This document will guide you through the installation process. This process consists of three parts. One first part about the personal computer configuration in which one the DEIDE application is going to be installed. One second completely automated part that will be executed by means of the (SetupDEIDE.exe). And finally, one third part containing the manual configuration by an advanced user or system administrator. I) PC and WINDOWS XP CONFIGURATION PROCESS:
1) You must starting up your computer, in which the Windows XP or Windows 2000 must be installed as Operating System ((Windows, Windows XP, Windows XP
PRO/HOME and service Pack are Microsoft products, copyright all rights reserved). 2) In the Display Properties, select the Settings tab and later select a
resolution of 1024 x 768 for an optimal visualisation. 3) Once installed the software provided in this package, you must carry out the
network settings (LAN or any other device that uses TCP/IP protocol, for example Wi-Fi). For it, contact your network administrator to configure the remote connexion with another PROWATCH - DEIDE equipment.
4) In order to make the remote connexion with another PROWATCH equipment, not only it is necessary to know IP address for remote equipment, you need the remote equipment name (see Control Panel - > System). Could be useful that your system administrator writes down your equipment name in a file (DEIDE allows to import and to export this file) and of all the PROWATCH equipments with which you want to communicate in order to manage a list of equipments and to configure them with the same list and in a same way. All the equipments configured with the same list will be able to communicate among them.
5) REQUIREMENTS: very important, your computer must have installed the Acrobat Reader v.5 or higher (Acrobat Reader) and a text editor tool.
II) GUIDE FOR DEIDE SOFTWARE INSTALLATION PROCESS
1) Run the “SetupDEIDE.exe” file in the CD provided or support provided. 2) This application will guide you for the basic installation of the DEIDE
equipments software. Please, follow the instructions that are detailed and do not power off the computer during the installation process until it has been completed.
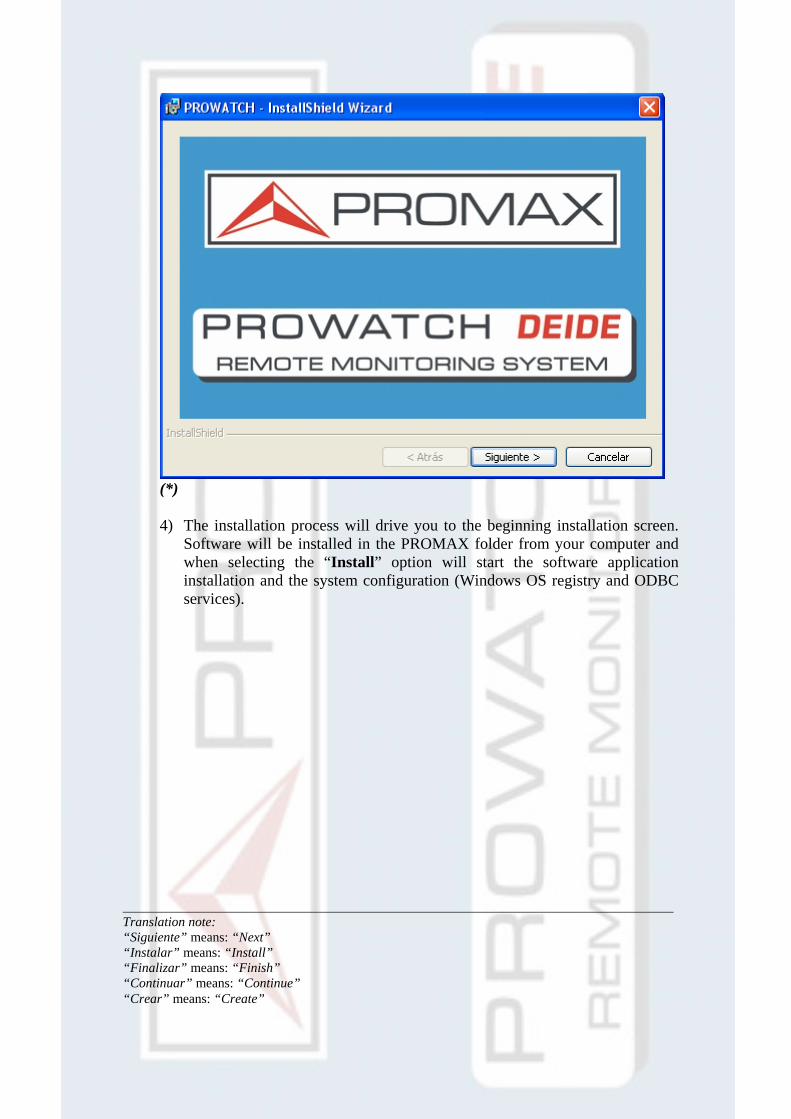
3) When executing the SetupDEIDE.exe file, the installation assistant (InstallShield Wizard) will help you during the installation process. In this first part of the process Windows OS will be configured, your system will be verified and will appear a welcome PROMAX window.
(*)
4) The installation process will drive you to the beginning installation screen.
Software will be installed in the PROMAX folder from your computer and when selecting the “Install” option will start the software application installation and the system configuration (Windows OS registry and ODBC services).
Translation note: “Siguiente” means: “Next” “Instalar” means: “Install” “Finalizar” means: “Finish” “Continuar” means: “Continue” “Crear” means: “Create”
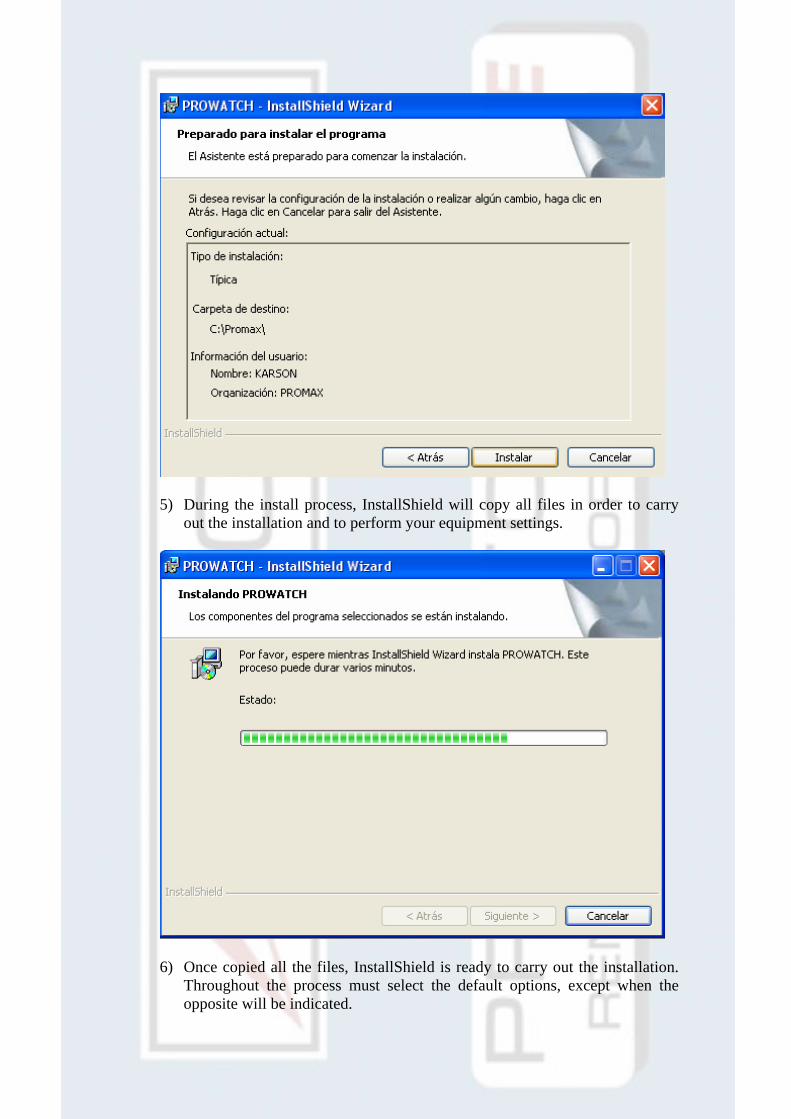
5) During the install process, InstallShield will copy all files in order to carry out the installation and to perform your equipment settings.
6) Once copied all the files, InstallShield is ready to carry out the installation. Throughout the process must select the default options, except when the opposite will be indicated.

7) Later the installation of MySQL database v4.0.15 begins, selecting all the parameters by default.
8) The MySQL database is a very important step in the installation process, reason why it is necessary to pay attention until the process is successfully completed.
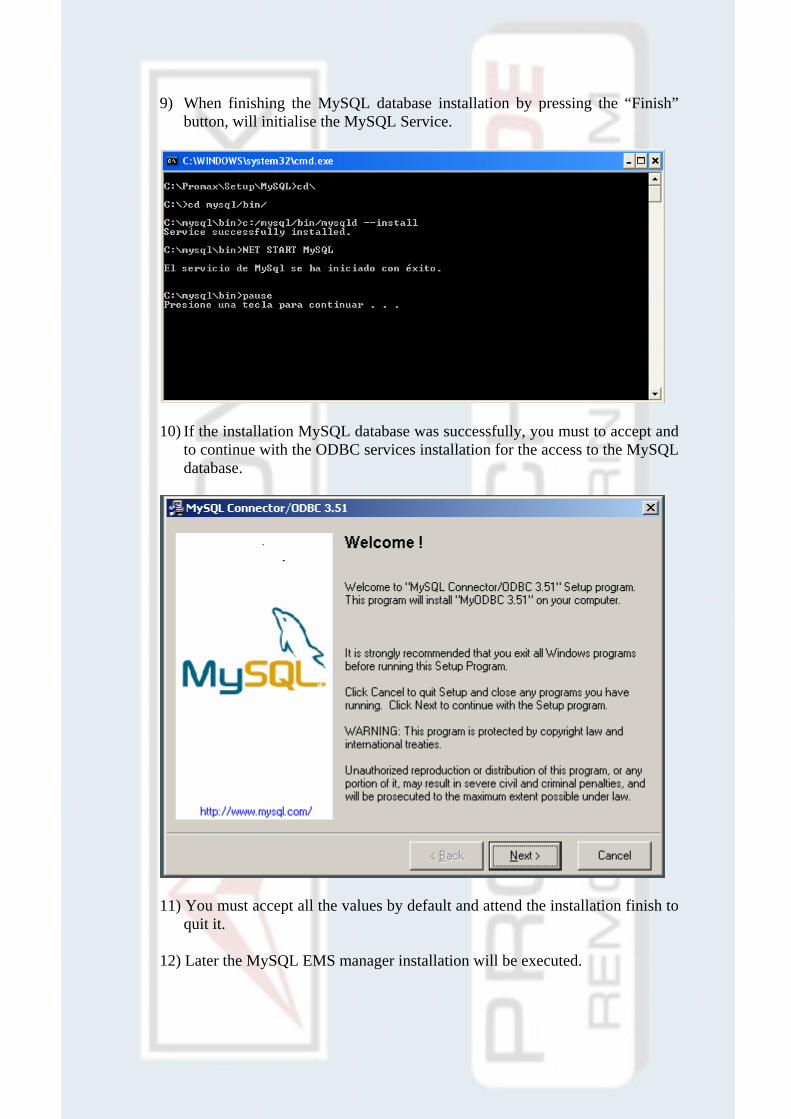
9) When finishing the MySQL database installation by pressing the “Finish” button, will initialise the MySQL Service.
10) If the installation MySQL database was successfully, you must to accept and to continue with the ODBC services installation for the access to the MySQL database.
11) You must accept all the values by default and attend the installation finish to quit it.
12) Later the MySQL EMS manager installation will be executed.
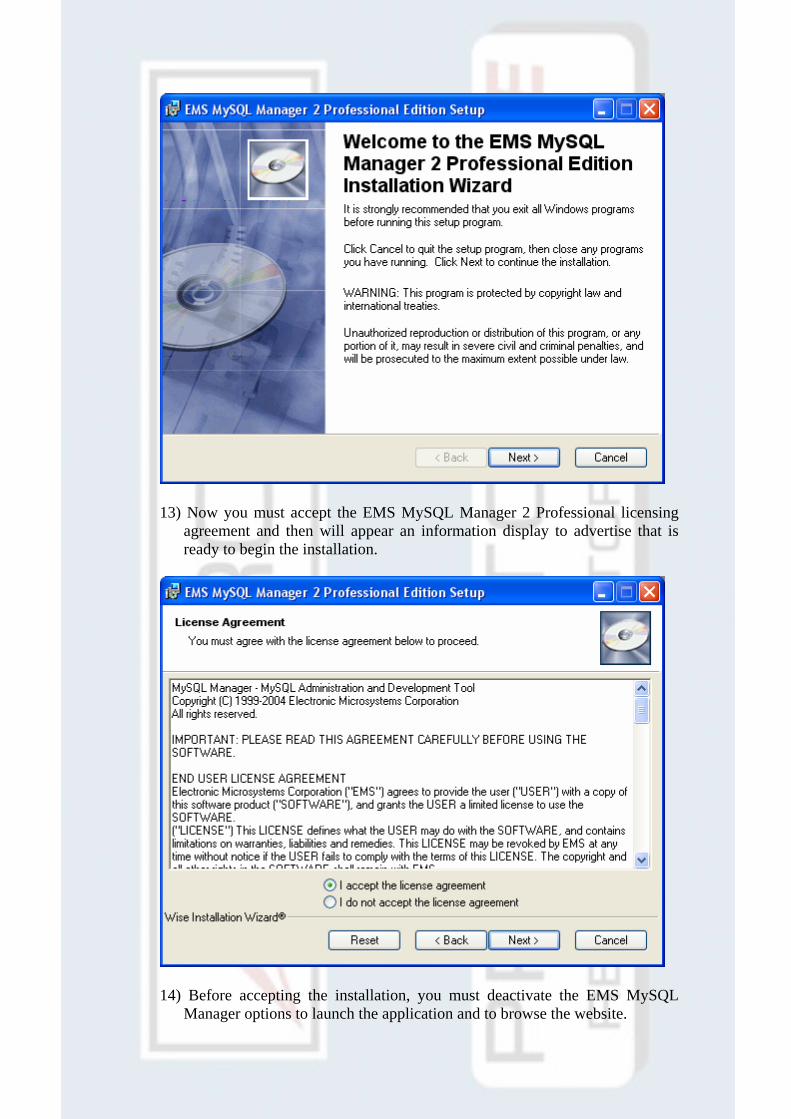
13) Now you must accept the EMS MySQL Manager 2 Professional licensing agreement and then will appear an information display to advertise that is ready to begin the installation.
14) Before accepting the installation, you must deactivate the EMS MySQL Manager options to launch the application and to browse the website.

15) Once you accept it, the MySQL database manager will be installed and after finishing it will appear a screen like the following one to inform that the installation has been done successfully.
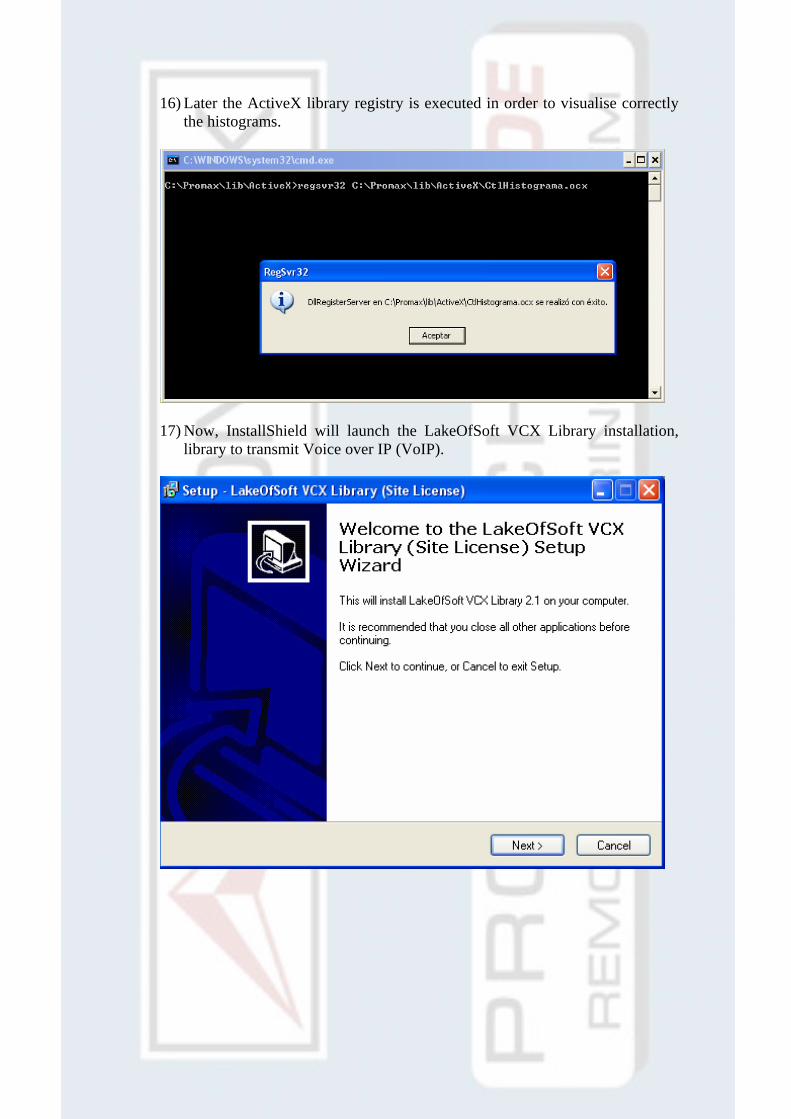
16) Later the ActiveX library registry is executed in order to visualise correctly the histograms.
17) Now, InstallShield will launch the LakeOfSoft VCX Library installation, library to transmit Voice over IP (VoIP).
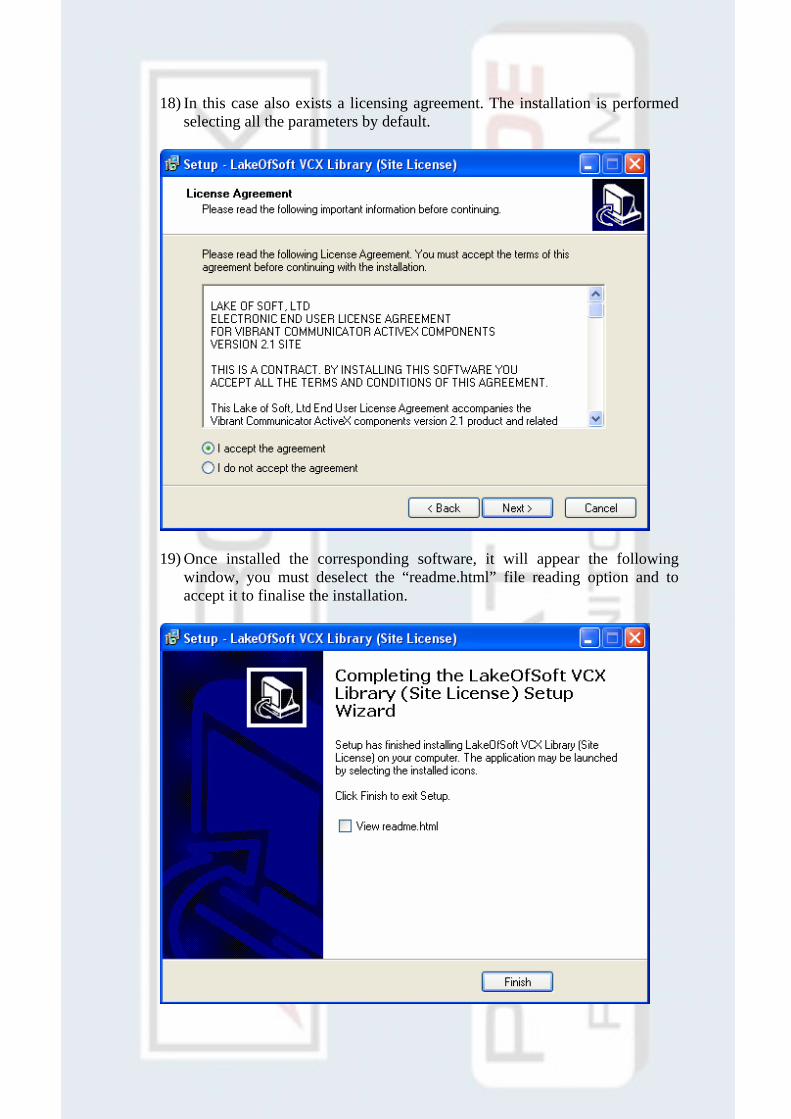
18) In this case also exists a licensing agreement. The installation is performed selecting all the parameters by default.
19) Once installed the corresponding software, it will appear the following window, you must deselect the “readme.html” file reading option and to accept it to finalise the installation.

20) Next begins the package installation for SoftDVR Lite v2.0 multimedia video/ audio playing and recording devices.
21) In spite this software package does not pass the Windows logo-compliant testing, you must follow with the installation process.
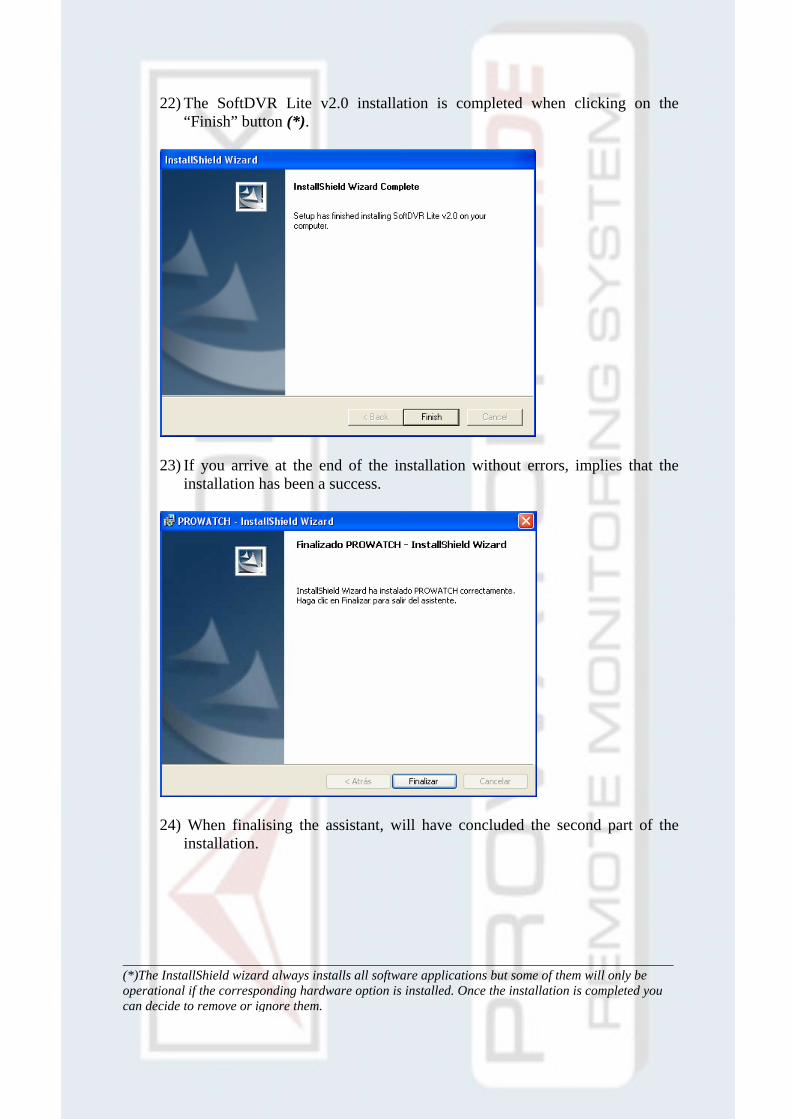
22) The SoftDVR Lite v2.0 installation is completed when clicking on the “Finish” button (*).
23) If you arrive at the end of the installation without errors, implies that the installation has been a success.
24) When finalising the assistant, will have concluded the second part of the installation.
(*)The InstallShield wizard always installs all software applications but some of them will only be operational if the corresponding hardware option is installed. Once the installation is completed you can decide to remove or ignore them.

III) PROWATCH - DEIDE MANUAL CONFIGURATION PROCESS:
1) At this moment, your equipment is still not completely set to execute the
DEIDE application. This process will be finalised once fixed the scripts registry corresponding to DEIDE database and the VCX for VoIP library registry.
2) First, you must run the program “EMS MySQL Manager 2 Professional” that
is located in the “Start” menu or through a direct access in the desktop. 3) Once started the application (select language and all the others options by
default), go to the “Database” Menu and select the “Expert Database creation…." Option.
4) It appears the expert database creation screen, where the user shall enter the new database name: in “Set new database name” field by typing the “DEIDE” string name (see red circle and use capital letters), verify that all the other data are correct, as follows:
- Set New Database name: DEIDE - Host: localhost - Port: 3306 - Login: root - Password:

5) Click with the mouse on --> Database creation (small red circle). 6) Result: CREATE DATABASE DEIDE; --> Press on Create option.
7) Register Database --> Press on Register.
8) Database has been registered. It appears on the upper left side a new icon: “DEIDE on localhost”.
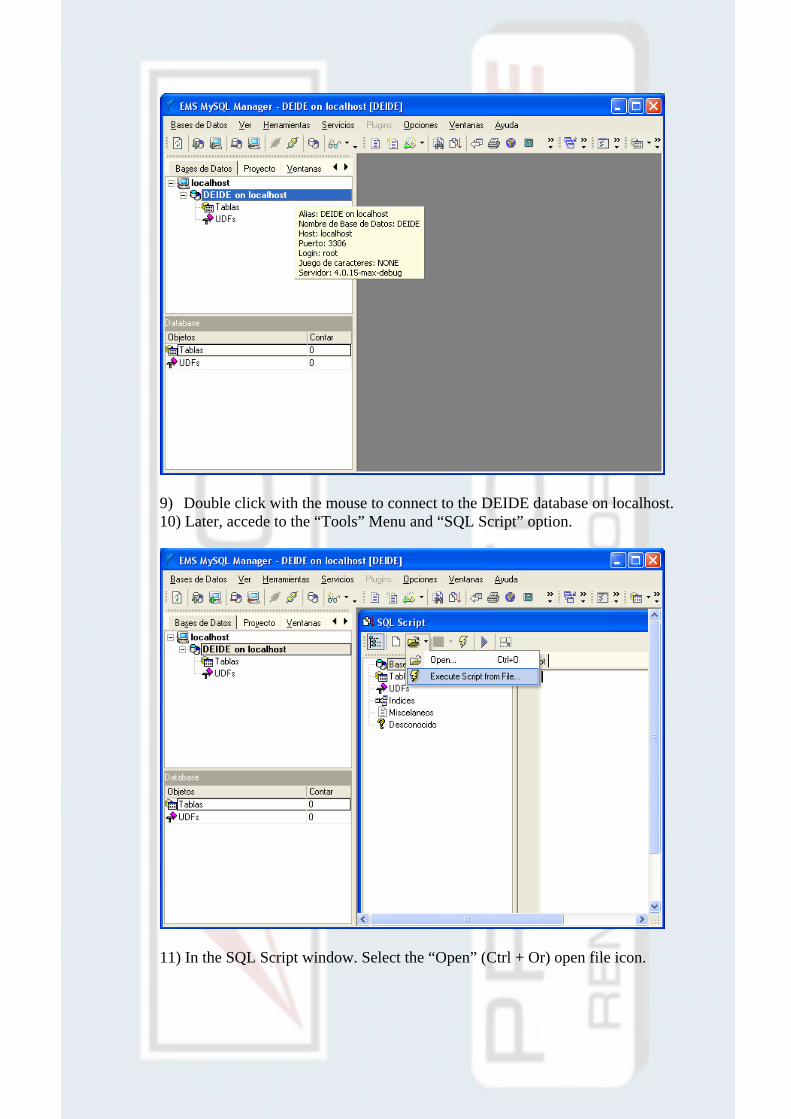
9) Double click with the mouse to connect to the DEIDE database on localhost. 10) Later, accede to the “Tools” Menu and “SQL Script” option.
11) In the SQL Script window. Select the “Open” (Ctrl + Or) open file icon.
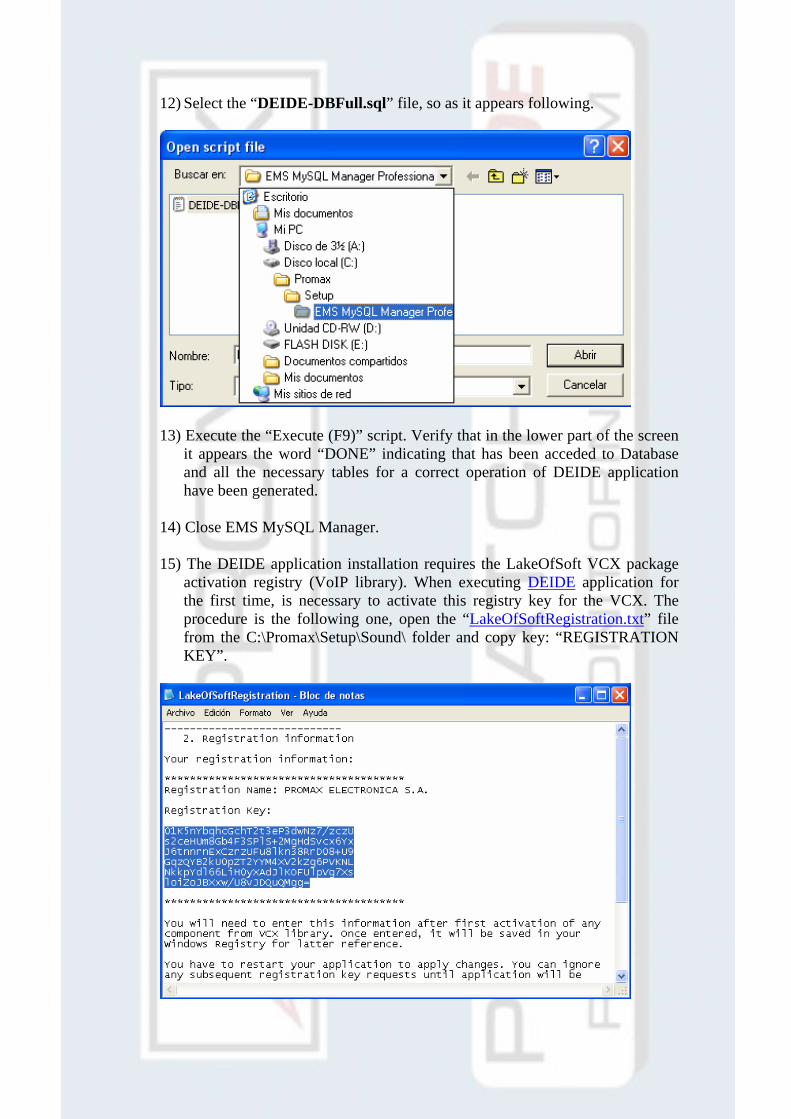
12) Select the “DEIDE-DBFull.sql” file, so as it appears following.
13) Execute the “Execute (F9)” script. Verify that in the lower part of the screen it appears the word “DONE” indicating that has been acceded to Database and all the necessary tables for a correct operation of DEIDE application have been generated.
14) Close EMS MySQL Manager. 15) The DEIDE application installation requires the LakeOfSoft VCX package
activation registry (VoIP library). When executing DEIDE application for the first time, is necessary to activate this registry key for the VCX. The procedure is the following one, open the “LakeOfSoftRegistration.txt” file from the C:\Promax\Setup\Sound\ folder and copy key: “REGISTRATION KEY”.

16) When executing the DEIDE application will open a window. In this window you must paste the key and once confirmed the VCX control will be registered.
17) In order that the changes make an effect, it is necessary to close the DEIDE application.
18) When restarting the application, the PROWATCH – DEIDE remote control
system software will be completely installed and ready to be used. 19) Congratulations and thank you in name of PROMAX ELECTRONICA, S.A.
for purchasing PROWATCH - DEIDE products.

IV) ADDITIONAL VIDEO SERVER INFORMATION (*):
1. The Video Server transmission protocol can be configured through a set of functions in Client Settings, in order to access to these settings you must use a window in Internet Explorer (see details explained ahead).
2. The functions of Video Server Client configuration are:
a) Media option: it allows to activate or to deactivate the audio. b) Protocol option: it allows to choose among one of the three protocols in
order to optimise the server performance. The transmission protocol options are: UDP, TCP and HTTP:
• UDP protocol allows audio and video transmissions in real time. However, it can occur that some packages are lost due to traffic bursts in the network. In this case, the pictures can arrive to darken or to lose themselves.
• TCP protocol allows that a fewer number of packages are lost; this causes a better video visualisation. The disadvantage of TCP protocol is that the transmission effect in real time is worse than with UDP protocol.
• HTTP protocol must be selected in case that the network is protected by means of a Firewall and only allows that HTTP port is open. In this transmission mode, the audio is not sent, is only the video operative.
3. In the DEIDE application, once the Video Server has been correctly
connected, the selected Protocol option is indicated on the left upper side from the video visualisation window. The Video Server software configures the protocol by default: HTTP - Vonly. In order to select another protocol (for example: UDP - VA), the user must be connected by means of the Internet Explorer to the video server access Web (by default IP address will be 192.168.0.2xx (where “xx” represent the PROWATCH number, for example, PROWATCH101 => “xx = 01”), login “root“ and password “0002D1018FCC “). When selecting the Client Settings option, appears a page with the options described until this moment:
(*) Only for equipments with the Video Streaming option.
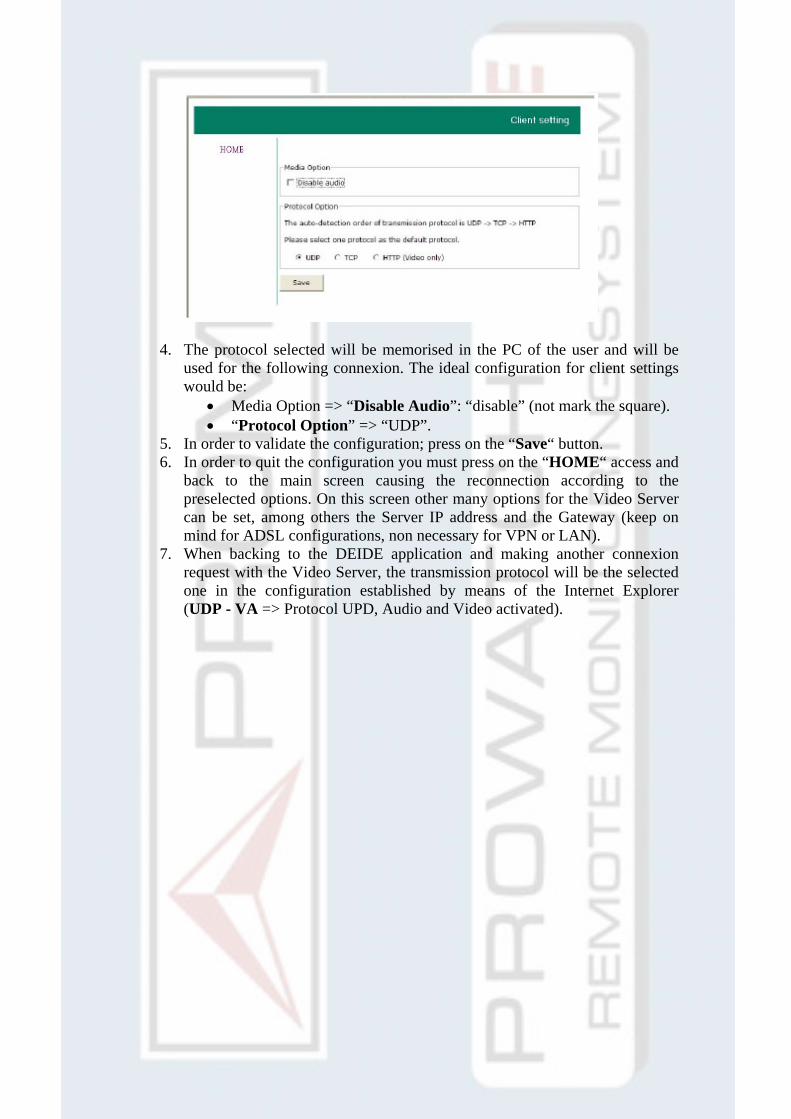
4. The protocol selected will be memorised in the PC of the user and will be used for the following connexion. The ideal configuration for client settings would be:
• Media Option => “Disable Audio”: “disable” (not mark the square). • “Protocol Option” => “UDP”.
5. In order to validate the configuration; press on the “Save“ button. 6. In order to quit the configuration you must press on the “HOME“ access and
back to the main screen causing the reconnection according to the preselected options. On this screen other many options for the Video Server can be set, among others the Server IP address and the Gateway (keep on mind for ADSL configurations, non necessary for VPN or LAN).
7. When backing to the DEIDE application and making another connexion request with the Video Server, the transmission protocol will be the selected one in the configuration established by means of the Internet Explorer (UDP - VA => Protocol UPD, Audio and Video activated).
V) ADDITIONAL SOFTWARE DEIDE INFORMATION:
1) In case of uninstalling this software, in the first place it will be necessary to eliminate the package of installation PROWATCH.
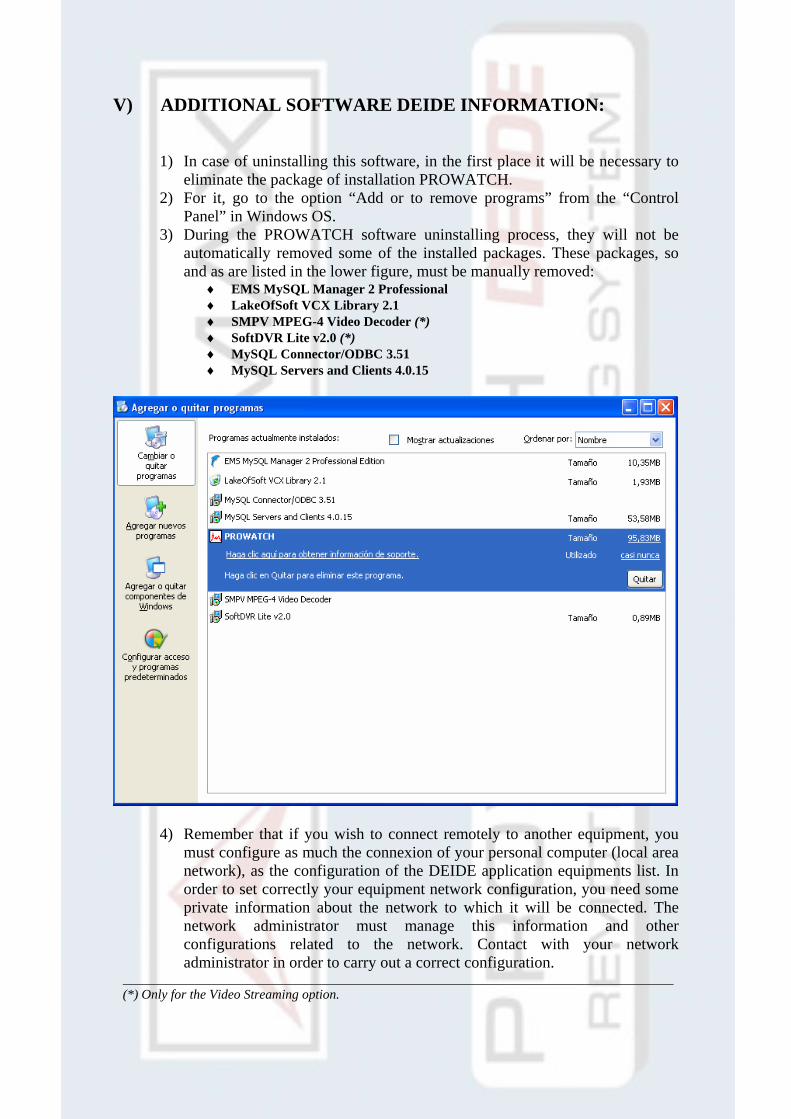
2) For it, go to the option “Add or to remove programs” from the “Control Panel” in Windows OS.
3) During the PROWATCH software uninstalling process, they will not be automatically removed some of the installed packages. These packages, so and as are listed in the lower figure, must be manually removed:
♦ EMS MySQL Manager 2 Professional ♦ LakeOfSoft VCX Library 2.1 ♦ SMPV MPEG-4 Video Decoder (*) ♦ SoftDVR Lite v2.0 (*) ♦ MySQL Connector/ODBC 3.51 ♦ MySQL Servers and Clients 4.0.15
4) Remember that if you wish to connect remotely to another equipment, you must configure as much the connexion of your personal computer (local area network), as the configuration of the DEIDE application equipments list. In order to set correctly your equipment network configuration, you need some private information about the network to which it will be connected. The network administrator must manage this information and other configurations related to the network. Contact with your network administrator in order to carry out a correct configuration.
(*) Only for the Video Streaming option.
5) Remember that Windows XP Service Pack 2 contains a Firewall. If you has this Firewall or any other (antivirus or routers) it must correctly configured in order to allow that DEIDE application can open the communication ports for a correct operation. Contact with your administrator and kindly reads the Firewall configuration file (for Windows, see FireWall WinXP.txt).
6) This information can be obtained in the user’s manual and also the
configuration help guide that are offered with this application. For more details contact with our technical service (See last page).

Copyright 2005 PROMAX ELECTRONICA, S.A. All rights reserved. For more details or consultations contact via email or telephone with the PROWATCH – DEIDE technical service: PROMAX ELECTRÓNICA, S.A. Address: C/Francesc Moragas 71-75 P.O.B. #118 C.P. 08907 TELF. 93 260 20 00 FAX. 93 338 11 26 http://www.promax.es/ mailto:[email protected]