Embed Size (px)
Citation preview

Armadito for GLPI DocumentationRelease 1.0
Teclib
Oct 24, 2018


Contents
1 Introduction 3
2 Getting Started 52.1 1. Plugin Installation . . . . . . . . . . . . . . . . . . . . . . . . . . . . . . . . . . . . . . . . . . . 52.2 2. Enrollment Keys generation . . . . . . . . . . . . . . . . . . . . . . . . . . . . . . . . . . . . . . 52.3 3. Agents installation . . . . . . . . . . . . . . . . . . . . . . . . . . . . . . . . . . . . . . . . . . . 52.4 4. Agents configuration . . . . . . . . . . . . . . . . . . . . . . . . . . . . . . . . . . . . . . . . . 62.5 5. Agents enrollment . . . . . . . . . . . . . . . . . . . . . . . . . . . . . . . . . . . . . . . . . . . 6
3 Armadito Agent 73.1 Introduction . . . . . . . . . . . . . . . . . . . . . . . . . . . . . . . . . . . . . . . . . . . . . . . 73.2 Provided Tasks . . . . . . . . . . . . . . . . . . . . . . . . . . . . . . . . . . . . . . . . . . . . . . 73.3 Task Scheduling . . . . . . . . . . . . . . . . . . . . . . . . . . . . . . . . . . . . . . . . . . . . . 103.4 Compilation . . . . . . . . . . . . . . . . . . . . . . . . . . . . . . . . . . . . . . . . . . . . . . . 113.5 Installation . . . . . . . . . . . . . . . . . . . . . . . . . . . . . . . . . . . . . . . . . . . . . . . . 133.6 Configuration . . . . . . . . . . . . . . . . . . . . . . . . . . . . . . . . . . . . . . . . . . . . . . . 153.7 Enrollment . . . . . . . . . . . . . . . . . . . . . . . . . . . . . . . . . . . . . . . . . . . . . . . . 15
4 Armadito for GLPI 174.1 Introduction . . . . . . . . . . . . . . . . . . . . . . . . . . . . . . . . . . . . . . . . . . . . . . . 174.2 Installation . . . . . . . . . . . . . . . . . . . . . . . . . . . . . . . . . . . . . . . . . . . . . . . . 174.3 Configuration . . . . . . . . . . . . . . . . . . . . . . . . . . . . . . . . . . . . . . . . . . . . . . . 184.4 User Manual . . . . . . . . . . . . . . . . . . . . . . . . . . . . . . . . . . . . . . . . . . . . . . . 18
5 RESTful API 23
6 Licensing 25
7 Screenshots 277.1 Plugin Armadito for GLPI . . . . . . . . . . . . . . . . . . . . . . . . . . . . . . . . . . . . . . . . 27
i

ii
Armadito for GLPI Documentation, Release 1.0
Armadito for GLPI is an open-source solution to manage computer antiviruses on IT infrastructures. It could be usedto manage various kind of Antiviruses.
Key points :
• Open source
• Multi Antiviruses
• Multi Operating Systems
• Multi Task schedulers
Main features :
• Scan : on-demand scan deployment on computers
• Alerts : centralization of alerts (realtime + on-demand scans)
• AVConfig : centralized remote configuration
• State : databases updates and antivirus states
Compatibility matrix :
Antivirus OS Versions Scan Alerts AVConfig StateArmadito Linux 0.12.8 Yes Yes Soon YesKaspersky Windows 17.0.0 Yes Yes Yes YesESET Nod32 Linux 4.0 Yes Yes Soon YesAvast Windows Soon Soon Soon Soon360TotalSec Windows Soon Soon Soon Soon. . . . . . . . . . . . . . . . . . . . .
This solution can be divided into two subprojects :
• armadito-agent : client-side part installed on each managed computer.
• armadito-glpi : server-side part developed as a plugin for GLPI.
Contents 1

Armadito for GLPI Documentation, Release 1.0
2 Contents
CHAPTER 1
Introduction
Armadito for GLPI aims to be a Free IT management solution dedicated to Antiviruses management. It is a comple-mentary solution to GLPI : the Free IT and Asset Management Software. Indeed, GLPI is an Information Resource-Manager with an additional Administration Interface.
Integrated as a plugin to GLPI, armadito-glpi relies on the powerful APIs of GLPI. The plugin provides many chartsgrouped on different boards. All these boards are configurable/customizable in order to fit administrator’s preferences.This plugin is all about the capacity of simply managing multiple kind of antiviruses. Development is driven with thatgoal since the beginning. Also, it should be easier to manage multiple antiviruses.
Armadito Agent is the client side program which communicates to both Antiviruses and GLPI. Note that all commu-nications with the plugin are within a RESTful API. Armadito agent is written in oriented object programming in Perllanguage. It has been conceived in a way that simplify being compatibile with new antiviruses. For maintaining codequality, perl-critic is passed on each build, including on travis-ci.
3

Armadito for GLPI Documentation, Release 1.0
4 Chapter 1. Introduction
CHAPTER 2
Getting Started
Armadito Plugin for GLPI does not radically differs in usage from core GLPI. It is why people who already use GLPIshould not be lost when using that plugin.
For this tutorial, we assume that you have GLPI >= 9.1 already installed and configured. If not, please follow theprocedure on glpi-project.org.
2.1 1. Plugin Installation
• Tutorial
2.2 2. Enrollment Keys generation
To create a new enrollment key, go to General > Enrollment Keys menu in the plugin.
1 - Click on “+” button on the top at left
2 - Select an expiration date and the usage counter
3 - Validate form by clicking on add button
2.3 3. Agents installation
Please, follow one of these tutorials :
• Linux Tutorial
• Windows Tutorial
5
Armadito for GLPI Documentation, Release 1.0
2.4 4. Agents configuration
Basically, you need to set a few things in agent.cfg the first time you install an agent :
1 - Plugin Server URL (ex: http://127.0.0.1/glpi/plugins/armadito/)
2 - An antivirus to manage (ex: Armadito, Kaspersky, Eset)
3 - The kind of scheduler you will use (ex: Cron, Win32Native)
4 - Your network advanced configuration (if needed, i.e. proxy, authentification, etc)
Furthermore, you should set a scheduling configuration that fits your needs in scheduler-X.cfg.
More info :
• Configuration doc
• Scheduling doc
2.5 5. Agents enrollment
On either Linux or Windows, you need admin/superuser rights for enrollment. It is due to the fact that armadito-agentretrieves your system UUID as an unique identifier. Indeed, it allows automatic association with inventory in GLPI.
Be sure that you got a valid enrollment key, or you won’t be able to enroll your agent.
To enroll/re-enroll an agent, just type the following with admin/superuser rights :
$ armadito-agent -t "Enrollment" -k "AAAAE-AAAAD-AAAAF-AAAAZ-AAAA5"
Note: Feel free to ask on forum.armadito.org if you have any question.
6 Chapter 2. Getting Started
CHAPTER 3
Armadito Agent
• armadito-agent : client-side part installed on each managed computer.
3.1 Introduction
Armadito Agent is the interface between Armadito plugin for GLPI and Antiviruses installed on managed computers.This agent basically provides a set of tasks that can be executed at any time :
• Enrollment : new agent ID assignation or re-assignation.
• GetJobs : get available jobs for this agent.
• RunJobs : run jobs with a given priority and post results to GLPI.
• State : get antivirus status and send it to GLPI.
• Scan : on-demand scan and send results to GLPI.
• Alerts : check for virus alerts and send it to GLPI.
• AVConfig : manage antiviruses’ configurations
Note: You can also find a fully detailed documentation on CPAN.
CPAN documentation also includes binary usage description that you can also get by using –help option on computerwhere agent is installed.
3.2 Provided Tasks
It is important that administrators understand briefly how these tasks works. Thus, in this section, all tasks will bedescribed in details.
7
Armadito for GLPI Documentation, Release 1.0
3.2.1 Enrollment
– POST /api/agents :
1 - After retrieving computer’s UUID, the agent sends a request containing enrollment key to add or update agent indatabase.
2 - Enrollment key validity is checked on server side.
3 - An ID from 0 to number_of_agents is assigned and sent back to agent if enrollment is authorized.
4 - Then the agent stores persistently this ID.
Enrollment is mandatory and need to be done when agent is not in database (removed or first time). If your computerchanges his UUID, a new agent ID will be assigned when running this task again. It means that the previous ID willstill be in database. It is then administrator’s choice to keep it or remove it by using plugin’s web interface.
Example :
$ armadito-agent -t "Enrollment" -k "AAAAA-AAAAA-AAAAA-AAAAA-AAAAA"
3.2.2 Scheduler
– GET & POST /api/schedulers
1 - Retrieve Scheduler configuration defined into plugin Armadito for GLPI (if there is one)
2 - Update local Scheduler configuration (if needed)
3 - Retrieve current local Scheduler configuration
4 - Send it in a json message to plugin Armadito for GLPI
5 - Store only differences in database
Example :
$ armadito-agent -t "Scheduler"
3.2.3 Getjobs
– GET /api/jobs :
1 - Enrolled agent sends a request to get assigned jobs.
2 - The plugin sends back an array of jobs in a json message.
3 - The agent parses the message and stores it for later use.
There is a getJobs limit which defines the maximum of jobs that can be retrieved for each request to API. By default,it is limited to 10 jobs but you can change this value in General > Configuration > Jobs from Armadito plugin inGLPI.
Example :
$ armadito-agent -t "Getjobs"
8 Chapter 3. Armadito Agent

Armadito for GLPI Documentation, Release 1.0
3.2.4 Runjobs
– POST /api/jobs
1 - Get list of previously stored jobs (locally)
2 - Execute these jobs sequentially
3 - Sends Jobs execution statuses to GLPI. It can includes error messages.
A Job can have 4 differents levels of priority :
• low = 0
• medium = 1
• high = 2
• urgent = 3
Job priority can be selected by administrator when creating a new job in Armadito Plugin for GLPI. Note that, at eachcall of Runjobs, jobs are executed sequentially according to their priority level.
Example 1, tasks are executed after waiting 10 seconds :
$ armadito-agent -t "Runjobs" -w 10
Example 2, tasks are executed after waiting randomly between 0 and 10 seconds :
$ armadito-agent -t "Runjobs" -wr 10
Note: It works in combination with Getjobs task. Getjobs should be run more often than Runjobs in order to fullybenefit from job priority system.
3.2.5 State
– POST /api/states
1 - Get Antivirus status (databases update status, on-access activation, etc)
2 - Sends this status in a json message to Armadito plugin for GLPI.
3 - Database is updated in GLPI
For Armadito Antivirus, the first step consists on sending a GET request to RESTful API of the antivirus.
Example :
$ armadito-agent -t "State"
3.2.6 Scan
– POST /api/scans
1 - Ask Antivirus for a new on-demand scan
2 - Send progress regularly to GLPI before scan’s end (optional)
3 - Send scan results to plugin Armadito for GLPI
3.2. Provided Tasks 9
Armadito for GLPI Documentation, Release 1.0
Example :
$ armadito-agent -t "Scan"
3.2.7 Alerts
– POST /api/alerts
1 - Retrieve Antivirus specific alerts
2 - Send alerts in a json message to plugin Armadito for GLPI
3 - Store these alerts in database
Example :
$ armadito-agent -t "Alerts"
Note: A checksum considering main characteristics is computed on server side. It allows to avoid inserting duplicates.
3.2.8 AVConfig
– GET & POST /api/avconfigs
1 - Retrieve Antivirus configuration defined into plugin Armadito for GLPI (if there is one)
2 - Update local computer Antivirus’ configuration (if needed)
3 - Retrieve current local Antivirus configuration
4 - Send it in a json message to plugin Armadito for GLPI
5 - Store only differences in database
Example :
$ armadito-agent -t "AVConfig"
Note: The way Step 5 has been implemented leads to a great reduction of database size. Indeed, if 1000 agents havethe same configuration, only 1 copy will be stored.
3.3 Task Scheduling
Because a task is an action that can be executed independantly from the others, the way tasks are planified can be fromoutside. I.e. from another program. It means that any tasks planification program should do the job. Thus, ArmaditoAgent does not include a task planification system in itself, but provides wrappers.
To allow easy remote control of agent’s tasks, armadito plugin for GLPI provides some ways to configure schedulersfrom server side. Indeed, managing these planifications can be done within “Scheduler” agent task :
armadito-agent -t "Scheduler"
10 Chapter 3. Armadito Agent
Armadito for GLPI Documentation, Release 1.0
That task is a kind of wrapper for OS Schedulers, but it can communicates with Armadito Plugin for GLPI’s RESTfulAPI. Administrator could use these wrappers, but he can also decide to manage scheduling by himself from outside.
If Administrator decides to use Armadito Agent’s wrappers, it has to be configured in main configuration file(etc/agent.cfg). It can be done, by simply setting which scheduler to use :
scheduler = Cron
Then, scheduler has to be configured properly. Each wrapper has a specific configuration file associated (etc/scheduler-win32native.cfg, etc/cron.cfg, etc). Because constraints in IT infrastructures differs from an organization to an other,frequencies and planification of these tasks are an administrator’s choice.
3.3.1 Win32Native
Win32Native is a wrapper to the native “SCHTASKS” program of Windows. It basically simplify the use of schtasksin the agent specific case. For full documentation on possibilities offered by Schtasks, see on MSDN Schtasks.exe.
• Configuration example : scheduler-win32native.cfg
• Configuration file path : <installdir>\etc\scheduler-win32native.cfg
• Source File : Scheduler/Win32Native.pm
3.3.2 Cron
Cron simply add/update a crontab configuration file for Armadito Agent. For full documentation of crontab, seeCronHowto.
• Configuration example : scheduler-cron.cfg
• Configuration file path : <installdir>/etc/scheduler-cron.cfg
• Source File : Scheduler/Cron.pm
In order to apply a new/updated configuration :
armadito-agent -t "Scheduler"
3.3.3 Armadito Scheduler
Warning: It is still under experimentation.
Armadito Scheduler is a task scheduler conceived with the purpose of maximizing equitability in the repartition oftasks over time.
• Source Code : Github Armadito-Scheduler
3.4 Compilation
armadito-agent can be built from sources with cpan on Windows and Linux.
3.4. Compilation 11
Armadito for GLPI Documentation, Release 1.0
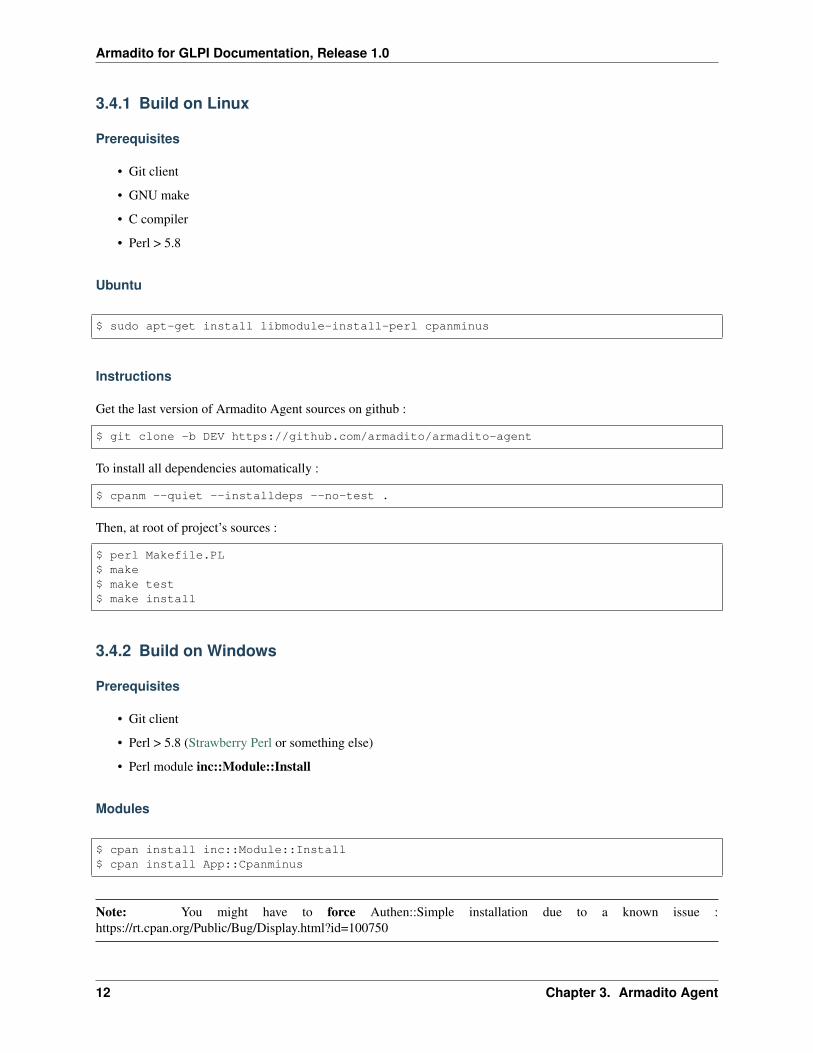
3.4.1 Build on Linux
Prerequisites
• Git client
• GNU make
• C compiler
• Perl > 5.8
Ubuntu
$ sudo apt-get install libmodule-install-perl cpanminus
Instructions
Get the last version of Armadito Agent sources on github :
$ git clone -b DEV https://github.com/armadito/armadito-agent
To install all dependencies automatically :
$ cpanm --quiet --installdeps --no-test .
Then, at root of project’s sources :
$ perl Makefile.PL$ make$ make test$ make install
3.4.2 Build on Windows
Prerequisites
• Git client
• Perl > 5.8 (Strawberry Perl or something else)
• Perl module inc::Module::Install
Modules
$ cpan install inc::Module::Install$ cpan install App::Cpanminus
Note: You might have to force Authen::Simple installation due to a known issue :https://rt.cpan.org/Public/Bug/Display.html?id=100750
12 Chapter 3. Armadito Agent
Armadito for GLPI Documentation, Release 1.0
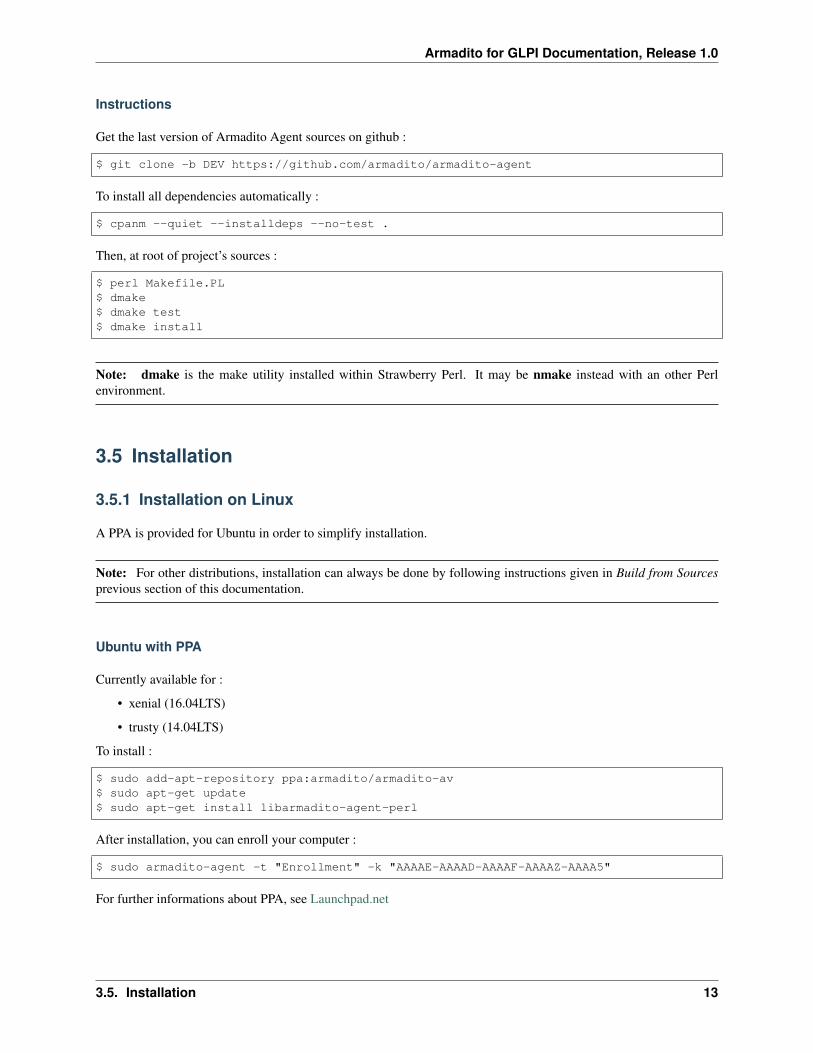
Instructions
Get the last version of Armadito Agent sources on github :
$ git clone -b DEV https://github.com/armadito/armadito-agent
To install all dependencies automatically :
$ cpanm --quiet --installdeps --no-test .
Then, at root of project’s sources :
$ perl Makefile.PL$ dmake$ dmake test$ dmake install
Note: dmake is the make utility installed within Strawberry Perl. It may be nmake instead with an other Perlenvironment.
3.5 Installation
3.5.1 Installation on Linux
A PPA is provided for Ubuntu in order to simplify installation.
Note: For other distributions, installation can always be done by following instructions given in Build from Sourcesprevious section of this documentation.
Ubuntu with PPA
Currently available for :
• xenial (16.04LTS)
• trusty (14.04LTS)
To install :
$ sudo add-apt-repository ppa:armadito/armadito-av$ sudo apt-get update$ sudo apt-get install libarmadito-agent-perl
After installation, you can enroll your computer :
$ sudo armadito-agent -t "Enrollment" -k "AAAAE-AAAAD-AAAAF-AAAAZ-AAAA5"
For further informations about PPA, see Launchpad.net
3.5. Installation 13
Armadito for GLPI Documentation, Release 1.0
3.5.2 Installation on Windows
Basically, armadito-agent’s installation on Windows can be made offline or online. It means at least two different kindof installers. We provide command line installation examples for both installers. We decided to use Inno Setup alsobecause it is quite simple, open source and well documented. Also, it is a good alternative to Perl Dev Kit (now notavailable for individual sales) and old school installations with cpan.
Warning: Inno Setup is now well known, but some Antiviruses still have false positives, for example withtemporary files created by Inno Setup Installer.
About Enrollment Key(s)
In both cases, installation can be done without providing a good enrollement key, while it is not recommended. Ad-ministrators should be able to fastly generate enrollment key(s) from Armadito plugin for GLPI from menu General >Enrollment Keys.
If you installed without a valid enrollment key, no worry, you will still be able to enroll later.
Download Installer
Offline or Online : https://github.com/armadito/armadito-agent/releases
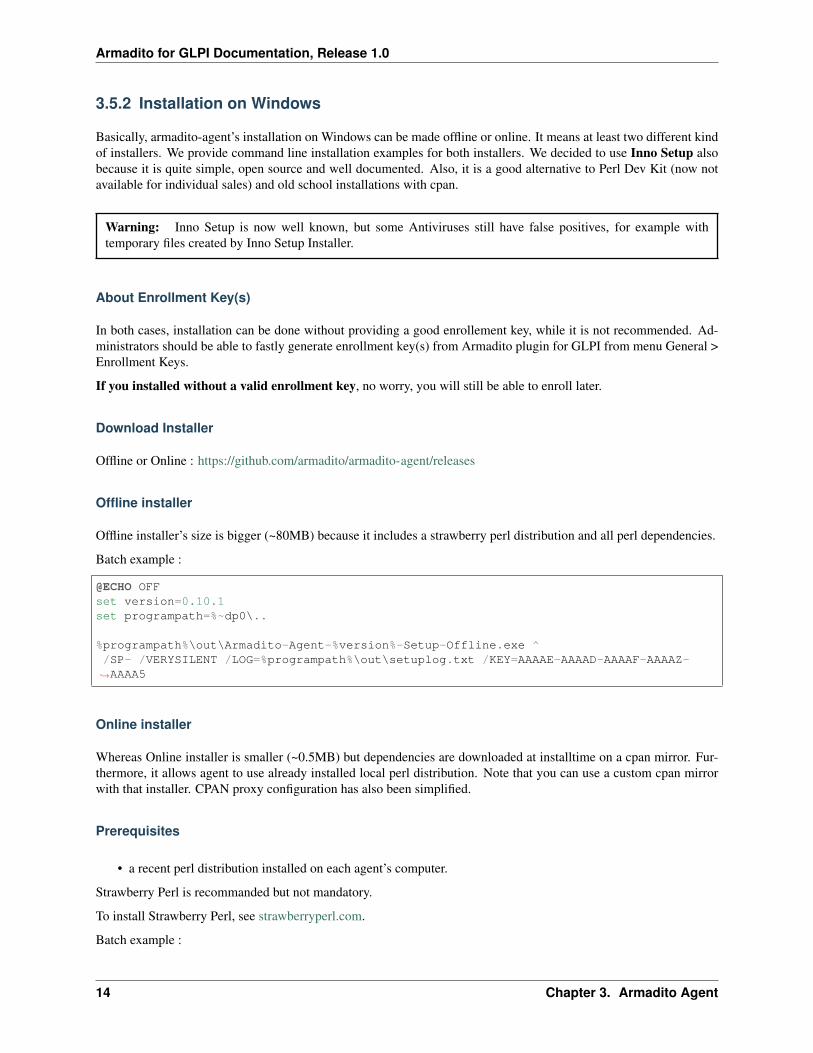
Offline installer
Offline installer’s size is bigger (~80MB) because it includes a strawberry perl distribution and all perl dependencies.
Batch example :
@ECHO OFFset version=0.10.1set programpath=%~dp0\..
%programpath%\out\Armadito-Agent-%version%-Setup-Offline.exe ^/SP- /VERYSILENT /LOG=%programpath%\out\setuplog.txt /KEY=AAAAE-AAAAD-AAAAF-AAAAZ-→˓AAAA5
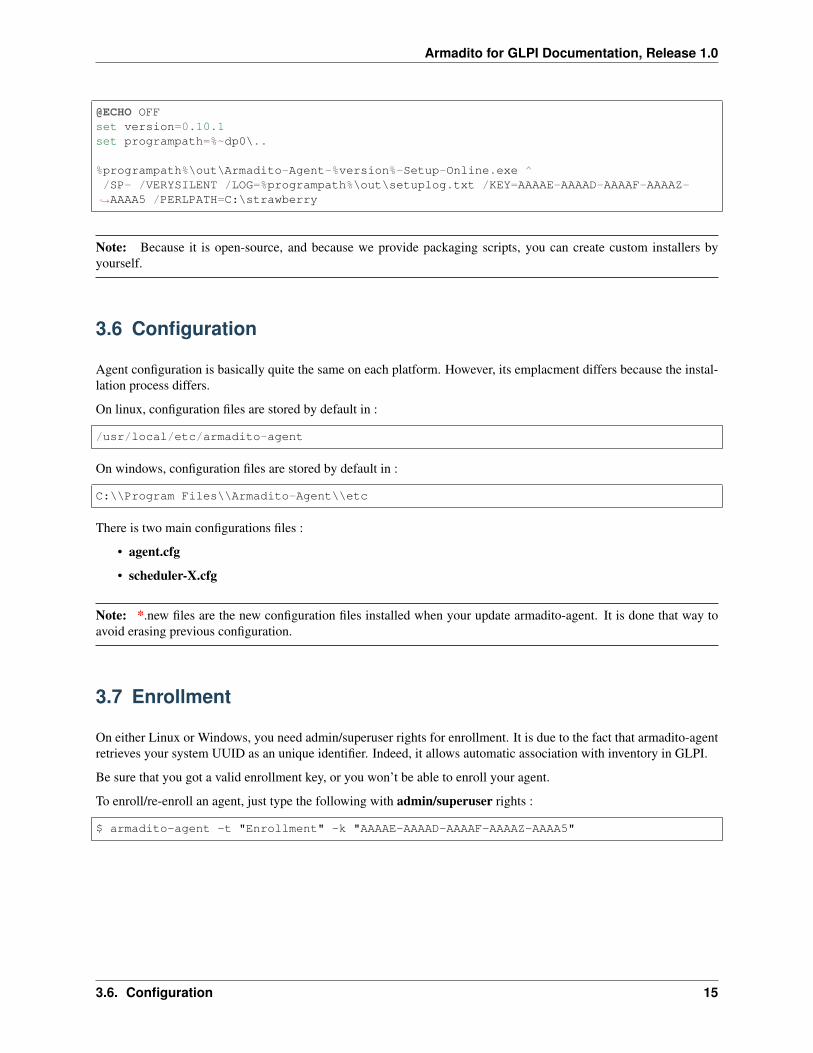
Online installer
Whereas Online installer is smaller (~0.5MB) but dependencies are downloaded at installtime on a cpan mirror. Fur-thermore, it allows agent to use already installed local perl distribution. Note that you can use a custom cpan mirrorwith that installer. CPAN proxy configuration has also been simplified.
Prerequisites
• a recent perl distribution installed on each agent’s computer.
Strawberry Perl is recommanded but not mandatory.
To install Strawberry Perl, see strawberryperl.com.
Batch example :
14 Chapter 3. Armadito Agent
Armadito for GLPI Documentation, Release 1.0
@ECHO OFFset version=0.10.1set programpath=%~dp0\..
%programpath%\out\Armadito-Agent-%version%-Setup-Online.exe ^/SP- /VERYSILENT /LOG=%programpath%\out\setuplog.txt /KEY=AAAAE-AAAAD-AAAAF-AAAAZ-→˓AAAA5 /PERLPATH=C:\strawberry
Note: Because it is open-source, and because we provide packaging scripts, you can create custom installers byyourself.
3.6 Configuration
Agent configuration is basically quite the same on each platform. However, its emplacment differs because the instal-lation process differs.
On linux, configuration files are stored by default in :
/usr/local/etc/armadito-agent
On windows, configuration files are stored by default in :
C:\\Program Files\\Armadito-Agent\\etc
There is two main configurations files :
• agent.cfg
• scheduler-X.cfg
Note: *.new files are the new configuration files installed when your update armadito-agent. It is done that way toavoid erasing previous configuration.
3.7 Enrollment
On either Linux or Windows, you need admin/superuser rights for enrollment. It is due to the fact that armadito-agentretrieves your system UUID as an unique identifier. Indeed, it allows automatic association with inventory in GLPI.
Be sure that you got a valid enrollment key, or you won’t be able to enroll your agent.
To enroll/re-enroll an agent, just type the following with admin/superuser rights :
$ armadito-agent -t "Enrollment" -k "AAAAE-AAAAD-AAAAF-AAAAZ-AAAA5"
3.6. Configuration 15

Armadito for GLPI Documentation, Release 1.0
16 Chapter 3. Armadito Agent

CHAPTER 4
Armadito for GLPI
• armadito-glpi : server-side part developed as a plugin for GLPI.
4.1 Introduction
Most Antiviruses editors provide their own management solution. While it is a good solution for most companies, itcan be an expensive solution. Besides, most antiviruses management services are not open-source, leading users toworrying about their data.
Also, Armadito for GLPI aims to be a free and open-source alternative for these needs. Conceived as modular aspossible, it should offer a reduced development effort for new features. In addition, a great attention is given to codequality, see SonarQube.com for details.
Because Armadito for GLPI is a plugin for GLPI, it means that if you already use GLPI, you won’t have to install andconfigure a new server dedicated to Antiviruses management. It also means that computer inventories are automaticallyassociated with armadito agents. Furthermore, you will be able to select and execute actions on computers from theGLPI’s menu Assets > Computers.
4.2 Installation
4.2.1 Prerequisites
• GLPI installed >= 9.1
4.2.2 Instructions
1 - Download last version here
2 - Unzip and copy files into a new folder called armadito, i.e. /<glpi_install_dir>/plugins/armadito.
3 - Install dependencies in plugin’s directory : composer install –no-dev
17
Armadito for GLPI Documentation, Release 1.0
4 - Log into GLPI
5 - Install and enable the plugin in GLPI : go to Setup > Plugins and select Armadito.
4.3 Configuration
Plugin’s configuration is accessible in menu General > Configuration. That menu will give more and more possibil-ities as time goes by.
4.3.1 General Setup
• Debug Level : [Verbose, Debug, Info, Warning, Error]
4.3.2 Boards
That section provides a preview in order to help you to select colors that you prefer. For now, colors palette aregenerated with 3 parameters (Hue, Saturation, Value). The way palettes are generated is explained in the followingblog post :
how-to-create-random-colors-programmatically
• Color Palette Hue : [0..1]
• Color Palette Saturation : [0..1]
• Color Palette Value : [0..1]
4.3.3 States
4.3.4 Alerts
4.3.5 Scans
4.3.6 Jobs
• Maximum jobs agents can get by round : [0..100]
4.4 User Manual
This part can be considered as a kind of user manual that guide you through the use of Armadito Plugin for GLPI.All features will be described here with as much details as needed for everyone to understand how it works and whatcan be done. This documentation is structured according to plugin’s menus structure.
4.4.1 General
This menu regroup things that are global to the whole plugin. It includes a global configuration section.
18 Chapter 4. Armadito for GLPI
Armadito for GLPI Documentation, Release 1.0
Board
The focus of this board is mainly about armadito agents management. That submenu is the main board of the plugin.Like all plugins’ boards, it will be fully configurable.
For now, there is three charts :
• AntivirusChart : shows antiviruses repartition of enrolled agents.
• ComputersChart : shows armadito agents repartition in comparison to GLPI computers.
• LastContactsChart : shows agents connexions of last hours
Agents
This submenu should be used frequently because it is the main interface for managing agents. Basically, it is aconfigurable list of enrolled agents.
The first thing to understand is that you can easily search and select group of agents by this web page. It uses one ofthe most powerful features provided by GLPI project’s core for manipulating objects you have in the web console. It isimplemented and used in GLPI since a long time. It allows you to perform simple to very complex database requests.Then, once you have selected some agents, you can perform what GLPI calls “massive actions” on them.
Example :
You want to deploy an on-demand scan on agents that have Kaspersky installed.
1 - You configure the search engine in order that only agents with Antivirus Name containing “Kaspersky” are selected.
2 - You select all agents that are now listed
3 - You click on action and select Scan
4 - You select a scan configuration (previously created)
5 - You select a job priority and that’s all.
Antiviruses
This submenu is a configurable list of all antiviruses enrolled until now. Some massive actions could be added here infuture versions.
Enrollment Keys
This submenu is where you can manage your enrollment keys. You can create/revoke enrollment keys. Before doinganything else in the plugin, you have to create one or more enrollment key(s).
If you are not new to GLPI, you probably found by yourself how to add a new key. Indeed, the procedure is quitesimple :
1 - Click on “+” button on the top at left
2 - Select an expiration date and the usage counter
3 - Validate form by clicking on add button
To revoke enrollment keys :
1 - Select one or more keys
2 - Select “put in dustbin” Action and validate
4.4. User Manual 19
Armadito for GLPI Documentation, Release 1.0
Note: Note that whenever you use “put in dustbin” action in GLPI, you can use “restore” action. It is possible becauseit is a simple flag in database.
Usage counter is decremented at each newly enrolled agent. It can be really helpful if you want to keep a true controlof enrollment process in your infrastructure.
Configuration
That menu regroup configurations for the whole plugin. It allows you to rapidly check what configuration variablesare available.
• Configuration
4.4.2 States
Board
That board has been implemented to simplify the way you can visualize your antiviruses. Each agent send regularlydatabases updates statuses. The provided charts are here to help you detecting which agents/antiviruses might haveproblems updating their databases.
The plugin provides some default charts but we really think that ussers feedback will help improve this kind of board.Users feedback should give an idea of what are the best indicators, of what really need administrators. All ideas are ofcourse welcomed.
For now, there is three charts :
• UpdateStatusChart : shows databases updates statuses repartition
• MostCriticalUpdatesChart : shows top 10 agents with most critical updates
• LastUpdatesChart : shows databases updates of last hours
States
Similar to General > Agents, this submenu allows you to search and select agents. But this time, it is focused ondatabases updates management. And it gives you a simple way to be sure that everything is going well, that everyantiviruses’ databases are up-to-date. Most antiviruses basically split their database updates into multiple sub parts (ormodules). Also, a link inside each row allows you to check databases updates in details.
Furthermore, you probably want to be sure that antiviruses’ real time protection is activated. Also, a section called “AVDetails” refers to every statuses information related to an installed Antivirus. It includes real time protection status forexample. With some Antiviruses, it means a lot of details. It is why we called this menu “States”. It does not onlyconsider databases updates.
AV Configurations
This part is about controlling your antiviruses’ configuration. It implies a large data set to store into GLPI database.Because GLPI uses MySQL, the implementation on how are stored configurations is very specific. To be able togather data from big infrastructures, a custom Entity–attribute–value model has been implemented. Indeed, we thinkthat most configurations over a same IT infrastructure are most of the time very similar, even sometimes identical.Also, it is not worth to store identical data multiple times. It leads to a great reduction of database size usage.
20 Chapter 4. Armadito for GLPI
Armadito for GLPI Documentation, Release 1.0
4.4.3 Alerts
Board
It is here possible to know which antivirus detects more viruses in your IT infrastructure. While it is not the initialpurpose, it could be used as a realtime antiviruses comparison tool. You can also detects what kind of virus has spreadthe most.
For now, there is three charts :
• AlertsByVirusNameChart : shows alerts repartition by threat name
• LastAlertsChart : shows alerts traffic of last hours
• AlertsByAntivirusChart : shows alerts repartition by antivirus name
Alerts
That section is where centralized alerts can be monitored. For example, you can search for some specific alertscoming from multiple antiviruses, from multiple operating systems. Furthermore, you can manipulate these alerts byremoving/restoring them as you wish.
More features will be easy to add because of the way “massive actions” are implemented in GLPI. We could laterimagine features like sending a group of alerts by email, etc.
4.4.4 Scans
Board
Deployed scan results are stored in GLPI database. Also, some charts gives an overview of what has been successfulor not. Scan durations can be compared to each other. It leads to a better management of future scans, because you areable to know how long a specific scan take in your infrastructure.
For now, there is three charts :
• ScanStatusChart : shows deployed scans statuses’ repartition
• LongestScansChart : shows top ten longest scans
• AverageDurationsChart : shows average duration by scan configuration
Scans
This submenu gives details about deployed scans. It includes a link to the scan configuration used. It gives you onceagain a search engine for selecting scans. Furthermore, it can be useful to know which kind of scan leads to morethreat detections.
Configurations
This part is important because it is needed for deploying a new scan. It’s the single place where you set AV specific’sscan options. You can select an enrolled Antivirus, define where to scan and with which parameters.
Example :
You want to create an on-demand scan configuration for agents that have ArmaditoAV installed :
1 - You click on “+” on the top at left
4.4. User Manual 21
Armadito for GLPI Documentation, Release 1.0
2 - You fill form according to your needs
3 - You validate
4.4.5 Jobs
All actions deployed on agents are jobs. It is a kind of encapsulation for the communication with agents. Also, adeployed scan is a job. It is added to a queue like all jobs. Thus, a priority system is easy to apply.
Board
Once again, you want to be sure that all is working fine on your agents. Also, you could see which jobs takes too long.
For now, there is three charts :
• JobStatusChart : shows job statuses’ repartition
• LongestJobRunsChart : shows top ten longest jobs executions
• AverageDurationsChart : shows average job execution duration by kind of jobs
Jobs
You probably want to know regularly what jobs fails and with which error message. It is possible by this submenu. Itis another search and select menu. Some columns includes hyperlinks for more details about a job, a scan or somethingelse.
4.4.6 Schedulers
This section will be implemented soon. It will be available in future versions. The main purpose will be aboutmanaging client side task schedulers.
Board
Schedulers
22 Chapter 4. Armadito for GLPI
CHAPTER 5
RESTful API
All connections between agents and server-side (i.e. plugin for GLPI) are done within the RESTful API. This API isprovided by the plugin to all agents managed.
For further details :
• API Source code
• API Swagger doc
23

Armadito for GLPI Documentation, Release 1.0
24 Chapter 5. RESTful API
CHAPTER 6
Licensing
Armadito for GLPI can be divided in few subprojects, which are the following :
• Armadito agent
• Armadito plugin for GLPI
Armadito agent
• Description : Perl Agent interfacing between Antiviruses and GLPI.
• License : GPLv3+
• Github : armadito-agent
Armadito plugin for GLPI
• Description : Plugin GLPI for antiviruses management.
• License : AGPLv3+
• Github : armadito-glpi
25

Armadito for GLPI Documentation, Release 1.0
26 Chapter 6. Licensing
CHAPTER 7
Screenshots
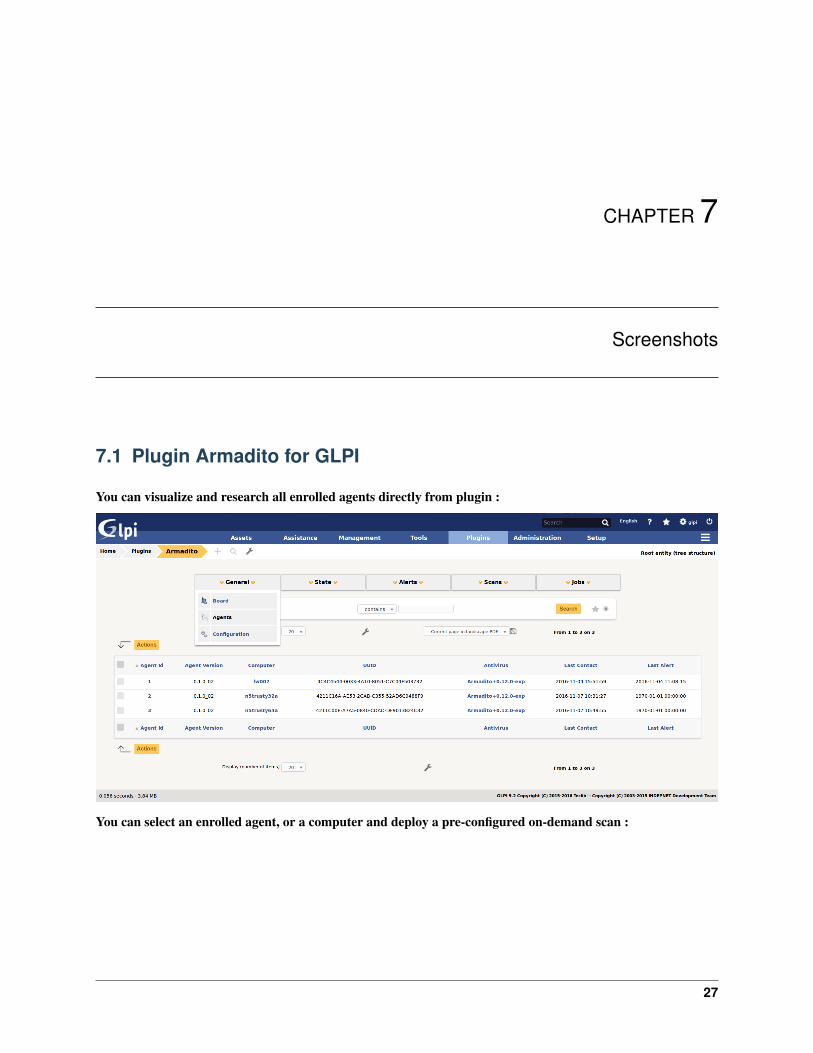
7.1 Plugin Armadito for GLPI
You can visualize and research all enrolled agents directly from plugin :
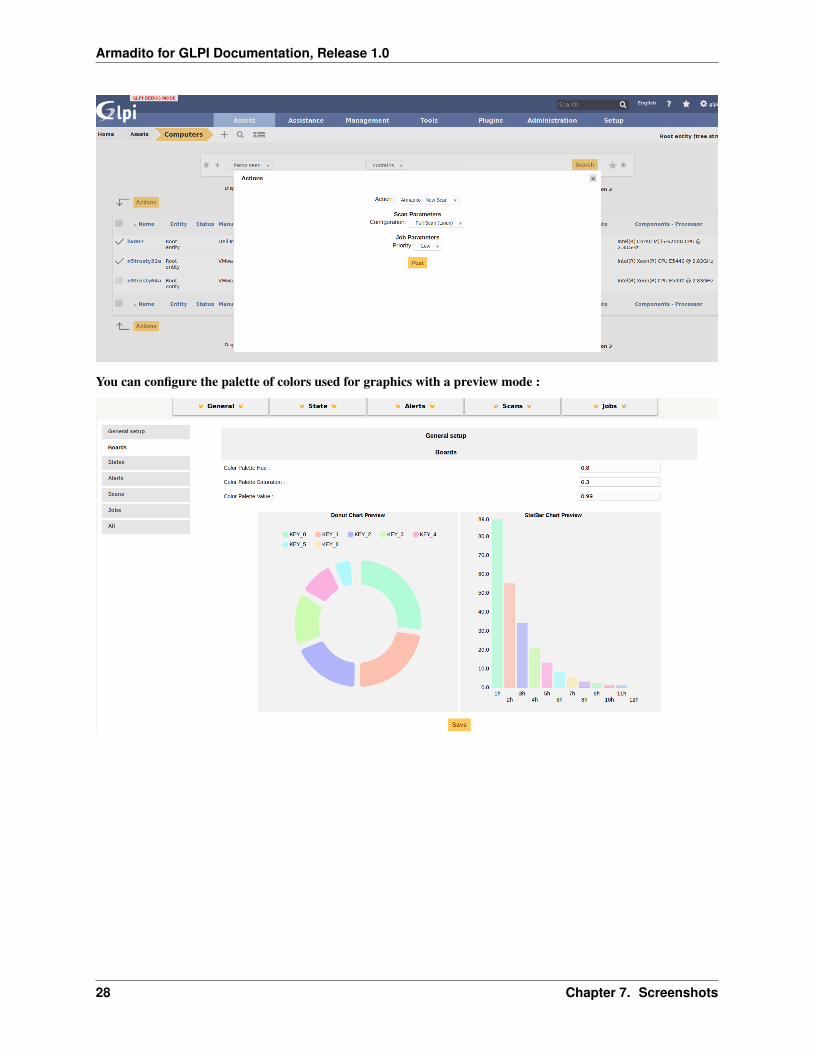
You can select an enrolled agent, or a computer and deploy a pre-configured on-demand scan :
27
Armadito for GLPI Documentation, Release 1.0
You can configure the palette of colors used for graphics with a preview mode :
28 Chapter 7. Screenshots


![Plugin Monitoring for GLPI - Forge GLPI PROJECT · Monitoring plugin for GLPI ... • [M] = manual operation • ... Don't use GLPI's default super-admin, create your own account](https://img.pdfslide.us/doc/110x75/5ac24b097f8b9a1c768dca48/plugin-monitoring-for-glpi-forge-glpi-project-plugin-for-glpi-m-manual.jpg)