Embed Size (px)
Citation preview
USER GUIDE
The URL for the Image Web Server is http://geoscience.nt.gov.au/giws
The Geophysical Image Web Server allows you to view images produced from geophysical surveys of the Northern Territory.
Index maps of the airborne geophysical surveys and gravity surveys are available at:
http://geoscience.nt.gov.au/giws/files/AirborneMagRadSurveyIndex.html and http://geoscience.nt.gov.au/giws/files/GravitySurveyIndex.html.
These show all NTGS and Geoscience Australia surveys available through the Minerals and Energy InfoCentre.
Getting Started
The Geophysical Image Web Server site is best viewed by using Microsoft Internet Explorer, Mozilla Firefox, and Google Chrome.
Views
Home
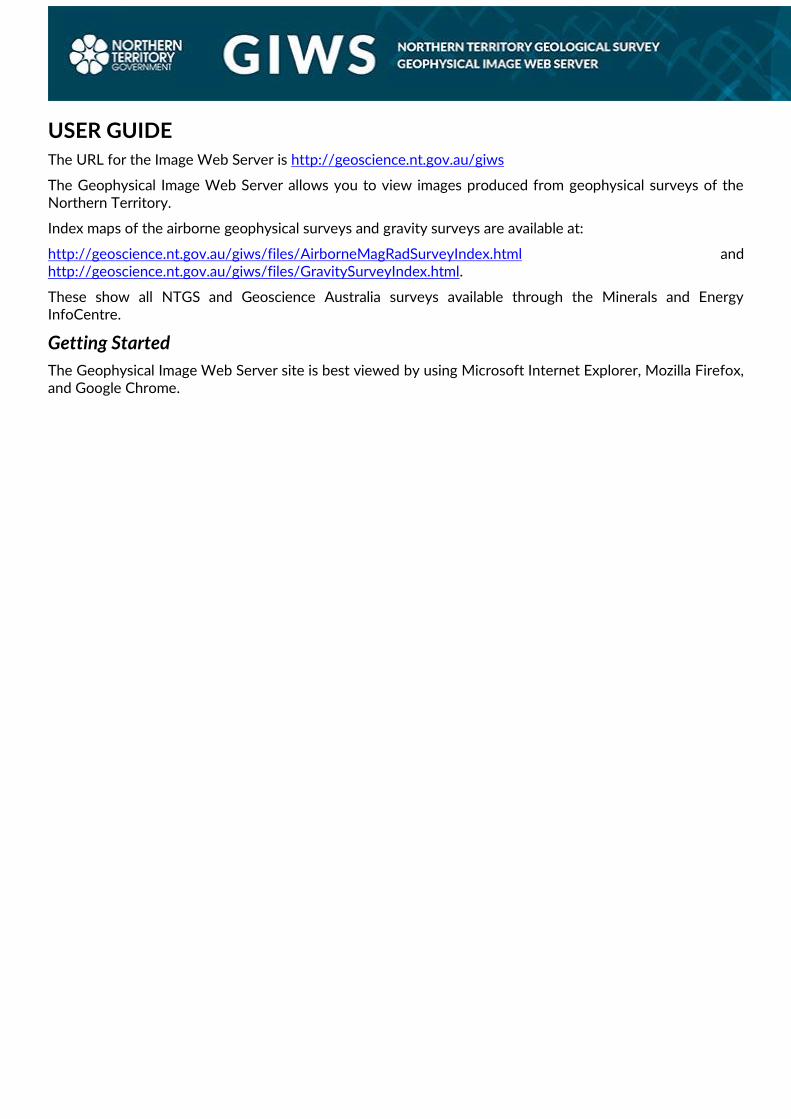
The home page shows information and useful links in the right hand side column. It also shows a default image in the image panel, but there are no tools available on this page to manipulate that image or to view other images. To view the available images, you must click on one of the options in the horizontal menu at the top of the right hand panel.
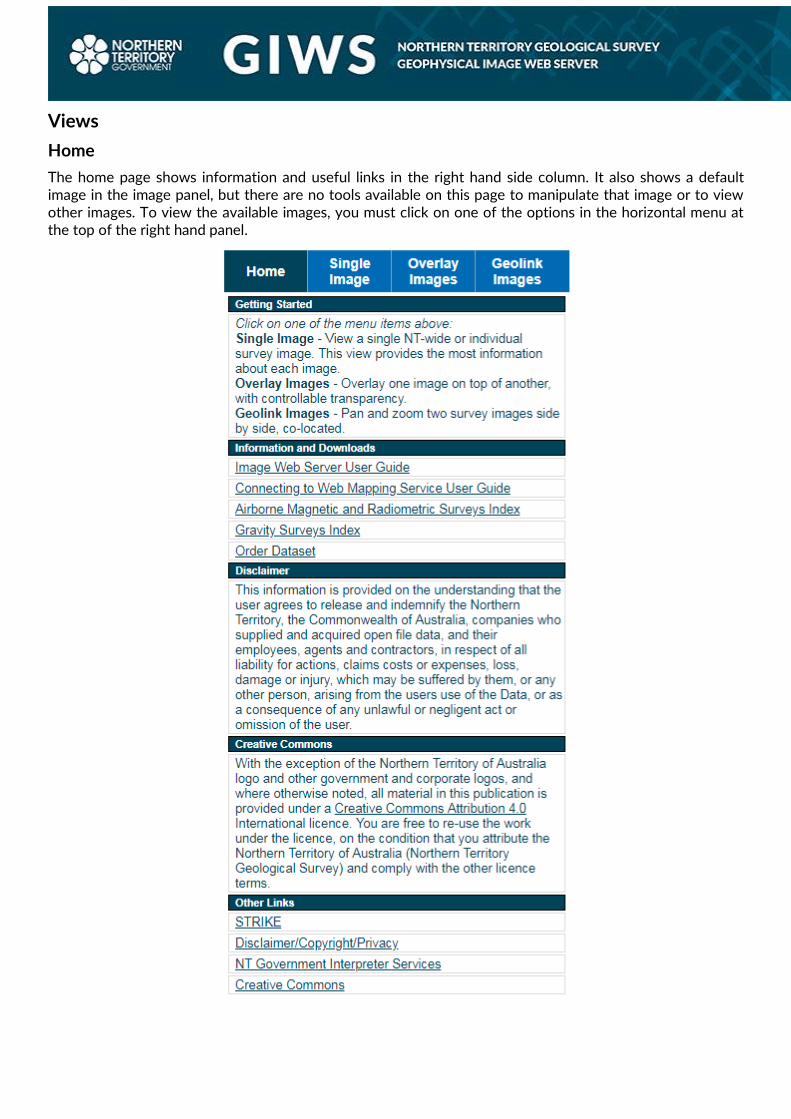
Single
This page displays a single image. There are a number of NT-wide images available, as well as all our individual survey images. You can select an image to view from the drop-down menus near the top of the right hand panel. The image is displayed in the main part of the page, on the left of the menu panel.
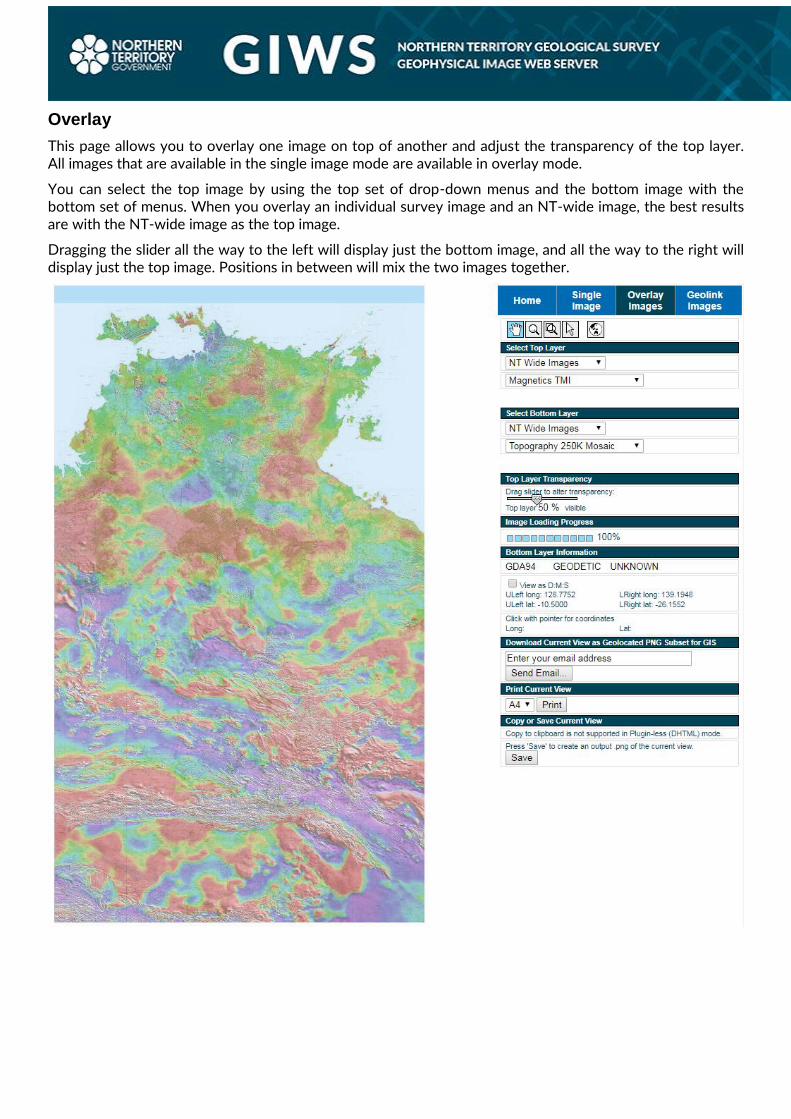
Overlay
This page allows you to overlay one image on top of another and adjust the transparency of the top layer. All images that are available in the single image mode are available in overlay mode.
You can select the top image by using the top set of drop-down menus and the bottom image with the bottom set of menus. When you overlay an individual survey image and an NT-wide image, the best results are with the NT-wide image as the top image.
Dragging the slider all the way to the left will display just the bottom image, and all the way to the right will display just the top image. Positions in between will mix the two images together.
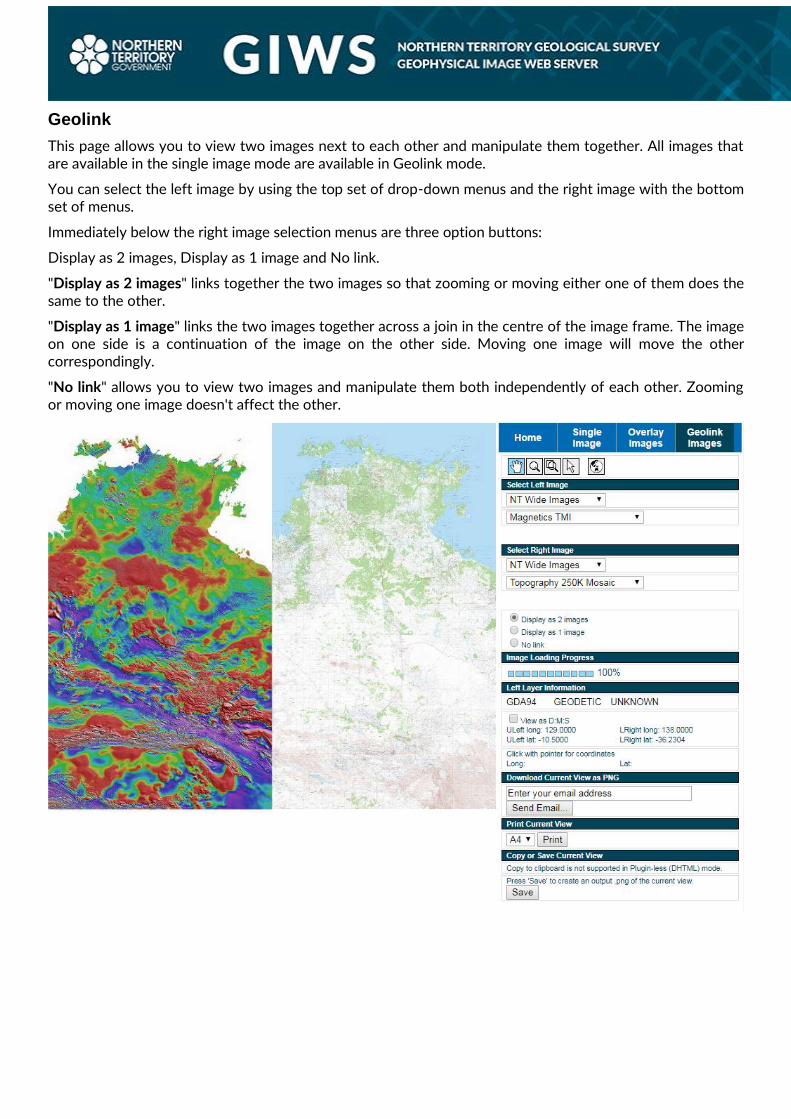
Geolink
This page allows you to view two images next to each other and manipulate them together. All images that are available in the single image mode are available in Geolink mode.
You can select the left image by using the top set of drop-down menus and the right image with the bottom set of menus.
Immediately below the right image selection menus are three option buttons:
Display as 2 images, Display as 1 image and No link.
"Display as 2 images" links together the two images so that zooming or moving either one of them does the same to the other.
"Display as 1 image" links the two images together across a join in the centre of the image frame. The image on one side is a continuation of the image on the other side. Moving one image will move the other correspondingly.
"No link" allows you to view two images and manipulate them both independently of each other. Zooming or moving one image doesn't affect the other.
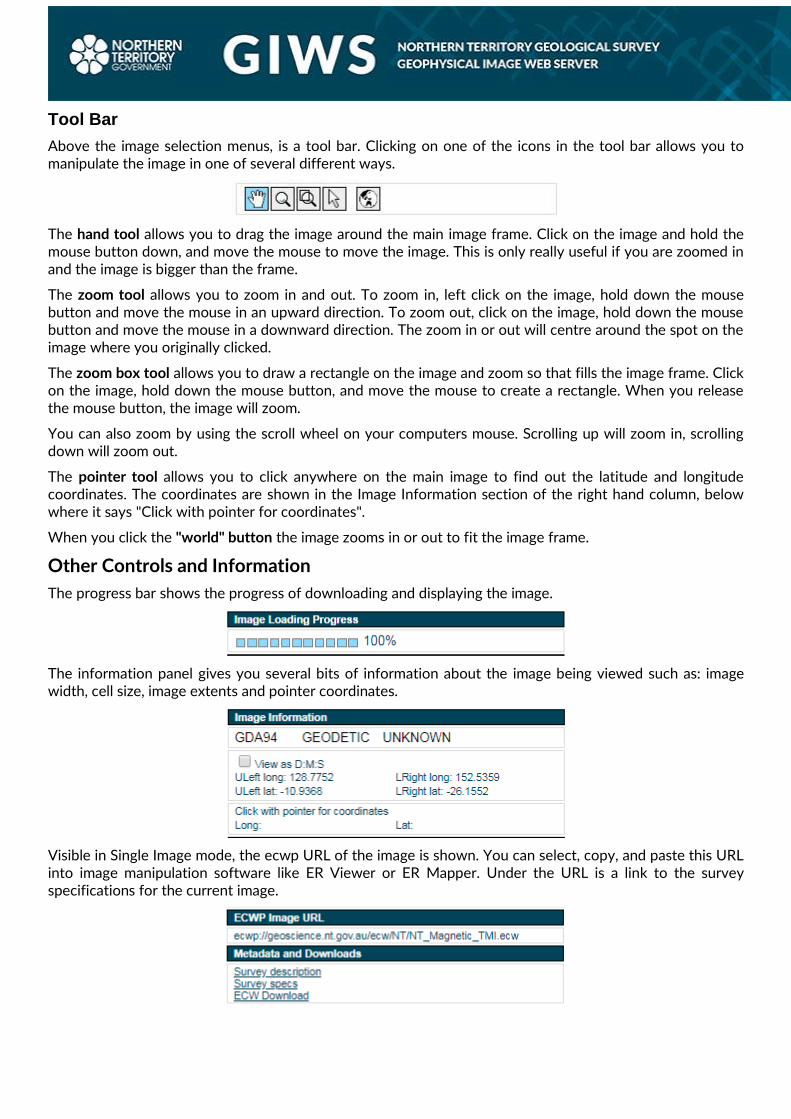
Tool Bar
Above the image selection menus, is a tool bar. Clicking on one of the icons in the tool bar allows you to manipulate the image in one of several different ways.
The hand tool allows you to drag the image around the main image frame. Click on the image and hold the mouse button down, and move the mouse to move the image. This is only really useful if you are zoomed in and the image is bigger than the frame.
The zoom tool allows you to zoom in and out. To zoom in, left click on the image, hold down the mouse button and move the mouse in an upward direction. To zoom out, click on the image, hold down the mouse button and move the mouse in a downward direction. The zoom in or out will centre around the spot on the image where you originally clicked.
The zoom box tool allows you to draw a rectangle on the image and zoom so that fills the image frame. Click on the image, hold down the mouse button, and move the mouse to create a rectangle. When you release the mouse button, the image will zoom.
You can also zoom by using the scroll wheel on your computers mouse. Scrolling up will zoom in, scrolling down will zoom out.
The pointer tool allows you to click anywhere on the main image to find out the latitude and longitude coordinates. The coordinates are shown in the Image Information section of the right hand column, below where it says "Click with pointer for coordinates".
When you click the "world" button the image zooms in or out to fit the image frame.
Other Controls and Information
The progress bar shows the progress of downloading and displaying the image.
The information panel gives you several bits of information about the image being viewed such as: image width, cell size, image extents and pointer coordinates.
Visible in Single Image mode, the ecwp URL of the image is shown. You can select, copy, and paste this URL into image manipulation software like ER Viewer or ER Mapper. Under the URL is a link to the survey specifications for the current image.
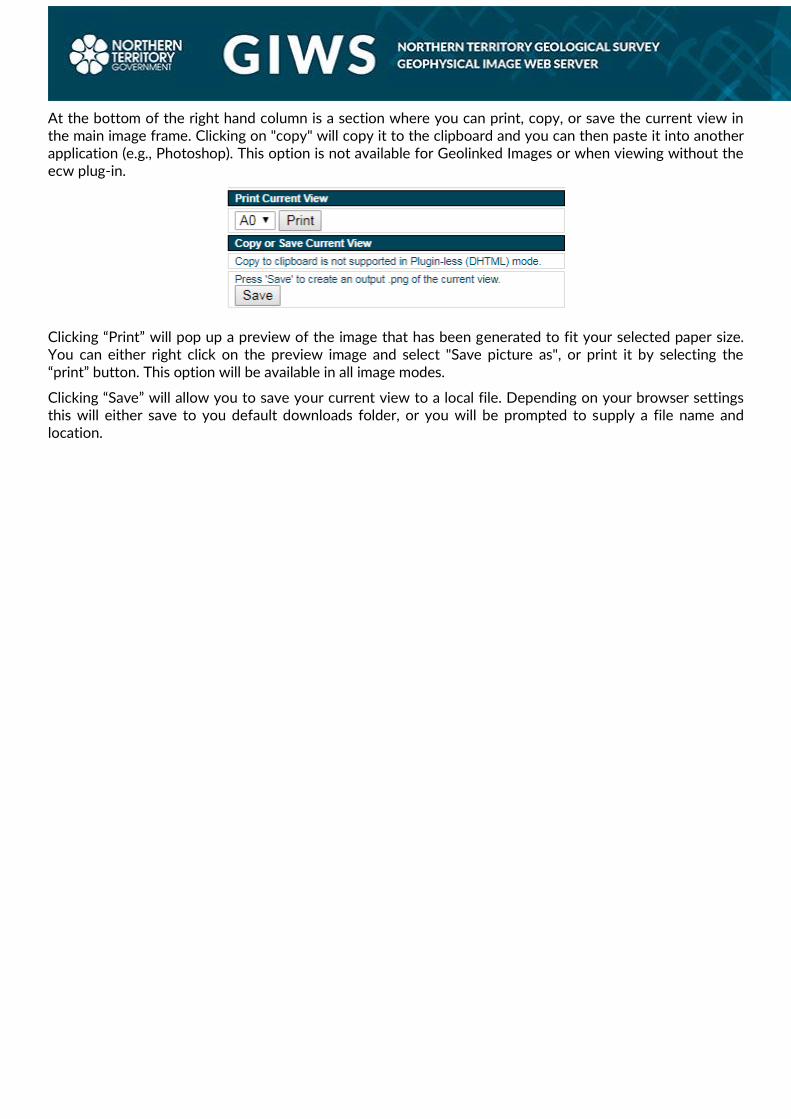
At the bottom of the right hand column is a section where you can print, copy, or save the current view in the main image frame. Clicking on "copy" will copy it to the clipboard and you can then paste it into another application (e.g., Photoshop). This option is not available for Geolinked Images or when viewing without the ecw plug-in.
Clicking “Print” will pop up a preview of the image that has been generated to fit your selected paper size. You can either right click on the preview image and select "Save picture as", or print it by selecting the “print” button. This option will be available in all image modes.
Clicking “Save” will allow you to save your current view to a local file. Depending on your browser settings this will either save to you default downloads folder, or you will be prompted to supply a file name and location.
Connecting to Web Mapping Service
The Geophysical Image Web Server (GIWS) has a Web Mapping Service (WMS) that you can connect to from your GIS Application. Follow the steps below to connect to the GIWS WMS.
Connecting from MapInfo Professional
1. In an open window of MapInfo Professional, click File > Open Web Service > Open WMS
2. In the window that opens, click on Servers
3. In the WMS Servers List window, Click Add
4. In the WMS Server Information window, enter the WMS Service link (above) into the Server URL field.
http://geoscience.nt.gov.au/erdas-iws/ogc/wms/GIWS_NT?service=WMS&request=getcapabilities
5. You can also enter an optional description, as well as test the URL to ensure it is entered correctly. Click OK.
6. The WMS should now appear in the WMS Servers List, select the WMS and click OK
7. You should now see a list of available WMS Layers, select the layer/s, click Add>> to move it to the right-hand column, and click OK: This will load the WMS layer into the Map Window.
8. The WMS will now appear in the WMS Servers List, in future, you should be able to start at step 5.
Connecting from ArcGIS
1. In the Catalog window, expand the GIS Servers node and double-click Add WMS Server or Add WCS Server.
2. The Add WMS Server or Add WCS Server dialog box appears. Type the server URL and other properties for your connection.
http://geoscience.nt.gov.au/erdas-iws/ogc/wms/GIWS_NT?service=WMS&request=getcapabilities&
3. The WMS or WCS server connection is added as an item in your GIS Servers tree view. You can expand and work with the services provided by this connection.