Embed Size (px)
Citation preview
Travel ManagementGuide
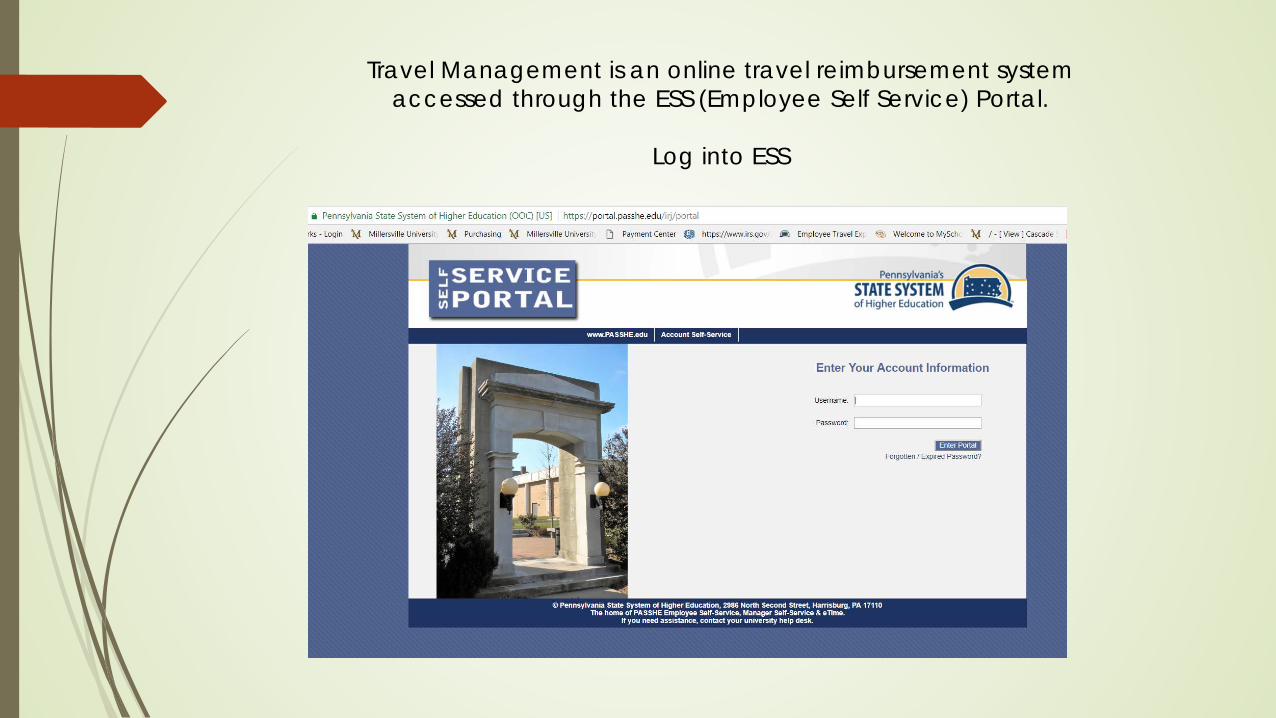
Travel Management is an online travel reimbursement system accessed through the ESS (Employee Self Service) Portal.
Log into ESS

ESS Portal / Travel Management
Getting Started
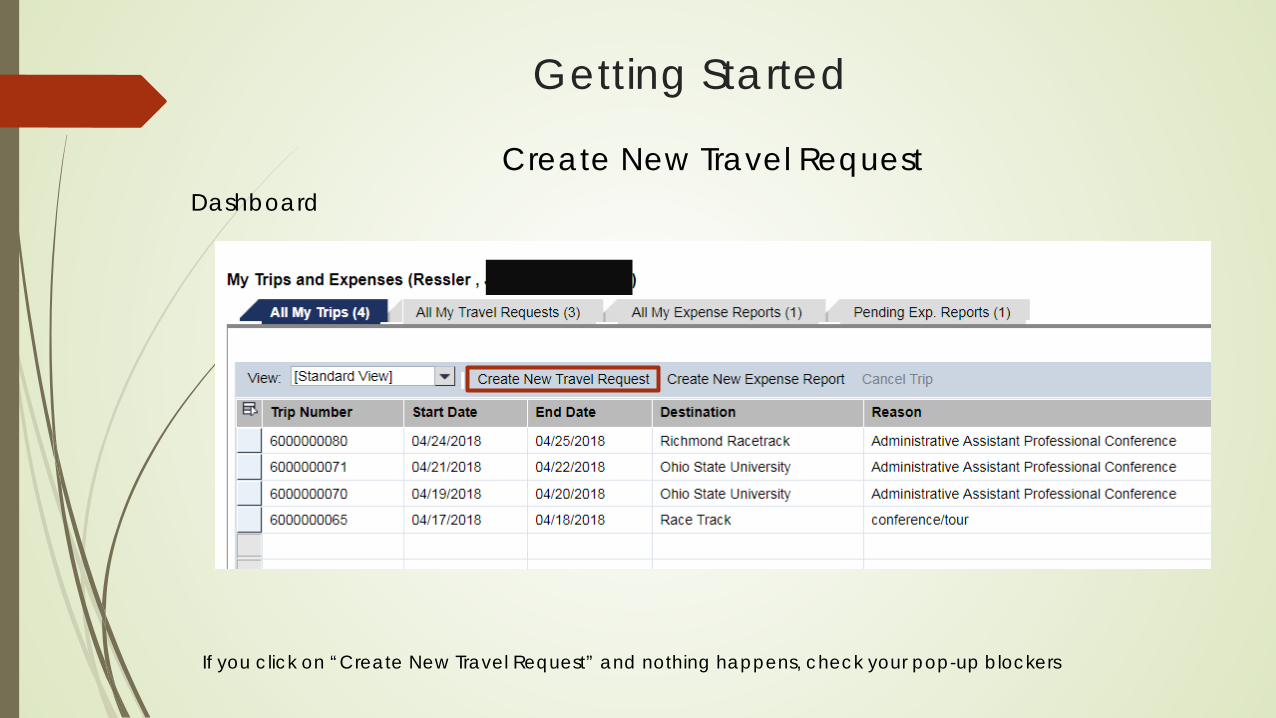
Create New Travel RequestDashboard
If you click on “Create New Travel Request” and nothing happens, check your pop-up blockers
Step 1 - Enter General Data
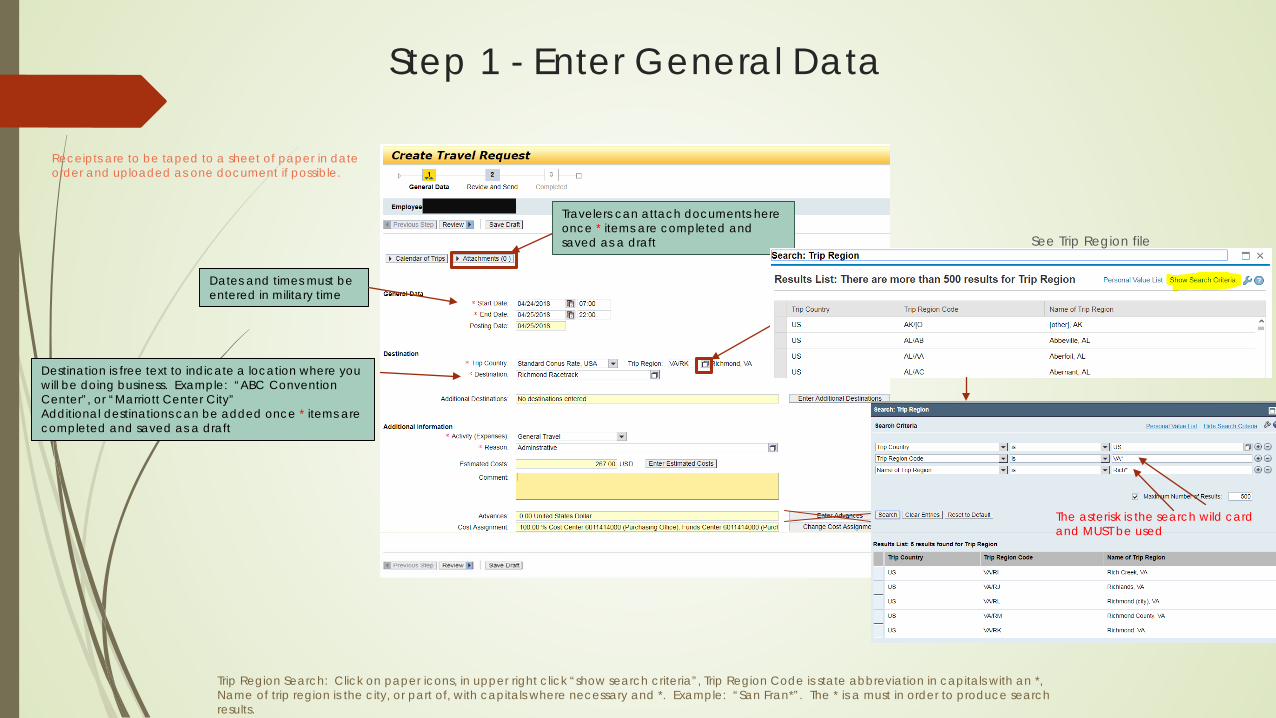
Receipts are to be taped to a sheet of paper in date order and uploaded as one document if possible.
Travelers can attach documents here once * items are completed and saved as a draft
Dates and times must be entered in military time
Trip Region Search: Click on paper icons, in upper right click “show search criteria”, Trip Region Code is state abbreviation in capitals with an *, Name of trip region is the city, or part of, with capitals where necessary and *. Example: “San Fran*”. The * is a must in order to produce search results.
Destination is free text to indicate a location where you will be doing business. Example: “ABC Convention Center”, or “Marriott Center City”Additional destinations can be added once * items are completed and saved as a draft
See Trip Region file
The asterisk is the search wild card and MUST be used

Step 1 - Enter General Data
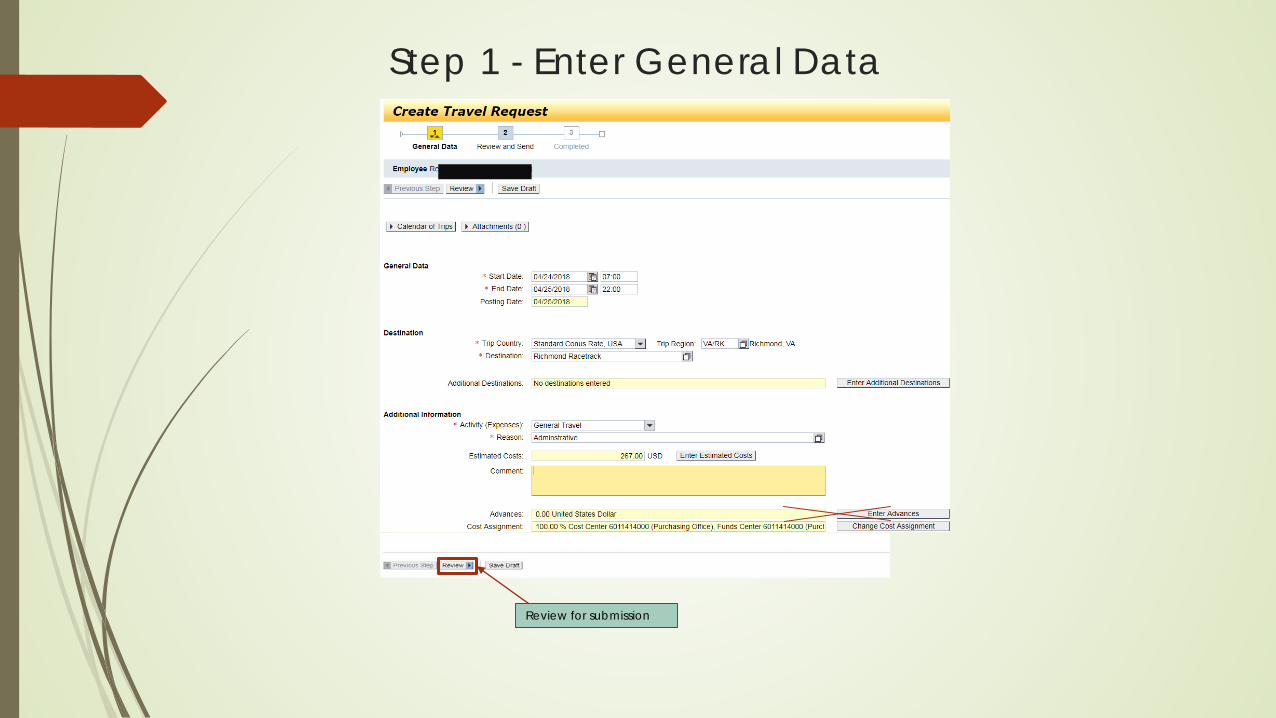
Comment: This should be where anything is documented that should be known when audited. Example: “Enterprise”, or “Enterprise rate taken but POV used”, or “conference hotel”, or “hotel split with 3 faculty members”, or “ Conf reg paid with PCard”, or justification for an expense, or any or all above, etc.
Subsistence rates are based on the US General Services (USG) Rates. The USG rates are based on the county. Enter the city you will be doing business in. See notes below.
Activity would likely be “General Tvel” or “Training/Development Travel”. These are the GL codes that most employee travel falls under.Reason is free text to enter the business purpose of the travel. Example: “XYZ conference”, or “Administrative Assistant Conference”; etc
Advances are never used under any circumstance (all expenses are paid via Expense Report).Cost Center changes would need to be made here if 100% or split in %, or on the receipts entry in the expense report if by $ amount or if not known up front. Any
Step 1 - Enter General Data
Review for submission
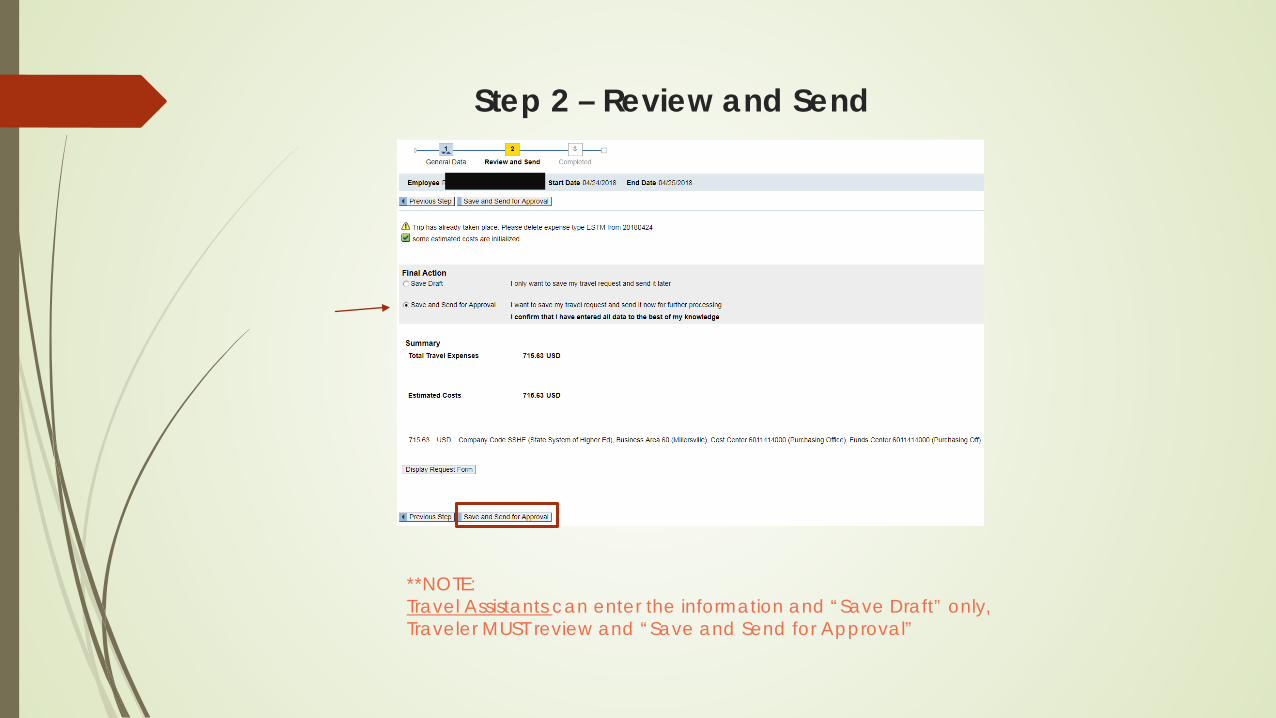
Step 2 – Review and Send
**NOTE: Travel Assistants can enter the information and “Save Draft” only, Traveler MUST review and “Save and Send for Approval”
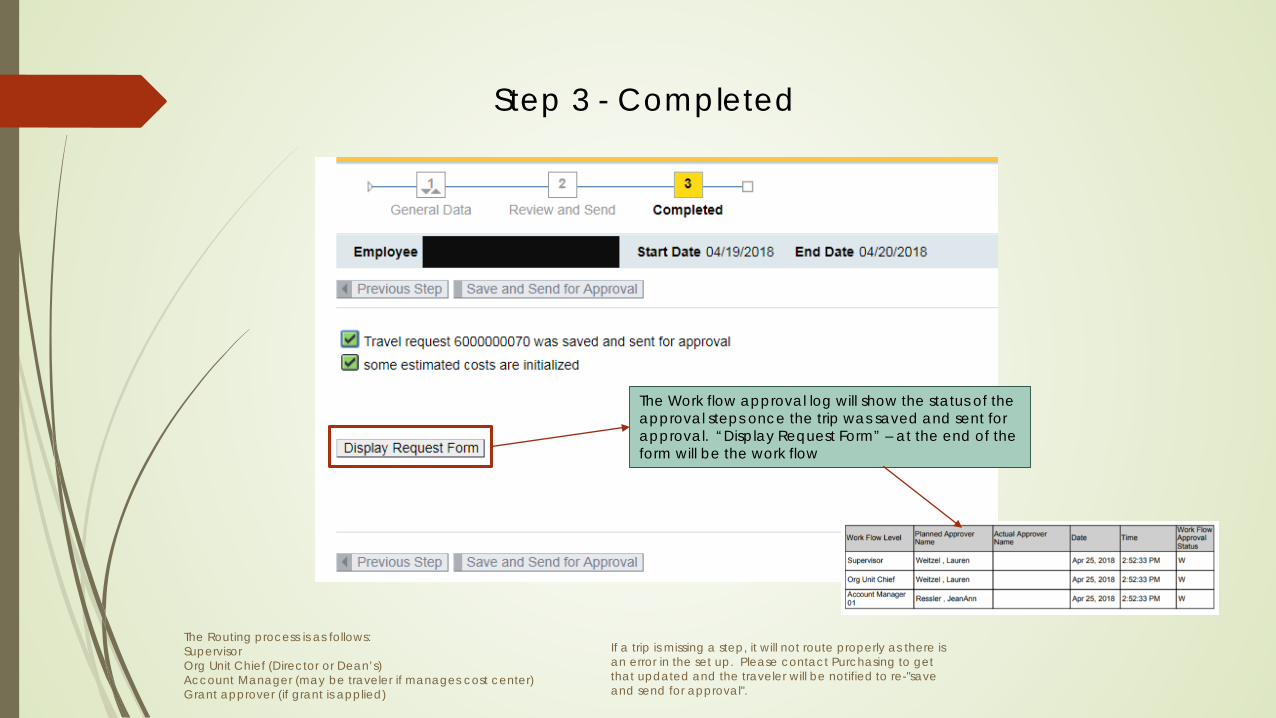
The Work flow approval log will show the status of the approval steps once the trip was saved and sent for approval. “Display Request Form” – at the end of the form will be the work flow
Step 3 - Completed
The Routing process is as follows:SupervisorOrg Unit Chief (Director or Dean’s)Account Manager (may be traveler if manages cost center)Grant approver (if grant is applied)
If a trip is missing a step, it will not route properly as there is an error in the set up. Please contact Purchasing to get that updated and the traveler will be notified to re-"save and send for approval".

Create a Travel Expense Report
Click on the “All My Travel Requests” Tab
Locate your approved Travel Request and click “Create” under Expense Report (if the Travel Request is not approved, you will not be able to create an expense report)
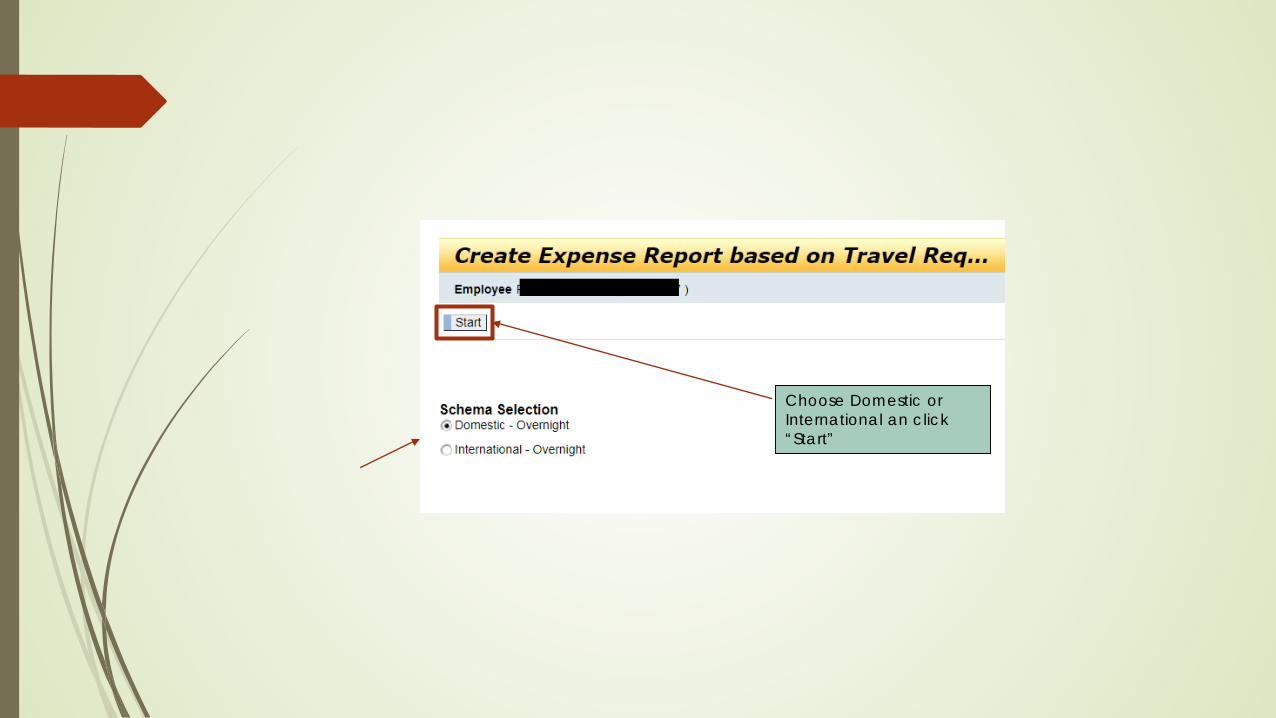
Choose Domestic or International an click “Start”

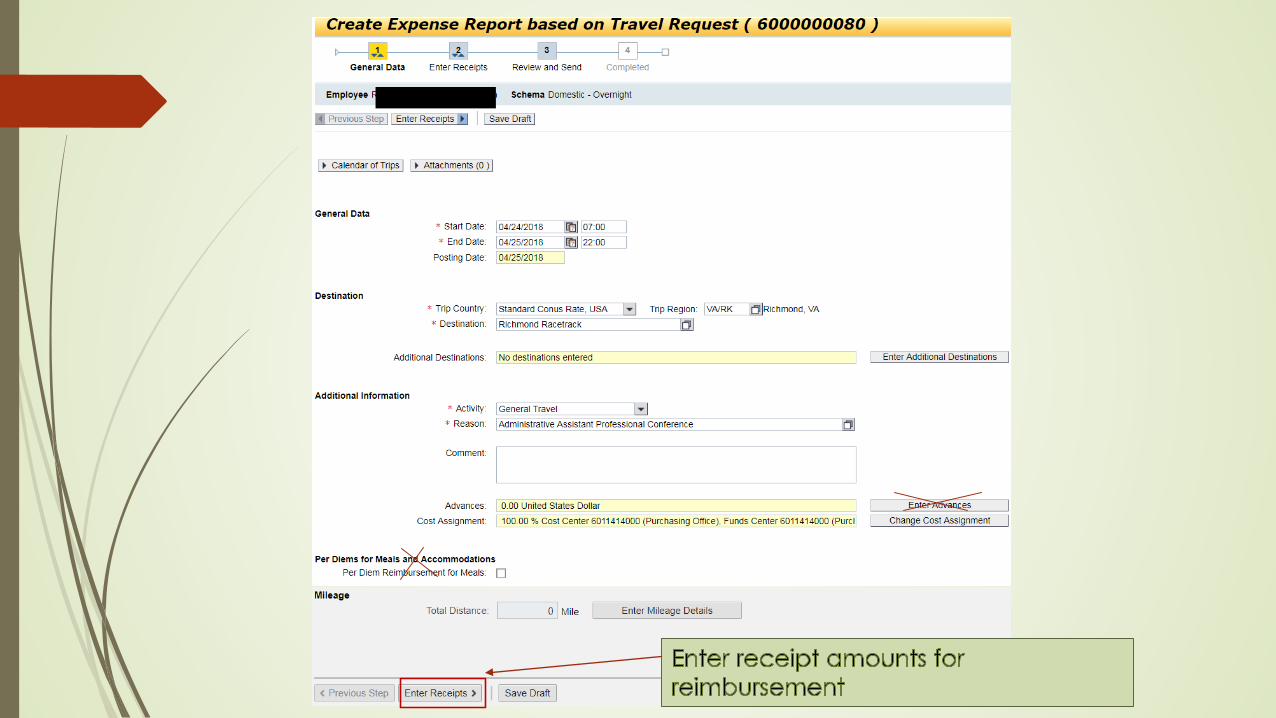
Step 1 – General Data
Comments:Enter any additional information here
Enter the receipts here. NOTE: Subsistence receipts MUST be entered in 24 hour periods as this is the rate of reimbursement.
Advances would never be used as MU does not issue advances.
Per Diem reimbursement would never be used as receipts are required for all reimbursements up to the per diem.
Any changes can be made on this General Data page if different from the TR
Travelers can attach documents here once * items are completed and saved as a draft
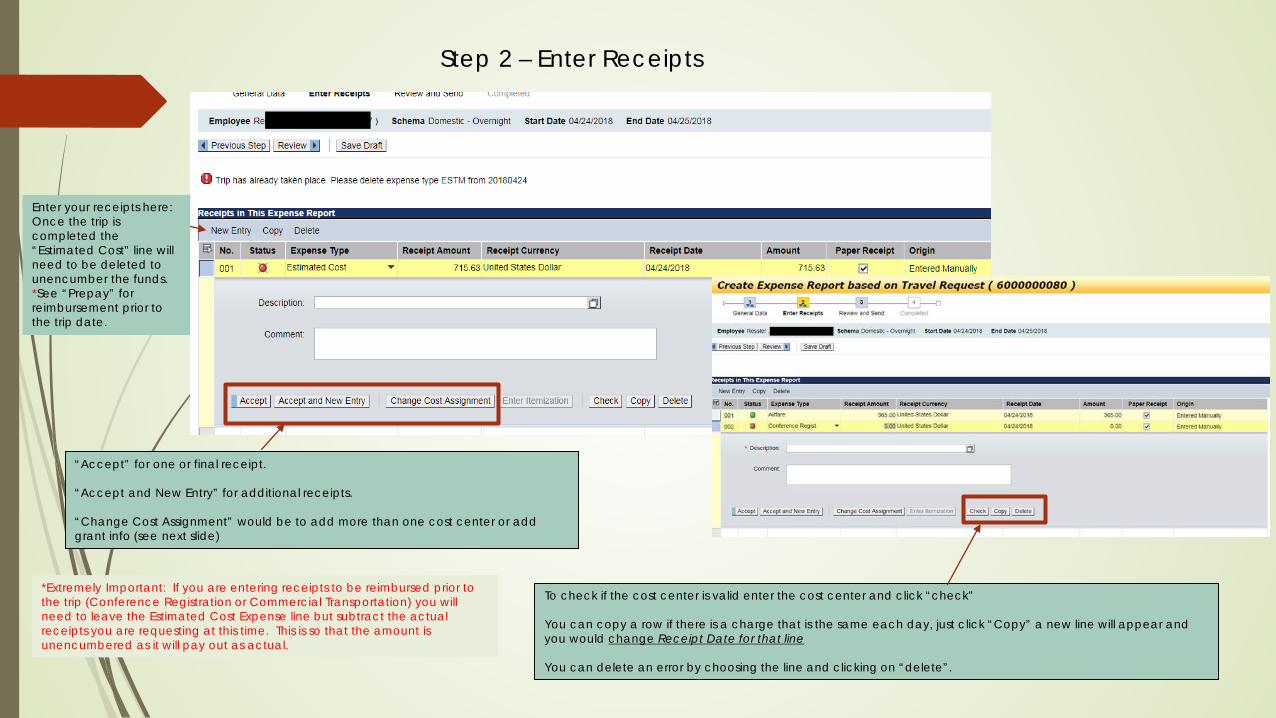
To check if the cost center is valid enter the cost center and click “check”
You can copy a row if there is a charge that is the same each day, just click “Copy” a new line will appear and you would change Receipt Date for that line
You can delete an error by choosing the line and clicking on “delete”.
“Accept” for one or final receipt.
“Accept and New Entry” for additional receipts.
“Change Cost Assignment” would be to add more than one cost center or add grant info (see next slide)
Step 2 – Enter Receipts
*Extremely Important: If you are entering receipts to be reimbursed prior to the trip (Conference Registration or Commercial Transportation) you will need to leave the Estimated Cost Expense line but subtract the actual receipts you are requesting at this time. This is so that the amount is unencumbered as it will pay out as actual.
Enter your receipts here: Once the trip is completed the “Estimated Cost” line will need to be deleted to unencumber the funds. *See “Prepay” for reimbursement prior to the trip date.
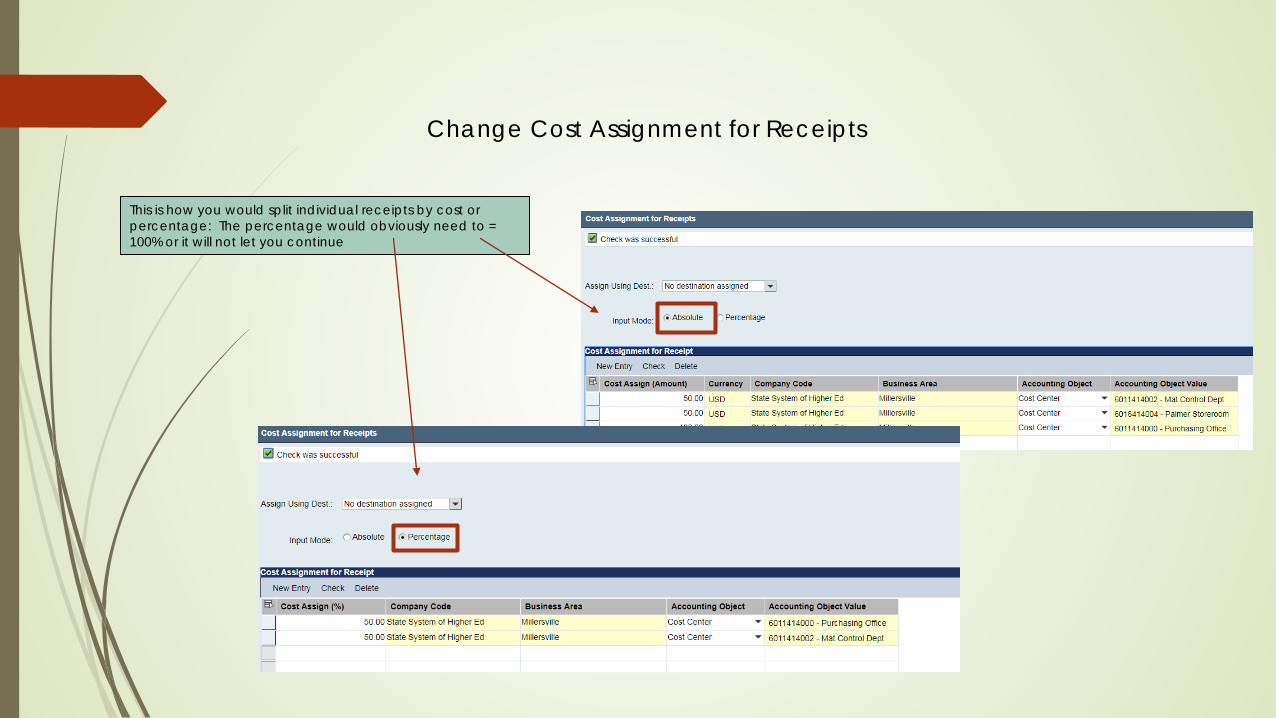
Change Cost Assignment for Receipts
This is how you would split individual receipts by cost or percentage: The percentage would obviously need to = 100% or it will not let you continue
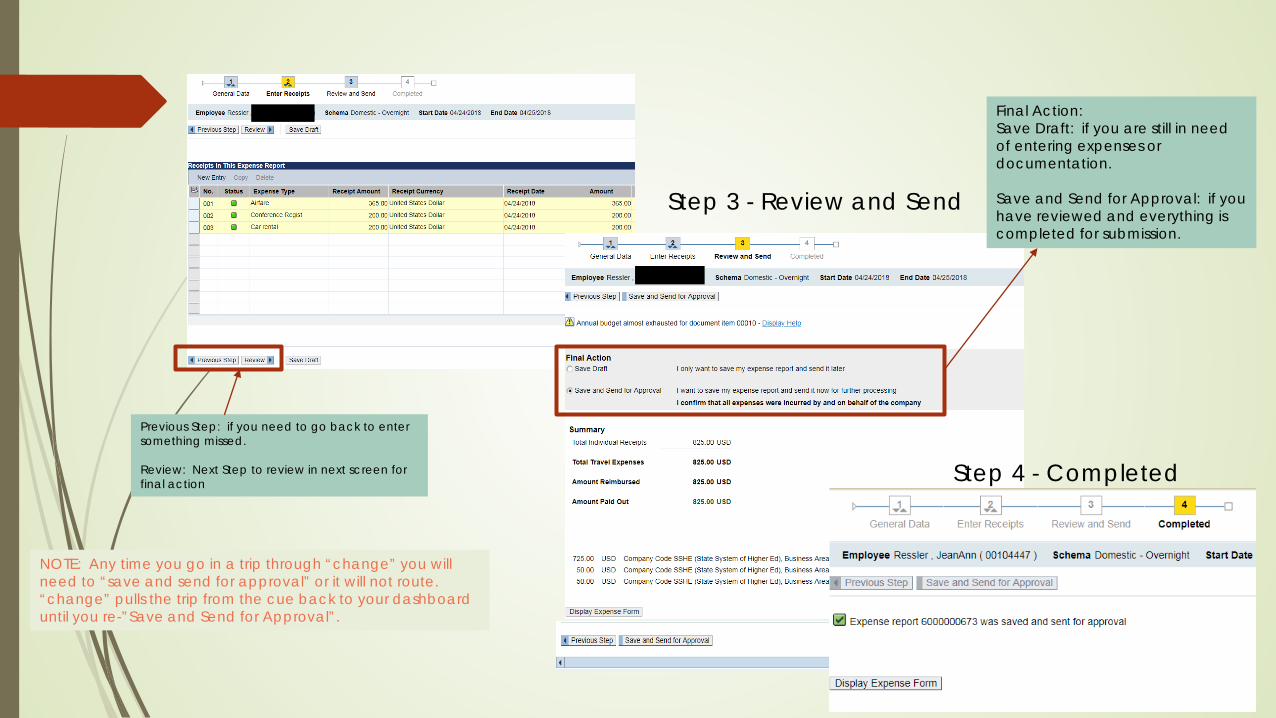
Step 4 - Completed
Step 3 - Review and Send
Previous Step: if you need to go back to enter something missed.
Review: Next Step to review in next screen for final action
Final Action:Save Draft: if you are still in need of entering expenses or documentation.
Save and Send for Approval: if you have reviewed and everything is completed for submission.
NOTE: Any time you go in a trip through “change” you will need to “save and send for approval” or it will not route. “change” pulls the trip from the cue back to your dashboard until you re-”Save and Send for Approval”.
Notes:All reimbursements are made through the Expense Report. This is a change from the paper process.
An Expense Report cannot be started from a Travel Request until all approvals are received and the blue “create” link is available under the “Expense Report” column of the Travel Request.
ALL expense reports would be created through the Travel Request. The Travel Request must be approved before you can create an expense report so get the Travel Request in early!
Travel Assistants can complete the entry; however, they only have permissions to Save Draft.The travel must enter the Travel Request or Travel Expense Report and go to Step 3, review, and Save and Send for Approval.
Any time you go into a trip through “change” you will need to re-”save and send for approval” so it goes back to routing.
You can check on the status of the Request or Report at any time by going in to “My Trips and Expenses”, “All My Trips” tab, click on the trip line in question, details will come up below the dashboard where you can “display/print”. Or you can “All my Travel Requests” or “All My Expense Reports” tab click on the “Display/Print” button on the dashboard. You can review expenses submitted and at the end of the document you can view the status on the “Approval Log”.
Grants and additional cost centers would need to be entered at the Travel Expense Report receipt level. It will route to those grant approvers of cost center/IO/WBS managers at that time.
Please, tape receipts to a sheet of paper in date order and upload receipts in as few file uploads as possible. This would assist the auditing process. There will be times this is not possible, that is ok.
Please make sure your receipt dates are correct.
It will be much more efficient process:faster approvalsmore timely reimbursementstraveler can see the status at any timeauditor can email the traveler directly as opposed to returning formsfar less paper useensure the proper set ups are completed so appropriate approvers are involved
It will take time to get used to it…we all understand that.We are learning with you. If we are all patient, we will have much success.