Embed Size (px)
Citation preview

Pizza Delivery System Release 2 (R2) Team Caribou Colleen DiVincenzo Casey Klimkowsky Peter Mikitsh Isioma Nnodum Andrew Zemke Preface This documentation will provide descriptions for interacting with the Pizza Delivery System developed by Team Caribou. Initializing the System To launch the system, unzip caribou_r2.zip. This should contain a Java JAR file called caribou_r2.jar, along with five XML files. It is necessary that these five files are in the same directory as the JAR when running the R1 program. From the directory containing the JAR file, run the following command to start the program. $ java -jar caribou_r2.jar Program Flow This diagram details the flow between components.
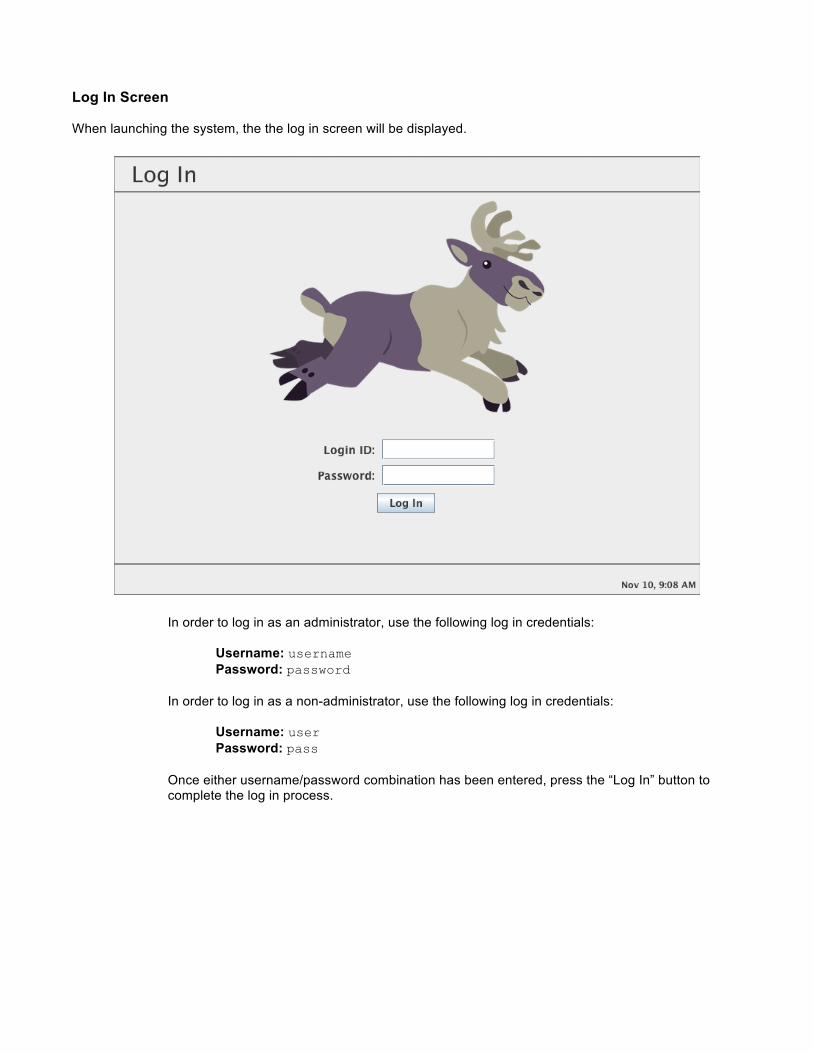
Log In Screen When launching the system, the the log in screen will be displayed.
In order to log in as an administrator, use the following log in credentials:
Username: username Password: password In order to log in as a non-administrator, use the following log in credentials: Username: user Password: pass Once either username/password combination has been entered, press the “Log In” button to complete the log in process.
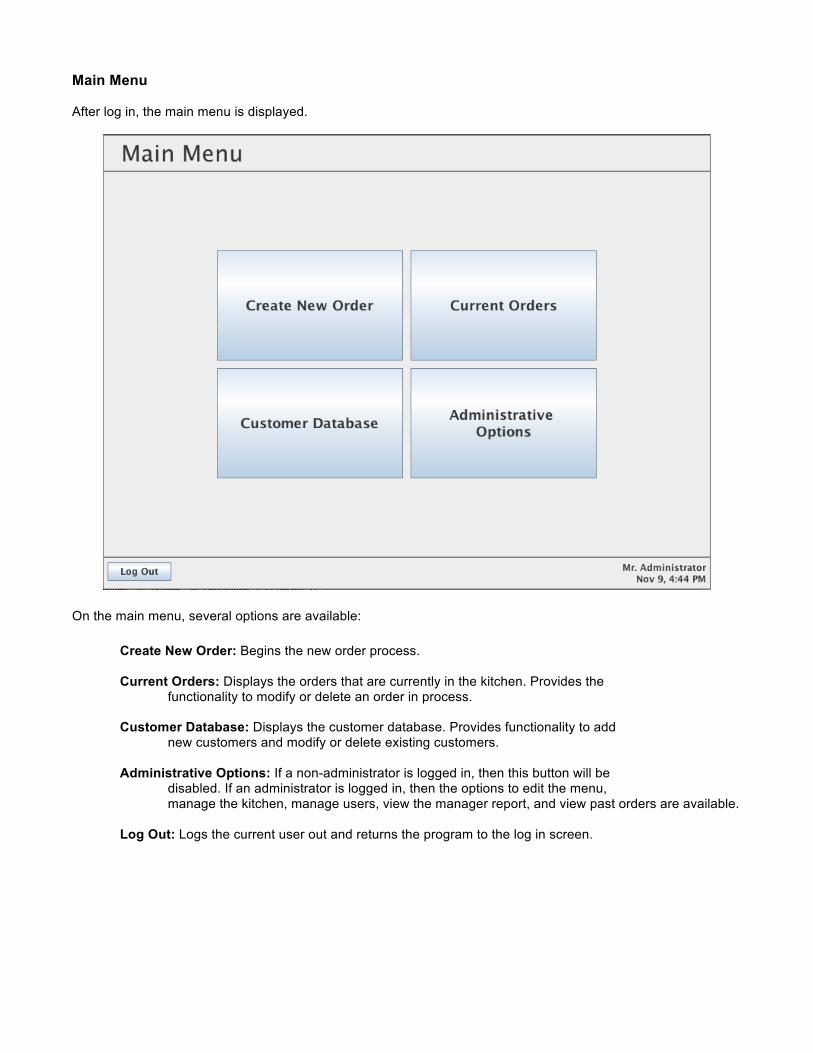
Main Menu After log in, the main menu is displayed.
On the main menu, several options are available: Create New Order: Begins the new order process. Current Orders: Displays the orders that are currently in the kitchen. Provides the
functionality to modify or delete an order in process.
Customer Database: Displays the customer database. Provides functionality to add new customers and modify or delete existing customers.
Administrative Options: If a non-administrator is logged in, then this button will be disabled. If an administrator is logged in, then the options to edit the menu, manage the kitchen, manage users, view the manager report, and view past orders are available.
Log Out: Logs the current user out and returns the program to the log in screen.
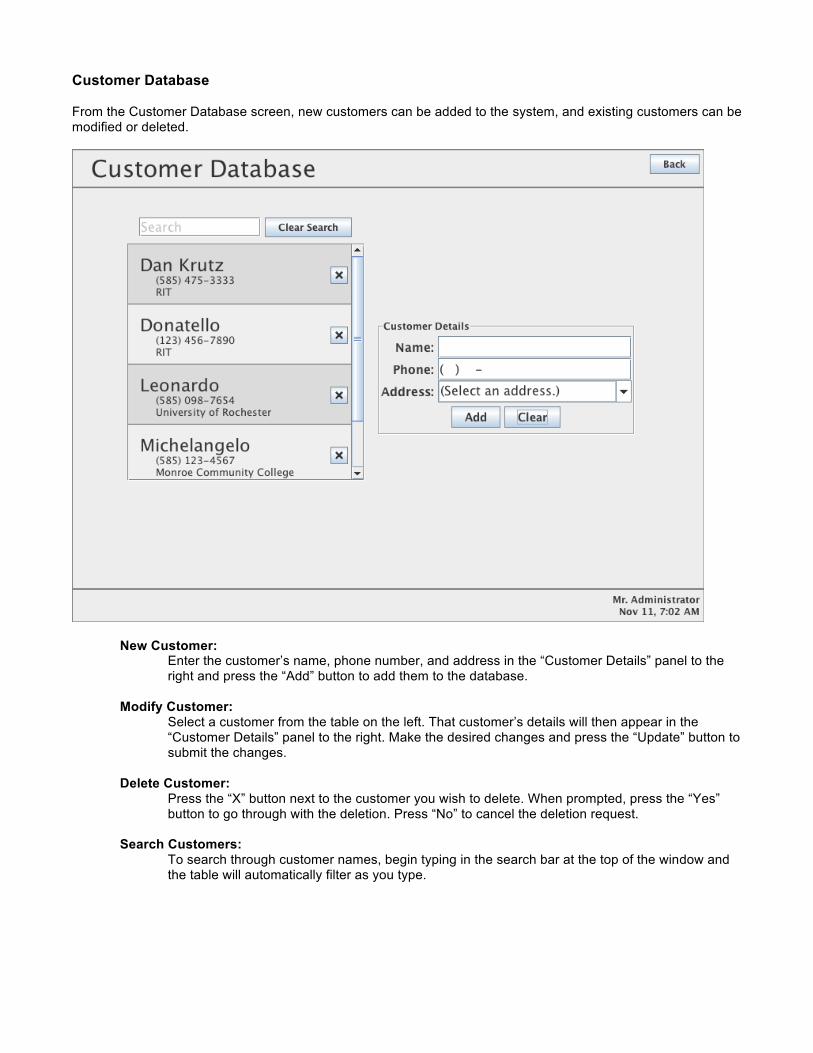
Customer Database From the Customer Database screen, new customers can be added to the system, and existing customers can be modified or deleted.
New Customer:
Enter the customer’s name, phone number, and address in the “Customer Details” panel to the right and press the “Add” button to add them to the database.
Modify Customer: Select a customer from the table on the left. That customer’s details will then appear in the
“Customer Details” panel to the right. Make the desired changes and press the “Update” button to submit the changes.
Delete Customer: Press the “X” button next to the customer you wish to delete. When prompted, press the “Yes”
button to go through with the deletion. Press “No” to cancel the deletion request.
Search Customers: To search through customer names, begin typing in the search bar at the top of the window and the table will automatically filter as you type.

Creating an Order Once the “Create New Order” button has been pressed, the following screen is displayed:
Enter a phone number that is numeric and 10 digits in length. Do not enter any dashes, spaces, or characters other than [0-9]. For example, “4753333” is not a valid phone number, while “5854753333” is. The “OK” button will not be enabled until a valid phone number is entered.
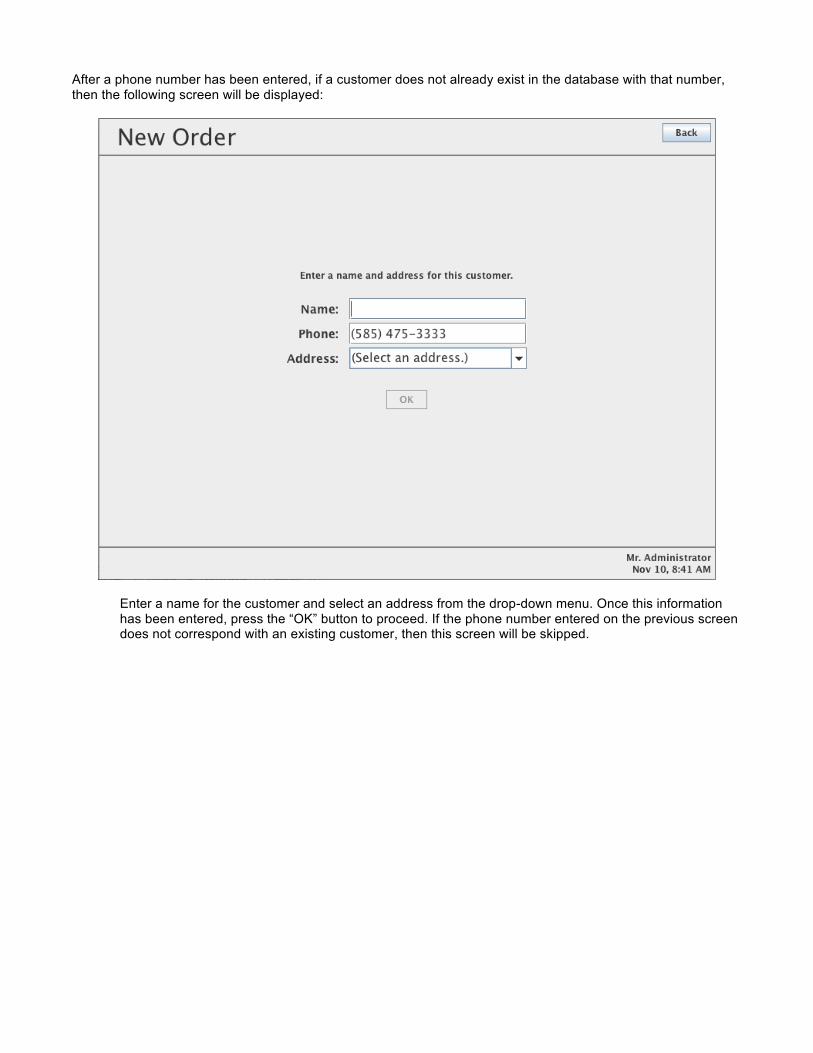
After a phone number has been entered, if a customer does not already exist in the database with that number, then the following screen will be displayed:
Enter a name for the customer and select an address from the drop-down menu. Once this information has been entered, press the “OK” button to proceed. If the phone number entered on the previous screen does not correspond with an existing customer, then this screen will be skipped.
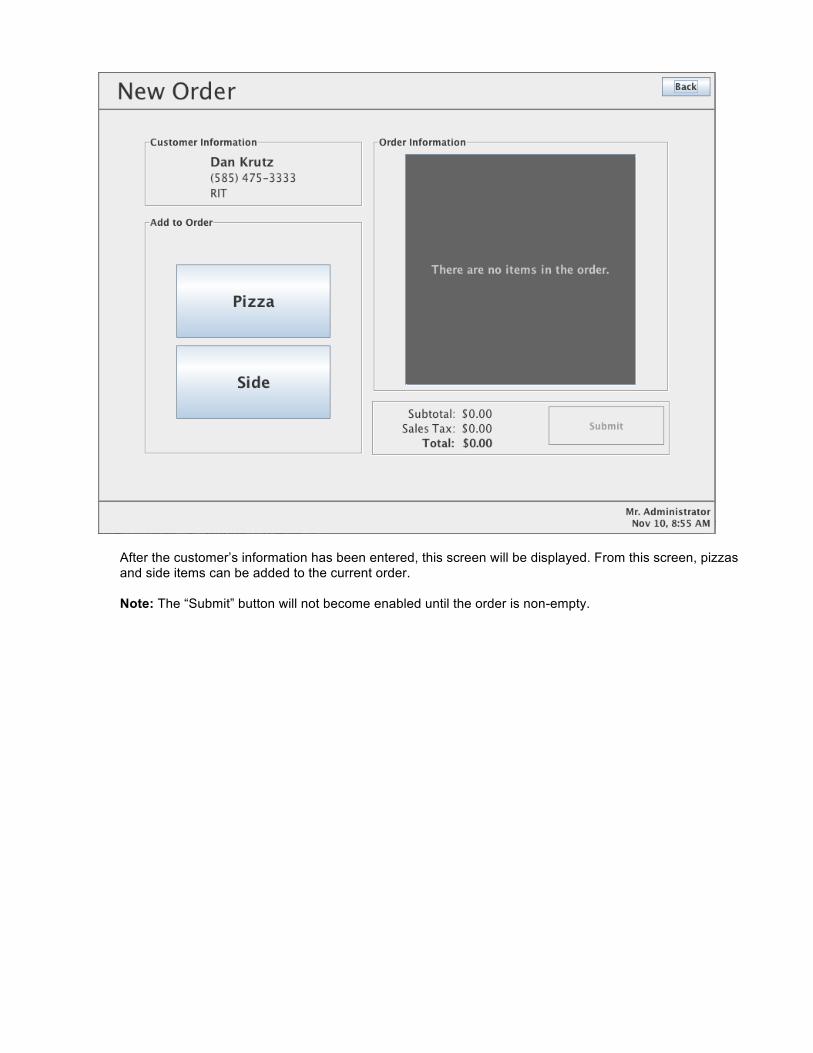
After the customer’s information has been entered, this screen will be displayed. From this screen, pizzas and side items can be added to the current order. Note: The “Submit” button will not become enabled until the order is non-empty.

Adding a Side: To add a side item to the order, press the “Side” button. This screen will then be displayed:
Enter non-negative numerical quantities for each of the sides, or use the “+” and “-” buttons. Press the “Done” button when finished and the desired quantities have been entered.
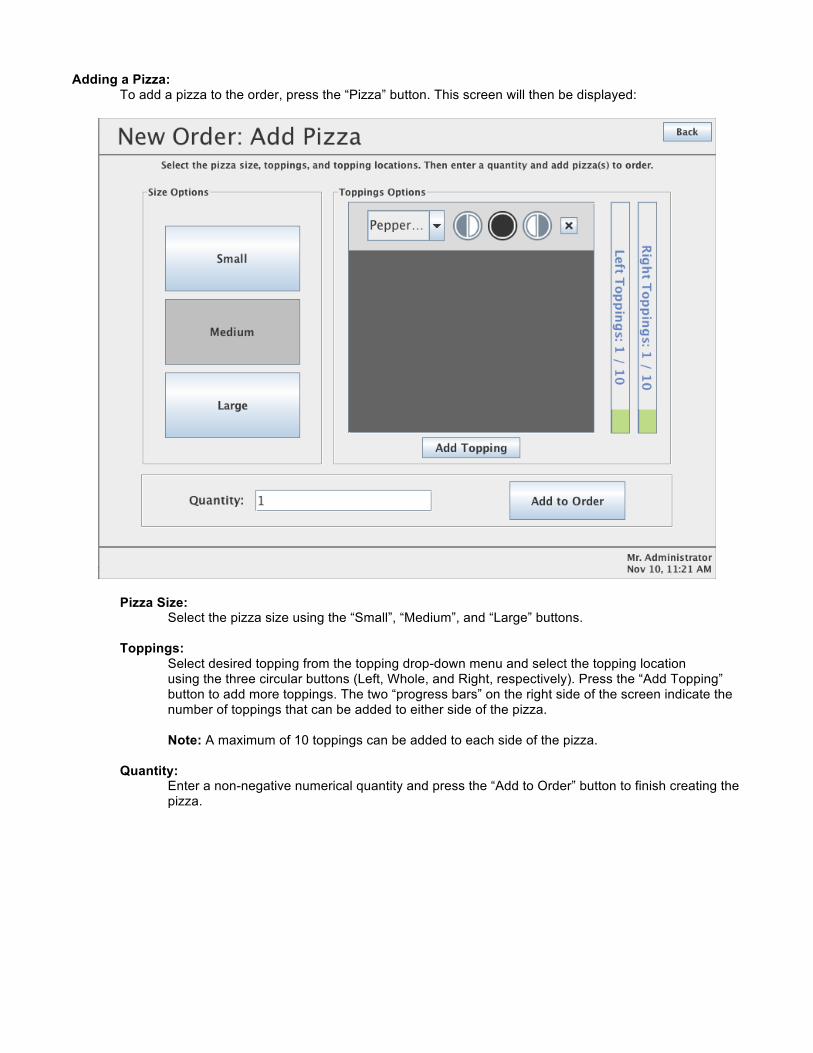
Adding a Pizza: To add a pizza to the order, press the “Pizza” button. This screen will then be displayed:
Pizza Size: Select the pizza size using the “Small”, “Medium”, and “Large” buttons.
Toppings:
Select desired topping from the topping drop-down menu and select the topping location using the three circular buttons (Left, Whole, and Right, respectively). Press the “Add Topping” button to add more toppings. The two “progress bars” on the right side of the screen indicate the number of toppings that can be added to either side of the pizza. Note: A maximum of 10 toppings can be added to each side of the pizza.
Quantity: Enter a non-negative numerical quantity and press the “Add to Order” button to finish creating the pizza.

After items have been added to the order, they will be displayed in the “Order Information” panel. Items in the order can be modified at any time by clicking on their cells.
After items have been added to the order, press the “Submit” button to send the order to the kitchen. A confirmation screen will then be displayed indicating the estimated delivery time of the order.

Current Orders After an order has been submitted, it will be displayed on the Current Orders screen.
Here, the list of orders that are currently in the kitchen are displayed. In order to view an order’s details, click its cell. The order’s details will then be displayed in the pane on the bottom of the screen. After an order has been selected, it can be modified or deleted with the “Modify” and “Delete” buttons, respectively. Note: An order can be modified only if it is awaiting preparation, and can only be deleted if it is not on route or already delivered.
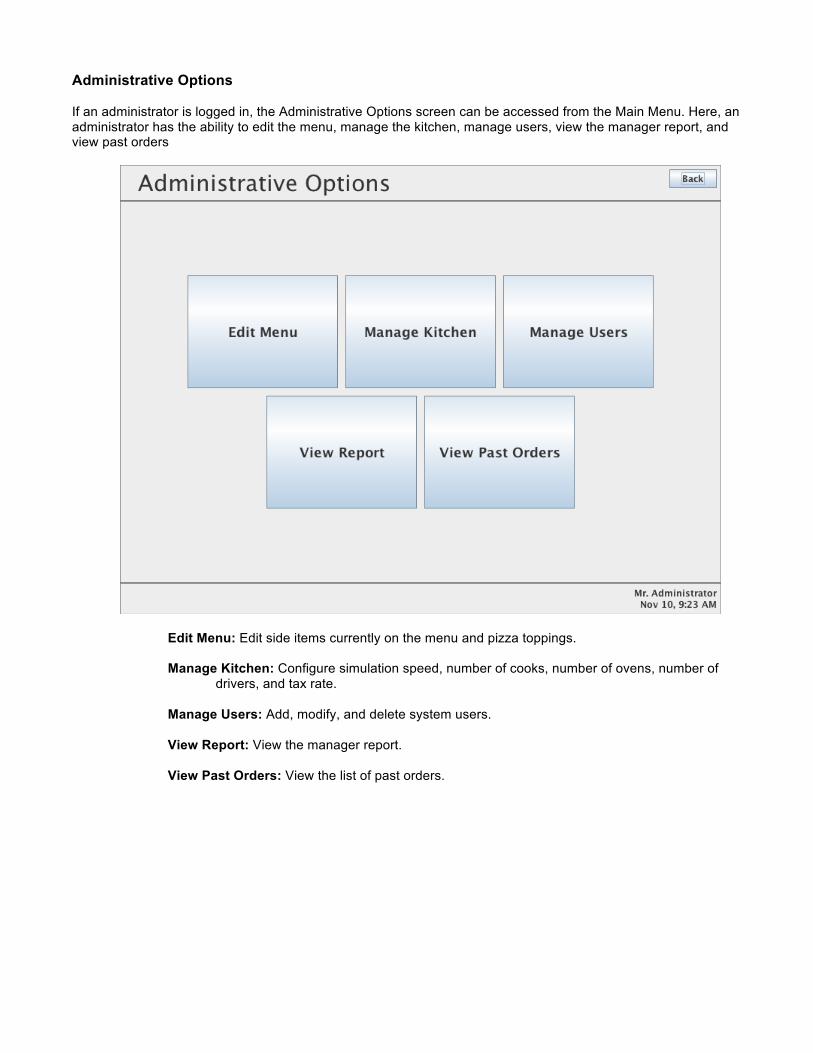
Administrative Options If an administrator is logged in, the Administrative Options screen can be accessed from the Main Menu. Here, an administrator has the ability to edit the menu, manage the kitchen, manage users, view the manager report, and view past orders
Edit Menu: Edit side items currently on the menu and pizza toppings. Manage Kitchen: Configure simulation speed, number of cooks, number of ovens, number of
drivers, and tax rate.
Manage Users: Add, modify, and delete system users.
View Report: View the manager report. View Past Orders: View the list of past orders.
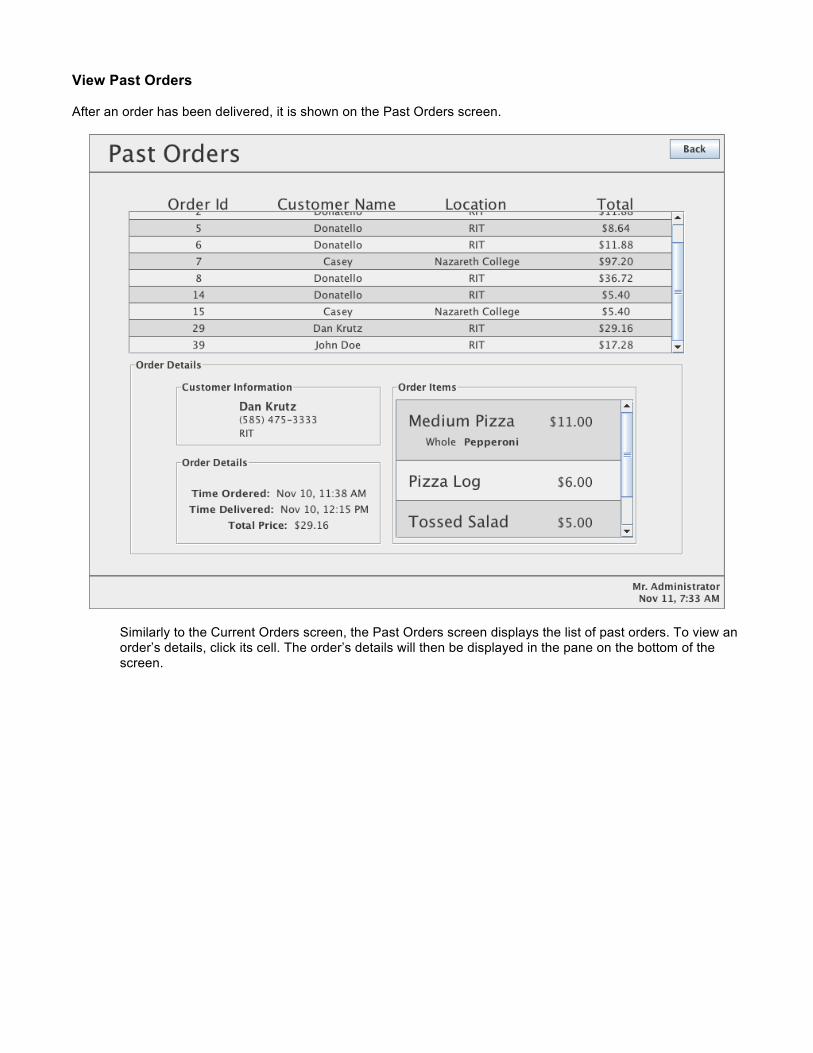
View Past Orders After an order has been delivered, it is shown on the Past Orders screen.
Similarly to the Current Orders screen, the Past Orders screen displays the list of past orders. To view an order’s details, click its cell. The order’s details will then be displayed in the pane on the bottom of the screen.

View Report The Manager Report displays calculated values, such as the number of orders in the report and average time spent waiting to cook.
No interaction is available on the Manager Report screen, except to go back to the Administrative Options.
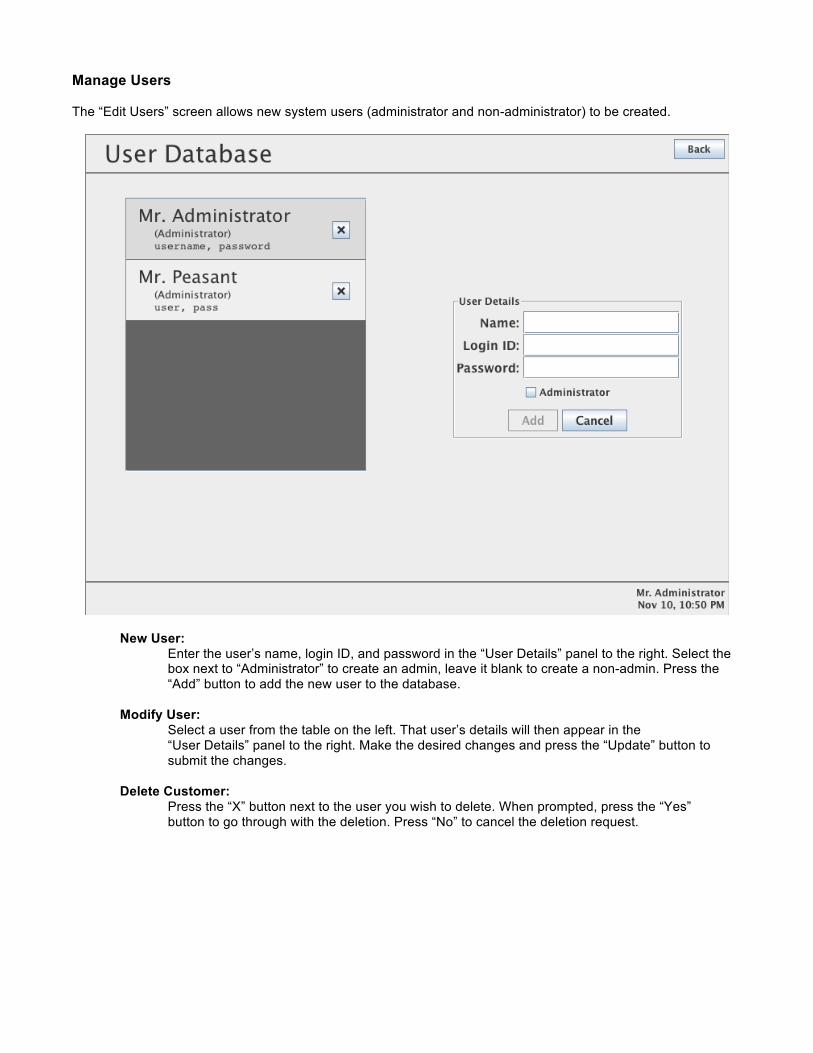
Manage Users The “Edit Users” screen allows new system users (administrator and non-administrator) to be created.
New User: Enter the user’s name, login ID, and password in the “User Details” panel to the right. Select the box next to “Administrator” to create an admin, leave it blank to create a non-admin. Press the “Add” button to add the new user to the database.
Modify User: Select a user from the table on the left. That user’s details will then appear in the
“User Details” panel to the right. Make the desired changes and press the “Update” button to submit the changes.
Delete Customer: Press the “X” button next to the user you wish to delete. When prompted, press the “Yes”
button to go through with the deletion. Press “No” to cancel the deletion request.
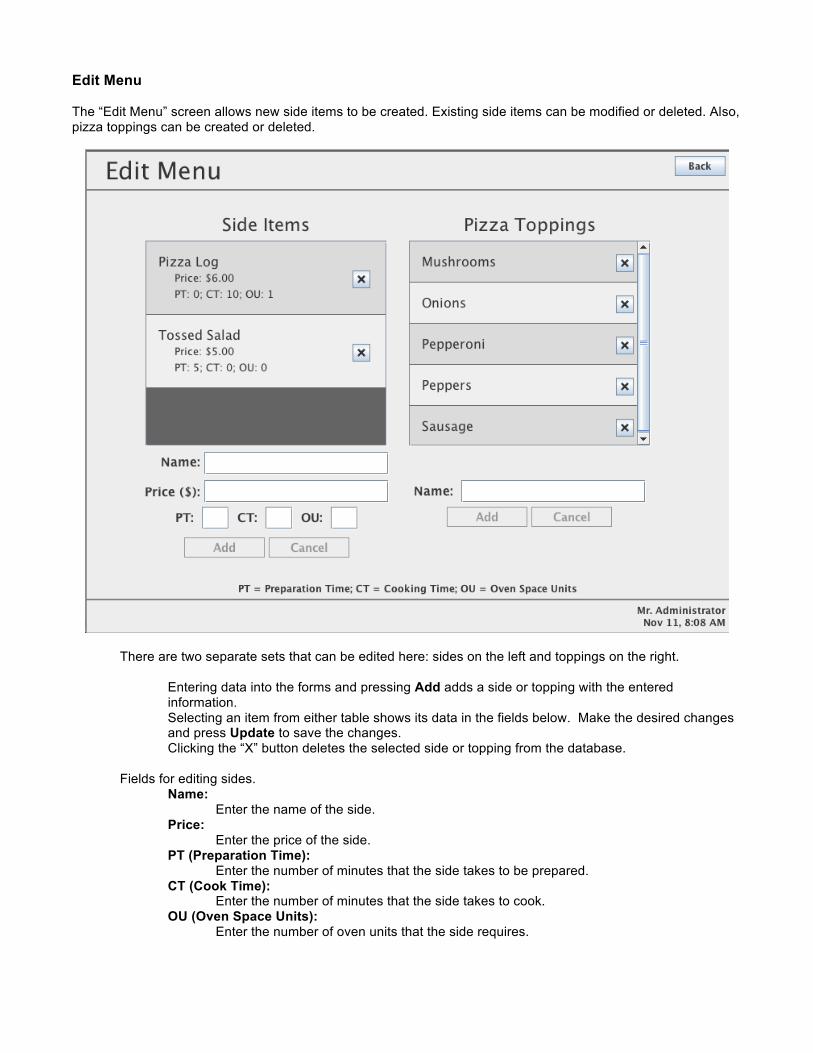
Edit Menu The “Edit Menu” screen allows new side items to be created. Existing side items can be modified or deleted. Also, pizza toppings can be created or deleted.
There are two separate sets that can be edited here: sides on the left and toppings on the right.
Entering data into the forms and pressing Add adds a side or topping with the entered information. Selecting an item from either table shows its data in the fields below. Make the desired changes and press Update to save the changes.
Clicking the “X” button deletes the selected side or topping from the database.
Fields for editing sides. Name: Enter the name of the side. Price: Enter the price of the side. PT (Preparation Time): Enter the number of minutes that the side takes to be prepared. CT (Cook Time): Enter the number of minutes that the side takes to cook. OU (Oven Space Units): Enter the number of oven units that the side requires.
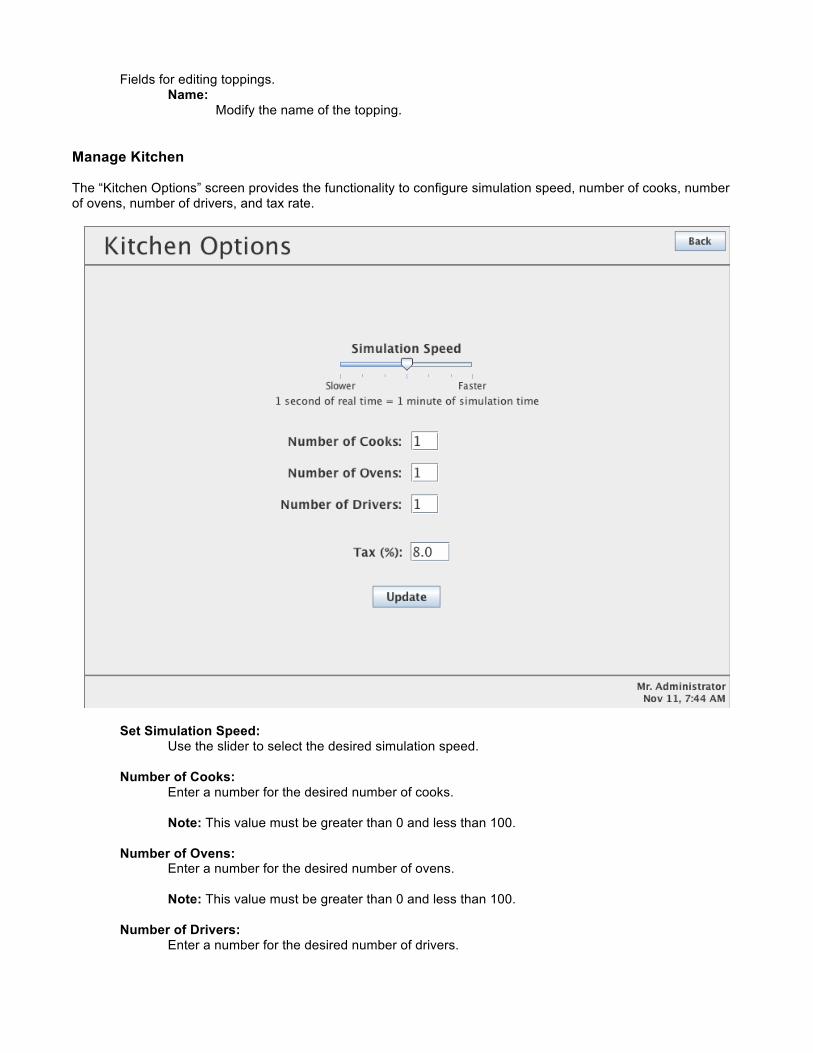
Fields for editing toppings. Name: Modify the name of the topping. Manage Kitchen The “Kitchen Options” screen provides the functionality to configure simulation speed, number of cooks, number of ovens, number of drivers, and tax rate.
Set Simulation Speed: Use the slider to select the desired simulation speed. Number of Cooks: Enter a number for the desired number of cooks. Note: This value must be greater than 0 and less than 100. Number of Ovens:
Enter a number for the desired number of ovens. Note: This value must be greater than 0 and less than 100. Number of Drivers: Enter a number for the desired number of drivers.

Note: This value must be greater than 0 and less than 100. Tax Rate: Enter a number for the desired tax rate. Note: This value must be non-negative and less than 100. Note: Screenshots were taken on a Mac platform.