Embed Size (px)
Citation preview
Gentle Yoga Sequence for Emotional Well-Being
Here is a set of yoga poses to support your yoga practice at home. It is recommended that
you learn these poses with a trained yoga teacher before you try them on your own. Start by
doing one or two poses a day and also think about adding little bits of yoga into your daily
life. Some examples could include:
• Standing in mountain pose and breathing while waiting in line.
• Rolling your shoulders while at your desk.
• Doing “legs up the wall” before going to bed.
Yoga is about building the connection between mind, body and spirit. Regular practice of
yoga can help you face life with more steadiness and ease. Let yourself experience the
poses, but be sure to come out of them if you are uncomfortable.
Before you start: • Wear loose clothing.
• Find a comfortable space to practice - it doesn’t have to be big.
• Find any props you might want – perhaps a mat, blankets, wall space or a chair.
• Plan your practice time - it doesn’t have to be long; you can start small at first.
How to practice: • Bring an attitude of curiosity.
• Explore your poses – don’t worry about your performance.
• Move slowly and mindfully so that you notice and feel the poses.
• Be kind to yourself – there’s no “right” or “wrong” in yoga.
• Observe your breath – it can help you connect your body and mind.
• Rest when you need to - be guided by how you feel.
• Notice how you feel after each pose. Are there any changes?
• Remember that your yoga practice an act of self-care.
May the healing intention that brought you to yoga, continue to benefit you.
1
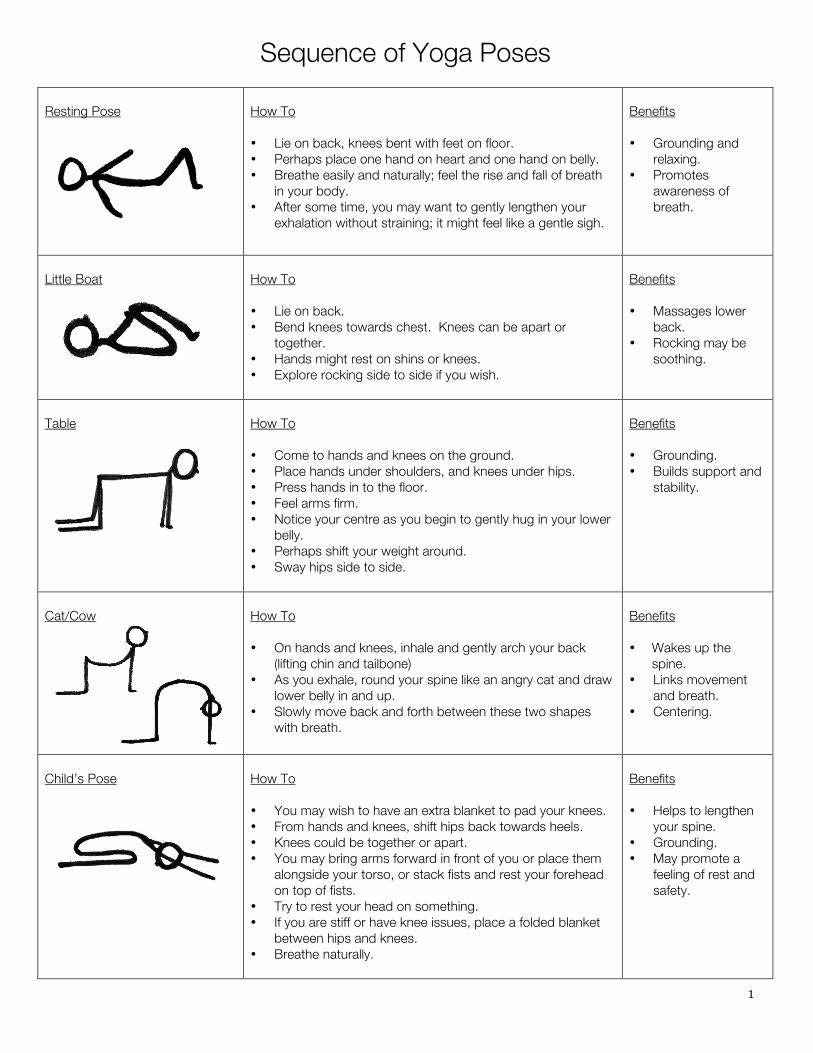
Sequence of Yoga Poses
Resting Pose
How To • Lie on back, knees bent with feet on floor. • Perhaps place one hand on heart and one hand on belly. • Breathe easily and naturally; feel the rise and fall of breath
in your body. • After some time, you may want to gently lengthen your
exhalation without straining; it might feel like a gentle sigh.
Benefits • Grounding and
relaxing. • Promotes
awareness of breath.
Little Boat
How To • Lie on back. • Bend knees towards chest. Knees can be apart or
together. • Hands might rest on shins or knees. • Explore rocking side to side if you wish.
Benefits • Massages lower
back. • Rocking may be
soothing.
Table
How To • Come to hands and knees on the ground. • Place hands under shoulders, and knees under hips. • Press hands in to the floor. • Feel arms firm. • Notice your centre as you begin to gently hug in your lower
belly. • Perhaps shift your weight around. • Sway hips side to side.
Benefits • Grounding. • Builds support and
stability.
Cat/Cow
How To • On hands and knees, inhale and gently arch your back
(lifting chin and tailbone) • As you exhale, round your spine like an angry cat and draw
lower belly in and up. • Slowly move back and forth between these two shapes
with breath.
Benefits • Wakes up the
spine. • Links movement
and breath. • Centering.
Child’s Pose
How To • You may wish to have an extra blanket to pad your knees. • From hands and knees, shift hips back towards heels. • Knees could be together or apart. • You may bring arms forward in front of you or place them
alongside your torso, or stack fists and rest your forehead on top of fists.
• Try to rest your head on something. • If you are stiff or have knee issues, place a folded blanket
between hips and knees. • Breathe naturally.
Benefits • Helps to lengthen
your spine. • Grounding. • May promote a
feeling of rest and safety.
2
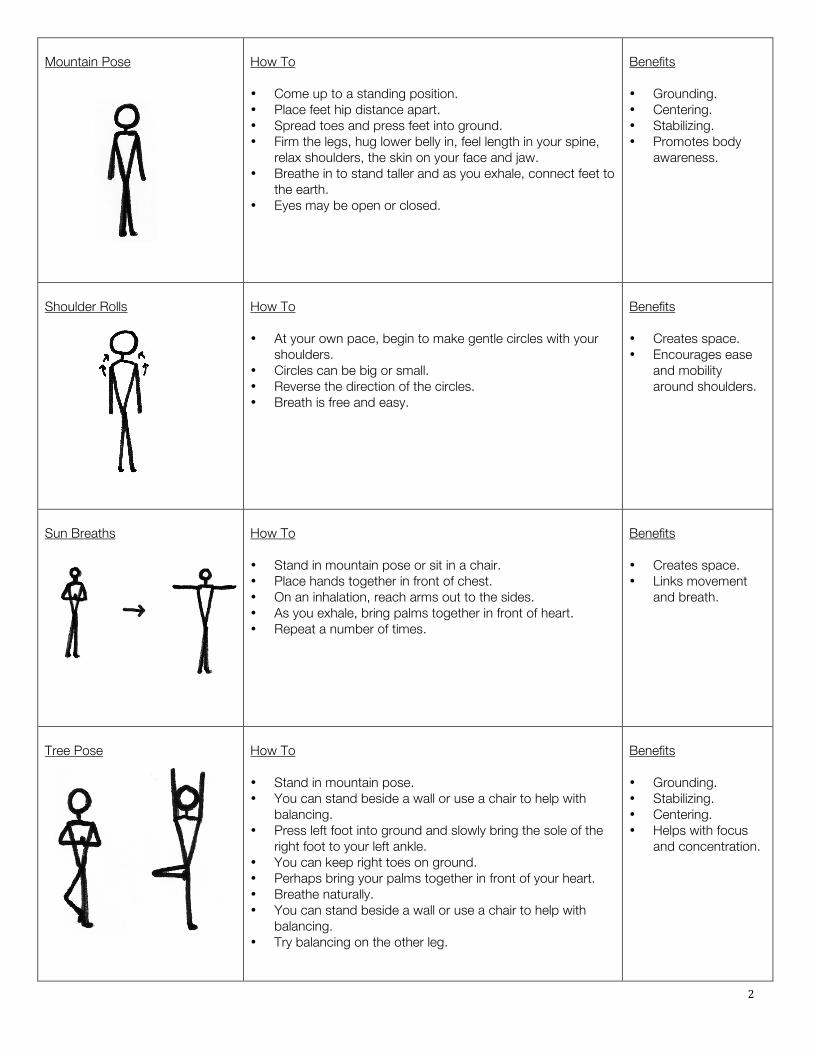
Mountain Pose
How To • Come up to a standing position. • Place feet hip distance apart. • Spread toes and press feet into ground. • Firm the legs, hug lower belly in, feel length in your spine,
relax shoulders, the skin on your face and jaw. • Breathe in to stand taller and as you exhale, connect feet to
the earth. • Eyes may be open or closed.
Benefits • Grounding. • Centering. • Stabilizing. • Promotes body
awareness.
Shoulder Rolls
How To • At your own pace, begin to make gentle circles with your
shoulders. • Circles can be big or small. • Reverse the direction of the circles. • Breath is free and easy.
Benefits • Creates space. • Encourages ease
and mobility around shoulders.
Sun Breaths
How To • Stand in mountain pose or sit in a chair. • Place hands together in front of chest. • On an inhalation, reach arms out to the sides. • As you exhale, bring palms together in front of heart. • Repeat a number of times.
Benefits • Creates space. • Links movement
and breath.
Tree Pose
How To • Stand in mountain pose. • You can stand beside a wall or use a chair to help with
balancing. • Press left foot into ground and slowly bring the sole of the
right foot to your left ankle. • You can keep right toes on ground. • Perhaps bring your palms together in front of your heart. • Breathe naturally. • You can stand beside a wall or use a chair to help with
balancing. • Try balancing on the other leg.
Benefits • Grounding. • Stabilizing. • Centering. • Helps with focus
and concentration.
3
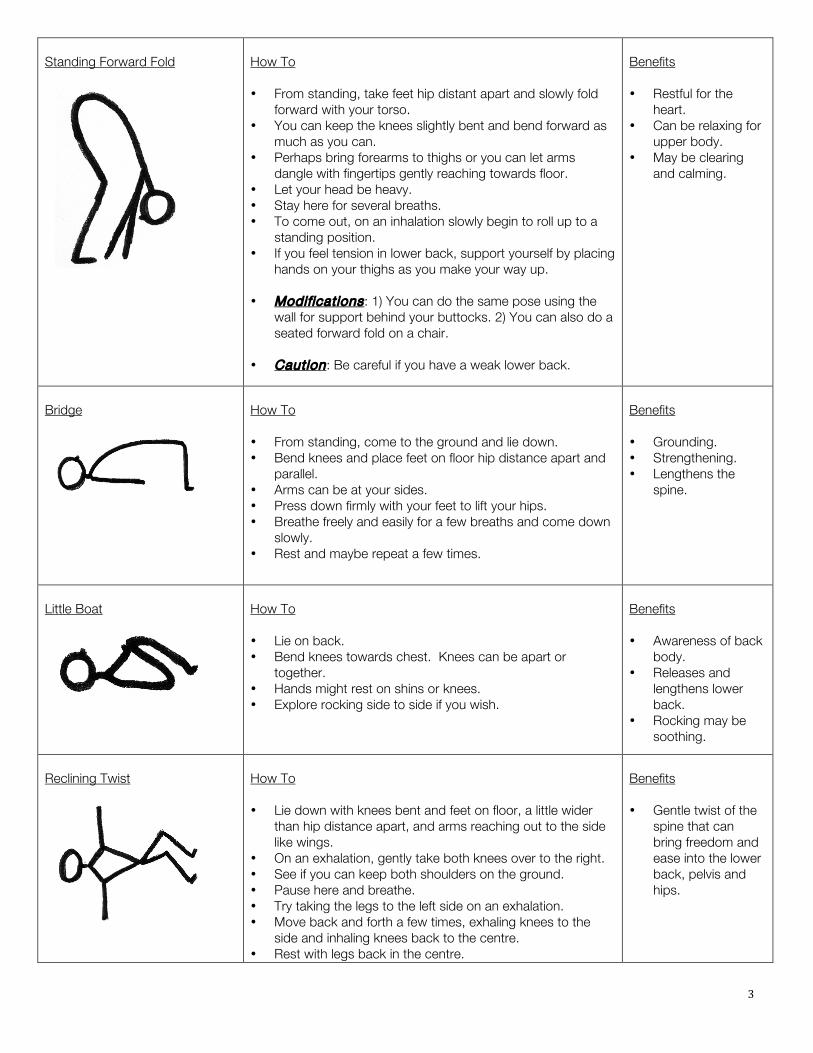
Standing Forward Fold
How To • From standing, take feet hip distant apart and slowly fold
forward with your torso. • You can keep the knees slightly bent and bend forward as
much as you can. • Perhaps bring forearms to thighs or you can let arms
dangle with fingertips gently reaching towards floor. • Let your head be heavy. • Stay here for several breaths. • To come out, on an inhalation slowly begin to roll up to a
standing position. • If you feel tension in lower back, support yourself by placing
hands on your thighs as you make your way up. • Modif icat ions : 1) You can do the same pose using the
wall for support behind your buttocks. 2) You can also do a seated forward fold on a chair.
• Caution : Be careful if you have a weak lower back.
Benefits • Restful for the
heart. • Can be relaxing for
upper body. • May be clearing
and calming.
Bridge
How To • From standing, come to the ground and lie down. • Bend knees and place feet on floor hip distance apart and
parallel. • Arms can be at your sides. • Press down firmly with your feet to lift your hips. • Breathe freely and easily for a few breaths and come down
slowly. • Rest and maybe repeat a few times.
Benefits • Grounding. • Strengthening. • Lengthens the
spine.
Little Boat
How To • Lie on back. • Bend knees towards chest. Knees can be apart or
together. • Hands might rest on shins or knees. • Explore rocking side to side if you wish.
Benefits • Awareness of back
body. • Releases and
lengthens lower back.
• Rocking may be soothing.
Reclining Twist
How To • Lie down with knees bent and feet on floor, a little wider
than hip distance apart, and arms reaching out to the side like wings.
• On an exhalation, gently take both knees over to the right. • See if you can keep both shoulders on the ground. • Pause here and breathe. • Try taking the legs to the left side on an exhalation. • Move back and forth a few times, exhaling knees to the
side and inhaling knees back to the centre. • Rest with legs back in the centre.
Benefits • Gentle twist of the
spine that can bring freedom and ease into the lower back, pelvis and hips.
4
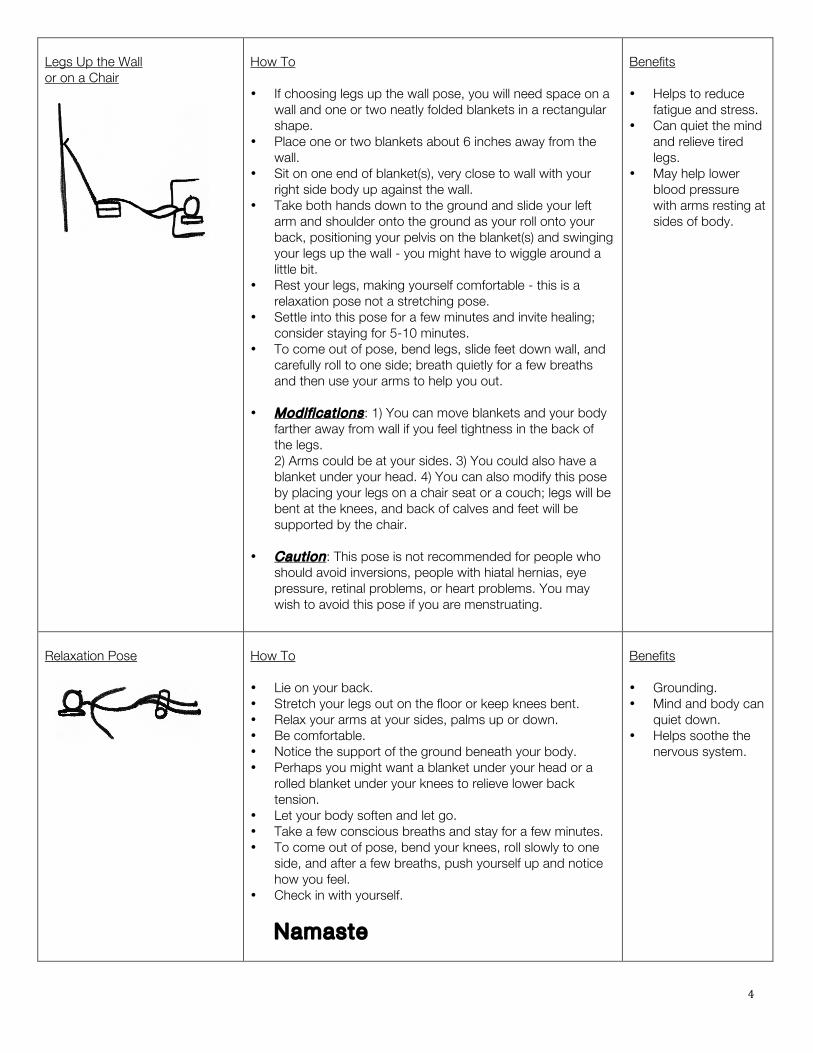
Legs Up the Wall or on a Chair
How To • If choosing legs up the wall pose, you will need space on a
wall and one or two neatly folded blankets in a rectangular shape.
• Place one or two blankets about 6 inches away from the wall.
• Sit on one end of blanket(s), very close to wall with your right side body up against the wall.
• Take both hands down to the ground and slide your left arm and shoulder onto the ground as your roll onto your back, positioning your pelvis on the blanket(s) and swinging your legs up the wall - you might have to wiggle around a little bit.
• Rest your legs, making yourself comfortable - this is a relaxation pose not a stretching pose.
• Settle into this pose for a few minutes and invite healing; consider staying for 5-10 minutes.
• To come out of pose, bend legs, slide feet down wall, and carefully roll to one side; breath quietly for a few breaths and then use your arms to help you out.
• Modif icat ions : 1) You can move blankets and your body farther away from wall if you feel tightness in the back of the legs. 2) Arms could be at your sides. 3) You could also have a blanket under your head. 4) You can also modify this pose by placing your legs on a chair seat or a couch; legs will be bent at the knees, and back of calves and feet will be supported by the chair.
• Caution : This pose is not recommended for people who
should avoid inversions, people with hiatal hernias, eye pressure, retinal problems, or heart problems. You may wish to avoid this pose if you are menstruating.
Benefits • Helps to reduce
fatigue and stress. • Can quiet the mind
and relieve tired legs.
• May help lower blood pressure with arms resting at sides of body.
Relaxation Pose
How To • Lie on your back. • Stretch your legs out on the floor or keep knees bent. • Relax your arms at your sides, palms up or down. • Be comfortable. • Notice the support of the ground beneath your body. • Perhaps you might want a blanket under your head or a
rolled blanket under your knees to relieve lower back tension.
• Let your body soften and let go. • Take a few conscious breaths and stay for a few minutes. • To come out of pose, bend your knees, roll slowly to one
side, and after a few breaths, push yourself up and notice how you feel.
• Check in with yourself.
Namaste
Benefits • Grounding. • Mind and body can
quiet down. • Helps soothe the
nervous system.