Embed Size (px)
Citation preview
AFB Smear Microscopy
Notes:
Welcome to the Association of Public Health Laboratories Essentials of the Micro bacteriology Laboratory Promoting Quality Practices. This is the AFB Smear Microscopy Module. The goal of this module is to take an in- depth look at the standards of practice in the Mycobacteriology Lab for preparing AFB smears, examining AFB smears, recording smear results, and interpreting those smear results.

1.2 Terminology
Notes:
First, let’s look at some terminology. AFB smear microscopy is microscopic examination of specially stained smears to detect acid-fast organisms such as Mycobacterium tuberculosis and non-tuberculous mycobacteria, which are abbreviated NTM. Acid-fast bacilli or AFB are organisms, including mycobacteria, that resist decolorization with acid alcohol due to the lipid-rich mycolic acids in their cell wall, thereby retaining the primary stain.

1.3 Terminology
Notes:
Some more terminology. Processing is the digestion, decontamination, and concentration of a primary patient specimen prior to setting up culture and smear. And, smear is a small amount of primary patient specimen, direct or processed, that’s placed on a slide for the purpose of microscopic examination.
1.4 AFB Microscopy
Notes:
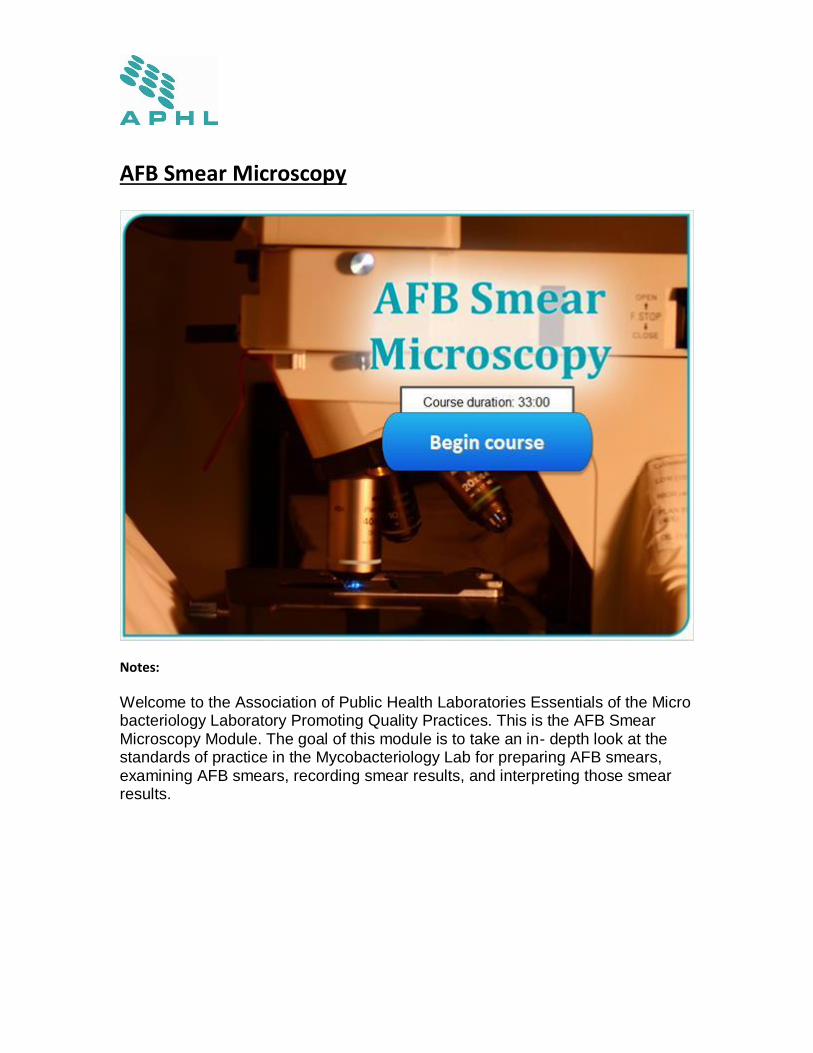
A little bit more about smears. Examination of smears is a rapid, convenient and inexpensive test. All types of specimens can be evaluated, including respiratory specimens, tissue, bodily fluids, etc. Positive AFB smear results provide a first indication of mycobacterial infection, and TB disease. Ultimately, the smear is a great screening tool but it must be accompanied by additional testing including culture for a conformation of diagnosis.

1.5 AFB Microscopy Results Guide Decisions
Notes:
Smear results guides decisions on clinical management. Patient therapy can be initiated for TB based on smear result and clinical presentation. Changes in smear status are important for monitoring response to therapy. Smear results guides decisions on laboratory testing. Algorithms for use of nucleic acid amplification tests are often based on smear positivity. Additionally, smear results guide decisions on public health interventions. Smear status and grade are useful for identifying the most infectious cases. For example, a patient who is four plus smear positive, would be more infectious than someone who is smear negative. Contact investigations are prioritized based on smear result. And, decisions regarding respiratory isolation are based on smear results.
1.6 Smear-Positive TB Cases
Notes:
Here’s some more how Smear results relate to TB disease. Smear-positivity and grade indicates relative bacterial burden and correlates with disease presentation. Patients that are sputum smear-positive are 5-10 times more infectious than smear negative patients. Untreated or treated with an inappropriate regimen, a sputum smear-positive patient may infect 10-15 persons per year.
1.7 Sputum Smear Results
Notes:
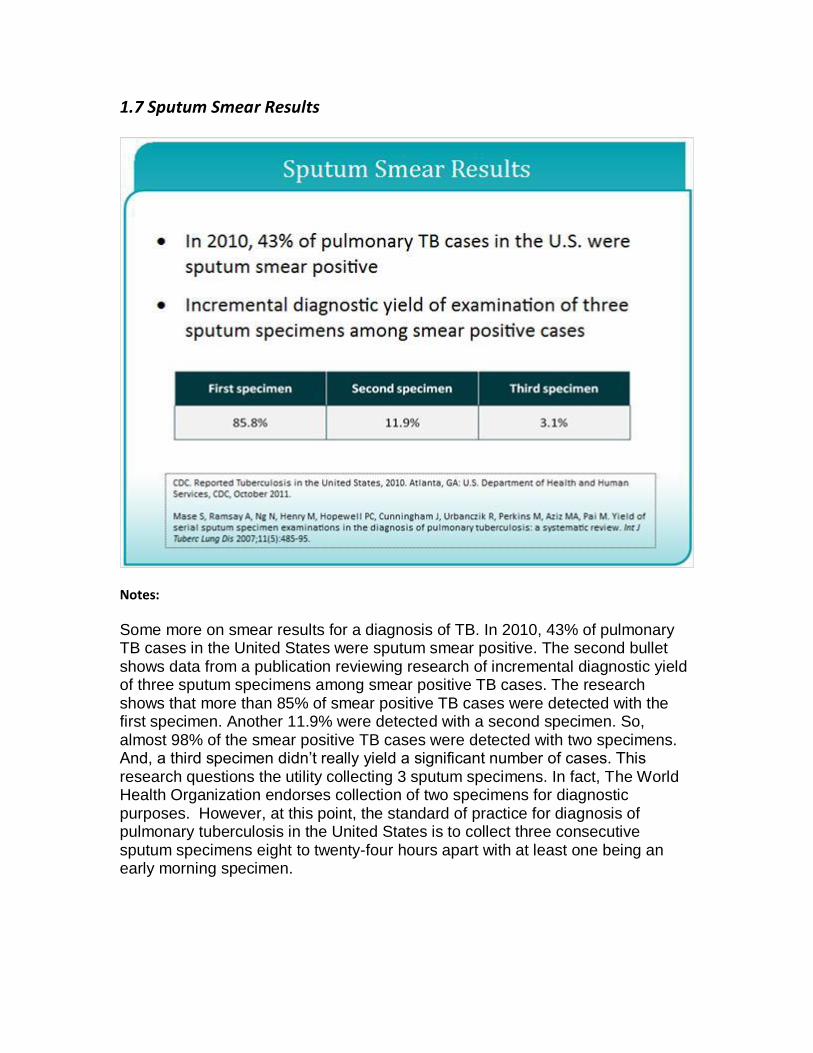
Some more on smear results for a diagnosis of TB. In 2010, 43% of pulmonary TB cases in the United States were sputum smear positive. The second bullet shows data from a publication reviewing research of incremental diagnostic yield of three sputum specimens among smear positive TB cases. The research shows that more than 85% of smear positive TB cases were detected with the first specimen. Another 11.9% were detected with a second specimen. So, almost 98% of the smear positive TB cases were detected with two specimens. And, a third specimen didn’t really yield a significant number of cases. This research questions the utility collecting 3 sputum specimens. In fact, The World Health Organization endorses collection of two specimens for diagnostic purposes. However, at this point, the standard of practice for diagnosis of pulmonary tuberculosis in the United States is to collect three consecutive sputum specimens eight to twenty-four hours apart with at least one being an early morning specimen.
1.8 Limitations of AFB Microscopy
Notes:
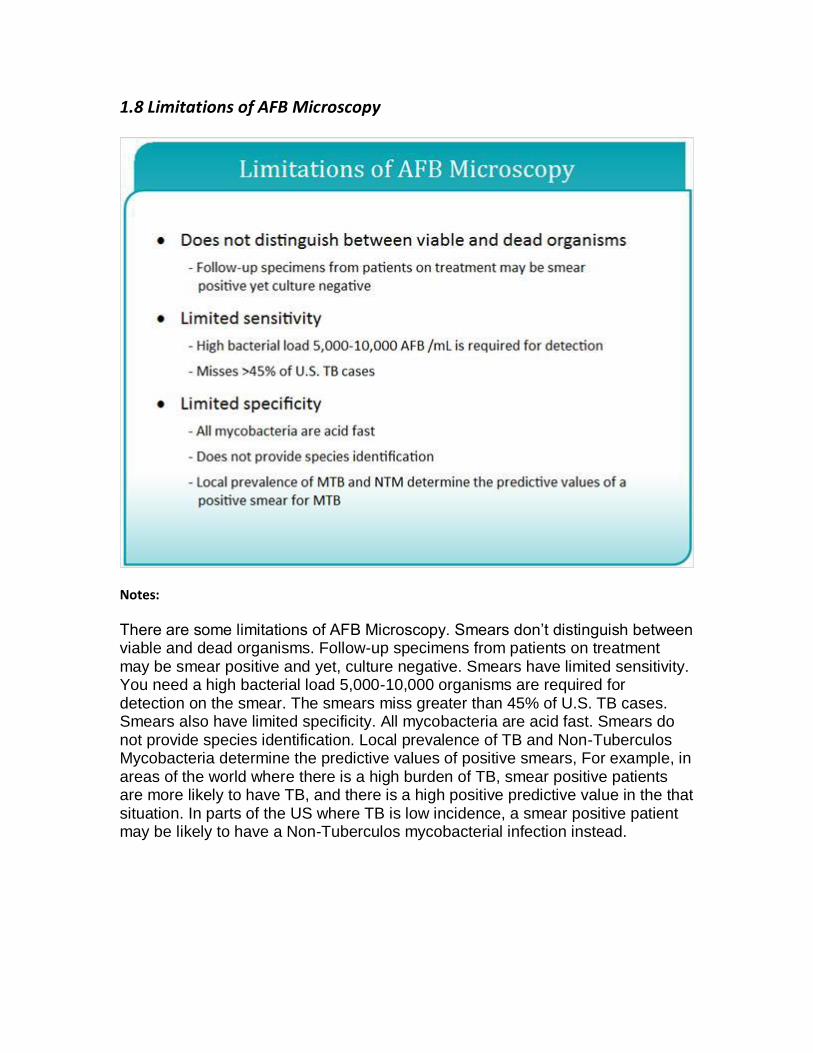
There are some limitations of AFB Microscopy. Smears don’t distinguish between viable and dead organisms. Follow-up specimens from patients on treatment may be smear positive and yet, culture negative. Smears have limited sensitivity. You need a high bacterial load 5,000-10,000 organisms are required for detection on the smear. The smears miss greater than 45% of U.S. TB cases. Smears also have limited specificity. All mycobacteria are acid fast. Smears do not provide species identification. Local prevalence of TB and Non-Tuberculos Mycobacteria determine the predictive values of positive smears, For example, in areas of the world where there is a high burden of TB, smear positive patients are more likely to have TB, and there is a high positive predictive value in the that situation. In parts of the US where TB is low incidence, a smear positive patient may be likely to have a Non-Tuberculos mycobacterial infection instead.

1.9 Smear Types
Notes:
There are two types of smears, Direct Smears and Concentrated Smears. Direct smears are prepared directly from a patient specimen prior to processing. And, concentrated smears are prepared from a processed specimen after centrifugation
1.10 Direct Smears
Notes:
Direct smears are rapid and simple. They can be performed for quick results. For preparation of a direct smear, select the cheesy necrotic, and blood tinged particles in the specimen, because, they are most likely to produce a positive direct smear result. Positive results help to confirm clinical suspicions. The direct smear is not as sensitive as concentrated smear, so a direct smear should always be followed by a concentrated smear.
1.11 Concentrated Smear
Notes:
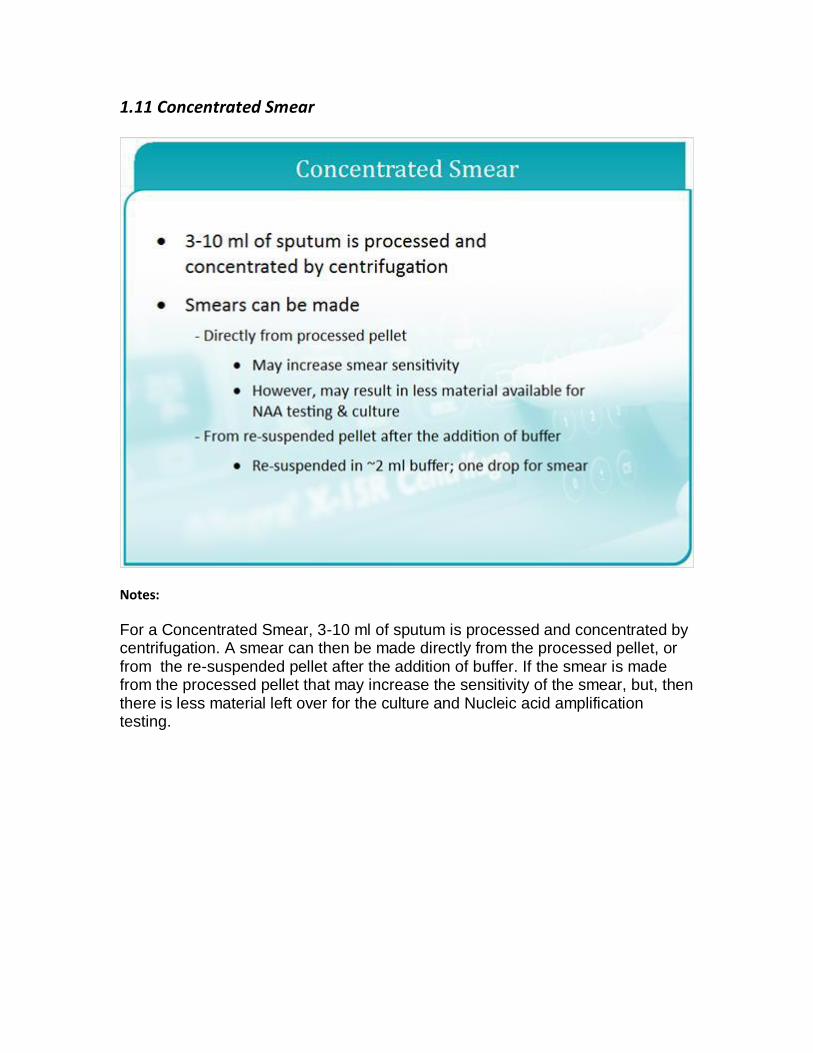
For a Concentrated Smear, 3-10 ml of sputum is processed and concentrated by centrifugation. A smear can then be made directly from the processed pellet, or from the re-suspended pellet after the addition of buffer. If the smear is made from the processed pellet that may increase the sensitivity of the smear, but, then there is less material left over for the culture and Nucleic acid amplification testing.
1.12 AFB Microscopy Staining Techniques
Notes:
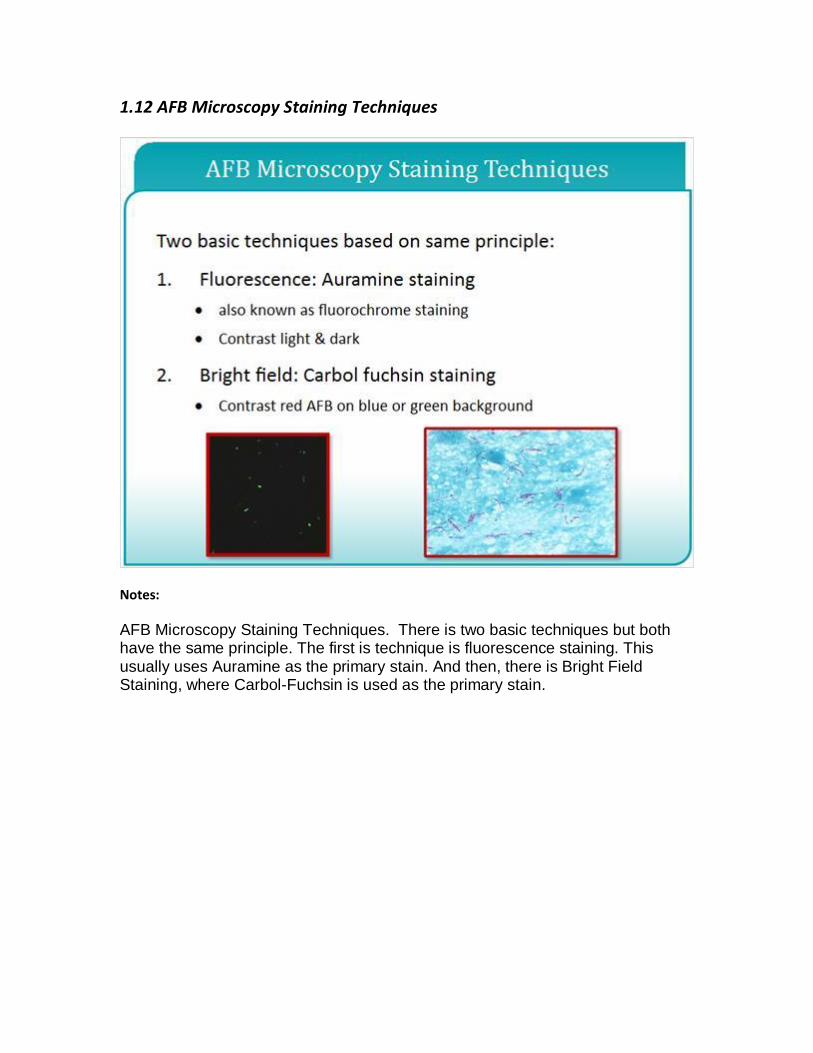
AFB Microscopy Staining Techniques. There is two basic techniques but both have the same principle. The first is technique is fluorescence staining. This usually uses Auramine as the primary stain. And then, there is Bright Field Staining, where Carbol-Fuchsin is used as the primary stain.

1.13 Carbol-Fuchsin AFB Staining
Notes:
Now, let’s talk about Carbol-Fuchsin AFB Staining. The primary stain is carbol fuchsin. And, there are two basic methods that are used: Ziehl-Neelson or Kinyoun staining. For the Ziehl-Neelson staining, this requires heat during staining. It requires a higher magnification to read. More fields need to be examined. It requires more time to read. It requires oil immersion. And, it stains all Non-Tuberculos Mycobacteria very well. The Kinyoun procedure is a cold carbol-fuchsin method. And so, it does not require heat like Ziehl-Neelson. It still requires a higher magnification to read, and a longer time to read under oil immersion. And so in that respect, it’s similar to Ziehl-Neelson. Neither of these methods are recommended for staining primary patient specimens.
1.14 Fluorescent AFB Staining
Notes:
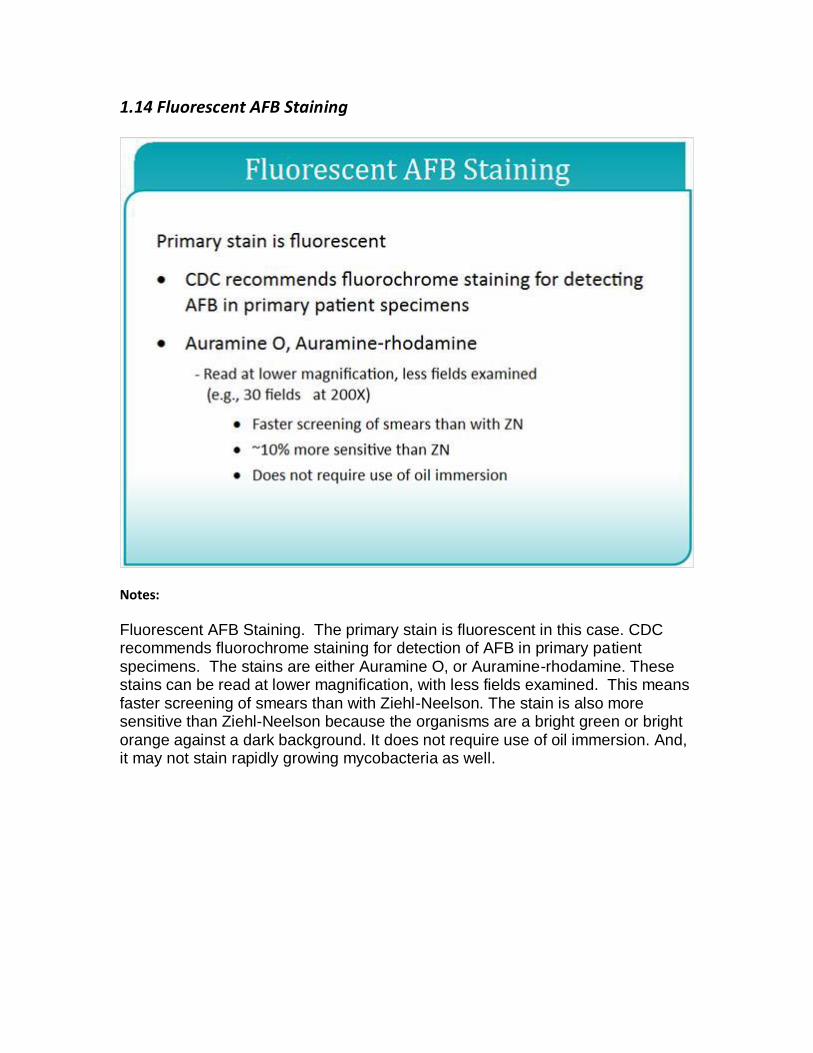
Fluorescent AFB Staining. The primary stain is fluorescent in this case. CDC recommends fluorochrome staining for detection of AFB in primary patient specimens. The stains are either Auramine O, or Auramine-rhodamine. These stains can be read at lower magnification, with less fields examined. This means faster screening of smears than with Ziehl-Neelson. The stain is also more sensitive than Ziehl-Neelson because the organisms are a bright green or bright orange against a dark background. It does not require use of oil immersion. And, it may not stain rapidly growing mycobacteria as well.
1.15 Knowledge Check
1.16 True or False: One benefit of direct smears is that in most cases they
are more sensitive than a concentrated smear for detecting AFB.

1.17 What is the recommended and most sensitive staining method for
the detection of AFB from primary patient specimens?

1.18 Steps in Performing AFB Microscopy
Notes:
Now, we’re going to go through the steps in Performing AFB Smear Microscopy. We’re going to talk about preparing and fixing smears, staining smears, examining smears, and recording and reporting results.
1.19 Getting Started
Notes:
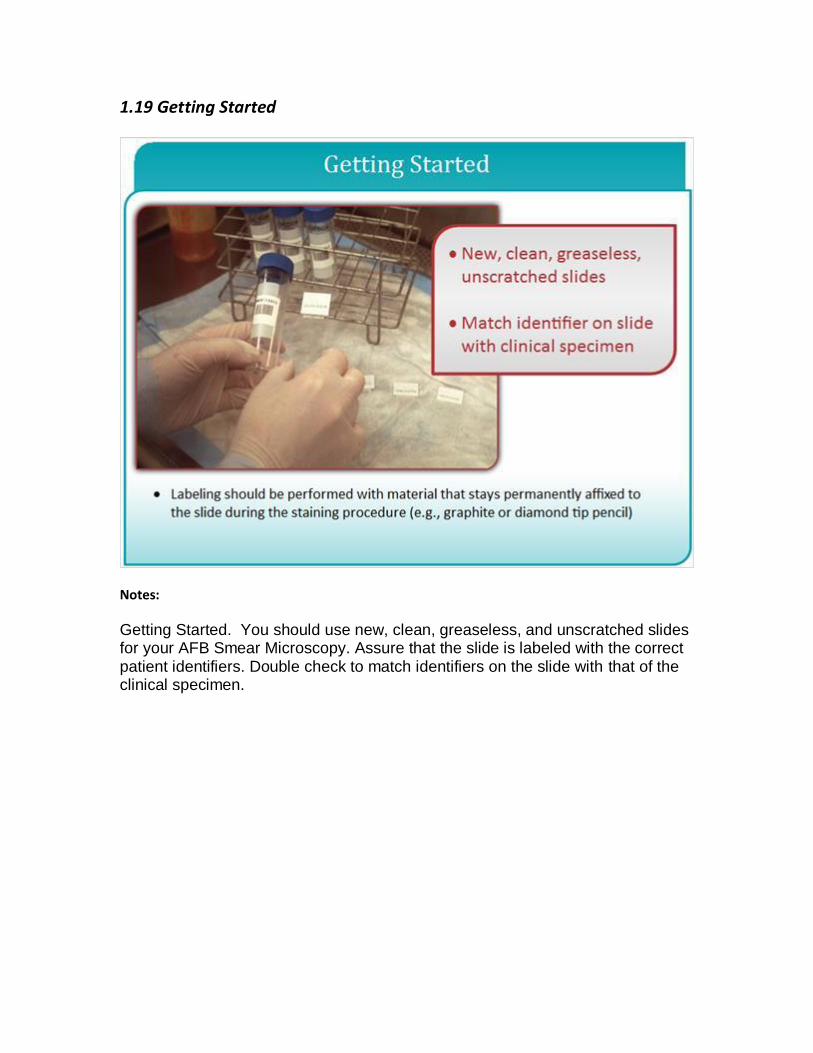
Getting Started. You should use new, clean, greaseless, and unscratched slides for your AFB Smear Microscopy. Assure that the slide is labeled with the correct patient identifiers. Double check to match identifiers on the slide with that of the clinical specimen.

1.20 Creating a Smear
Notes:
This photo shows a microbiologist that’s making a smear. You can see that they’re putting one to two drops of material onto then smearing it in an area of approximately two centimeters squared.

1.21 Thickness of Smear Sample
Notes:
This photo shows slides prepared at thicknesses. Be sure to prepare smears at a suitable thickness. Smears that are too thick may flake during staining and may be difficult to decolorize. Acid-fast organisms that might be present may be obscured. Smears that are too thin may not contain enough sample. Either condition--too thick or too thin--can lead to erroneous results, particularly false negative results. Here the smear in the center is of the proper thickness. A simple test for you to use is to hold a smear about 3 to 4 inches over news-print. You should just be able to just read the newsprint through the smear.

1.22 Fixing Smears
Notes:
Prior to heat fixing, smears should be allowed to air dry completely within the biological safety cabinet. There are several acceptable methods for heat fixing. You can use Flame fixing. You can use an electric slide warmer at 65 to 75 degrees for two hours. You can use a slide warmer at 80 degrees for 15 minutes. You can 5% phenol in 70% ethanol for 5 min. This method also kills the AFB. Some considerations: Flame fixing may aerosolize organisms from the smear. Insufficient heat or time can lead to smear washing off. Slide warmers may not heat evenly. And viable AFB may remain even after some of the fixing methods.

1.23 Slide Warmer
Notes:
This photo shows some slides warming on a slide warmer. The slide warmer is set for 65 to 75o C. And, the slides need to stay on the slide warmer for 2 hours.
1.24 Heat Fixing Smear
Notes:
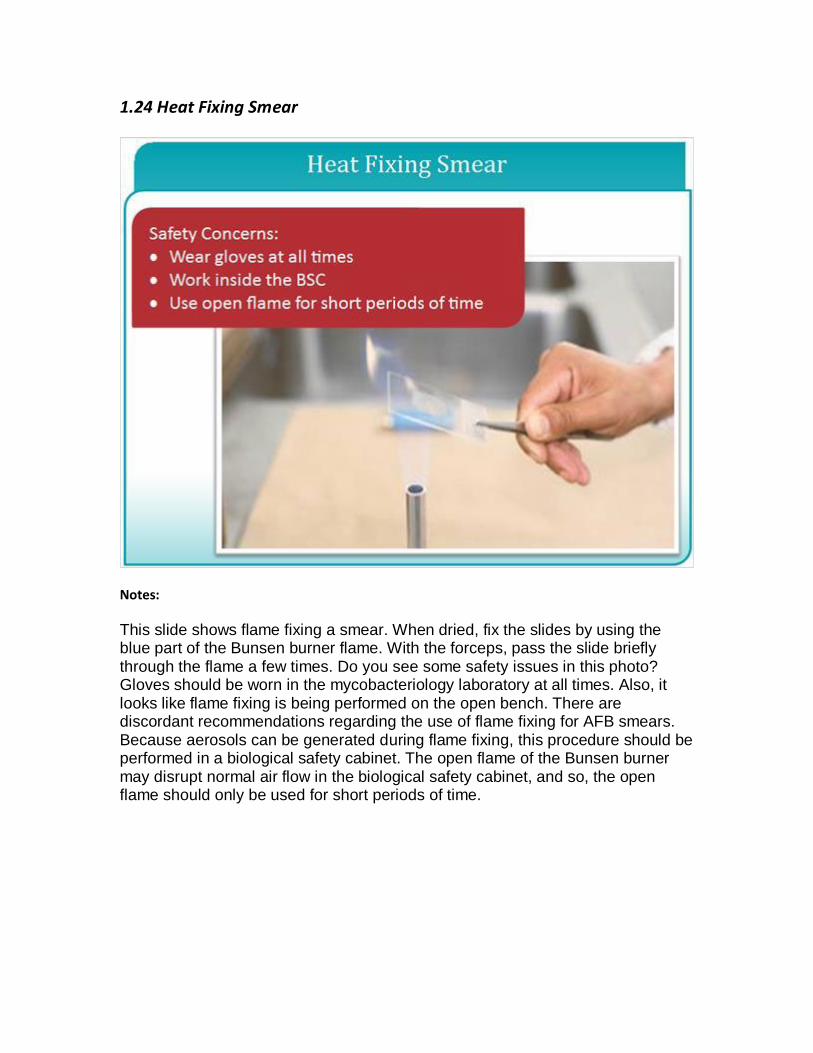
This slide shows flame fixing a smear. When dried, fix the slides by using the blue part of the Bunsen burner flame. With the forceps, pass the slide briefly through the flame a few times. Do you see some safety issues in this photo? Gloves should be worn in the mycobacteriology laboratory at all times. Also, it looks like flame fixing is being performed on the open bench. There are discordant recommendations regarding the use of flame fixing for AFB smears. Because aerosols can be generated during flame fixing, this procedure should be performed in a biological safety cabinet. The open flame of the Bunsen burner may disrupt normal air flow in the biological safety cabinet, and so, the open flame should only be used for short periods of time.
1.25 AFB Staining Principles
Notes:
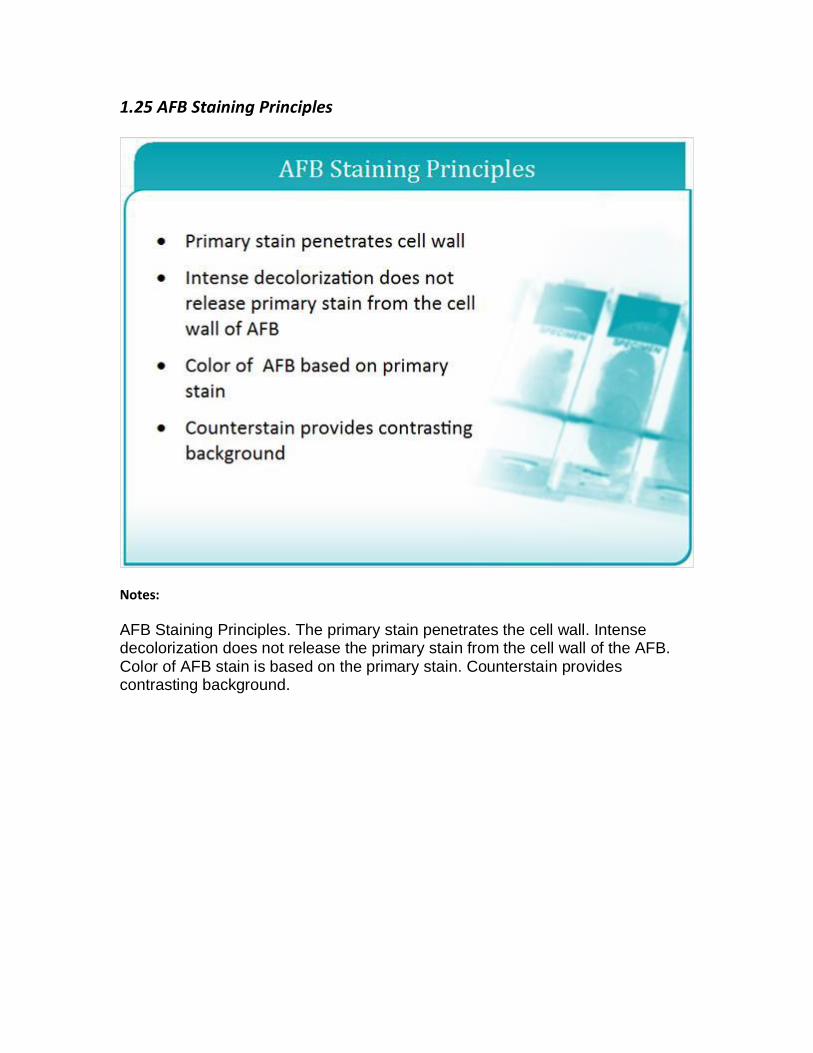
AFB Staining Principles. The primary stain penetrates the cell wall. Intense decolorization does not release the primary stain from the cell wall of the AFB. Color of AFB stain is based on the primary stain. Counterstain provides contrasting background.
1.26 Stains Used in Fluorescence Microscopy
Notes:
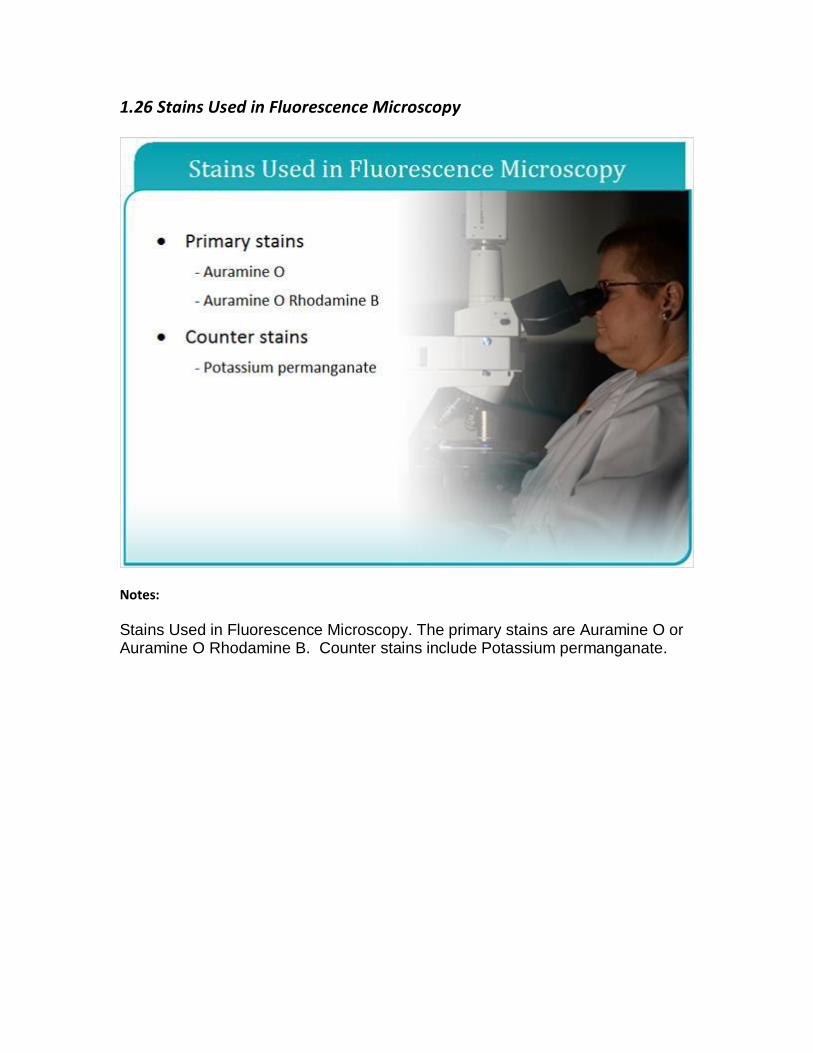
Stains Used in Fluorescence Microscopy. The primary stains are Auramine O or Auramine O Rhodamine B. Counter stains include Potassium permanganate.
1.27 Fluorescence AFB Microscopy
Notes:
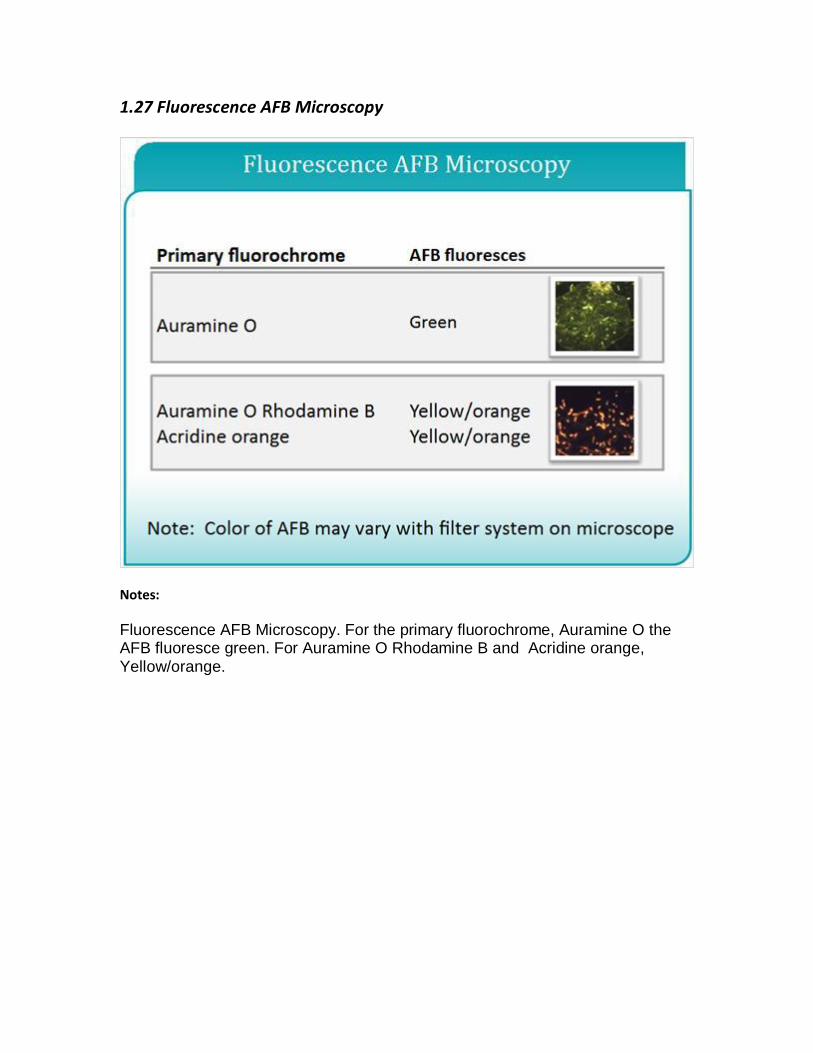
Fluorescence AFB Microscopy. For the primary fluorochrome, Auramine O the AFB fluoresce green. For Auramine O Rhodamine B and Acridine orange, Yellow/orange.

1.28 Auramine O Stain
Notes:
Here, we see a photo with some slides are being stained with Auramine O. And, the organisms on the right are the product of the staining procedure. You can see here that they’re glowing green with a black background.

1.29 Water Quality Is Key
Notes:
Water Quality Is the key. AFB microscopy is not specific, and acid-fast organisms from the environment and be contaminants in the staining procedure. Introduction of environmental contaminants during wash steps and in the reagent preparation must be avoided. Use of a negative control slide is essential for detecting potential environmental contaminants. Avoid using large containers of reagents and carboys of water. Use filtered distilled or deionized water. Water filtration and distribution systems should be monitored for contamination.
1.30 Staining Reagents
Notes:
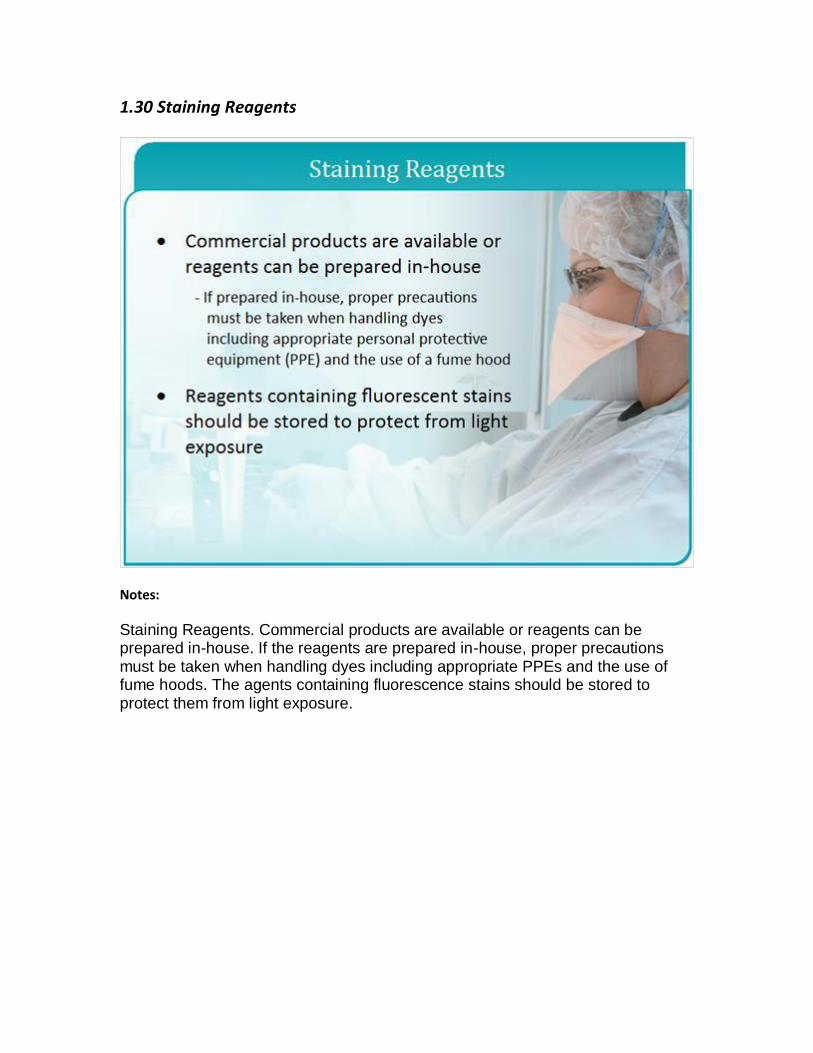
Staining Reagents. Commercial products are available or reagents can be prepared in-house. If the reagents are prepared in-house, proper precautions must be taken when handling dyes including appropriate PPEs and the use of fume hoods. The agents containing fluorescence stains should be stored to protect them from light exposure.
1.31 Steps in the Fluorescent Staining Procedure
Notes:
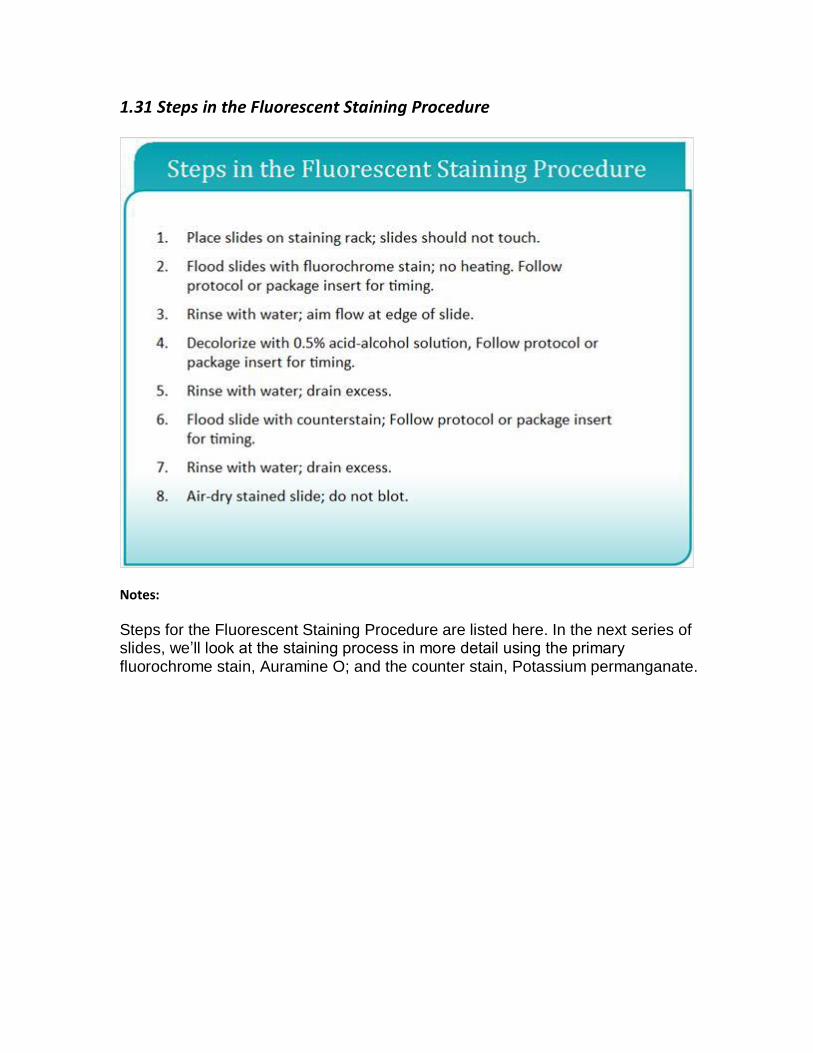
Steps for the Fluorescent Staining Procedure are listed here. In the next series of slides, we’ll look at the staining process in more detail using the primary fluorochrome stain, Auramine O; and the counter stain, Potassium permanganate.
1.32 Steps in the Fluorescent Staining Procedure
Notes:
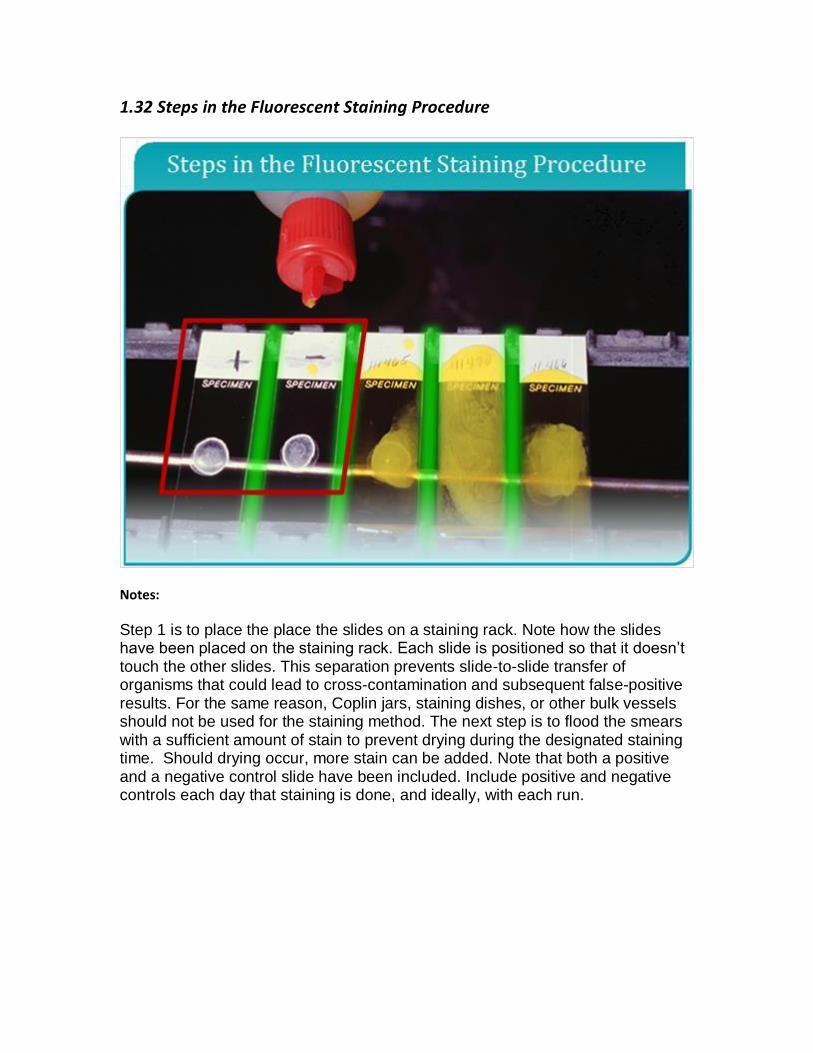
Step 1 is to place the place the slides on a staining rack. Note how the slides have been placed on the staining rack. Each slide is positioned so that it doesn’t touch the other slides. This separation prevents slide-to-slide transfer of organisms that could lead to cross-contamination and subsequent false-positive results. For the same reason, Coplin jars, staining dishes, or other bulk vessels should not be used for the staining method. The next step is to flood the smears with a sufficient amount of stain to prevent drying during the designated staining time. Should drying occur, more stain can be added. Note that both a positive and a negative control slide have been included. Include positive and negative controls each day that staining is done, and ideally, with each run.
1.33 Steps in the Fluorescent Staining Procedure
Notes:
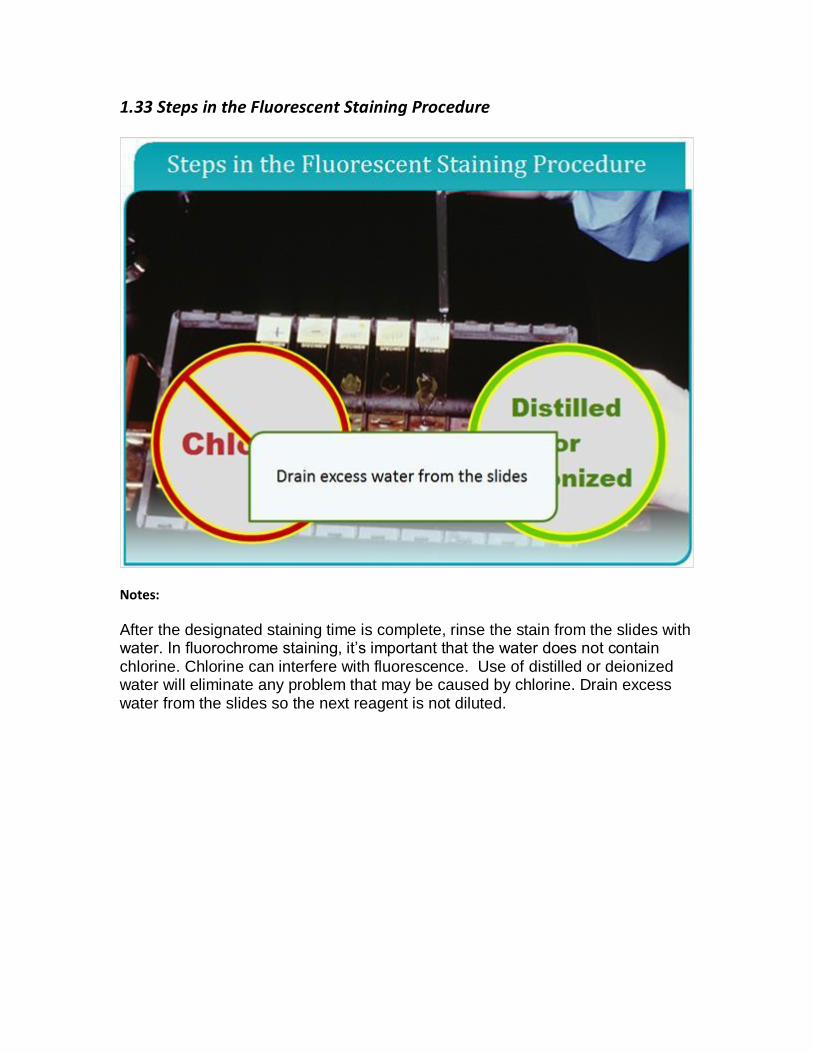
After the designated staining time is complete, rinse the stain from the slides with water. In fluorochrome staining, it’s important that the water does not contain chlorine. Chlorine can interfere with fluorescence. Use of distilled or deionized water will eliminate any problem that may be caused by chlorine. Drain excess water from the slides so the next reagent is not diluted.

1.34 Steps in the Fluorescent Staining Process
Notes:
Destain the smears by flooding the slides with acid-alcohol. After decolorizing for 2-3 minutes, only acid-fast organisms, if present in the smears, will retain the primary dye. You should be aware that the concentrations of both the acid and the alcohol in the decolorizing solution used for fluorochrome staining are less than the concentrations in the decolorizing solution used for fuchsin-staining; thus, you can’t use the same decolorizing solution interchangeably between the two methods.

1.35 Steps in the Fluorescent Staining Procedure
Notes:
Rinse the slides with water as before to remove the acid-alcohol.
1.36 Steps in the Fluorescent Staining Procedure
Notes:
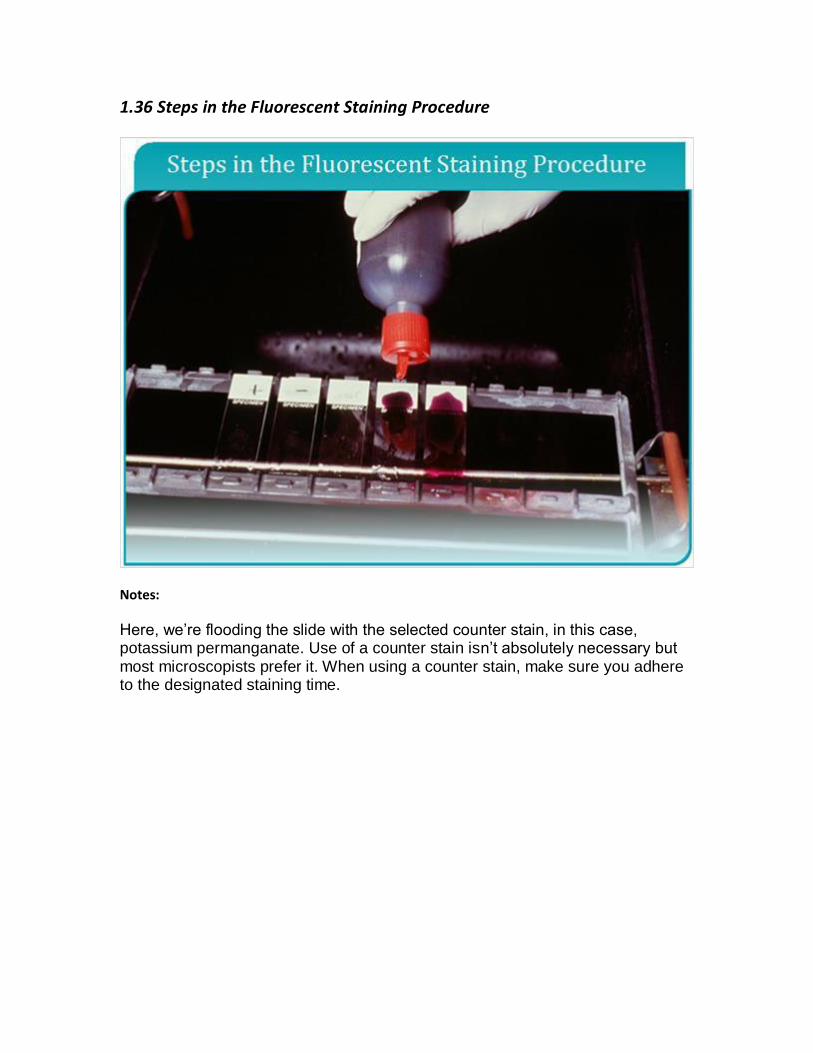
Here, we’re flooding the slide with the selected counter stain, in this case, potassium permanganate. Use of a counter stain isn’t absolutely necessary but most microscopists prefer it. When using a counter stain, make sure you adhere to the designated staining time.
1.37 Steps in the Fluorescent Staining Procedure
Notes:
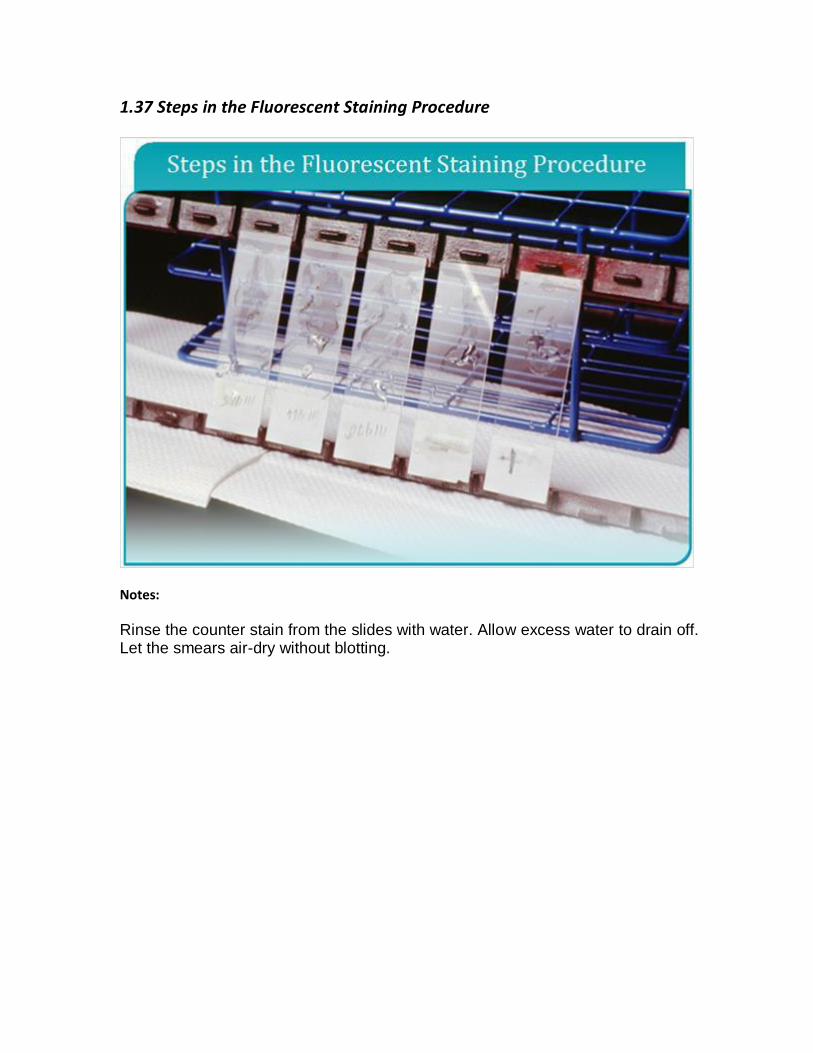
Rinse the counter stain from the slides with water. Allow excess water to drain off. Let the smears air-dry without blotting.
1.38 Schematic of an Incident-Light Fluorescence Microscope
Notes:
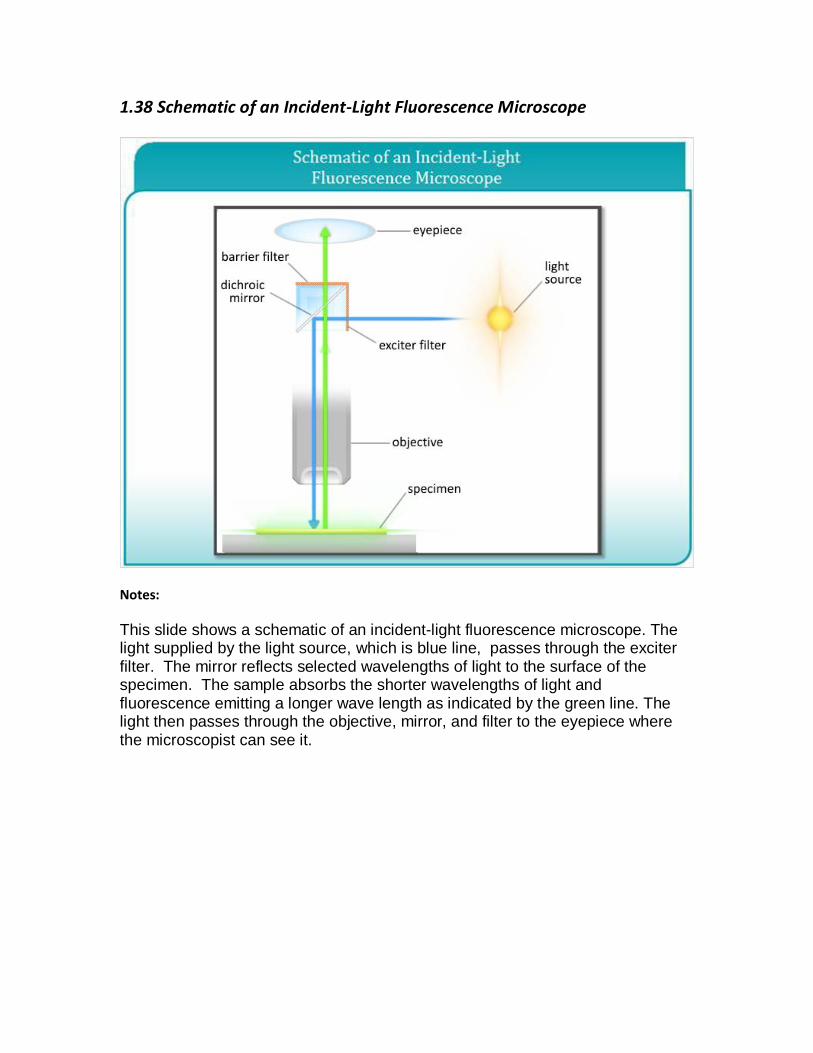
This slide shows a schematic of an incident-light fluorescence microscope. The light supplied by the light source, which is blue line, passes through the exciter filter. The mirror reflects selected wavelengths of light to the surface of the specimen. The sample absorbs the shorter wavelengths of light and fluorescence emitting a longer wave length as indicated by the green line. The light then passes through the objective, mirror, and filter to the eyepiece where the microscopist can see it.
1.39 Fluorescence Microscopy
Notes:
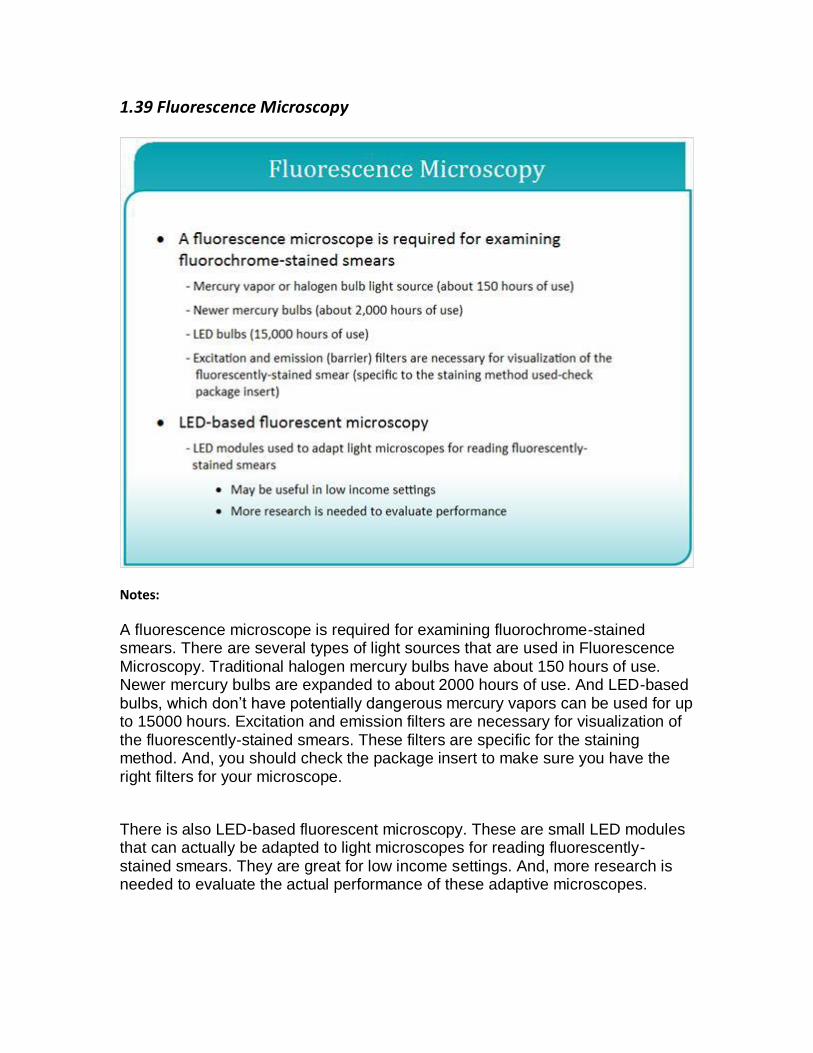
A fluorescence microscope is required for examining fluorochrome-stained smears. There are several types of light sources that are used in Fluorescence Microscopy. Traditional halogen mercury bulbs have about 150 hours of use. Newer mercury bulbs are expanded to about 2000 hours of use. And LED-based bulbs, which don’t have potentially dangerous mercury vapors can be used for up to 15000 hours. Excitation and emission filters are necessary for visualization of the fluorescently-stained smears. These filters are specific for the staining method. And, you should check the package insert to make sure you have the right filters for your microscope.
There is also LED-based fluorescent microscopy. These are small LED modules that can actually be adapted to light microscopes for reading fluorescently-stained smears. They are great for low income settings. And, more research is needed to evaluate the actual performance of these adaptive microscopes.

1.40 Systematic Examination of Smears
Notes:
A microscopist should be consistent in the way he or she examines a slide, so that reliable results are obtained from day to day.
1.41 Number of Fields to Examine
Notes:
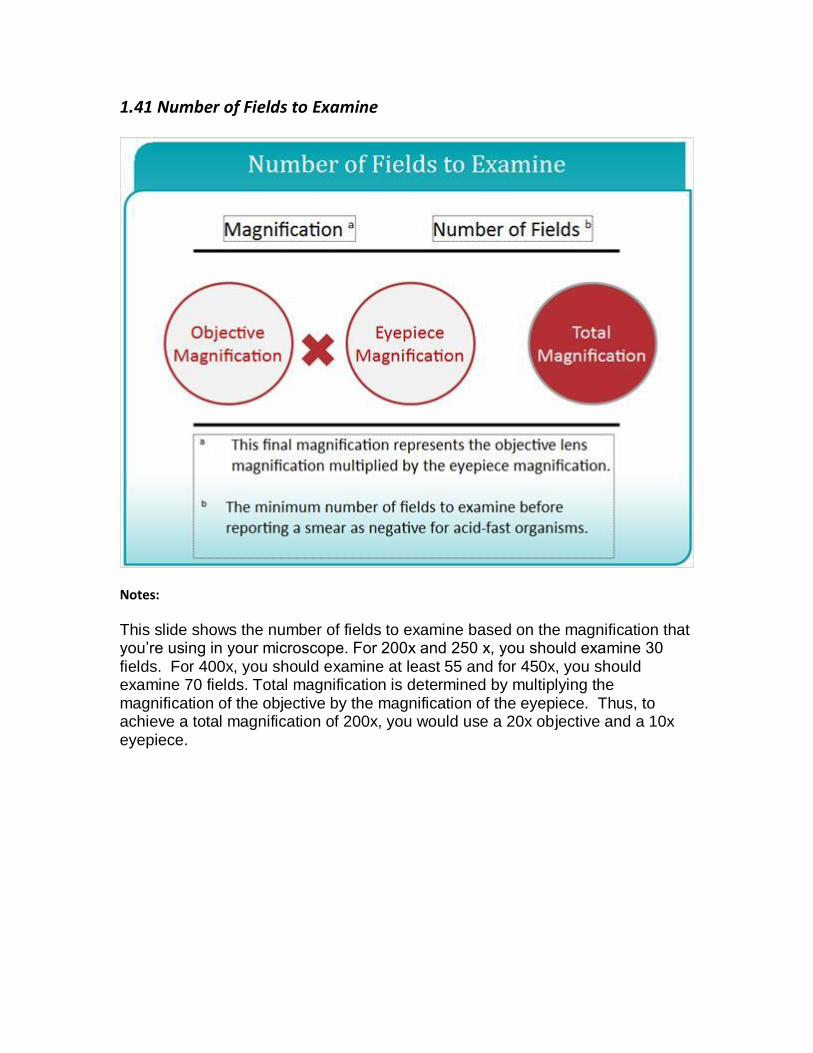
This slide shows the number of fields to examine based on the magnification that you’re using in your microscope. For 200x and 250 x, you should examine 30 fields. For 400x, you should examine at least 55 and for 450x, you should examine 70 fields. Total magnification is determined by multiplying the magnification of the objective by the magnification of the eyepiece. Thus, to achieve a total magnification of 200x, you would use a 20x objective and a 10x eyepiece.
1.42 Flourochrome stained AFB
Notes:
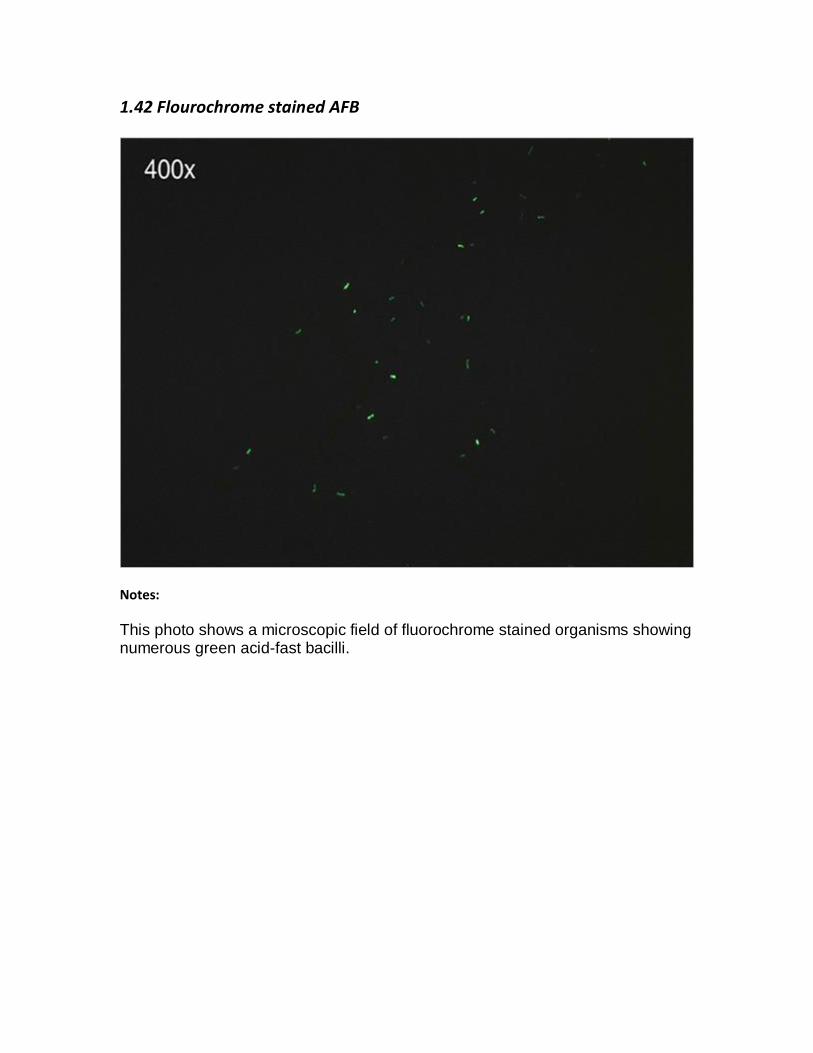
This photo shows a microscopic field of fluorochrome stained organisms showing numerous green acid-fast bacilli.

1.43 Examining Smears for AFB
Notes:
You’ll note that the AFB will be rod-shaped, 1-10 micrometers in length. The appearance is generally long and slender but some of them appear bent. The Bacilli may contain heavily stained areas which are called beads. When you are counting organisms if you see a clump of bacilli that are stuck together, you should count those as one. Debris and some other species, such as Nocardia and Corynebacterium, and some fungal spores may appear acid fast.

1.44 Reporting Smear Results
Notes:
This table shows the recommendation for reporting smear results. This chart shows a numerical scheme for reporting AFB smear results. This is the current CDC recommended scale. Since the fluorochrome stain is recommended for detecting AFB in primary patient specimens, these recommendations are highlighted in the following slides; however, information about Ziehl-Neelson is also included.
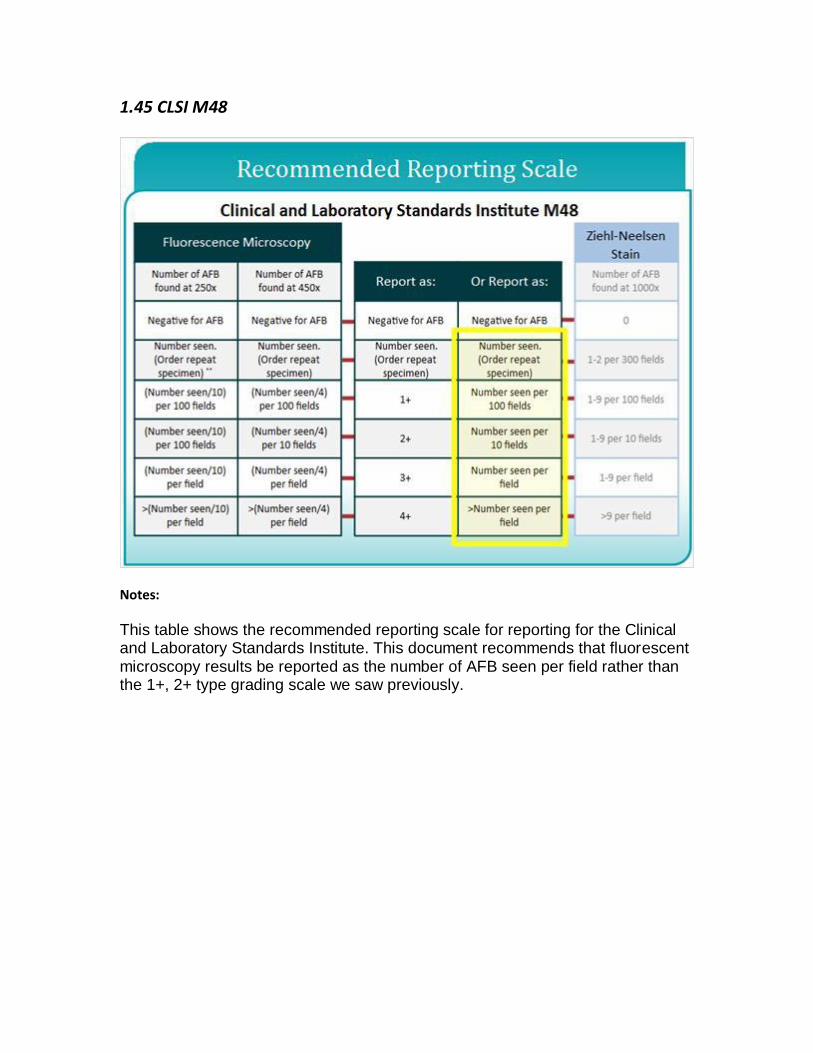
1.45 CLSI M48
Notes:
This table shows the recommended reporting scale for reporting for the Clinical and Laboratory Standards Institute. This document recommends that fluorescent microscopy results be reported as the number of AFB seen per field rather than the 1+, 2+ type grading scale we saw previously.
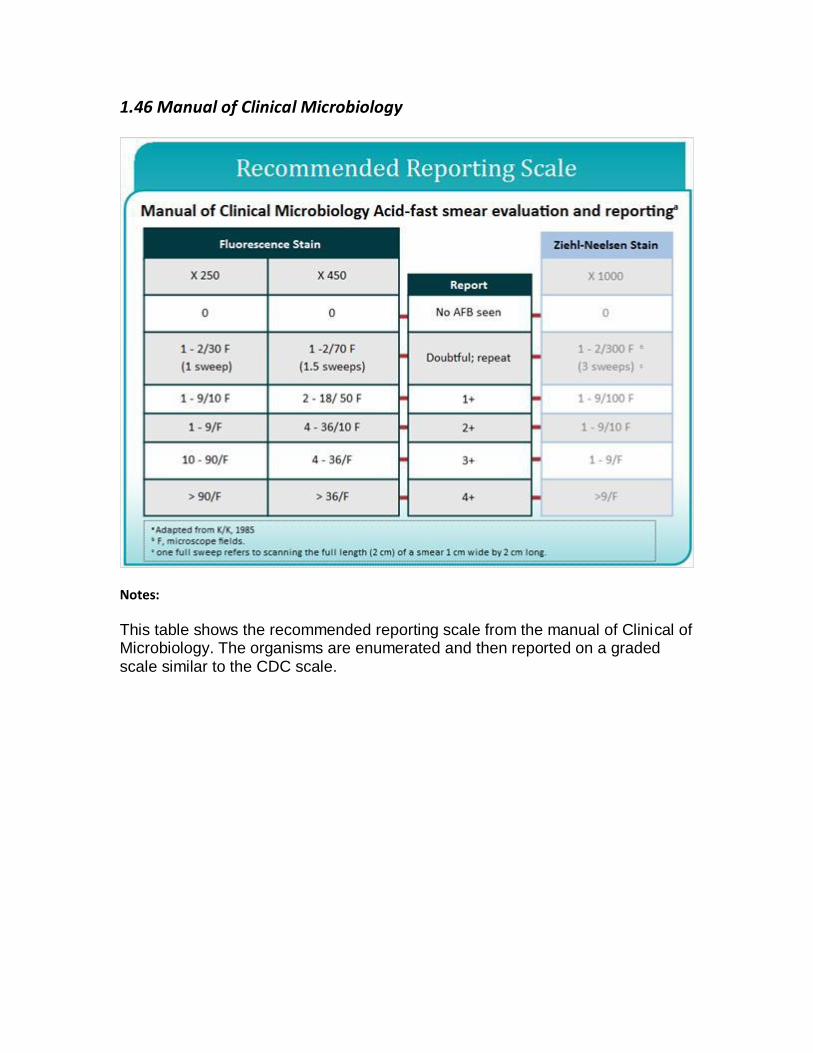
1.46 Manual of Clinical Microbiology
Notes:
This table shows the recommended reporting scale from the manual of Clinical of Microbiology. The organisms are enumerated and then reported on a graded scale similar to the CDC scale.

1.47 Reporting Smear Results
Notes:
Now, we’ll talk about reporting smear results. Report an approximation of a number of AFB viewed on the slide using a semi-quantitative scale. Report smear results within 24 hours of specimen receipt. Smear positive results are considered critical values and should be reported to the health care provider and the public health department as soon as results are known.

1.48 Importance of Control Slides
Notes:
Control slides are important to assess the quality of the reagents, to determine if the staining is performed properly, to determine if the microscope is working properly, to detect environmental contaminants, and to help find the plane of focus.

1.49 Quality Assurance of AFB Microscopy
Notes:
Quality Assurance of AFB Microscopy. A known positive and known negative smear should be read with each run and when new reagents are used. QC smears may be prepared in advance, heat-killed, and stored unstained. It’s preferable to prepare QC slides using sediment from clinical specimens. Commercial QC slides are available. If preparing QC slides in-house, take proper precautions to ensure that QC materials, such as cell suspensions and slides, do not cross-contaminate patient specimens. Records should include stain lot numbers, expiration dates, results of the control slides, and technician name. Patient smears should only be examined and reported when control slides are acceptable.
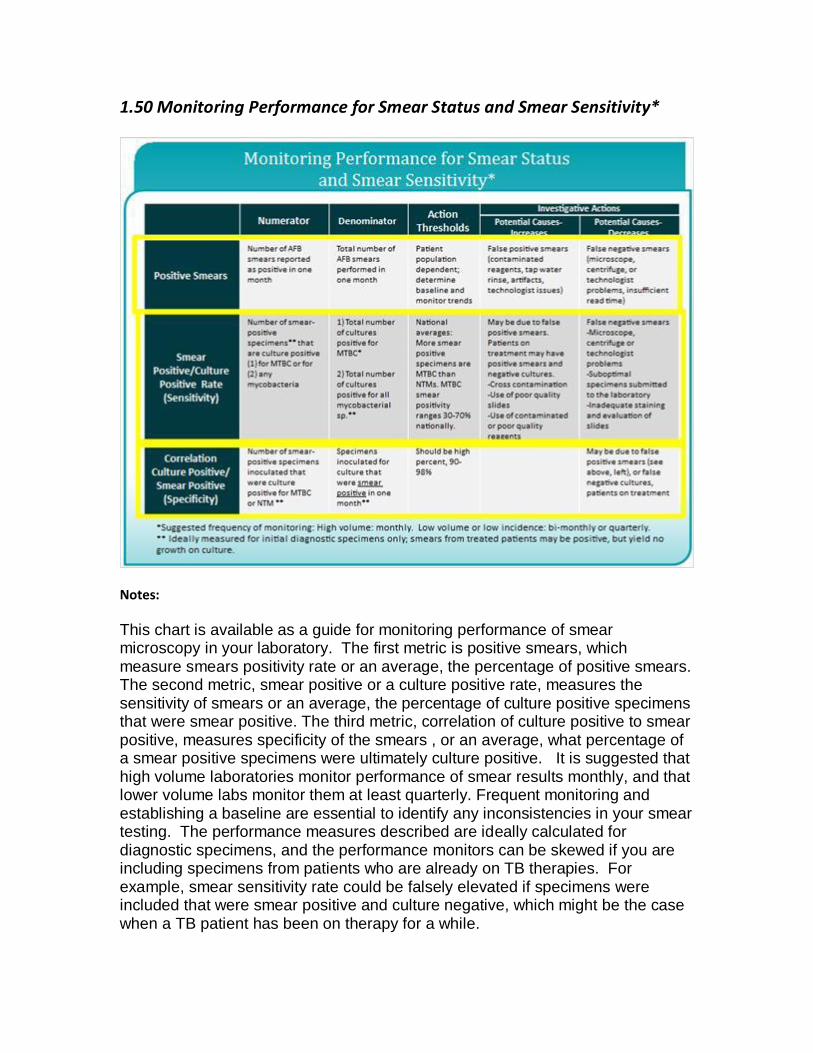
1.50 Monitoring Performance for Smear Status and Smear Sensitivity*
Notes:
This chart is available as a guide for monitoring performance of smear microscopy in your laboratory. The first metric is positive smears, which measure smears positivity rate or an average, the percentage of positive smears. The second metric, smear positive or a culture positive rate, measures the sensitivity of smears or an average, the percentage of culture positive specimens that were smear positive. The third metric, correlation of culture positive to smear positive, measures specificity of the smears , or an average, what percentage of a smear positive specimens were ultimately culture positive. It is suggested that high volume laboratories monitor performance of smear results monthly, and that lower volume labs monitor them at least quarterly. Frequent monitoring and establishing a baseline are essential to identify any inconsistencies in your smear testing. The performance measures described are ideally calculated for diagnostic specimens, and the performance monitors can be skewed if you are including specimens from patients who are already on TB therapies. For example, smear sensitivity rate could be falsely elevated if specimens were included that were smear positive and culture negative, which might be the case when a TB patient has been on therapy for a while.

1.51 Suggestions for Avoiding False-Positive AFB Smear Results
Notes:
This slide shows some things that could cause False-Positive smear results. Make sure to use new slides. Use a staining rack, not coplin jars. Make sure that slides are not touching each other during the staining process. Request new specimens, if there is a high background due to food particles. Use fresh stains or filtered stain if its old. And, wipe the oil from the oil immersion lens after each use.
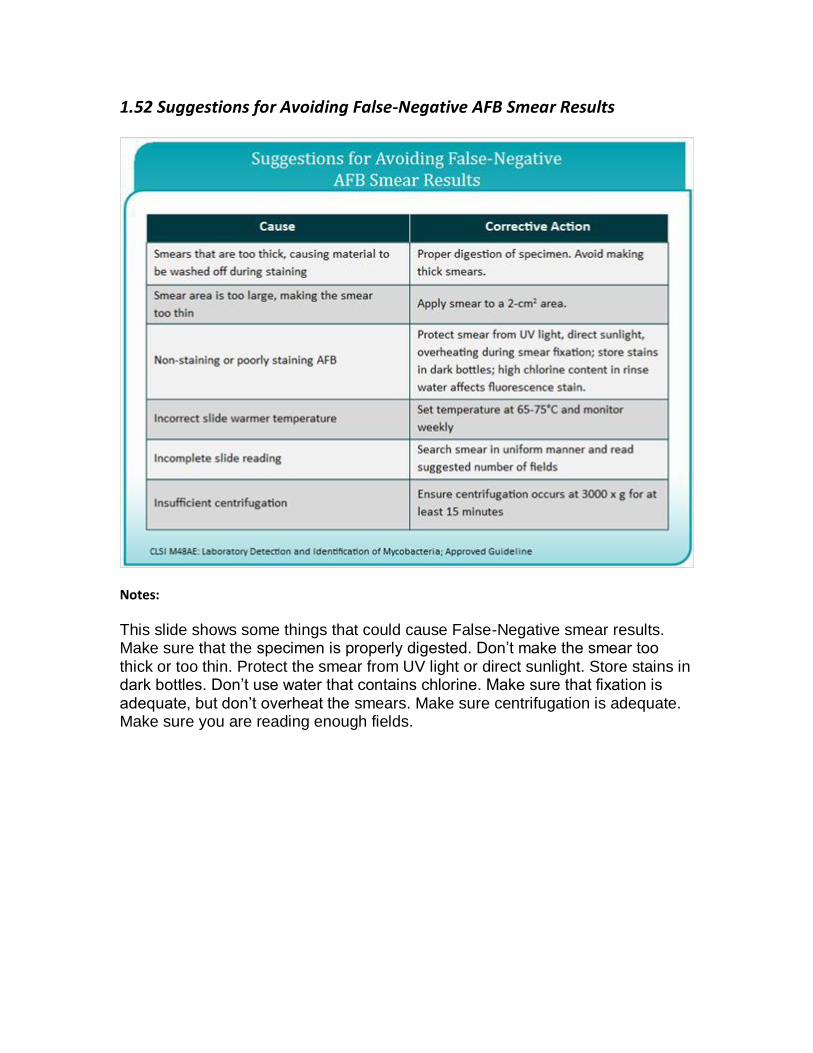
1.52 Suggestions for Avoiding False-Negative AFB Smear Results
Notes:
This slide shows some things that could cause False-Negative smear results. Make sure that the specimen is properly digested. Don’t make the smear too thick or too thin. Protect the smear from UV light or direct sunlight. Store stains in dark bottles. Don’t use water that contains chlorine. Make sure that fixation is adequate, but don’t overheat the smears. Make sure centrifugation is adequate. Make sure you are reading enough fields.
1.53 Maintaining Proficiency in
Notes:
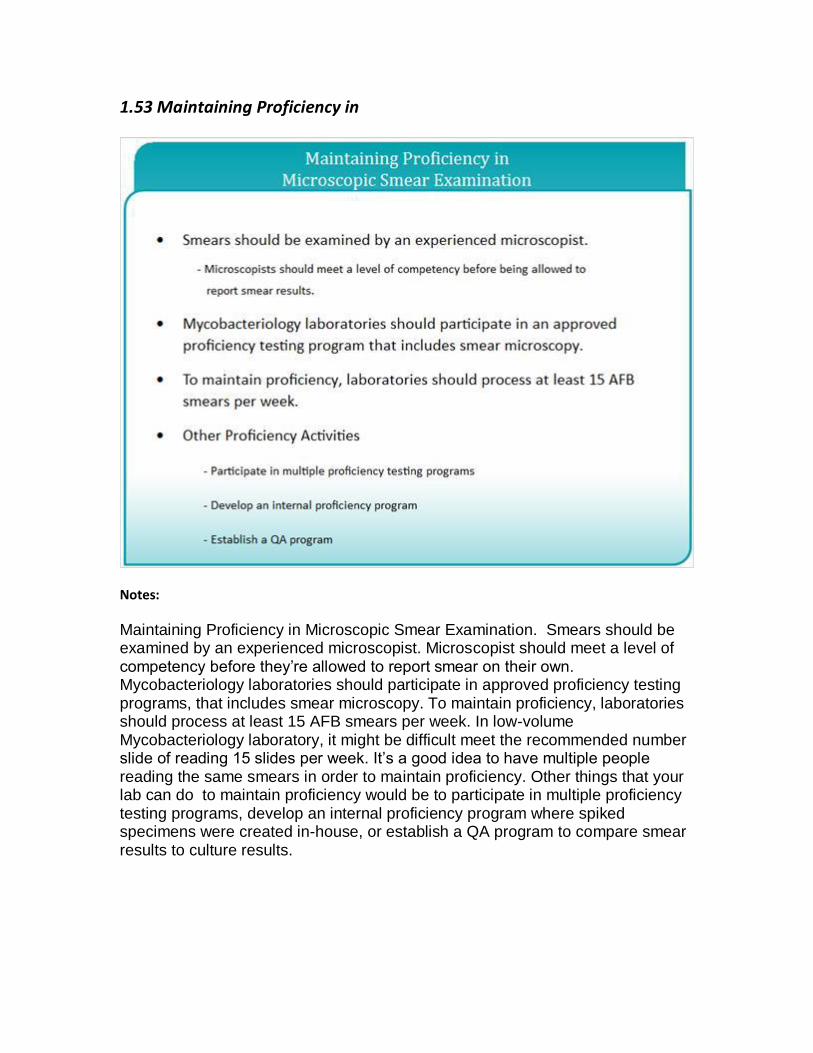
Maintaining Proficiency in Microscopic Smear Examination. Smears should be examined by an experienced microscopist. Microscopist should meet a level of competency before they’re allowed to report smear on their own. Mycobacteriology laboratories should participate in approved proficiency testing programs, that includes smear microscopy. To maintain proficiency, laboratories should process at least 15 AFB smears per week. In low-volume Mycobacteriology laboratory, it might be difficult meet the recommended number slide of reading 15 slides per week. It’s a good idea to have multiple people reading the same smears in order to maintain proficiency. Other things that your lab can do to maintain proficiency would be to participate in multiple proficiency testing programs, develop an internal proficiency program where spiked specimens were created in-house, or establish a QA program to compare smear results to culture results.
1.54 Achieving Reliable Results
Notes:
Achieving Reliable Results. In order to achieve reliable results, make sure that you obtain good quality specimens. Prevent contamination of testing reagents and adjacent slides when you are staining. Follow established procedures and recommendations. And, ensure accurate reporting and record keeping.

1.55 Refer to the picture. What issue(s), if any, might you face with this
prepared smear?
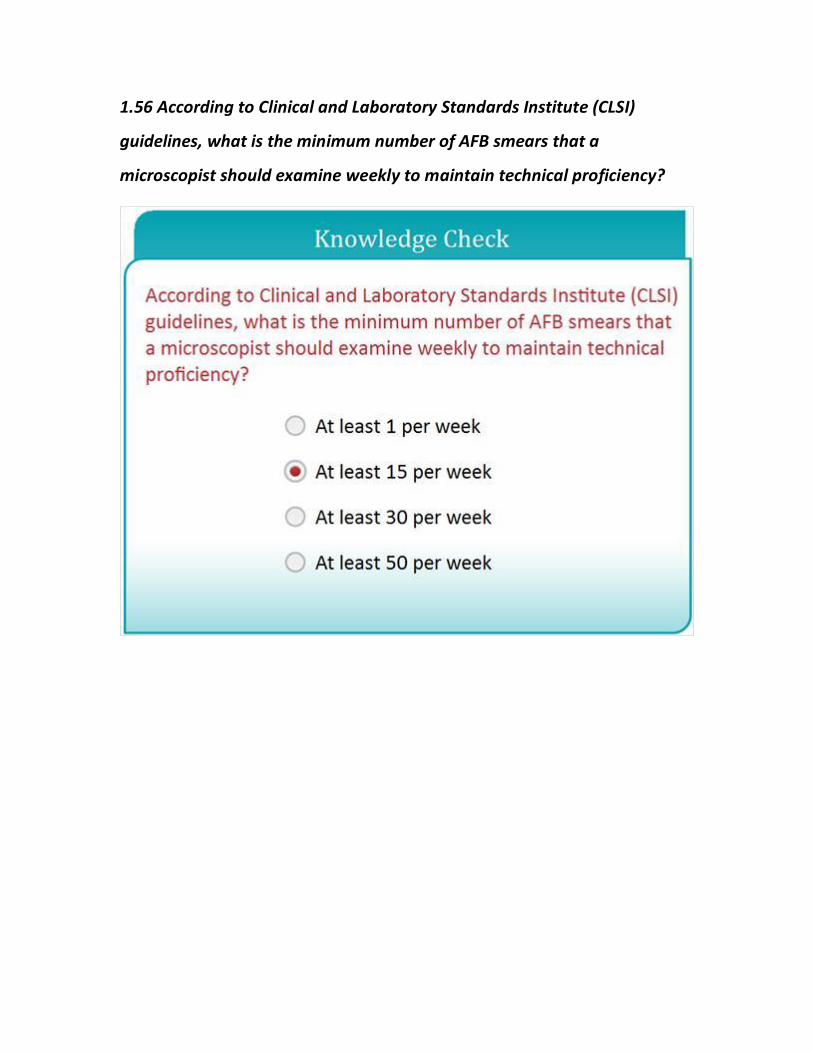
1.56 According to Clinical and Laboratory Standards Institute (CLSI)
guidelines, what is the minimum number of AFB smears that a
microscopist should examine weekly to maintain technical proficiency?
1.57 AFB Morphology
Notes:
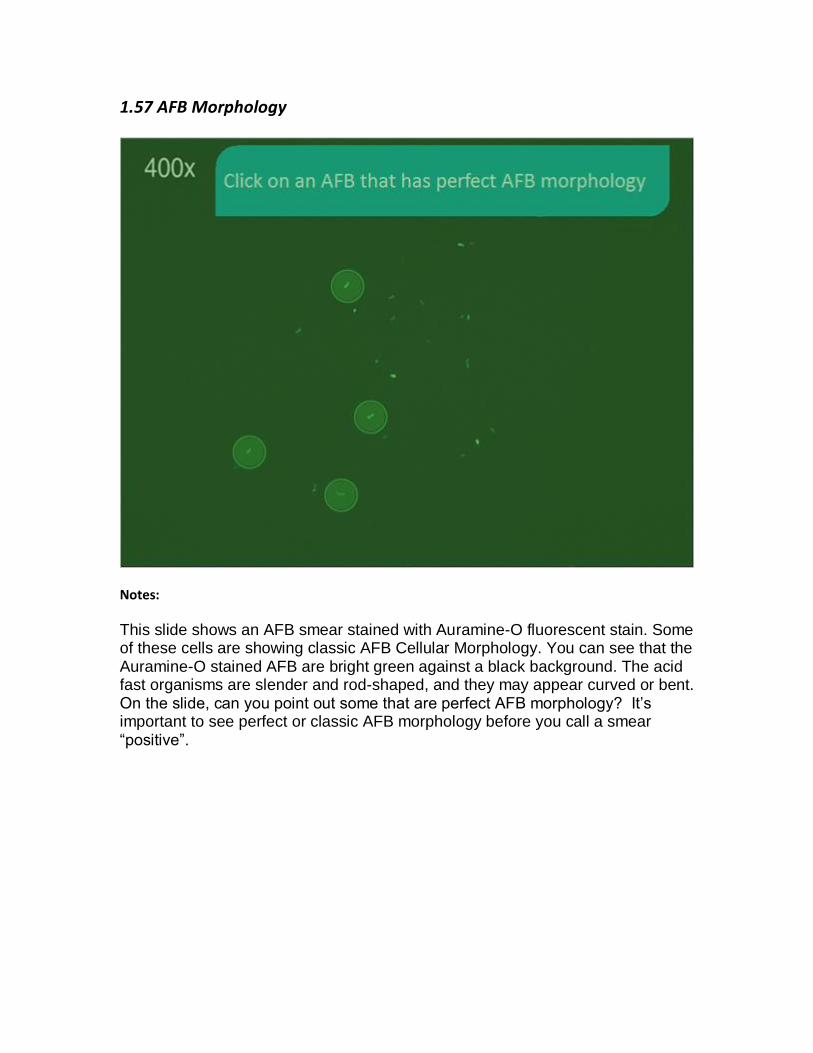
This slide shows an AFB smear stained with Auramine-O fluorescent stain. Some of these cells are showing classic AFB Cellular Morphology. You can see that the Auramine-O stained AFB are bright green against a black background. The acid fast organisms are slender and rod-shaped, and they may appear curved or bent. On the slide, can you point out some that are perfect AFB morphology? It’s important to see perfect or classic AFB morphology before you call a smear “positive”.

1.58 Fluorescent Debris
Notes:
This slide shows some large fluorescent debris, which might be epithelial cells, and then, some acid fast organisms as well. The AFB are a slightly greener in color and much smaller than the fluorescent debris.

1.59 AFB Morphology
Notes:
This photo shows several AFB with classic morphology. The smaller/shorter fluorescent objects might be AFB; if we were actually using a microscope we could focus up and down on those objects to get a better look.
Individual rods may display heavily stained areas, which are referred to as beads, and areas of alternating stain producing kind of a banded appearance.
1.60 Magnification
Notes:
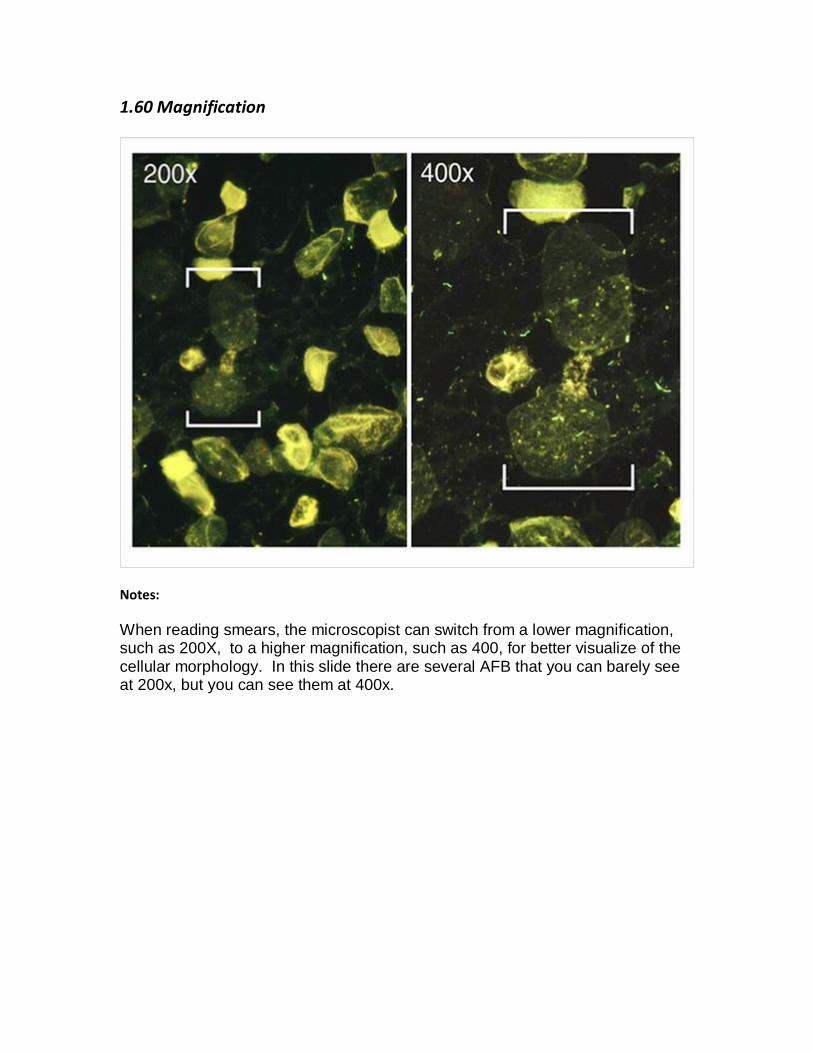
When reading smears, the microscopist can switch from a lower magnification, such as 200X, to a higher magnification, such as 400, for better visualize of the cellular morphology. In this slide there are several AFB that you can barely see at 200x, but you can see them at 400x.
1.61 Positive and Negative Controls
Notes:
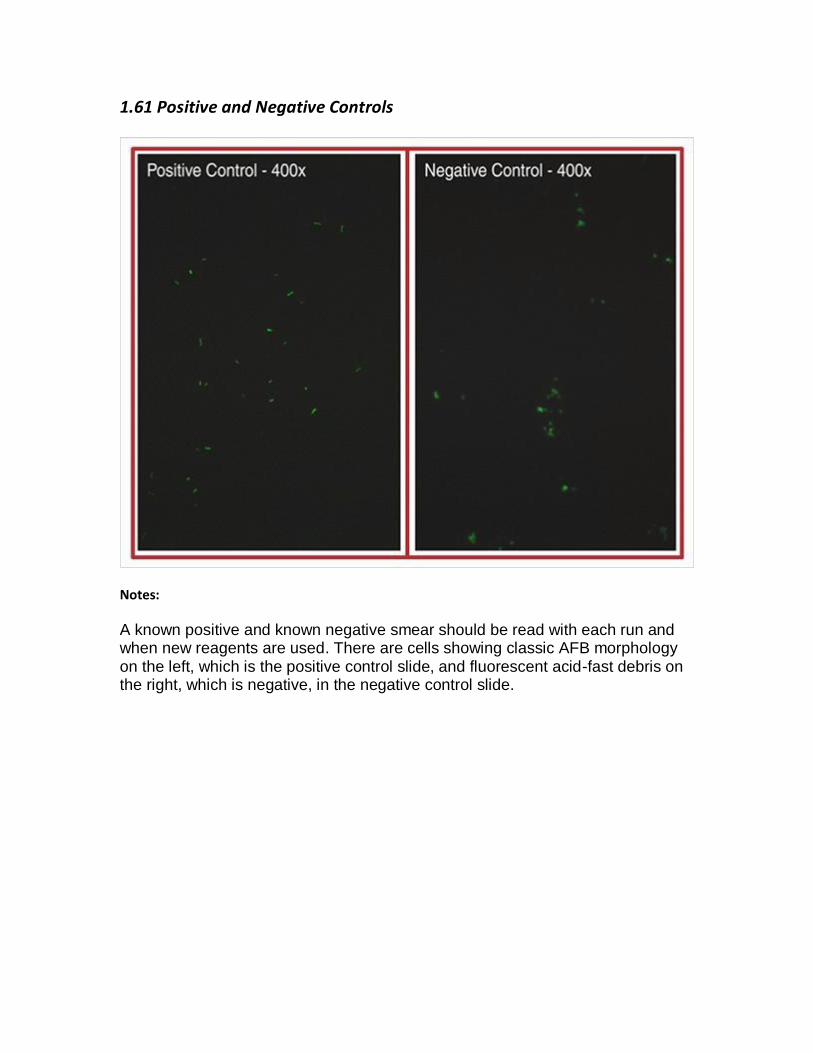
A known positive and known negative smear should be read with each run and when new reagents are used. There are cells showing classic AFB morphology on the left, which is the positive control slide, and fluorescent acid-fast debris on the right, which is negative, in the negative control slide.

1.62 Artifacts
Notes:
Fluorescent debris and artifacts are often seen in a variety of patient specimens, especially in tissues specimens. Objects that exhibit a dull fluorescence, maybe gray or yellow-green, or do not have distinct bacilliary morphology are considered artifacts. And, the microscopist needs to learn to distinguish between AFB and artifacts.

1.63 Identifying AFB
Notes:
There’s one lone rod-shaped AFB toward the center of this slide. The other objects in the slide are shorter, and I would not consider them to be classic AFB morphology.
1.64 Identifying AFB
Notes:
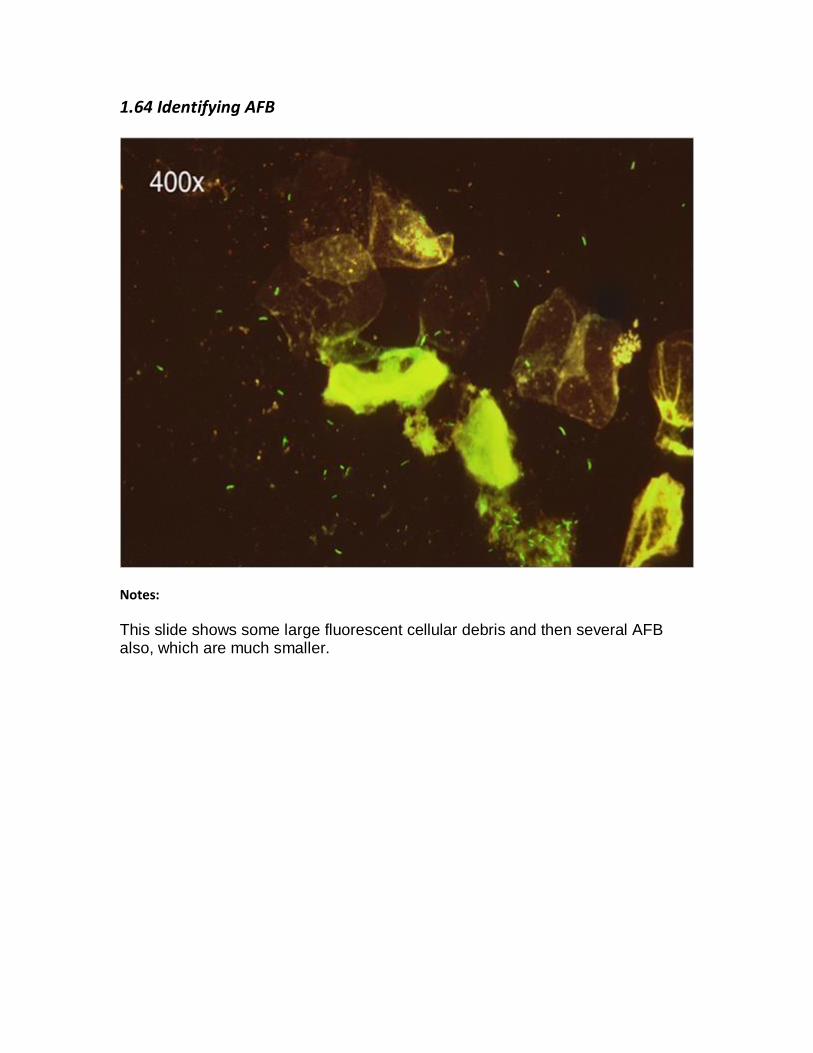
This slide shows some large fluorescent cellular debris and then several AFB also, which are much smaller.

1.65 Identifying AFB
Notes:
Again, some large cellular fluorescent and then some AFB organism.
1.66 Acid-fast bacilli
Notes:
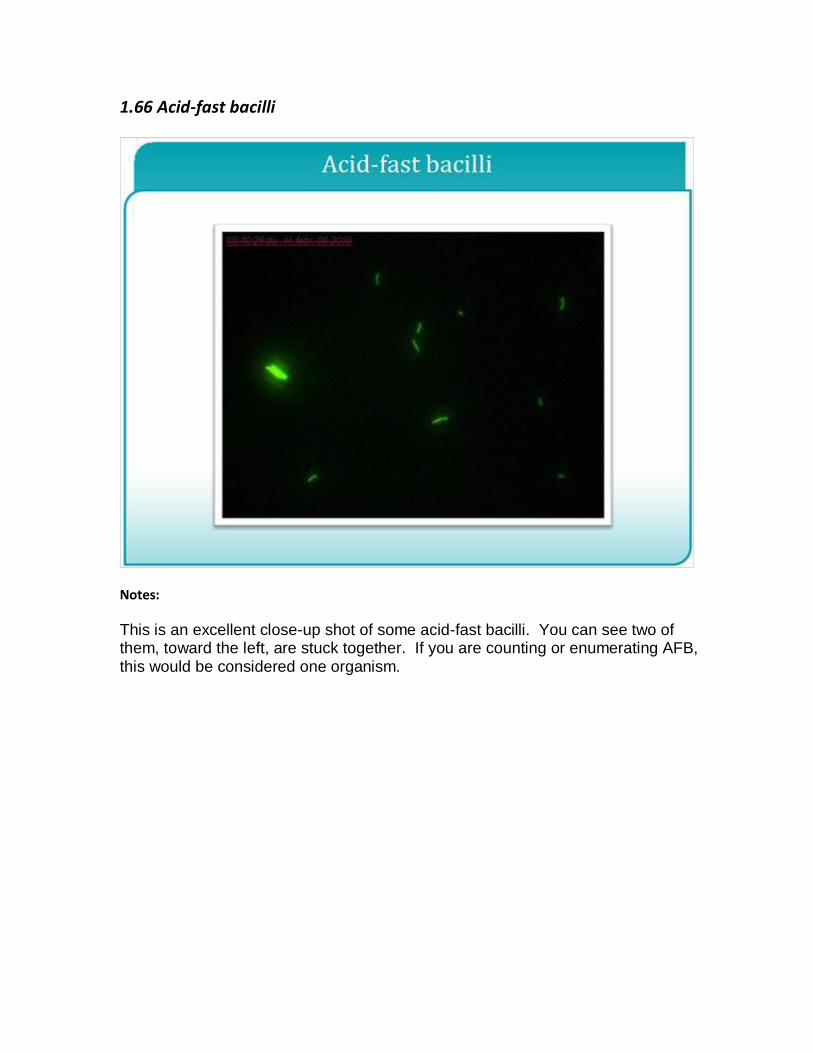
This is an excellent close-up shot of some acid-fast bacilli. You can see two of them, toward the left, are stuck together. If you are counting or enumerating AFB, this would be considered one organism.
1.67 Auramine-O Stain
Notes:
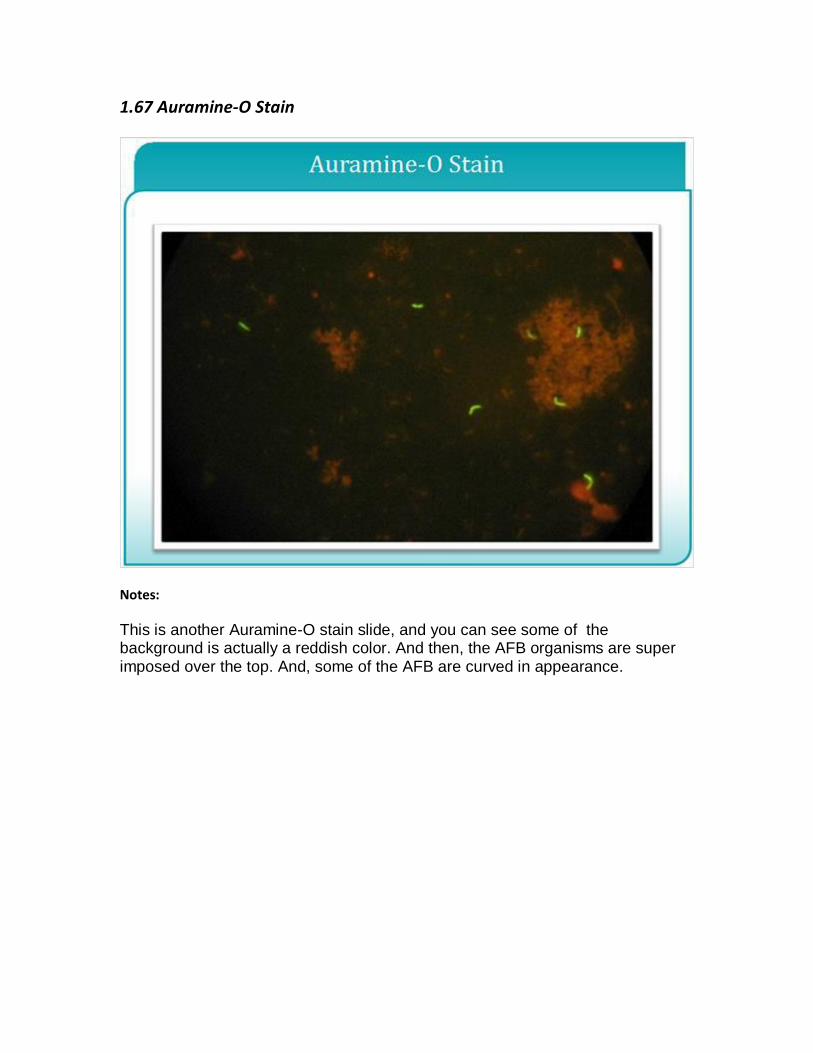
This is another Auramine-O stain slide, and you can see some of the background is actually a reddish color. And then, the AFB organisms are super imposed over the top. And, some of the AFB are curved in appearance.
1.68 AFB with Beaded Appearance
Notes:
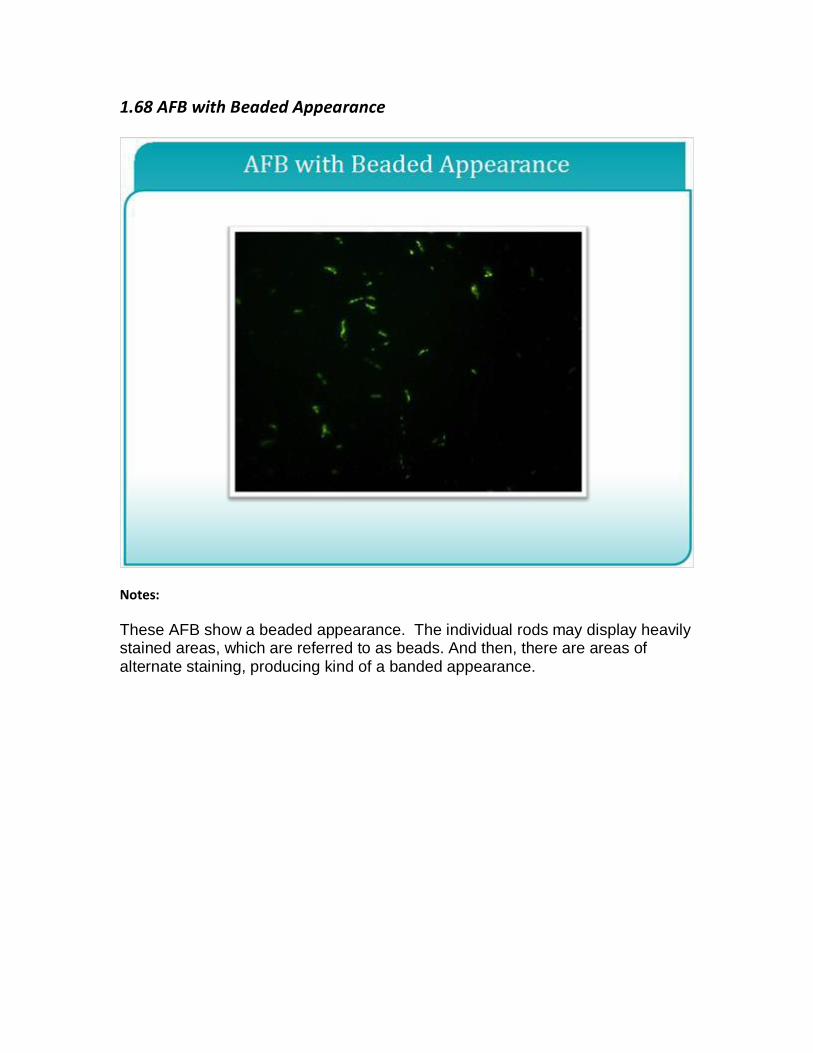
These AFB show a beaded appearance. The individual rods may display heavily stained areas, which are referred to as beads. And then, there are areas of alternate staining, producing kind of a banded appearance.
1.70 References
Notes:
This is the end of the AFB Smear Microscopy Presentation, which is part of a series from the Association of Public Health Laboratories, “Essentials of the Mycobacteriology Laboratory: Promoting Quality Practices”.
Please see the cdc and aphl websites for more information on the topics presented here.