Embed Size (px)
Citation preview

ADP Training Guide (For Recruiters)

WELCOME TO ADP RECRUITMENT!
This step-by-step guide is meant to work as a complement to the individualized training session you received
(conducted by an HR representative)
Our new process within ADP allows for our recruiting and hiring practices to be more streamlined and centralized
If you run into issues, please reach out to Kim Patterson at [email protected] or 336.293.0015. You can also look for the symbol at the top right in ADP to access
ADP’s support center or for the symbol at the top right in ADP to access ADP’s Bridge online community.
SECTION ONE: REQUISITIONS
This section covers:
• getting a new requisition entered into ADP• finding the URL for an existing requisition
• navigating through the internal Career Center
(Before starting a requisition, be sure you have all pertinent information from the hiring manager who is
submitting this request)
Open a new requisition

Click on “PROCESS,”
then “Talent,” then
“Requisitions”
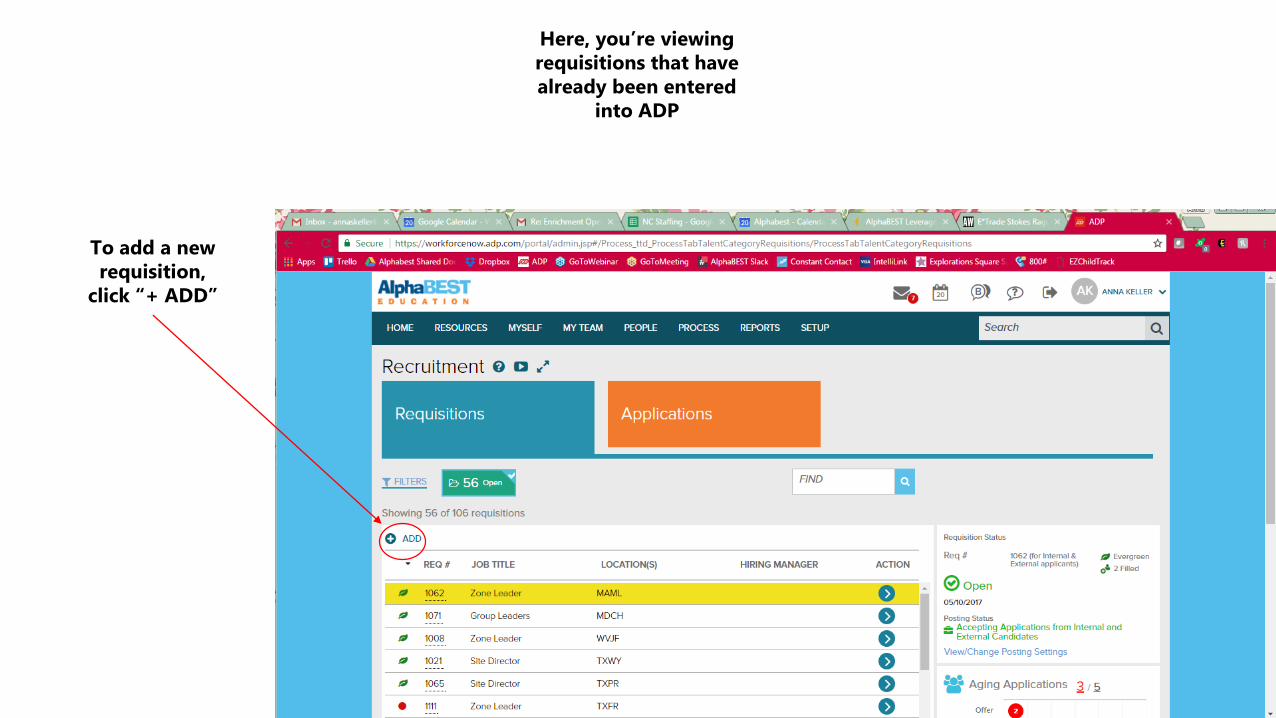
Here, you’re viewing requisitions that have already been entered
into ADP
To add a new requisition,
click “+ ADD”
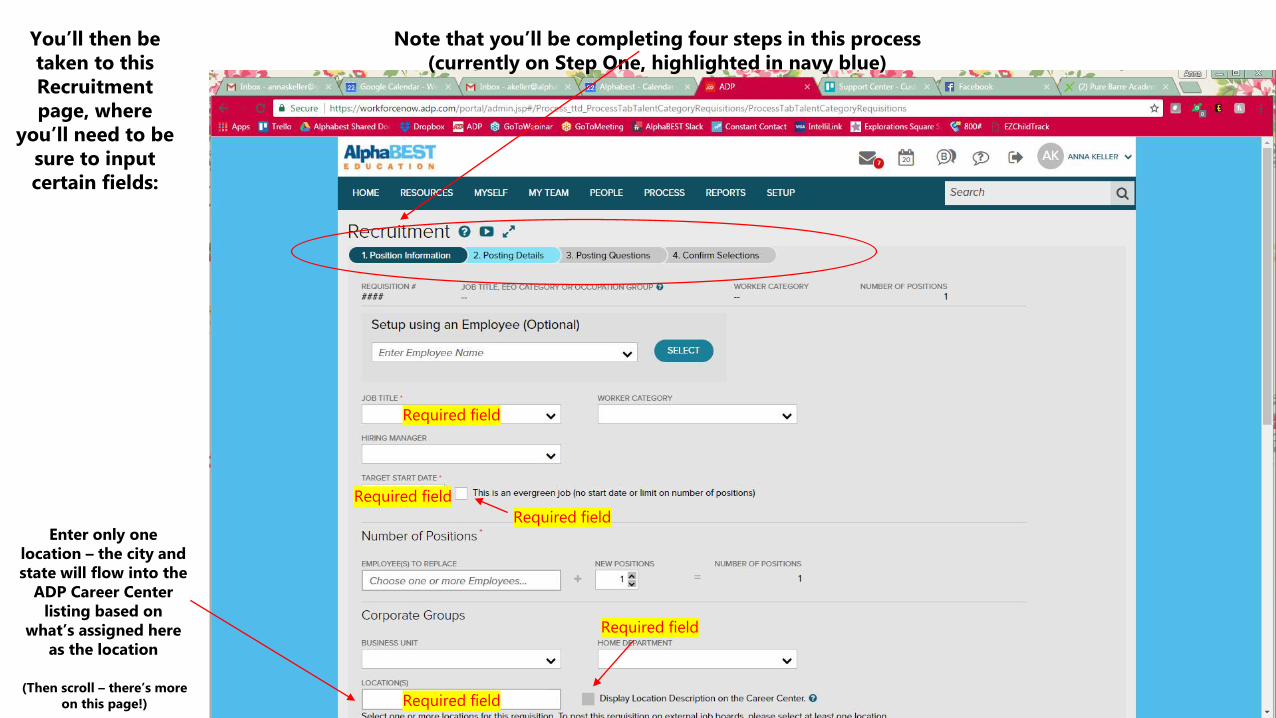
You’ll then be taken to this Recruitment page, where
you’ll need to be sure to input certain fields:
Required field
Required field
Required field
Enter only one location – the city and state will flow into the
ADP Career Center listing based on
what’s assigned here as the location
(Then scroll – there’s more on this page!)
Note that you’ll be completing four steps in this process (currently on Step One, highlighted in navy blue)
Required field
Required field
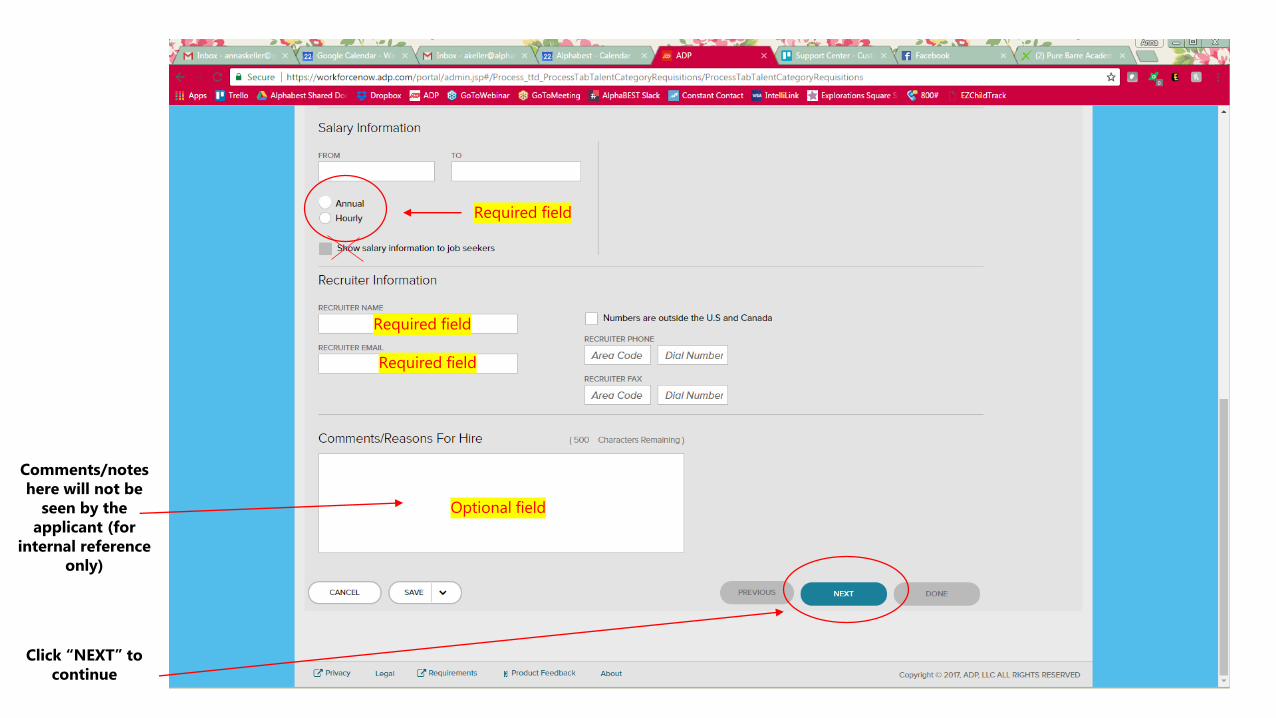
Comments/notes here will not be
seen by the applicant (for
internal reference only)
Required field
Required field
Required field
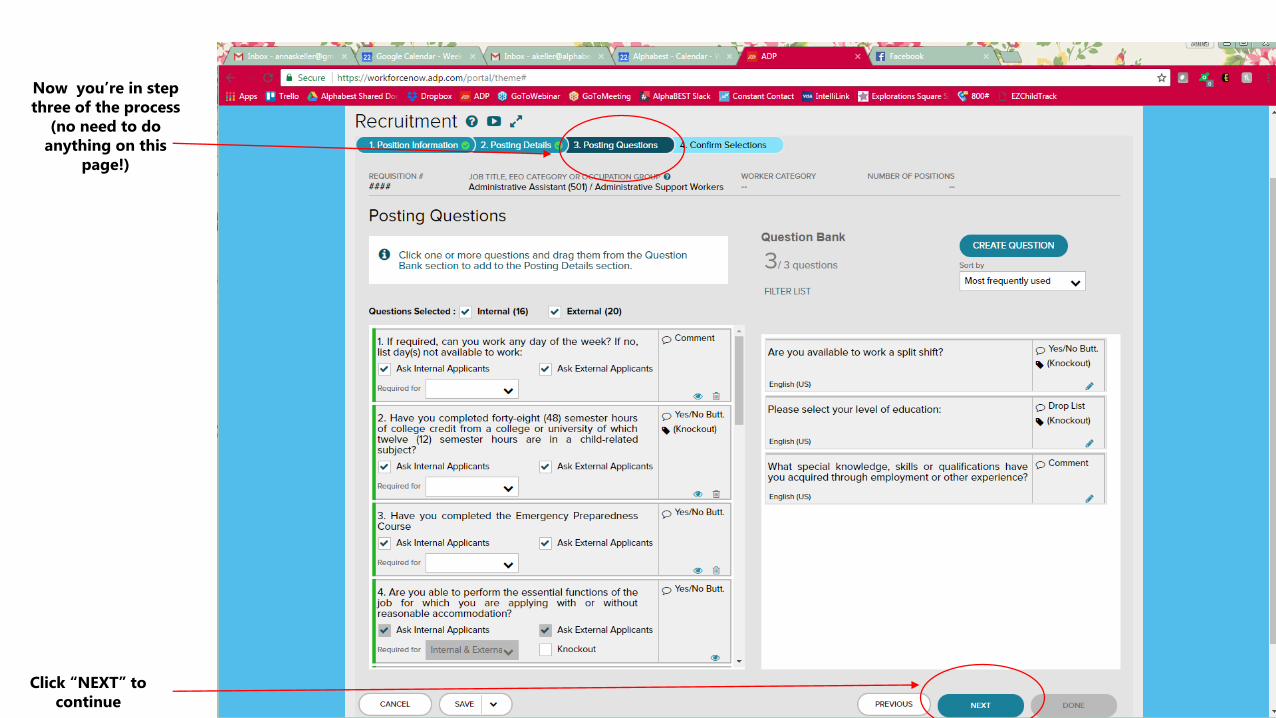
Click “NEXT” to continue
Optional field
Required fieldRequired field
Click “NEXT” to continue
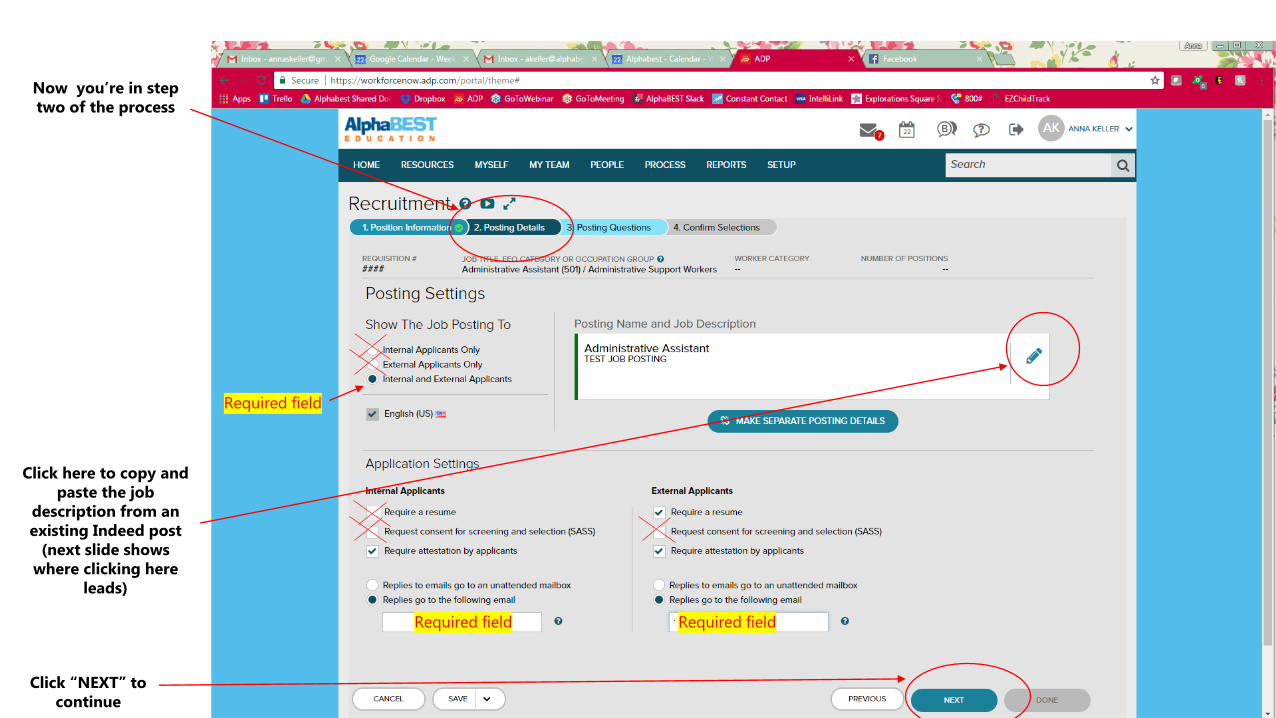
Now you’re in step two of the process
Required field
Click here to copy and paste the job
description from an existing Indeed post
(next slide shows where clicking here
leads)
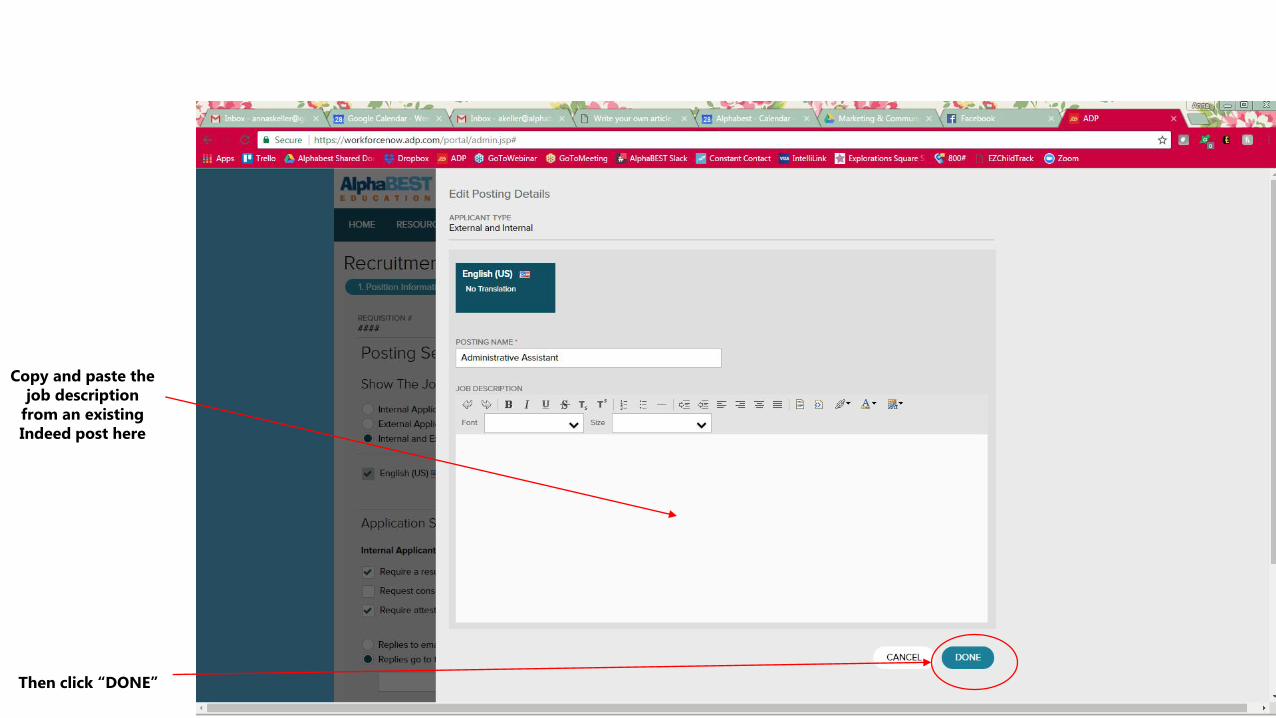
Copy and paste the job description
from an existing Indeed post here
Then click “DONE”
Click “NEXT” to continue
Now you’re in step three of the process
(no need to do anything on this
page!)
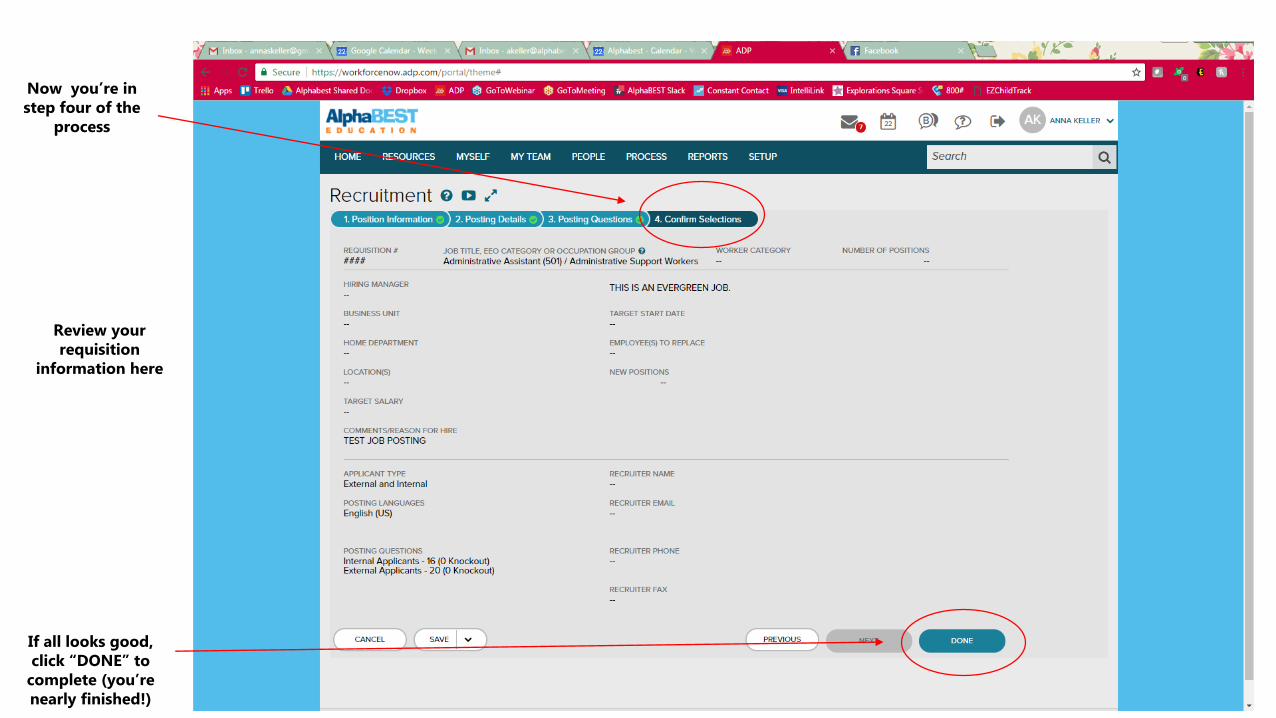
Review your requisition
information here
If all looks good, click “DONE” to
complete (you’re nearly finished!)
Now you’re in step four of the
process

Enter yesterday’s date here
This takes you to your external
job URL that can be sent to candidates to
start the application
process
Always add a referral
capability by clicking here
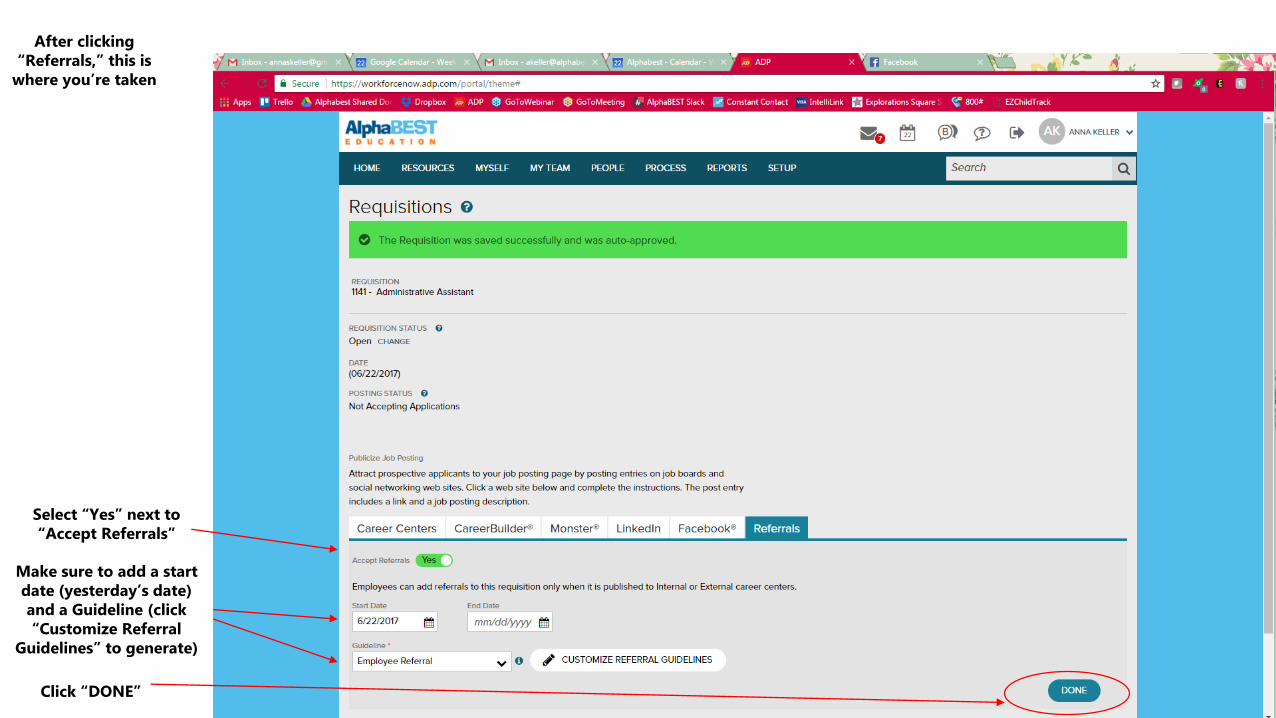
After clicking “Referrals,” this is
where you’re taken
Select “Yes” next to “Accept Referrals”
Make sure to add a start date (yesterday’s date) and a Guideline (click “Customize Referral
Guidelines” to generate)
Click “DONE”
Send a job posting to an interested candidate/find a link for an existing job posting

Click on “PROCESS,”
then “Talent,” then
“Requisitions”
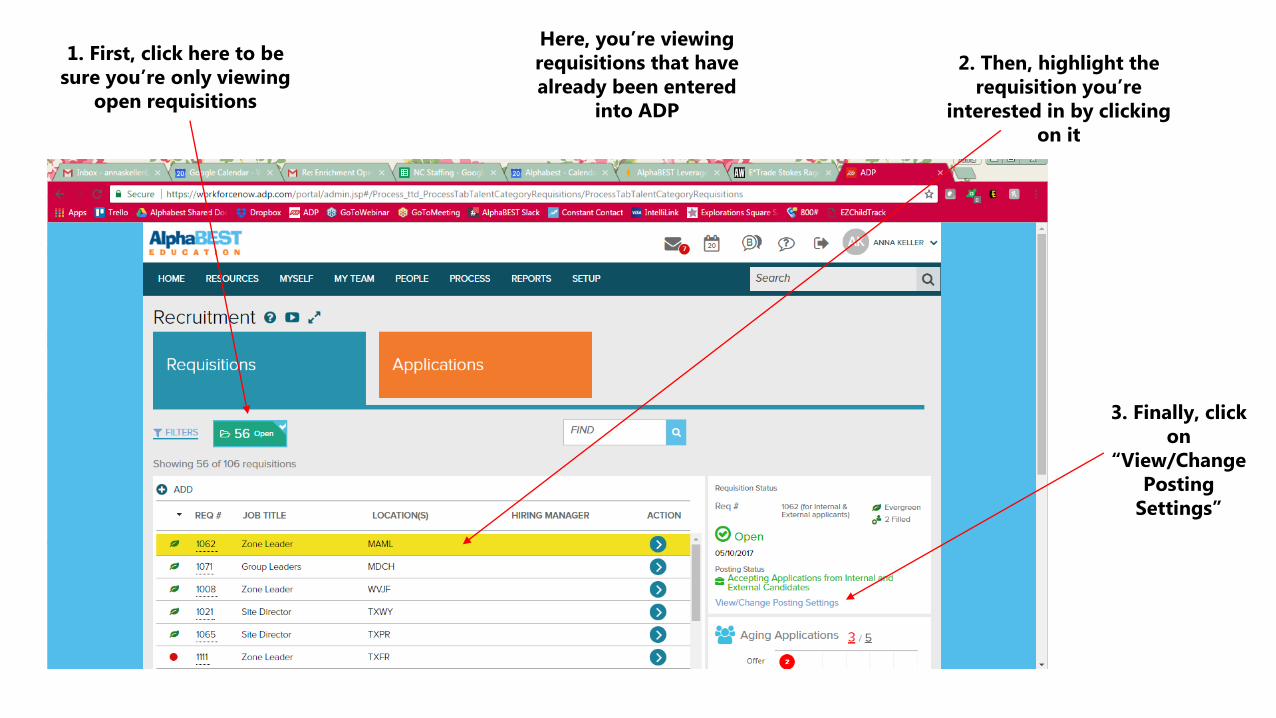
Here, you’re viewing requisitions that have already been entered
into ADP
3. Finally, click on
“View/Change Posting
Settings”
1. First, click here to be sure you’re only viewing
open requisitions
2. Then, highlight the requisition you’re
interested in by clicking on it
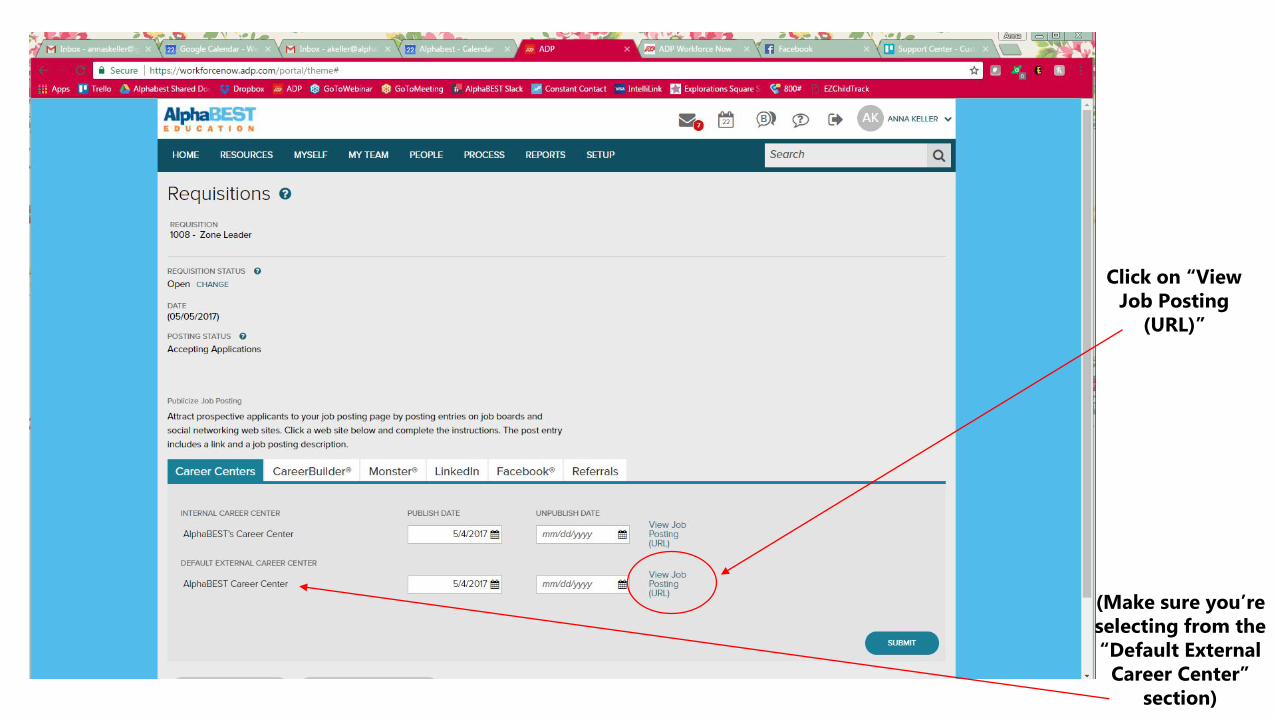
(Make sure you’re selecting from the “Default External
Career Center” section)
Click on “View Job Posting
(URL)”
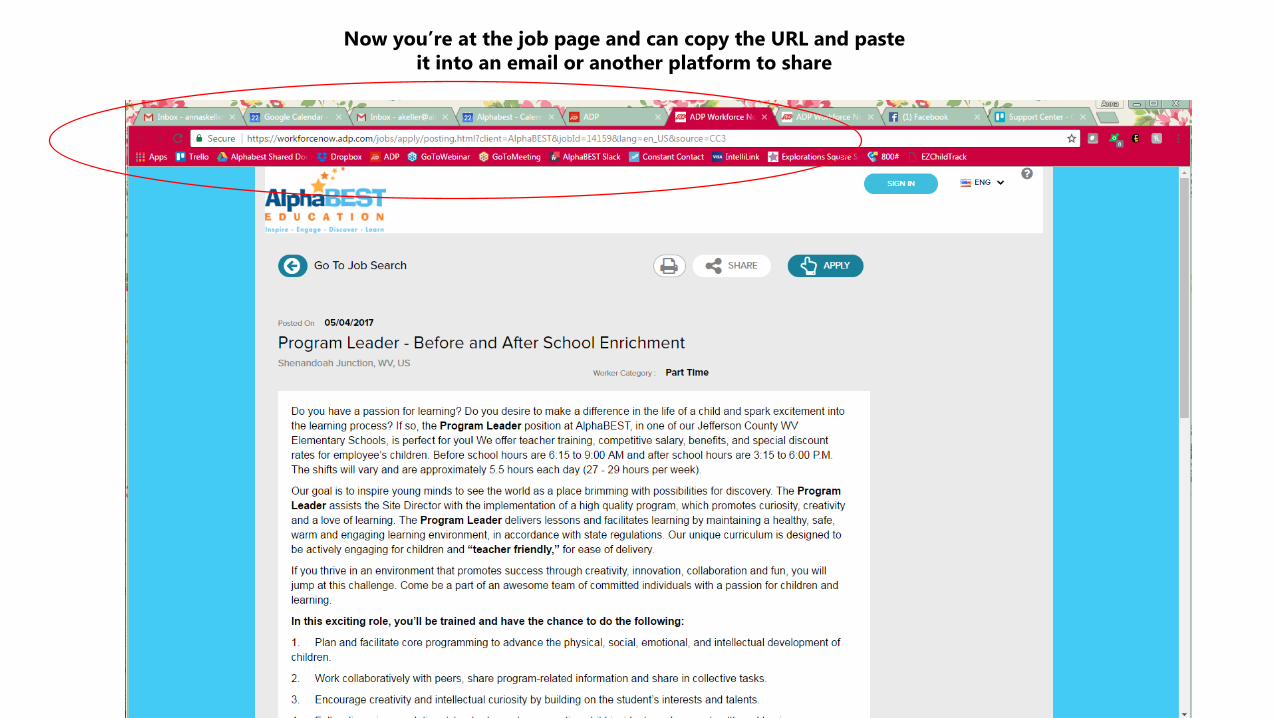
Now you’re at the job page and can copy the URL and paste it into an email or another platform to share
Navigate the internal Career Center (the place where existing employees apply for open jobs)
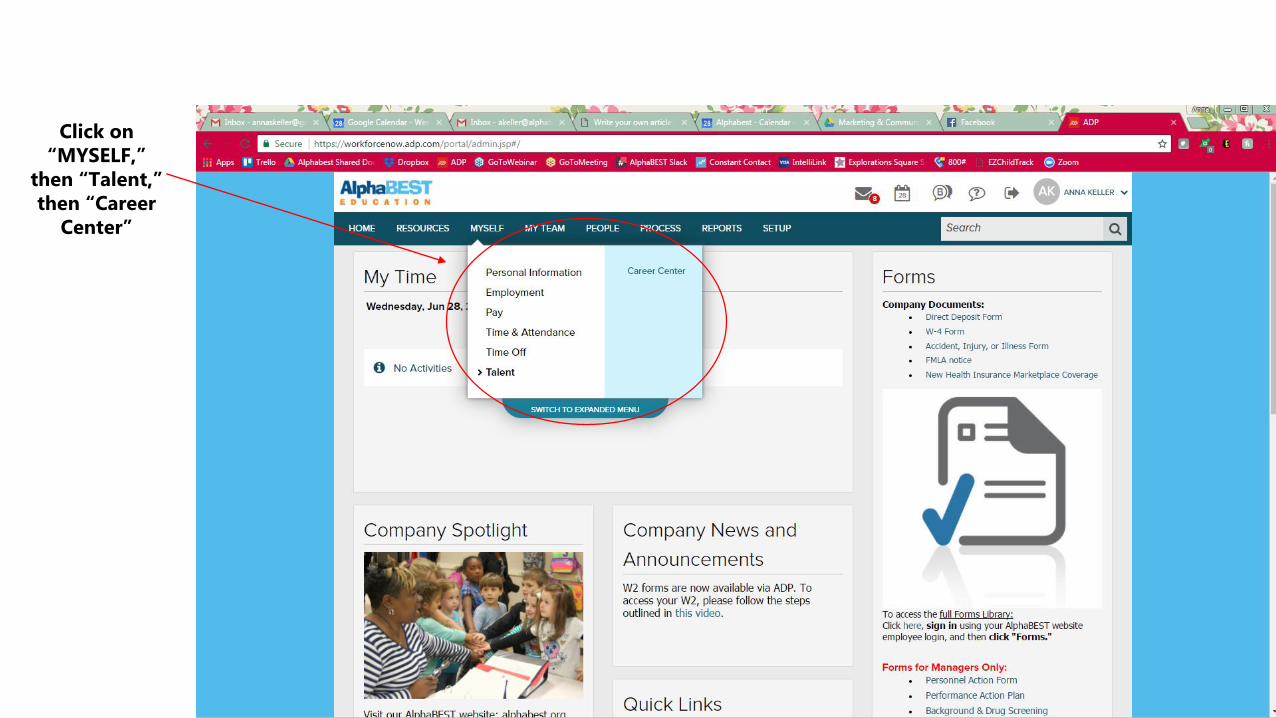
Click on “MYSELF,”
then “Talent,” then “Career
Center”
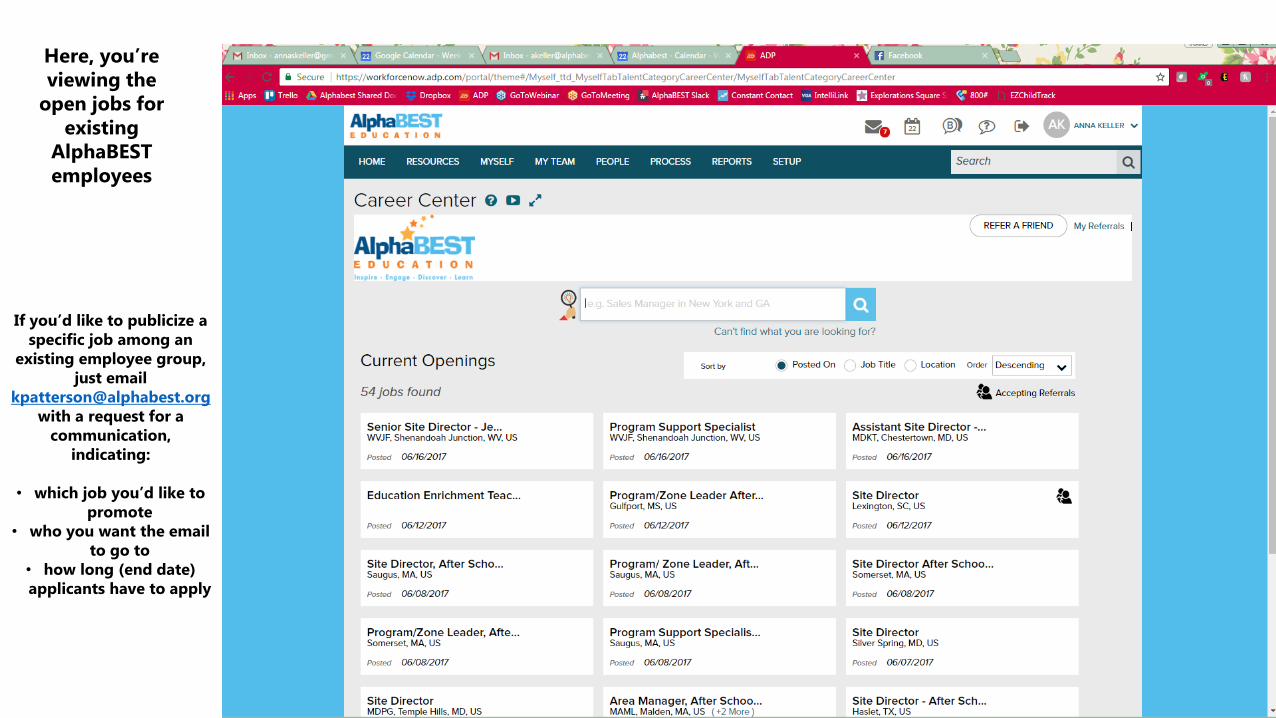
Here, you’re viewing the
open jobs for existing
AlphaBESTemployees
If you’d like to publicize a specific job among an
existing employee group, just email
[email protected] a request for a
communication, indicating:
• which job you’d like to promote
• who you want the email to go to
• how long (end date) applicants have to apply
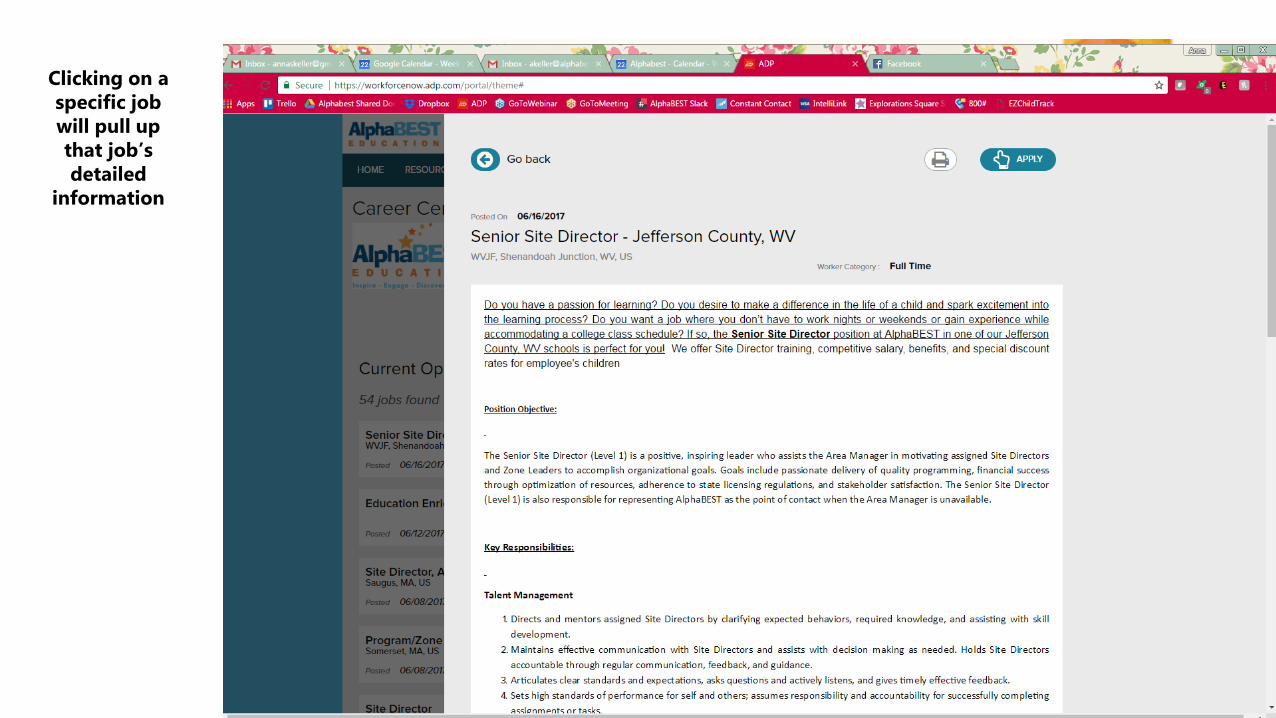
Clicking on a specific job will pull up that job’s detailed
information
SECTION TWO: APPLICATIONS
This section covers:
• locating submitted applications • communicating with applicants
Locate an existing application

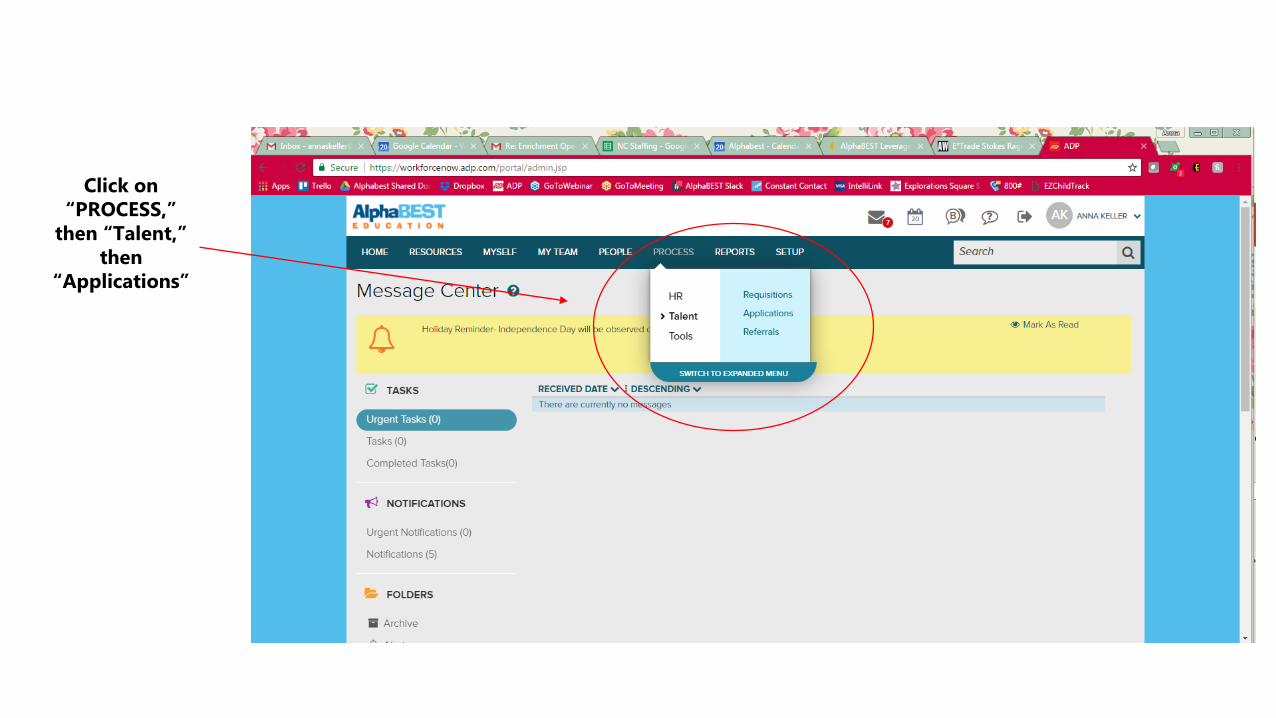
Click on “PROCESS,”
then “Talent,” then
“Applications”
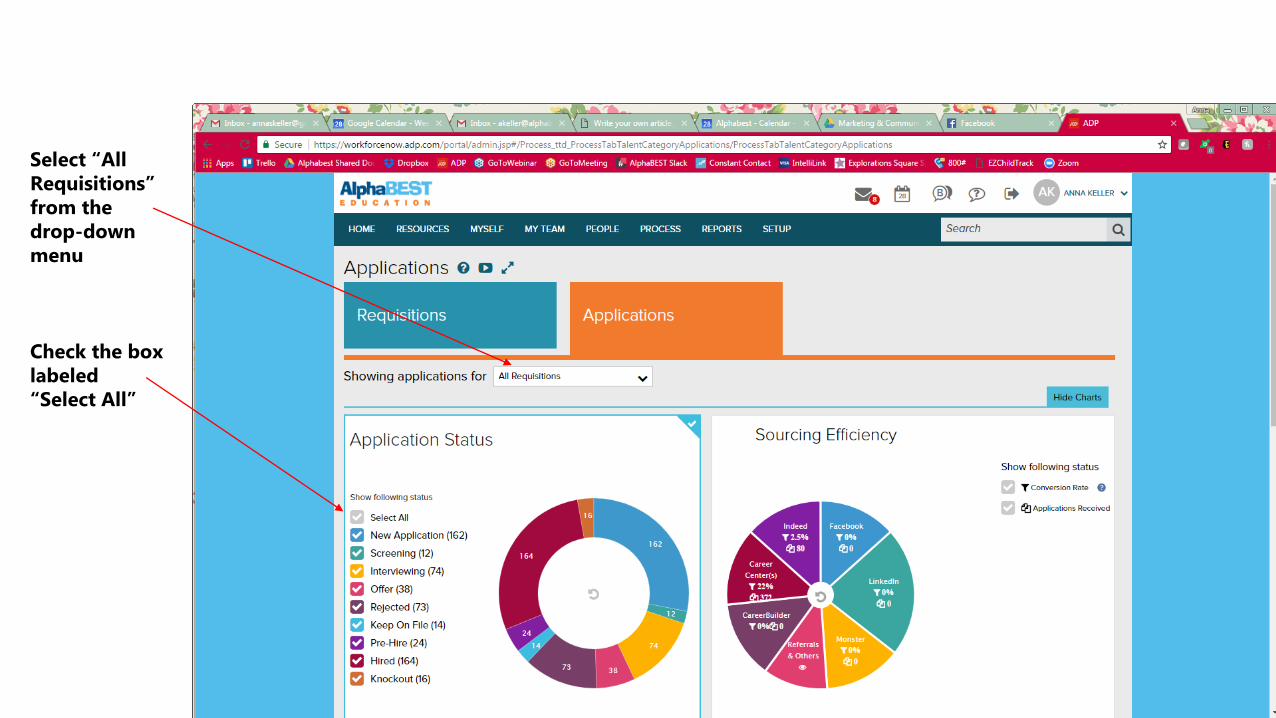
Check the box labeled “Select All”
Select “All Requisitions” from the drop-down menu

To make your search easier, click on column titles to sort as desired, then click on appropriate candidate
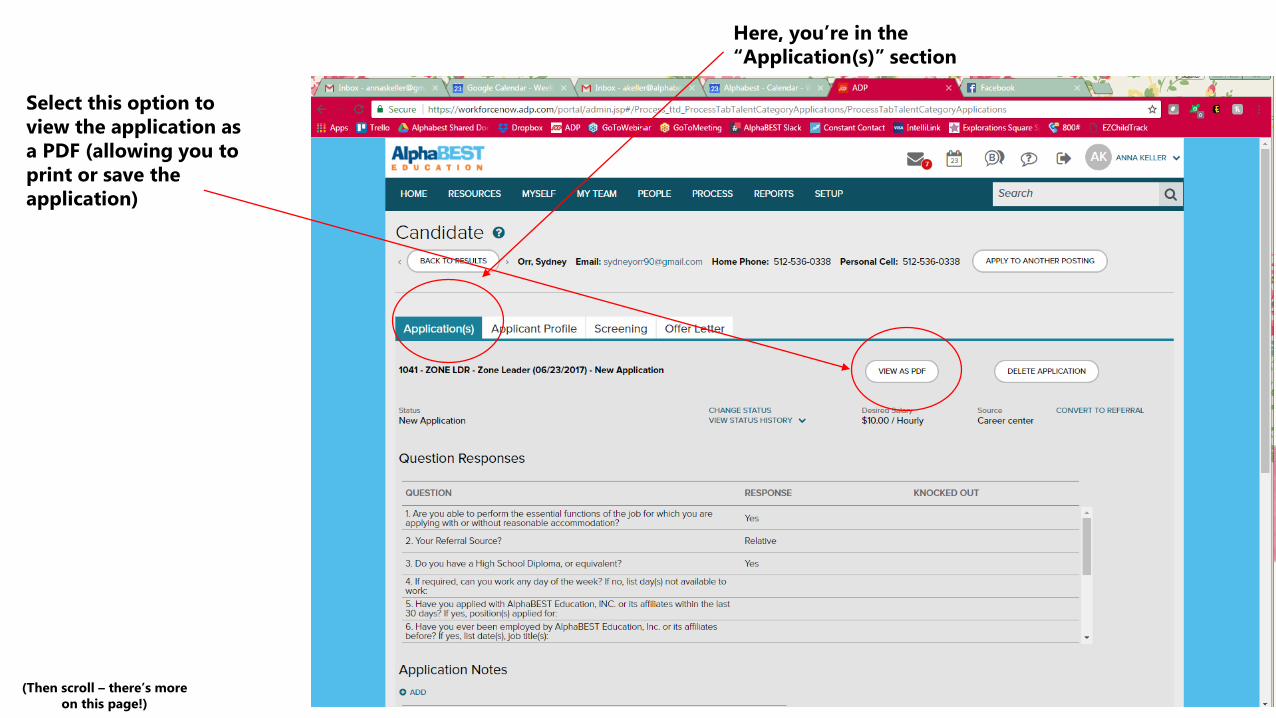
Select this option to view the application as a PDF (allowing you to print or save the application)
(Then scroll – there’s more on this page!)
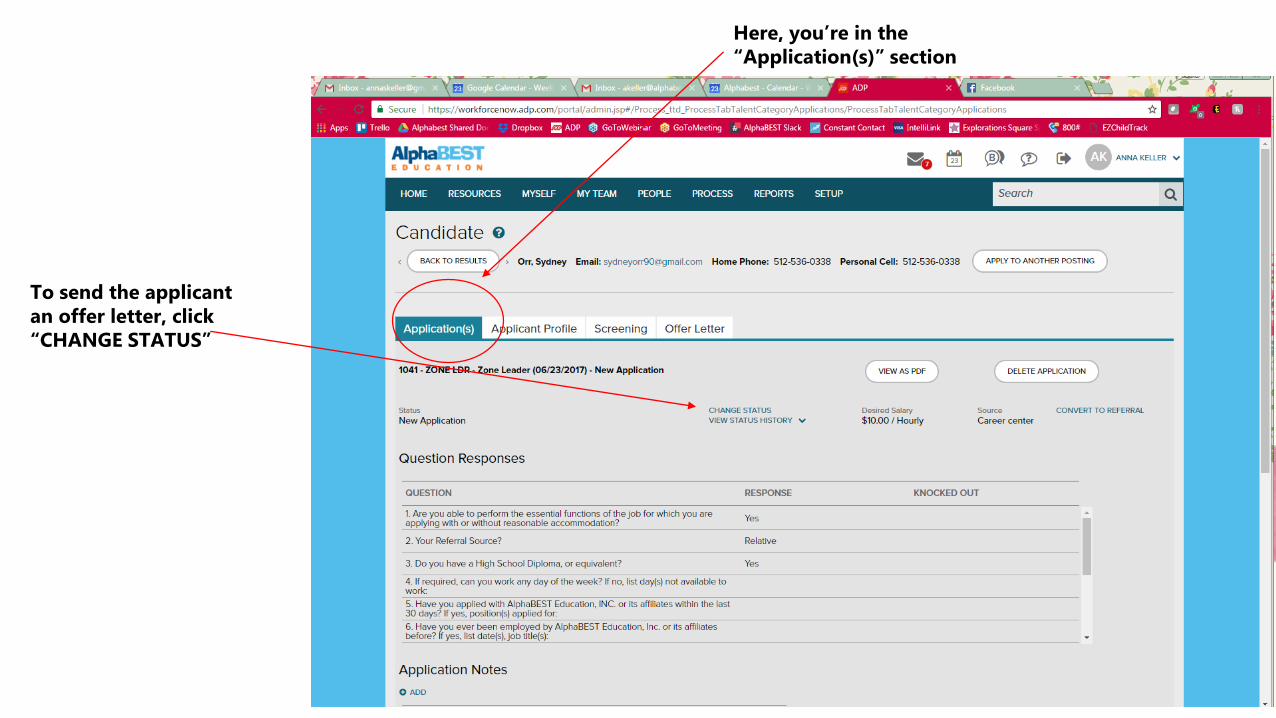
Here, you’re in the “Application(s)” section
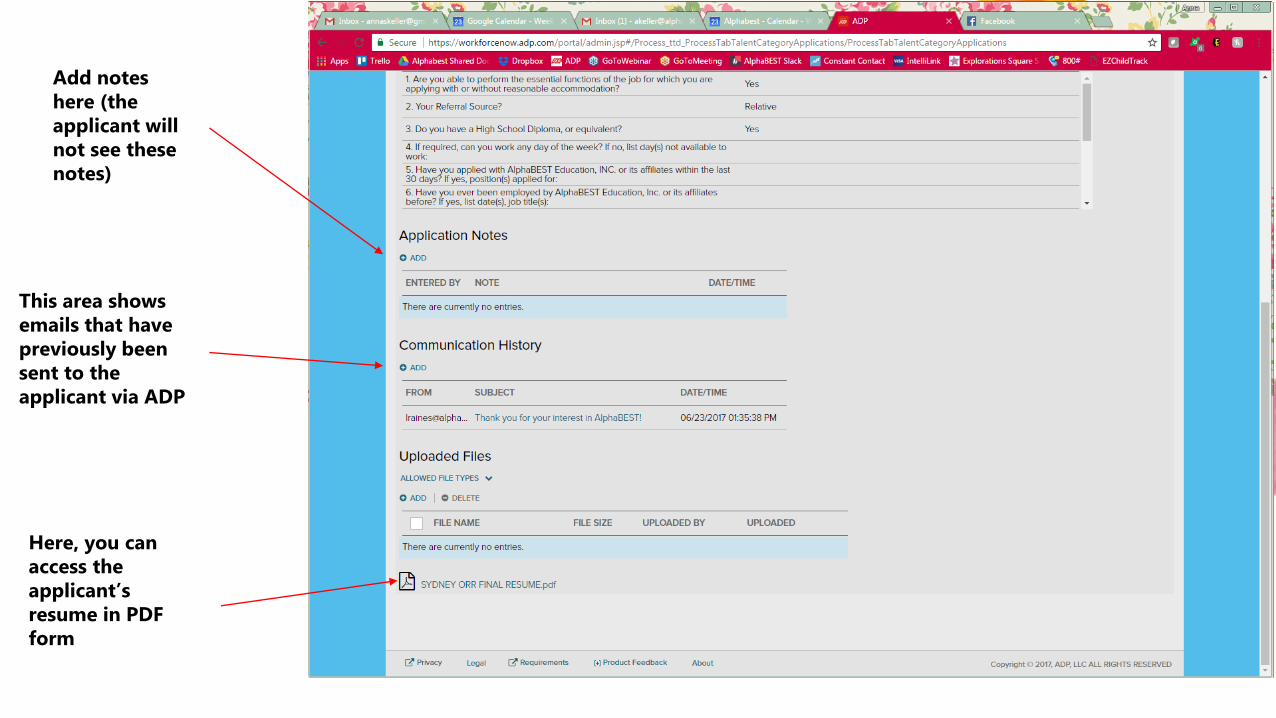
Add notes here (the applicant will not see these notes)
This area shows emails that have previously been sent to the applicant via ADP
Here, you can access the applicant’s resume in PDF form
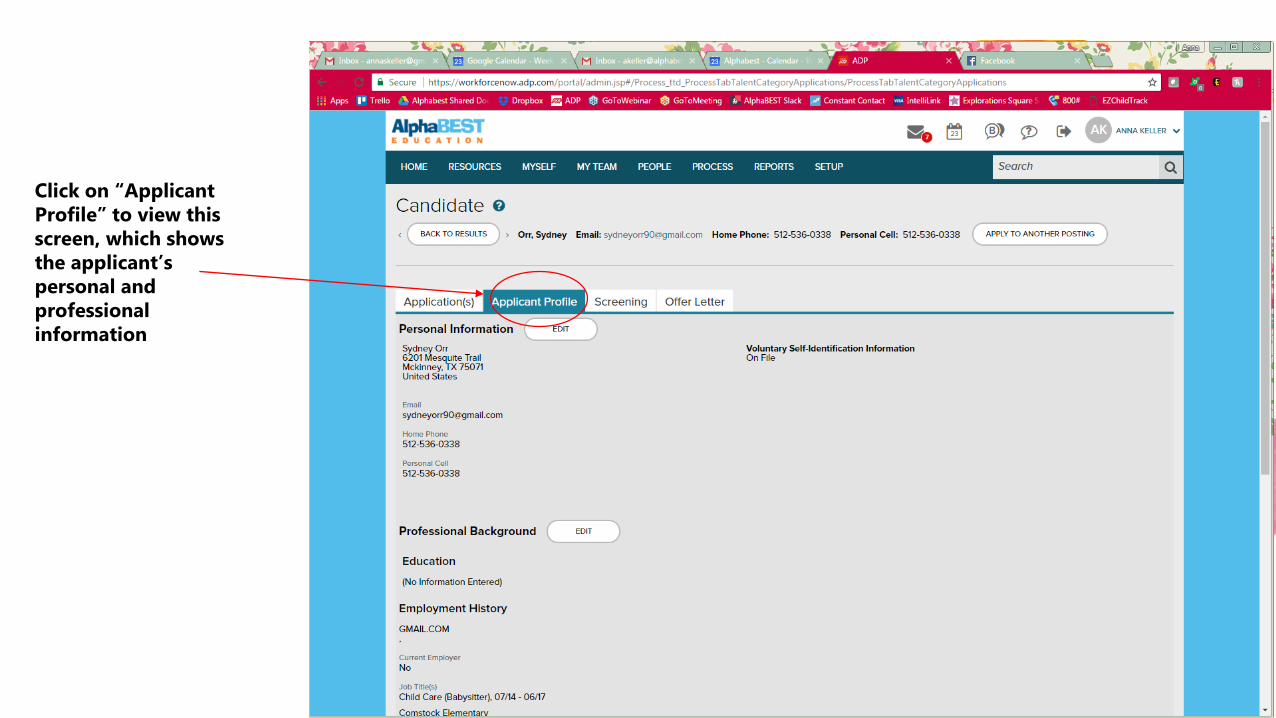
Click on “Applicant Profile” to view this screen, which shows the applicant’s personal and professional information
Communicate with an applicant

Click on “PROCESS,”
then “Talent,” then
“Applications”

Check the box labeled “Select All”
Select “All Requisitions” from the drop-down menu
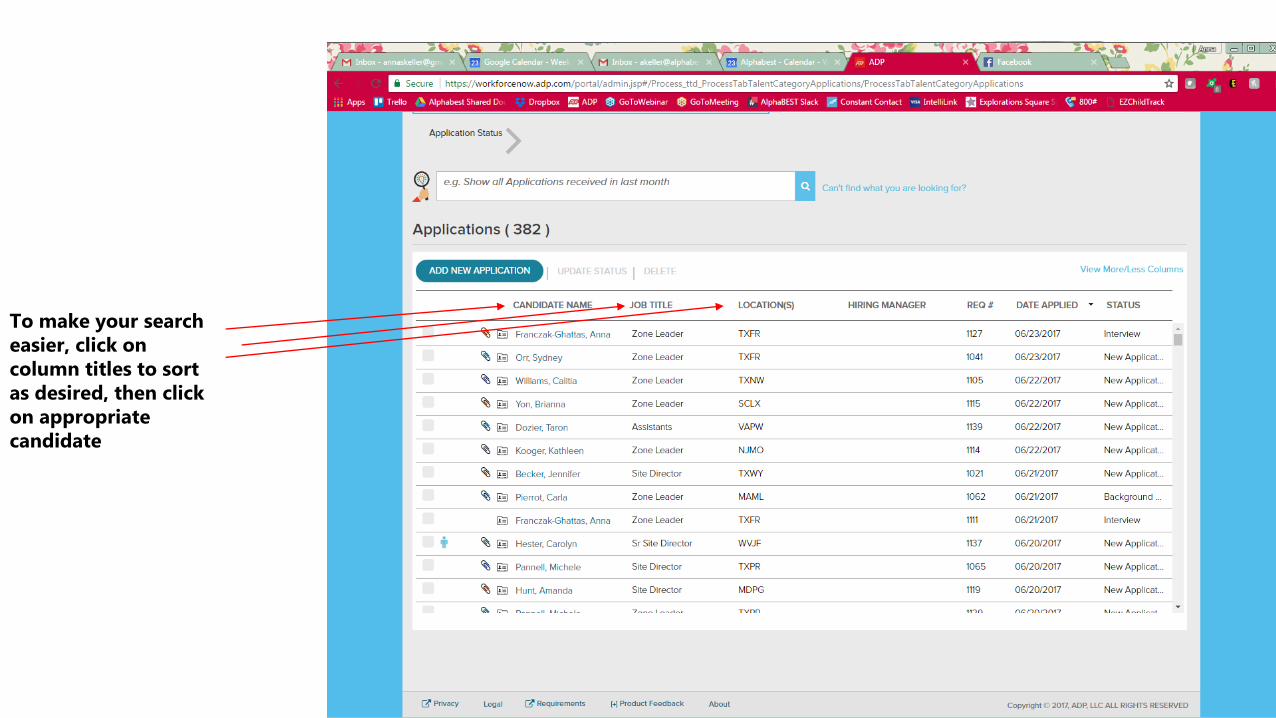
To make your search easier, click on column titles to sort as desired, then click on appropriate candidate
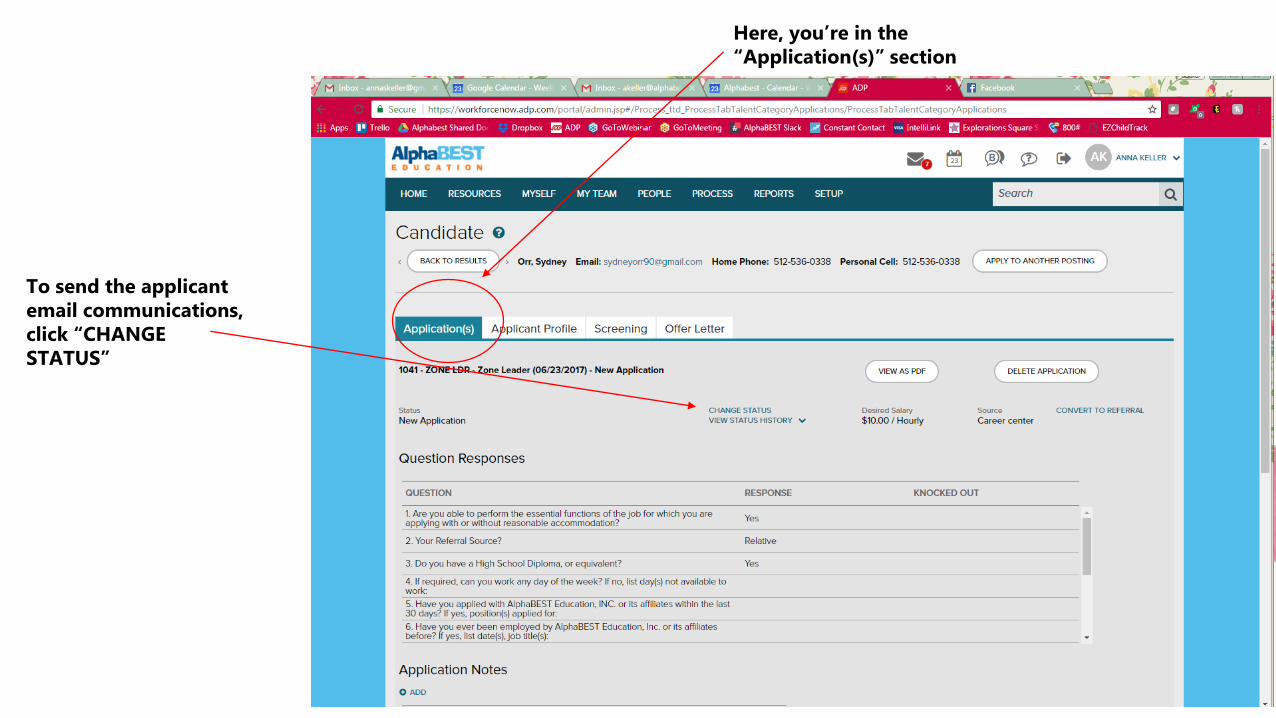
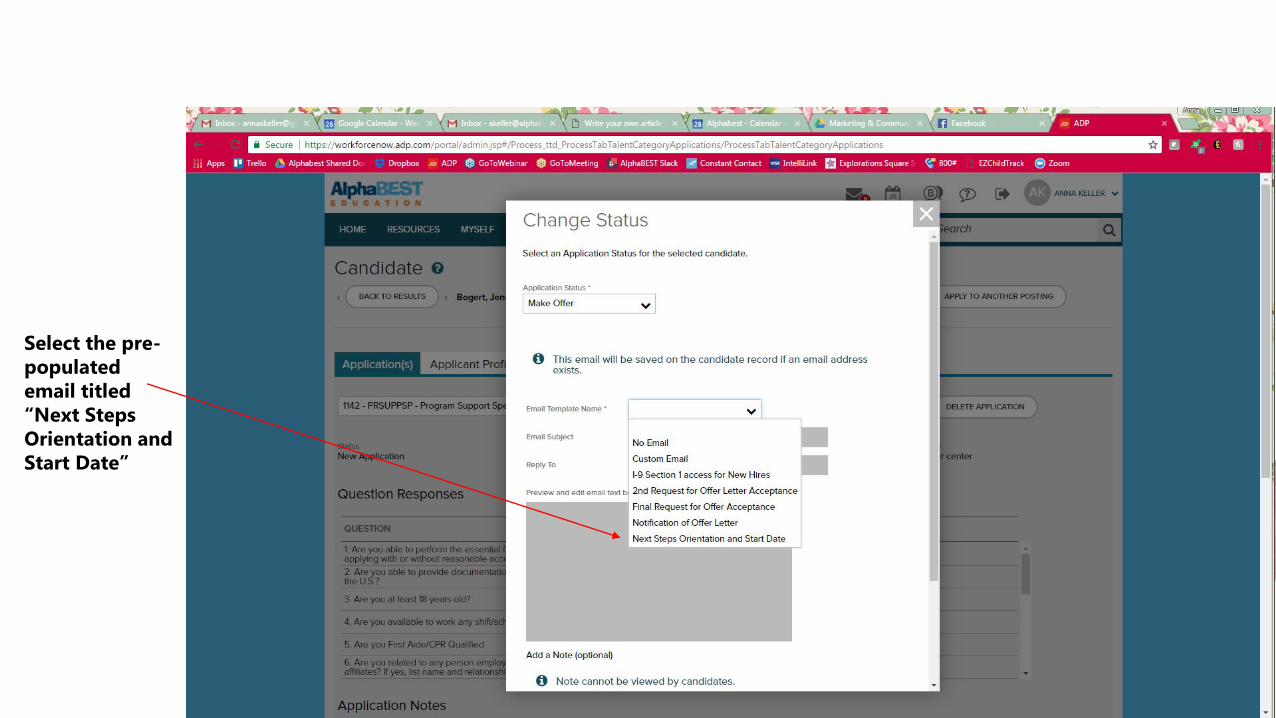
To send the applicant email communications, click “CHANGE STATUS”
Here, you’re in the “Application(s)” section
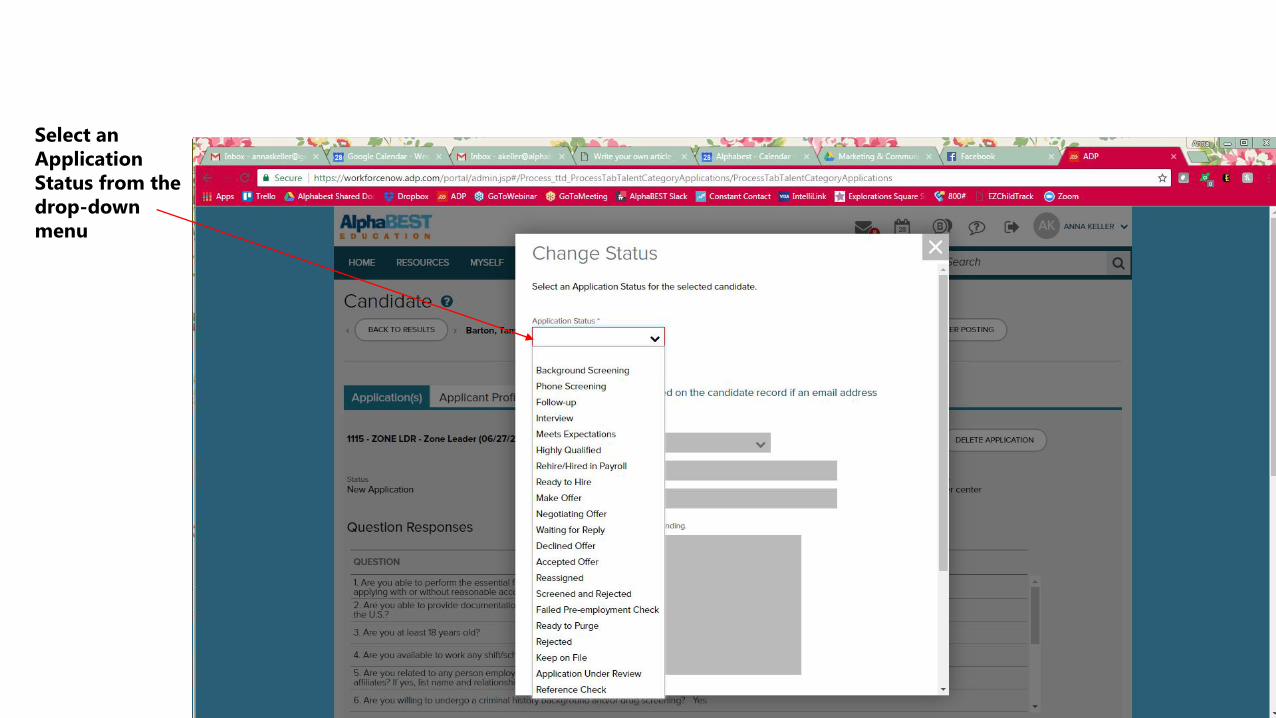
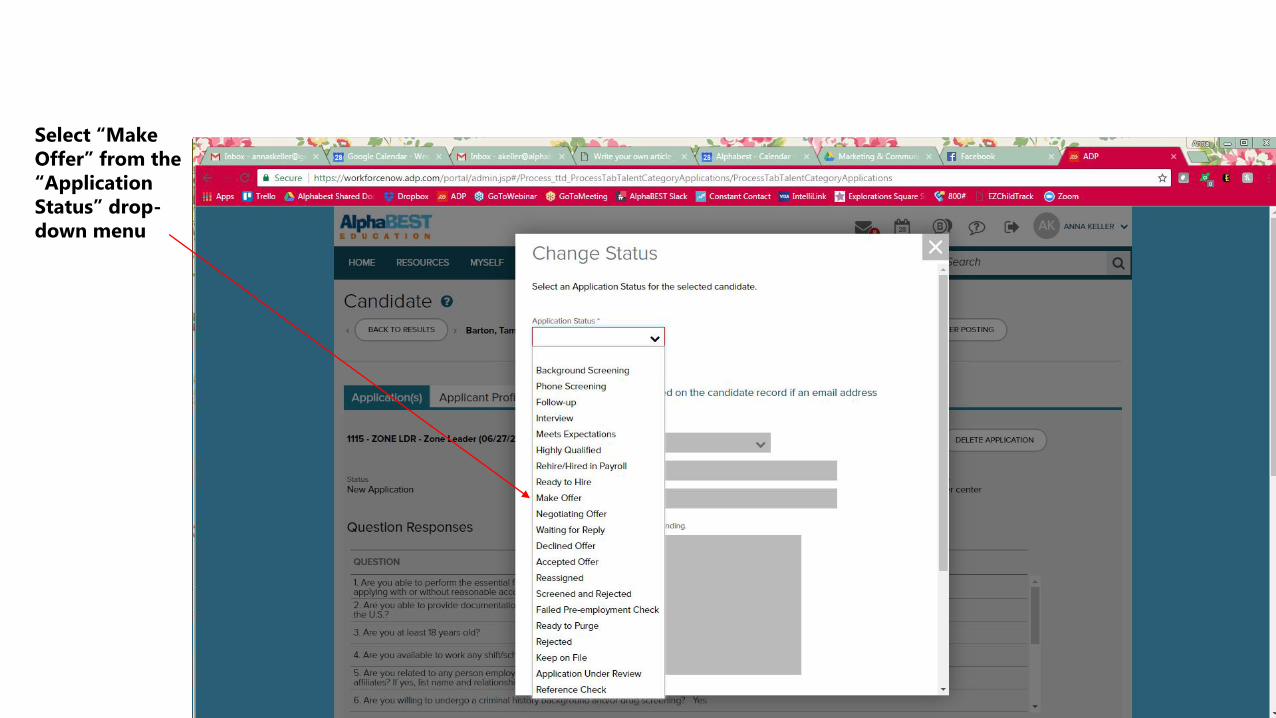
Select an Application Status from the drop-down menu
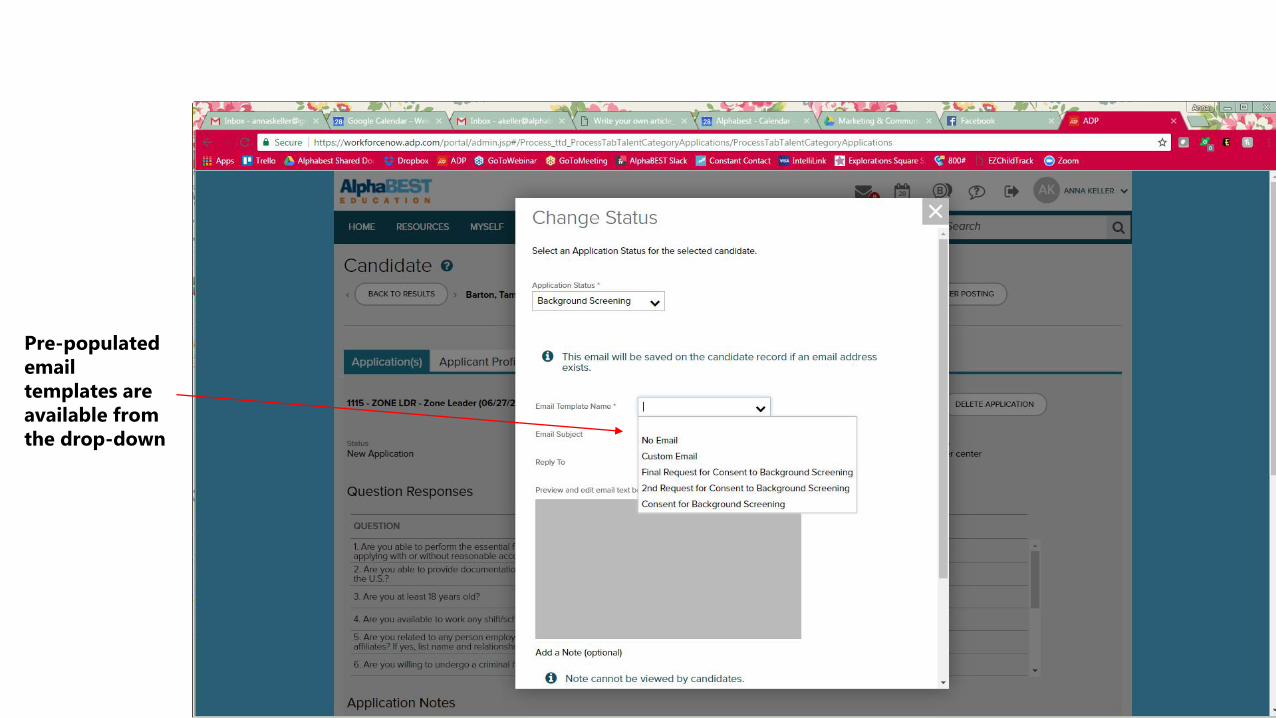
Pre-populated email templates are available from the drop-down
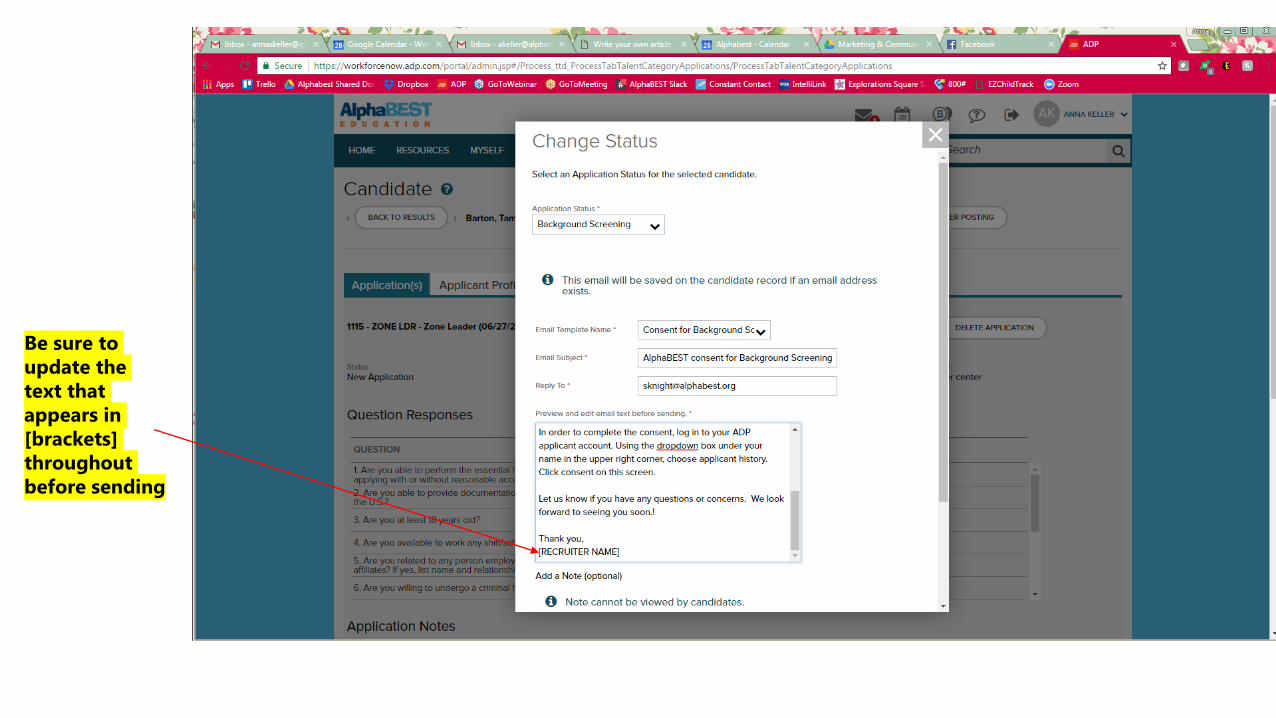
Be sure to update the text that appears in [brackets] throughout before sending

SECTION THREE: BACKGROUND SCREENING
This section covers how to initiate a background screening for a candidate
Click on “PROCESS,”
then “Talent,” then
“Applications”

Check the box labeled “Select All”
Select “All Requisitions” from the drop-down menu

To make your search easier, click on column titles to sort as desired, then click on appropriate candidate
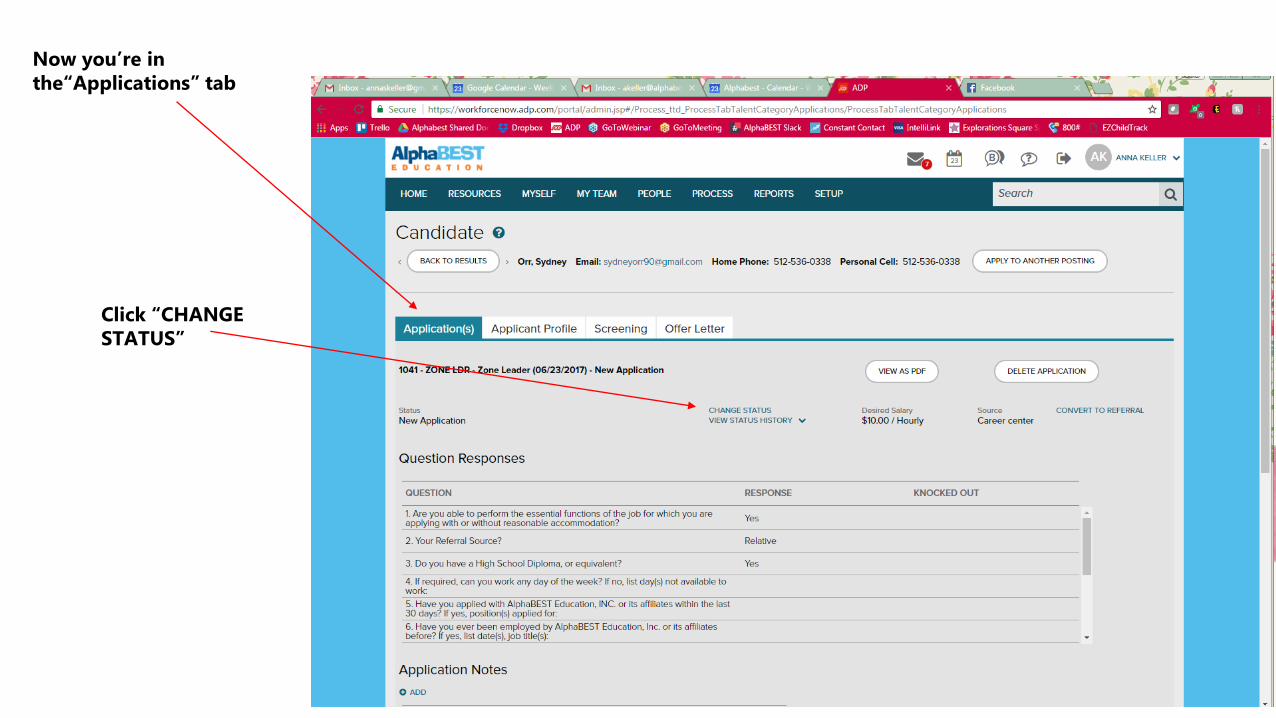
Click “CHANGE STATUS”
Now you’re in the“Applications” tab
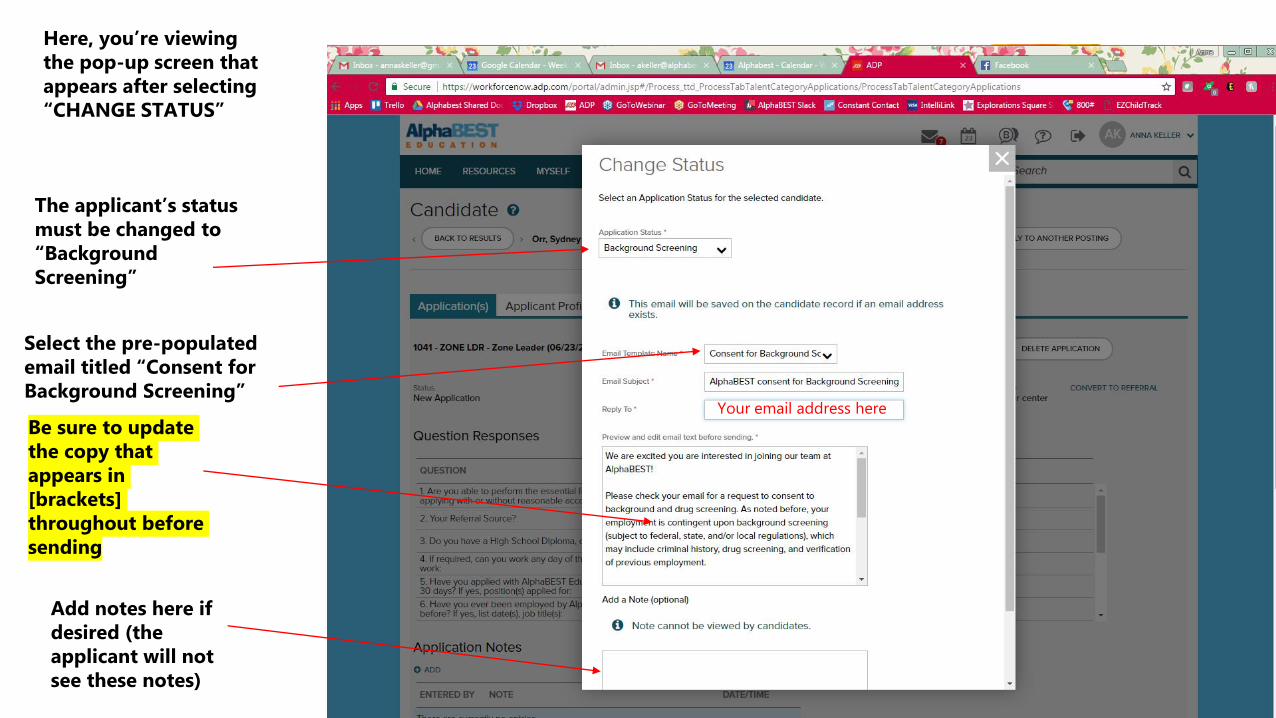
Your email address here
Here, you’re viewing the pop-up screen that appears after selecting “CHANGE STATUS”
The applicant’s status must be changed to “Background Screening”
Select the pre-populated email titled “Consent for Background Screening”
Add notes here if desired (the applicant will not see these notes)
Be sure to update the copy that appears in [brackets] throughout before sending
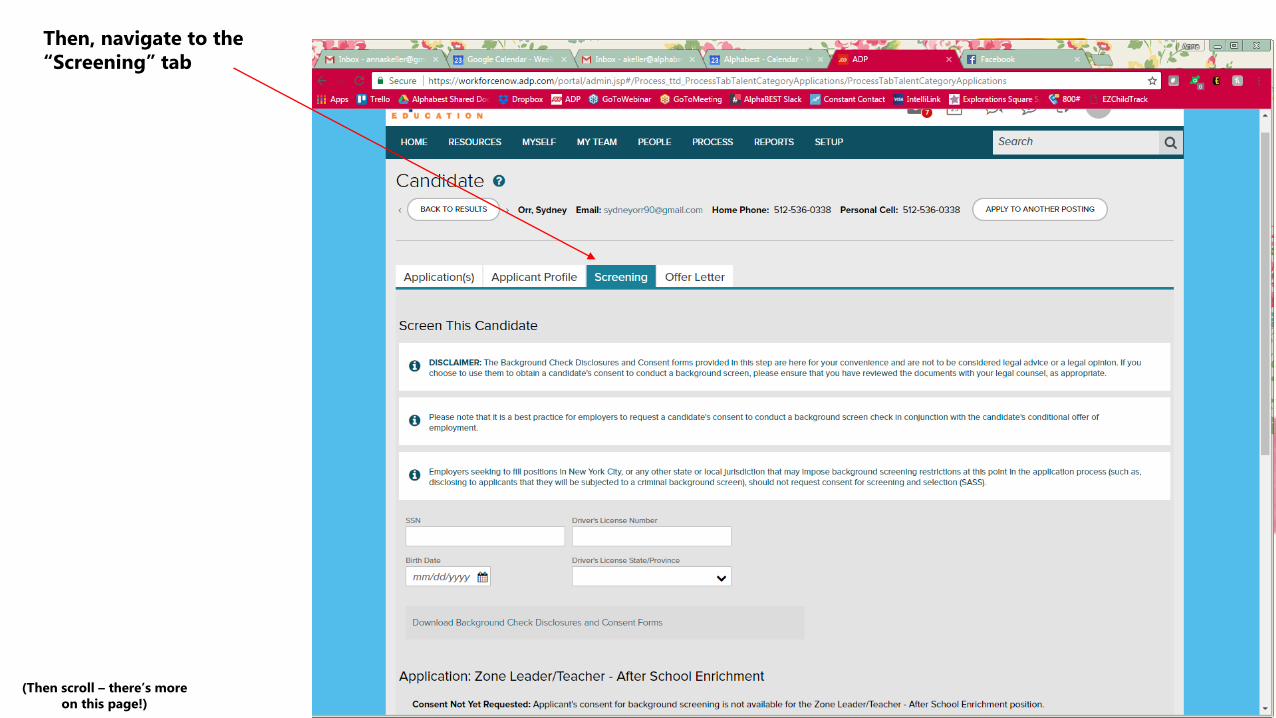
Then, navigate to the “Screening” tab
(Then scroll – there’s more on this page!)
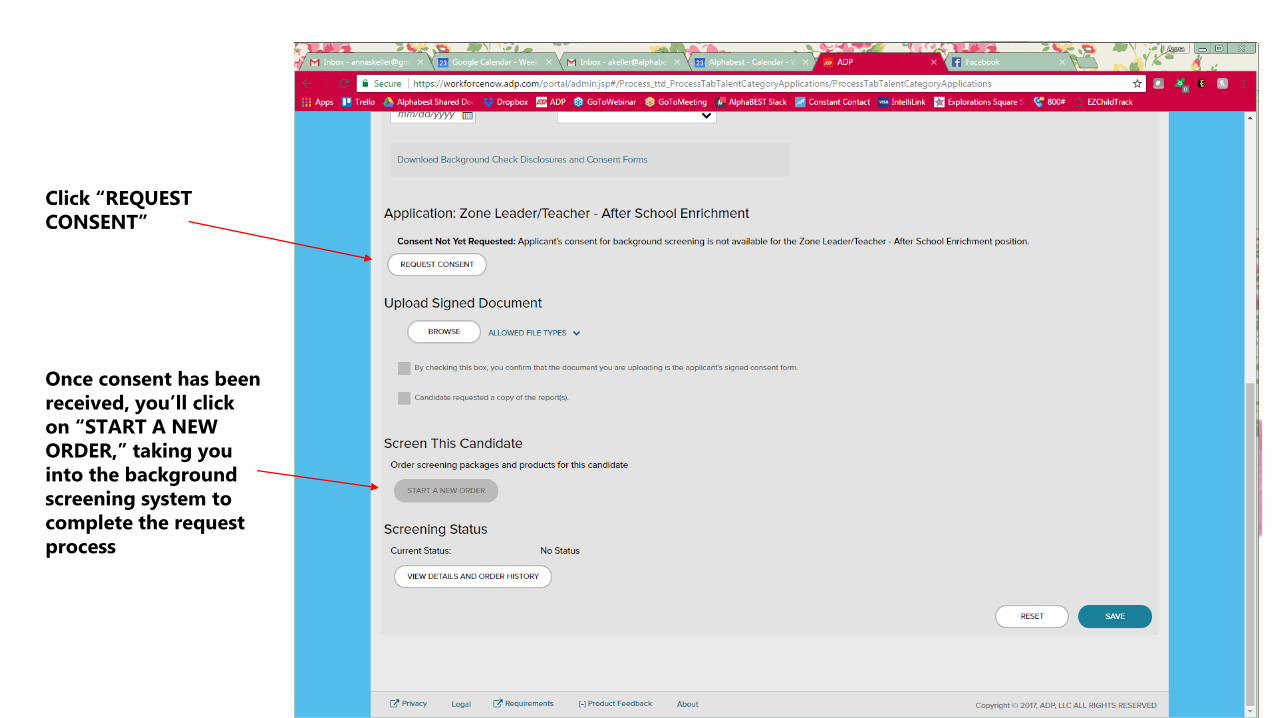
Click “REQUEST CONSENT”
Once consent has been received, you’ll click on “START A NEW ORDER,” taking you into the background screening system to complete the request process

SECTION FOUR: ISSUING A CONTINGENT OFFER LETTER
This section covers how to customize and send a contingent offer letter to a candidate

Click on “PROCESS,”
then “Talent,” then
“Applications”

Check the box labeled “Select All”
Select “All Requisitions” from the drop-down menu

To make your search easier, click on column titles to sort as desired, then click on appropriate candidate
To send the applicant an offer letter, click “CHANGE STATUS”
Here, you’re in the “Application(s)” section

Select “Make Offer” from the “Application Status” drop-down menu
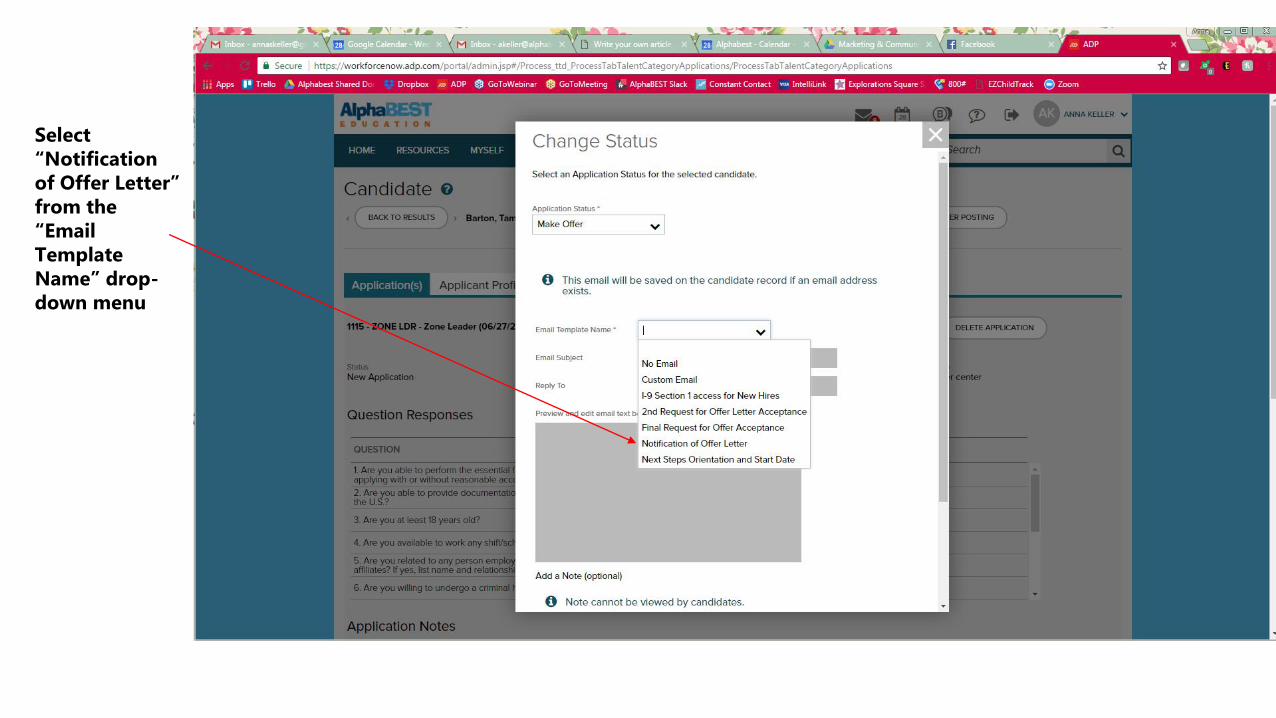
Select “Notification of Offer Letter” from the “Email Template Name” drop-down menu
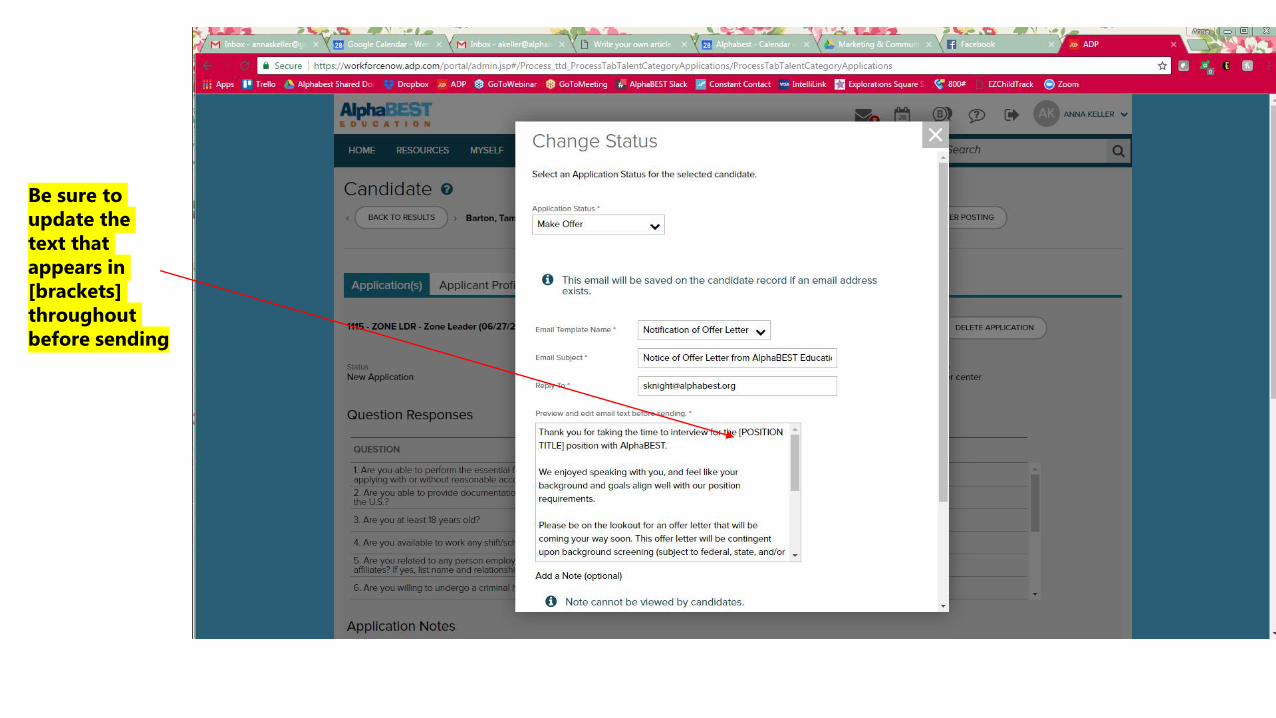
Be sure to update the text that appears in [brackets] throughout before sending
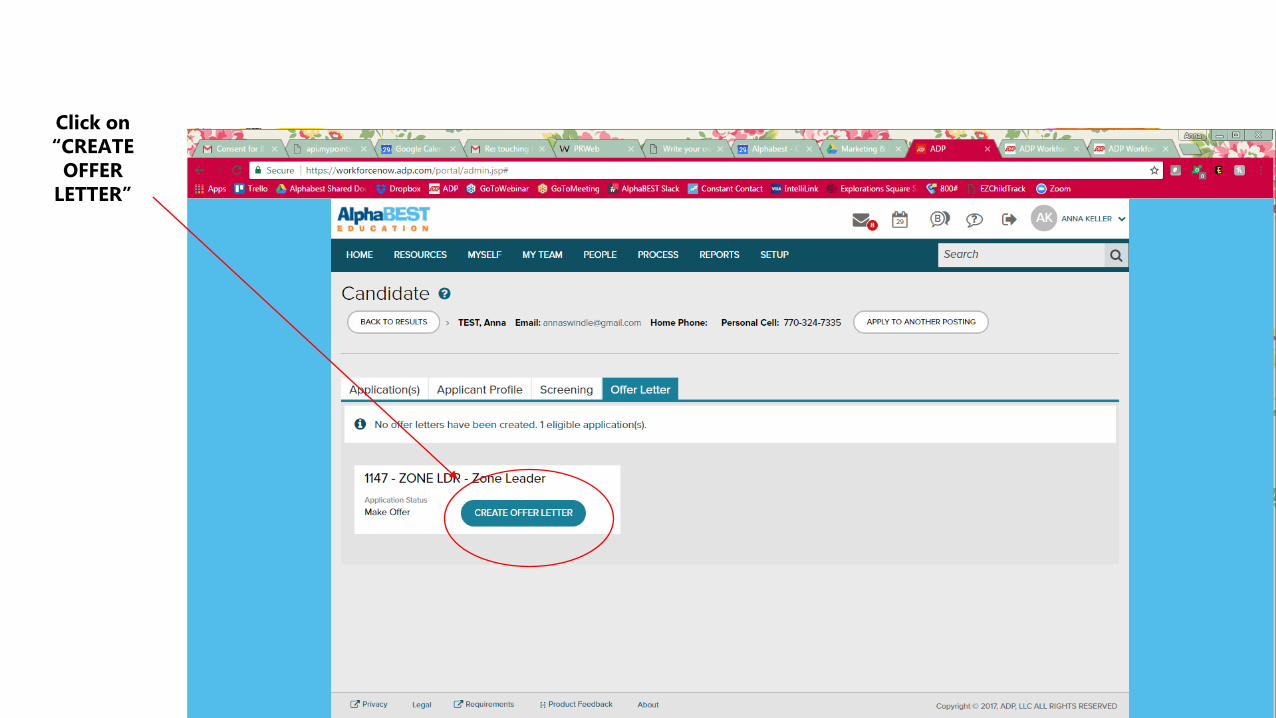
Click on “CREATE
OFFER LETTER”
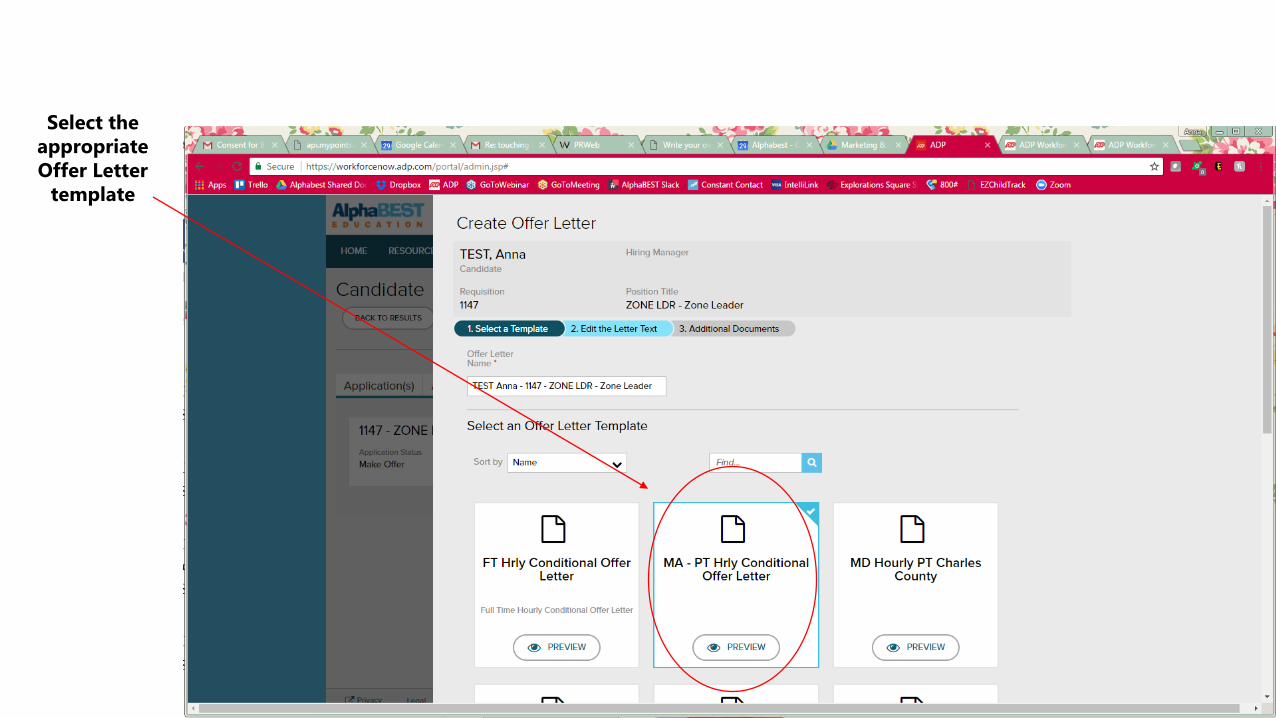
Select the appropriate Offer Letter
template
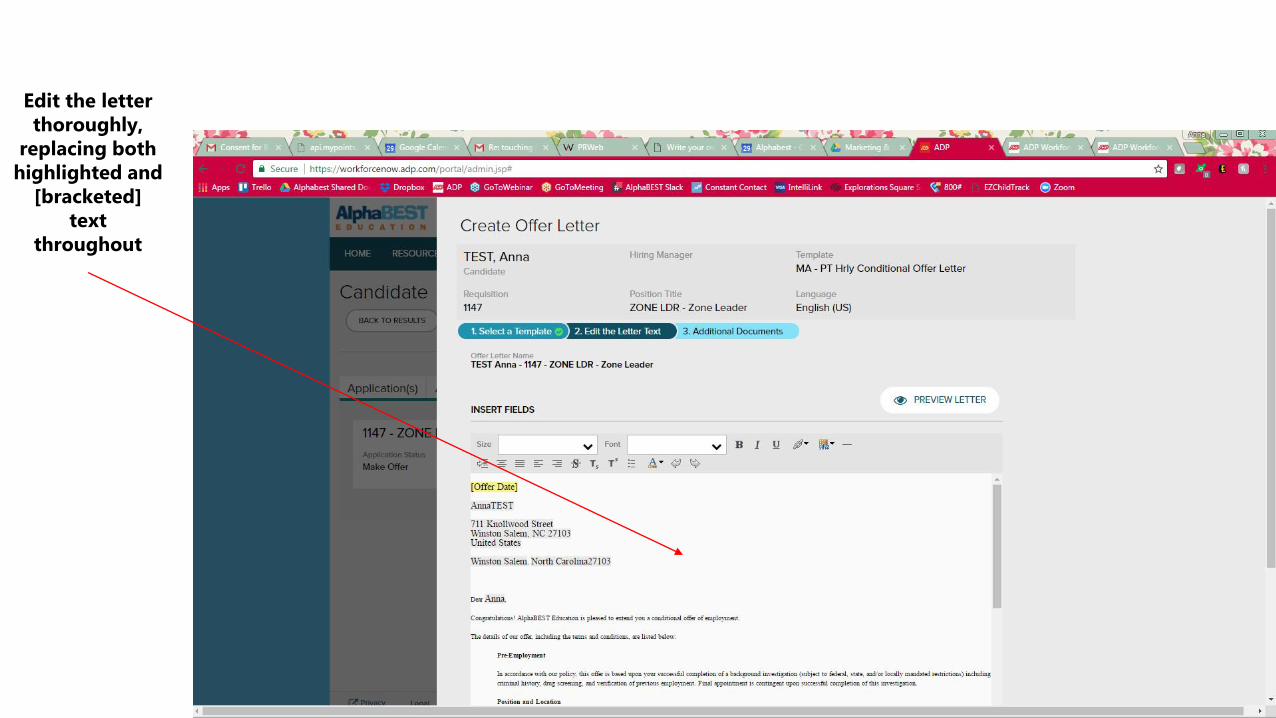
Edit the letter thoroughly,
replacing both highlighted and
[bracketed] text
throughout
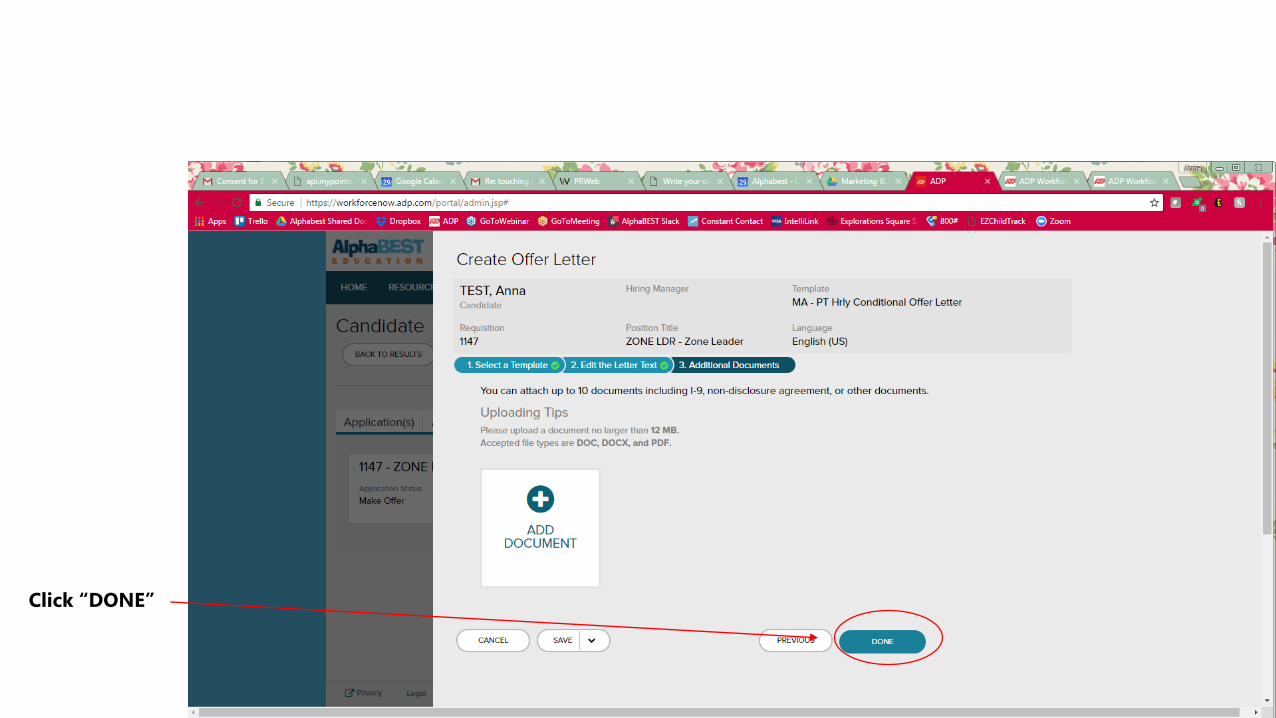
Click “DONE”

Click “YES, SEND FOR
APPROVAL”
61
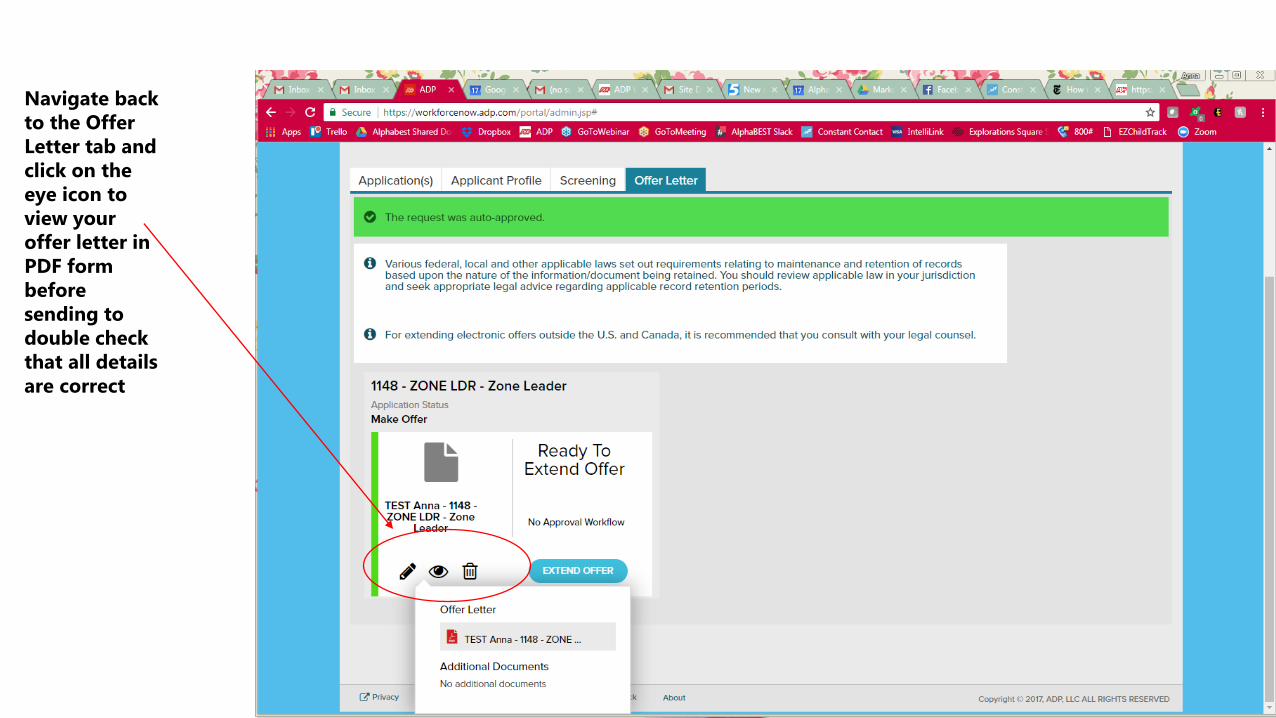
Navigate back to the Offer Letter tab and click on the eye icon to view your offer letter in PDF form before sending to double check that all details are correct
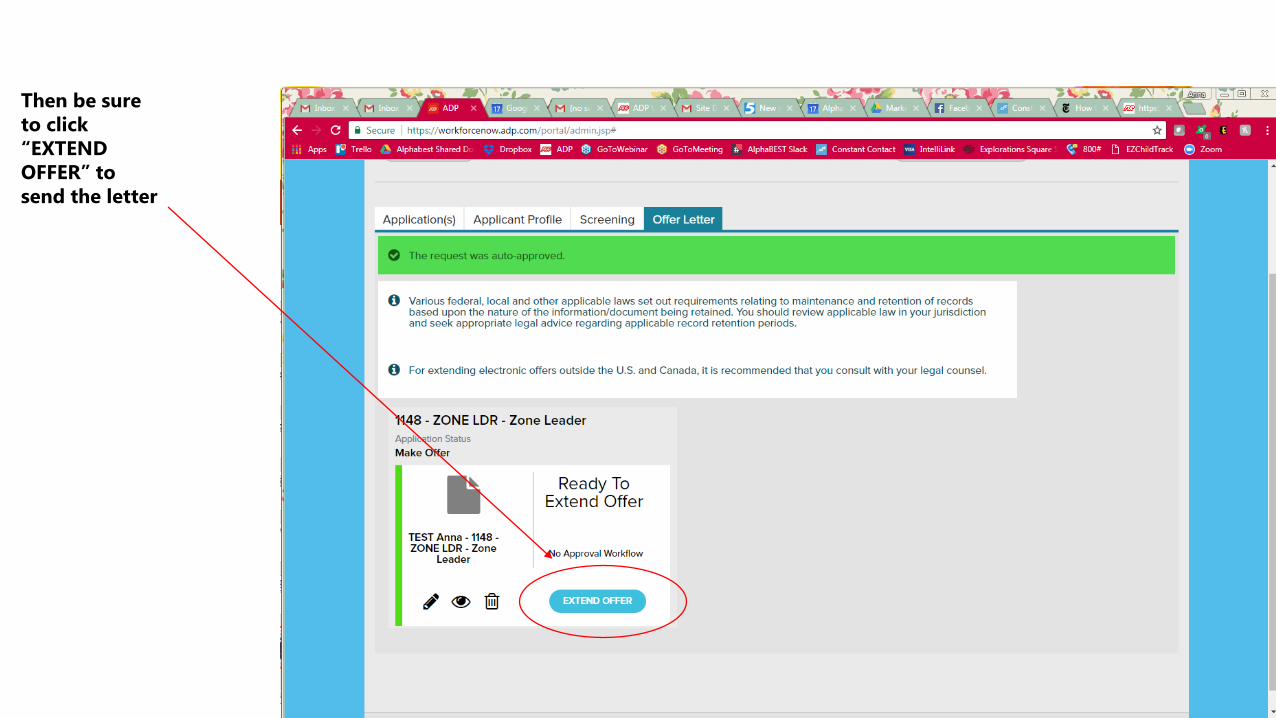
62
Then be sure to click “EXTEND OFFER” to send the letter
SECTION FIVE: ISSUING NEXT STEPS EMAIL
This section covers how to send a Next Steps letter after a candidate has successfully passed the background check stage

Click on “PROCESS,”
then “Talent,” then
“Applications”

Check the box labeled “Select All”
Select “All Requisitions” from the drop-down menu

To make your search easier, click on column titles to sort as desired, then click on appropriate candidate
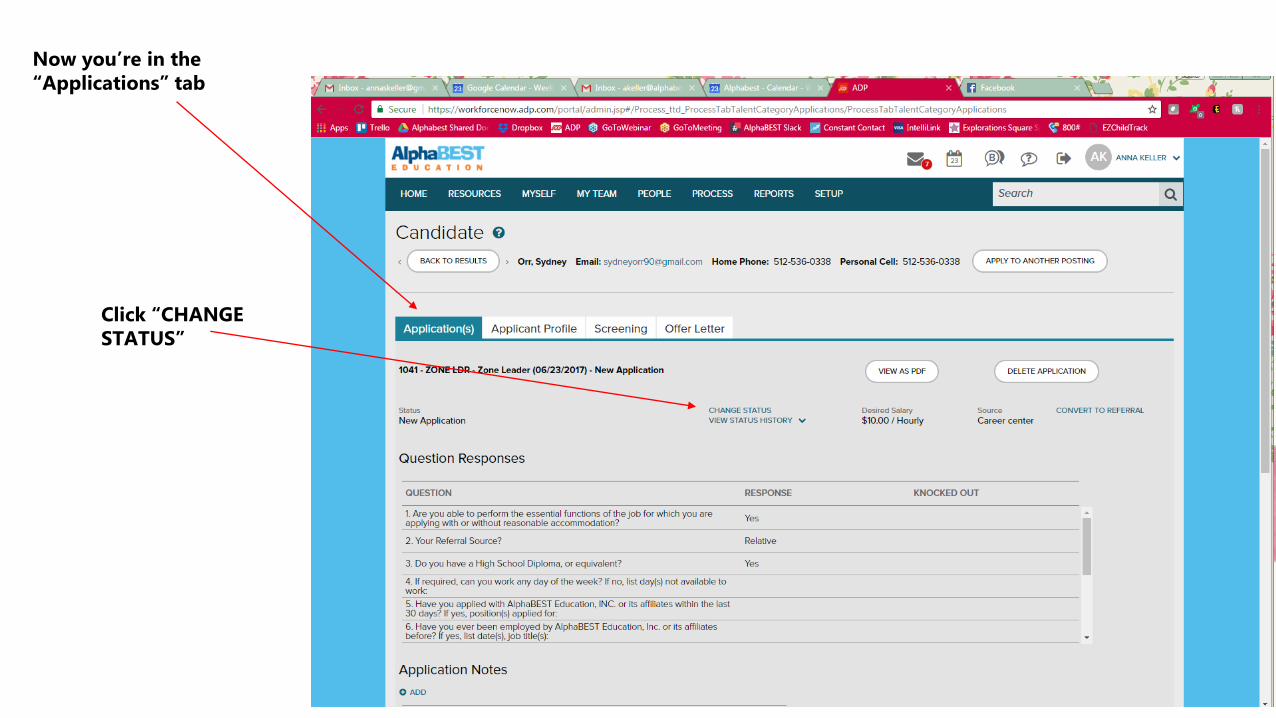
Click “CHANGE STATUS”
Now you’re in the “Applications” tab
68
Select “Make Offer” from the “Application Status” drop-down menu
Select the pre-populated email titled “Next Steps Orientation and Start Date”
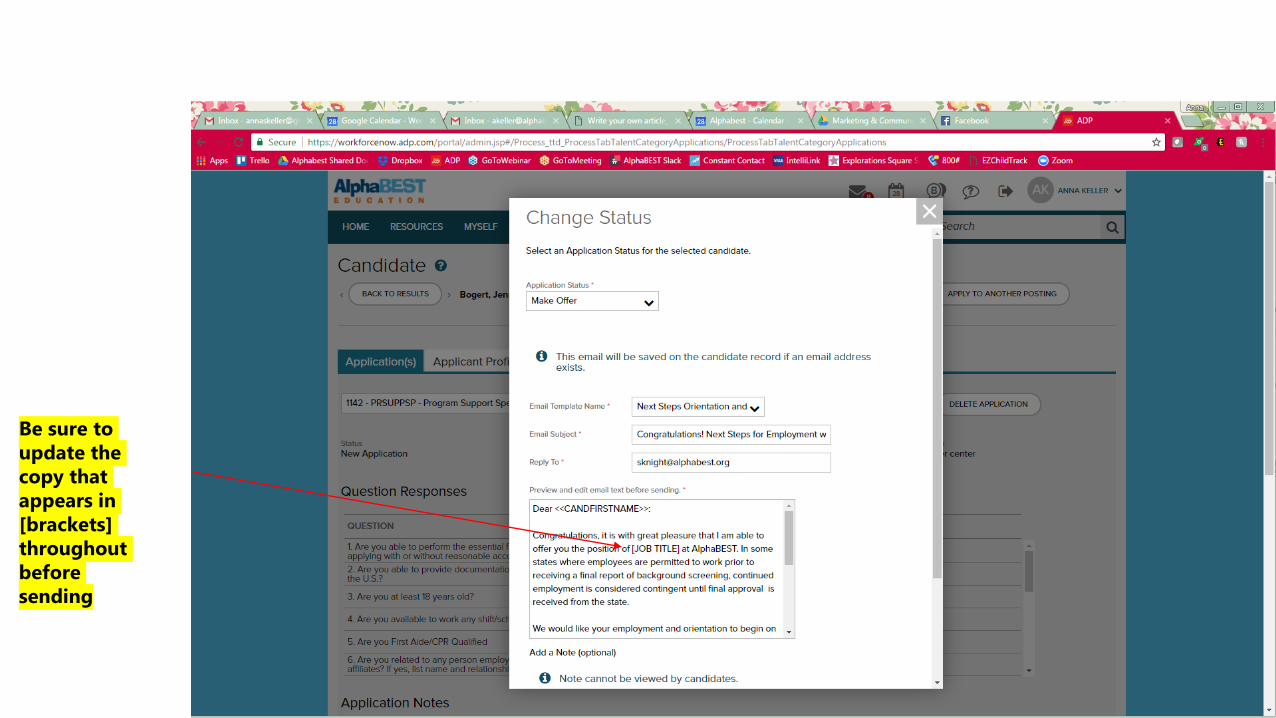
Be sure to update the copy that appears in [brackets] throughout before sending
SECTION SEVEN: I-9, EMPLOYEE INFO SHEET, & BANKING/TAX INFO
This section covers how to get these final documents input into the system for a new hire

Locating forms to send to the new hire
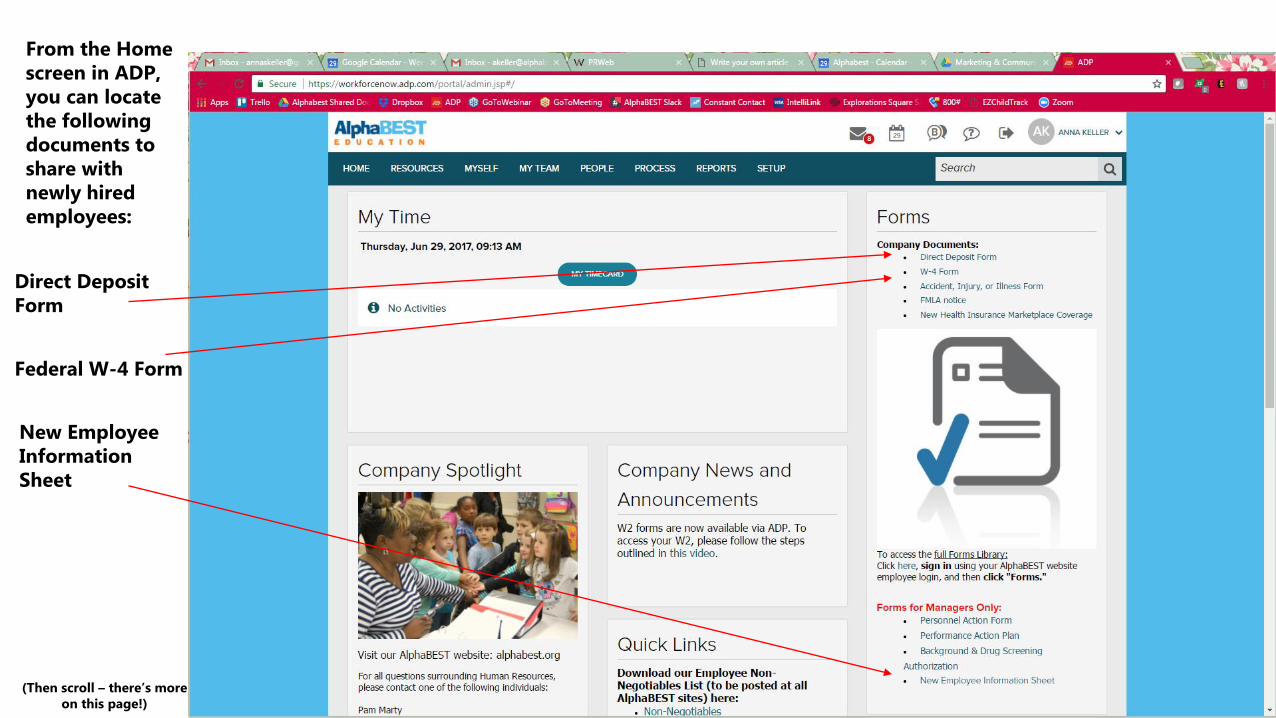
From the Home screen in ADP, you can locate the following documents to share with newly hired employees:
Direct Deposit Form
(Then scroll – there’s more on this page!)
Federal W-4 Form
New Employee Information Sheet

The link to send to employees to complete the I-9 form can be found farther down on the Home screen
Please also be sure to have the new hire complete the state-level banking form, which you should have on hand (it is not on ADP since each state has a separate version)
If you run into issues with the I-9 form, you can call the ADP eI-9 help number: 866.616.0292
Inputting completed forms into ADP
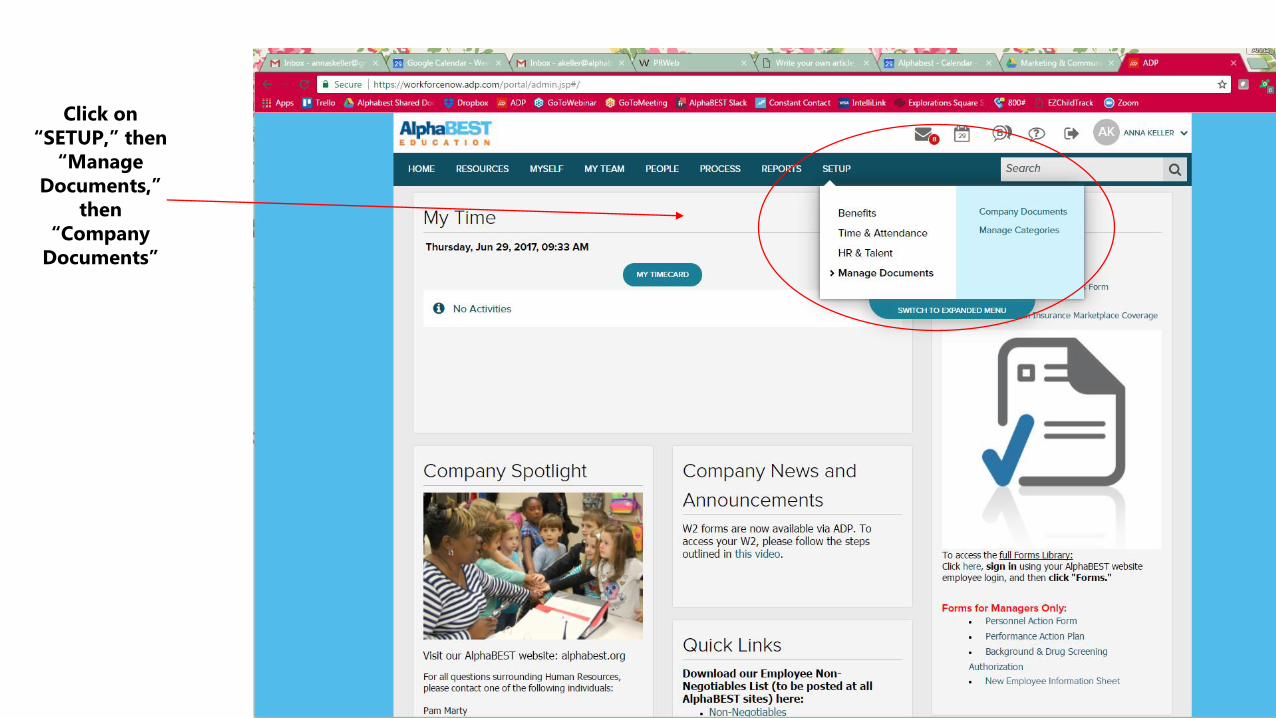
Click on “SETUP,” then
“Manage Documents,”
then “Company
Documents”

Click on “UPLOAD”
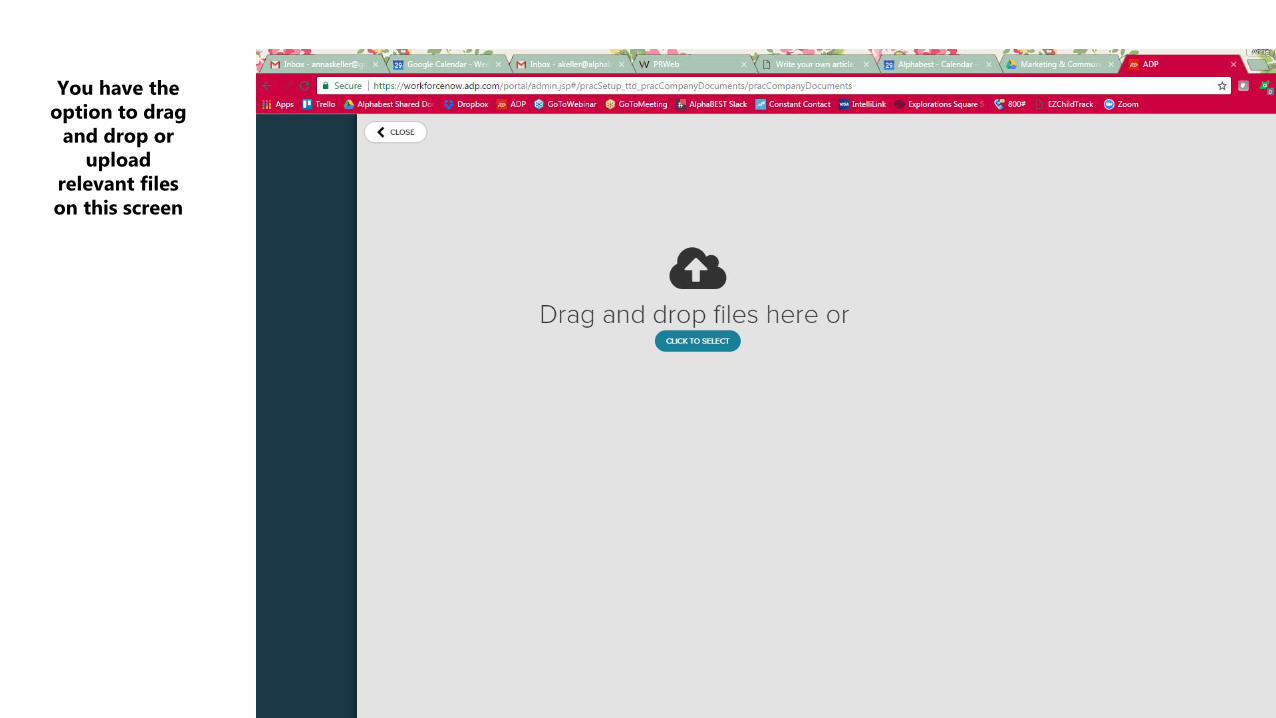
You have the option to drag
and drop or upload
relevant files on this screen
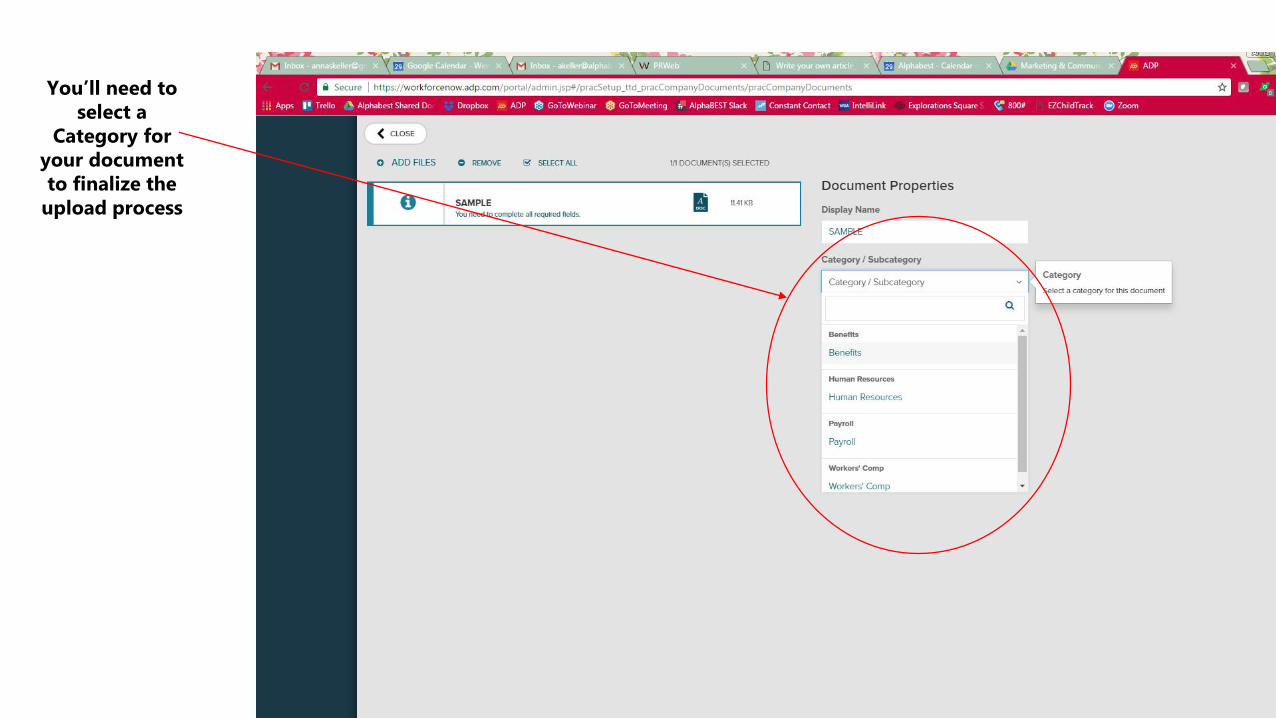
You’ll need to select a
Category for your document to finalize the
upload process
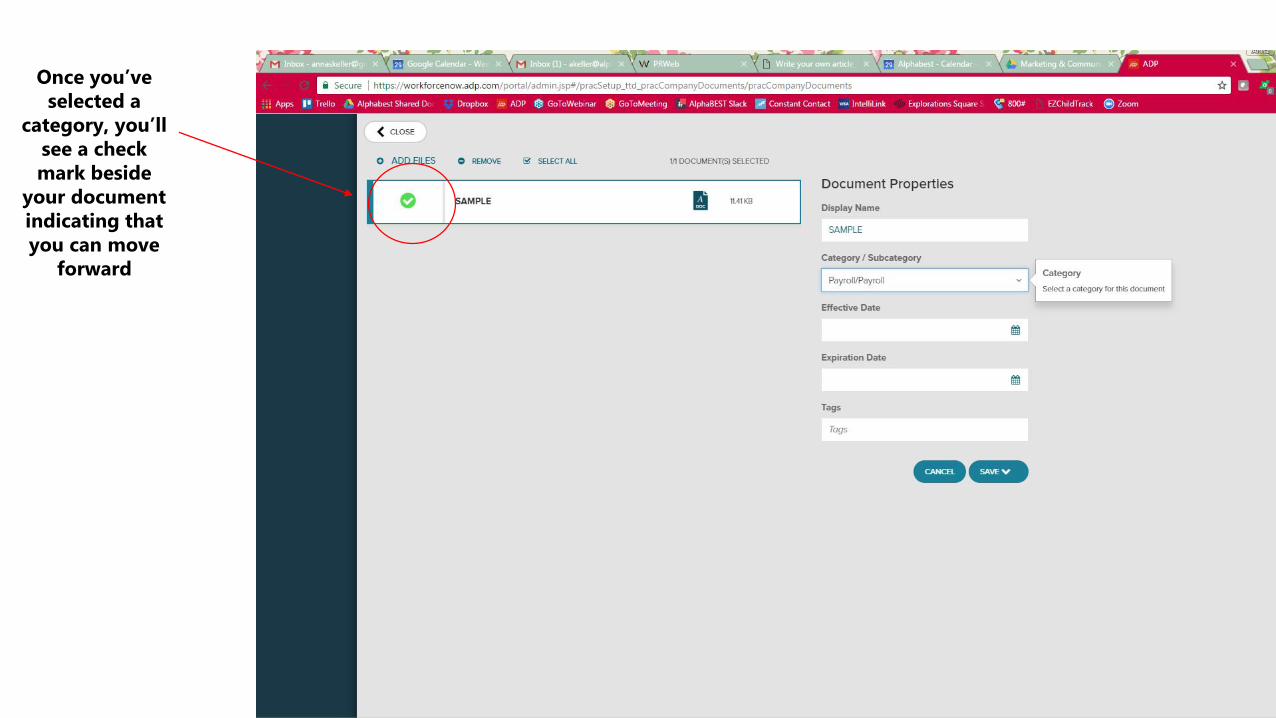
Once you’ve selected a
category, you’ll see a check mark beside
your document indicating that you can move
forward
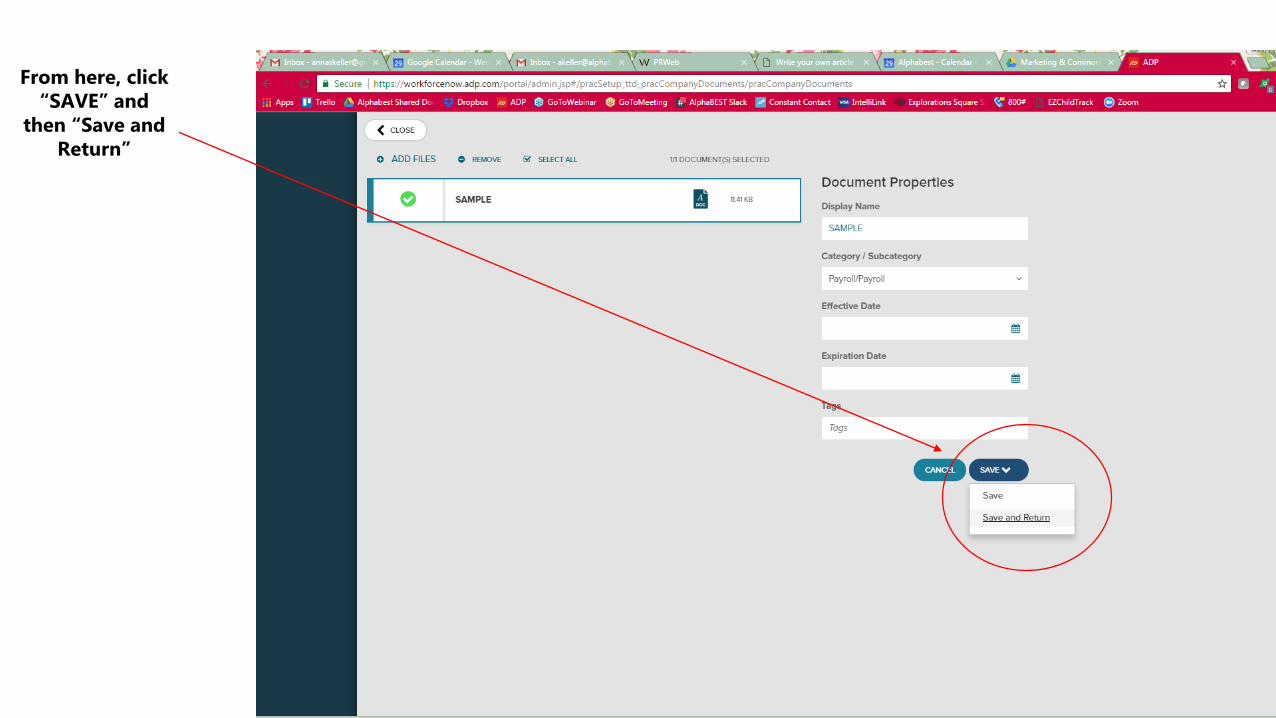
From here, click “SAVE” and
then “Save and Return”
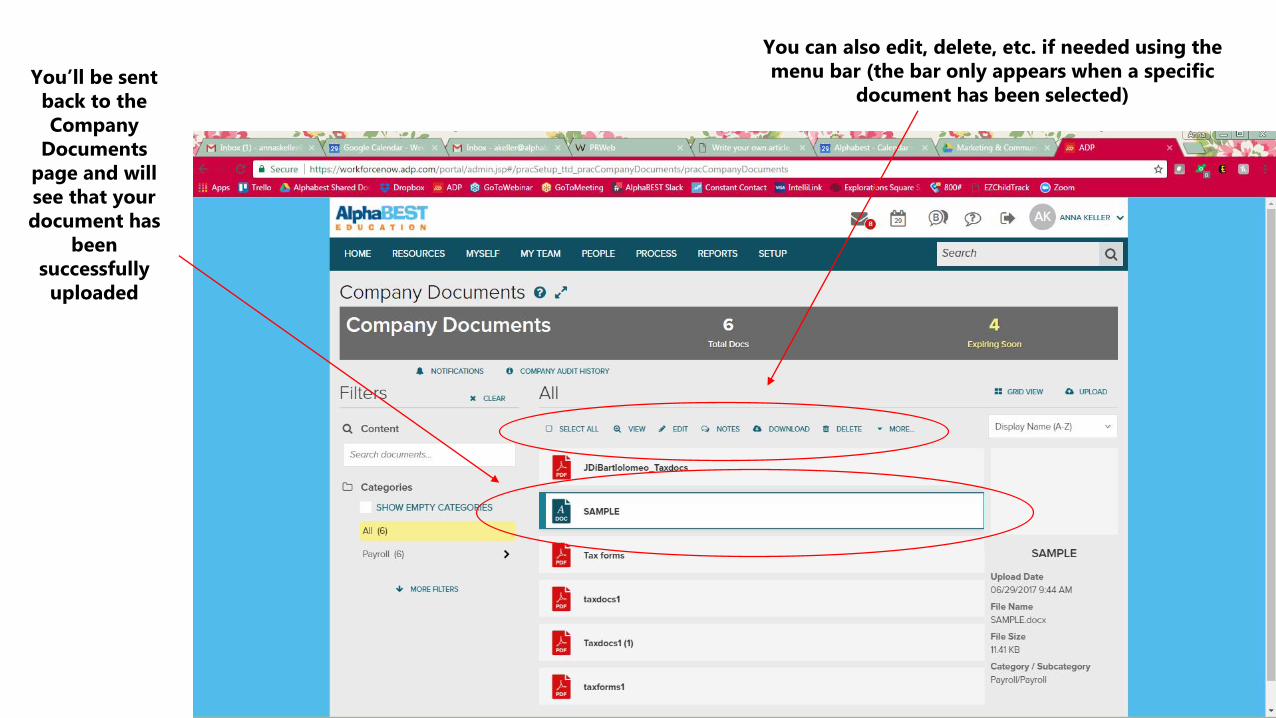
You’ll be sent back to the Company
Documents page and will see that your document has
been successfully uploaded
You can also edit, delete, etc. if needed using the menu bar (the bar only appears when a specific
document has been selected)


![Recruiters Guide[1]](https://img.pdfslide.us/doc/110x75/55143eab497959111e8b4633/recruiters-guide1.jpg)