Embed Size (px)
Citation preview
3D logo Tutorial | Good-Walls.com http://www.good-walls.com/2008/06/20/3d-logo-tutorial/
1 of 36 07.07.2008 23:00
HomeSubmit Your Wallpaper/TutorialTutorialsFAQAbout Us
Submit
Send us your Wallpaper and or Tutorial
Wait
We will give a quality test to all Wallpapers
Approved
Now your Wallpaper is Online and available to Millions
GoodWallsAllExclusiveLandscapesMinimalPhotographyPhotoManipUrbanAbstractDigital ArtVector
3D logo Tutorial | Good-Walls.com http://www.good-walls.com/2008/06/20/3d-logo-tutorial/
2 of 36 07.07.2008 23:00
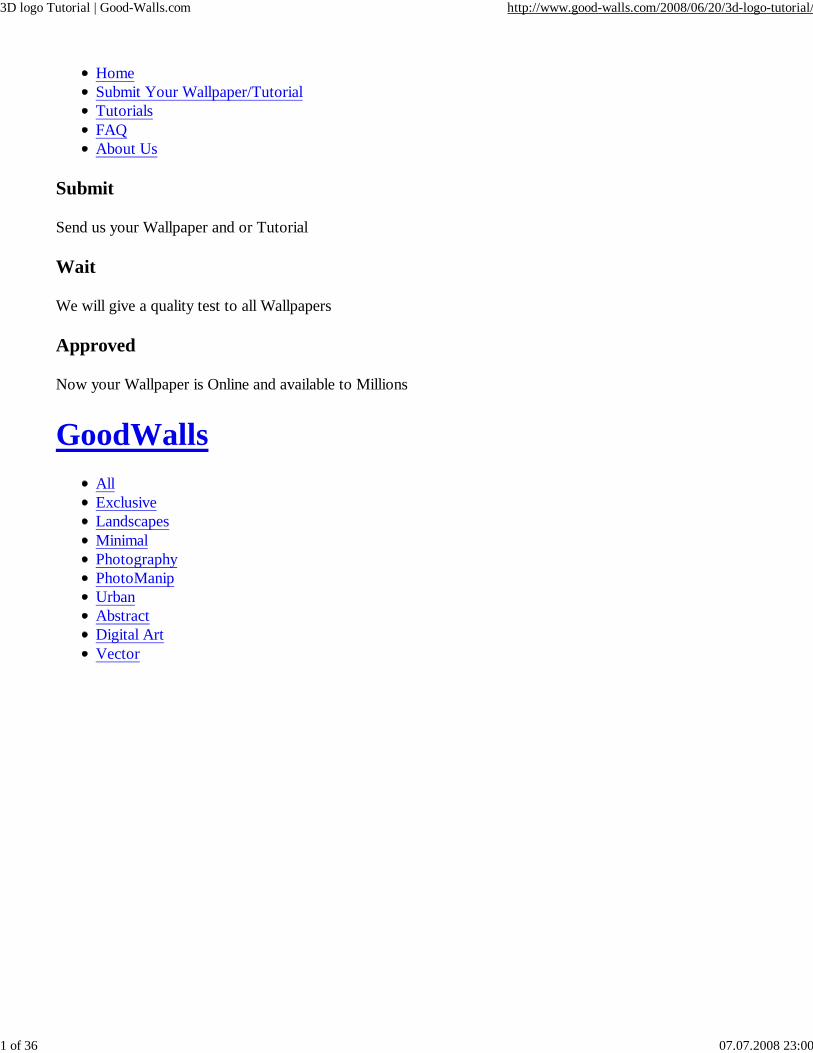
Many people asked me how to do this, heres your awnser, with only illustrator and photoshop you can do almost anything. In this Tutorial you will start with the making of a logo shape, going to rough 3D, and finishing it in Photoshop. This is so easy that even the starting beginner can do it.
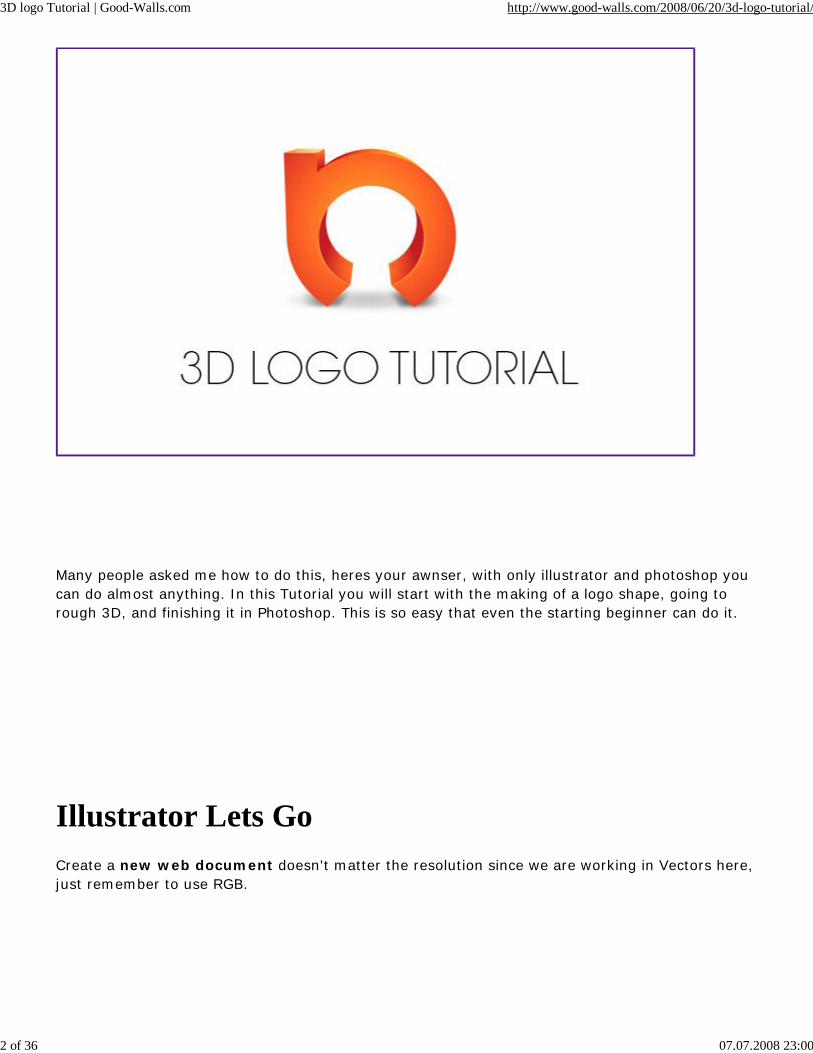
Illustrator Lets GoCreate a new web document doesn't matter the resolution since we are working in Vectors here, just remember to use RGB.
3D logo Tutorial | Good-Walls.com http://www.good-walls.com/2008/06/20/3d-logo-tutorial/
3 of 36 07.07.2008 23:00
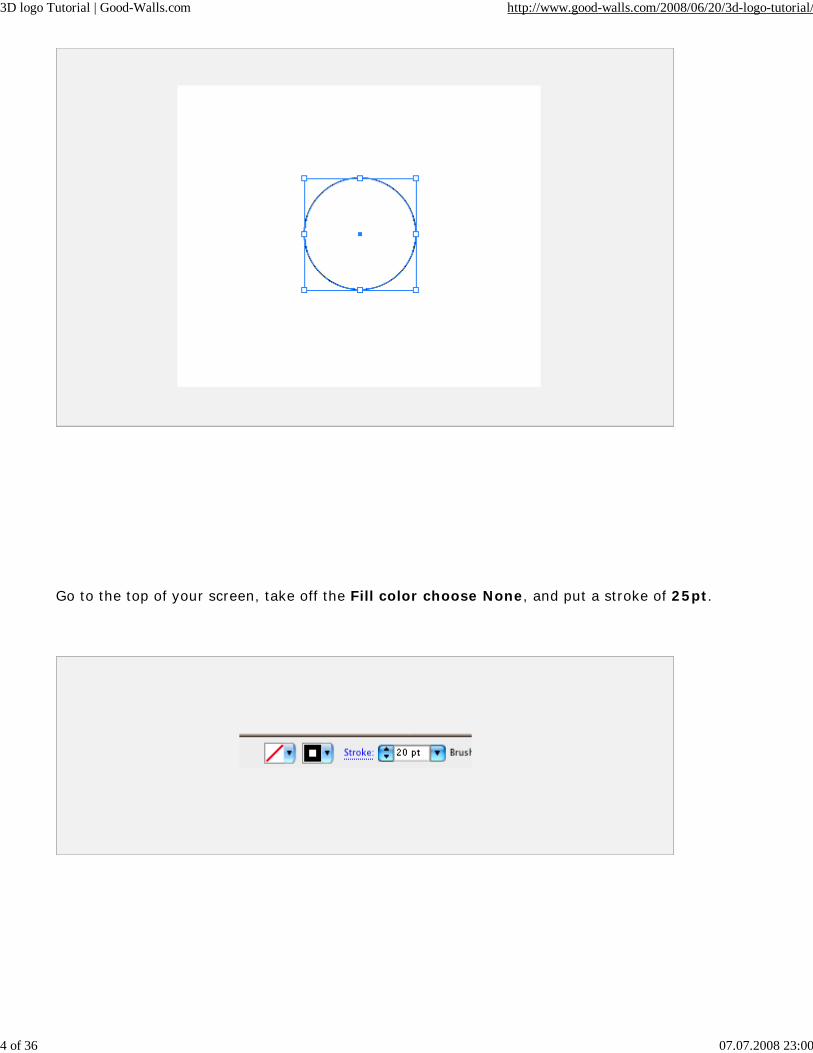
Now with your document created lets go to the tool bar and pickup the Elipse tool or hit (L) on your keyboard, remember to hold down shift while doing this circle so it stays perfect.
3D logo Tutorial | Good-Walls.com http://www.good-walls.com/2008/06/20/3d-logo-tutorial/
4 of 36 07.07.2008 23:00
Go to the top of your screen, take off the Fill color choose None, and put a stroke of 25pt.
3D logo Tutorial | Good-Walls.com http://www.good-walls.com/2008/06/20/3d-logo-tutorial/
5 of 36 07.07.2008 23:00
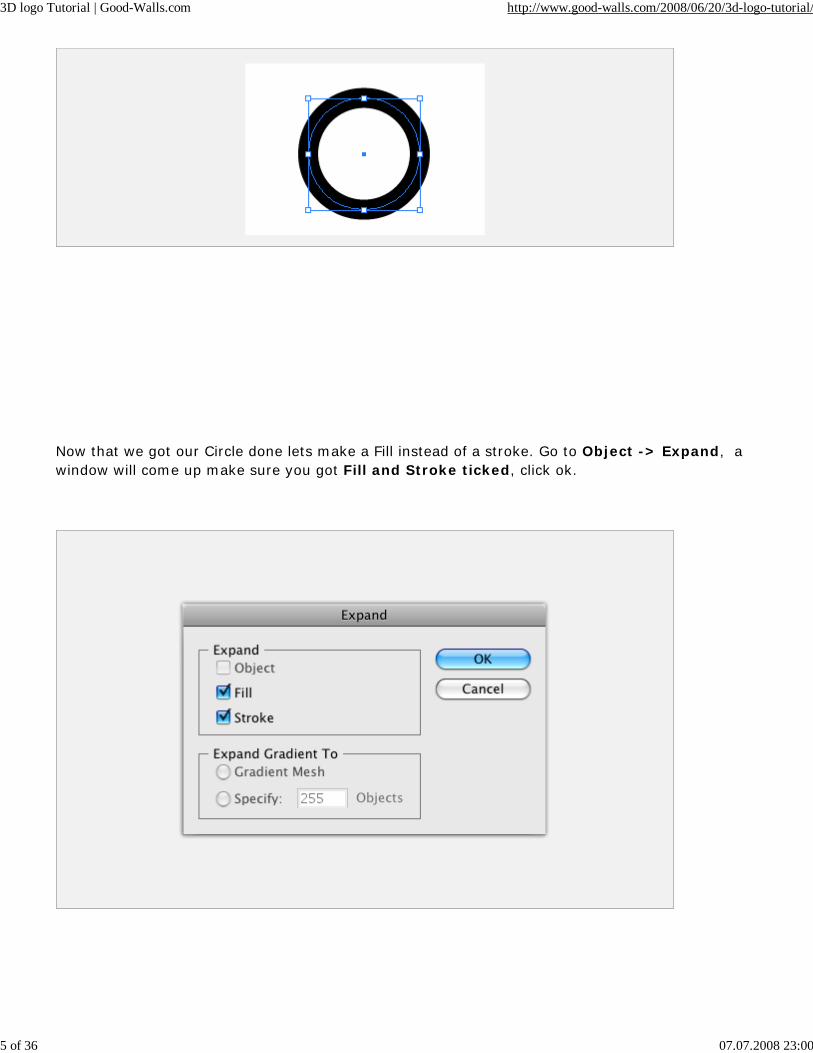
Now that we got our Circle done lets make a Fill instead of a stroke. Go to Object -> Expand, awindow will come up make sure you got Fill and Stroke ticked, click ok.
3D logo Tutorial | Good-Walls.com http://www.good-walls.com/2008/06/20/3d-logo-tutorial/
6 of 36 07.07.2008 23:00
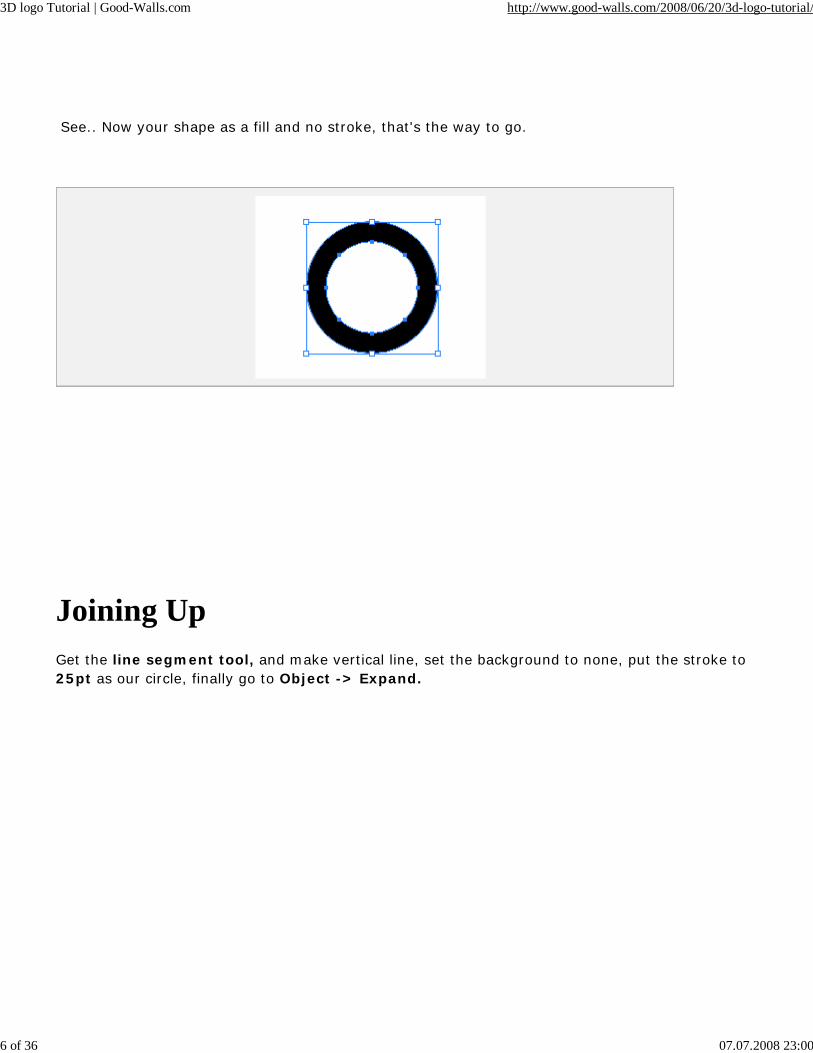
See.. Now your shape as a fill and no stroke, that's the way to go.
Joining UpGet the line segment tool, and make vertical line, set the background to none, put the stroke to 25pt as our circle, finally go to Object -> Expand.
3D logo Tutorial | Good-Walls.com http://www.good-walls.com/2008/06/20/3d-logo-tutorial/
7 of 36 07.07.2008 23:00
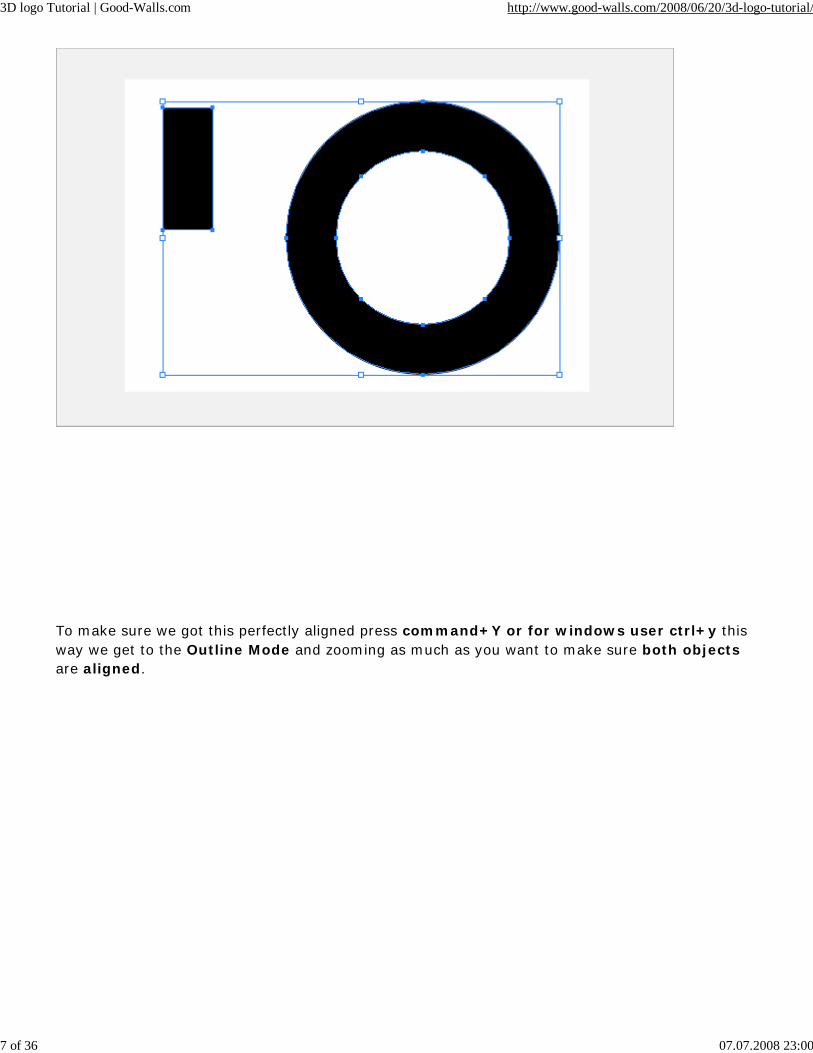
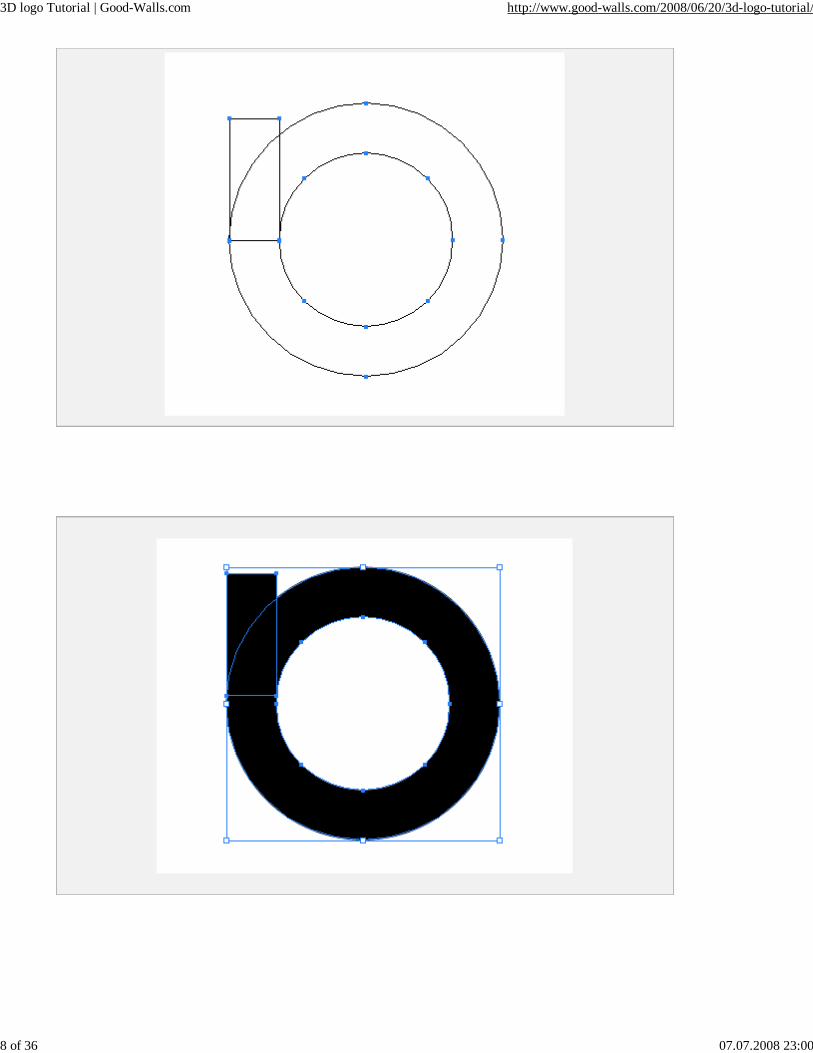
To make sure we got this perfectly aligned press command+Y or for windows user ctrl+y this way we get to the Outline Mode and zooming as much as you want to make sure both objectsare aligned.
3D logo Tutorial | Good-Walls.com http://www.good-walls.com/2008/06/20/3d-logo-tutorial/
8 of 36 07.07.2008 23:00
3D logo Tutorial | Good-Walls.com http://www.good-walls.com/2008/06/20/3d-logo-tutorial/
9 of 36 07.07.2008 23:00
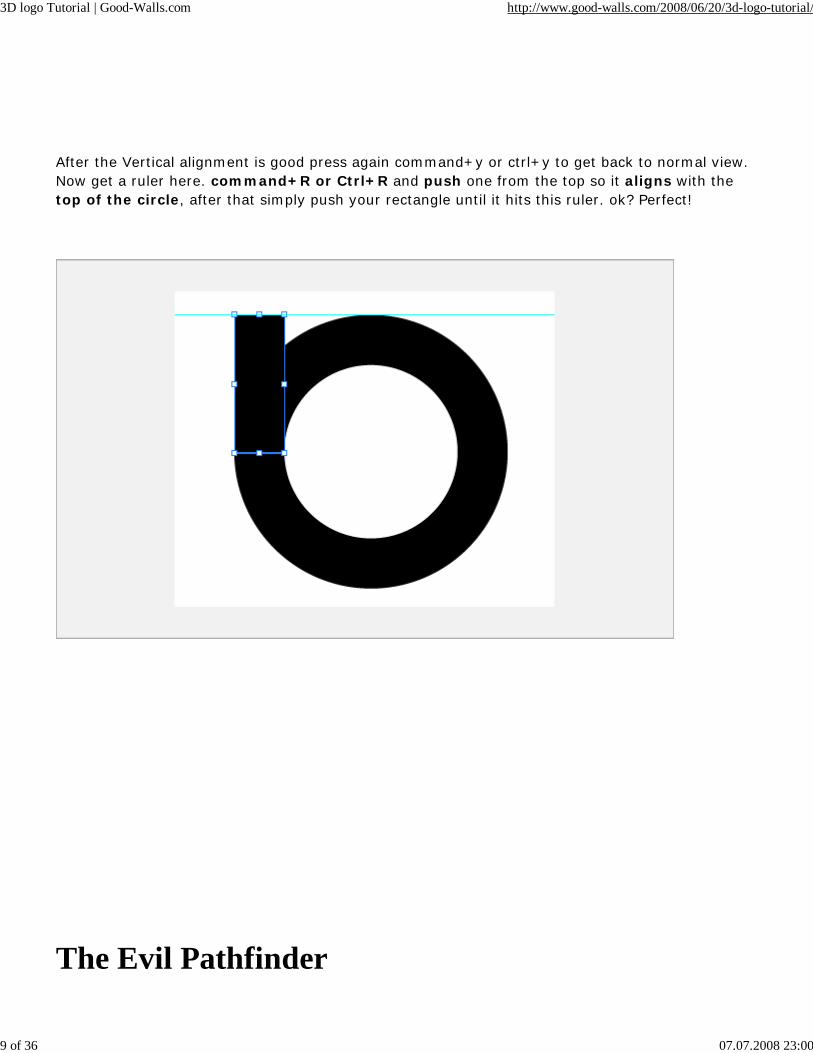
After the Vertical alignment is good press again command+y or ctrl+y to get back to normal view. Now get a ruler here. command+R or Ctrl+R and push one from the top so it aligns with the top of the circle, after that simply push your rectangle until it hits this ruler. ok? Perfect!
The Evil Pathfinder
3D logo Tutorial | Good-Walls.com http://www.good-walls.com/2008/06/20/3d-logo-tutorial/
10 of 36 07.07.2008 23:00
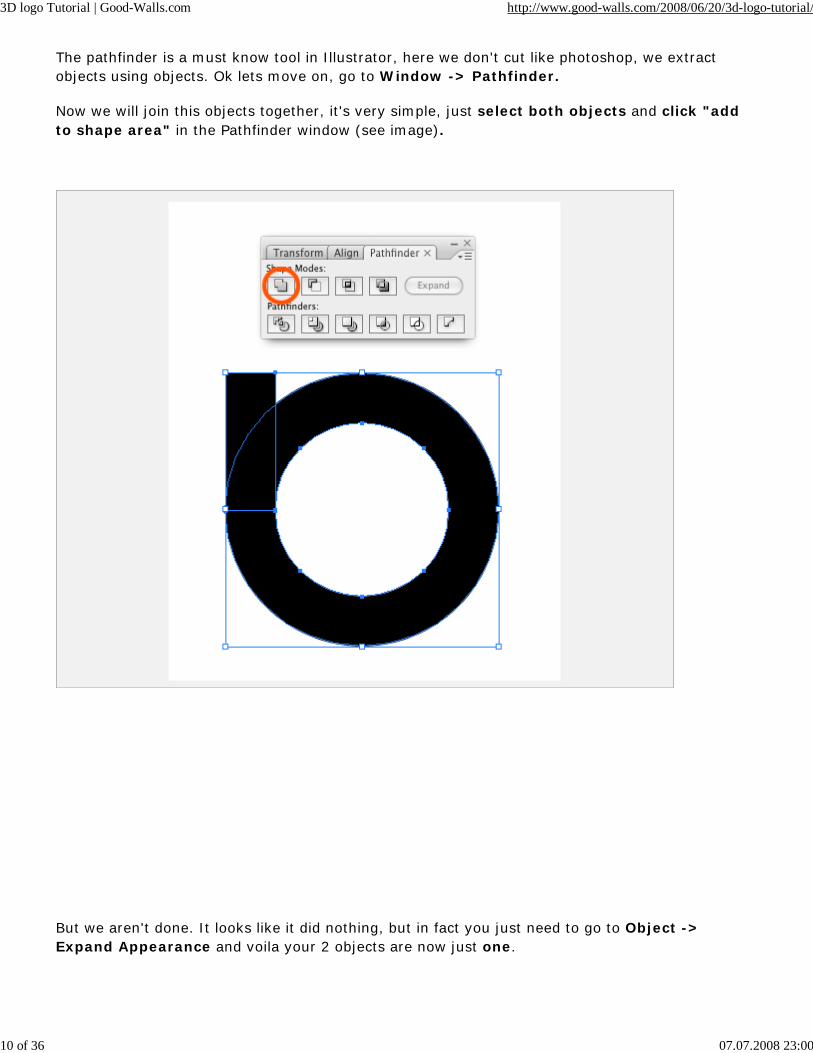
The pathfinder is a must know tool in Illustrator, here we don't cut like photoshop, we extract objects using objects. Ok lets move on, go to Window -> Pathfinder.
Now we will join this objects together, it's very simple, just select both objects and click "add to shape area" in the Pathfinder window (see image).
But we aren't done. It looks like it did nothing, but in fact you just need to go to Object -> Expand Appearance and voila your 2 objects are now just one.
3D logo Tutorial | Good-Walls.com http://www.good-walls.com/2008/06/20/3d-logo-tutorial/
11 of 36 07.07.2008 23:00
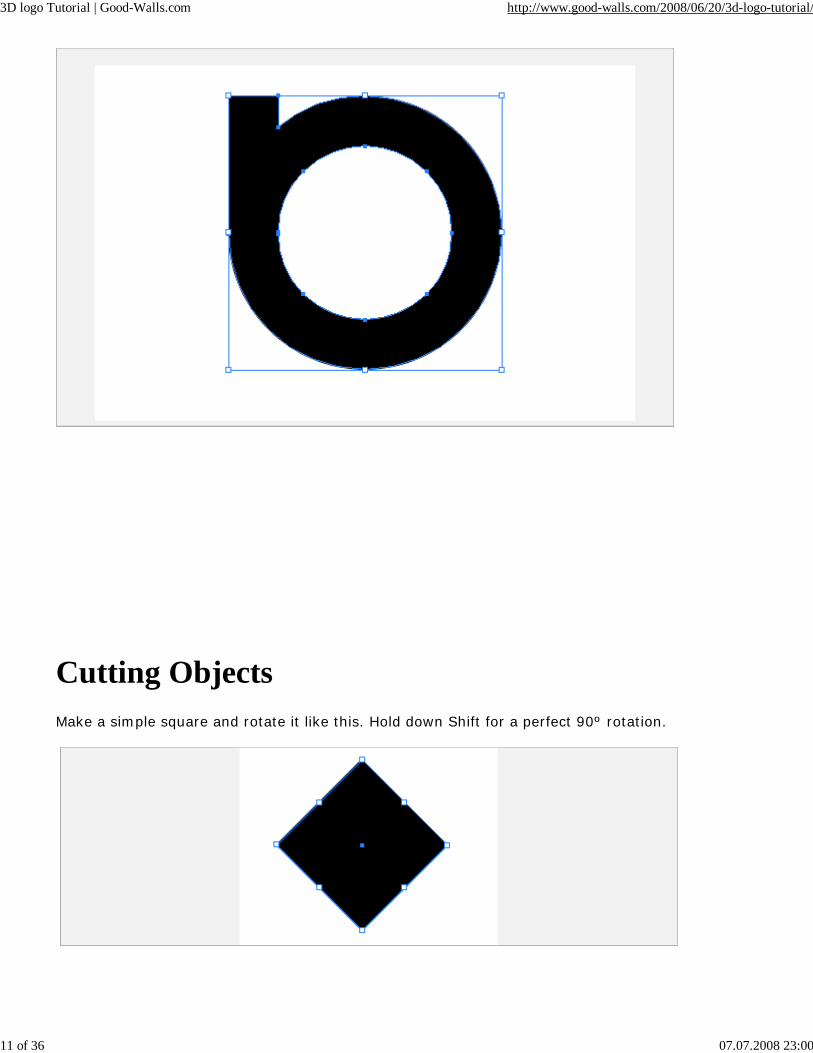
Cutting ObjectsMake a simple square and rotate it like this. Hold down Shift for a perfect 90º rotation.
3D logo Tutorial | Good-Walls.com http://www.good-walls.com/2008/06/20/3d-logo-tutorial/
12 of 36 07.07.2008 23:00
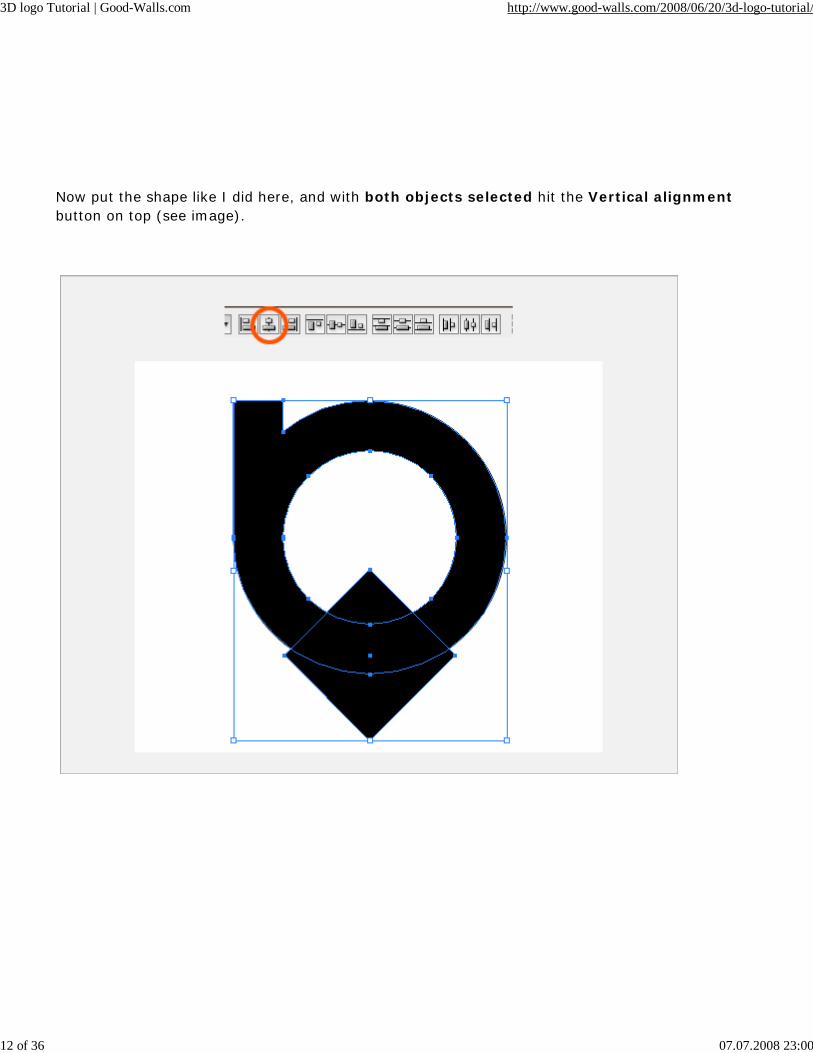
Now put the shape like I did here, and with both objects selected hit the Vertical alignmentbutton on top (see image).
3D logo Tutorial | Good-Walls.com http://www.good-walls.com/2008/06/20/3d-logo-tutorial/
13 of 36 07.07.2008 23:00
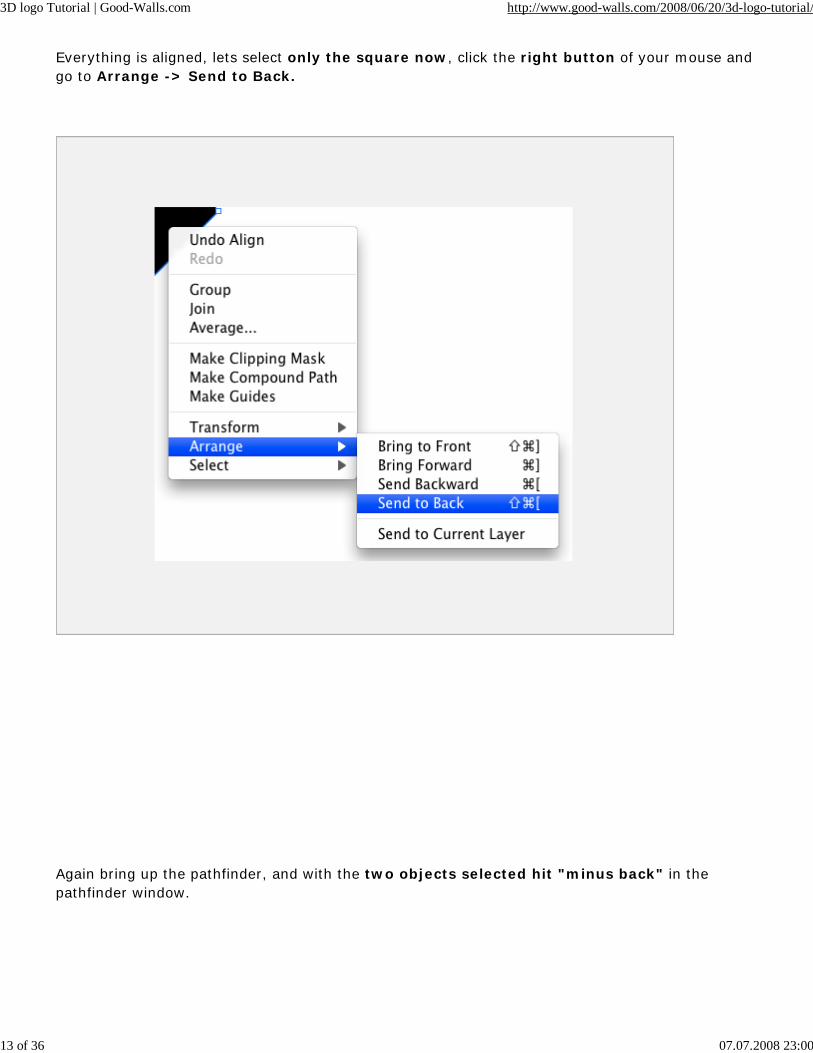
Everything is aligned, lets select only the square now, click the right button of your mouse and go to Arrange -> Send to Back.
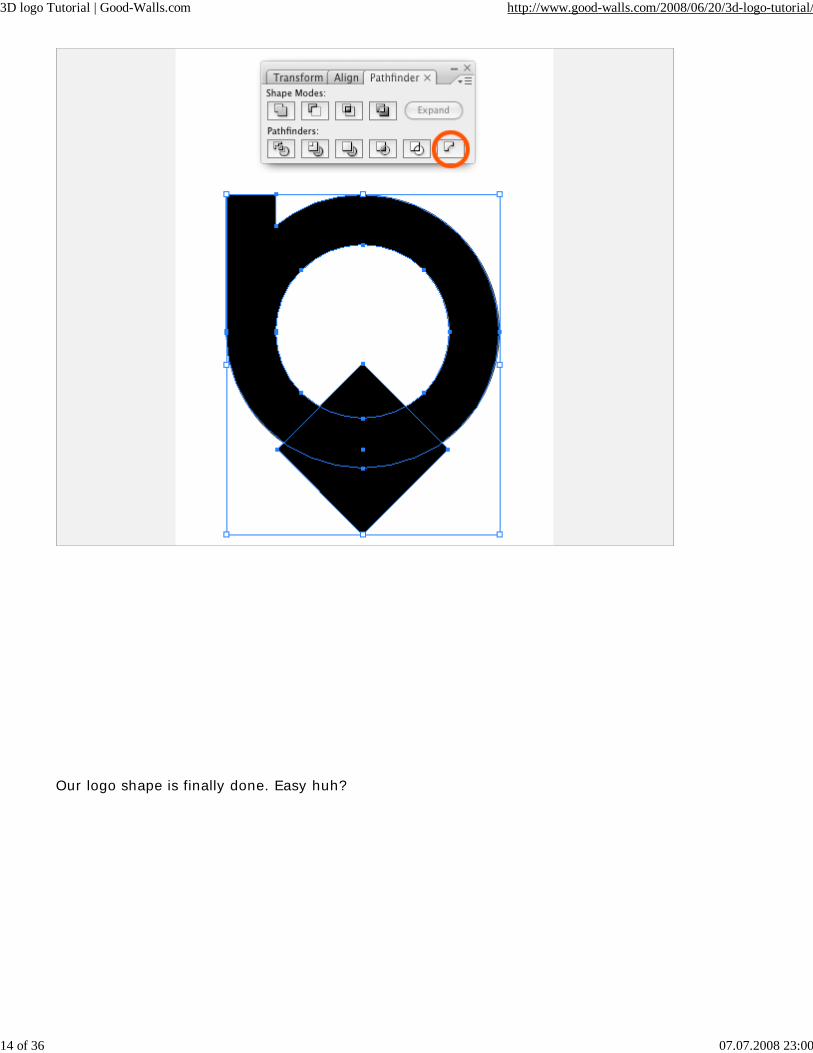
Again bring up the pathfinder, and with the two objects selected hit "minus back" in the pathfinder window.
3D logo Tutorial | Good-Walls.com http://www.good-walls.com/2008/06/20/3d-logo-tutorial/
14 of 36 07.07.2008 23:00
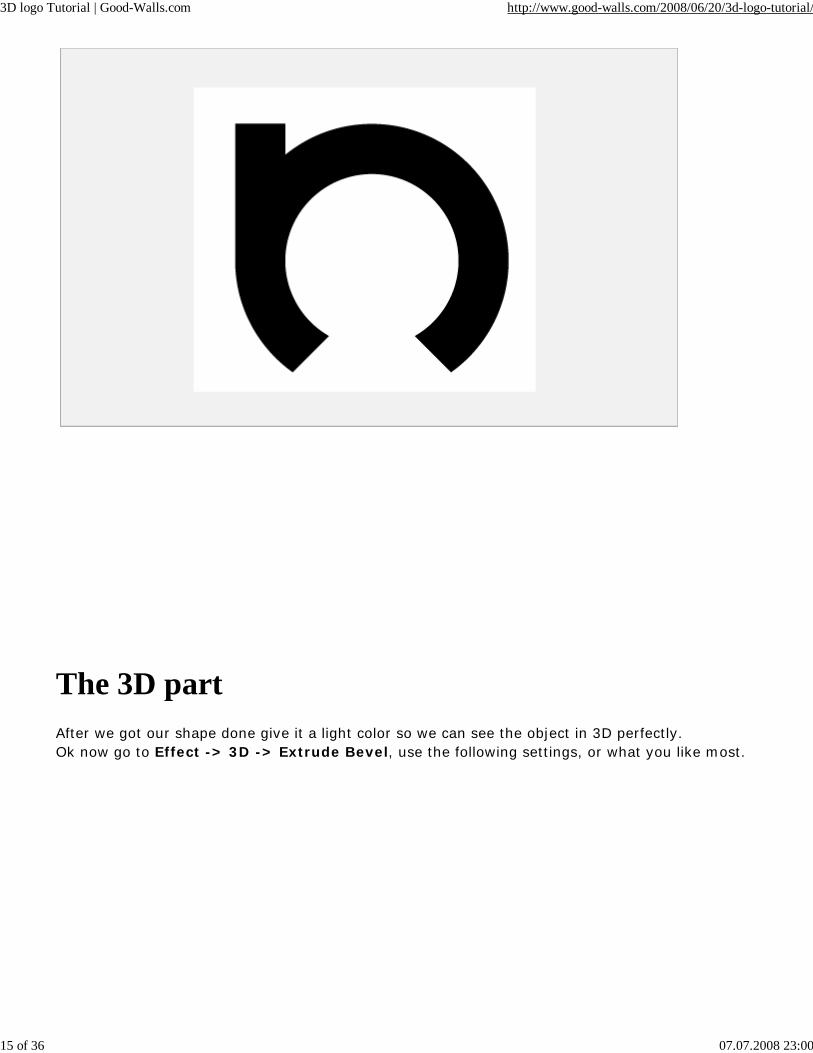
Our logo shape is finally done. Easy huh?
3D logo Tutorial | Good-Walls.com http://www.good-walls.com/2008/06/20/3d-logo-tutorial/
15 of 36 07.07.2008 23:00
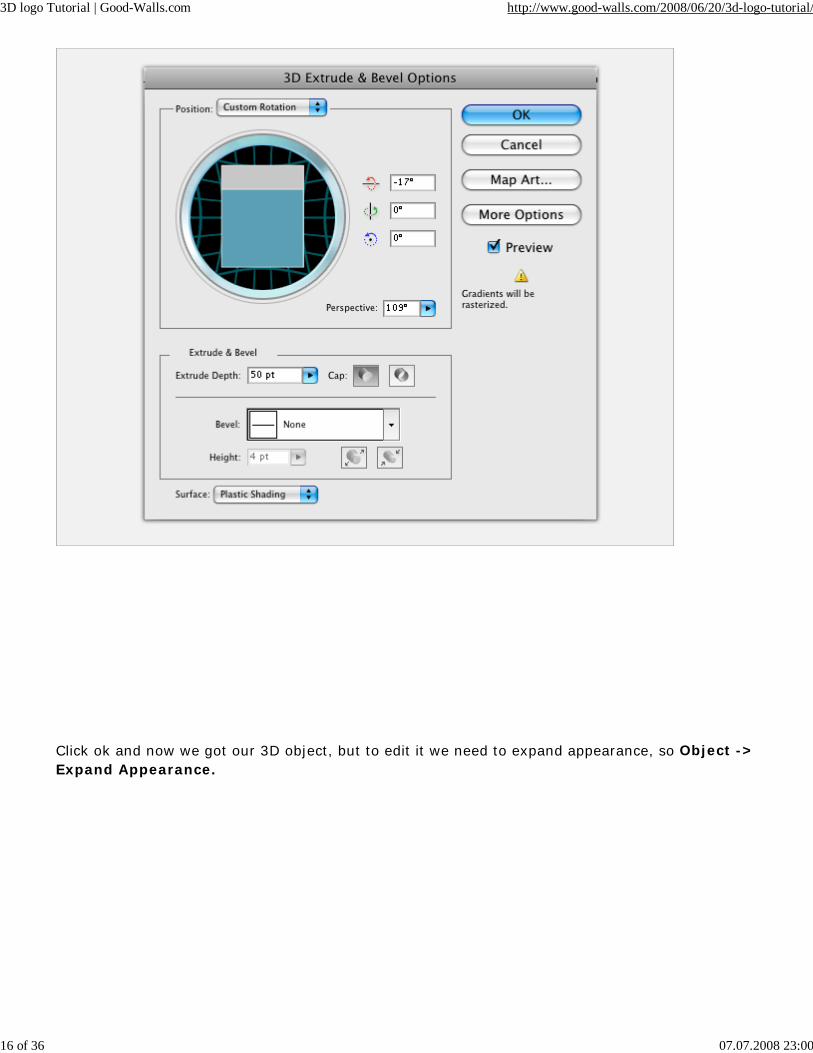
The 3D partAfter we got our shape done give it a light color so we can see the object in 3D perfectly.Ok now go to Effect -> 3D -> Extrude Bevel, use the following settings, or what you like most.
3D logo Tutorial | Good-Walls.com http://www.good-walls.com/2008/06/20/3d-logo-tutorial/
16 of 36 07.07.2008 23:00
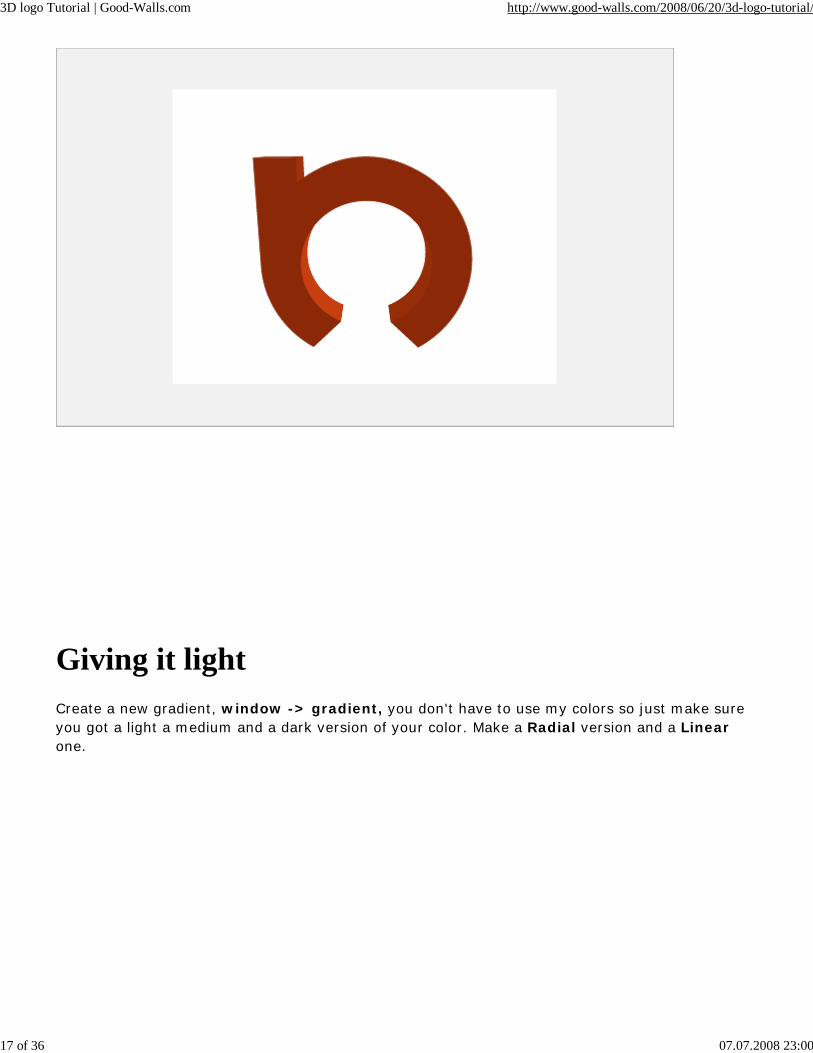
Click ok and now we got our 3D object, but to edit it we need to expand appearance, so Object -> Expand Appearance.
3D logo Tutorial | Good-Walls.com http://www.good-walls.com/2008/06/20/3d-logo-tutorial/
17 of 36 07.07.2008 23:00
Giving it lightCreate a new gradient, window -> gradient, you don't have to use my colors so just make sure you got a light a medium and a dark version of your color. Make a Radial version and a Linearone.

3D logo Tutorial | Good-Walls.com http://www.good-walls.com/2008/06/20/3d-logo-tutorial/
18 of 36 07.07.2008 23:00
With the Direction Selection Tool (A) select the inside of the object like we did, remember to zoom so we get all shapes, if you have to go one by one.

3D logo Tutorial | Good-Walls.com http://www.good-walls.com/2008/06/20/3d-logo-tutorial/
19 of 36 07.07.2008 23:00
Now with the radial gradient we created selected simply drag from the bottom middle to the top, try different times until you are happy with it.
Now the front of the shape, using the gradient tool again start from the middle and go out of the object so that the light comes from the middle, remember use radial gradient here.
For the other parts just use the same but this time Linear Gradient, try to match mine, it's easy simply select each shape with the directional selection tool, get your gradient and try it out.
3D logo Tutorial | Good-Walls.com http://www.good-walls.com/2008/06/20/3d-logo-tutorial/
20 of 36 07.07.2008 23:00
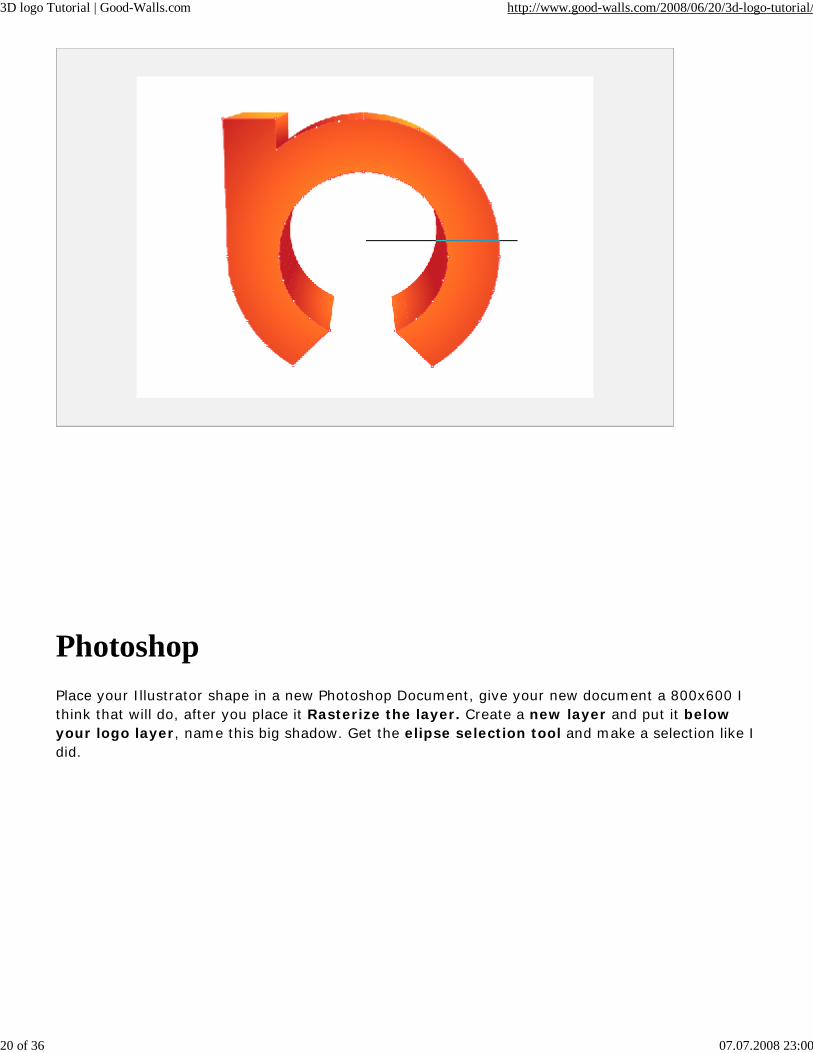
PhotoshopPlace your Illustrator shape in a new Photoshop Document, give your new document a 800x600 I think that will do, after you place it Rasterize the layer. Create a new layer and put it below your logo layer, name this big shadow. Get the elipse selection tool and make a selection like Idid.
3D logo Tutorial | Good-Walls.com http://www.good-walls.com/2008/06/20/3d-logo-tutorial/
21 of 36 07.07.2008 23:00
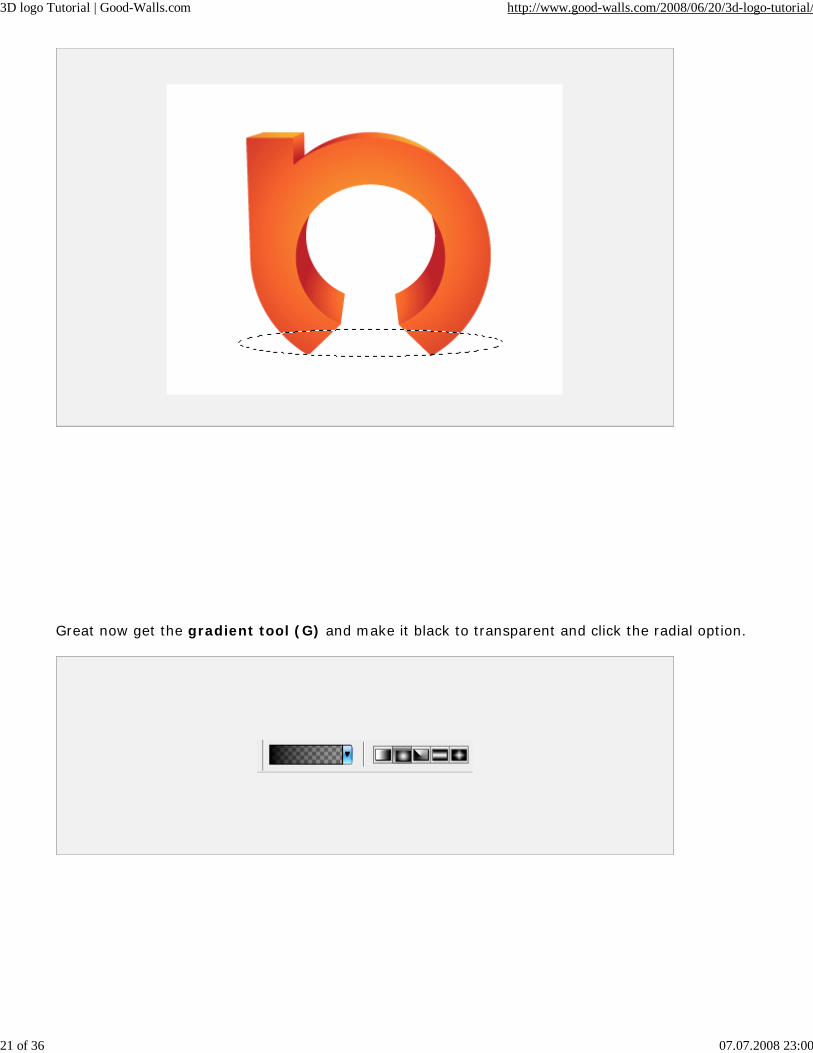
Great now get the gradient tool (G) and make it black to transparent and click the radial option.

3D logo Tutorial | Good-Walls.com http://www.good-walls.com/2008/06/20/3d-logo-tutorial/
22 of 36 07.07.2008 23:00
Start from the middle and straight out until you get something like this.
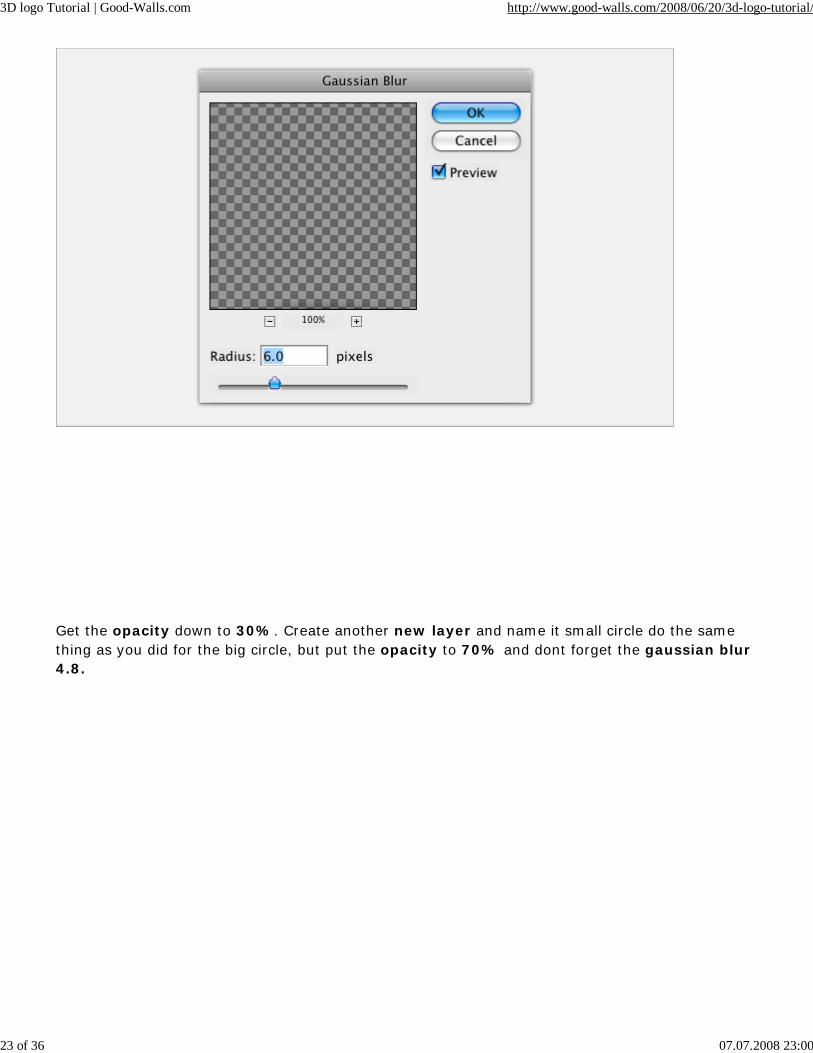
Go to Filters -> Gaussian Blur -> and give it a nice blur in our case we did 6.0 but if you are using a diferent size it may not suit you, just try different settings until you got it.
3D logo Tutorial | Good-Walls.com http://www.good-walls.com/2008/06/20/3d-logo-tutorial/
23 of 36 07.07.2008 23:00
Get the opacity down to 30%. Create another new layer and name it small circle do the same thing as you did for the big circle, but put the opacity to 70% and dont forget the gaussian blur 4.8.

3D logo Tutorial | Good-Walls.com http://www.good-walls.com/2008/06/20/3d-logo-tutorial/
24 of 36 07.07.2008 23:00
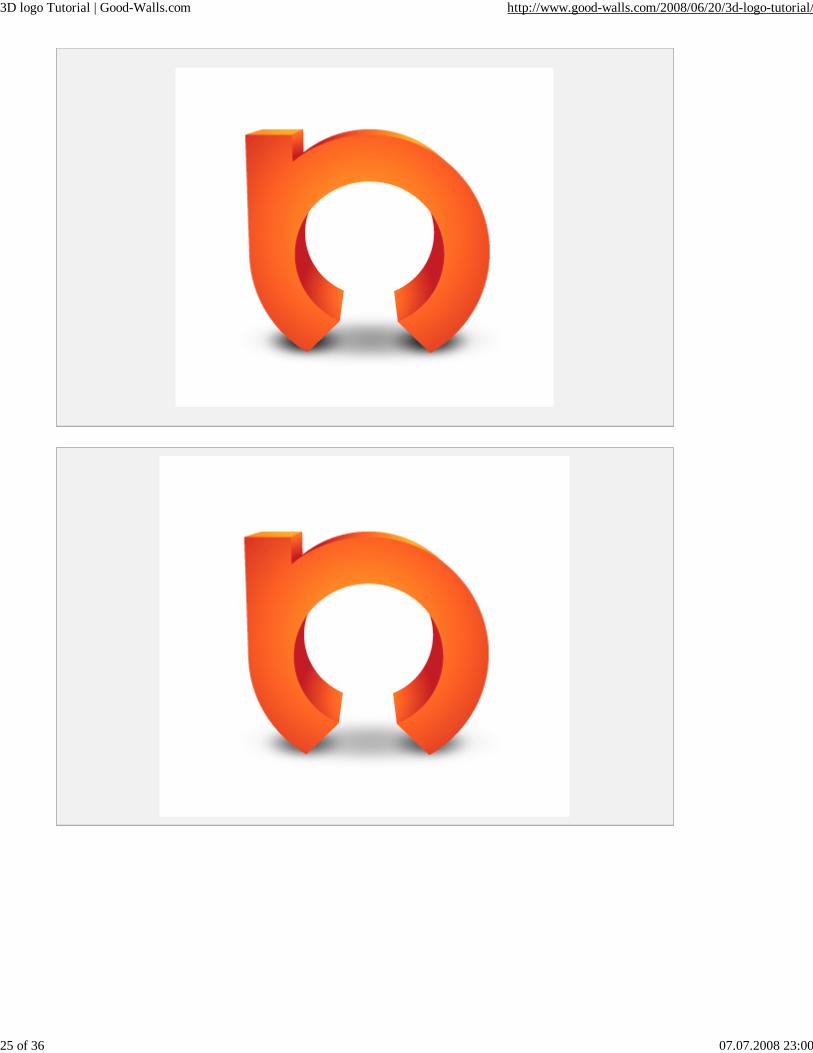
Hold down ALT+SHIFT and drag your circle to the other part of the logo so it copies it. Perfect!
3D logo Tutorial | Good-Walls.com http://www.good-walls.com/2008/06/20/3d-logo-tutorial/
25 of 36 07.07.2008 23:00
3D logo Tutorial | Good-Walls.com http://www.good-walls.com/2008/06/20/3d-logo-tutorial/
26 of 36 07.07.2008 23:00
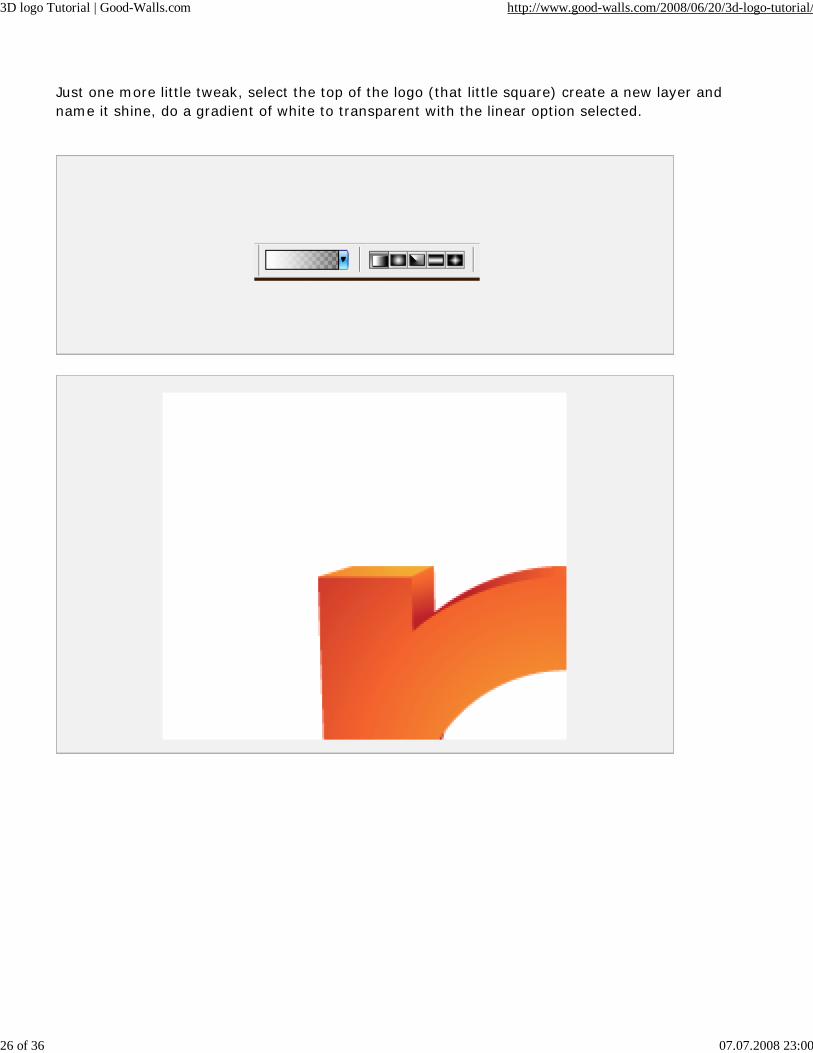
Just one more little tweak, select the top of the logo (that little square) create a new layer and name it shine, do a gradient of white to transparent with the linear option selected.
3D logo Tutorial | Good-Walls.com http://www.good-walls.com/2008/06/20/3d-logo-tutorial/
27 of 36 07.07.2008 23:00
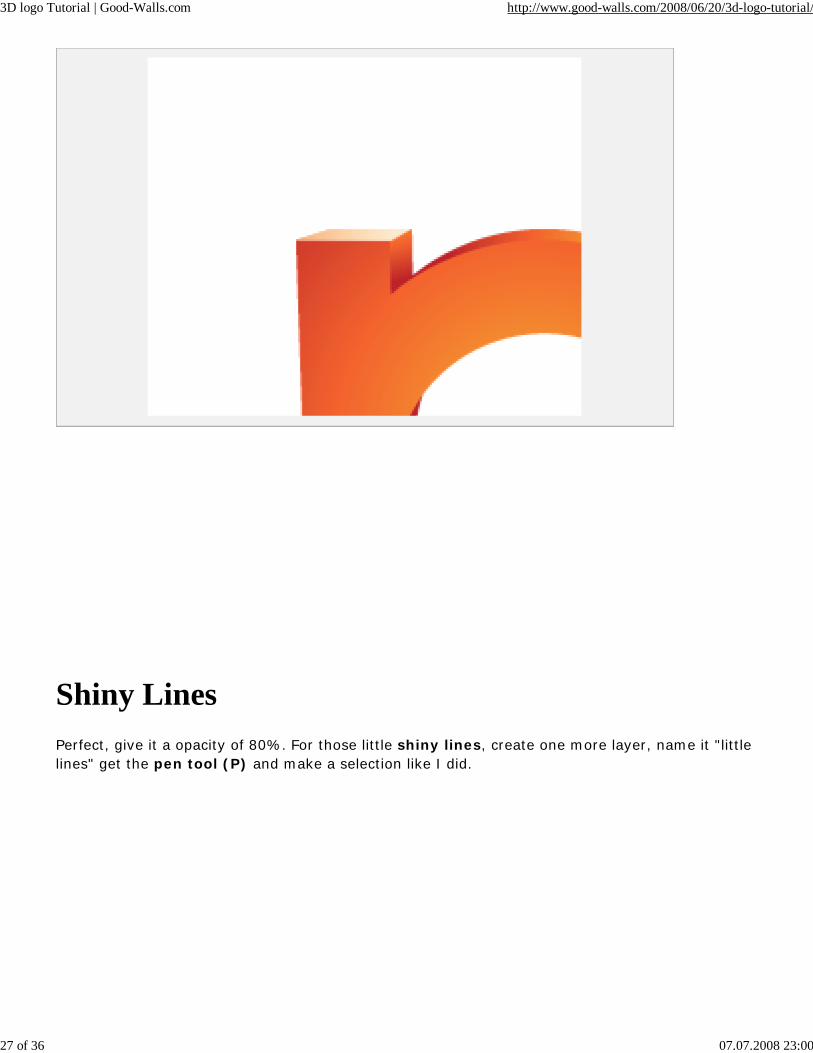
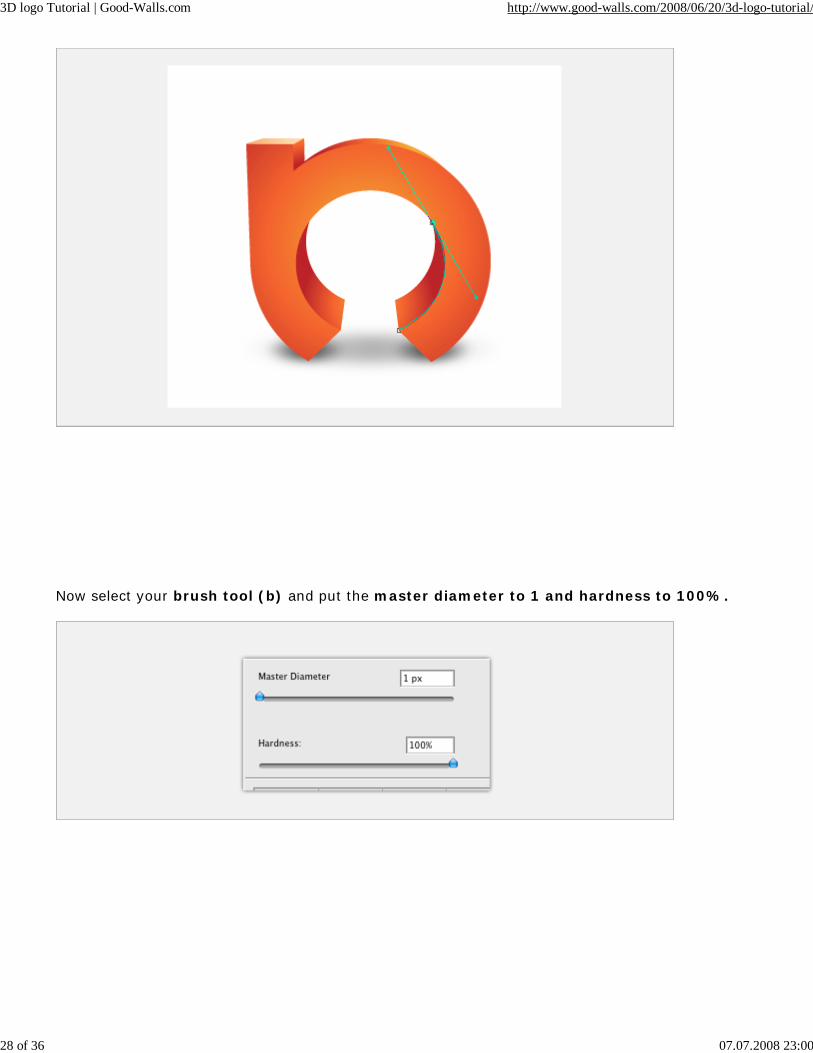
Shiny LinesPerfect, give it a opacity of 80%. For those little shiny lines, create one more layer, name it "little lines" get the pen tool (P) and make a selection like I did.
3D logo Tutorial | Good-Walls.com http://www.good-walls.com/2008/06/20/3d-logo-tutorial/
28 of 36 07.07.2008 23:00
Now select your brush tool (b) and put the master diameter to 1 and hardness to 100%.
3D logo Tutorial | Good-Walls.com http://www.good-walls.com/2008/06/20/3d-logo-tutorial/
29 of 36 07.07.2008 23:00
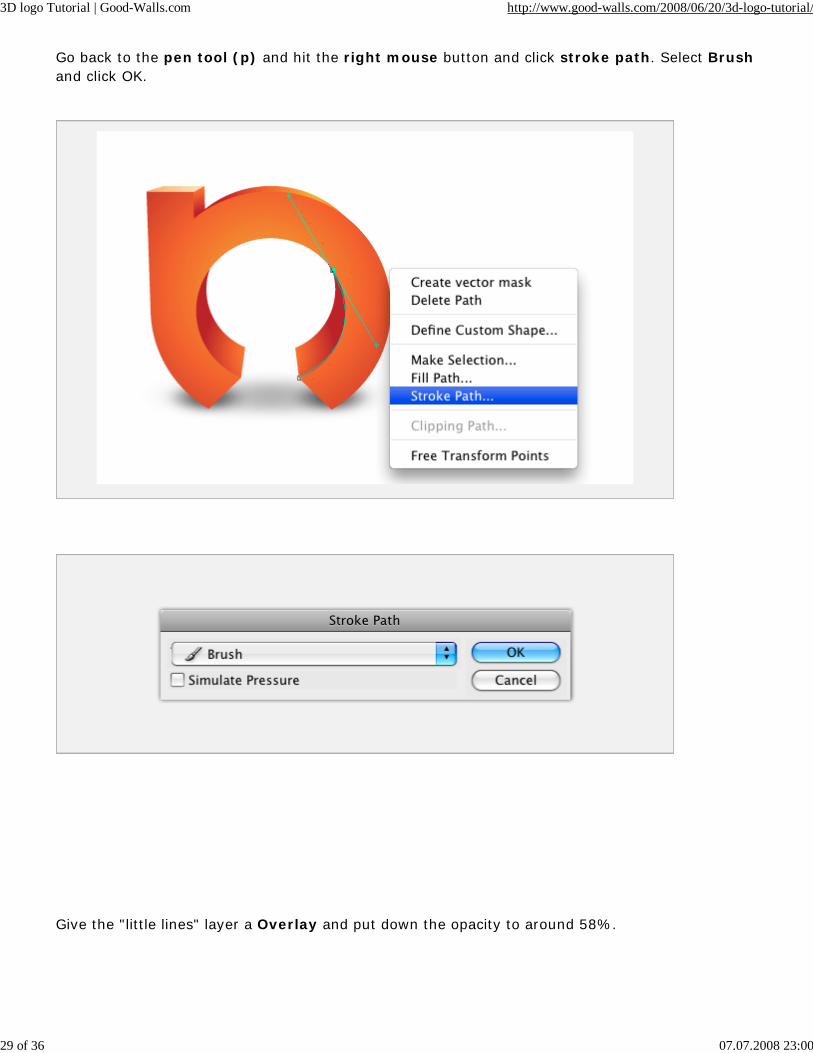
Go back to the pen tool (p) and hit the right mouse button and click stroke path. Select Brushand click OK.
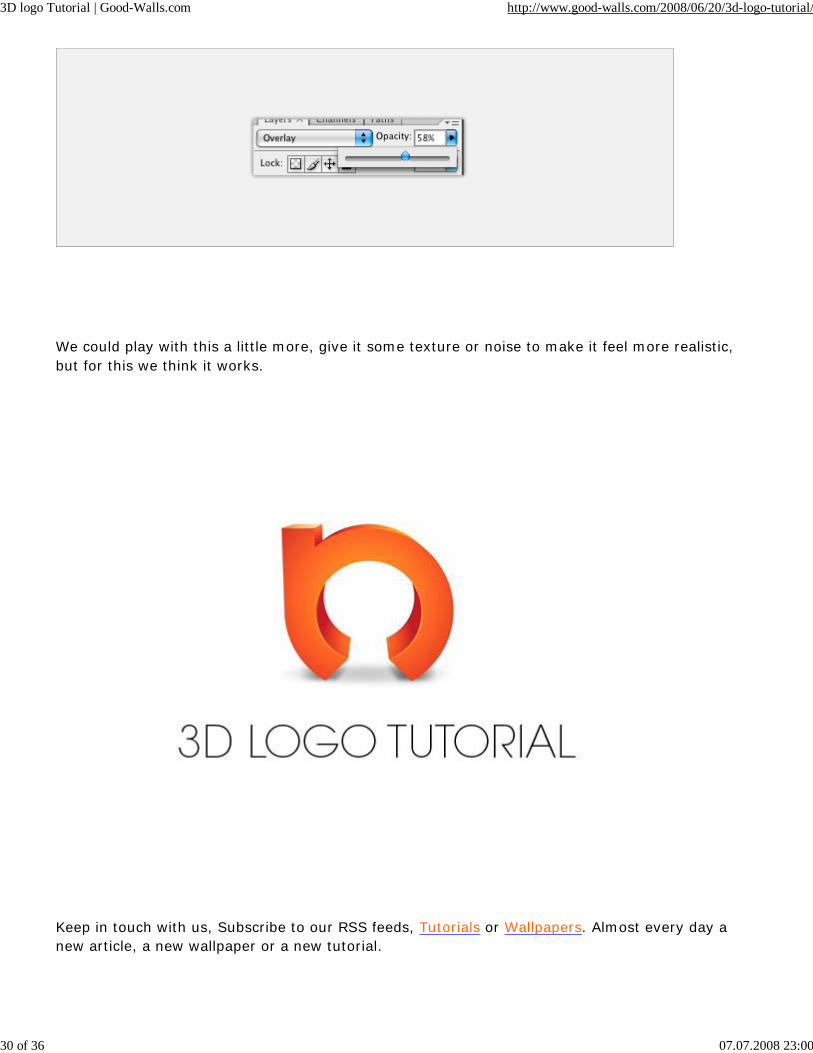
Give the "little lines" layer a Overlay and put down the opacity to around 58%.
3D logo Tutorial | Good-Walls.com http://www.good-walls.com/2008/06/20/3d-logo-tutorial/
30 of 36 07.07.2008 23:00
We could play with this a little more, give it some texture or noise to make it feel more realistic, but for this we think it works.
Keep in touch with us, Subscribe to our RSS feeds, Tutorials or Wallpapers. Almost every day a new article, a new wallpaper or a new tutorial.
3D logo Tutorial | Good-Walls.com http://www.good-walls.com/2008/06/20/3d-logo-tutorial/
31 of 36 07.07.2008 23:00
This Tutorial is Exclusive to Good-Walls.com it may not be copied or linked without permission.
Did you enjoy the Tutorial?
Thank you
Comments1Ali Salem
June 20th, 2008 at 6:46 am
Man thanks a lot!
2Eli
June 20th, 2008 at 7:07 am
Beautiful outcome, and nice looking site you have here. The colors used in the logo really make it look great.
3greven
June 20th, 2008 at 6:07 pm
Great tutorial. Simple and effective!
Bom post outra vez.
4ROBERT
June 21st, 2008 at 6:35 am
thanks
digg it
12diggs
3D logo Tutorial | Good-Walls.com http://www.good-walls.com/2008/06/20/3d-logo-tutorial/
32 of 36 07.07.2008 23:00
5thazer
June 21st, 2008 at 4:16 pm
sweeeeet tut!! thanks!
6ice
June 22nd, 2008 at 9:11 am
woow ! nice
7Marc
June 23rd, 2008 at 11:55 pm
Hi, I did this tutorial, and well when it talks about hitting (A) to get the direct select tool and select thesmall shapes, I am unable to do that, it just selects the shape over and over again. I am using AdobeIllustrator CS3, I don’t know if you used a different version. Any help would be appreciated, thank you.
8Duarte Pires
June 24th, 2008 at 5:22 am
Hi there Marc, you have to expand the shape first, select the object and go to Object Expand Appearance, after that you can select individual shapes.
9ZaFaR
June 26th, 2008 at 10:59 pm
congrats! keep up the good work!
10huszone
July 1st, 2008 at 8:14 am
mate great skills and talent. keep it up
11Daniel Skinner
July 1st, 2008 at 9:07 am
Is there anyway to achieve a similar effect but still keeping the entire logo as a vector?
Dan
12Duarte Pires
July 1st, 2008 at 11:38 am
Yes Daniel, in this tut I haven’t showed all the things to do in photoshop, I also burned the logo andthere are tons of thing you can do in photoshop that you can’t in illustrator, But I will do in the future ahow to do a 3d looking logo again, but this time illustrator only and no Typo, only shapes.
3D logo Tutorial | Good-Walls.com http://www.good-walls.com/2008/06/20/3d-logo-tutorial/
33 of 36 07.07.2008 23:00
13Daniel Skinner
July 1st, 2008 at 11:40 am
Duarte, Thanks - that’s a good way to get people to subscribe. I’ll wait for that tutorial to show up inmy RSS reader!
Thanks
Dan
14Duarte Pires
July 1st, 2008 at 11:43 am
Thank you for subscribing.
15Daniel Geraldi
July 1st, 2008 at 6:08 pm
Very cool!Thanks!
16gen
July 2nd, 2008 at 8:12 am
wow! amazing tut. I remember seeing this logo on Faveup.com and I was blown away about how good it was and was wondering how it was made.
17yuriy danilov
July 3rd, 2008 at 4:22 am
Nice!
18Ashraf
July 3rd, 2008 at 5:54 am
You don’t need Photoshop to do anything in this tutorial. All these steps can be done in Illustrator!(CS2 and up)
19Jeff Justice
July 6th, 2008 at 8:23 pm
Hey! Great tutorial… Thanks.. But it could have been easier to do with the simplest 3D apps…
Your Comment is Important
Name(required)
3D logo Tutorial | Good-Walls.com http://www.good-walls.com/2008/06/20/3d-logo-tutorial/
34 of 36 07.07.2008 23:00
Email (required) WebSite
Submit Comment
Snow Turquoise Wallpaper
Subscribe to our Feeds
Want to get the latest Wallpapers in your RSS reader?
Just click below and Subscribe to our wallpapers feeds and or tutorials.
Wallpaper feed Tutorials feed
Send us your Wallpaper and tutorial!
GET PAID, send us your Wallpaper and get $30, send us the tutorial for it and get $40 more.
Find out more here.
3D logo Tutorial | Good-Walls.com http://www.good-walls.com/2008/06/20/3d-logo-tutorial/
35 of 36 07.07.2008 23:00
Recent Posts
DragonFly Wallpaper
2008-07-06
Unknown Machine Wallpaper
2008-07-05
Eye of the Storm
2008-07-04
Stay Green Go Red
2008-07-03
Liquid Dream Wallpaper
2008-07-01
Dangerous Jungle
2008-07-01
Green, Greener Wallpaper
2008-06-30
Recent Comments
//Jay “
this is real neat. thank”

3D logo Tutorial | Good-Walls.com http://www.good-walls.com/2008/06/20/3d-logo-tutorial/
36 of 36 07.07.2008 23:00
greven “
Cool Wall. ”
Abhisek “
WOW! Great tuto.”
sam “
yeah nice Very great”
Jeff Justice “
Hey! Great tutorial... Thanks..”
All Wallpapers and or Tutorials on Good-Walls.com are copyright their respective authors. You may use the Wallpapers in your personal computer. You may not use them for commercial works. You may use the effects in the Tutorials to create other works.
Copyright © 2008
Good-Walls.com