Non O157 Shiga toxin-producing Escherichia coli from meat products
Marina Torresi Teramo 12 Dicembre 2012
FSIS Official Methods can be found in the FSIS Microbiology Laboratory Guidebook (MLG). The MLG is updated to incorporate improvements in analytical methods. The latest version can be found at: http://www.fsis.usda.gov/Science/Microbiological_Lab_Guidebook/index.asp Resources: •USDA Microbiology Laboratory Guidebook (MLG) Chapter 5B.02: Detection and Isolation of non – O157 Shiga toxin-producing Escherichia coli (STEC) from meat products; •USDA MLG Chapter 5B Appendix 1; •USDA MLG Chapter 5B Appendix 2; •USDA MLG Chapter 5B Appendix 3.
Background
• Increased awareness of non-O157 STEC in illness and hemolytic uremic syndrome (HUS);
• Estimated 70-84% of human illness caused by non-O157 STEC are caused by 6 major serogroups (O26, O45, O103, O111, O121 and O145);
• Similarly to E. coli O157, cattle are a major reservoir for non-O157 STEC.
Quality controls
1) General The top six non O157 STEC control strains shall meet the following genetic characteristics: stx+ and eae+.
2) Sample Enrichment Controls Positive control: E. coli O157:H7 strain 465-97 (stx- eae+) inoculated into a meat matrix free of the target analyte; Negative control: Uninoculated media (mTSB) 3) DNA Extraction Control Preparation E. coli O157:H7 strain 465-97 (stx- eae+): Positive DNA extraction control. 4) IMS Plating Controls Streak the serogroup(s) of interest (based on serogroup specific PCR results) onto mRBA and incubate along with the samples that have been treated with the IMS procedure.
Quality controls 5) PCR Controls a.stx/eae screen PCR •DNA extraction eae positive control: DNA template from bioluminescent E. coli O157:H7 •PCR positive control: DNA template from a cocktail of top six STEC cultures analyzed in triplicate •NTC: PCR certified water b. Serogroup- specific screen PCR (O antigen gene cluster) •PCR positive control: DNA template from a cocktail of top six STEC cultures analyzed in triplicate •NTC: PCR certified water c. stx/eae confirmatory PCR •PCR positive control: DNA template from a cocktail of top six STEC cultures analyzed in triplicate •NTC: PCR certified water d. Serogroup-specific confirmatory PCR (O antigen gene cluster) •PCR positive control: DNA template from a cocktail of top six STEC cultures analyzed in triplicate •NTC: PCR certified water
Quality controls
5) PCR Controls To prepare the controls: • Streak onto a SBA STEC culture and incubate at 35±2°C for 18-24h • Create a culture suspension in PCR certified water corresponding to
approximately 109 CFU/ml. • In one tube, 1,0ml from each suspension shall be added to 4,0 ml of PCR
certified water to create a 10 ml cocktail of all six strains. • Transfer 100µl of the suspension in PCR tubes and heat at 95-99°C for
10min. • Centrifuge for 3min at 10.000xg • Use the supernatant as PCR positive control for all PCR assay. Note: DNA can be prepared as a batch, aliquoted to smaller volume tubes and stored at ≤20°C for 1 year.
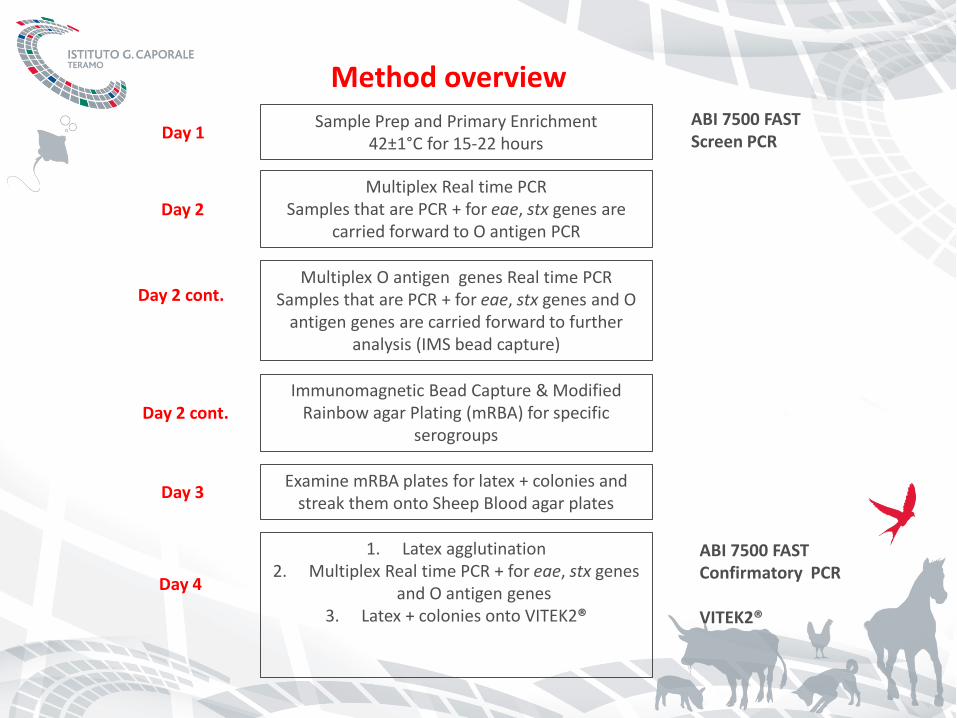
Method overview Sample Prep and Primary Enrichment
42±1°C for 15-22 hours
Multiplex Real time PCR Samples that are PCR + for eae, stx genes are
carried forward to O antigen PCR
Multiplex O antigen genes Real time PCR Samples that are PCR + for eae, stx genes and O
antigen genes are carried forward to further analysis (IMS bead capture)
Immunomagnetic Bead Capture & Modified Rainbow agar Plating (mRBA) for specific
serogroups
Examine mRBA plates for latex + colonies and streak them onto Sheep Blood agar plates
1. Latex agglutination 2. Multiplex Real time PCR + for eae, stx genes
and O antigen genes 3. Latex + colonies onto VITEK2®
ABI 7500 FAST Screen PCR
ABI 7500 FAST Confirmatory PCR VITEK2®
Day 1
Day 2
Day 2 cont.
Day 2 cont.
Day 3
Day 4
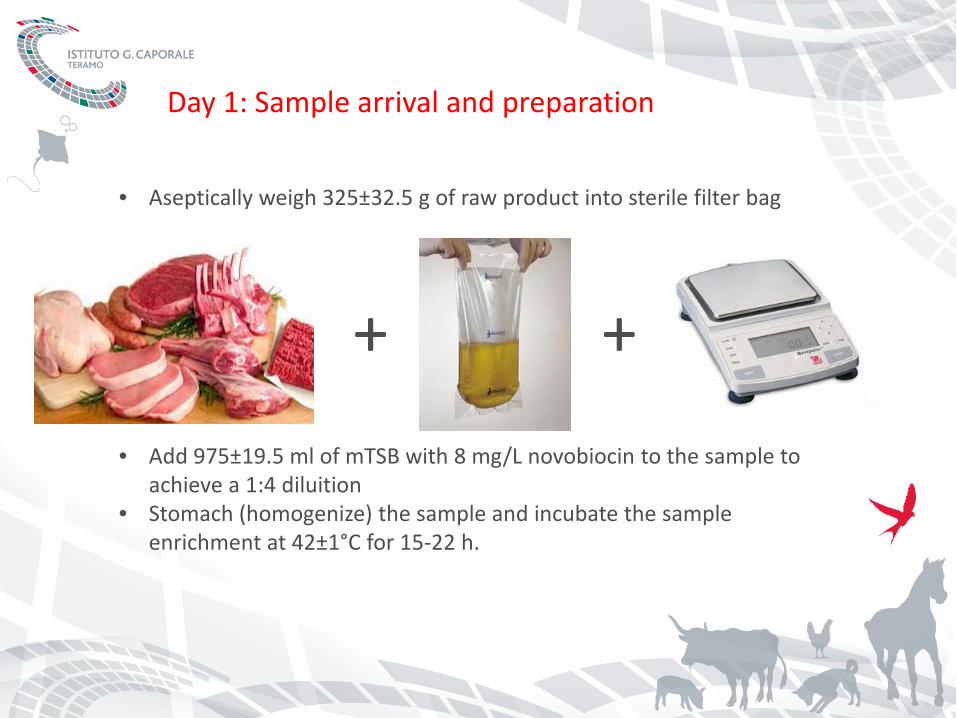
Day 1: Sample arrival and preparation
• Aseptically weigh 325±32.5 g of raw product into sterile filter bag
• Add 975±19.5 ml of mTSB with 8 mg/L novobiocin to the sample to achieve a 1:4 diluition
• Stomach (homogenize) the sample and incubate the sample enrichment at 42±1°C for 15-22 h.
+ +

Prelabel three sterile 1.5 ml microcentrifuge tubes for each sample and turn on heating block set at 95-99°C
Day 2: Screening Step- DNA Extraction Step
Transfer a 1.4±0.1 ml aliquot of enriched sample (15-22 h incubation) to a microcentrifuge tube
Centrifuge the aliquot at 1500 xg for 1 min. Transfer the supernatant into the second centrifuge tube
Centrifuge the trasferred supernatant at 10.000 xg for 5 min. Discard the supernatant
Add 500±50 µl of 0,85% saline to the bacterial pellet and resuspend the pellet with the pipette or by vortexing
Centrifuge the suspension at 10.000 xg for 3 minutes
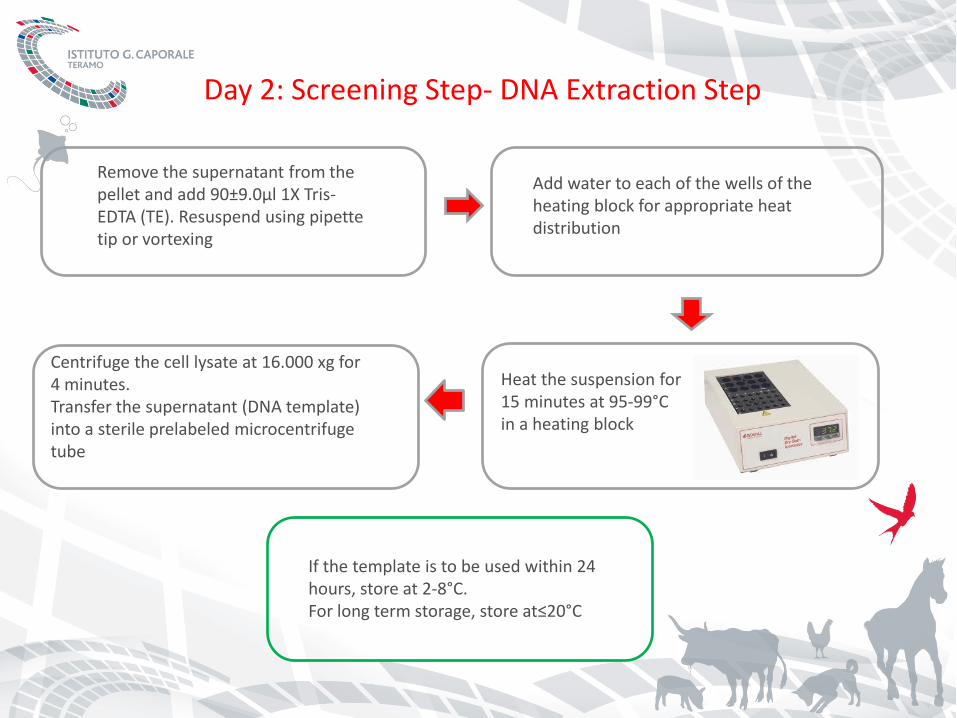
Day 2: Screening Step- DNA Extraction Step
Remove the supernatant from the pellet and add 90±9.0µl 1X Tris- EDTA (TE). Resuspend using pipette tip or vortexing
Add water to each of the wells of the heating block for appropriate heat distribution
Heat the suspension for 15 minutes at 95-99°C in a heating block
Centrifuge the cell lysate at 16.000 xg for 4 minutes. Transfer the supernatant (DNA template) into a sterile prelabeled microcentrifuge tube
If the template is to be used within 24 hours, store at 2-8°C. For long term storage, store at≤20°C
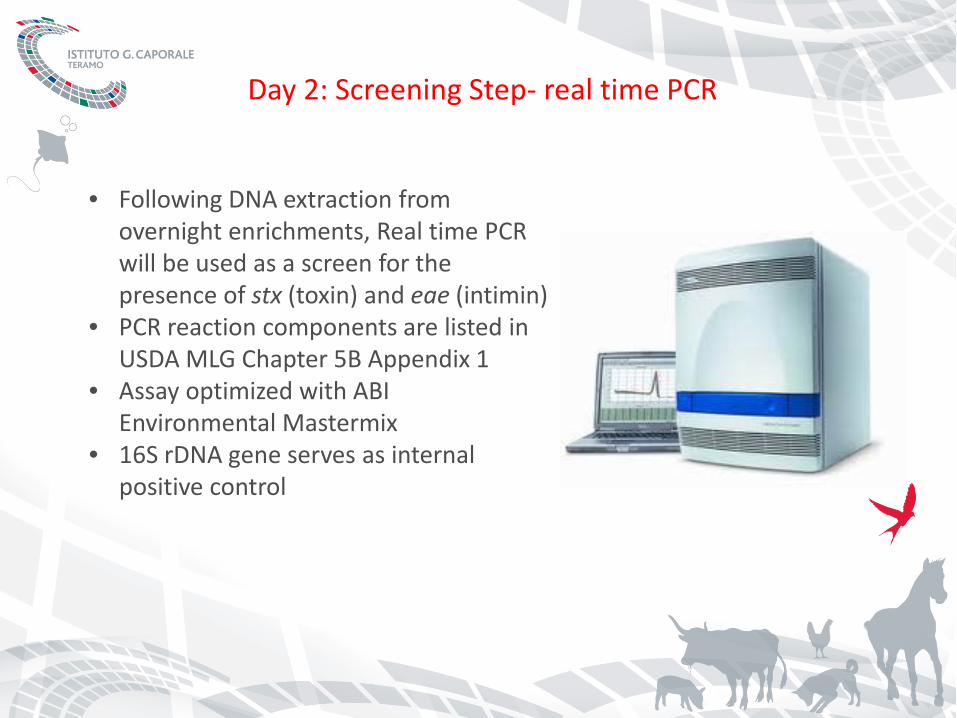
Day 2: Screening Step- real time PCR
• Following DNA extraction from overnight enrichments, Real time PCR will be used as a screen for the presence of stx (toxin) and eae (intimin)
• PCR reaction components are listed in USDA MLG Chapter 5B Appendix 1
• Assay optimized with ABI Environmental Mastermix
• 16S rDNA gene serves as internal positive control
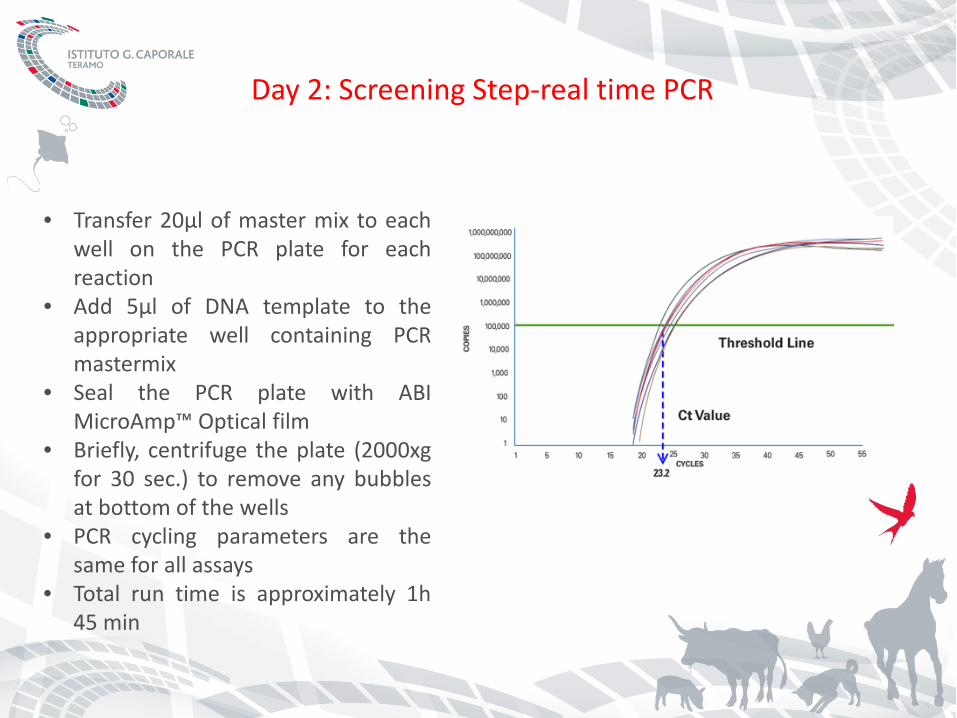
Day 2: Screening Step-real time PCR
• Transfer 20µl of master mix to each well on the PCR plate for each reaction
• Add 5µl of DNA template to the appropriate well containing PCR mastermix
• Seal the PCR plate with ABI MicroAmp™ Optical film
• Briefly, centrifuge the plate (2000xg for 30 sec.) to remove any bubbles at bottom of the wells
• PCR cycling parameters are the same for all assays
• Total run time is approximately 1h 45 min
Day 2: Screening Step- real time PCR
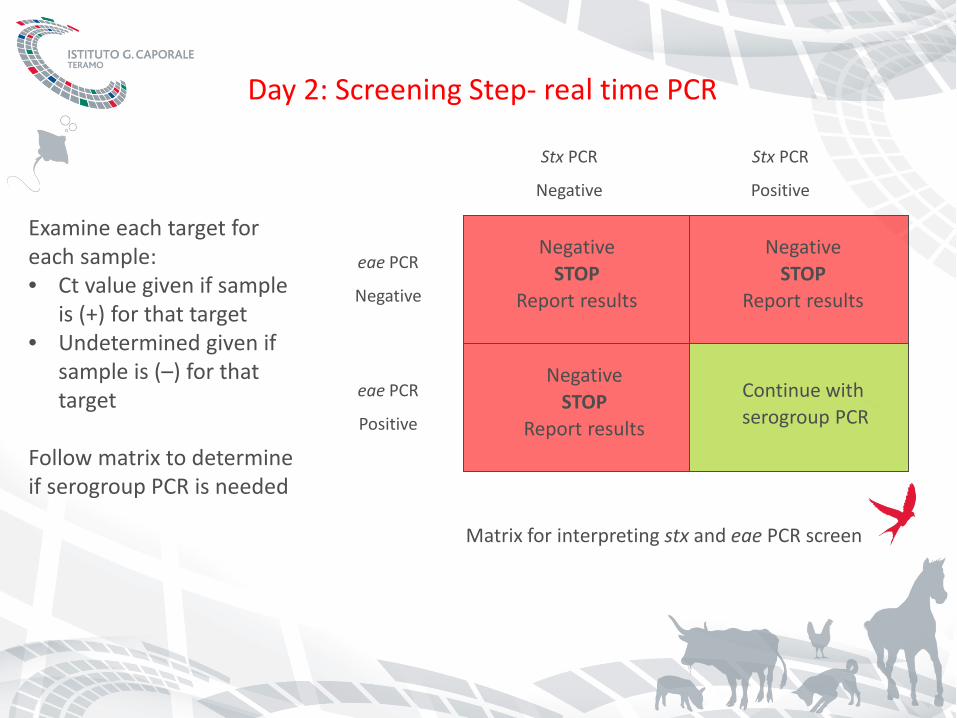
Examine each target for each sample: • Ct value given if sample
is (+) for that target • Undetermined given if
sample is (–) for that target
Follow matrix to determine if serogroup PCR is needed
Negative STOP
Report results
Negative STOP
Report results
Negative STOP
Report results
Continue with serogroup PCR
Stx PCR
Negative
Stx PCR
Positive
eae PCR
Negative
eae PCR
Positive
Matrix for interpreting stx and eae PCR screen
Day 2: Screening Step- real time PCR
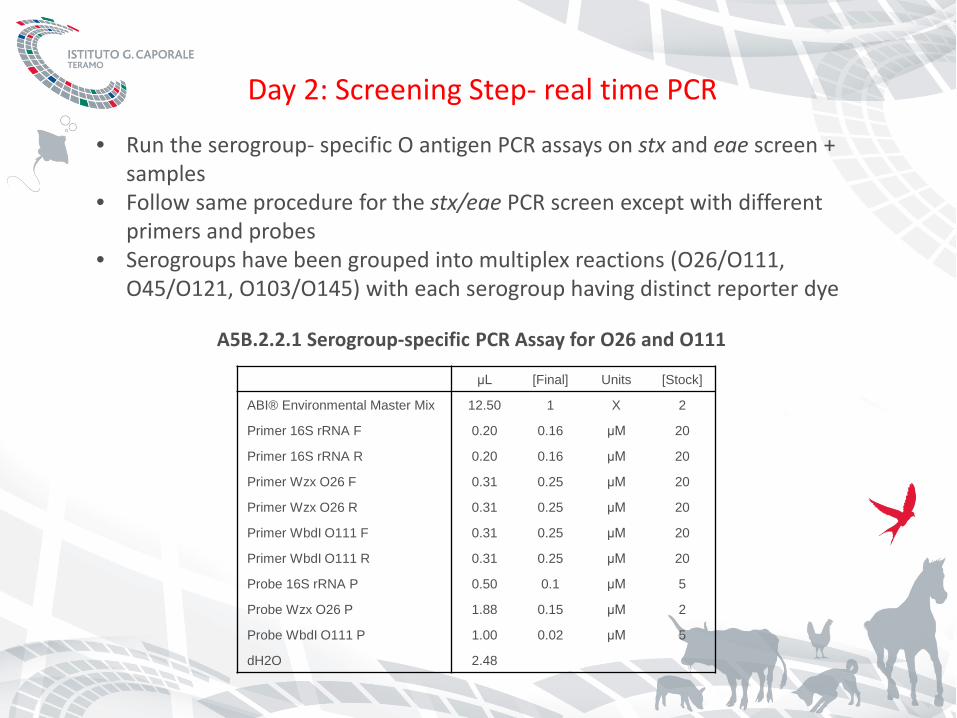
• Run the serogroup- specific O antigen PCR assays on stx and eae screen + samples
• Follow same procedure for the stx/eae PCR screen except with different primers and probes
• Serogroups have been grouped into multiplex reactions (O26/O111, O45/O121, O103/O145) with each serogroup having distinct reporter dye
A5B.2.2.1 Serogroup-specific PCR Assay for O26 and O111
μL [Final] Units [Stock]
ABI® Environmental Master Mix 12.50 1 X 2
Primer 16S rRNA F 0.20 0.16 μM 20
Primer 16S rRNA R 0.20 0.16 μM 20
Primer Wzx O26 F 0.31 0.25 μM 20
Primer Wzx O26 R 0.31 0.25 μM 20
Primer WbdI O111 F 0.31 0.25 μM 20
Primer WbdI O111 R 0.31 0.25 μM 20
Probe 16S rRNA P 0.50 0.1 μM 5
Probe Wzx O26 P 1.88 0.15 μM 2
Probe WbdI O111 P 1.00 0.02 μM 5
dH2O 2.48
Day 2: Screening Step- real time PCR
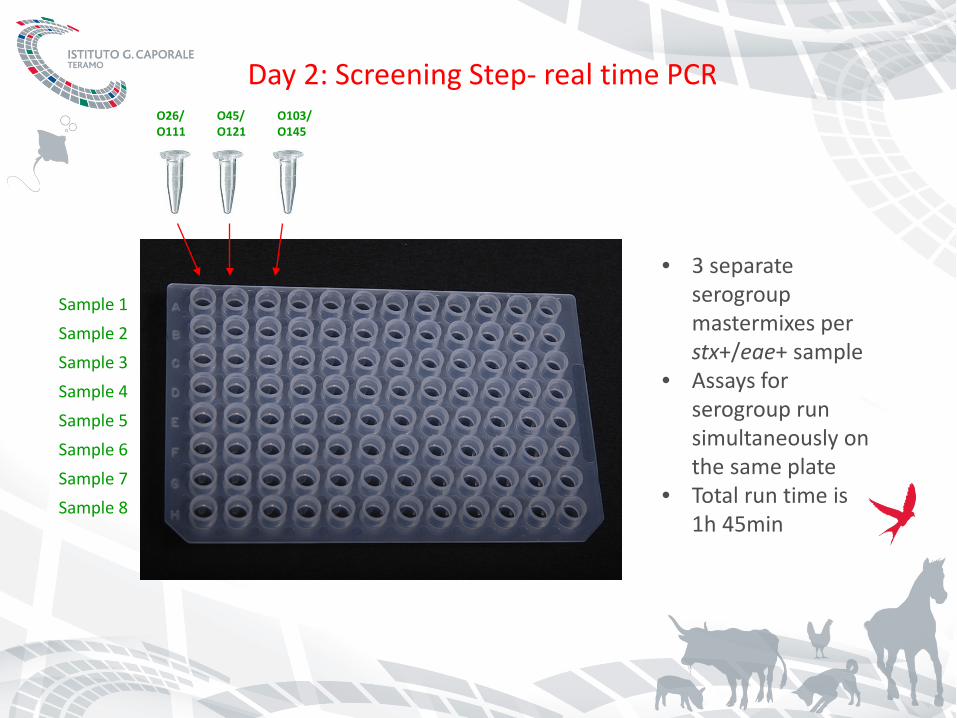
• 3 separate serogroup mastermixes per stx+/eae+ sample
• Assays for serogroup run simultaneously on the same plate
• Total run time is 1h 45min
Sample 1 Sample 2 Sample 3 Sample 4 Sample 5 Sample 6 Sample 7 Sample 8
O26/ O111
O45/ O121
O103/ O145
Day 2: Screening Step - real time PCR
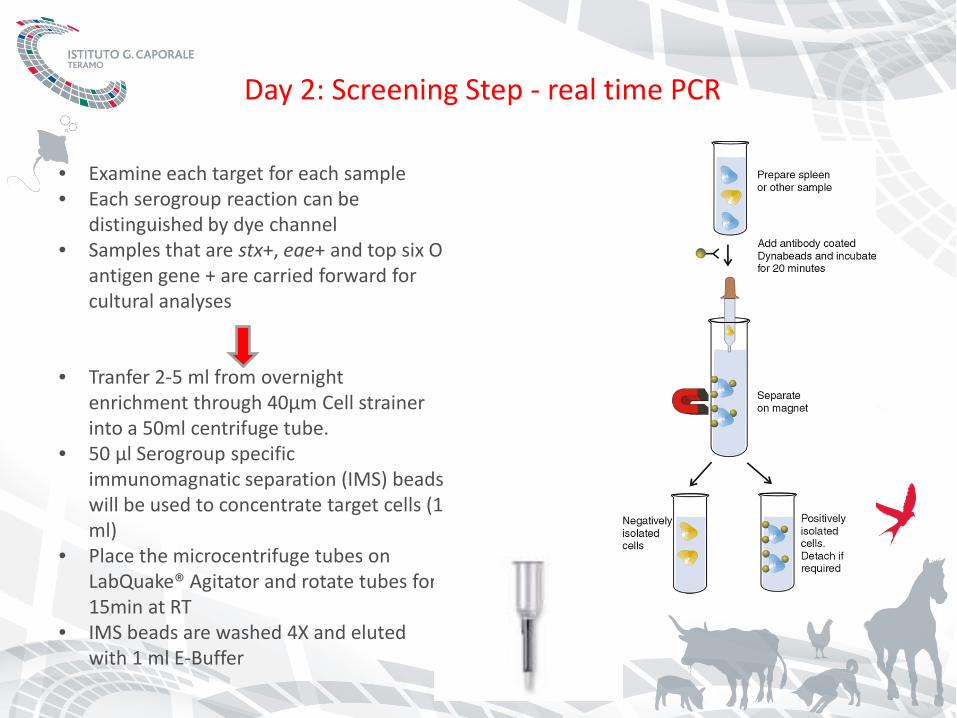
• Examine each target for each sample • Each serogroup reaction can be
distinguished by dye channel • Samples that are stx+, eae+ and top six O
antigen gene + are carried forward for cultural analyses
• Tranfer 2-5 ml from overnight enrichment through 40µm Cell strainer into a 50ml centrifuge tube.
• 50 µl Serogroup specific immunomagnatic separation (IMS) beads will be used to concentrate target cells (1 ml)
• Place the microcentrifuge tubes on LabQuake® Agitator and rotate tubes for 15min at RT
• IMS beads are washed 4X and eluted with 1 ml E-Buffer
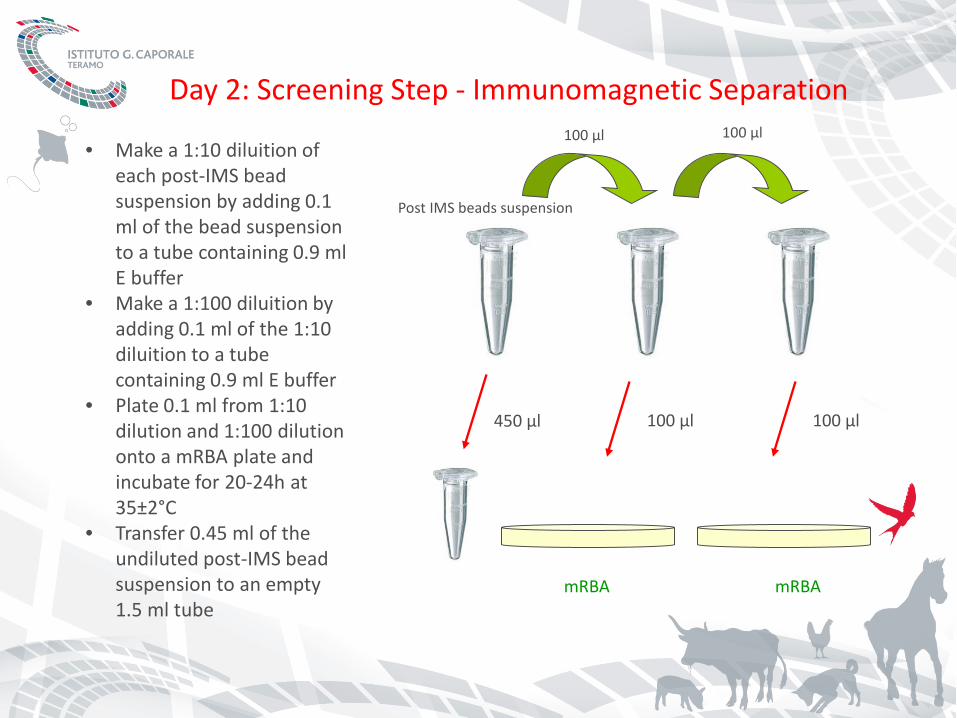
Day 2: Screening Step - Immunomagnetic Separation
• Make a 1:10 diluition of each post-IMS bead suspension by adding 0.1 ml of the bead suspension to a tube containing 0.9 ml E buffer
• Make a 1:100 diluition by adding 0.1 ml of the 1:10 diluition to a tube containing 0.9 ml E buffer
• Plate 0.1 ml from 1:10 dilution and 1:100 dilution onto a mRBA plate and incubate for 20-24h at 35±2°C
• Transfer 0.45 ml of the undiluted post-IMS bead suspension to an empty 1.5 ml tube
Post IMS beads suspension
mRBA mRBA
450 μl 100 μl 100 μl
100 μl 100 μl
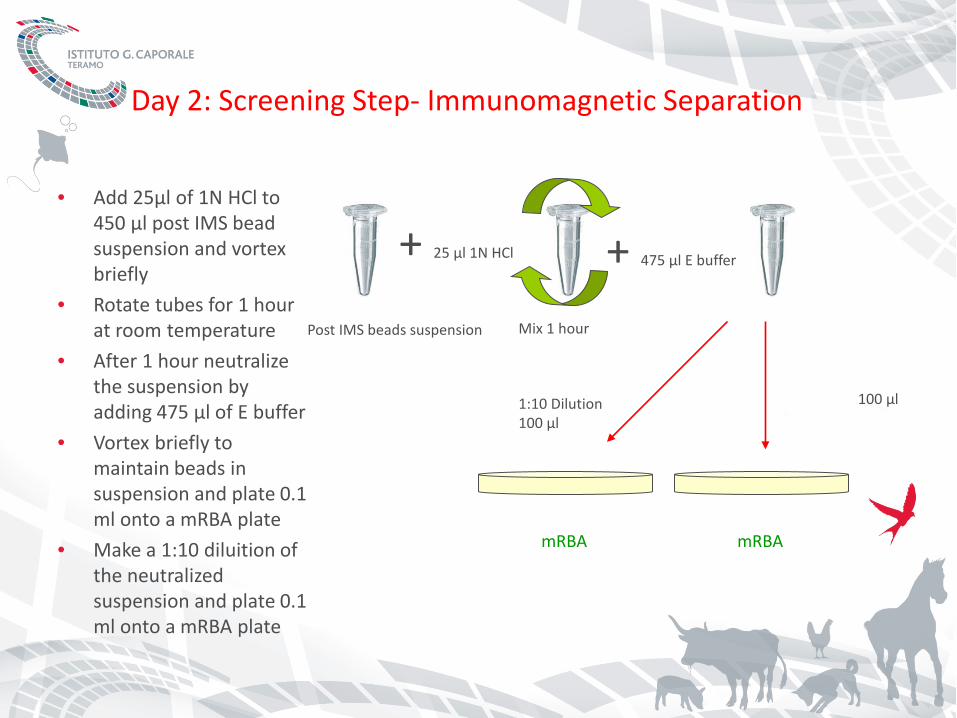
• Add 25μl of 1N HCl to 450 μl post IMS bead suspension and vortex briefly
• Rotate tubes for 1 hour at room temperature
• After 1 hour neutralize the suspension by adding 475 μl of E buffer
• Vortex briefly to maintain beads in suspension and plate 0.1 ml onto a mRBA plate
• Make a 1:10 diluition of the neutralized suspension and plate 0.1 ml onto a mRBA plate
Day 2: Screening Step- Immunomagnetic Separation
Post IMS beads suspension
+ 25 μl 1N HCl + 475 μl E buffer
100 μl 1:10 Dilution 100 μl
mRBA mRBA
Mix 1 hour
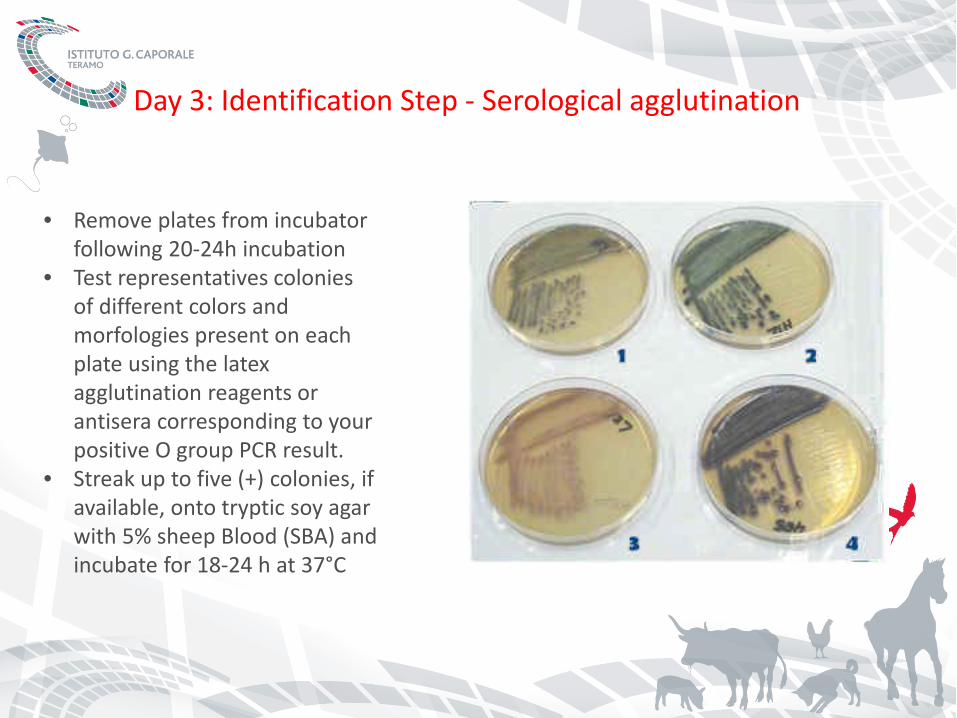
Day 3: Identification Step - Serological agglutination
• Remove plates from incubator following 20-24h incubation
• Test representatives colonies of different colors and morfologies present on each plate using the latex agglutination reagents or antisera corresponding to your positive O group PCR result.
• Streak up to five (+) colonies, if available, onto tryptic soy agar with 5% sheep Blood (SBA) and incubate for 18-24 h at 37°C
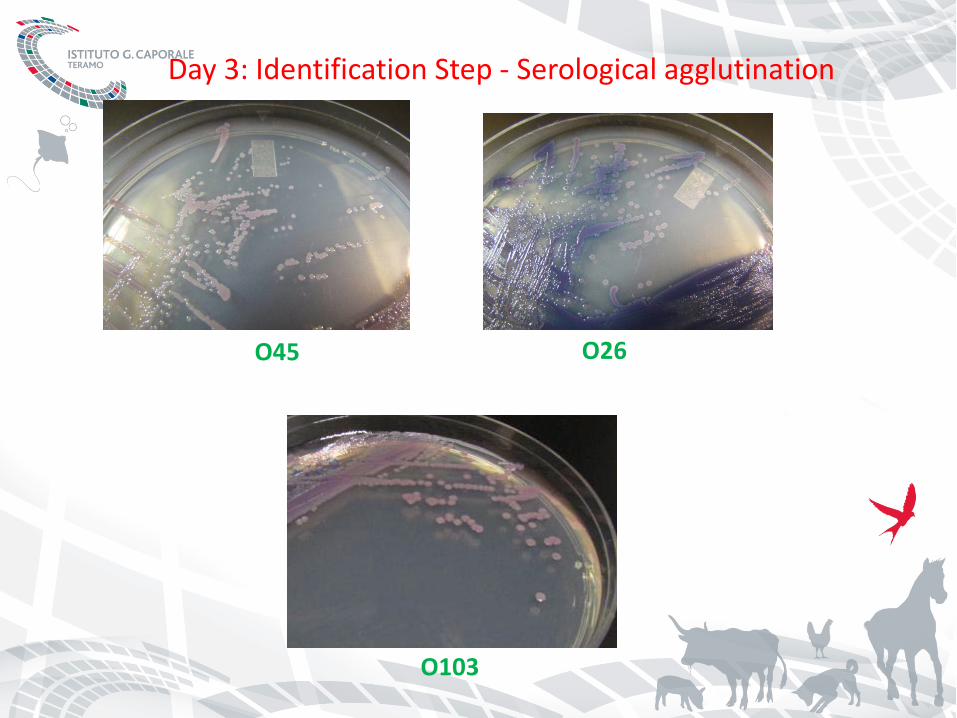
O26 O45
O103
Day 3: Identification Step - Serological agglutination
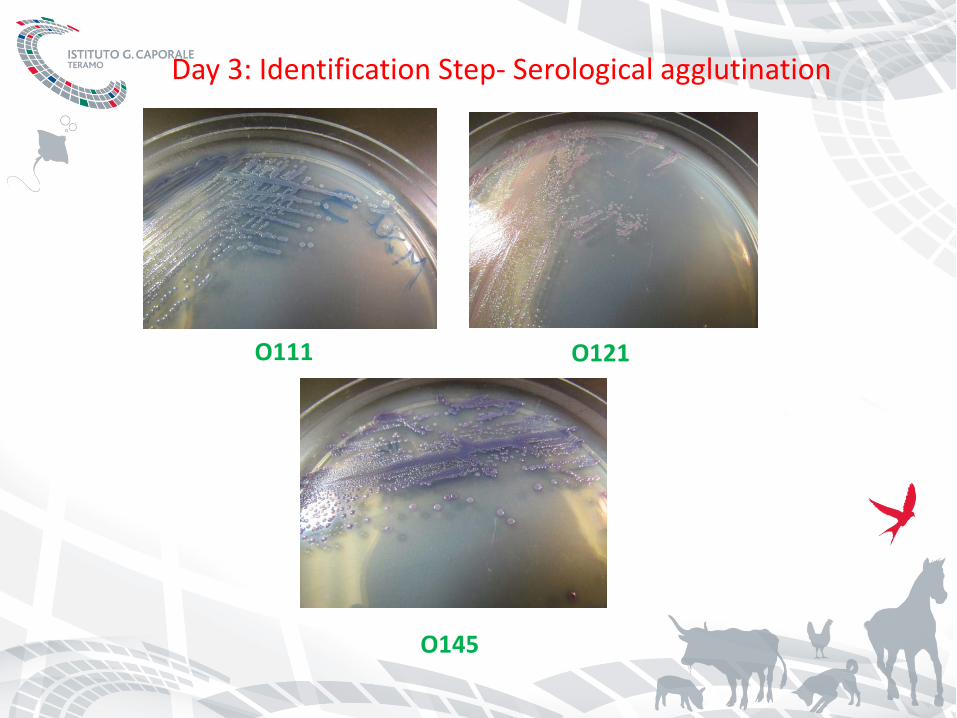
O111 O121
O145
Day 3: Identification Step- Serological agglutination
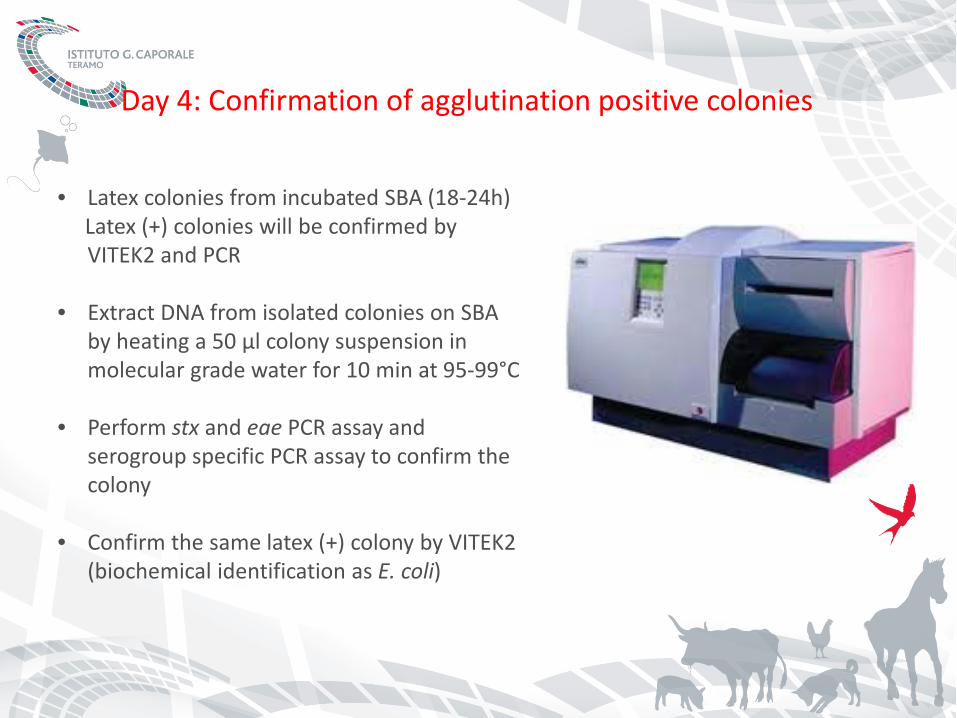
Day 4: Confirmation of agglutination positive colonies
• Latex colonies from incubated SBA (18-24h) Latex (+) colonies will be confirmed by
VITEK2 and PCR • Extract DNA from isolated colonies on SBA
by heating a 50 µl colony suspension in molecular grade water for 10 min at 95-99°C
• Perform stx and eae PCR assay and serogroup specific PCR assay to confirm the colony
• Confirm the same latex (+) colony by VITEK2 (biochemical identification as E. coli)
Recommended