Embed Size (px)
Citation preview
Word 2010
Mail Merge
Mail Merge using Word 2010
i
TABLE OF CONTENTS
Understanding Mail Merge ........................................................................................................... 1
Main steps for performing a mail merge ..................................................................................... 1
STEP 1 - MAIN DOCUMENT .................................................................................................................................................. 2
STEP 2 - DATA SOURCE ........................................................................................................................................................ 2
STEP 3 - ADD THE MERGE FIELDS ........................................................................................................................................... 3
STEP 4 – PREVIEW THE LETTER .............................................................................................................................................. 3
STEP 5 – COMPLETE THE MERGE ........................................................................................................................................... 3
Restore a mail merge main document to a regular document ................................................... 4
Creating a data source within Word 2010 Mail Merge ................................................................ 5
Editing an existing data source ................................................................................................... 7
Refining the list of Recipients ...................................................................................................... 8
Creating Labels ............................................................................................................................. 9
Using data sources from other applications ............................................................................. 10
WORD ............................................................................................................................................................................ 10
EXCEL ............................................................................................................................................................................. 10
ACCESS ........................................................................................................................................................................... 11
OUTLOOK ........................................................................................................................................................................ 11
Sending a Mail Merge Email via Outlook ................................................................................... 12
Mail Merge using Word 2010
1
Understanding Mail Merge
Mail merge involves taking information from one document – the data source – and combining it with another document – the main document (sometimes referred to as a form document). The data source is a document, spreadsheet, database, or other type of file that contains the variable information (such as names, addresses etc) that changes from one merged document to the next. The main document contains the text that does not change, as well as merge fields, which are placeholders that indicate where Word should insert variable information from the data source. Mail merge can also be used to generate mailing labels using your data source.
Main steps for performing a mail merge
STEP 1 - Create or open the main document.
STEP 2 - Create or open an existing data source.
STEP 3 - Add the merge fields to the main document.
STEP 4 - Preview the letter with the merged data in place.
STEP 5 - Complete the Merge - Edit/print individual letters.

Mail Merge using Word 2010
2
Step 1 - Main Document
1. Create a new blank document.
2. Click on the Mailings Tab
3. Click on the Start Mail Merge button and select Letter. For User familiar with Mail Merge in Word 2003 you may find it useful to use the Step by Step Wizard which will task pane displayed on the right of the screen select the document type Letters from there
Step 2 - Data Source
1. Next you must choose if you are using an existing data source or creating a new data source from the Select Recipients button. The data source may be a word document, an excel spreadsheet or an access database. Do one of the following:
a. Use an existing data source file
i. If you have a Microsoft Excel worksheet, a Microsoft Access database, or another type of data file, click Use Existing List, and then locate the file in the Select Data Source dialog box.
ii. For Excel, you can select data from any worksheet or named range within a workbook. For Access, you can select data from any table or query that is defined in the database.
iii. For another type of data file, select the file in the Select Data Source dialog box.
iv. A Microsoft Word document - the document should contain a single table. The first row of the table must contain headings, and the other rows must contain the records that you want to merge.
v. Use Outlook Contacts If you want to use your Contacts list in Microsoft Outlook, click Select from Outlook Contacts.
b. Create a new data file
i. If you don't have a data file yet, click Type New List, and then use the form that opens to create your list. The list is saved as a database (.accdb) file that you can reuse. Note: If you are unfamiliar with Access it is advisable to create your source file using either Excel or Word before starting the Mail Merge.
2. Assuming we already have the data source created and saved locate the file from Select Data Source dialog box. If the file is not listed, select the appropriate file type or select All Files in the Files of type box. Choose the data source file and click on the Open button.
3. If you have not already done so, setup the main document by typing the text required for the letter.
Mail Merge using Word 2010
3
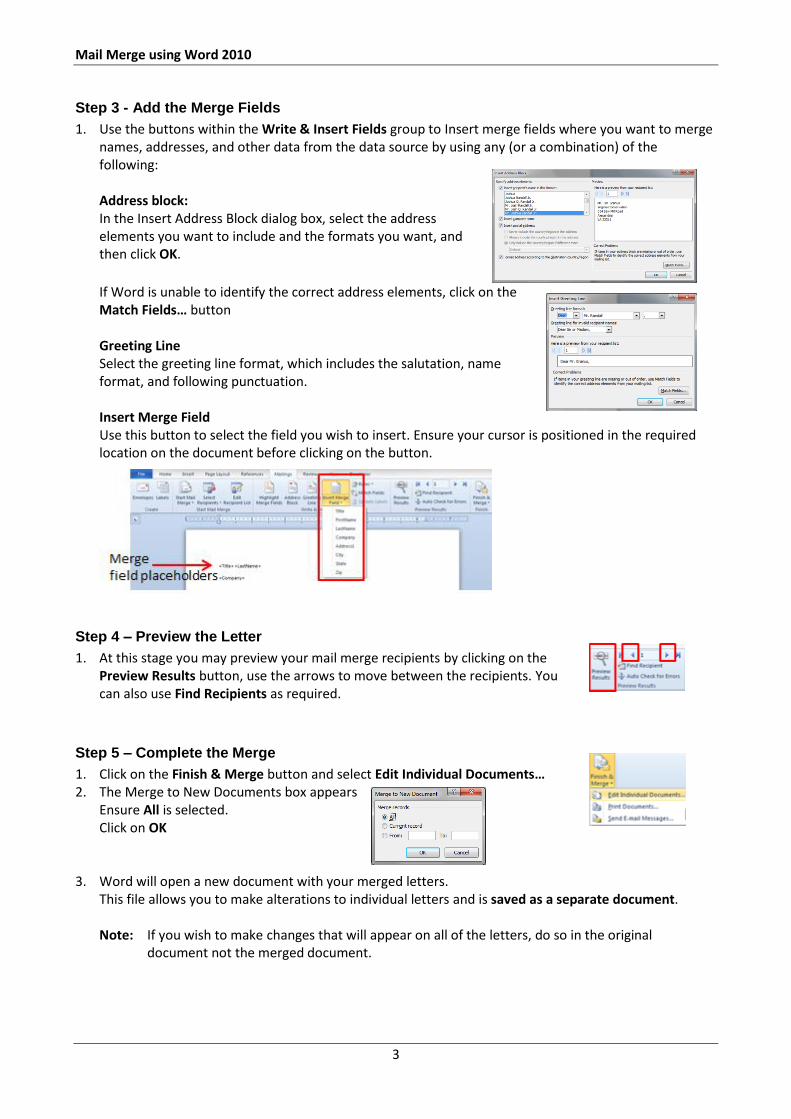
Step 3 - Add the Merge Fields
1. Use the buttons within the Write & Insert Fields group to Insert merge fields where you want to merge names, addresses, and other data from the data source by using any (or a combination) of the following: Address block: In the Insert Address Block dialog box, select the address elements you want to include and the formats you want, and then click OK.
If Word is unable to identify the correct address elements, click on the Match Fields… button Greeting Line Select the greeting line format, which includes the salutation, name format, and following punctuation. Insert Merge Field Use this button to select the field you wish to insert. Ensure your cursor is positioned in the required location on the document before clicking on the button.
Step 4 – Preview the Letter
1. At this stage you may preview your mail merge recipients by clicking on the Preview Results button, use the arrows to move between the recipients. You can also use Find Recipients as required.
Step 5 – Complete the Merge
1. Click on the Finish & Merge button and select Edit Individual Documents… 2. The Merge to New Documents box appears
Ensure All is selected. Click on OK
3. Word will open a new document with your merged letters. This file allows you to make alterations to individual letters and is saved as a separate document. Note: If you wish to make changes that will appear on all of the letters, do so in the original
document not the merged document.
Mail Merge using Word 2010
4
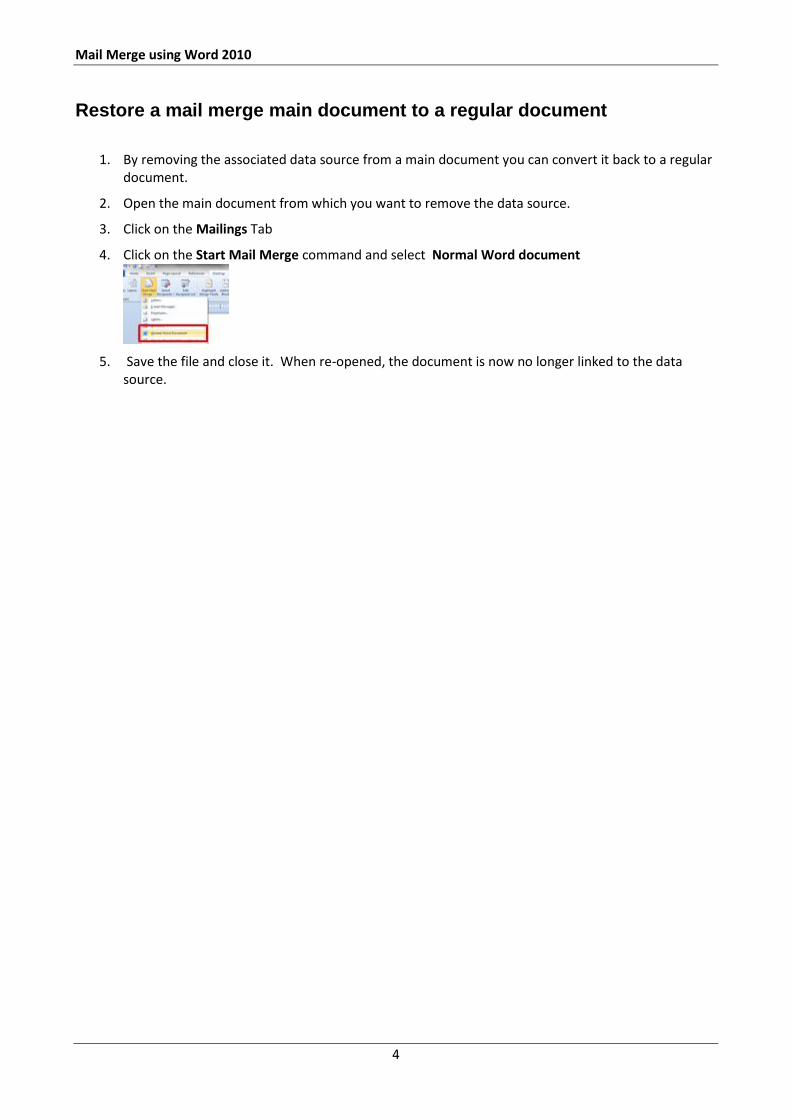
Restore a mail merge main document to a regular document
1. By removing the associated data source from a main document you can convert it back to a regular document.
2. Open the main document from which you want to remove the data source.
3. Click on the Mailings Tab
4. Click on the Start Mail Merge command and select Normal Word document
5. Save the file and close it. When re-opened, the document is now no longer linked to the data source.

Mail Merge using Word 2010
5
Creating a data source within Word 2010 Mail Merge It is possible to create your list of names and addresses while carrying out your mail merge. However do remember that your data source will be an access table. (If you are unfamiliar with Access or the Mail Merge process it is less confusing to have already created your data source before commencing the mail merge process).
1. Under the heading Select recipients choose Type New List
2. The following dialogue box appears: Within this box there are a number of prepared fields for Title, First Name etc. If you wish to add new fields or delete unwanted fields, click on Customize Columns… The Customize Address List dialogue box is displayed:
3. In this example select the field State then click on Delete. The following dialogue box will be displayed: Click on Yes to confirm that you wish to delete the field. Also remove the fields Zip Code, Country or Region, Home Phone, Work Phone and E-mail Address.
4. To add a new field click on Add… Type in the field name Dept and click on OK Use the Move Up button to position the new Dept field above Company Name and below Last Name.
5. Click on OK
Mail Merge using Word 2010
6
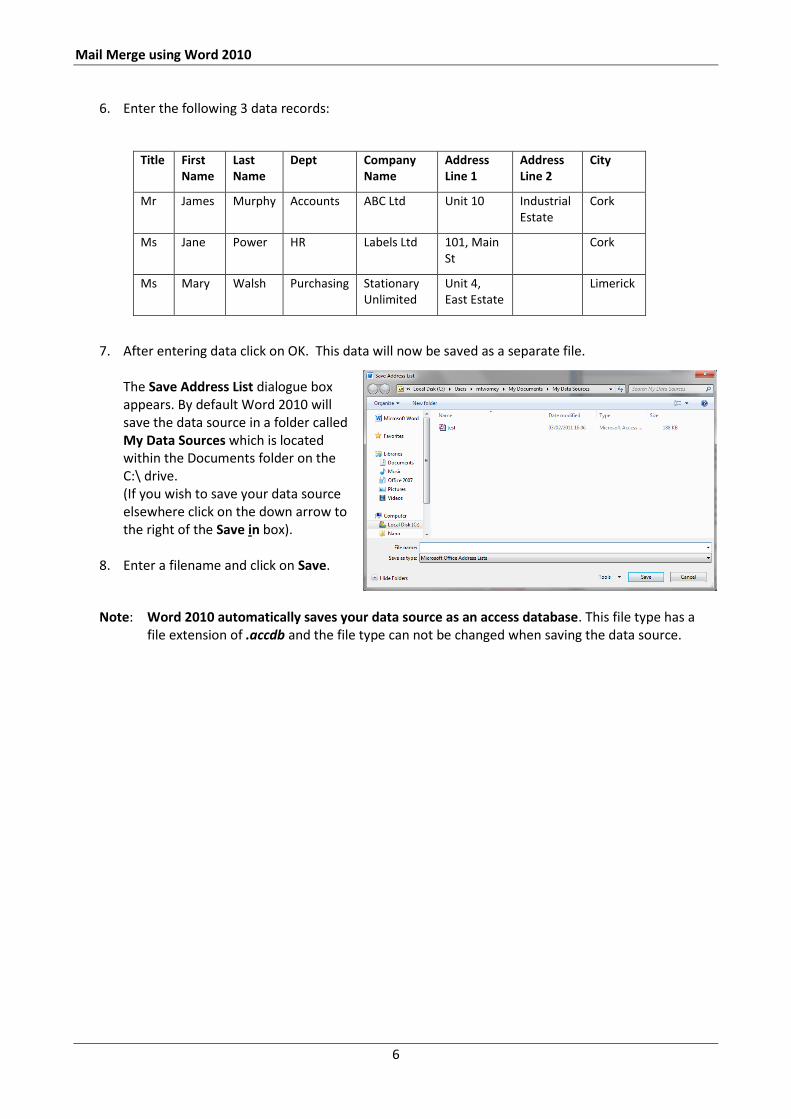
6. Enter the following 3 data records:
Title First Name
Last Name
Dept Company Name
Address Line 1
Address Line 2
City
Mr James Murphy Accounts ABC Ltd Unit 10 Industrial Estate
Cork
Ms Jane Power HR Labels Ltd 101, Main St
Cork
Ms Mary Walsh Purchasing Stationary Unlimited
Unit 4, East Estate
Limerick
7. After entering data click on OK. This data will now be saved as a separate file. The Save Address List dialogue box appears. By default Word 2010 will save the data source in a folder called My Data Sources which is located within the Documents folder on the C:\ drive. (If you wish to save your data source elsewhere click on the down arrow to the right of the Save in box).
8. Enter a filename and click on Save.
Note: Word 2010 automatically saves your data source as an access database. This file type has a file extension of .accdb and the file type can not be changed when saving the data source.

Mail Merge using Word 2010
7
Editing an existing data source
To edit an existing data source, simply open the file in the application that it was originally created, make the appropriate changes and save the file. When you use the data source again for a mail merge the changes will be reflected.
Alternatively, carry out the following steps within Word to edit your data source:
1. Open the original main document used for the mail merge.
2. To access the data source Click on the Edit Recipients List command
3. The Mail Merge Recipients are displayed , click on the file name under the Data Source heading
4. Then click on Edit (this button will be greyed out until you have carried out the previous step)
5. The data is displayed, go to the record you wish to edit and make the appropriate changes. Records may also be added or deleted using the New Entry or Delete Entry buttons. Warning when you use the delete button the record is deleted without displaying any warning message!!
6. Click on OK
7. You will be prompted to save the changes made to the data source file
8. Click on Yes then click on OK
Mail Merge using Word 2010
8
Refining the list of Recipients
When you connect to a certain data source file, you might not want to merge information from all the records (or rows) in that data file into your main document.
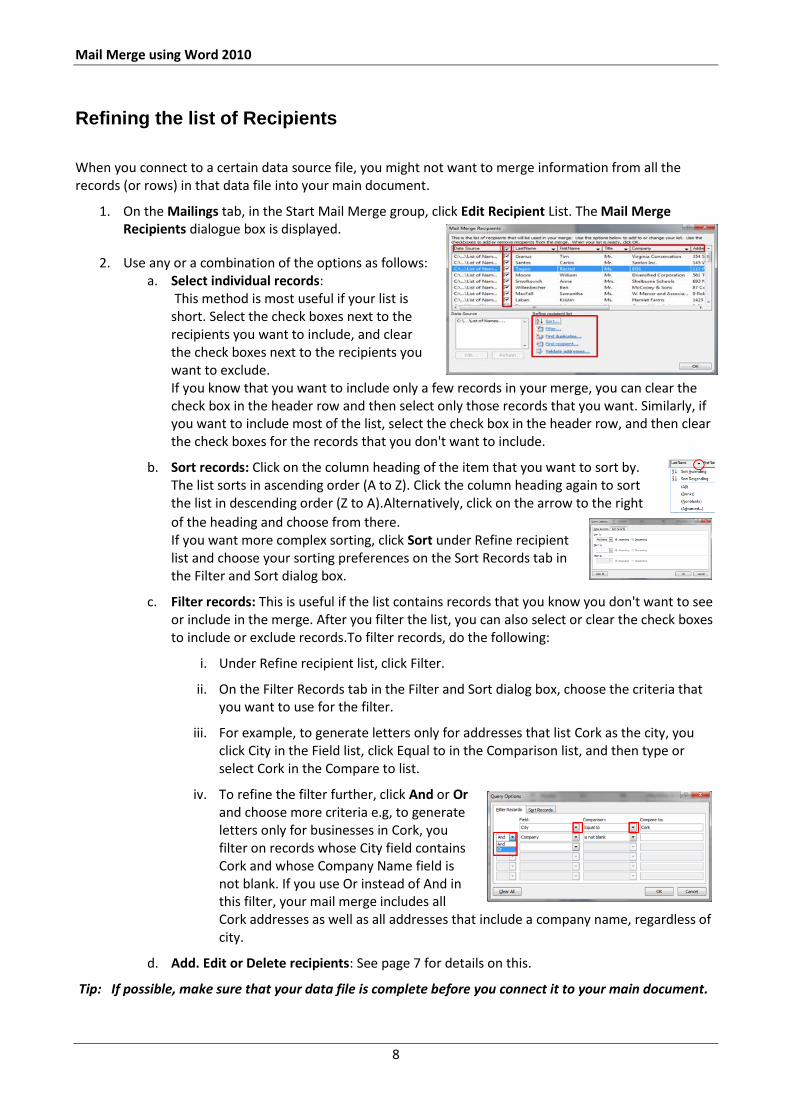
1. On the Mailings tab, in the Start Mail Merge group, click Edit Recipient List. The Mail Merge Recipients dialogue box is displayed.
2. Use any or a combination of the options as follows: a. Select individual records:
This method is most useful if your list is short. Select the check boxes next to the recipients you want to include, and clear the check boxes next to the recipients you want to exclude. If you know that you want to include only a few records in your merge, you can clear the check box in the header row and then select only those records that you want. Similarly, if you want to include most of the list, select the check box in the header row, and then clear the check boxes for the records that you don't want to include.
b. Sort records: Click on the column heading of the item that you want to sort by. The list sorts in ascending order (A to Z). Click the column heading again to sort the list in descending order (Z to A).Alternatively, click on the arrow to the right
of the heading and choose from there. If you want more complex sorting, click Sort under Refine recipient list and choose your sorting preferences on the Sort Records tab in the Filter and Sort dialog box.
c. Filter records: This is useful if the list contains records that you know you don't want to see or include in the merge. After you filter the list, you can also select or clear the check boxes to include or exclude records.To filter records, do the following:
i. Under Refine recipient list, click Filter.
ii. On the Filter Records tab in the Filter and Sort dialog box, choose the criteria that you want to use for the filter.
iii. For example, to generate letters only for addresses that list Cork as the city, you click City in the Field list, click Equal to in the Comparison list, and then type or select Cork in the Compare to list.
iv. To refine the filter further, click And or Or and choose more criteria e.g, to generate letters only for businesses in Cork, you filter on records whose City field contains Cork and whose Company Name field is not blank. If you use Or instead of And in this filter, your mail merge includes all Cork addresses as well as all addresses that include a company name, regardless of city.
d. Add. Edit or Delete recipients: See page 7 for details on this.
Tip: If possible, make sure that your data file is complete before you connect it to your main document.
Mail Merge using Word 2010
9
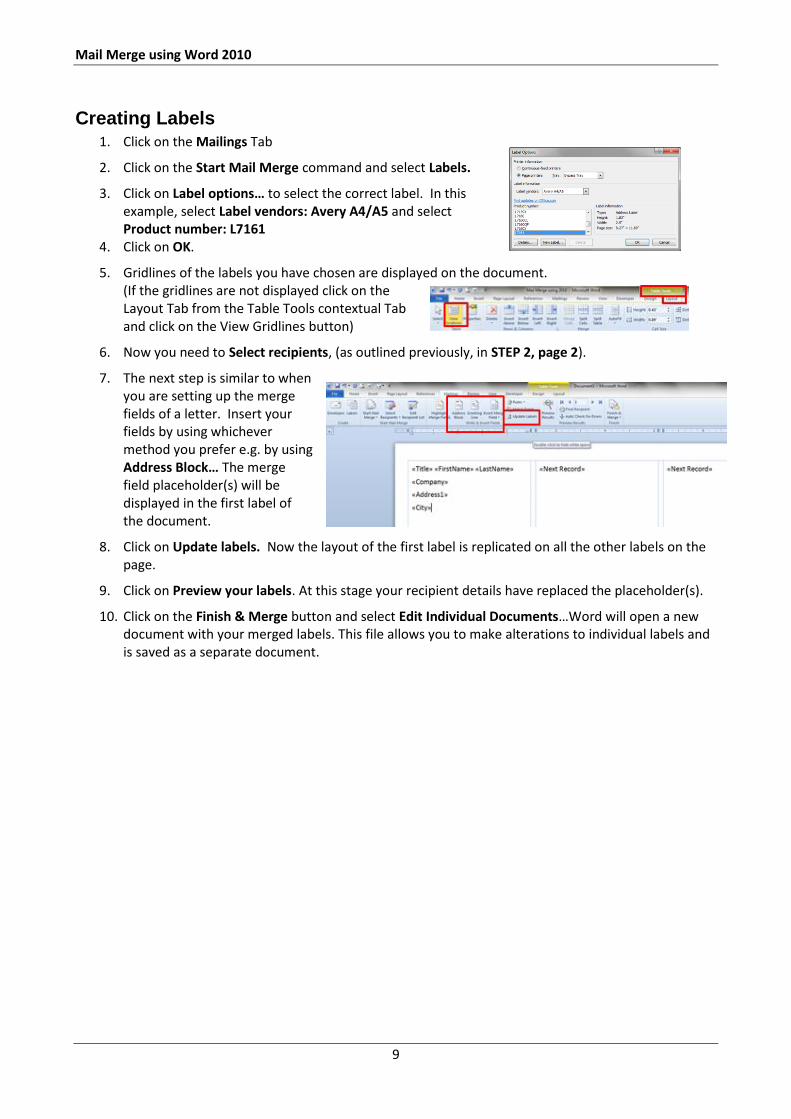
Creating Labels 1. Click on the Mailings Tab
2. Click on the Start Mail Merge command and select Labels.
3. Click on Label options… to select the correct label. In this example, select Label vendors: Avery A4/A5 and select Product number: L7161
4. Click on OK.
5. Gridlines of the labels you have chosen are displayed on the document. (If the gridlines are not displayed click on the Layout Tab from the Table Tools contextual Tab and click on the View Gridlines button)
6. Now you need to Select recipients, (as outlined previously, in STEP 2, page 2).
7. The next step is similar to when you are setting up the merge fields of a letter. Insert your fields by using whichever method you prefer e.g. by using Address Block… The merge field placeholder(s) will be displayed in the first label of the document.
8. Click on Update labels. Now the layout of the first label is replicated on all the other labels on the page.
9. Click on Preview your labels. At this stage your recipient details have replaced the placeholder(s).
10. Click on the Finish & Merge button and select Edit Individual Documents…Word will open a new document with your merged labels. This file allows you to make alterations to individual labels and is saved as a separate document.
Mail Merge using Word 2010
10
Using data sources from other applications
Your data source is made up of sets of information structured in columns called fields and rows called records. You can use a list from any of the following programs; Microsoft Word, Excel, Access or Outlook. However it is important that the structure of your list is laid out correctly so that it can be used successfully as a data source.
Word
1. Lay out the data in a table. The first row contains the fieldnames. Each column will contain a separate field e.g. the first column might contain Firstname and the next column would be Lastname.
Title FirstName LastName AddressLine1 AddressLine2 City
Mr James Murphy Unit 10 Industrial Estate
Cork
Ms Jane Power 101 Main St Cork
Ms Mary Walsh Unit 4, East Estate Limerick
2. Once you have your data source saved you then start your Mail Merge within Microsoft Word as outlined on pages 2 & 3.
3. At the Select Recipients step click on browse – ensure that files of type is set to All Files otherwise the only files listed are .accdb (access) files. When you locate your file continue the steps as previously outlined.
Excel
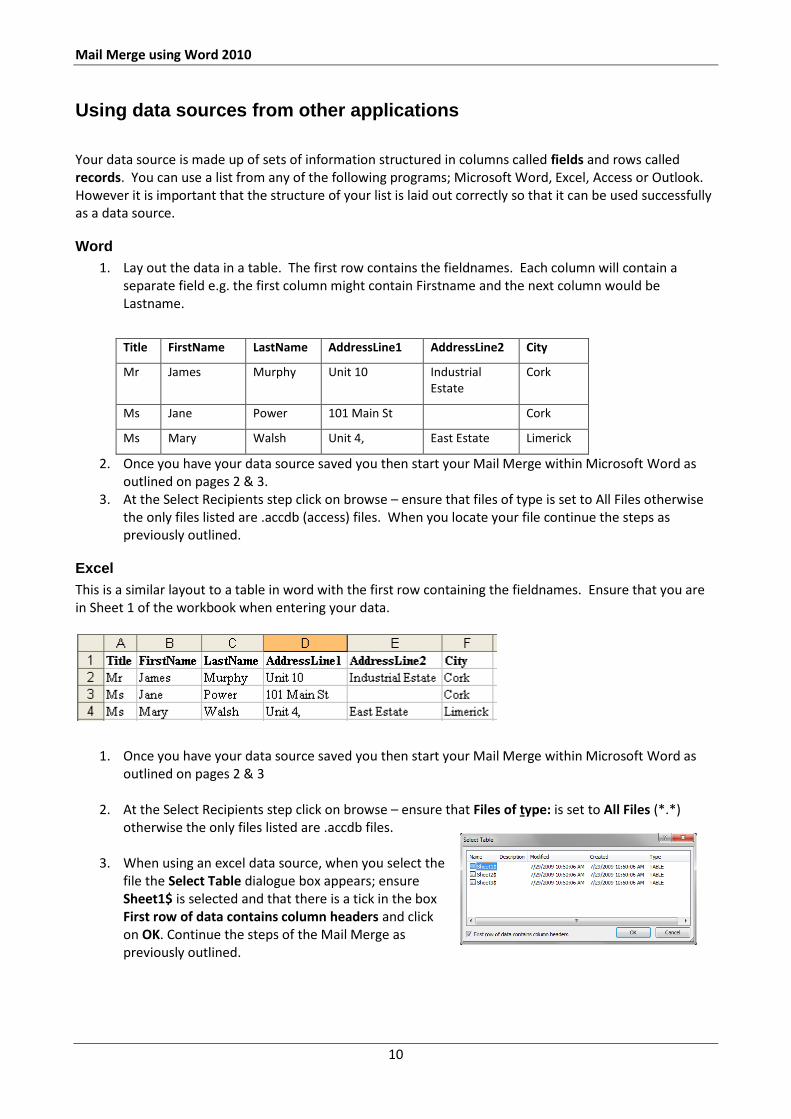
This is a similar layout to a table in word with the first row containing the fieldnames. Ensure that you are in Sheet 1 of the workbook when entering your data.
1. Once you have your data source saved you then start your Mail Merge within Microsoft Word as outlined on pages 2 & 3
2. At the Select Recipients step click on browse – ensure that Files of type: is set to All Files (*.*) otherwise the only files listed are .accdb files.
3. When using an excel data source, when you select the file the Select Table dialogue box appears; ensure Sheet1$ is selected and that there is a tick in the box First row of data contains column headers and click on OK. Continue the steps of the Mail Merge as previously outlined.
Mail Merge using Word 2010
11
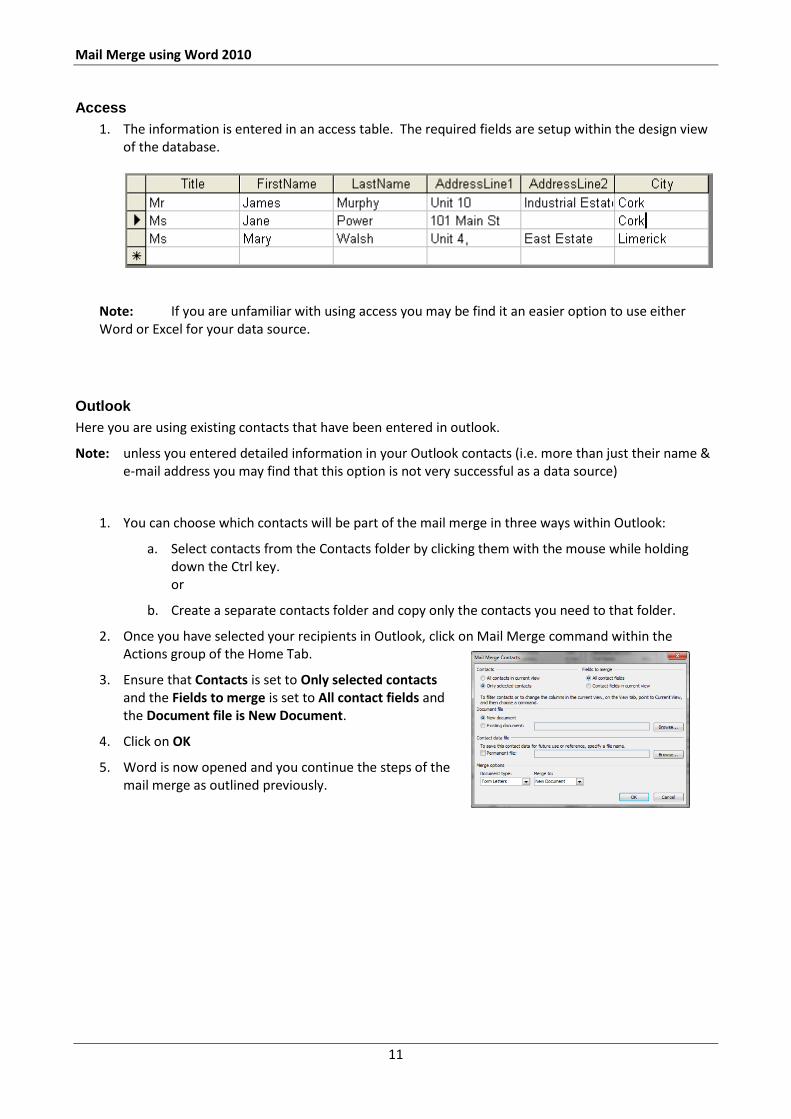
Access
1. The information is entered in an access table. The required fields are setup within the design view of the database.
Note: If you are unfamiliar with using access you may be find it an easier option to use either Word or Excel for your data source.
Outlook
Here you are using existing contacts that have been entered in outlook.
Note: unless you entered detailed information in your Outlook contacts (i.e. more than just their name & e-mail address you may find that this option is not very successful as a data source)
1. You can choose which contacts will be part of the mail merge in three ways within Outlook:
a. Select contacts from the Contacts folder by clicking them with the mouse while holding down the Ctrl key. or
b. Create a separate contacts folder and copy only the contacts you need to that folder.
2. Once you have selected your recipients in Outlook, click on Mail Merge command within the Actions group of the Home Tab.
3. Ensure that Contacts is set to Only selected contacts and the Fields to merge is set to All contact fields and the Document file is New Document.
4. Click on OK
5. Word is now opened and you continue the steps of the mail merge as outlined previously.
Mail Merge using Word 2010
12
Sending a Mail Merge Email via Outlook If you wish to send a personalised email it can be created in word using an existing data source that contains a list of email addresses (this could be a column within a word table or an excel/access list). While it is set up in Word it is sent via your Outlook account.
1. Click on the Mailings Tab
2. Click on the Start Mail Merge button and select Email messages.
3. Use the Select Recipients button to select the data source file.
4. Use the Write & Insert field group commands as previously outlined in Step 3 & 4 on page 3 of this manual to setup up the email message.
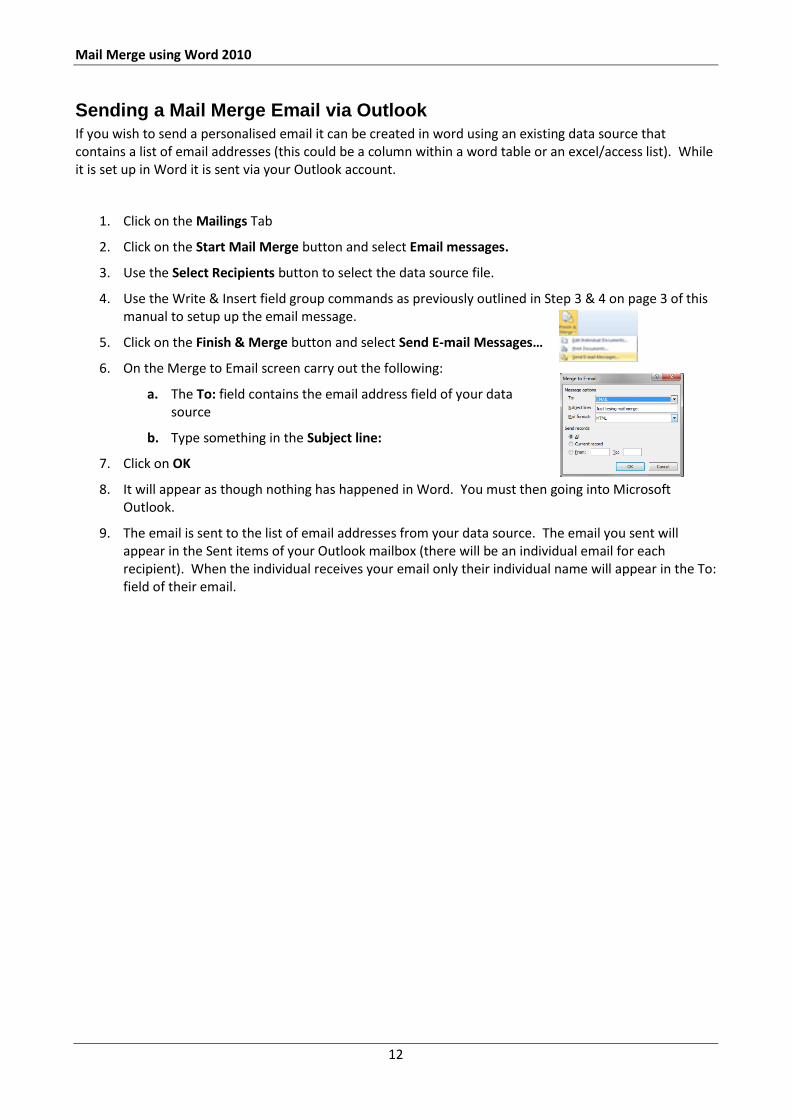
5. Click on the Finish & Merge button and select Send E-mail Messages…
6. On the Merge to Email screen carry out the following:
a. The To: field contains the email address field of your data source
b. Type something in the Subject line:
7. Click on OK
8. It will appear as though nothing has happened in Word. You must then going into Microsoft Outlook.
9. The email is sent to the list of email addresses from your data source. The email you sent will appear in the Sent items of your Outlook mailbox (there will be an individual email for each recipient). When the individual receives your email only their individual name will appear in the To: field of their email.
Mail Merge using Word 2010
13
Notes