Embed Size (px)
Citation preview
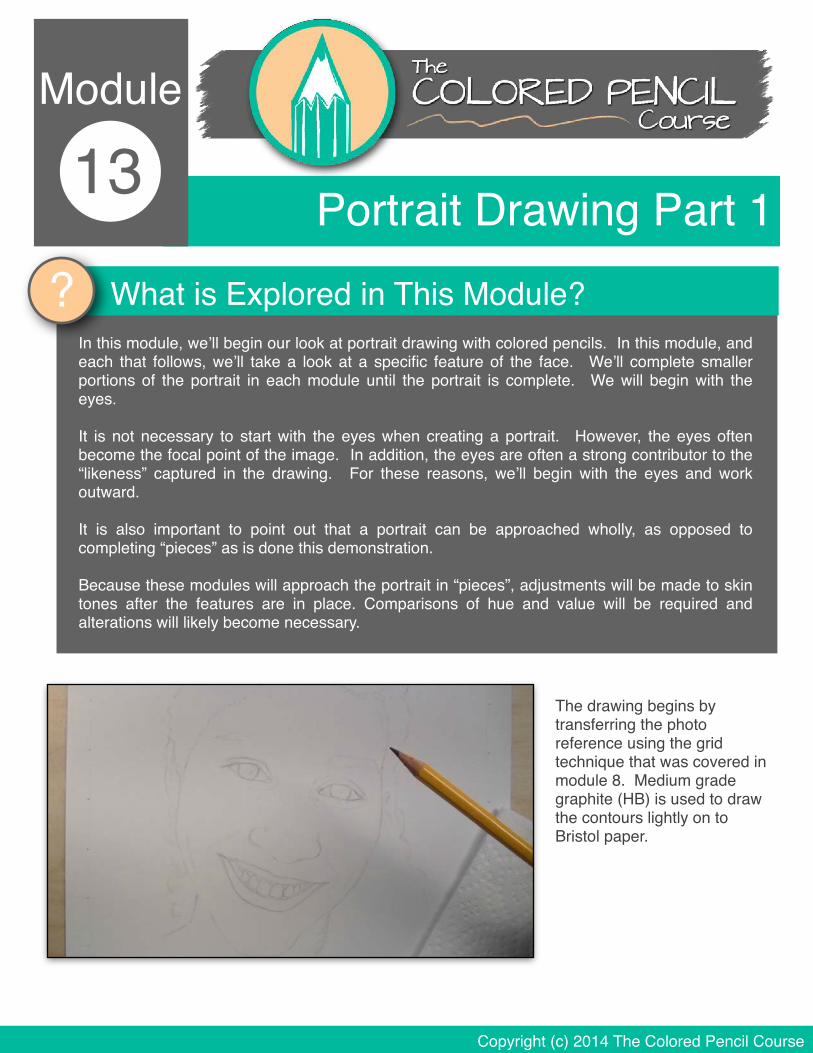
Portrait Drawing Part 113Module
In this module, we’ll begin our look at portrait drawing with colored pencils. In this module, and each that follows, we’ll take a look at a specific feature of the face. We’ll complete smaller portions of the portrait in each module until the portrait is complete. We will begin with the eyes.!!It is not necessary to start with the eyes when creating a portrait. However, the eyes often become the focal point of the image. In addition, the eyes are often a strong contributor to the “likeness” captured in the drawing. For these reasons, we’ll begin with the eyes and work outward. !!It is also important to point out that a portrait can be approached wholly, as opposed to completing “pieces” as is done this demonstration. !!Because these modules will approach the portrait in “pieces”, adjustments will be made to skin tones after the features are in place. Comparisons of hue and value will be required and alterations will likely become necessary. !
? What is Explored in This Module?
Copyright (c) 2014 The Colored Pencil Course
The drawing begins by transferring the photo reference using the grid technique that was covered in module 8. Medium grade graphite (HB) is used to draw the contours lightly on to Bristol paper.!
Copyright (c) 2014 The Colored Pencil Course
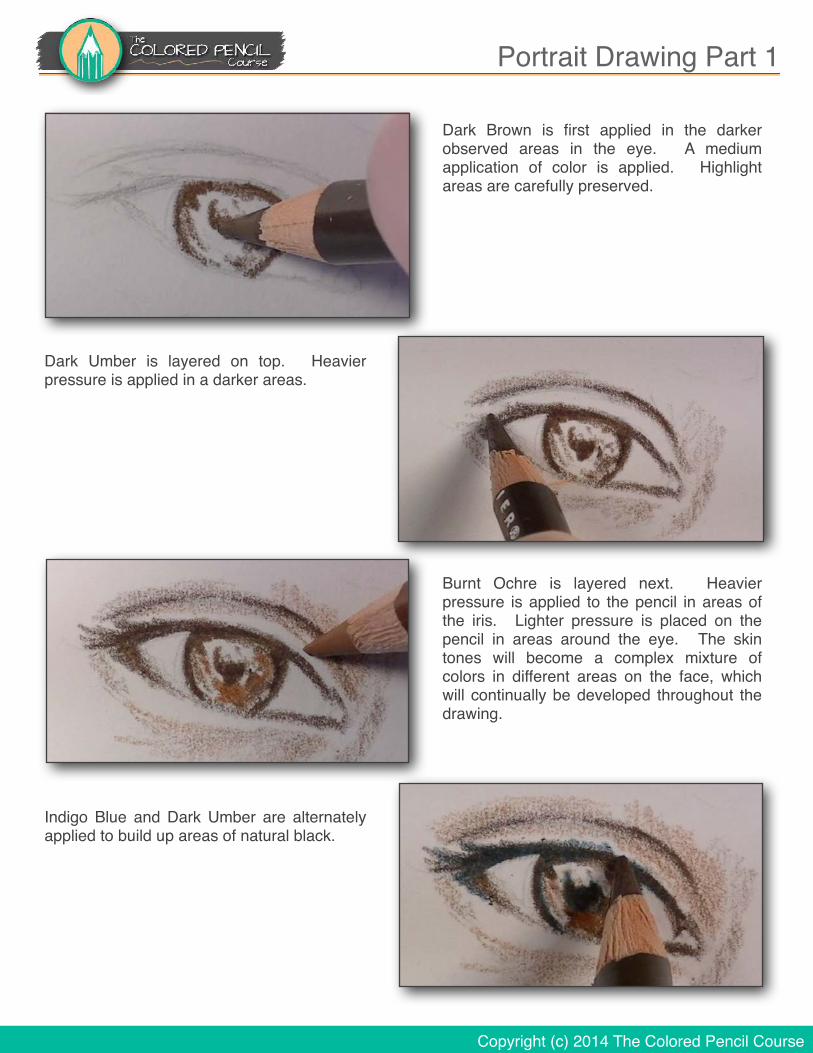
Dark Brown is first applied in the darker observed areas in the eye. A medium application of color is applied. Highlight areas are carefully preserved.!
Portrait Drawing Part 1
Dark Umber is layered on top. Heavier pressure is applied in a darker areas. !
Burnt Ochre is layered next. Heavier pressure is applied to the pencil in areas of the iris. Lighter pressure is placed on the pencil in areas around the eye. The skin tones will become a complex mixture of colors in different areas on the face, which will continually be developed throughout the drawing. !
Indigo Blue and Dark Umber are alternately applied to build up areas of natural black. !
Copyright (c) 2014 The Colored Pencil Course
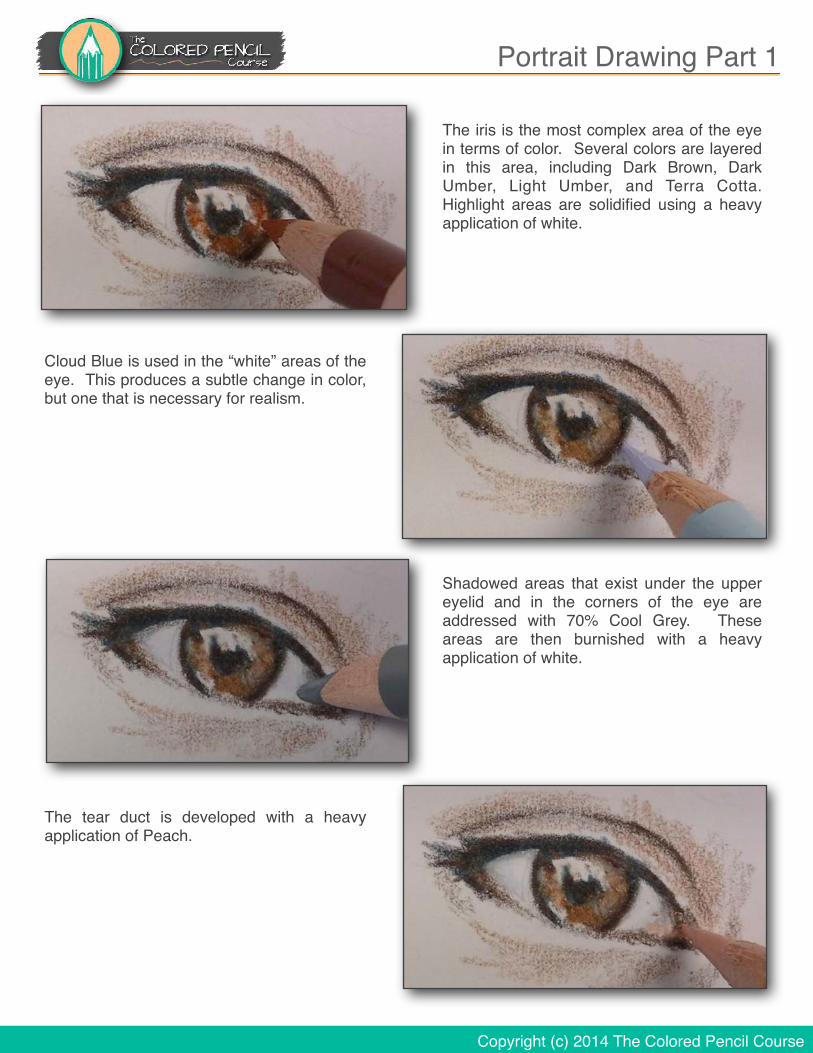
The iris is the most complex area of the eye in terms of color. Several colors are layered in this area, including Dark Brown, Dark Umber, Light Umber, and Terra Cotta. Highlight areas are solidified using a heavy application of white. !
Portrait Drawing Part 1
Cloud Blue is used in the “white” areas of the eye. This produces a subtle change in color, but one that is necessary for realism. !
Shadowed areas that exist under the upper eyelid and in the corners of the eye are addressed with 70% Cool Grey. These areas are then burnished with a heavy application of white.!
The tear duct is developed with a heavy application of Peach. !
Copyright (c) 2014 The Colored Pencil Course
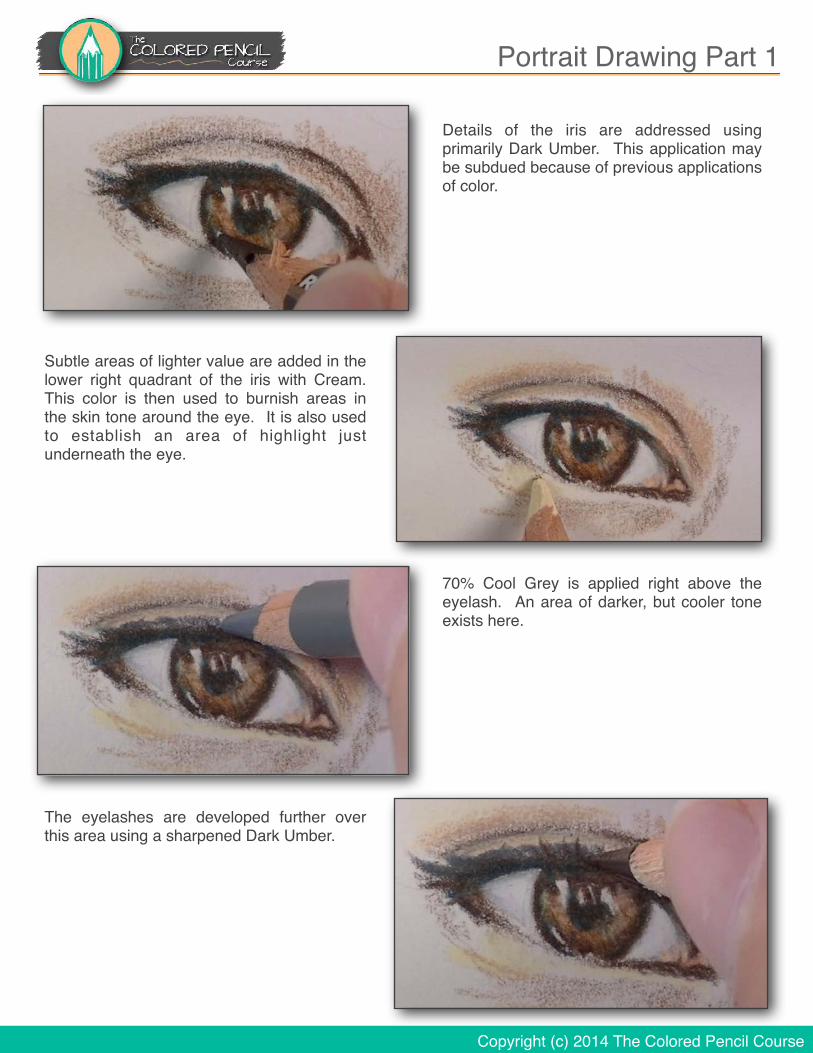
Details of the iris are addressed using primarily Dark Umber. This application may be subdued because of previous applications of color. !
Portrait Drawing Part 1
Subtle areas of lighter value are added in the lower right quadrant of the iris with Cream. This color is then used to burnish areas in the skin tone around the eye. It is also used to establish an area of highlight just underneath the eye. !
70% Cool Grey is applied right above the eyelash. An area of darker, but cooler tone exists here.!
The eyelashes are developed further over this area using a sharpened Dark Umber.!
Copyright (c) 2014 The Colored Pencil Course
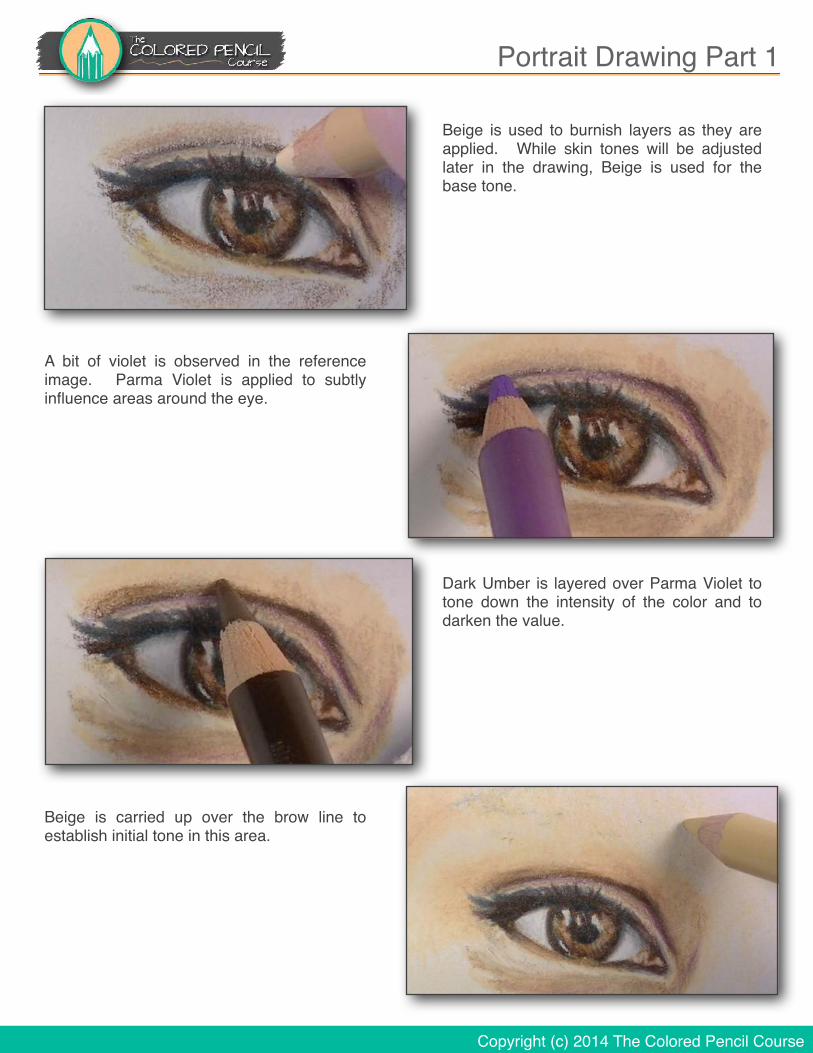
Beige is used to burnish layers as they are applied. While skin tones will be adjusted later in the drawing, Beige is used for the base tone.!
Portrait Drawing Part 1
A bit of violet is observed in the reference image. Parma Violet is applied to subtly influence areas around the eye.!
Dark Umber is layered over Parma Violet to tone down the intensity of the color and to darken the value.!
Beige is carried up over the brow line to establish initial tone in this area. !
Copyright (c) 2014 The Colored Pencil Course
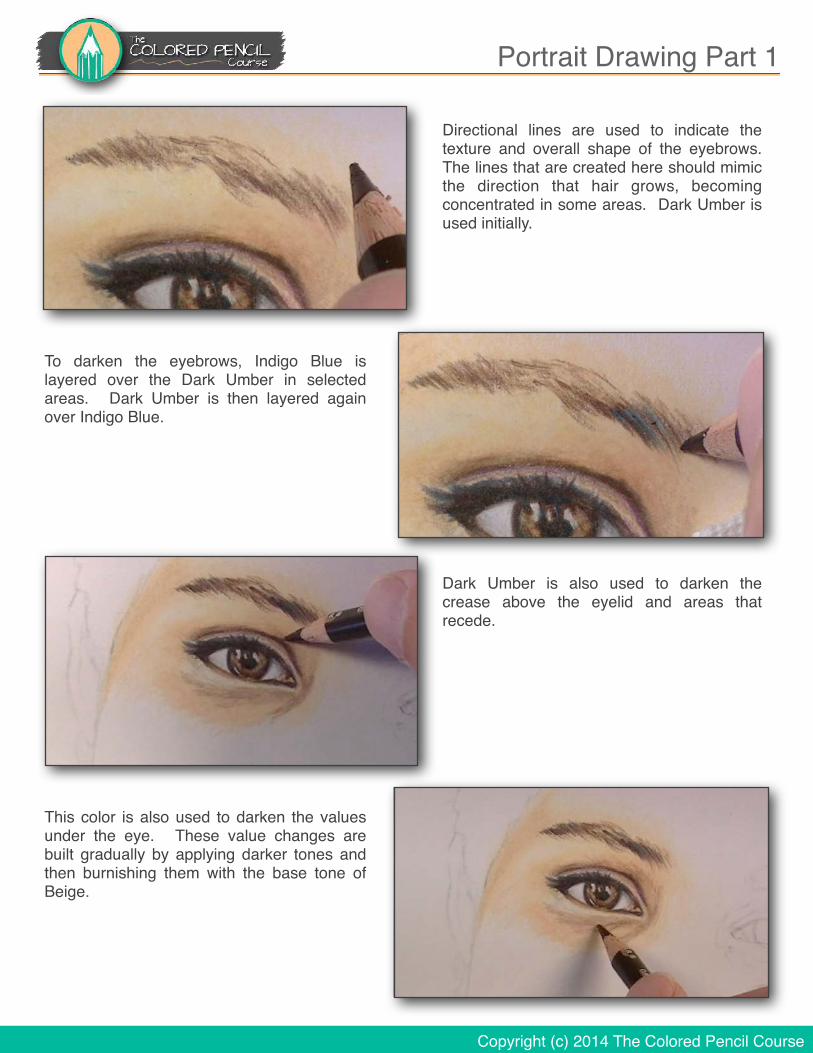
Directional lines are used to indicate the texture and overall shape of the eyebrows. The lines that are created here should mimic the direction that hair grows, becoming concentrated in some areas. Dark Umber is used initially. !
Portrait Drawing Part 1
To darken the eyebrows, Indigo Blue is layered over the Dark Umber in selected areas. Dark Umber is then layered again over Indigo Blue.!
Dark Umber is also used to darken the crease above the eyelid and areas that recede. !
This color is also used to darken the values under the eye. These value changes are built gradually by applying darker tones and then burnishing them with the base tone of Beige.!
Copyright (c) 2014 The Colored Pencil Course
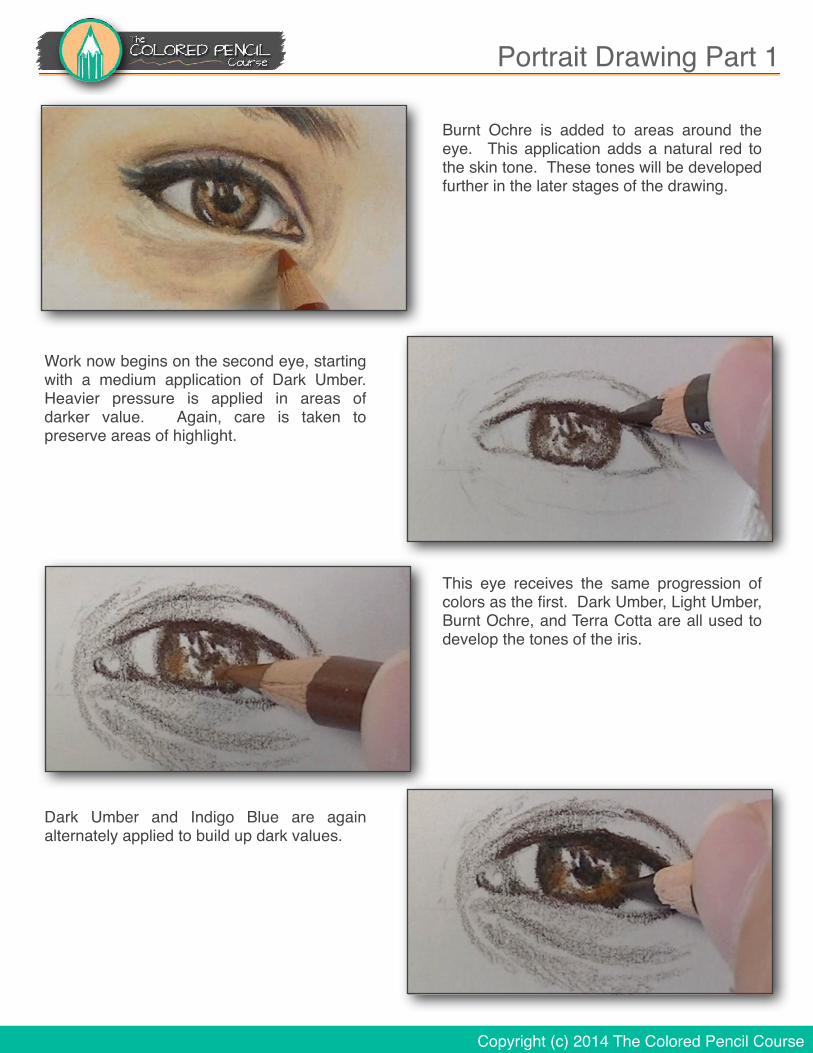
Burnt Ochre is added to areas around the eye. This application adds a natural red to the skin tone. These tones will be developed further in the later stages of the drawing.!
Portrait Drawing Part 1
Work now begins on the second eye, starting with a medium application of Dark Umber. Heavier pressure is applied in areas of darker value. Again, care is taken to preserve areas of highlight.!
This eye receives the same progression of colors as the first. Dark Umber, Light Umber, Burnt Ochre, and Terra Cotta are all used to develop the tones of the iris.!
Dark Umber and Indigo Blue are again alternately applied to build up dark values.!
Copyright (c) 2014 The Colored Pencil Course
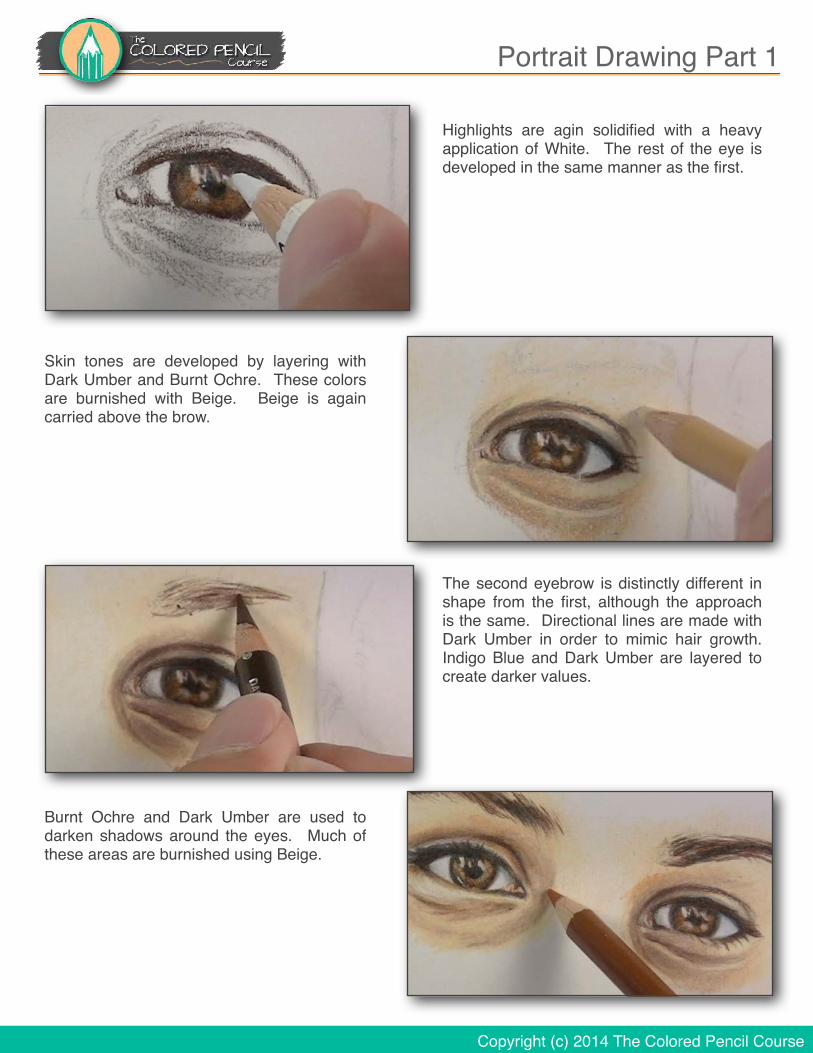
Highlights are agin solidified with a heavy application of White. The rest of the eye is developed in the same manner as the first. !
Portrait Drawing Part 1
Skin tones are developed by layering with Dark Umber and Burnt Ochre. These colors are burnished with Beige. Beige is again carried above the brow. !
The second eyebrow is distinctly different in shape from the first, although the approach is the same. Directional lines are made with Dark Umber in order to mimic hair growth. Indigo Blue and Dark Umber are layered to create darker values.!
Burnt Ochre and Dark Umber are used to darken shadows around the eyes. Much of these areas are burnished using Beige. !