Embed Size (px)
Citation preview

Velocity
AVG-18900StepS Above Moonbow
PE-413CAvIAR
PE-433Snow
SE-606ShAdow
© 2015 Courtesy of Art Gallery Quilts LLC. All Rights Reserved.
F A B R I C S D E S I G N E D B Y
H A N D B A G D E S I G N E D B Y A G F S T U D I O
FABR IC REQUIREMENTS
Add IT IoNAl MATER IAlS
Fabric A AVG-18900 1 ½ yds. Fabric B PE-413 ⅝ yd. Fabric C PE-433 ½ yd. Fabric D SE-606 ⅔ yd. Grey Faux Leather
•two (2) 1” Circle Rings
•two (2) 1“ Swivel Clasps
•one (1) Magnetic Snap
•Ultra Firm Stabilizer
•Fusible Fleece
•wonder Clips
ar tga l le ry fabr ics.com
CUTT INg d IRECT IoNS
CoNSTRUCT IoN
Sew all rights sides together with ½"seam allowance, unless otherwise noted.
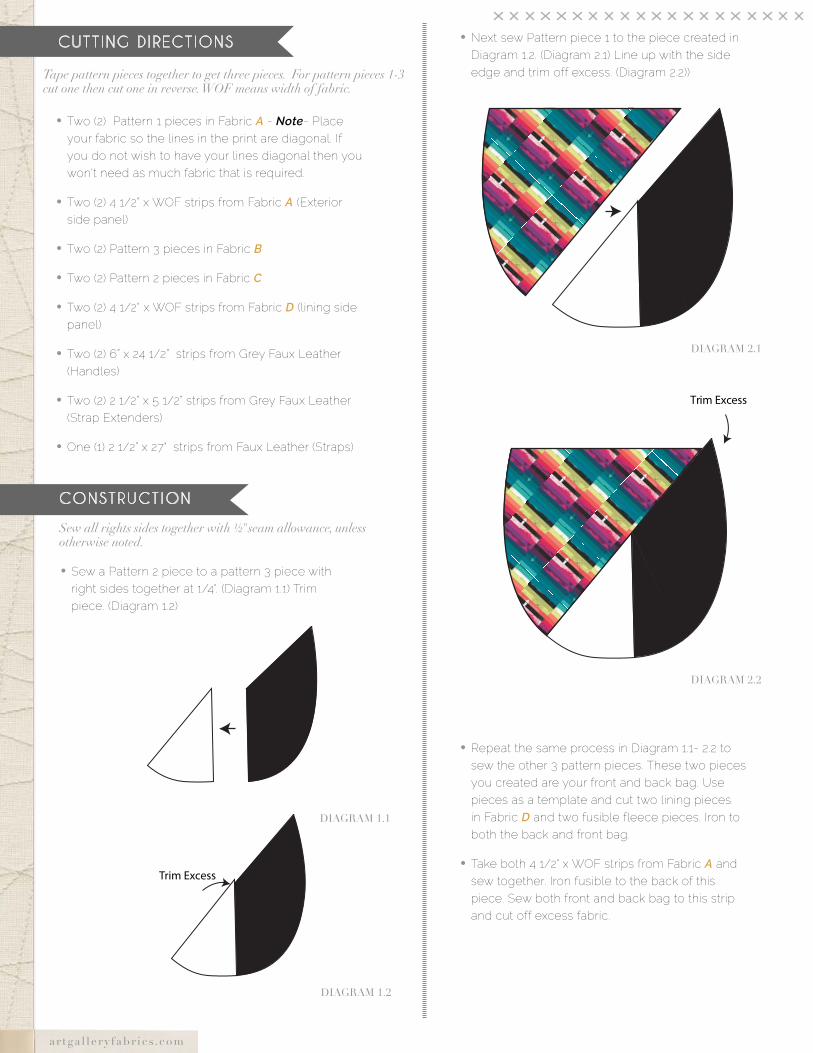
•Sew a pattern 2 piece to a pattern 3 piece with right sides together at 1/4". (diagram 1.1) trim piece. (diagram 1.2)
•next sew pattern piece 1 to the piece created in diagram 1.2. (diagram 2.1) Line up with the side edge and trim off excess. (diagram 2.2))
•two (2) pattern 1 pieces in Fabric A - Note- place your fabric so the lines in the print are diagonal. If you do not wish to have your lines diagonal then you won't need as much fabric that is required.
•two (2) 4 1/2” x woF strips from Fabric A (exterior side panel)
•two (2) pattern 3 pieces in Fabric B
•two (2) pattern 2 pieces in Fabric C
•two (2) 4 1/2“ x woF strips from Fabric D (lining side panel)
•two (2) 6” x 24 1/2” strips from Grey Faux Leather (handles)
•two (2) 2 1/2” x 5 1/2” strips from Grey Faux Leather (Strap extenders)
•one (1) 2 1/2” x 27" strips from Faux Leather (Straps)
DIAGRAM 1.1
DIAGRAM 1.2
DIAGRAM 2.1
DIAGRAM 2.2
Tape pattern pieces together to get three pieces. For pattern pieces 1-3 cut one then cut one in reverse. WOF means width of fabric.
Trim Excess
Trim Excess
•Repeat the same process in diagram 1.1- 2.2 to sew the other 3 pattern pieces. these two pieces you created are your front and back bag. Use pieces as a template and cut two lining pieces in Fabric D and two fusible fleece pieces. Iron to both the back and front bag.
•take both 4 1/2" x woF strips from Fabric A and sew together. Iron fusible to the back of this piece. Sew both front and back bag to this strip and cut off excess fabric.
ar tga l le ry fabr ics.com
DIAGRAM 3.3
DIAGRAM 3.1 DIAGRAM 3.2
DIAGRAM 4
DIAGRAM 5.2
DIAGRAM 5.3
DIAGRAM 5.1
•trim top of lining at 1/4", we want the lining to be a little smaller so it can lay nice and flat on the inside of the exterior of the bag.
•take both 4 1/2" x woF strips from Fabric D and sew together to make one long strip. Sew both front and back lining to this strip and cut off excess fabric but leave a small unsewn portion at the bottom of the lining to pull right side of bag through.
Creating the Handles
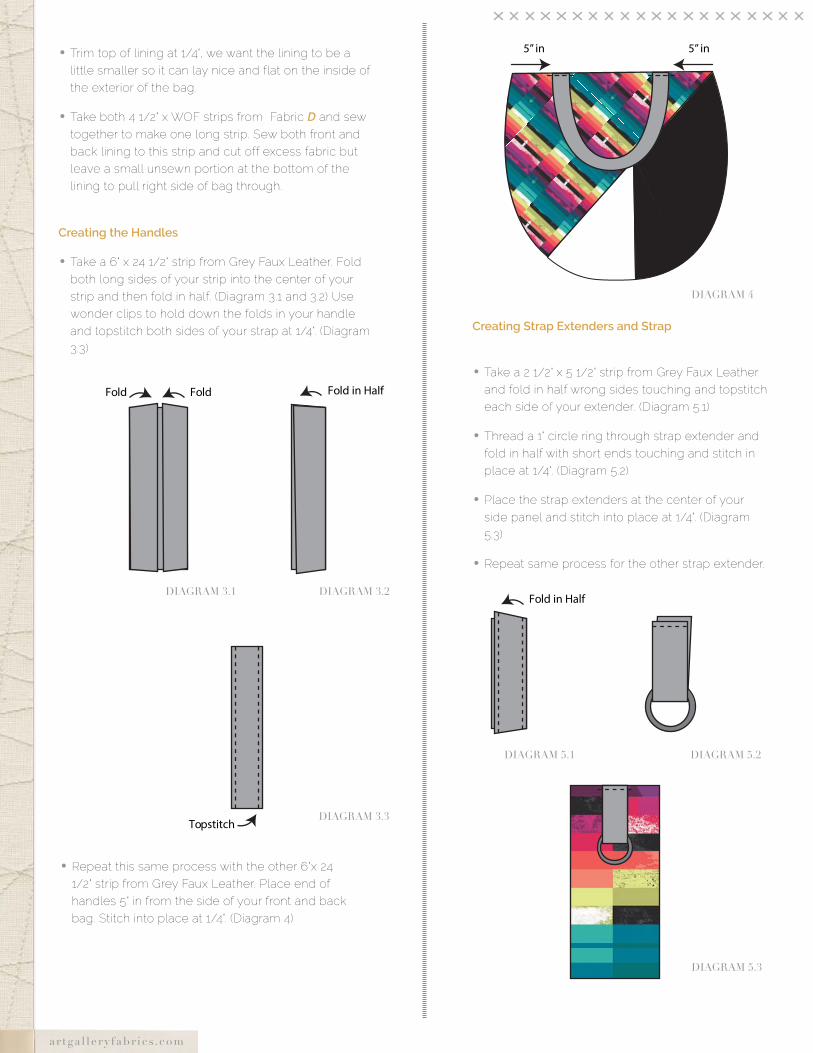
•take a 6" x 24 1/2" strip from Grey Faux Leather. Fold both long sides of your strip into the center of your strip and then fold in half. (diagram 3.1 and 3.2) Use wonder clips to hold down the folds in your handle and topstitch both sides of your strap at 1/4". (diagram 3.3)
•Repeat this same process with the other 6"x 24 1/2" strip from Grey Faux Leather. place end of handles 5" in from the side of your front and back bag. Stitch into place at 1/4". (diagram 4)
Creating Strap Extenders and Strap
•take a 2 1/2" x 5 1/2" strip from Grey Faux Leather and fold in half wrong sides touching and topstitch each side of your extender. (diagram 5.1)
•thread a 1" circle ring through strap extender and fold in half with short ends touching and stitch in place at 1/4". (diagram 5.2)
•place the strap extenders at the center of your side panel and stitch into place at 1/4". (diagram 5.3)
•Repeat same process for the other strap extender.
FoldFold Fold in Half
Topstitch
5” in 5” in
Fold in Half
ar tga l le ry fabr ics.com
B INd INg NOTE: While all possible care has been taken to ensure the accuracy of this pattern, We are not responsible for printing errors or the way in which individual work varies.Please read instructions carefully before starting the construction of this quilt. If desired, wash and iron your fabrics before starting to cut.
ar tga l le ry fabr ics.com
© 2015 Courtesy of Art Gallery Quilts LLC. All Rights Reserved.
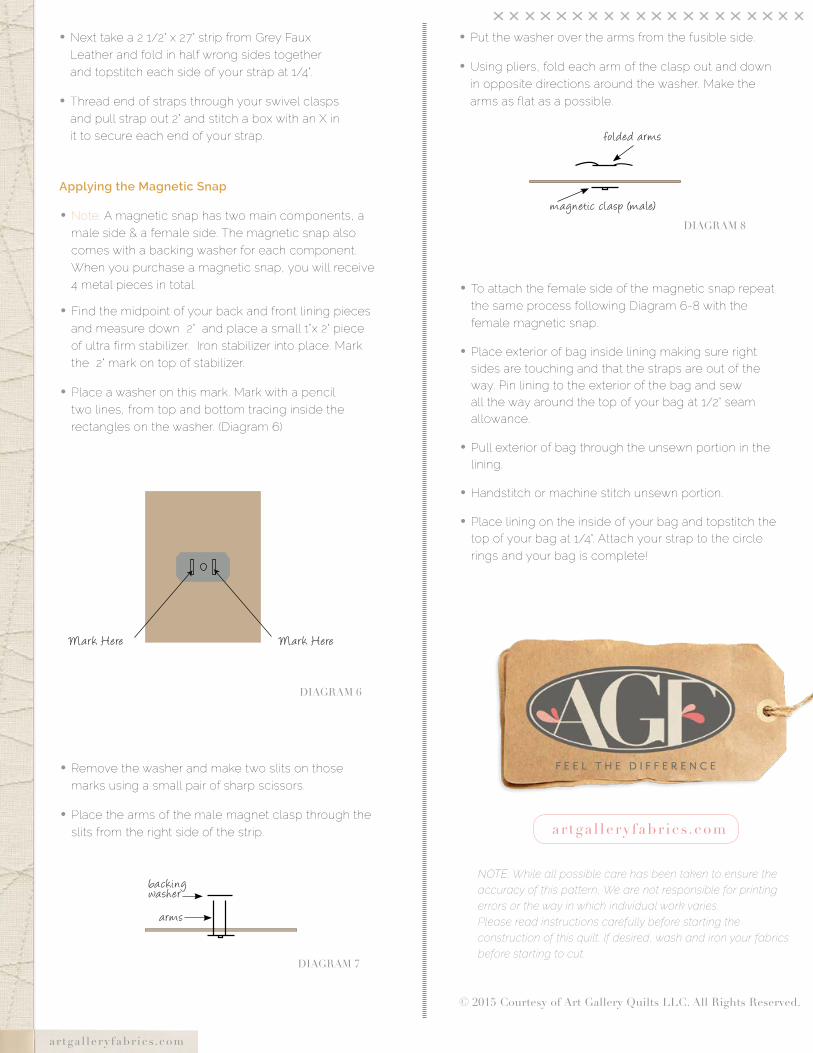
•Find the midpoint of your back and front lining pieces and measure down 2" and place a small 1"x 2" piece of ultra firm stabilizer. Iron stabilizer into place. Mark the 2" mark on top of stabilizer.
•place a washer on this mark. Mark with a pencil two lines, from top and bottom tracing inside the rectangles on the washer. (diagram 6)
•Remove the washer and make two slits on those marks using a small pair of sharp scissors.
•place the arms of the male magnet clasp through the slits from the right side of the strip.
•put the washer over the arms from the fusible side.
•Using pliers, fold each arm of the clasp out and down in opposite directions around the washer. Make the arms as flat as a possible.
•to attach the female side of the magnetic snap repeat the same process following diagram 6-8 with the female magnetic snap.
•place exterior of bag inside lining making sure right sides are touching and that the straps are out of the way. pin lining to the exterior of the bag and sew all the way around the top of your bag at 1/2" seam allowance.
•pull exterior of bag through the unsewn portion in the lining.
•handstitch or machine stitch unsewn portion.
•place lining on the inside of your bag and topstitch the top of your bag at 1/4". Attach your strap to the circle rings and your bag is complete!
Mark HereMark Here
DIAGRAM 6
DIAGRAM 7
DIAGRAM 8
backingwasher
a rms
folded a rms
magnetic cla sp (ma le)
Applying the Magnetic Snap
•note: A magnetic snap has two main components, a male side & a female side. the magnetic snap also comes with a backing washer for each component. when you purchase a magnetic snap, you will receive 4 metal pieces in total.
•next take a 2 1/2" x 27" strip from Grey Faux Leather and fold in half wrong sides together and topstitch each side of your strap at 1/4".
•thread end of straps through your swivel clasps and pull strap out 2" and stitch a box with an X in it to secure each end of your strap.
ar tga l le ry fabr ics.com
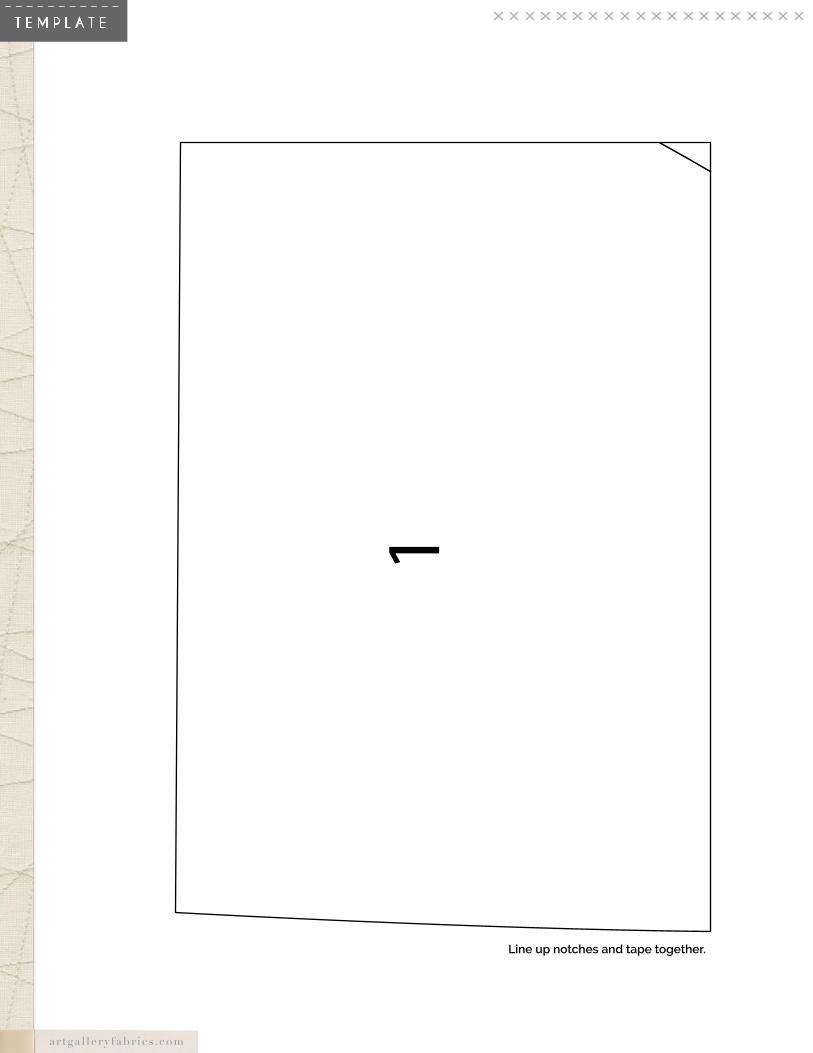
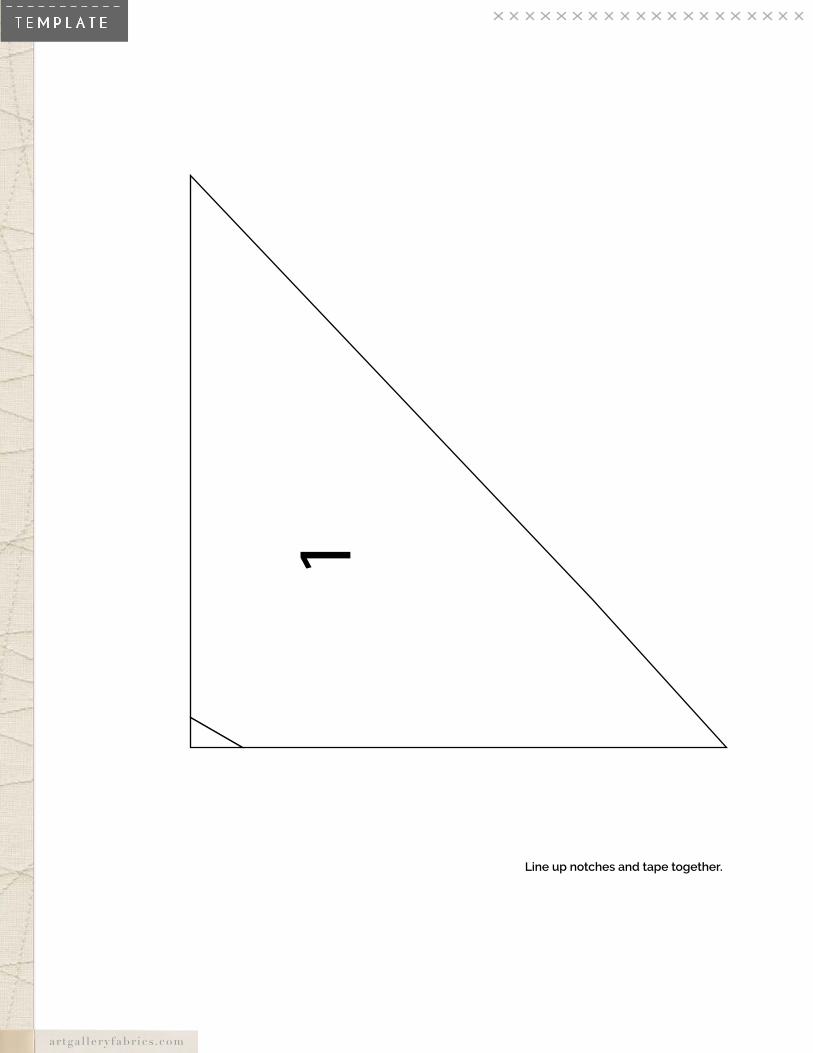
T E M P l A T E
1
Line up notches and tape together.
ar tga l le ry fabr ics.com
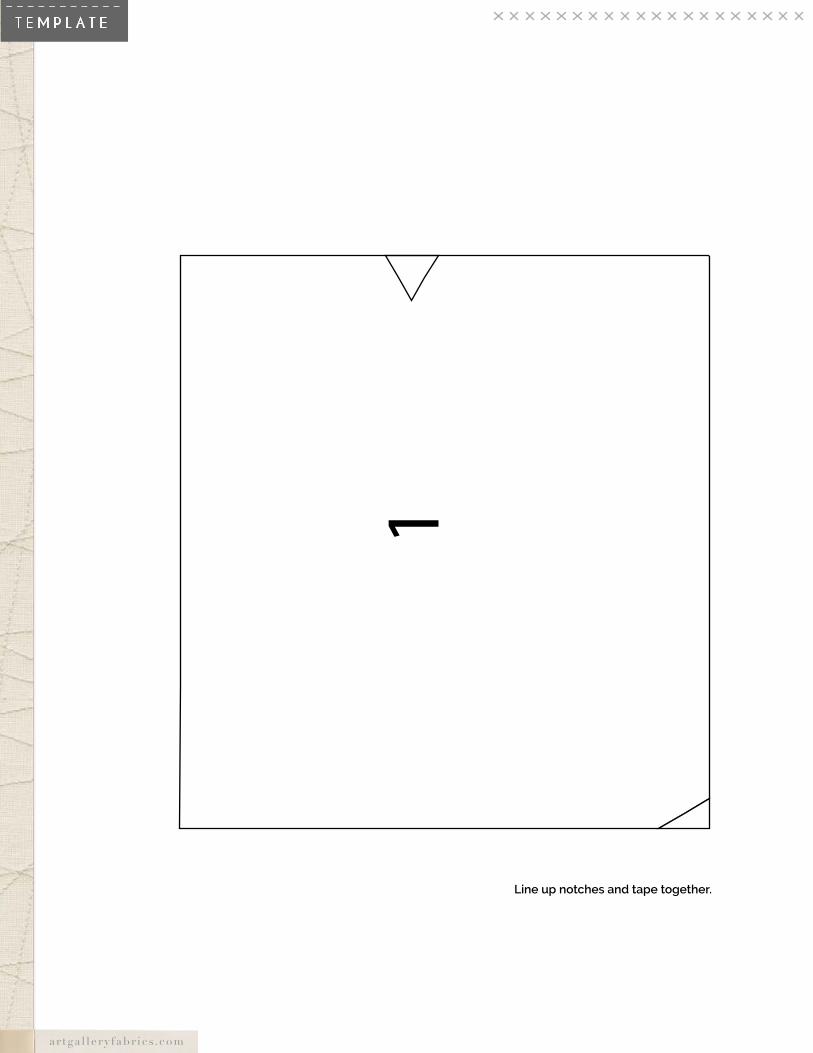
T E M P l A T E
1
Line up notches and tape together.
ar tga l le ry fabr ics.com
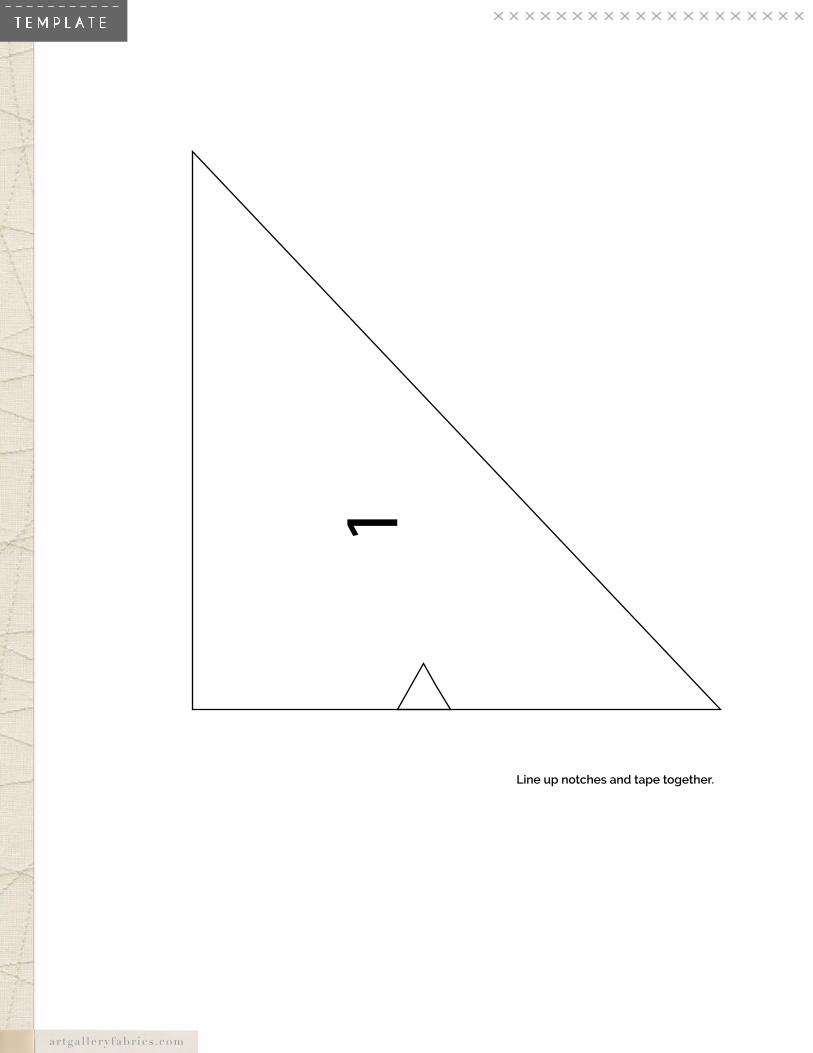
T E M P l A T E
1
Line up notches and tape together.
ar tga l le ry fabr ics.com
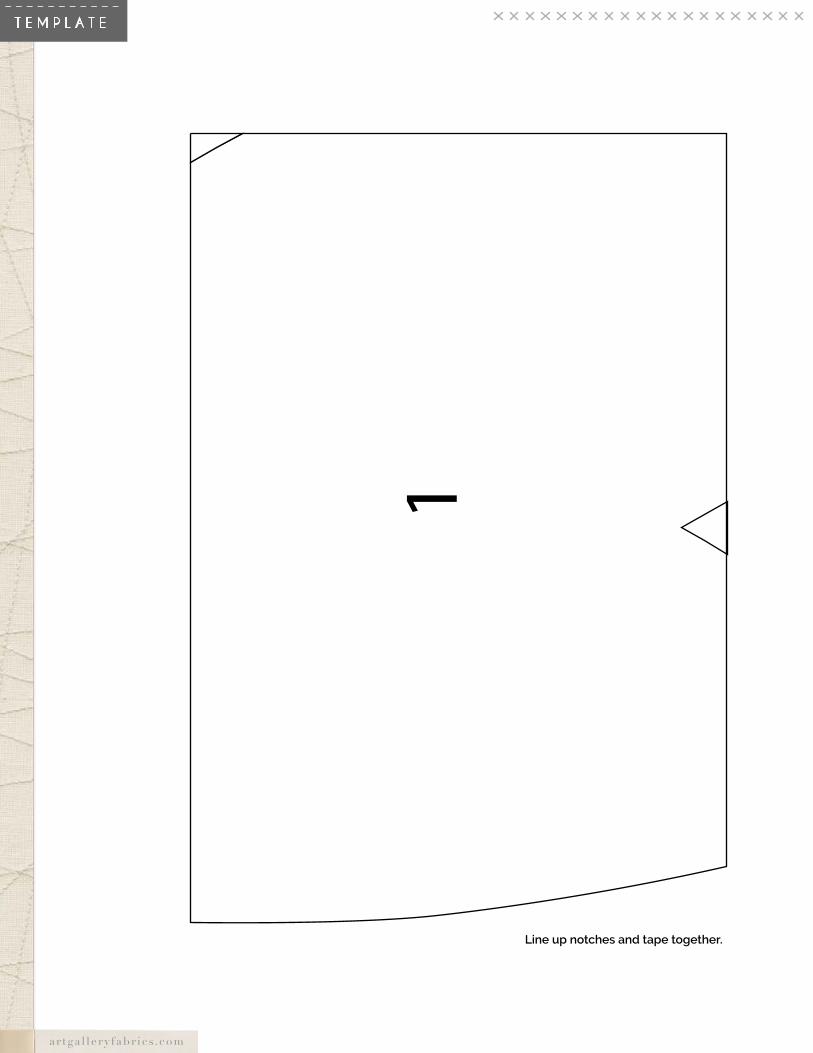
T E M P l A T E
1
Line up notches and tape together.
ar tga l le ry fabr ics.com
T E M P l A T E
1
Line up notches and tape together.
ar tga l le ry fabr ics.com
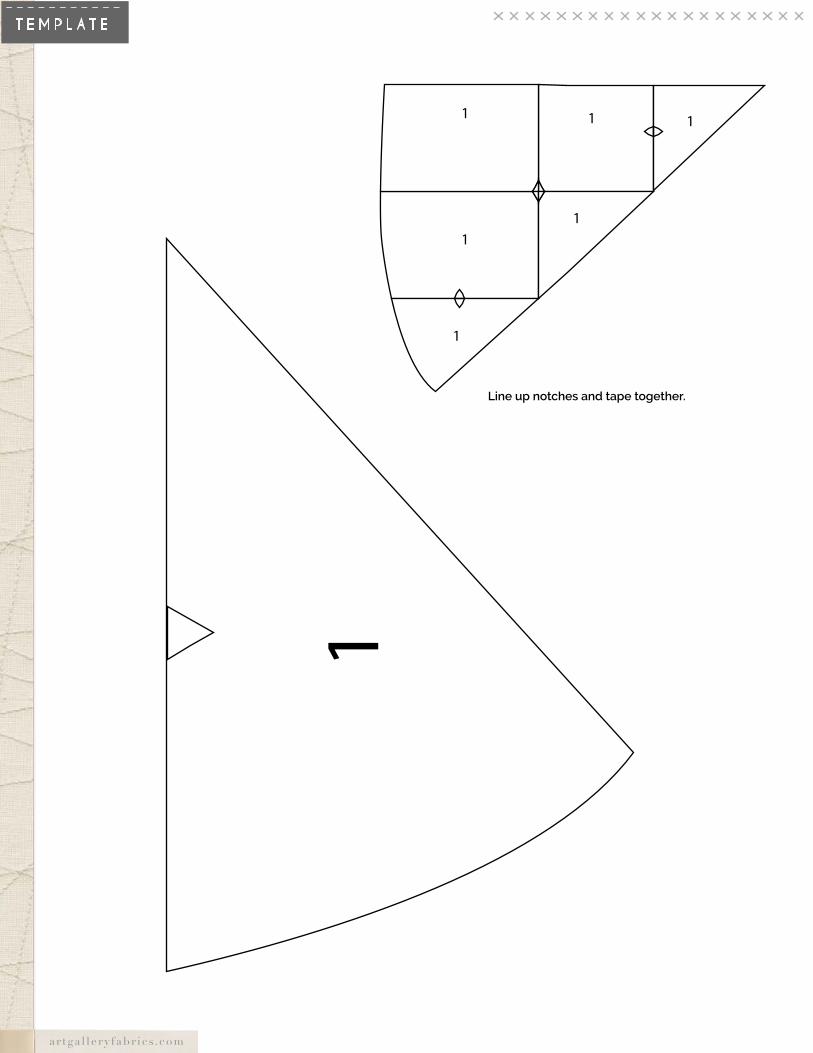
T E M P l A T E
1
1
1
1
1
11
Line up notches and tape together.
ar tga l le ry fabr ics.com
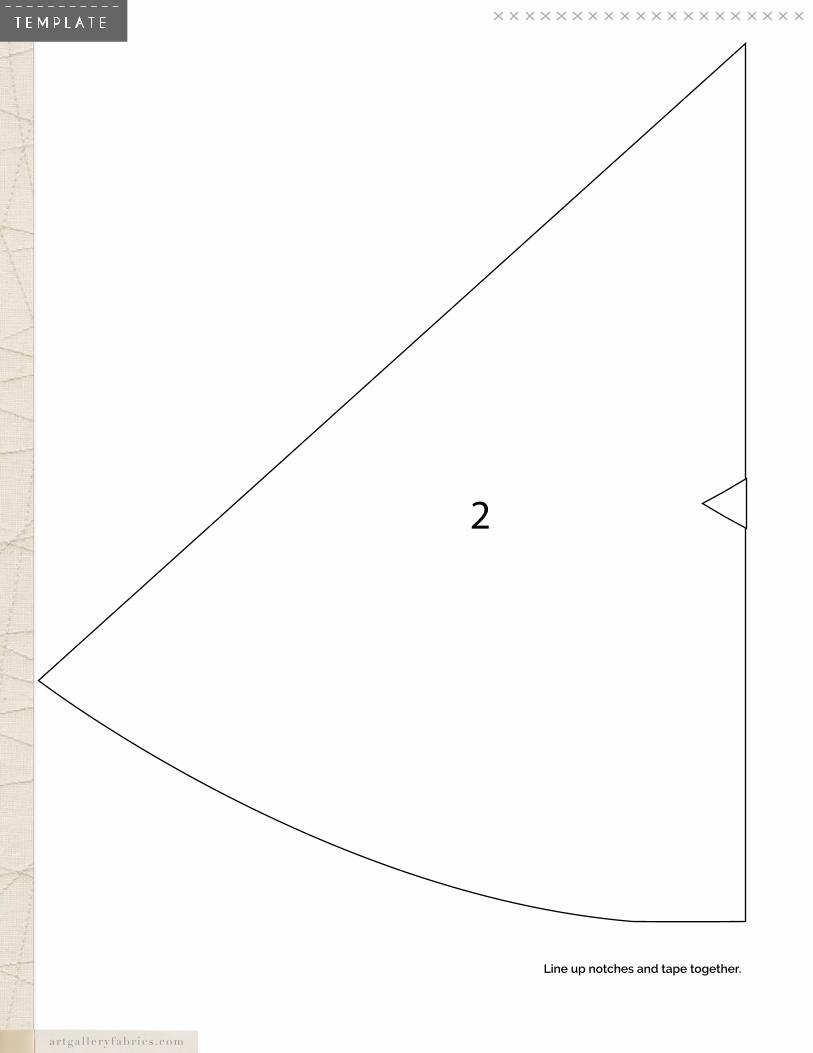
T E M P l A T E
2
Line up notches and tape together.
ar tga l le ry fabr ics.com
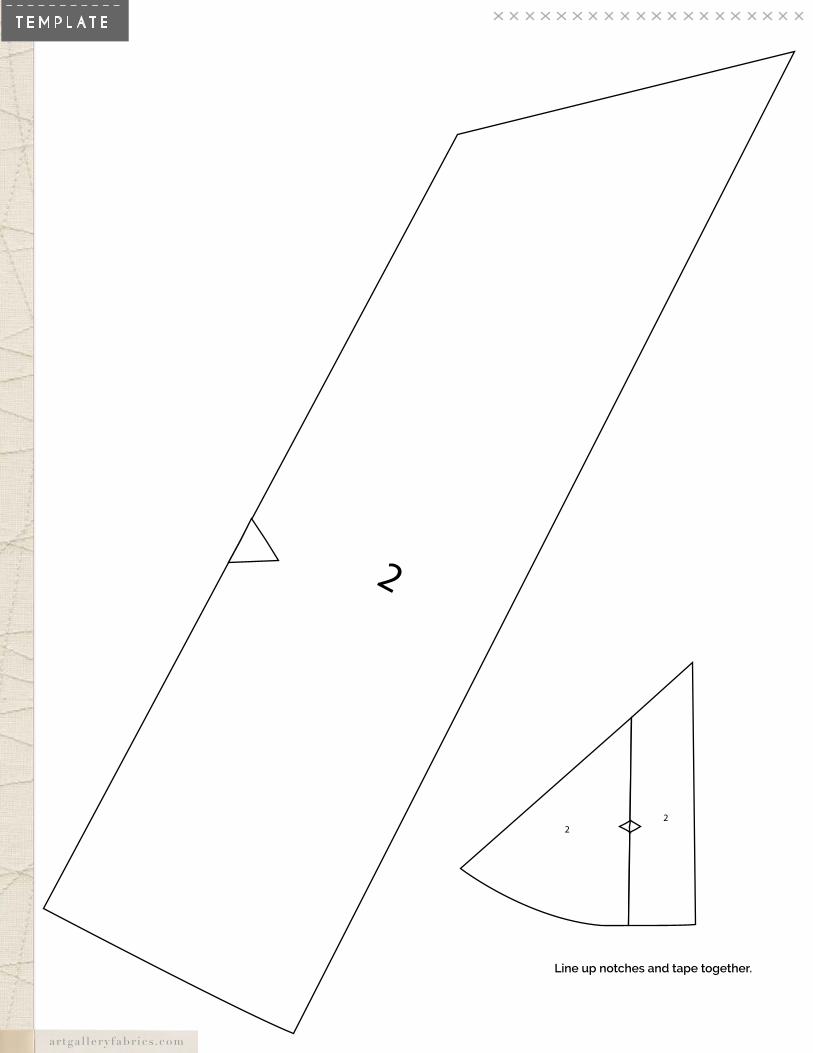
T E M P l A T E
Line up notches and tape together.
2
22
ar tga l le ry fabr ics.com
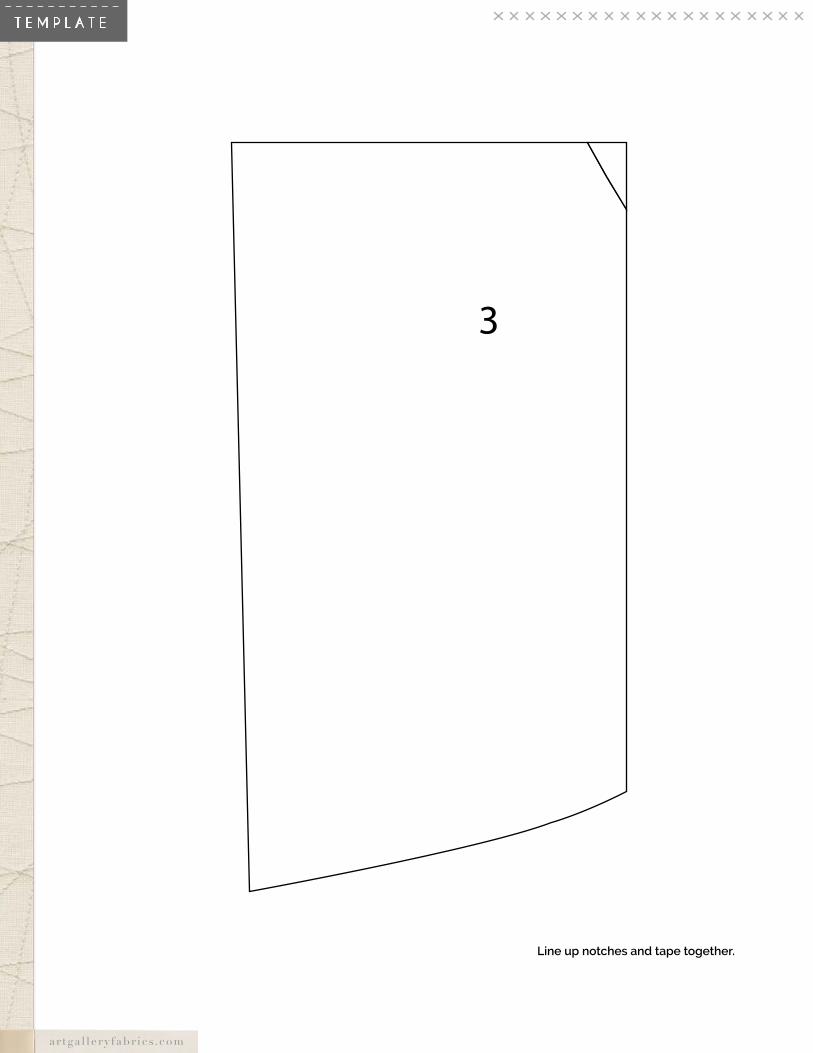
T E M P l A T E
Line up notches and tape together.
3
3 3
33
ar tga l le ry fabr ics.com
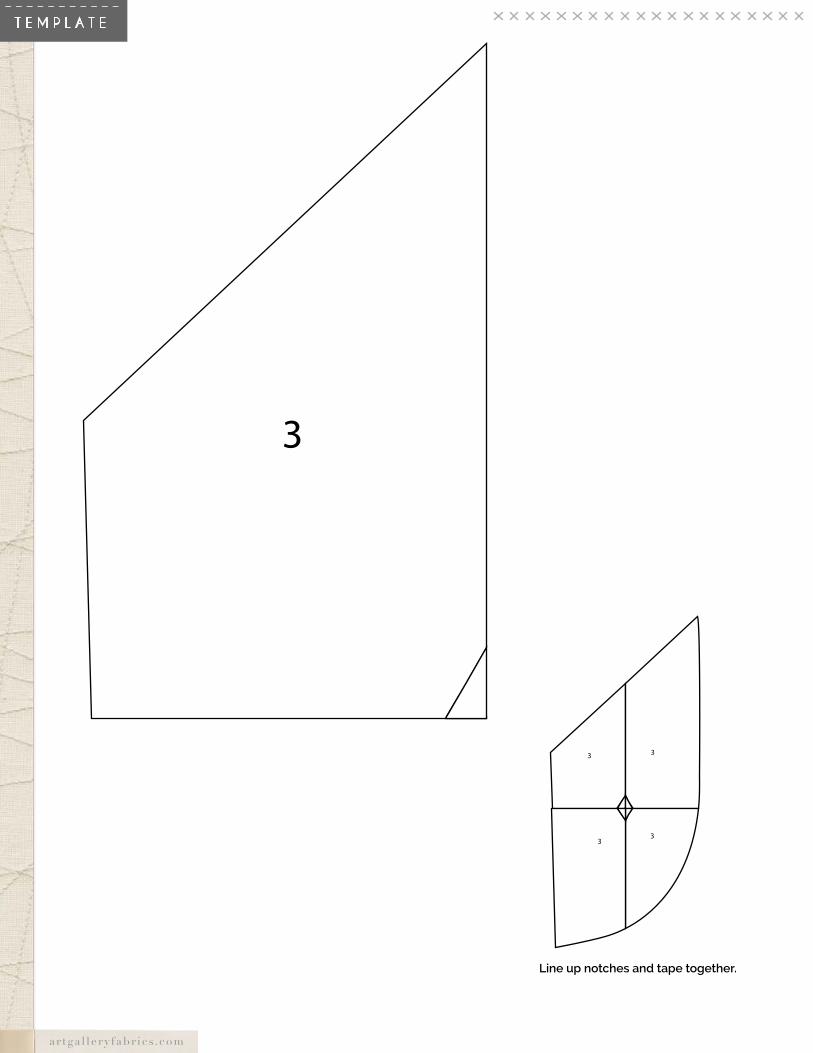
T E M P l A T E
Line up notches and tape together.
3
ar tga l le ry fabr ics.com
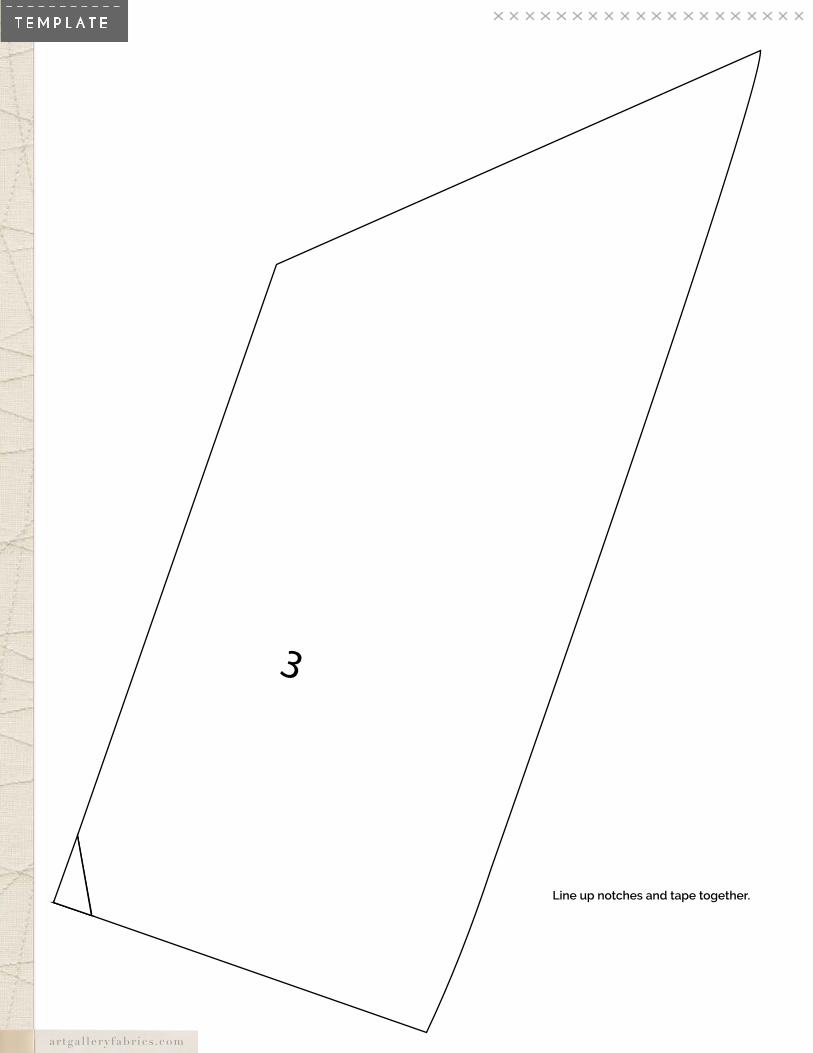
T E M P l A T E
3
Line up notches and tape together.
ar tga l le ry fabr ics.com
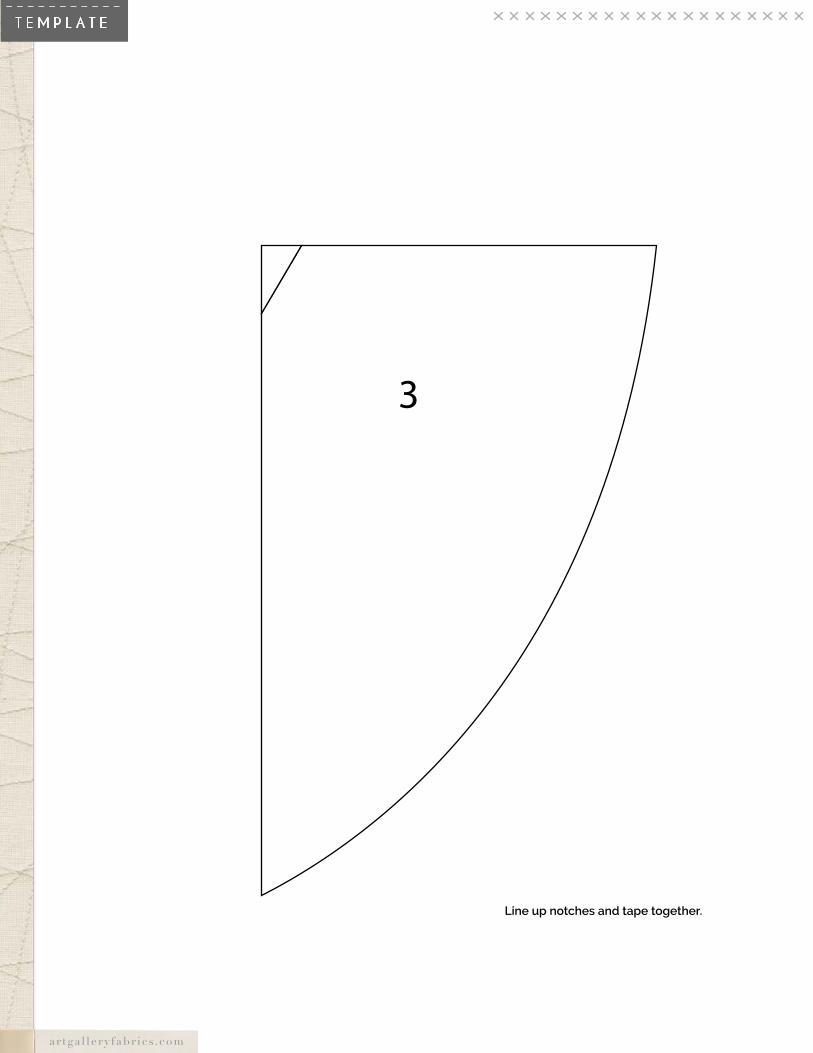
T E M P l A T E
Line up notches and tape together.
3