Embed Size (px)
Citation preview
Sode Pop – A modern material Sode Daku
Parts List Spine – (2) .265x32.5 carbon rod (5) 4-in. diameter Dacron circle
(1) .265 arrow nock (1/2) 3-in. diameter Dacron circle
(1) .265 external aluminum ferrule (2) 5 in. piece of 100# line
(1) .234 VEC (3) 3in. pieces of flat braid
Spreaders – (4) J65 fiberglass rods (8 yards) 1-inch strip nylon
(2) .276 internal ferrule (7) 1x5in. pieces of Dacron for pockets
(4) .281 VEC (1) 1x 1½ in. piece of Dacron
Bottom spreader – (1) .157x40 solid fiberglass rod (5) 1x2in. piece of Dacron
(2) .156 VEC 150# line for bridle
(1) 3/16x ½ in. rubber O-ring
The anti-intuitive place to start
In order to give the super glue some time to set up, before beginning the sail construction,
please glue up the following:
• Glue the knock onto one end of one of the carbon spars
• Glue the aluminum ferrule onto one end of the other carbon spar
• Glue the internal fiberglass ferrules into one end of two separate fiberglass spars
Set these and the rest of the sticks aside to dry.
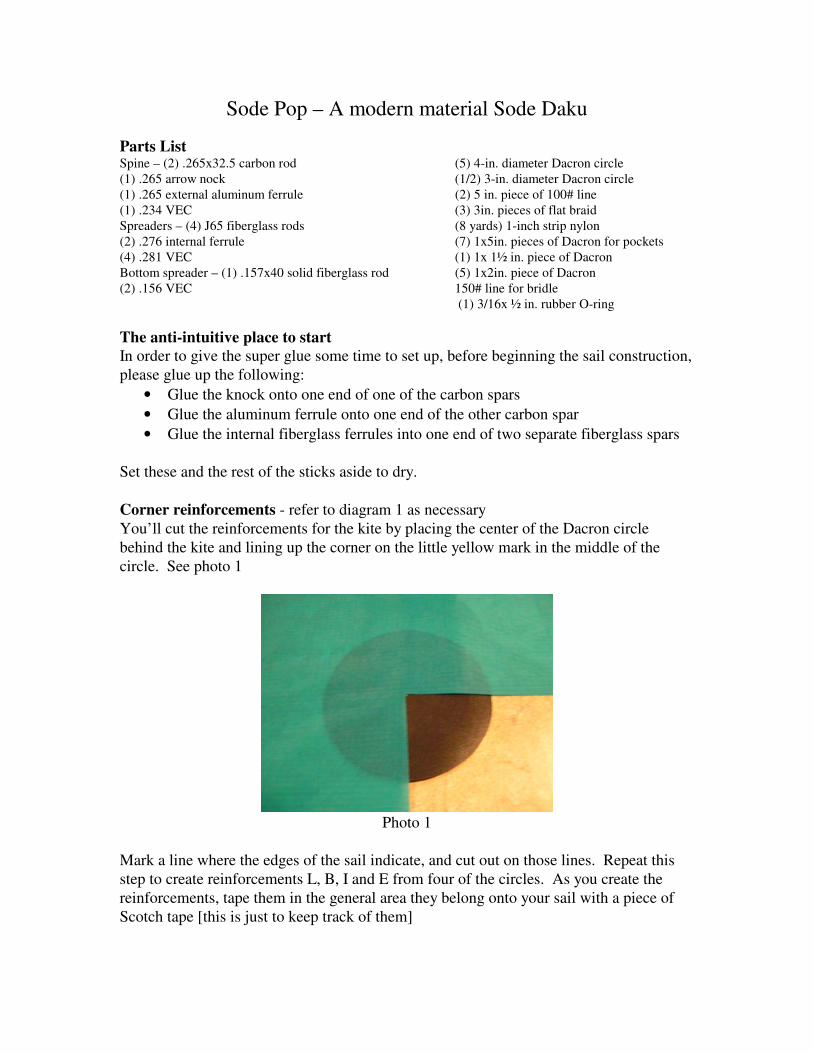
Corner reinforcements - refer to diagram 1 as necessary
You’ll cut the reinforcements for the kite by placing the center of the Dacron circle
behind the kite and lining up the corner on the little yellow mark in the middle of the
circle. See photo 1
Photo 1
Mark a line where the edges of the sail indicate, and cut out on those lines. Repeat this
step to create reinforcements L, B, I and E from four of the circles. As you create the
reinforcements, tape them in the general area they belong onto your sail with a piece of
Scotch tape [this is just to keep track of them]

The pieces you cut out to create reinforcements I and E become reinforcements H and F.
The half circle piece in your kit is reinforcement G.
Cut reinforcement A from one of the leftover pieces from creating either reinforcement L
or B.
For reinforcements C, D, J and K, take the remaining full circle. Fold it in half, cut on the
fold. Take each half circle, fold it in half and cut on that fold. You should be left with
four quarter circles. See photo 2 and 3.
Photo 2 Photo 3
DO NOT SEW THE REINFORCEMENTS DOWN YET!!!
Tail attachment pieces
Take the (2) 5-inch pieces of Dacron line, fold them in half and tie an overhand (stopper)
knot near the fold. Sew these onto the backs of reinforcements H and F so that the knot
extends off the bottom edge of the kite and the knot is approximately ¾ of an inch below
the edge. Sew this securely with a zig-zag back and forth a couple of times. A little piece
of double stick tape can help hold the line in place while you sew. See photo 4
Photo 4
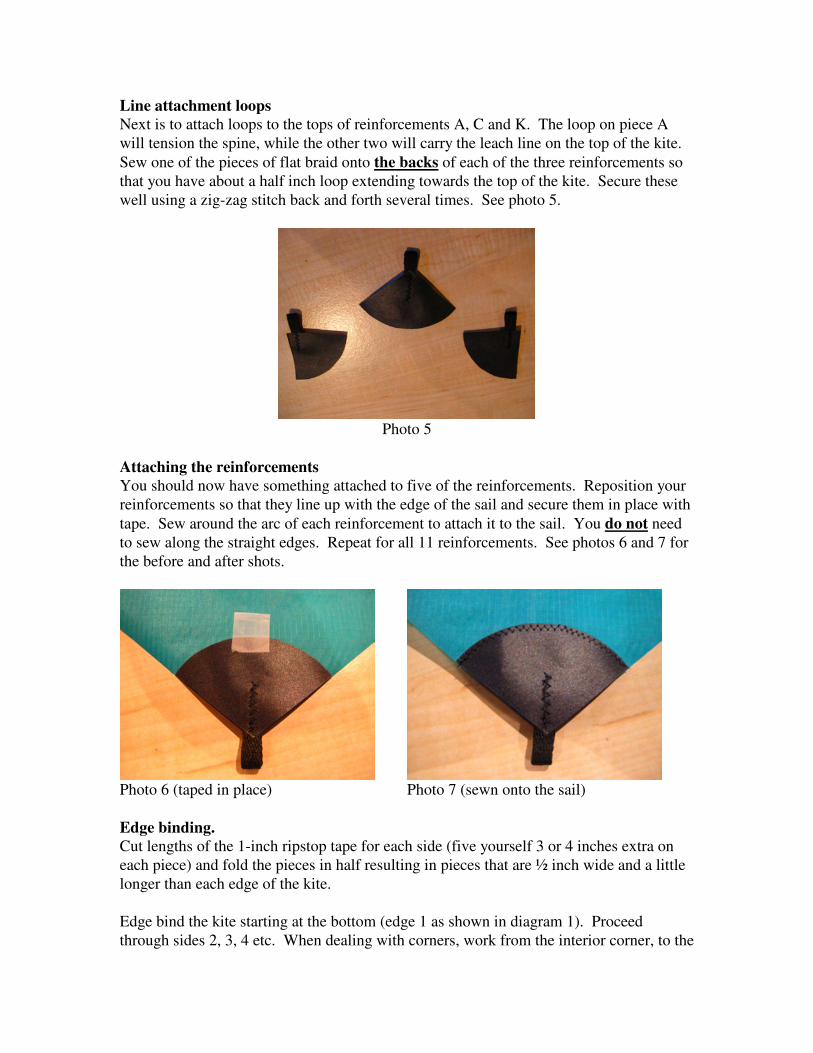
Line attachment loops
Next is to attach loops to the tops of reinforcements A, C and K. The loop on piece A
will tension the spine, while the other two will carry the leach line on the top of the kite.
Sew one of the pieces of flat braid onto the backs of each of the three reinforcements so
that you have about a half inch loop extending towards the top of the kite. Secure these
well using a zig-zag stitch back and forth several times. See photo 5.
Photo 5
Attaching the reinforcements
You should now have something attached to five of the reinforcements. Reposition your
reinforcements so that they line up with the edge of the sail and secure them in place with
tape. Sew around the arc of each reinforcement to attach it to the sail. You do not need
to sew along the straight edges. Repeat for all 11 reinforcements. See photos 6 and 7 for
the before and after shots.
Photo 6 (taped in place) Photo 7 (sewn onto the sail)
Edge binding.
Cut lengths of the 1-inch ripstop tape for each side (five yourself 3 or 4 inches extra on
each piece) and fold the pieces in half resulting in pieces that are ½ inch wide and a little
longer than each edge of the kite.
Edge bind the kite starting at the bottom (edge 1 as shown in diagram 1). Proceed
through sides 2, 3, 4 etc. When dealing with corners, work from the interior corner, to the

outside corner. For example, for the edge between reinforcements H and I. Start the
binding at reinforcement I and work towards H.
To accomplish inside corners, on one end of the edge binding, hot cut along the fold
about an inch in (See photo 8). Sliding the sail through this cut, line the edge binding as
it will be attached to the kite (See photo 9). Using a ½ inch wide ruler, or a quilter’s rule
[something that will show you where ½ inch from the edge of the kite is], mark a line
parallel to the intersecting side (see photo 10). Hot cut along that line, then replace the
edge binding on the kite. Sew with a straight stitch close to the cut edge of the binding
(away from the fold) being careful not to run off the binding. Sticking down the corner
you’re starting from on the back side of the fabric will help keep the binding from
bunching up accidentally. Continue by number until all 11 sides are bound. Hot cut your
edges. Where there are loops or tail attachment points extending off the edge of the kite,
prior to sewing down the edge binding, line up where the loop will cross the edge
binding, and hot cut a small (1/2 inch-ish) slit along the fold of the binding.
Photo 8 Photo 9
Photo 10
Pockets
Hot cut a shallow angle on one short side of the Dacron pocket pieces. Fold each piece in
half so that the point of the cut angle lines up just shy of the opposite flat side. Pockets
are placed so that the fold is lined up with the edge of the kite on reinforcement pieces C,
D, F, G, H, J and K. For the pocket on reinforcement piece G, center the pocket on the

center of the kite. Sew around the pockets using a straight stitch. Sew the three sides that
do not contain the fold. It can be helpful to hold the pocket in place with a bit of tape as
you get it started (See photo 11)
Photo 11
Cross Spar channels
Four of the 1x2 Dacron pieces are for the cross spar channels which are attached to
reinforcement pieces B, E, I and L. Line the long edge of the 1x2 pieces along the edge
of the kite. On the top of the kite, line up the short edge so that the channel is entirely on
the reinforcement with the short edge towards the middle of the kite. For the channels at
the middle of the kite, line up the short edge so that the channel is entirely on the
reinforcement with the short edge towards the outside of the kite. Sew these to the kite
by sewing approximately 1/8 of an inch from the edge along both long edges. Again tape
can be helpful (See photo 12).
Photo 12
Holes for bridle
On reinforcements B, E, I and L, you’ll need to hot cut bridle holes. Use a pointy hot
cutter for this, and go all the way through. Make two holes through each reinforcement
about ½ apart. On the top, place the holes about 1 inch from the outside edge of the spar
channel. At the middle of the kite, place the holes about 1 inch from the inside edge of
the spar channel (See photo 13).
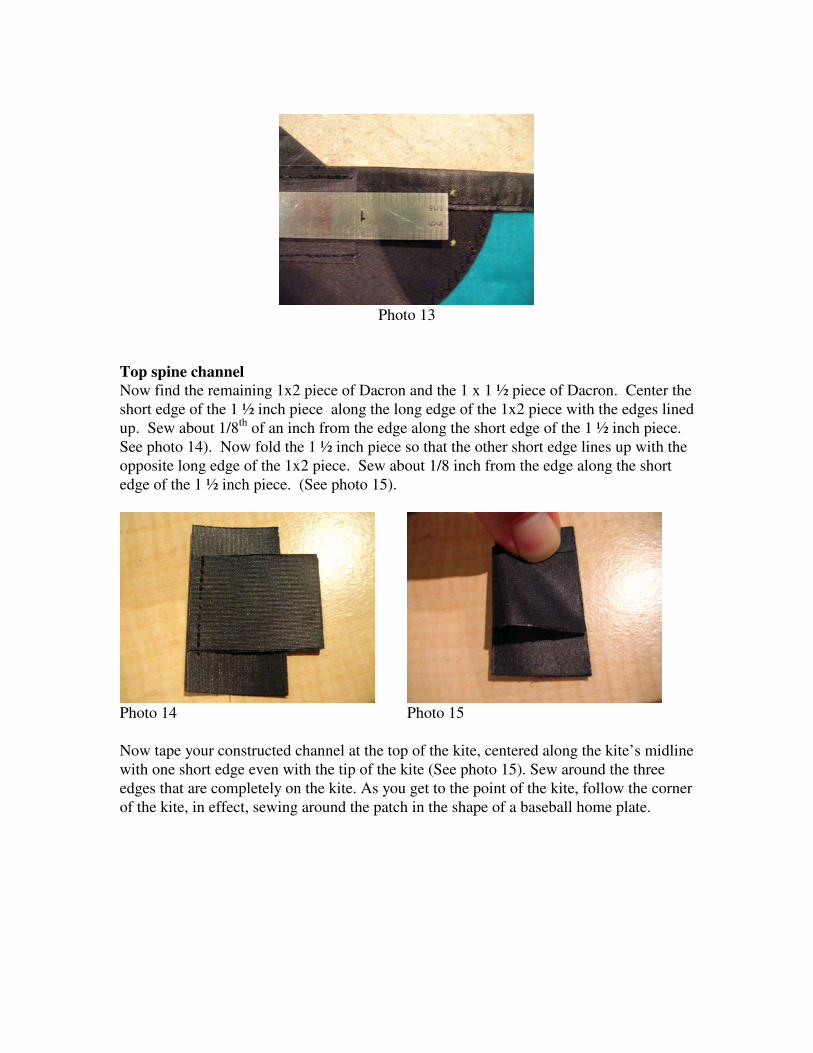
Photo 13
Top spine channel
Now find the remaining 1x2 piece of Dacron and the 1 x 1 ½ piece of Dacron. Center the
short edge of the 1 ½ inch piece along the long edge of the 1x2 piece with the edges lined
up. Sew about 1/8th
of an inch from the edge along the short edge of the 1 ½ inch piece.
See photo 14). Now fold the 1 ½ inch piece so that the other short edge lines up with the
opposite long edge of the 1x2 piece. Sew about 1/8 inch from the edge along the short
edge of the 1 ½ inch piece. (See photo 15).
Photo 14 Photo 15
Now tape your constructed channel at the top of the kite, centered along the kite’s midline
with one short edge even with the tip of the kite (See photo 15). Sew around the three
edges that are completely on the kite. As you get to the point of the kite, follow the corner
of the kite, in effect, sewing around the patch in the shape of a baseball home plate.

Photo 15
Sticks
Cut the .157 fiberglass to length and glue on the smallest end caps. (These aren’t terribly
snug, so will need some glue)
For the top cross spar, take one of the fiberglass rods with the ferrule. Line where the
ferrule enters the spar up with the center of the kite. Mark at the end of that side’s pocket
(You want these to be tight once in the pockets). Cut to length, slip on one of the largest
end caps. (These are tight and probably won’t need glue. Put this spar into the pocket.
Slide one of the non-ferruled fiberglass rods onto the ferrule, and then mark the opposite
pocket. Cut to length and slip on the end cap.
Repeat for the bottom cross spar.
For the spine, slide the carbon rod with the ferrule into the pocket at the bottom of the
kite. Measure how far the carbon rod with the nock will extend into the ferrule and mark
on the ferrule. Slide the rod with the nock through the channel at the top of the kite,
lining the nock up so that it extends about ¾ inch past the point of the kite. Cut this spar
to length so that it lines up with the mark you made on the ferrule.
Strings
Tie a 10-inch piece of line into a loop using a figure 8 knot. This is your pig tail.
Cut a 24-inch piece of line and tie onto the loop at the tip of the kite with a double sheep
shank knot. The other end gets a large loop tied into it with a Figure 8 knot. It may be
easiest to tie that first, and then attach it to the kite. That loop gets prussic-ed onto the
spine to tension the spine when you assemble the kite.
Cut 2 60-inch lengths of lines for your bow lines. Fold each end in 10 inches, and tie a
loop with a Figure 8. The loops then Prussic onto opposite ends of a cross spar (one
string per spar).
Cut three lengths of line that are each twice as long as your kite is tall. Tie loops on both
ends of one line using Figure 8 knots. The loops get Lark’s Headed or Prussiced onto the
other two lines. To attach the bridle, at each attachment point, run one end of the string
through the hole that is closer to the middle of the kite. Wrap the line around the cross
spar once, then exit through the hole towards the edge of the kite. Pull enough line
through so that you can tie a Bowline knot. Repeat for each of the four bridle points.
Attach the pig tail to the vertical leg of the bridle. The tow point for this kite is
deceptively low. Also, very small bridle adjustments make a big difference. I
recommend starting with the tow point very low, so that the kite will not lift off. Move
up in small increments until the kite just barely flies. Then raise the tow point a little less
than ½ inch. This kite will PULL. 150# flying line is not overkill.
The remaining line is for the top leach line. Attach to the loop at reinforcement point C
or K with a double sheep shank knot. Run the line through the knock, then through the
loop at the opposite top corner. Tie the end back onto the line with a taut line hitch.
Tension this line prior to flight; otherwise your top cross spar will do some ugly, amazing
things.
You can add tails, although the kite does not need them to fly.
Go fly a kite ☺

Figure 1.
The dimensions given are adapted from Masaaki Modegi’s The Making of Japanese Kites