Embed Size (px)
Citation preview

Thank You
Instructi
Initial CleYour newacrylic frosuggest onumbersof plain dwell. Acry
Never cle
Assembli
1. F
2. M3. T
u for choosing
ions – Acclim
eaning: w Acclimationom scratchingonly removings it will be verdish soap (avoylic will break
ean Acrylic wi
ing the Acclim
First remove a
Make sure yoTake #3 – Bac
g Synergy Reef
mation Fallo
n Fallout Sheltg during shipg the paper inry easy to asseoid dish soapsk if dropped!!
ith alcohol ba
mation Fallou
all the protec
u have receivck – and lay it
f! We hope you
out Shelter B
ter comes flatment. Gentlyn numbered oemble. Only cs with moistu! Please avoid
ased products
ut Shelter Box
ctive paper fro
ved all 6 pieceflat. Make su
u enjoy your ne
Box
t packed withy peel all of thorder as you aclean your Acurizers, etc.). Wd dropping an
s; this will cau
x:
om the pieces
es. ure the round
ew Acclimation
h the protectihe protective are assemblincclimation FalWe have alsony of the piece
use crazing or
s you are goin
ded legs are fa
n Fallout Shelt
ive paper coawrapping offng it. Once yollout Shelter bo provided anes if possible
r cracks all ov
ng to assemb
acing down.
ter!
ating still on tf of each piecou are familiabox with warn “Acrylic Care.
ver the acrylic
ble.
he acrylic. The as you assear with the piem water and e” sheet for r
c pieces.
his protects themble it. We eces and theia single dropeference as
he
r p
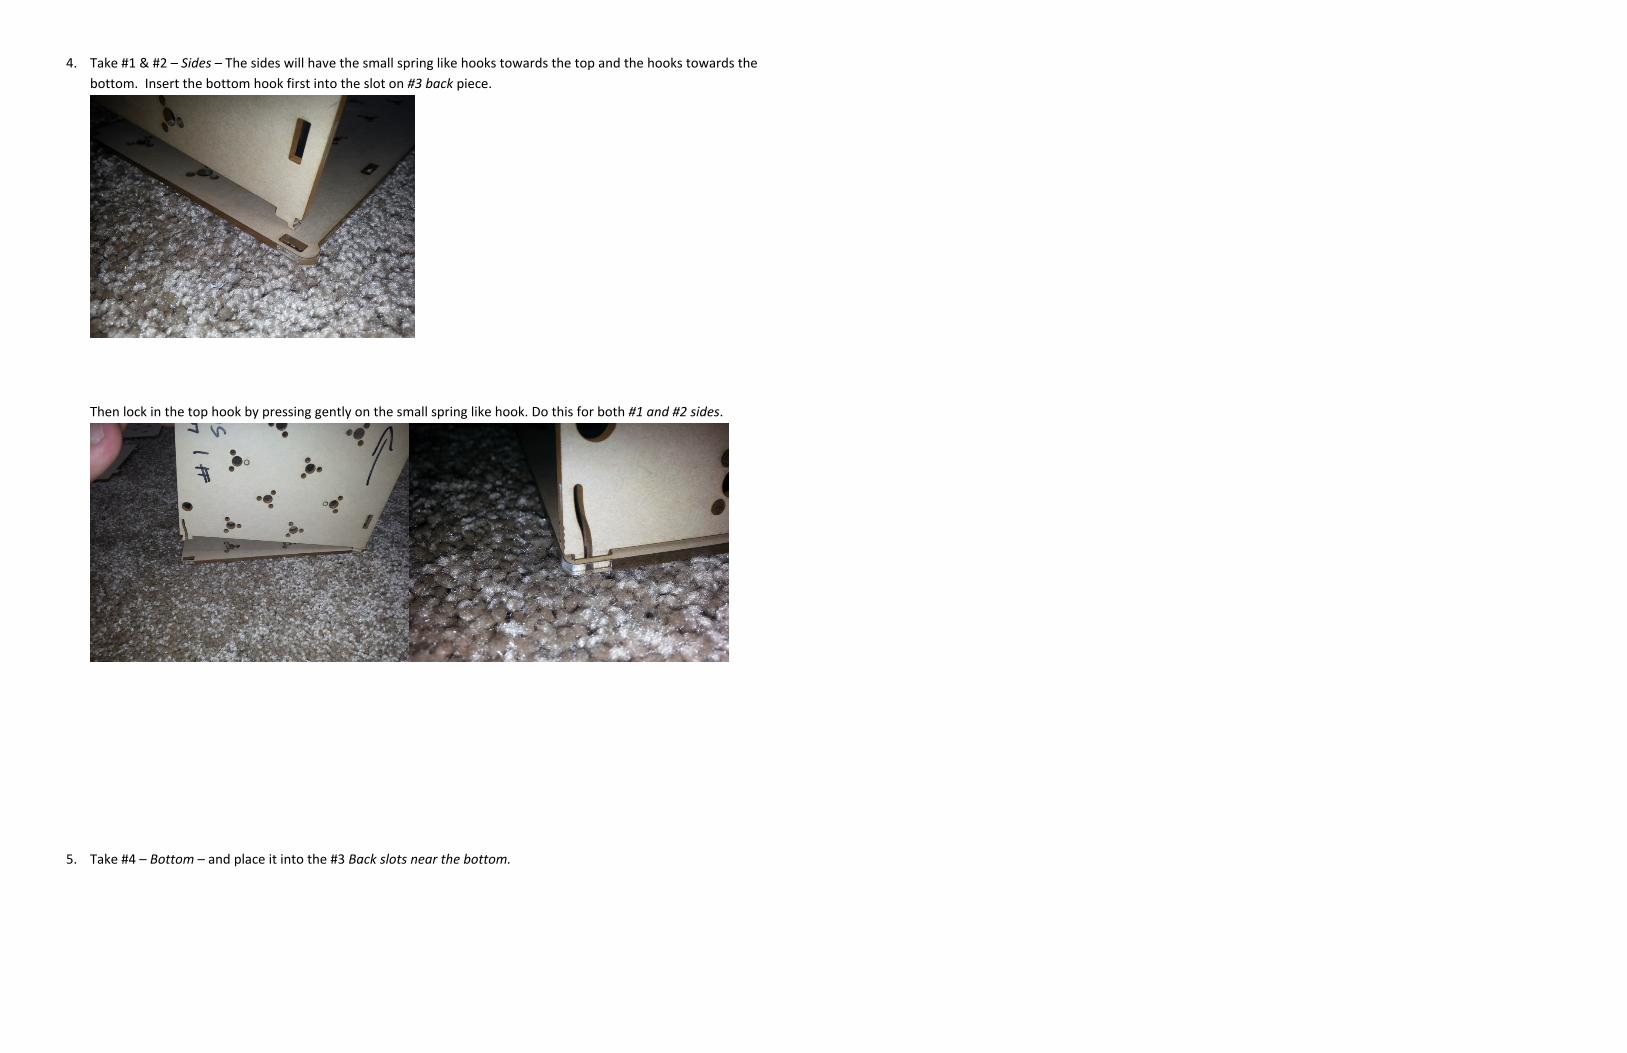
4. Take #1 & #2 – Sides – The sides will have the small spring like hooks towards the top and the hooks towards the bottom. Insert the bottom hook first into the slot on #3 back piece.
Then lock in the top hook by pressing gently on the small spring like hook. Do this for both #1 and #2 sides.
5. Take #4 – Bottom – and place it into the #3 Back slots near the bottom.
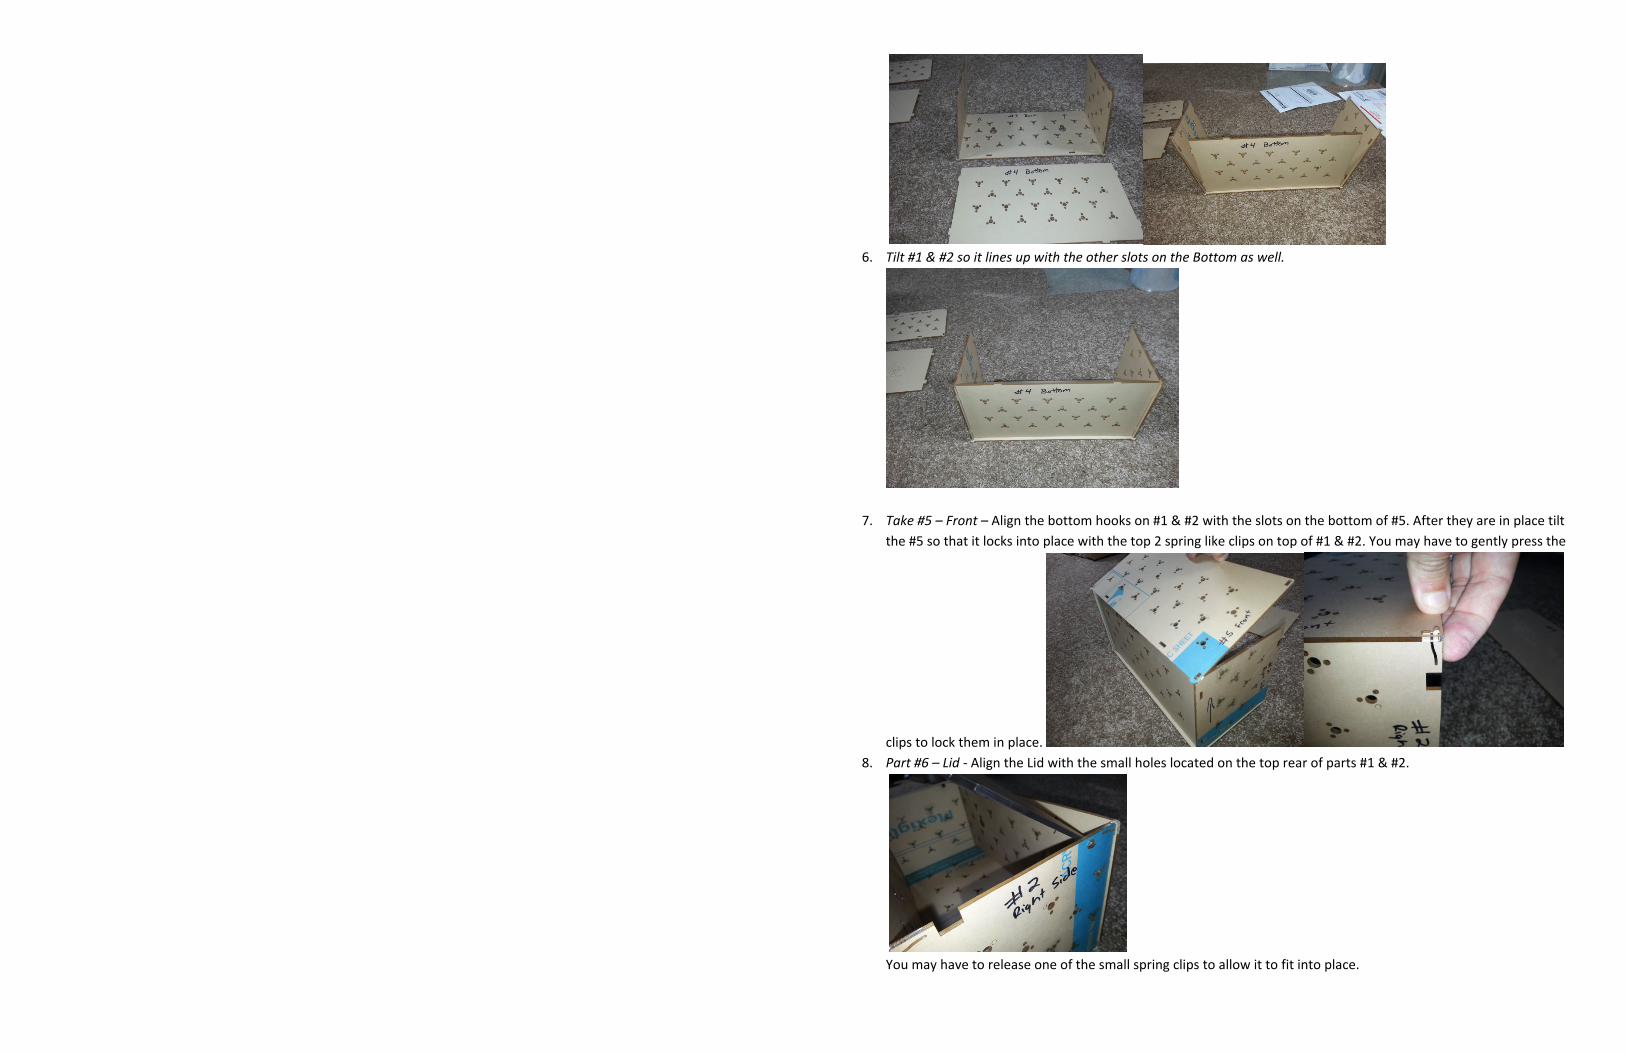
6. Tilt #1 & #2 so it lines up with the other slots on the Bottom as well.
7. Take #5 – Front – Align the bottom hooks on #1 & #2 with the slots on the bottom of #5. After they are in place tilt the #5 so that it locks into place with the top 2 spring like clips on top of #1 & #2. You may have to gently press the
clips to lock them in place. 8. Part #6 – Lid ‐ Align the Lid with the small holes located on the top rear of parts #1 & #2.
You may have to release one of the small spring clips to allow it to fit into place.

9. Suction Cups – Take the 2 provided suction cups and insert them into the holes provided on the #3 Back.
Make sure they lock into the smaller hole.
That’s it! You’re finished and can now attach the Acclimation Fallout Shelter inside your aquarium and provide that needed shelter for acclimation or for a stressed fish.
We also have photos of how to build the Acclimation Fallout Shelter on our website under the product link in our store.
If any parts are accidently damaged, we do sell replacement parts on our website, www.synergyreef.com
Please contact Synergy Reef Systems or your dealer with any installation questions.
Email: [email protected]
LIMITED WARRANTY
Synergy Reef Systems makes no claim to the suitability of this product for any specific use. The end user is solely responsible for determining fitness for a particular use, and for installation. This product is sold as a component of a custom aquarium installation.
Your new Acclimation Fallout Shelter is warranted to be free of defects when it arrives. If there are any manufacturer defects upon arrival, we must be notified within 24 hours of receipt. We will, at our
discretion, repair or replace your product at no charge during this period. Return shipping is the responsibility of the purchaser. This warranty does not cover accidental damage, misuse, improper care or alteration, or acts of God, such as floods and earthquakes. Coverage terminates if the original purchaser sells or otherwise transfers the product. Purchaser must provide sales receipt from authorized dealer. This warranty excludes claims for incidental or consequential damages, loss of revenue or profits, loss of business, or other financial loss in connection with the warranty problem.
Some jurisdictions do not allow the exclusion or limitation of incidental or consequential damages so the above limitation or exclusion may not apply to you.
This warranty giv
ves you specific legal rigghts, and you may also hhave other rights, which vary from state to statee or country to country.