Embed Size (px)
Citation preview

LESSON PLAN FOR BASIC SWIMMING AND WATER SURVIVAL INSTRUCTOR TRAINING CLASS F2 SCHOOL A-012-1014 PREPARED BY NAVAL AVIATION SCHOOLS COMMAND 181 CHAMBERS AVE SUITE C PENSACOLA, FLORIDA 32508-5221 PREPARED FOR NAVAL AVIATION SCHOOLS COMMAND 181 CHAMBERS AVE SUITE C PENSACOLA, FLORIDA 32508-5221 January 2005

LESSON PLAN CHANGE RECORD
Number and Description of Change Entered By
2

TABLE OF CONTENTS
CONTENTS Change Record.......................................................................2 Security Awareness Notice...........................................................5 Safety/Hazard Notice................................................................5 DOR/TTO Policy......................................................................7 UNIT 1.1 Prerequisite verification, physical health screen and physical health screen and
course overview for unit one. 1.2 Lifeguard Training Course
UNIT 2.1 Prerequisite verification physical health screen and course overview for unit two.
2.2 Swim Screen 2.3 Teaching the Non-swimmer 2.4 Personal Flotation Devices 2.5 Survival Strokes 2.6 Swimming in Organization Clothing 2.7 Treading Water
2.8 Methods of Staying Afloat 2.9 Underwater Swimming and Surface Dives 2.10 Abandon Ship Drill 2.11 Surface Debris, Surface Burning Oil, and Rough Water Swimming 2.12 Advanced Strokes 2.13 Mask, Fins, and Snorkel Indoctrination 2.14 Swimming for Lifetime Fitness 2.15 Conditioning Swim #1 2.16 Conditioning Swim #2 2.17 Conditioning Swim #3 2.18 Conditioning Swim #4 2.19 Spinal Injury management for Divers and SEALS 2.20 Learning to Conduct the Swim Tester Course 2.21 Skills Test 2.22 Using Games to Improve Swimming and Survival Skills
3
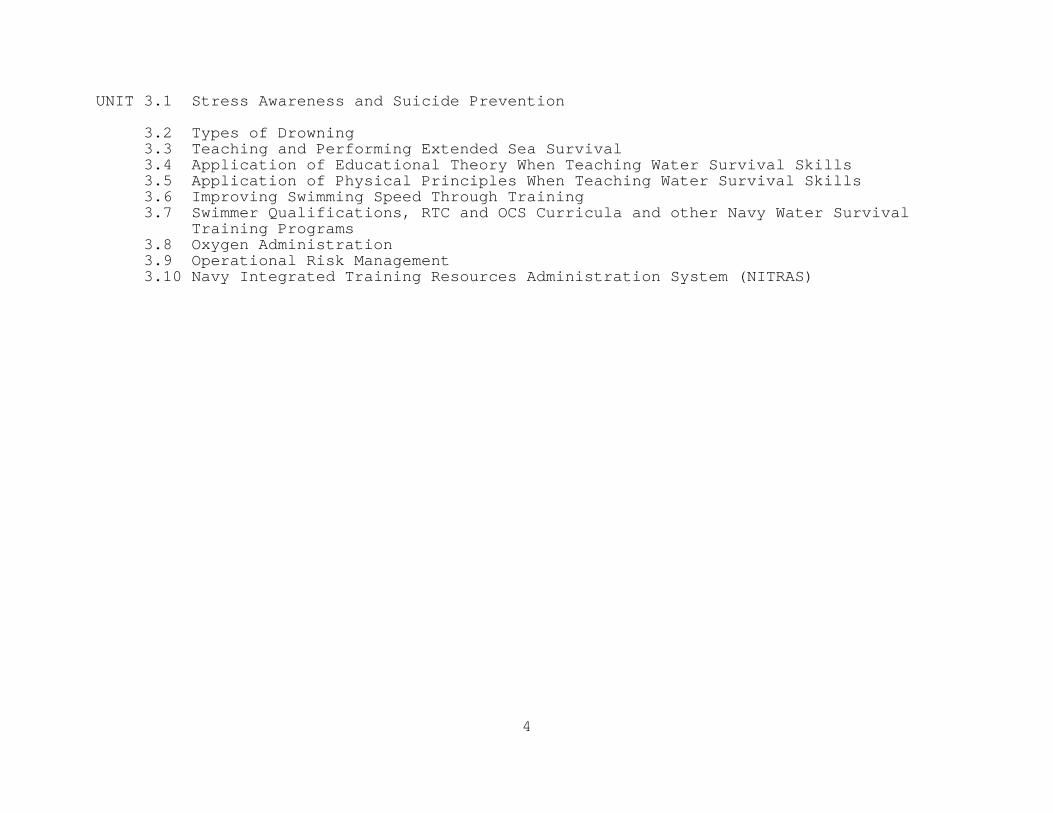
UNIT 3.1 Stress Awareness and Suicide Prevention 3.2 Types of Drowning
3.3 Teaching and Performing Extended Sea Survival 3.4 Application of Educational Theory When Teaching Water Survival Skills 3.5 Application of Physical Principles When Teaching Water Survival Skills 3.6 Improving Swimming Speed Through Training 3.7 Swimmer Qualifications, RTC and OCS Curricula and other Navy Water Survival
Training Programs 3.8 Oxygen Administration 3.9 Operational Risk Management 3.10 Navy Integrated Training Resources Administration System (NITRAS)
4

SECURITY AWARENESS NOTICE This course does not contain any classified material. SAFETY/HAZARD AWARENESS NOTICE a. All personnel must be reminded that personal injury, death, or equipment damage can result from carelessness, failure to comply with approved procedures, or violations of warning, cautions, and safety regulations. b. CAUTION: Laser pointing devices may be used during this coarse. To include remote controls. Refer to NASC Inst. 5100.12 Review fire and environmental emergency procedures with class. MISHAP/HAZARD REPORTING a. Safe training is the number one goal. Mishaps can result in lost lives, and the unnecessary loss of thousands of man hours and millions of dollars. Mishaps can be prevented. For the most part, they are the result of actions performed incorrectly, either knowingly or unknowingly, by people who fail to exercise sufficient foresight, lack the requisite training, knowledge, or motivation, or who fail to recognize and report hazards. b. A mishap is any unplanned or unexpected event causing personnel injury, occupational illness, death, material loss or damage or an explosion whether damage occurs or not. c. A hazardous condition is any situation where if allowed to go unchecked or uncorrected has the potential to cause a mishap. d. A near miss is when a mishap is avoided merely by chance. e. It is the responsibility of all Department of Defense personnel to report all mishaps and near misses. If a mishap, hazardous condition or near miss occurs let your instructor know immediately.
5

f. Instructors will correct hazardous conditions, if able, immediately. If unable to correct the hazard condition on their own, the instructor will submit a work request and submit a report of unsafe/unhealthy working conditions to the command training safety officer via their division/departmental training safety officer. Instructors will ensure interim corrective action is implemented to protect personnel until the hazard is abated. Reports can be hand written on the appropriate form. Injuries will be reported on the appropriate form. In the event of a near miss the pertinent information will be submitted to the command training safety officer via their divisional/departmental training safety officer and include lessons learned.
6

NATRACOM DOR AND TRAINING TIME OUT POLICY For Instructors: 1. Ensure all students are briefed on TTO policy and procedures prior to each high or moderate-risk evolution or laboratory. For multi-day or all-day evolutions, TTO shall be rebriefed prior to the start of training following major breaks, such as mealtimes. Evolution-specific TTO procedures should be added where needed. These procedures should be standardized to conform with established fleet distress indicators where appropriate (e.g., standard small arms range procedures, diving distress signals, etc.). Emphasis shall be placed on specific verbal and nonverbal signals to be used by students and instructors. 2. A TTO may be called in any training situation where a student or instructor expresses concern for personal safety or requests clarification of procedures or requirements. TTO is also an appropriate means for a student to obtain relief if he or she is experiencing pain, heat stress, or other serious physical discomfort. 3. Instructors are responsible for maintaining situational awareness and shall remain alert to signs of student panic, fear, extreme exhaustion, or lack of confidence that may impair safe completion of the training exercise. Instructors shall cease training immediately when they consider such action appropriate. 4. Following a TTO, the situation shall be examined and additional explanation and instruction shall be provided as needed to allow safe resumption of training. Once the lead instructor on scene is fully apprised of the problem, he/she shall direct all training to cease or training with unaffected students to continue, based on the situation. 5. If a student refuses to participate in training after being instructed or after an unsafe condition has been corrected, or uses TTO excessively to disrupt training, that student shall be removed from training and referred for further counseling or administrative processing.
7

Basic TTO Student Briefing: A Training Time Out (TTO) may be called by any student or instructor in any training situation where they are concerned for their own or another's safety, or they request clarification of it, procedures or requirements. TTO is also an appropriate means for a student to obtain relief if he or she is experiencing pain, heat stress, or other serious physical discomfort. The purpose of the TTO is to correct the situation of concern, provide clarifying information, or remove the student or instructor from the possible hazardous environment. A TTO may be signaled with the abbreviation TTO, the words Training Time Out, crossed hands in a (T), a raised clenched fist, or other specific signals which will be briefed prior to a specific lab, test, or exercise. If the TTO signal is not acknowledged, the signaler shall shout "Time Out" (or other action as required by the training activity). The instructor shall attempt to relieve and remove the student from the possible hazardous environment. If an adequate number of instructors are available to allow training to continue safely, the lead instructor may elect to do so. However, if this is not practical, training will be stopped until the situation is corrected.
8

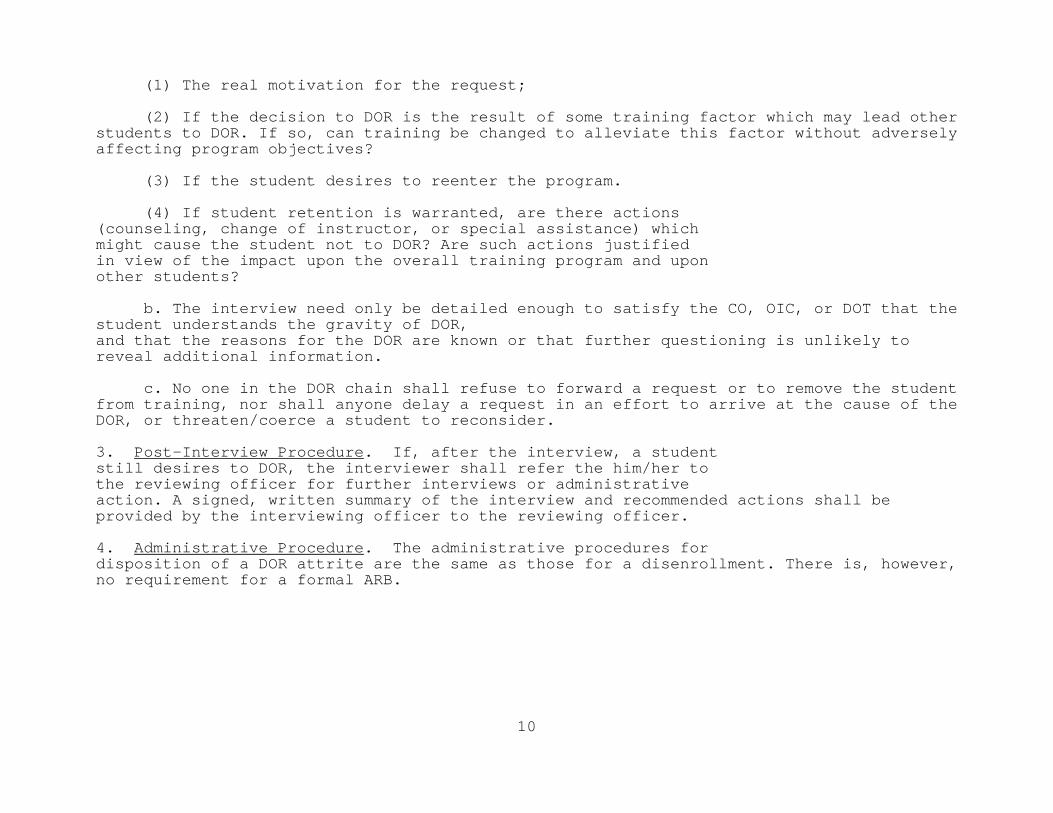
DROP ON REQUEST (DOR) For Instructors: Ensure all students are briefed on DOR policy and procedures voluntary high/moderate-risk courses. The following briefing shall be given prior to commencing the course (i.e., course indoctrination, welcome aboard brief, etc.) and should not be repeated unless there is a long break in the course (e.g., Christmas holidays): For Instructors and Students: 1. Policy. In all cases where a student states a desire to DOR from voluntary training based on concern for personal well-being, appropriate action shall be initiated, including removal from training, referral of the student for medical, counseling, or remedial action as appropriate, and review of the training environment, including training techniques. The scope and depth of these actions shall be determined by the nature of the complaint and the risk incurred in the training. A written summary of actions taken shall be made a permanent entry to the student's service record. In no case shall a student be coerced or threatened to induce him or her to return to training following a DOR. 2. Procedures. After removal from voluntary training, the student shall submit a written request detailing the reasons for DOR. The request should clearly indicate that the student wants to DOR (e.g., I, (name), desire to be removed from training in XYZ course for the following reason(s): ...). A standard Special Request/Authorization Form (NAVPERS 1336/3 (Rev. 9-75)) may be used. The request shall be submitted directly to the training or division officer and shall become a part of the student's training record. If a student was being processed for an Academic Review Board (ARB) action prior to the DOR, the ARB shall take precedence. In any case, the student shall be removed from training. a. Training or Division Officer's Interview. The loss of an able student from training or the continuation in training of a student who is unlikely to complete the program represents a waste of valuable resources, assets, time, and effort. Often, students who DOR do not give the real or complete reasons for their requests. The interviewer, using no overt or implied coercion or threats, shall make a reasonable effort to determine:
9
10
(1) The real motivation for the request; (2) If the decision to DOR is the result of some training factor which may lead other students to DOR. If so, can training be changed to alleviate this factor without adversely affecting program objectives? (3) If the student desires to reenter the program. (4) If student retention is warranted, are there actions (counseling, change of instructor, or special assistance) which might cause the student not to DOR? Are such actions justified in view of the impact upon the overall training program and upon other students? b. The interview need only be detailed enough to satisfy the CO, OIC, or DOT that the student understands the gravity of DOR, and that the reasons for the DOR are known or that further questioning is unlikely to reveal additional information. c. No one in the DOR chain shall refuse to forward a request or to remove the student from training, nor shall anyone delay a request in an effort to arrive at the cause of the DOR, or threaten/coerce a student to reconsider. 3. Post-Interview Procedure. If, after the interview, a student still desires to DOR, the interviewer shall refer the him/her to the reviewing officer for further interviews or administrative action. A signed, written summary of the interview and recommended actions shall be provided by the interviewing officer to the reviewing officer. 4. Administrative Procedure. The administrative procedures for disposition of a DOR attrite are the same as those for a disenrollment. There is, however, no requirement for a formal ARB.

1.1-1
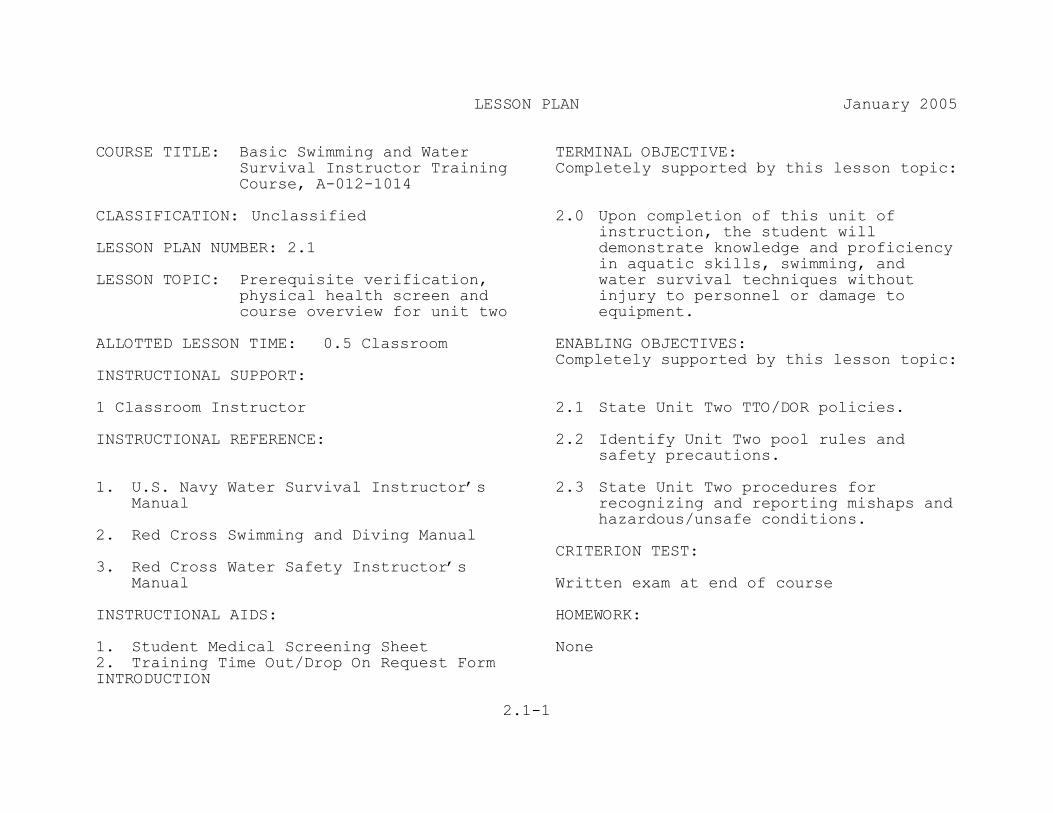
LESSON PLAN January 2005 COURSE TITLE: Basic Swimming and Water
Survival Instructor Training Course, A-012-1014
TERMINAL OBJECTIVE: Completely supported by this lesson topic:
CLASSIFICATION: Unclassified LESSON PLAN NUMBER: 1.1 LESSON TOPIC: Prerequisite verification,
physical health screen and course overview for unit one
1.0 Upon completion of this unit of instruction, the student will complete certification requirements for the American Red Cross Lifeguarding Course without injury to personnel or damage to equipment.
ALLOTTED LESSON TIME: 1.0 Classroom ENABLING OBJECTIVES: Completely supported by this lesson topic: INSTRUCTIONAL SUPPORT:
1 Qualified Navy Basic Swimming and Water Survival Instructor
1.1 State Unit One TTO/DOR policy.
INSTRUCTIONAL REFERENCE: None
1.2 Identify Unit One pool rules and safety precautions.
INSTRUCTIONAL AIDS: 1. Student Medical Screening Sheet
1.3 State Unit One procedures for recognizing and reporting mishaps and hazardous/unsafe conditions.
2. Training Time Out/Drop On Request Form
CRITERION TEST: None
HOMEWORK:
None
DISCUSSION POINT RELATED INSTRUCTOR ACTIVITY
1.1-2
(1) Prerequisites Review
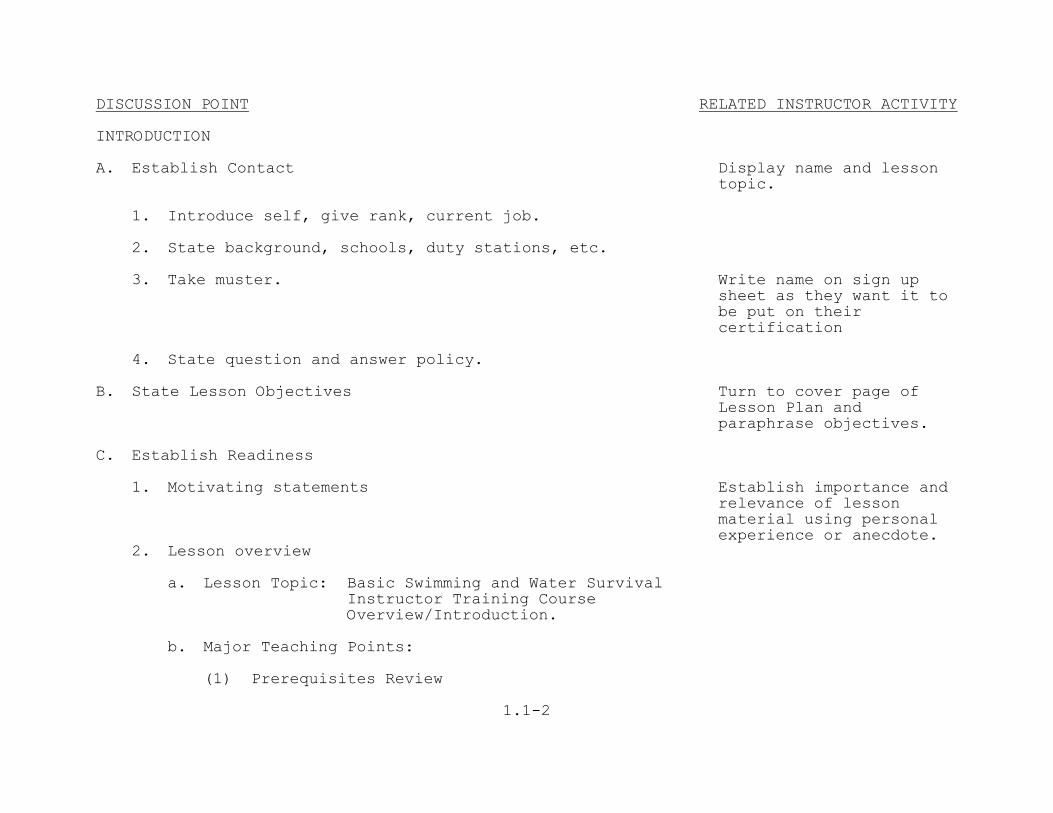
INTRODUCTION A. Establish Contact Display name and lesson
topic. 1. Introduce self, give rank, current job. 2. State background, schools, duty stations, etc. 3. Take muster. Write name on sign up
sheet as they want it to be put on their certification
4. State question and answer policy. B. State Lesson Objectives Turn to cover page of
Lesson Plan and paraphrase objectives.
C. Establish Readiness 1. Motivating statements Establish importance and
relevance of lesson material using personal experience or anecdote. 2. Lesson overview
a. Lesson Topic: Basic Swimming and Water Survival
Instructor Training Course Overview/Introduction.
b. Major Teaching Points:

DISCUSSION POINT RELATED INSTRUCTOR ACTIVITY
1.1-3
(2) Health/physical screening (3) TTO/DOR (4) Mishap Reporting (5) Pool Rules (6) Class Schedule
DISCUSSION POINT RELATED INSTRUCTOR ACTIVITY
1.1-4
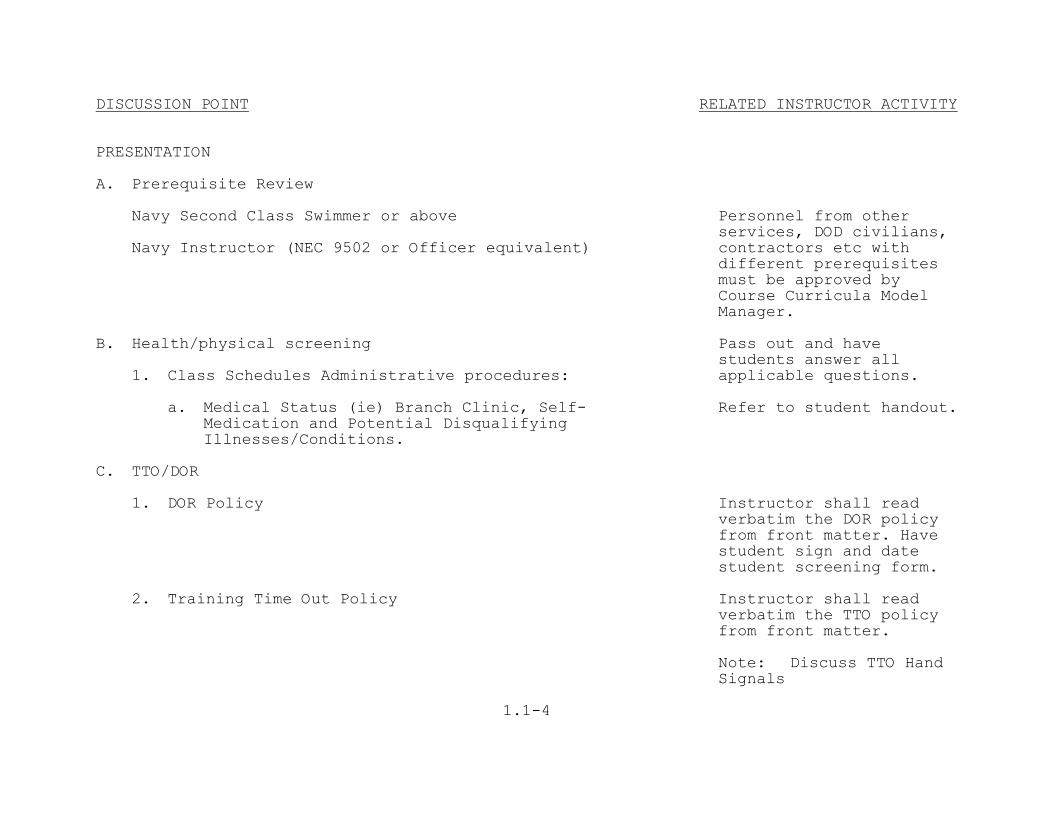
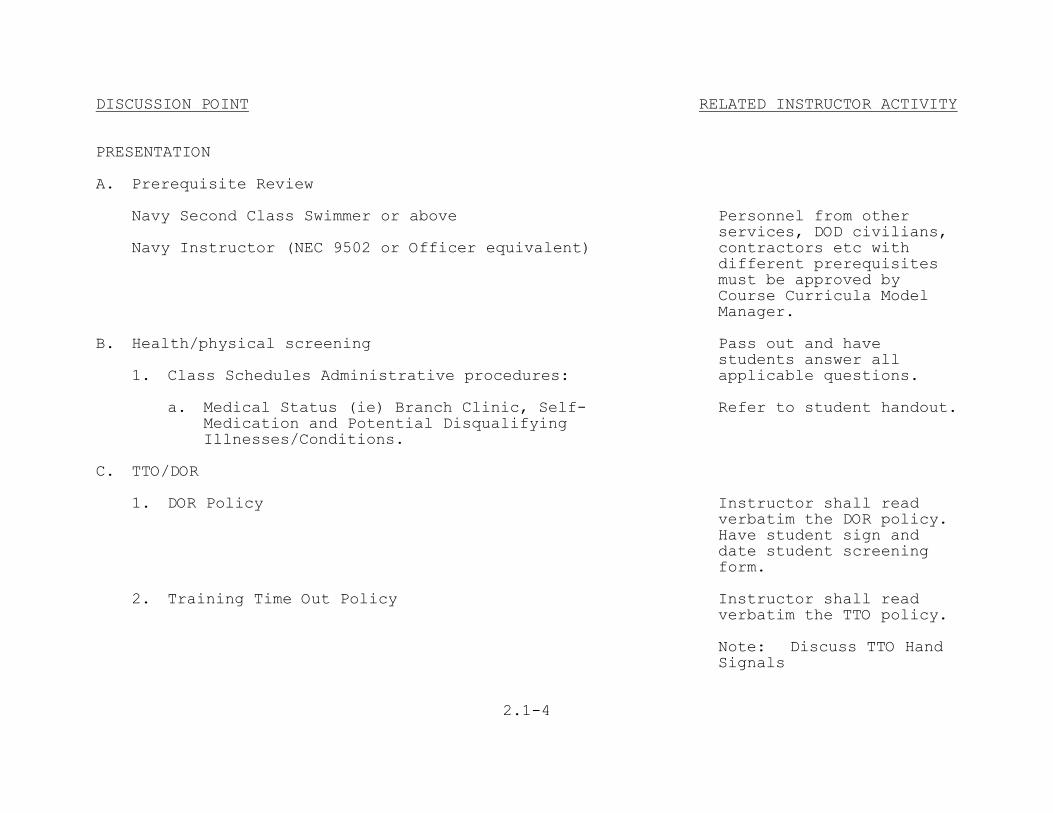
PRESENTATION A. Prerequisite Review Navy Second Class Swimmer or above Navy Instructor (NEC 9502 or Officer equivalent)
Personnel from other services, DOD civilians, contractors etc with different prerequisites must be approved by Course Curricula Model Manager.
B. Health/physical screening 1. Class Schedules Administrative procedures:
Pass out and have students answer all applicable questions.
a. Medical Status (ie) Branch Clinic, Self-
Medication and Potential Disqualifying Illnesses/Conditions.
Refer to student handout.
C. TTO/DOR 1. DOR Policy Instructor shall read
verbatim the DOR policy from front matter. Have student sign and date student screening form.
2. Training Time Out Policy Instructor shall read
verbatim the TTO policy from front matter.
Note: Discuss TTO Hand
Signals
DISCUSSION POINT RELATED INSTRUCTOR ACTIVITY
1.1-5
D. Mishap Reporting 1. Mishap and Unsafe Condition Reporting a. Mishap b. Hazardous condition
Instructor shall read verbatim the mishap, hazardous condition, and near miss procedures from front matter.
c. Near miss E. Pool Rules 1. Pool rules 2. Ear Wash Use 3. Showers.
Read and explain applicable pool rules, BSWSI’s explain that all BSWSI'S are lifeguard qualified. Students shall not swim unsupervised.
4. Inform students of emergency procedures. a. Whistle signals b. Directions c. Exits d. Muster area locations 5. No alcohol consumption 12 hours prior to training. 6. No earplugs shall be worn unless approved by flight
surgeon. Earplugs will prevent you from clearing ears underwater.

DISCUSSION POINT RELATED INSTRUCTOR ACTIVITY
1.1-6
7. Location of heads, pool, locker room, and designated smoking areas.
8. Security precautions are not available for personal
valuables.
F. Class Schedule Provide handout Review class schedule.
DISCUSSION POINT RELATED INSTRUCTOR ACTIVITY
1.1-7
SUMMARY AND REVIEW A. State lesson objectives. Turn to cover page for
objectives B. Review major teaching points. Briefly summarize. APPLICATION None EVALUATION None ASSIGNMENT None

1.2-1
LESSON PLAN January 2005 COURSE TITLE: Basic Swimming and Water
Survival Instructor Training Course, A-012-1014
TERMINAL OBJECTIVE: Completely supported by this lesson topic:
CLASSIFICATION: Unclassified LESSON PLAN NUMBER: 1.2 LESSON TOPIC: Lifeguard Training Course
1.0 Upon completion of this unit of instruction, the student will complete certification requirements for the American Red Cross Lifeguarding Course without injury to personnel or damage to equipment.
ALLOTTED LESSON TIME: 18.0 Classroom 16.5 Laboratory
ENABLING OBJECTIVES: Completely supported by this lesson topic:
INSTRUCTIONAL SUPPORT: 1 Qualified American Red Cross Lifeguard
1.4 Perform skills, knowledge, and written requirements of the American Red Cross Lifeguard Training Course
InstructorStudent/Staff ratio: CRITERION TEST: Per current Red Cross Lifeguard Instructor’s Manual
Written Exam
INSTRUCTION REFERENCES:
HOMEWORK:
American National Red Cross publications: None “Lifeguard Training” Stock Number 655720 “Lifeguarding Instructor’s Manual” Stock Number 654721
DISCUSSION POINT RELATED INSTRUCTOR ACTIVITY
1.2-2
INSTRUCTIONAL AIDS:
Videos:
“Lifeguard training" Stock Number 655722

DISCUSSION POINT RELATED INSTRUCTOR ACTIVITY
1.2-3
INTRODUCTION A. Establish Contact Display name and lesson
topic. 1. Introduce self, give rank, current job. 2. State background, schools, duty stations, etc. 3. Take muster. 4. State question and answer policy. 5. State Training Time Out policy. a. Brief on TTO. b. Show hand signals. 6. Ask for medical concerns: a. Has anyone gone to the hospital/branch medical
clinic for treatment with the last 24 hours?
b. Has anyone taken any medication or over-the-
counter medications in last 24 hours?
c. Are there any potentially disqualifying
illnesses/conditions?

DISCUSSION POINT RELATED INSTRUCTOR ACTIVITY
1.2-4
B. State Lesson Objectives Turn to cover page of Lesson Plan and paraphrase objectives.
C. Establish Readiness 1. Motivating statements: a. State how students will use course material. b. State why students need to know the lesson
material.
2. Lesson overview a. Lesson Topic : Lifeguard Training Course b. Major Teaching Points Lifeguard Training
DISCUSSION POINT RELATED INSTRUCTOR ACTIVITY
1.2-5
PRESENTATION A. Lifeguard Training Use the current Red Cross
Lifeguarding Instructor’s Manual to conduct this portion of the Navy Basic Water Survival Instructor Course

DISCUSSION POINT RELATED INSTRUCTOR ACTIVITY
1.2-6
SUMMARY AND REVIEW A. State lesson objectives Turn to cover page for
objectives. B. Review major teaching points Briefly summarize APPLICATION Conduct warm-up, stretches, and cool-down As per presentation A IAW Annex F. EVALUATION Written exam ASSIGNMENT Remedial instruction as required.
INTRODUCTION
2.1-1
LESSON PLAN January 2005 COURSE TITLE: Basic Swimming and Water
Survival Instructor Training Course, A-012-1014
TERMINAL OBJECTIVE: Completely supported by this lesson topic:
CLASSIFICATION: Unclassified LESSON PLAN NUMBER: 2.1 LESSON TOPIC: Prerequisite verification,
physical health screen and course overview for unit two
2.0 Upon completion of this unit of instruction, the student will demonstrate knowledge and proficiency in aquatic skills, swimming, and water survival techniques without injury to personnel or damage to equipment.
ALLOTTED LESSON TIME: 0.5 Classroom ENABLING OBJECTIVES: Completely supported by this lesson topic: INSTRUCTIONAL SUPPORT:
1 Classroom Instructor 2.1 State Unit Two TTO/DOR policies.
INSTRUCTIONAL REFERENCE:
2.2 Identify Unit Two pool rules and safety precautions.
1. U.S. Navy Water Survival Instructor’s
Manual 2.3 State Unit Two procedures for
recognizing and reporting mishaps and hazardous/unsafe conditions.
2. Red Cross Swimming and Diving Manual
CRITERION TEST:
3. Red Cross Water Safety Instructor’s Manual
Written exam at end of course
INSTRUCTIONAL AIDS: 1. Student Medical Screening Sheet
HOMEWORK: None
2. Training Time Out/Drop On Request Form

DISCUSSION POINT RELATED INSTRUCTOR ACTIVITY
2.1-2
(2) Health/physical screening
A. Establish Contact Display name and lesson
topic. 1. Introduce self, give rank, current job. 2. State background, schools, duty stations, etc. 3. Take muster. Write name on sign up
sheet as they want it to be put on their certification
4. State question and answer policy. B. State Lesson Objectives Turn to cover page of
Lesson Plan and paraphrase objectives.
C. Establish Readiness 1. Motivating statements Establish importance and
relevance of lesson material using personal experience or anecdote. 2. Lesson overview
a. Lesson Topic: Basic Swimming and Water Survival
Instructor Training Course Overview/Introduction.
b. Major Teaching Points: (1) Prerequisites Review

DISCUSSION POINT RELATED INSTRUCTOR ACTIVITY
2.1-3
(3) TTO/DOR (4) Mishap Reporting (5) Pool Rules (6) Class Schedule
DISCUSSION POINT RELATED INSTRUCTOR ACTIVITY
2.1-4
PRESENTATION A. Prerequisite Review Navy Second Class Swimmer or above Navy Instructor (NEC 9502 or Officer equivalent)
Personnel from other services, DOD civilians, contractors etc with different prerequisites must be approved by Course Curricula Model Manager.
B. Health/physical screening 1. Class Schedules Administrative procedures:
Pass out and have students answer all applicable questions.
a. Medical Status (ie) Branch Clinic, Self-
Medication and Potential Disqualifying Illnesses/Conditions.
Refer to student handout.
C. TTO/DOR 1. DOR Policy Instructor shall read
verbatim the DOR policy. Have student sign and date student screening form.
2. Training Time Out Policy Instructor shall read
verbatim the TTO policy. Note: Discuss TTO Hand
Signals

DISCUSSION POINT RELATED INSTRUCTOR ACTIVITY
2.1-5
7. Location of heads, pool, locker room, and designated
D. Mishap Reporting 1. Mishap and Unsafe Condition Reporting a. Mishap b. Hazardous condition
Instructor shall read verbatim the mishap, hazardous condition, and near miss procedures from front matter.
c. Near miss E. Pool Rules 1. Pool rules 2. Ear Wash Use 3. Showers.
Read and explain applicable pool rules, BSWSI’s explain that all BSWSI'S are lifeguard qualified. Students shall not swim unsupervised.
4. Inform students of emergency procedures. a. Whistle signals b. Directions c. Exits d. Muster area locations 5. No alcohol consumption 12 hours prior to training. 6. No ear plugs shall be worn unless approved by flight
surgeon. Ear plugs will prevent you from clearing ears underwater.

DISCUSSION POINT RELATED INSTRUCTOR ACTIVITY
2.1-6
smoking areas. 8. Security precautions are not available for personal
valuables.
F. Class Schedule Provide handout Review class schedule.

DISCUSSION POINT RELATED INSTRUCTOR ACTIVITY
2.1-7
SUMMARY AND REVIEW A. State lesson objectives. Turn to cover page for objectives B. Review major teaching points. Briefly summarize. APPLICATION None EVALUATION None ASSIGNMENT None
2.2-1
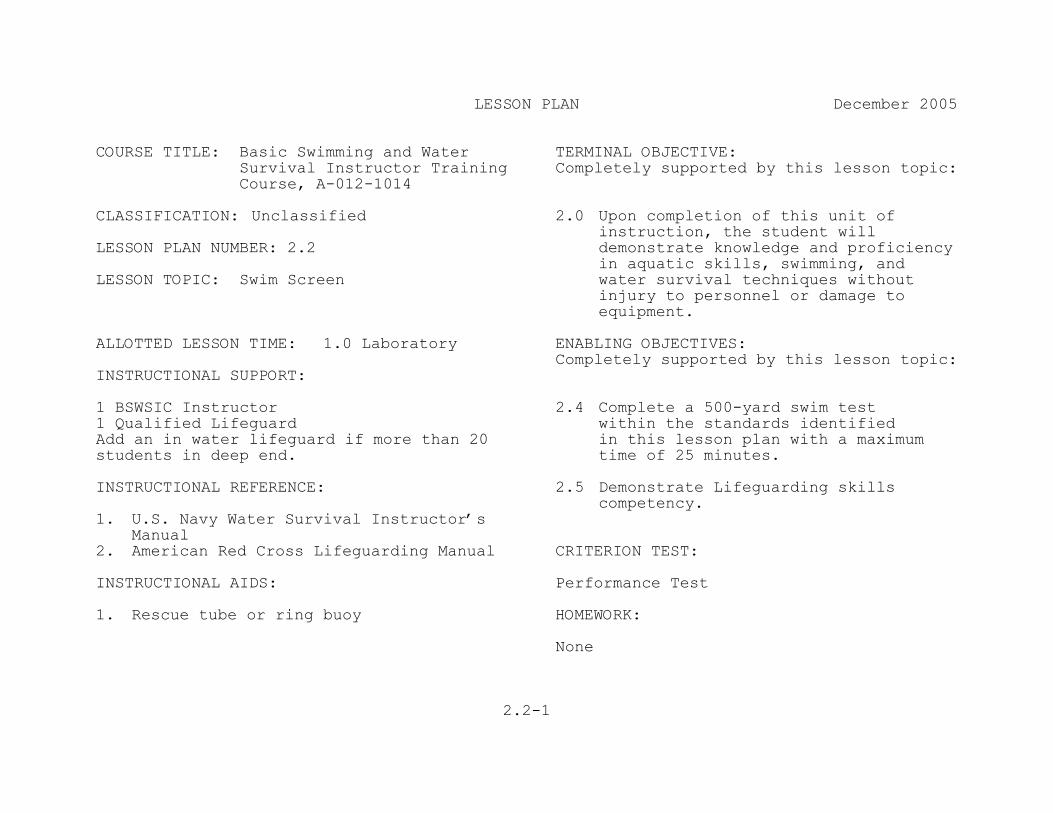
LESSON PLAN December 2005 COURSE TITLE: Basic Swimming and Water
Survival Instructor Training Course, A-012-1014
TERMINAL OBJECTIVE: Completely supported by this lesson topic:
CLASSIFICATION: Unclassified LESSON PLAN NUMBER: 2.2 LESSON TOPIC: Swim Screen
2.0 Upon completion of this unit of instruction, the student will demonstrate knowledge and proficiency in aquatic skills, swimming, and water survival techniques without injury to personnel or damage to equipment.
ALLOTTED LESSON TIME: 1.0 Laboratory ENABLING OBJECTIVES: Completely supported by this lesson topic: INSTRUCTIONAL SUPPORT:
1 BSWSIC Instructor 1 Qualified Lifeguard Add an in water lifeguard if more than 20 students in deep end.
2.4 Complete a 500-yard swim test within the standards identified in this lesson plan with a maximum
time of 25 minutes.
INSTRUCTIONAL REFERENCE:
2.5 Demonstrate Lifeguarding skills competency.
1. U.S. Navy Water Survival Instructor’s Manual
2. American Red Cross Lifeguarding Manual
CRITERION TEST:
INSTRUCTIONAL AIDS: Performance Test
1. Rescue tube or ring buoy HOMEWORK: None
DISCUSSION POINT RELATED INSTRUCTOR ACTIVITY
2.2-2
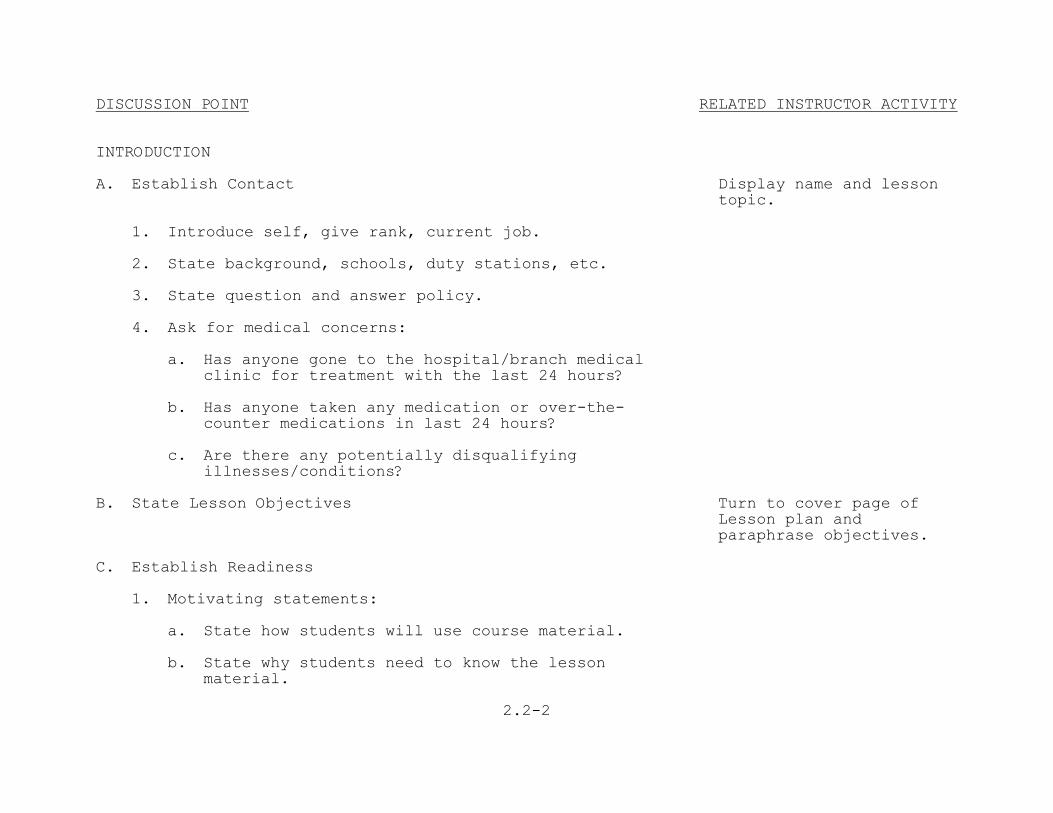
INTRODUCTION A. Establish Contact Display name and lesson
topic. 1. Introduce self, give rank, current job. 2. State background, schools, duty stations, etc. 3. State question and answer policy. 4. Ask for medical concerns: a. Has anyone gone to the hospital/branch medical
clinic for treatment with the last 24 hours?
b. Has anyone taken any medication or over-the-
counter medications in last 24 hours?
c. Are there any potentially disqualifying
illnesses/conditions?
B. State Lesson Objectives Turn to cover page of
Lesson plan and paraphrase objectives.
C. Establish Readiness 1. Motivating statements: a. State how students will use course material. b. State why students need to know the lesson
material.
DISCUSSION POINT RELATED INSTRUCTOR ACTIVITY
2.2-3
2. Lesson Overview a. Lesson Topic: Swim Screen b. Major Teaching Points (1) Swim Screen Description (2) Swim Screen Requirements (3) Administration of Lifeguard Screen

DISCUSSION POINT RELATED INSTRUCTOR ACTIVITY
2.2-4
PRESENTATION A. Swim Screen Description Purpose: To determine the basic skills of students. Those who do not complete the screen will be
disenrolled.
B. Swim Screen Requirements. Ensure required staff
personnel are present. 1. Swim 500 yards in 25 minutes or less utilizing the
following strokes (in prescribed order): Conduct safety brief.
a. 100 yards crawl stroke. b. 100 yards breaststroke.
Strokes must be swum to 2nd Class standards of Chapter 13 of Ref. 1.
c. 100 yards sidestroke. d. 200 yards of any combination of above strokes.
Students who participated in week one of Lifeguard do not have to do screen.
2. Object Retrieval a. 10 lb object. b. Minimum of 7 feet. c. Bring to surface. 3. Tread Water a. Arms crossed and hands under the armpits.

DISCUSSION POINT RELATED INSTRUCTOR ACTIVITY
2.2-5
b. Tread for 2 minutes. 4. Rescue a victim. a. Retrieve a victim from center of pool.
To be performed by divers seals and rescue swimmers that did not attend the lifeguard course.
b. Tow to side using available rescue equipment. C. Administration of Lifeguard Screen 1. Strokes Test a. 500 yard continuous swim. (1) 100 yards of crawl stroke, breaststroke and
sidestroke. Students perform strokes in this order.
(2) Perform strokes to 2nd Class Standards of
Chapter 13 of U.S. Navy Water Survival Instructor’s Manual.
(3) No stopping, standing or holding onto sides
of pool.
(4) Not allowed to gut it out. 2. 10 LB Object Retrieval a. Swim out over object.
Caution students to valsalva as required.
b. Dive down and grab object.
Use any surface dive desired.
c. Bring object to surface.

DISCUSSION POINT RELATED INSTRUCTOR ACTIVITY
2.2-6
3. Tread Water Test a. Any kick is acceptable. b. Arms crossed and hands in armpits. c. Arms and hands must stay in above position. d. Face must stay above surface of water at all
times.
e. Tread for 2 minutes. f. Students will not be allowed to gut it out. 4. Retesting a. Students may retest on all events at
instructor’s discretion.
b. A maximum of two re-tests for all events. D. Administration of Rescue Skills Retrieve a victim from the center of the pool, bring to
the side utilizing rescue equipment.
To be performed by divers seals and rescue swimmers that did not attend the Lifeguard course.

DISCUSSION POINT RELATED INSTRUCTOR ACTIVITY
2.2-7
SUMMARY AND REVIEW A. State lesson objectives. Turn to cover page for
objectives B. Review major teaching points. Briefly summarize. APPLICATION As per presentation C
Conduct warm-up, stretches, and cool-down IAW Annex F.
EVALUATION Performance test ASSIGNMENT Read Chapter 5 of U.S. Navy Water Survival Instructor’s Manual.
2.3-1
LESSON PLAN January 2005 COURSE TITLE: Basic Swimming and Water
Survival Instructor Training Course, A-012-1014
TERMINAL OBJECTIVE: Completely supported by this lesson topic:
CLASSIFICATION: Unclassified LESSON PLAN NUMBER: 2.3 LESSON TOPIC: Teaching the Non-Swimmer ALLOTTED LESSON TIME: 1.5 Laboratory
2.0 Upon completion of this unit of instruction, the student will demonstrate knowledge and proficiency in aquatic skills, swimming, and water survival techniques without injury to personnel or damage to equipment.
INSTRUCTIONAL SUPPORT: ENABLING OBJECTIVES: Completely supported by this lesson topic: 1 BSWIC Instructor 1 Qualified Lifeguard 2.6 Teach water adjustment/familiarity. Add an in water lifeguard if more than 20 students in deep end.
2.7 Teach buoyancy and floating techniques.
INSTRUCTIONAL REFERENCE: 1. U.S. Navy Water Survival Instructor’s
Manual
2.8 Teach breath control and rhythmic breathing.
INSTRUCTIONAL AIDS: CRITERION TEST:
Kickboards (1 per student)
Written exam at end of course Performance Test
HOMEWORK:
Read Chapter 5 of Ref. 1.

DISCUSSION POINT RELATED INSTRUCTOR ACTIVITY
2.3-2
INTRODUCTION A. Establish Contact Display name and lesson
topic. 1. Introduce self, give rank, current job. 2. State background, schools, duty stations, etc. 3. State question and answer policy. 4. Ask for medical concerns: a. Has anyone gone to the hospital/branch medical
clinic for treatment with the last 24 hours?
b. Has anyone taken any medication or over-the-
counter medications in last 24 hours?
c. Are there any potentially disqualifying
illnesses/conditions?
B. State Lesson Objectives Turn to cover page of
Lesson plan and paraphrase objectives.
C. Establish Readiness 1. Motivating statements: a. State how students will use course material. b. State why students need to know the lesson
material.

DISCUSSION POINT RELATED INSTRUCTOR ACTIVITY
2.3-3
2. Lesson Overview a. Lesson Topic: Swim Screen b. Major Teaching Points (1) Teaching the Non-swimmer (2) Demonstration (3) Practice Teaching

DISCUSSION POINT RELATED INSTRUCTOR ACTIVITY
2.3-4
PRESENTATION A. Teaching the Non-Swimmer
Chapter 5 of instructor reference.
1. Abilities of non-swimmer vary a. Prior water exposure b. Aptitude c. Enthusiasm d. Fear e. Peer pressure 2. Basic skills must be taught first a. Students must know basic skills before learning: (1) Strokes (2) Water survival skills b. Mental and Physical Adjustment to the Water
Section 5.1-5.2 of instructor reference. (1) Start in shallow end.
(2) Opening eyes underwater (3) Walking and bouncing in chest deep water (4) Blowing bubbles (5) Supine and prone float Experience affects on: 1. Buoyancy and movement 2. Vision and breathing
DISCUSSION POINT RELATED INSTRUCTOR ACTIVITY
2.3-5
(10) While face floating, kick and display a
3. Basic Skills
Section 5.3 of instructor reference.
a. Initial exposure to deep water is best accomplished with a 1:1 ratio between student and instructor.
b. The following skills should be taught to develop
basic foundations needed of swimming and water survival.
(1) Safety (2) Short duration breath-holding (3) Picking up objects from bottom of pool in
chest deep water
(4) Transition from standing to prone float to
supine float to standing
(5) Rhythmic breathing practice at side of pool (6) Step from side of pool to chest deep water
and recover to standing position.
(7) Jellyfish float in chest deep water for 30
seconds
(8) Survival float in chest deep water for 30
seconds
(9) Tread water in chest deep water for 3
seconds

DISCUSSION POINT RELATED INSTRUCTOR ACTIVITY
2.3-6
rudimentary crawl stroke arm action (11) While back floating, propel one’s self
through the water with a flutter kick and a rudimentary elementary backstroke arm action.
(12) Perform log rolling (turn over from front
to back to front)
(13) As student master the above items gradually
perform in deep end.
4. Survival Training Preparation Skills
Section 5.4 of instructor reference. a. Safety
b. Practice breathing with a kickboard. (1) Breathing to the side (2) Lifting head and breathing
Before attempting these skills students must perform basic skills comfortably without hesitation or fear.
c. Bobbing to the shallow end from depth just over
height of student.
d. Rudimentary crawl for 15 yards. e. Swim on back for 15 yards. f. Jump into deep water, roll on back and swim to
side of pool.
g. Jump into deep water, swim to side with a face
down stroke.
DISCUSSION POINT RELATED INSTRUCTOR ACTIVITY
2.3-7
(a) Temperature changes
h. Survival float in deep water for 1 minute. i. Tread water in deep water for 1 minute. j. Swim face down stroke, turn around and return to
starting point.
k. Swim on back, turn around and return to starting
point.
After mastering these skills the students should be able
to move on to other beginning Navy swim courses.
5. Reducing the student’s fears and apprehension of the
water. Section 5.5 of instructor reference.
a. To overcome fears of the water, people must
adapt to the water environment by learning gradually.
b. Move from the “known” to the “unknown” c. Allow sufficient time for student: (1) To feel confident (2) Have breathe control (3) Control movements (4) To feel safe d. Rational Thinking in Water (1) Adjustment from land to water (2) Changes to body in water

DISCUSSION POINT RELATED INSTRUCTOR ACTIVITY
2.3-8
(b) Pressure increases (c) Feeling of weightlessness e. Gain control of Movements (1) Vertical floating (a) Students must learn different arm and
leg movements in order to take a breath.
(b) Land motions (walking) is: 1. Wasted Energy 2. Negative Motion 3. Exhaustion f. Reduce Fear (1) Train in a low stress environment (2) Be friendly, helpful and supportive (3) Comfortable water (4) Use clear, interesting instructions (5) Thorough demonstrations (6) Numerous land drills (7) Organized water drills (8) Instructor/Student Feedback (9) Use training aids. (10) Non-swimmers start in shallow end (11) Ensure students have Mastered Mental and
Physical Adjustment to the water and basic skills.
6. Teaching breathing techniques
Section 5.6 of instructor reference.
a. Improper breathing can be triggered by:
DISCUSSION POINT RELATED INSTRUCTOR ACTIVITY
2.3-9
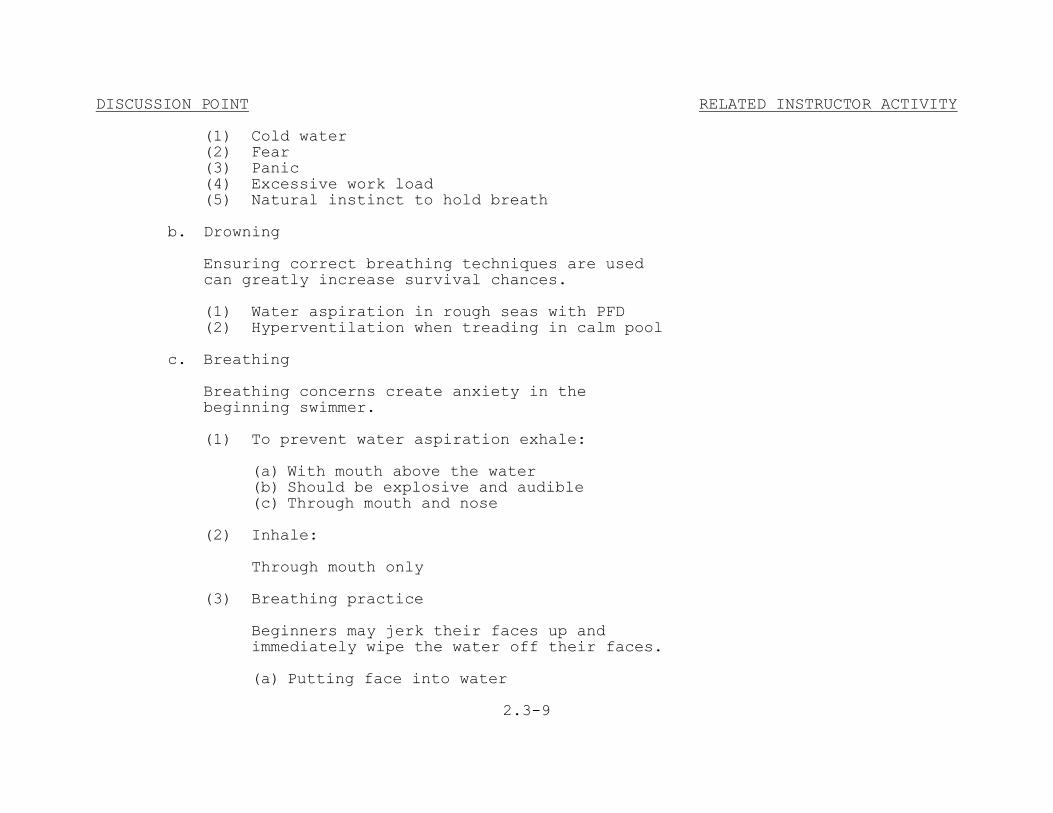
(a) Putting face into water
(1) Cold water (2) Fear (3) Panic (4) Excessive work load (5) Natural instinct to hold breath b. Drowning Ensuring correct breathing techniques are used
can greatly increase survival chances.
(1) Water aspiration in rough seas with PFD (2) Hyperventilation when treading in calm pool c. Breathing Breathing concerns create anxiety in the
beginning swimmer.
(1) To prevent water aspiration exhale: (a) With mouth above the water (b) Should be explosive and audible (c) Through mouth and nose (2) Inhale: Through mouth only (3) Breathing practice Beginners may jerk their faces up and
immediately wipe the water off their faces.

DISCUSSION POINT RELATED INSTRUCTOR ACTIVITY
2.3-10
c. Lowered carbon dioxide level
(b) Blowing bubbles with face in water (c) Bobbing and rhythmic breathing d. Hazardous oxygen deficiency Inadequate inhalation can result in hazardous
oxygen deficiency and possible unconsciousness.
(1) Inflating the cheeks only (2) Breathe off the top of their lungs. (3) Small exhalations (4) Large inhale followed by little or not
exhaling
e. Water in the nose (1) Exhale through mouth and nose, Inhale
through mouth only.
(2) If swimmer is upside down in the water have
student keep positive pressure in the nose.
7. Hyperventilation
Section 5.7 of instructor reference.
a. Rapid excessive deep breathing which lowers the body’s carbon dioxide level.
b. Voluntary hyperventilation, to achieve
underwater swimming endurance is extremely dangerous.
DISCUSSION POINT RELATED INSTRUCTOR ACTIVITY
2.3-11
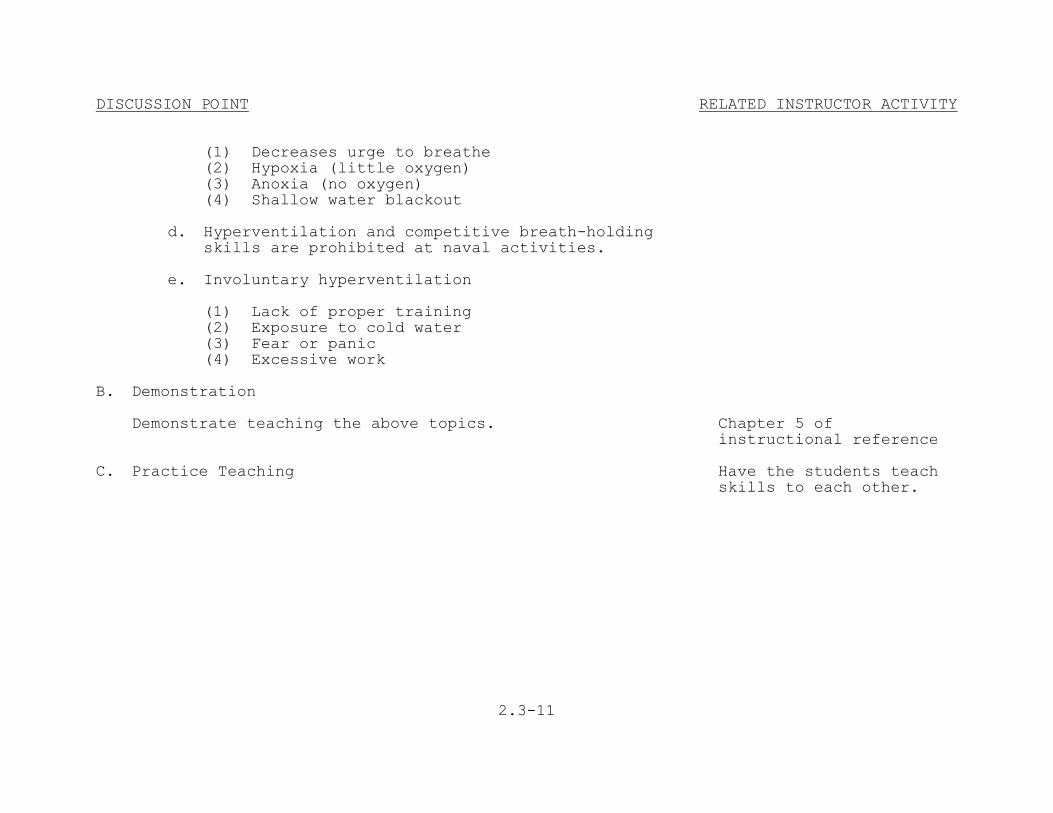
(1) Decreases urge to breathe (2) Hypoxia (little oxygen) (3) Anoxia (no oxygen) (4) Shallow water blackout d. Hyperventilation and competitive breath-holding
skills are prohibited at naval activities.
e. Involuntary hyperventilation (1) Lack of proper training (2) Exposure to cold water (3) Fear or panic (4) Excessive work B. Demonstration Demonstrate teaching the above topics. Chapter 5 of
instructional reference C. Practice Teaching Have the students teach
skills to each other.

DISCUSSION POINT RELATED INSTRUCTOR ACTIVITY
2.3-12
SUMMARY AND REVIEW A. State lesson objectives. Turn to cover page for
objectives B. Review major teaching points. Briefly summarize. APPLICATION As per presentation B and C. EVALUATION Written exam at end of course. ASSIGNMENT Read Chapter 13 of Navy’s Swimming and Water Survival Instructor’s Manual.

6. Trousers
2.4-1
LESSON PLAN January 2005 COURSE TITLE: Basic Swimming and Water
Survival Instructor Training Course, A-012-1014
TERMINAL OBJECTIVE: Completely supported by this lesson topic:
CLASSIFICATION: Unclassified LESSON PLAN NUMBER: 2.4 LESSON TOPIC: Personal Flotation Devices ALLOTTED LESSON TIME: 1.0 Classroom
1.0 Laboratory
2.0 Upon completion of this unit of instruction, the student will demonstrate knowledge and proficiency in aquatic skills, swimming, and water survival techniques without injury to personnel or damage to equipment.
INSTRUCTIONAL SUPPORT: ENABLING OBJECTIVES: Completely supported by this lesson topic: 1 Classroom Instructor
INSTRUCTIONAL REFERENCE: 1. NAVAIR 13-1-6 Manuals
2.9 Identify the purposes and characteristics of personal flotation devices.
2. NWP 3.50-1 SAR Manual 3. OPNAVINST 3710.7 General NATOPS
2.10 Practice survival skills while wearing a personal flotation device.
INSTRUCTIONAL AIDS: CRITERION TEST:
1. SV-2 Survival Vest Written exam at end of course 2. LPU-21 3. LPP-1/1A HOMEWORK: 4. LPU-30 5. Kapok None
DISCUSSION POINT RELATED INSTRUCTOR ACTIVITY
2.4-2
INTRODUCTION A. Establish Contact Display name and lesson
topic. 1. Introduce self, give rank, current job. 2. State background, schools, duty stations, etc. 3. State question and answer policy. B. State Lesson Objectives Turn to cover page of
Lesson Plan and paraphrase objectives.
C. Establish Readiness 1. Motivating Statements 2. Lesson overview
State how and why students will use material.
a. Lesson Topic: Personal Flotation Devices b. Major Teaching Points: (1) SV-2/B Survival Vest (2) LPU-21 Life Preserver (3) LPP-1/1A (4) LPU-30 (5) Kapok

DISCUSSION POINT RELATED INSTRUCTOR ACTIVITY
2.4-3
PRESENTATION: A. SV-2/B Survival Vest 1. An adjustable nylon vest designed to provide stowage
for survival items.
2. All SV-2 survival vest, except when worn with a
torso harness, are required to have the hoisting strap modification incorporated, and rescue hook is PRIMARY method of pick-up.
3. Provides for stowage of man-mounted survival
equipment and attachment and attachment of life preserver.
Put on SV-2 and demonstrate proper fit. Ensure one fist distance between chest strap and torso to prevent chest compression injury during helicopter rescue when applicable.
All required and optional survival items are tied into the vest and stowed so as evenly distribute weight.
B. LPU-21 Series Life Preserver 1. Description: a. Supports a survivor upright in the water in the
event of an emergency.
b. Fail safe flotation design: (1) Left waist lobe and right collar lobe
connected. Use displays.
(2) Right waist lobe and left collar lobe
connected. Explain advantage of lobe configuration.

DISCUSSION POINT RELATED INSTRUCTOR ACTIVITY
2.4-4
c. Sixty-five pounds buoyancy when fully inflated. d. Will rotate unconscious survivor face up
provided:
(1) Proper fit (2) Waist lobes snapped (3) Fully inflated 2. Actuation a. Beaded handles – CO2 – Pull beaded handles
slightly down and away from the body. b. If manual activation fails, LPU must be inflated
orally.
Pull left side to expose waist lobe and show oral inflation tube, partially inflate left side, then screw silver ring back up. Actuated right side.
(1) Locate oral inflation tube on waist lobe. (2) Remove from stowage pocket and unscrew
(clockwise) knurled locking ring.
(3) Depress spring loaded top of tube against
teeth and expel half of breath into bladder.
Caution students not injure themselves by pinching lip between mouthpiece and stem.
(4) Continue until each waist lobe is full. (5) Repeat procedure for opposite side. (6) Press waist lobe against body to pop out
collar lobe.

DISCUSSION POINT RELATED INSTRUCTOR ACTIVITY
2.4-5
3. Actuation
(7) Complete oral inflation of waist lobe and collar lobe until full.
(8) Press other waist lobe against body to pop
out collar lobe.
(9) Complete oral inflation of the remaining
waist lobe and collar lobe until full.
(10) Screw knurled locking rings and re-stow in
storage pockets.
(11) It may be necessary to manually separate
velcro on collar lobes no matter which way the LPU is inflated.
C. LPP-1/1A Life Preserver Assembly
Use displays and demonstrate.
1. Yoke type flotation assembly. a. 29 pound buoyancy b. May be worn while flying as passengers in
transport, cargo, and helo aircraft.
2. Pouch and adjustable belt assembly a. Adjust belt to fit snugly around waist. b. Rotate pouch over abdomen. c. Remove helmet or cranial prior to donning
overhead.

DISCUSSION POINT RELATED INSTRUCTOR ACTIVITY
2.4-6
(1) Consists of six attachment and adjustment
a. CO2 inflation valve and assembly. b. Oral inflation valve Operation: unscrew knurled ring then press down
with teeth while exhaling air into oral inflation tube.
c. Toggle assembly with line on belt to tie
survivors together or to raft.
4. LPU-30/P Life Preserver a. General description – A white vest type life
preserver assembly providing a minimum of 29 pounds buoyancy.
Ensure students understand this vest is not the same as the MK-1 Flight Deck Vest. The MK-1 may not be substituted for a LPU-30.
Consists of single compartment flotation assembly. b. Inflation (1) Manual inflation assembly – activated the
same as LPP-1/1A.
(2) Oral inflation valve and tube. (3) Adjust waist webbing to obtain proper fit. 5. Kapok Life Vest a. General description – A orange cloth covered
plastic foam filled life preserver.
DISCUSSION POINT RELATED INSTRUCTOR ACTIVITY
2.4-7
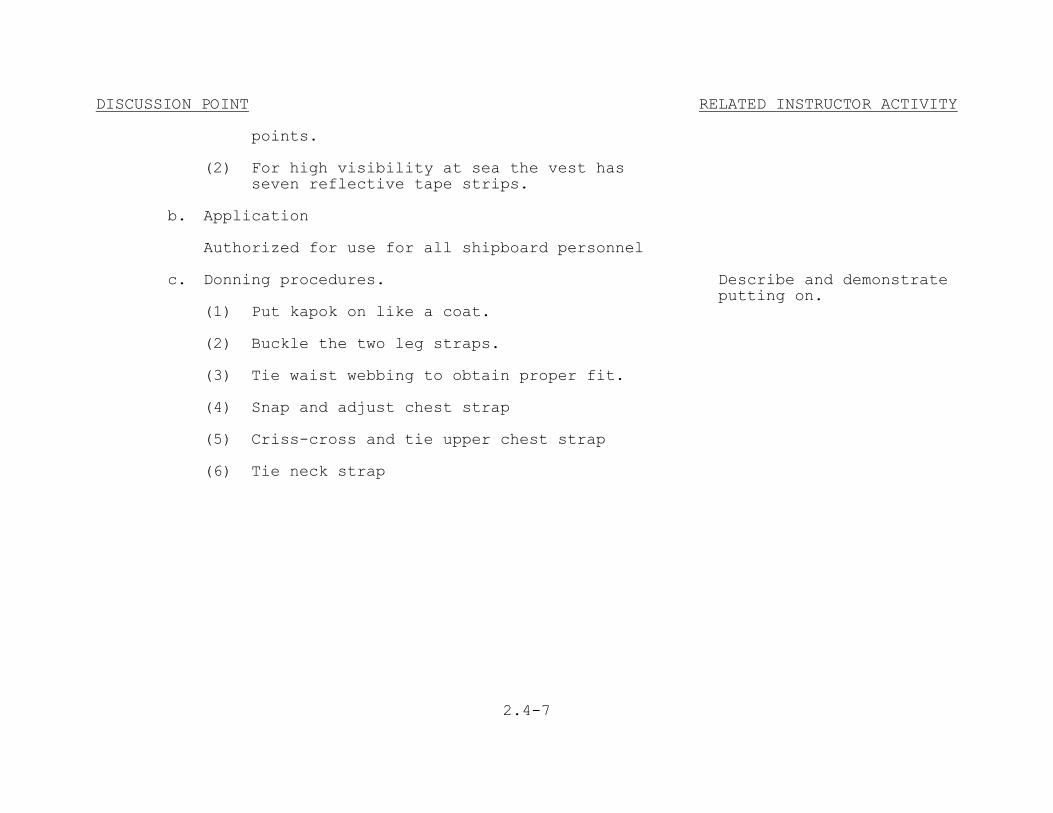
points. (2) For high visibility at sea the vest has
seven reflective tape strips.
b. Application Authorized for use for all shipboard personnel c. Donning procedures.
Describe and demonstrate putting on.
(1) Put kapok on like a coat. (2) Buckle the two leg straps. (3) Tie waist webbing to obtain proper fit. (4) Snap and adjust chest strap (5) Criss-cross and tie upper chest strap (6) Tie neck strap

DISCUSSION POINT RELATED INSTRUCTOR ACTIVITY
2.4-8
SUMMARY AND REVIEW A. State Lesson Objectives. Turn to cover page for
objectives B. Review Major Teaching Points. Briefly summarize. APPLICATION Have students put on various flotation devices and practice inflating them in the pool.
Conduct warm-up, stretches, and cool- down IAW Annex F.
EVALUATION Written exam at end of course. ASSIGNMENT None
2.5-1
LESSON PLAN January 2005 COURSE TITLE: Basic Swimming and Water
Survival Instructor Training Course, A-012-1014
TERMINAL OBJECTIVE: Completely supported by this lesson topic:
CLASSIFICATION: Unclassified LESSON PLAN NUMBER: 2.5 LESSON TOPIC: Survival Strokes ALLOTTED LESSON TIME: 2.0 Laboratory
2.0 Upon completion of this unit of instruction, the student will demonstrate knowledge and proficiency in aquatic skills, swimming, and water survival techniques without injury to personnel or damage to equipment.
INSTRUCTIONAL SUPPORT: ENABLING OBJECTIVES: Completely supported by this lesson topic: 1 BSWIC Instructor 1 Qualified Lifeguard 2.11 Perform Survival Strokes Another lifeguard if more than 20 students in deep end.
INSTRUCTIONAL REFERENCE:
CRITERION TEST:
1. U.S. Navy Water Survival Instructor’s Manual
Performance Test
2. American Red Cross Swimming and Diving HOMEWORK: Manual
Read Chapter 8 of reference 1. INSTRUCTIONAL AIDS:
Swimming pool

DISCUSSION POINT RELATED INSTRUCTOR ACTIVITY
2.5-2
INTRODUCTION A. Establish Contact Display name and lesson
topic. 1. Introduce self, give rank, current job. 2. State background, schools, duty stations, etc. 3. State question and answer policy. 4. State Training Time Out policy. 5. Ask for medical concern: a. Has anyone gone to the hospital/branch medical
clinic for treatment with the last 24 hours?
b. Has anyone taken any medication or over-the-
counter medications in last 24 hours.?
c. Are there any potentially disqualifying
illnesses/conditions?
B. State Lesson Objectives Turn to cover page of
Lesson Plan and paraphrase objectives.
C. Establish Readiness 1. Motivating Statements 2. Lesson overview
State how and why students will use material.
a. Lesson Topic: Swim Strokes

DISCUSSION POINT RELATED INSTRUCTOR ACTIVITY
2.5-3
b. Major Teaching Points: (1) Survival Strokes (2) Student Practice of Survival Strokes

DISCUSSION POINT RELATED INSTRUCTOR ACTIVITY
2.5-4
PRESENTATION: A. Survival Strokes Introduce the survival strokes identified in the U.S.
Navy Water Survival Instructors Manual: Breast stroke, sidestroke, elementary backstroke and crawlstroke. Brief students that they will be required to swim the breaststroke, sidestroke, elementary backstroke and crawlstroke to First Class Swim Standards, Chapter 13 of the U.S. Navy Water Survival Instructor’s Manual.
Conduct warm-up, stretches, and cool-down IAW Annex F.
B. Breaststroke 1. Advantages a. Uses large powerful muscles for propulsion. b. Offers good forward visibility. c. Offers controlled breathing. d. Glide action provides a rest between strokes,
conserving energy.
2. Body Position (Start and Glide) a. Prone, face resting in the water, looking
straight down.
b. The body is streamlined as much as possible, with arms extending forward and legs together.
c. The glide position begins and ends each stroke.
DISCUSSION POINT RELATED INSTRUCTOR ACTIVITY
2.5-5
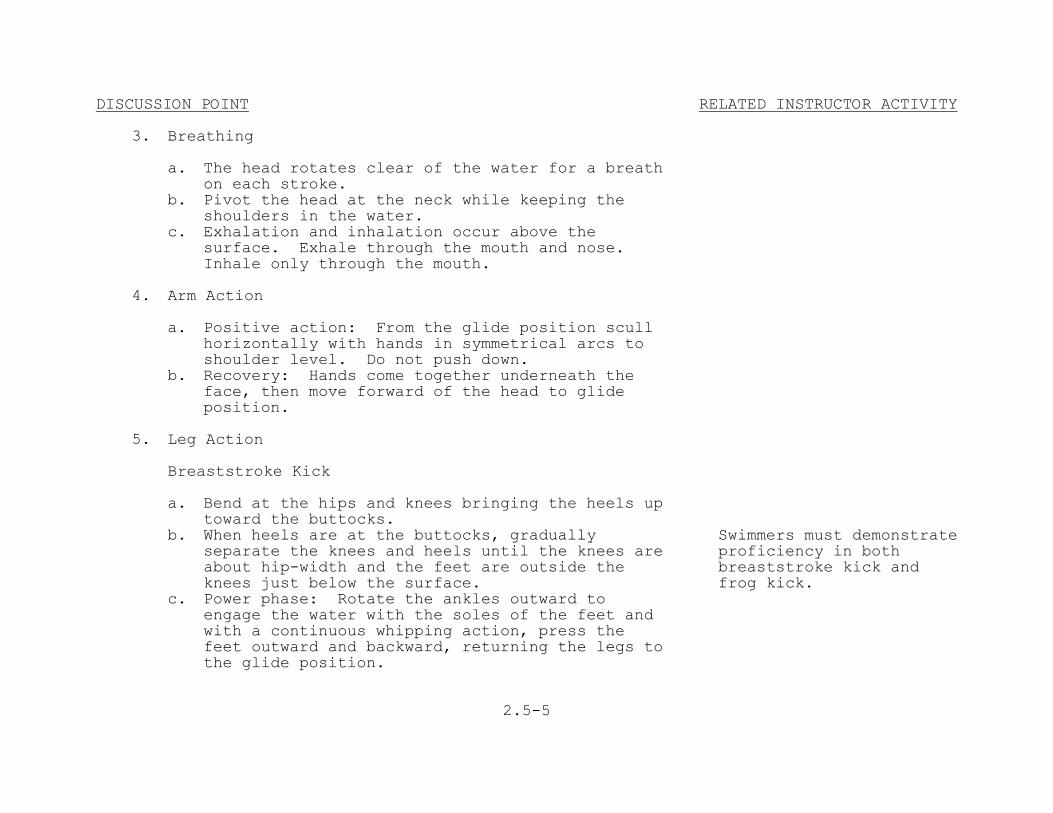
3. Breathing a. The head rotates clear of the water for a breath
on each stroke.
b. Pivot the head at the neck while keeping the shoulders in the water.
c. Exhalation and inhalation occur above the surface. Exhale through the mouth and nose. Inhale only through the mouth.
4. Arm Action a. Positive action: From the glide position scull
horizontally with hands in symmetrical arcs to shoulder level. Do not push down.
b. Recovery: Hands come together underneath the face, then move forward of the head to glide position.
5. Leg Action Breaststroke Kick a. Bend at the hips and knees bringing the heels up
toward the buttocks.
b. When heels are at the buttocks, gradually separate the knees and heels until the knees are about hip-width and the feet are outside the knees just below the surface.
Swimmers must demonstrate proficiency in both breaststroke kick and frog kick.
c. Power phase: Rotate the ankles outward to engage the water with the soles of the feet and with a continuous whipping action, press the feet outward and backward, returning the legs to the glide position.
DISCUSSION POINT RELATED INSTRUCTOR ACTIVITY
2.5-6
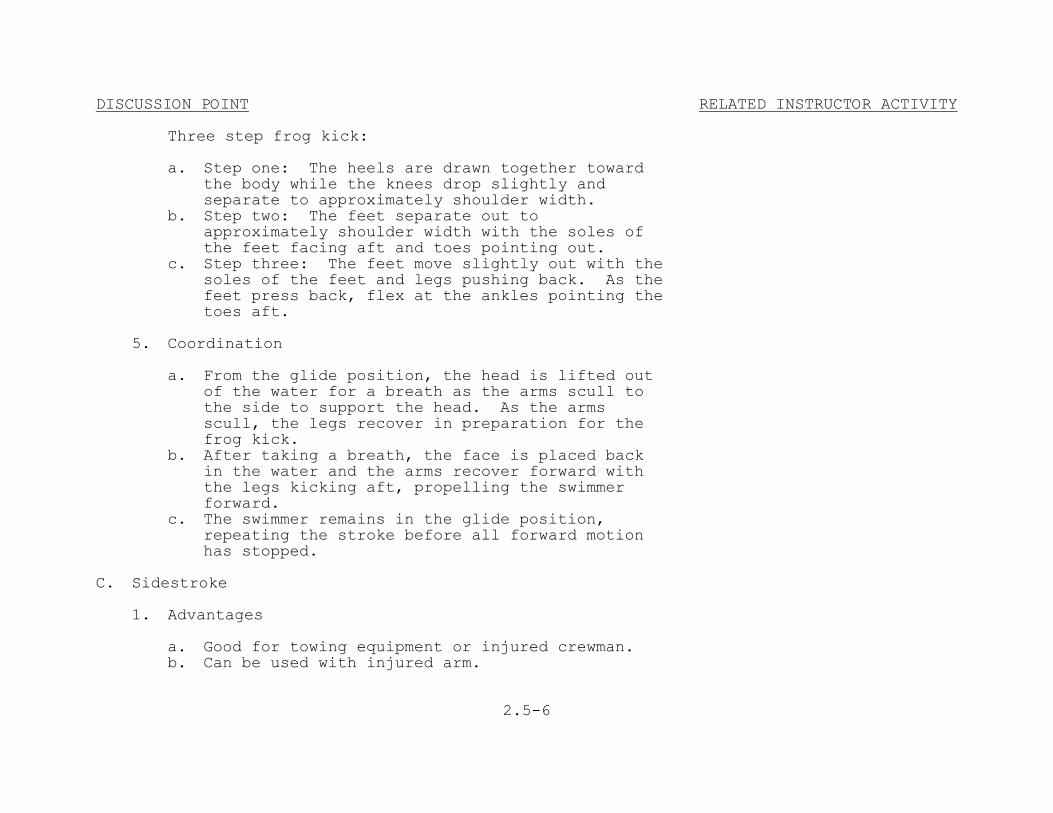
Three step frog kick: a. Step one: The heels are drawn together toward
the body while the knees drop slightly and separate to approximately shoulder width.
b. Step two: The feet separate out to approximately shoulder width with the soles of the feet facing aft and toes pointing out.
c. Step three: The feet move slightly out with the soles of the feet and legs pushing back. As the feet press back, flex at the ankles pointing the toes aft.
5. Coordination a. From the glide position, the head is lifted out
of the water for a breath as the arms scull to the side to support the head. As the arms scull, the legs recover in preparation for the frog kick.
b. After taking a breath, the face is placed back in the water and the arms recover forward with the legs kicking aft, propelling the swimmer forward.
c. The swimmer remains in the glide position, repeating the stroke before all forward motion has stopped.
C. Sidestroke 1. Advantages a. Good for towing equipment or injured crewman. b. Can be used with injured arm.
DISCUSSION POINT RELATED INSTRUCTOR ACTIVITY
2.5-7
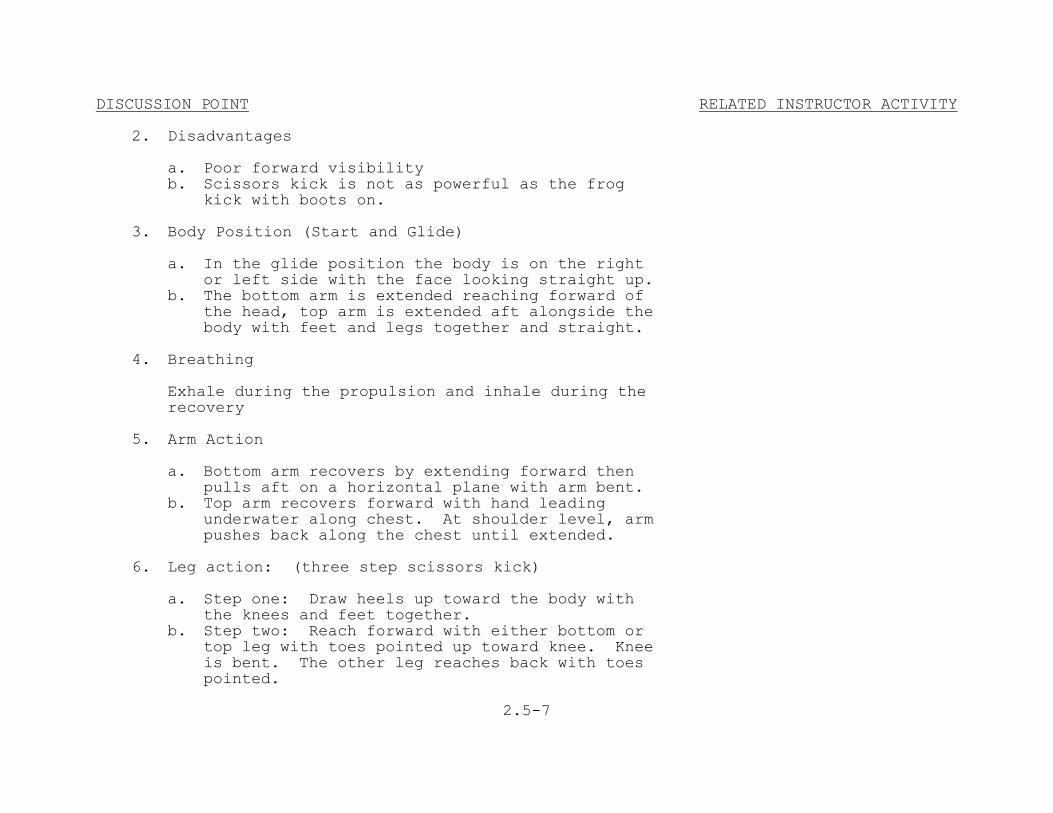
2. Disadvantages a. Poor forward visibility b. Scissors kick is not as powerful as the frog
kick with boots on.
3. Body Position (Start and Glide) a. In the glide position the body is on the right
or left side with the face looking straight up.
b. The bottom arm is extended reaching forward of the head, top arm is extended aft alongside the body with feet and legs together and straight.
4. Breathing Exhale during the propulsion and inhale during the
recovery
5. Arm Action a. Bottom arm recovers by extending forward then
pulls aft on a horizontal plane with arm bent.
b. Top arm recovers forward with hand leading underwater along chest. At shoulder level, arm pushes back along the chest until extended.
6. Leg action: (three step scissors kick) a. Step one: Draw heels up toward the body with
the knees and feet together.
b. Step two: Reach forward with either bottom or top leg with toes pointed up toward knee. Knee is bent. The other leg reaches back with toes pointed.

DISCUSSION POINT RELATED INSTRUCTOR ACTIVITY
2.5-8
d. The arms are extended alongside the body.
c. Step three: Kick legs together while pushing back with the bottom of the forward foot and the top of the aft foot.
7. Coordination a. From the glide position, the bottom arm pulls
aft as top arm recovers forward. The legs recover and separate for the scissors kick.
b. The bottom arm recovers forward as the top arm pushes aft and legs kick together. Swimmer delays in glide position before starting the cycle again.
D. Elementary Backstroke 1. Advantages a. Kick is effective with boots on. b. Glide conserves energy. c. A pleasantly comfortable stroke with fully
inflated PFD.
2. Disadvantages a. Does not provide for controlled breathing in
rough seas.
b. Offers no forward visibility. 3. Body Position: (Start and Glide) a. Body is kept horizontal. b. The back is arched. c. Legs extend aft with knees and feet together.
DISCUSSION POINT RELATED INSTRUCTOR ACTIVITY
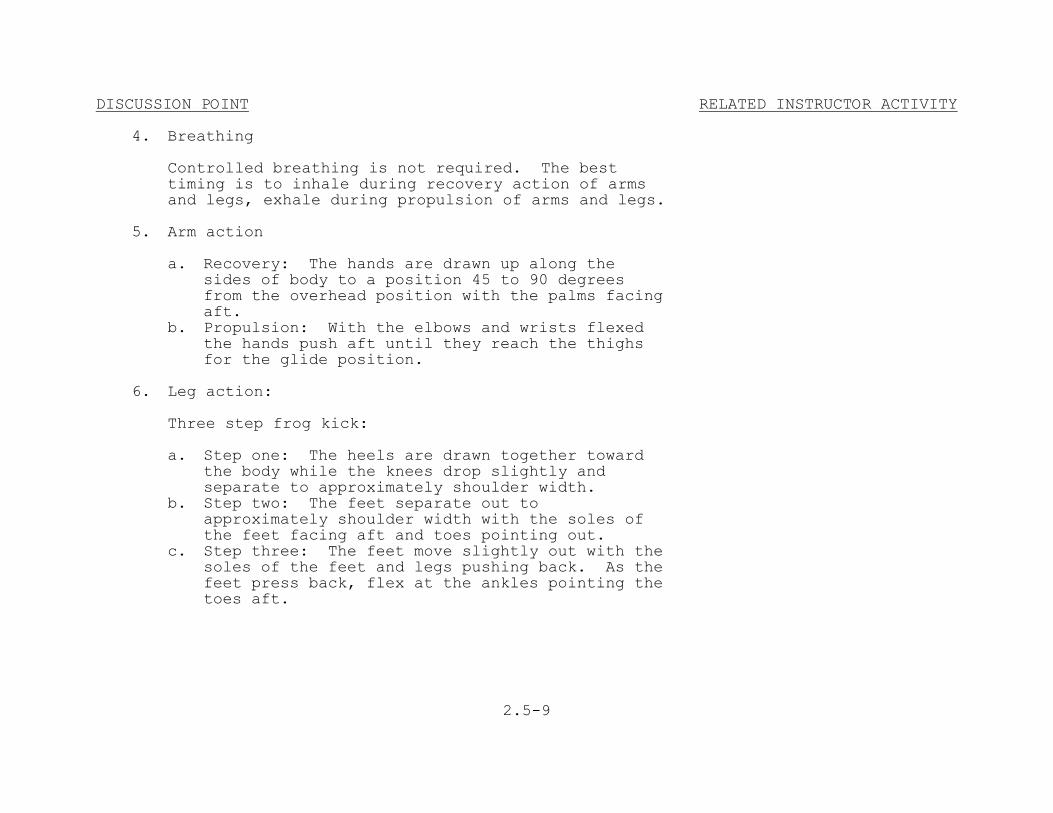
2.5-9
4. Breathing Controlled breathing is not required. The best
timing is to inhale during recovery action of arms and legs, exhale during propulsion of arms and legs.
5. Arm action a. Recovery: The hands are drawn up along the
sides of body to a position 45 to 90 degrees from the overhead position with the palms facing aft.
b. Propulsion: With the elbows and wrists flexed the hands push aft until they reach the thighs for the glide position.
6. Leg action: Three step frog kick: a. Step one: The heels are drawn together toward
the body while the knees drop slightly and separate to approximately shoulder width.
b. Step two: The feet separate out to approximately shoulder width with the soles of the feet facing aft and toes pointing out.
c. Step three: The feet move slightly out with the soles of the feet and legs pushing back. As the feet press back, flex at the ankles pointing the toes aft.

DISCUSSION POINT RELATED INSTRUCTOR ACTIVITY
2.5-10
7. Coordination a. Arms and legs recover together followed by
simultaneous pull with the arms and kick with the legs.
b. Glide position is maintained before starting cycle again.
D. American Crawl 1. Advantages a. Used to cover short distances quickly (i.e., to
swim away from debris, catch a drifting raft, etc.)
b. Can be used with broken legs. 2. Disadvantages a. Requires a great amount of energy and is not
considered a long distance stroke.
b. Poor forward visibility. 3. Body Position a. The body is kept face down in the horizontal
plane.
b. Surface of water is at eyebrow level. c. Arms are fully extended forward with legs
extending aft.

DISCUSSION POINT RELATED INSTRUCTOR ACTIVITY
2.5-11
4. Breathing a. Turn the head to one side as the corresponding
hand passes the face during the arm pull.
b. Begin exhaling with the face in the water. Finish exhaling as the face clears the water, and then inhale. Rotate the face back into the water as the recovering arm passes the head.
c. Breathe every stroke or every other stroke.
Bilateral breathing is not allowed.
5. Arm action a. Hands alternately enter the water in front of
the head.
b. Hand is kept flat as the arm pulls along the centerline of the body with elbow bent.
c. The arm recovers from the water elbow high them swings forward just above surface of the water.
6. Leg action a. Flutter kick the legs continuously from the hip,
separating the feet 12 to 18 inches.
b. The knee is kept loose with the toes pointed aft.
7. Coordination a. Legs kick continuously, not coordinated with
arms.
b. Coordination between arms and head is required to allow good propulsion and proper breathing.
DISCUSSION POINT RELATED INSTRUCTOR ACTIVITY
2.5-12
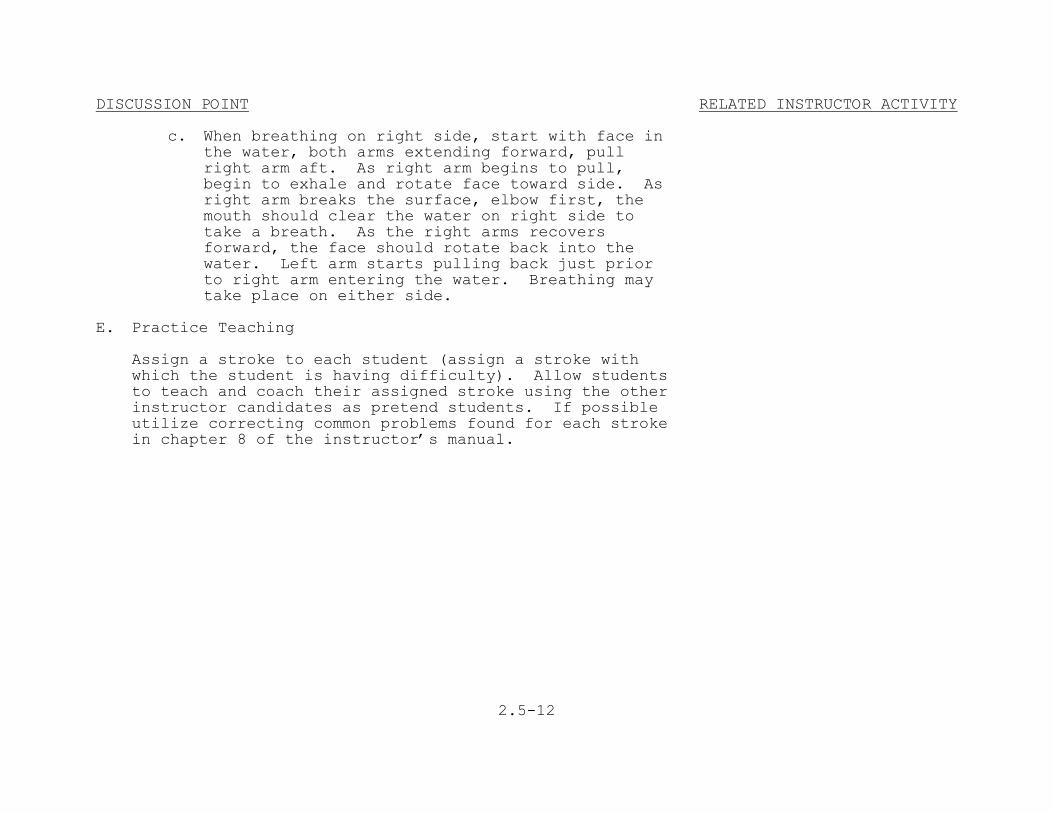
c. When breathing on right side, start with face in the water, both arms extending forward, pull right arm aft. As right arm begins to pull, begin to exhale and rotate face toward side. As right arm breaks the surface, elbow first, the mouth should clear the water on right side to take a breath. As the right arms recovers forward, the face should rotate back into the water. Left arm starts pulling back just prior to right arm entering the water. Breathing may take place on either side.
E. Practice Teaching Assign a stroke to each student (assign a stroke with
which the student is having difficulty). Allow students to teach and coach their assigned stroke using the other instructor candidates as pretend students. If possible utilize correcting common problems found for each stroke in chapter 8 of the instructor’s manual.

DISCUSSION POINT RELATED INSTRUCTOR ACTIVITY
2.5-13
SUMMARY AND REVIEW A. State Lesson Objectives. Turn to cover page for
objectives B. Review Major Teaching Points. Briefly summarize. APPLICATION As per presentation EVALUATION Performance test ASSIGNMENT None
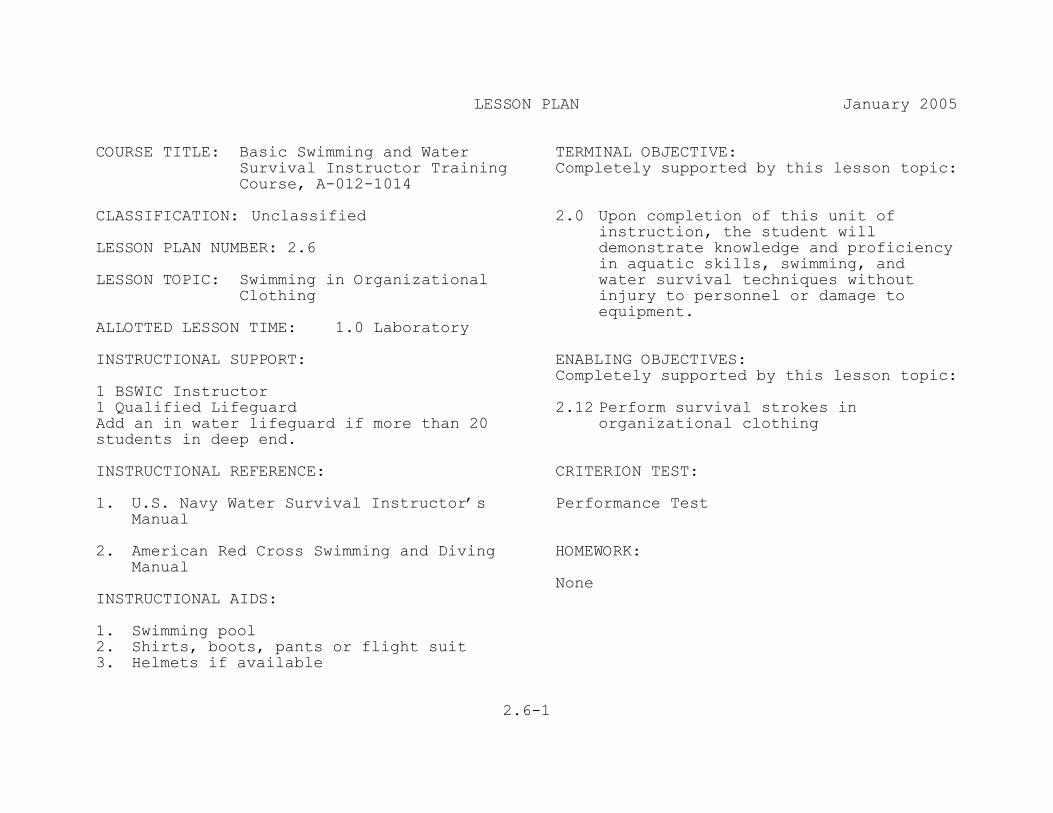
2.6-1
LESSON PLAN January 2005 COURSE TITLE: Basic Swimming and Water
Survival Instructor Training Course, A-012-1014
TERMINAL OBJECTIVE: Completely supported by this lesson topic:
CLASSIFICATION: Unclassified LESSON PLAN NUMBER: 2.6 LESSON TOPIC: Swimming in Organizational
Clothing ALLOTTED LESSON TIME: 1.0 Laboratory
2.0 Upon completion of this unit of instruction, the student will demonstrate knowledge and proficiency in aquatic skills, swimming, and water survival techniques without injury to personnel or damage to equipment.
INSTRUCTIONAL SUPPORT: ENABLING OBJECTIVES: Completely supported by this lesson topic: 1 BSWIC Instructor 1 Qualified Lifeguard Add an in water lifeguard if more than 20 students in deep end.
2.12 Perform survival strokes in organizational clothing
INSTRUCTIONAL REFERENCE:
CRITERION TEST:
1. U.S. Navy Water Survival Instructor’s Manual
Performance Test
2. American Red Cross Swimming and Diving HOMEWORK: Manual None
INSTRUCTIONAL AIDS:
1. Swimming pool 2. Shirts, boots, pants or flight suit 3. Helmets if available
DISCUSSION POINT RELATED INSTRUCTOR ACTIVITY
2.6-2
INTRODUCTION A. Establish Contact Display name and lesson
topic. 1. Introduce self, give rank, current job. 2. State background, schools, duty stations, etc. 3. State question and answer policy. 4. State Training Time Out policy. 5. Ask for medical concern: a. Has anyone gone to the hospital/branch medical
clinic for treatment with the last 24 hours?
b. Has anyone taken any medication or over-the-
counter medications in last 24 hours.?
c. Are there any potentially disqualifying
illnesses/conditions?
B. State Lesson Objectives Turn to cover page of
Lesson Plan and paraphrase objectives.
C. Establish Readiness 1. Motivating Statements 2. Lesson overview
State how and why students will use material.
a. Lesson Topic: Swimming in Organizational
Clothing

DISCUSSION POINT RELATED INSTRUCTOR ACTIVITY
2.6-3
b. Major Teaching Points: (1) Survival Strokes Review (2) Problems experienced while swimming in
clothes
(3) Student practice of organization clothing swim techniques
DISCUSSION POINT RELATED INSTRUCTOR ACTIVITY
2.6-4
PRESENTATION: A. Survival Strokes Review
Conduct warm-up, stretches, and cool-down IAW Annex F.
Review the mechanics of the breaststroke, sidestroke,
and elementary backstroke and crawl stroke as discussed in Lesson Plan 2.4.
Crawl stroke will be performed in flight suit only.
B. Problems experienced while swimming in clothing 1. Drag 2. Resistance to movement 3. Resistance to glide 4. Modifications of arm actions and kicks c. Student practice of Organizational Clothing Swim
Techniques. 1. Student safety brief
Ensure required safety personnel are present and a staff safety brief Conducted before students Enter the pool.
2. Swimming in organizational clothing Brief students on safety Assist candidates in mastering the survival
strokes while wearing organizational clothing. Start with shirt and pants or flight suit/ coveralls. Work up to shirt, pants and boots, Use land drills, kickboards, leg buoys etc as needed. Focus on short distances (25 yards or less) concentrating on correcting techniques so that the swimmer becomes efficient when swimming in organizational clothing.
Precautions before they enter the pool. Depending on facility, students may don survival vest, helmet and gloves in addition to shirt/pants and boots.
3. Practice teaching

DISCUSSION POINT RELATED INSTRUCTOR ACTIVITY
2.6-5
Assign a stroke to each student (assign a stroke with which the student is having difficulty). Allow students to teach and coach their assigned stroke using the other instructor candidates as pretend students. If possible as utilize “real students”.
Maintain correct staff to student ratios.

DISCUSSION POINT RELATED INSTRUCTOR ACTIVITY
2.6-6
SUMMARY AND REVIEW A. State Lesson Objectives. Turn to cover page for
objectives B. Review Major Teaching Points. Briefly summarize. APPLICATION As per presentation EVALUATION Performance test ASSIGNMENT None

2.7-1
LESSON PLAN January 2005 COURSE TITLE: Basic Swimming and Water
Survival Instructor Training Course, A-012-1014
TERMINAL OBJECTIVE: Completely supported by this lesson topic:
CLASSIFICATION: Unclassified LESSON PLAN NUMBER: 2.7 LESSON TOPIC: Treading Water ALLOTTED LESSON TIME: 2.0 Laboratory
2.0 Upon completion of this unit of instruction, the student will demonstrate knowledge and proficiency in aquatic skills, swimming, and water survival techniques without injury to personnel or damage to equipment.
INSTRUCTIONAL SUPPORT: ENABLING OBJECTIVES: Completely supported by this lesson topic: 1 BSWIC Instructor 1 Qualified Lifeguard Add an in water lifeguard if more than 20 students in deep end.
2.13 Perform three methods of treading water.
INSTRUCTIONAL REFERENCE:
CRITERION TEST:
U.S. Navy Water Survival Instructor’s Manual
Performance Test
HOMEWORK:INSTRUCTIONAL AIDS: Read Chapter 7 of reference 1. Swimming pool 2. Shirts, pants, boots or flight suit/
coveralls
3. Helmets, gloves and SV-2 if available

DISCUSSION POINT RELATED INSTRUCTOR ACTIVITY
2.7-2
INTRODUCTION
A. Establish Contact Display name and lesson
topic. 1. Introduce self, give rank, current job. 2. State background, schools, duty stations, etc. 3. State question and answer policy. 4. State Training Time Out policy. 5. Ask for medical concern: a. Has anyone gone to the hospital/branch medical
clinic for treatment with the last 24 hours?
b. Has anyone taken any medication or over-the-
counter medications in last 24 hours.?
c. Are there any potentially disqualifying
illnesses/conditions?
B. State Lesson Objectives Turn to cover page of
Lesson Plan and paraphrase objectives.

DISCUSSION POINT RELATED INSTRUCTOR ACTIVITY
2.7-3
C. Establish Readiness 1. Motivating Statements 2. Lesson overview
State how and why students will use material.
a. Lesson Topic: Treading Water b. Major Teaching Points: (1) Treading Water (2) Student practice of treading water
techniques

DISCUSSION POINT RELATED INSTRUCTOR ACTIVITY
2.7-4
PRESENTATION: A. Treading Water Introduce the three methods of treading water.
Conduct warm-up, stretches, and cool-down IAW Annex F.
1. Scissors Kick 2. Modified Frog Kick 3. Eggbeater Kick B. Scissors Kick 1. Advantages Easy to learn 2. Disadvantages a. Ineffective when wearing high top lace boots. b. Resistance and drag of long pants further
reduce effectiveness.
3. Body Position Vertical sitting position

DISCUSSION POINT RELATED INSTRUCTOR ACTIVITY
2.7-5
4. Leg Action Recovery Phase: a. Separate one thigh forward and one thigh aft
with knees under chest.
b. The forward foot is at a right angle to the calf toes pointed up.
c. The aft foot is in line with the calf, toes pointed aft.
Power Phase: a. Power phase is performed by a simultaneous kick
of both legs.
b. The bottom of the forward foot and inside of the calf press backward and downward with the foot whipping down to a position in line with the calf.
c. The aft leg presses downward and forward with the top of the foot and calf, with the foot whipping to a position at a right angle to the calf.
Movement:
The leg action is continuous, with the recovery slow, and the thrust just vigorous enough to support the head above the water.
5. Bobbing Care should be taken not to kick down, straightening
the thighs and extending the legs until the knees are straight. This causes bobbing and raises the swimmer too high out of the water and will cause swimmer to submerge under the water.
DISCUSSION POINT RELATED INSTRUCTOR ACTIVITY
2.7-6
6. Coordination Outward scull of the arms is time with the power
phase of the kick, and the inward sculling timed with the recovery of the legs.
C. Modified Frogkick 1. Advantages a. Kick is strong and is effective with high top
lace boots and long pants.
b. Can be used to scan horizon for rescue craft when no flotation is available.
c. Can be used while inflating life preserver, trousers etc.
2. Body position a. Vertical, almost sitting position leaning
slightly forward.
b. The head is tilted slightly back with the mouth just above the water.
3. Breathing a. Breathe continuously. Do not hold your breath. b. Exhale through the mouth and nose. Inhale
deeply through the mouth only.
c. A full air exchange is critical to avoid exhaustion or hyperventilation.

DISCUSSION POINT RELATED INSTRUCTOR ACTIVITY
2.7-7
4. Arm action a. Hands provide support for the body by sculling
horizontally just below the surface.
b. Hands scull inward at a 45-degree angle with thumbs up and then rotate thumbs down to scull outward.
c. The arms bend at the elbows rather than at the shoulders.
5. Leg action a. A continuous modified frog kick provides the
best support.
b. The kick has three steps: (1) The knees are raised and separated to
approximately shoulder width with the heels inboard of the knees.
(2) Rotate the feet outboard of the knees with the toes pointing up.
(3) Keep the knees almost stationary and push down with the soles of the feet while flexing the ankles to point the toes down.
6. Coordination Coordination between arms and legs is not required;
however, the best coordination is to kick as your hands skull inward.
DISCUSSION POINT RELATED INSTRUCTOR ACTIVITY
2.7-8
D. Eggbeater Kick 1. Advantages a. Most powerful b. Effective with high top lace boots and pants. 2. Disadvantages Difficult to master. 3. Leg Action The power phase and recovery of this kick is
identical to the modified frog kick with the exception being that each leg recovers and kicks alternately, not simultaneously
4. Arm action Arm action not coordinated with kick. Demonstrate 3 methods of
treading water in full organizational clothing/equipment.
E. Practice Teaching Assign treading water to each instructor candidate.
Assign the type of treading water with which the student has the most difficulty. Direct the instructor candidate to teach and coach his assigned tread, using the other instructor candidates as students. If possible find “real” students for instructor candidates to teach.

DISCUSSION POINT RELATED INSTRUCTOR ACTIVITY
2.7-9
SUMMARY AND REVIEW A. State Lesson Objectives. Turn to cover page for
objectives B. Review Major Teaching Points. Briefly summarize. APPLICATION As per presentation
Students experiencing difficulty will be remediated.
EVALUATION Performance test ASSIGNMENT None
2.8-1
LESSON PLAN January 2005 COURSE TITLE: Basic Swimming and Water
Survival Instructor Training Course, A-012-1014
TERMINAL OBJECTIVE: Completely supported by this lesson topic:
CLASSIFICATION: Unclassified LESSON PLAN NUMBER: 2.8 LESSON TOPIC: Methods of Staying Afloat ALLOTTED LESSON TIME: 1.0 Laboratory
2.0 Upon completion of this unit of instruction, the student will demonstrate knowledge and proficiency in aquatic skills, swimming, and water survival techniques without injury to personnel or damage to equipment.
INSTRUCTIONAL SUPPORT: ENABLING OBJECTIVES: Completely supported by this lesson topic: 1 BSWIC Instructor 1 Qualified Lifeguard Add an in water lifeguard if more than 20 students in deep end.
2.14 Perform five methods of survival floating.
INSTRUCTIONAL REFERENCE:
CRITERION TEST:
U.S. Navy Water Survival Instructor’s Manual
Performance Test
HOMEWORK:INSTRUCTIONAL AIDS: Read Chapter 6 of Reference. 1. Swimming pool 2. Shirt and trousers 3. Personal flotation device (PFD)

DISCUSSION POINT RELATED INSTRUCTOR ACTIVITY
2.8-2
INTRODUCTION A. Establish Contact Display name and lesson
topic. 1. Introduce self, give rank, current job. 2. State background, schools, duty stations, etc. 3. State question and answer policy. 4. State Training Time Out policy. 5. Ask for medical concern: a. Has anyone gone to the hospital/branch medical
clinic for treatment with the last 24 hours?
b. Has anyone taken any medication or over-the-
counter medications in last 24 hours.?
c. Are there any potentially disqualifying
illnesses/conditions?
B. State Lesson Objectives Turn to cover page of
Lesson Plan and paraphrase objectives.

DISCUSSION POINT RELATED INSTRUCTOR ACTIVITY
2.8-3
C. Establish Readiness 1. Motivating Statements 2. Lesson overview
State how and why students will use material.
a. Lesson Topic: Methods of Staying Afloat b. Major Teaching Points: (1) Survival Floating (2) Student practice of all Floating Techniques

DISCUSSION POINT RELATED INSTRUCTOR ACTIVITY
2.8-4
PRESENTATION: A. Survival Floating
Conduct warm-up, stretches, cool-down and IAW Annex F.
Introduce the methods of survival floating: Prone method, back float, clothing inflation, PFD, H.E.L.P. and Huddle.
B. Prone Float (Survival Float) 1. Advantages a. Effective if wearing restrictive clothing/
equipment. Explain the effects of hypothermia.
b. Allows for comfortable breathing. c. Conserves energy. 2. Disadvantages a. Placing the head in cold water (72 degrees
Fahrenheit and below) can lead to hypothermia.
b. In cold water, use as a last resort to catch breath or to implement some form of flotation.
3. Body Position a. Place face in the water with chin tucked to
chest.
b. Upper back and shoulders are horizontal to the surface, slightly under the water.
c. Arms are at the surface with elbows bent and hands separated slightly.
DISCUSSION POINT RELATED INSTRUCTOR ACTIVITY
2.8-5
d. Bend the waist with the hips underwater, lower than the upper body, and the legs dangling beneath.
Adjust for buoyancy variations by drawing legs up toward the chest or extending them out and adjusting the arms by extending them or drawing them in towards the chest.
4. Breathing a. Pivot at the neck, lifting the chin off the
chest until the mouth clears the surface.
b. The waist should remain bent, keeping the shoulders in the same near horizontal position to the surface.
c. As the mouth clears the surface, exhale quickly and forcefully through the mouth and nose.
d. Inhalations is through the mouth only and consists of a deep full breath of air.
Explain breathing off top of lungs.
e. Head us lowered to the resting position. 5. Coordination a. Support the head while breathing with a broad
sculling motion of the arms.
b. Sculling of arms is coordinated with the breathing to provide maximum lift when needed.
c. Arms remain near the surface and move on a plane parallel to the surface.
d. Hands press outward with the hands tilted approximately 45 degrees, thumbs down.
e. Exhale when mouth clears the water. The scull continues as the breath exchange is completed.
f. Hands press out to a point near the starting point.
DISCUSSION POINT RELATED INSTRUCTOR ACTIVITY
2.8-6
g. Palms are rotated facing inward, thumbs up, and returned to the starting point.
Demonstrate the survival float. Include methods
h. The amount of sculling required is dependent upon the buoyancy of the individual.
of teaching the non-swimmer to float.
C. Back float 1. Advantage Good for poor swimmers or non-swimmers who are
uncomfortable putting their face in the water.
2. Disadvantages a. Only effective in calm seas. b. Hazardous in rough seas. c. Good possibility of aspirating water if wave
breaks over the face while on back.
3. Body Position a. Lie on back. b. If legs pull you down bend the knees and/or
extend the arms over the head.
c. Individual composition, organizational clothing or equipment often makes the floater negatively buoyant. A gentle kicking of the legs and sculling of the arms may be required to keep afloat.
Demonstrate the survival float. Include methods of teaching the non-swimmer to float.
D. Clothing Inflation 1. It is imperative that survivors know how to
improvise flotation devices/aids when conventional methods fail or PFD’s are not worn.

DISCUSSION POINT RELATED INSTRUCTOR ACTIVITY
2.8-7
2. Applicable for military and recreational uses. 3. Many items can be inflated or used for flotation: a. Plastic bags b. Helmets c. Anti-G suits d. Organizational clothing f. Debris from aircraft or ship 4. Shirt and Coverall Inflation a. Tuck collar inside to help seal around the
neck.
b. Tie off bottom of the shirt or tuck it in. c. Button the top button. d. Unbutton the second button. e. Blow air into the space between the second and
third button.
f. Coveralls can be inflated in a similar manner by blowing air into the top of zipper.
5. If floating debris or other means of flotation is
available, use them instead of removing clothing.
6. Procedures for trouser inflation. a. Remove footwear while survival floating. b. Slowly and methodically remove trousers while
survival floating.
Inform students that they will have to remain on the surface while performing trouser inflation.
DISCUSSION POINT RELATED INSTRUCTOR ACTIVITY
2.8-8
c. Be careful not to get one leg inside out while removing trousers.
Lecture using organizational clothing as a visual aid.
d. Once removed, tie legs together at the cuff as
close to end as possible.
e. Four methods of inflating: (1) Overhead method: Leave zipper and waistband
open. Hold trousers as if you are going to put them on. Swing them around behind your head, placing zipper along back of neck. While kicking to support head and arms, grasp trousers at waistband above front pockets and extend arms up and over the head capturing air at the surface.
(2) Splash method: Close zipper or button fly.
Submerge waistband (fly down) approximately 2 to 3 inches below surface and fill with air by raising free hand above the water and “clapping air bubbles into trousers.
(3) Alternate splash method: With zipper closed
and snap closed place clothing legs over head and splash water into trousers while keeping waist band underwater.
(4) Oral inflation method: Close waistband and
zipper. Hold trousers waistband slightly below surface. Submerge beneath waistband and blow air into trousers (no more than ½ lung capacity at a time).
f. After inflation:
DISCUSSION POINT RELATED INSTRUCTOR ACTIVITY
2.8-9
(1) Put legs over top of head (fly down). (2) Secure belt tightly to close waistband
around waist or hold waist closed with one hand or by pinching with knees.
Demonstrate all 4 methods of trouser inflation in deep end of swimming pool.
(3) Keep trousers wet, add air by splashing
into waist or blow through single ply material.
E. Heat Escape Lessening Position (HELP) 1. Justification: The HELP position is used to cover
all of the high heat loss areas of the body such as the head, armpits, groin, and gets the head and neck out of the water. This position if used in cold water will allow the survivor to retain body heat for a longer period of time.
a. Requires some type of flotation. b. Legs together, ankles crossed, draw knees to
chest. Fold arms across chest; keep elbows close to side of chest and hands out of the water.

DISCUSSION POINT RELATED INSTRUCTOR ACTIVITY
2.8-10
F. Huddle Position 1. Justification: The HUDDLE position is best used
when there are more than one survivor to conserve body heat.
a. Requires some type of flotation. b. Useful for remaining afloat and conserving body
heat when other survivors are present.
c. Survivors group together and place arms around
shoulders.
d. Cross legs at ankles, knees together, let legs
dangle.
e. Try to maintain contact with each other at
sides of chest.

DISCUSSION POINT RELATED INSTRUCTOR ACTIVITY
2.8-11
APPLICATION A. Student Practice of all floating techniques. 1. Prone float practice 2. Back float practice 3. Prone and back float practice with organizational
clothing
3. Clothing inflation practice 4. H.E.L.P. practice Use PFD for HELP and 5. Huddle practice Huddle practice. B. Practice Teaching Have candidates practice teaching to each other or
utilize real students if available.

DISCUSSION POINT RELATED INSTRUCTOR ACTIVITY
2.8-12
SUMMARY AND REVIEW A. State Lesson Objectives. Turn to cover page for
objectives B. Review Major Teaching Points. Briefly summarize. APPLICATION As per presentation
Students experiencing difficulty will be remediated.
EVALUATION Performance test ASSIGNMENT Read Chapter 9 of U.S. Navy Water Survival Instructor’s Manual.

INTRODUCTION 2.9-1
LESSON PLAN January 2005 COURSE TITLE: Basic Swimming and Water
Survival Instructor Training Course, A-012-1014
TERMINAL OBJECTIVE: Completely supported by this lesson topic:
CLASSIFICATION: Unclassified LESSON PLAN NUMBER: 2.9 LESSON TOPIC: Underwater Swimming and
Surface Dives ALLOTTED LESSON TIME: 1.0 Laboratory
2.0 Upon completion of this unit of instruction, the student will demonstrate knowledge and proficiency in aquatic skills, swimming, and water survival techniques without injury to personnel or damage to equipment.
INSTRUCTIONAL SUPPORT: ENABLING OBJECTIVES: Completely supported by this lesson topic: 1 BSWIC Instructor 1 Qualified Lifeguard Add an in water lifeguard if more than 20 students in deep end.
2.15 Perform underwater swimming and surface dives.
INSTRUCTIONAL REFERENCE:
CRITERION TEST:
1. U.S. Navy Water Survival Instructor’s Manual
Performance Test
HOMEWORK:2. American Red Cross Swimming and Diving
Manual Read Chapter 9 of reference 1.
INSTRUCTIONAL AIDS:
1. Swimming pool 2. Shirt, trousers or coveralls and boots.

DISCUSSION POINT RELATED INSTRUCTOR ACTIVITY
2.9-2
A. Establish Contact Display name and lesson
topic. 1. Introduce self, give rank, current job. 2. State background, schools, duty stations, etc. 3. State question and answer policy. 4. State Training Time Out policy. 5. Ask for medical concern: a. Has anyone gone to the hospital/branch medical
clinic for treatment with the last 24 hours?
b. Has anyone taken any medication or over-the-
counter medications in last 24 hours.?
c. Are there any potentially disqualifying
illnesses/conditions?
B. State Lesson Objectives Turn to cover page of
Lesson Plan and paraphrase objectives.

DISCUSSION POINT RELATED INSTRUCTOR ACTIVITY
2.9-3
C. Establish Readiness 1. Motivating Statements 2. Lesson overview
State how and why students will use material.
a. Lesson Topic: Underwater Swimming and Surface
Dives
b. Major Teaching Points: (1) Underwater Swimming (2) Surface dives: when to use (3) Student practice

DISCUSSION POINT RELATED INSTRUCTOR ACTIVITY
2.9-4
PRESENTATION: A. Underwater Swimming
Conduct warm-up, stretches, and cool-down IAW Annex F.
1. Breaststroke can be modified for underwater swimming a. Perform breaststroke movement as if on the
surface
b. Do breaststroke with no arm movement. c. Pull the arm stroke all the way back to the
thighs.
d. Leg action and coordination remains the same on all three.
Demonstrate three strokes in the pool.
B. Surface Dives 1. Feet First Surface Dive Recommended when the water is murky and the swimmer
is uncertain of depth, or is concerned about hitting obstructions.
a. Start this dive by treading water vertically. b. Pressing both hands down vigorously to the sides
of the thighs while executing a strong scissors or breaststroke kick. Raising the body out of the water.
Picture on page 9-2 of reference one.
c. Take a deep breath at the top of rise. d. Keep vertical and streamlined as the body moves
downward.
e. When momentum slows turn the palms outward and sweep the hands and arms upward to get more propulsion.

DISCUSSION POINT RELATED INSTRUCTOR ACTIVITY
2.9-5
f. When at proper depth tuck the body and roll to a horizontal position to extend the arms and legs to swim underwater.
2. Tuck Surface Dive If one is uncertain of water depth or it is less
than 8 feet deep, keep an arm extended toward the bottom to protect the head.
a. Get forward momentum with a swimming stroke. b. Inhale quickly, sweep the arms backward to the
thighs and turn the palms down.
c. Roll forward until the body is almost upside down.
d. Quickly extend the legs upward while pressing arms and hands forward, palms down, toward the bottom.
e. A breaststroke pull may be used to gain greater depth.
3. Pike Dive a. The pike surface dive bends and straightens
like a jackknife with the legs kept straight and together throughout the dive.
b. Gain forward momentum using the american crawl
stroke.
c. Sweep the arms backward to the thighs and turn
the palms down.

DISCUSSION POINT RELATED INSTRUCTOR ACTIVITY
2.9-6
d. Tuck the chin to the chest, bend at the waist about 90 degrees and reach forward and downward with the arms.
e. Straighten the waist bringing the legs upward,
straight and together.
f. The final action fully extends the body to a
streamlined nearly vertical position and the weight of the legs and forward momentum drive the swimmer deep underwater without additional arm movement.
g. Exhaling gently through the nose during the
descent will maintain positive pressure and will prevent water from entering the nasal passages.
Demonstrate the three surface dives.
C. Student Practice of Underwater Swimming and Surface
Dives
1. Student safety brief 2. Underwater swim strokes
Warn students about the dangers of hyperventilation.
Assist candidates in mastering the three methods of
swimming underwater. Use land drills etc. as needed.
Limit underwater swim to 15 yards only. Provide ample rest time between underwater swims. 3. Surface dives
Assist candidates in mastering the three surface
dives.
DISCUSSION POINT RELATED INSTRUCTOR ACTIVITY
2.9-7
4. Surface dives and underwater swimming in organizational clothing.
Allow students to practice surface dives and
underwater swimming in organizational clothing. Start students in clothing without boots, building up to full clothing.
5. Practice teaching Assign an underwater stroke or surface dive to each
student. Allow students to teach and coach their assigned skills using the other instructor candidates as pretend students. If possible utilize real students.
DISCUSSION POINT RELATED INSTRUCTOR ACTIVITY
2.9-8
SUMMARY AND REVIEW A. State Lesson Objectives. Turn to cover page for
objectives B. Review Major Teaching Points. Briefly summarize. APPLICATION As per presentation
Students experiencing difficulty will be remediated.
EVALUATION Performance test ASSIGNMENT Read Chapter 10 of U.S. Navy Water Survival Instructor’s Manual.

2.10-1
LESSON PLAN January 2005 COURSE TITLE: Basic Swimming and Water
Survival Instructor Training Course, A-012-1014
TERMINAL OBJECTIVE: Completely supported by this lesson topic:
CLASSIFICATION: Unclassified LESSON PLAN NUMBER: 2.10 LESSON TOPIC: Abandon Ship Drill/Submerged
Burning Oil Swim ALLOTTED LESSON TIME: 1.0 Laboratory
2.0 Upon completion of this unit of instruction, the student will demonstrate knowledge and proficiency in aquatic skills, swimming, and water survival techniques without injury to personnel or damage to equipment.
INSTRUCTIONAL SUPPORT: ENABLING OBJECTIVES: Completely supported by this lesson topic: 1 BSWIC Instructor
2.16 Perform the abandon ship drill and submerged burning oil swim.
1 Qualified Lifeguard Add an in water lifeguard if more than 20 students in deep end.
INSTRUCTIONAL REFERENCE:
CRITERION TEST:
U.S. Navy Water Survival Instructor’s Manual
Performance Test
HOMEWORK:INSTRUCTIONAL AIDS: Read Chapter 10 of reference. 1. Swimming pool 2. Shirt, pants or coveralls, boots 3. Tower: minimum height 5’ 4. Personal flotation device (PFD)

DISCUSSION POINT RELATED INSTRUCTOR ACTIVITY
2.10-2
INTRODUCTION
A. Establish Contact Display name and lesson
topic. 1. Introduce self, give rank, current job. 2. State background, schools, duty stations, etc. 3. State question and answer policy. 4. State Training Time Out policy. 5. Ask for medical concern: a. Has anyone gone to the hospital/branch medical
clinic for treatment with the last 24 hours?
b. Has anyone taken any medication or over-the-
counter medications in last 24 hours.?
c. Are there any potentially disqualifying
illnesses/conditions?
B. State Lesson Objectives Turn to cover page of
Lesson Plan and paraphrase objectives.

DISCUSSION POINT RELATED INSTRUCTOR ACTIVITY
2.10-3
C. Establish Readiness 1. Motivating Statements 2. Lesson overview
State how and why students will use material.
a. Lesson Topic: Abandon ship drill b. Major Teaching Points: (1) Abandon ship drill procedures (2) Explanation and demonstration of the
abandon ship drill procedure.
(3) Submerged burning oil swim procedures (4) Explanation and demonstration of the
submerged burning oil swim procedure.

DISCUSSION POINT RELATED INSTRUCTOR ACTIVITY
2.10-4
PRESENTATION: A. Abandon Ship Drill Procedure
Conduct warm-up, stretches, and cool-down IAW Annex F. 1. Introduction
a. May be the only way to escape burning ship deck. b. Use as a last resort. Check for cargo nets,
hoses, etc. Climbing down is the preferred method.
2. Preparation a. Put on, but do not inflate a personal flotation
device (PFD).
b. Remove headgear. c. Prior to stepping off the structure, check area
below for debris or other personnel.
3. Body Position a. Stand straight with eyes on the horizon. b. Cross the arms with the hand of the inner arm
pinching closed the nose with thumb and forefinger to prevent water from entering sinuses.
Demonstrate arm and leg positions and nose pinch on pool deck.
c. Anchor the little finger under the chin.

DISCUSSION POINT RELATED INSTRUCTOR ACTIVITY
2.10-5
d. The hand of the outer arm firmly grasps the triceps of the inner arm.
e. The legs are crossed at the ankles after
stepping off the platform by bringing the trailing leg up behind the leading foot.
4. Breathing a. Take a normal breath just prior to stepping
off.
b. Hyperventilation, i.e., taking repetitive deep
breaths, prior to swimming underwater may cause “shallow water blackout” and unconsciousness. Do not hyperventilate prior to the abandon ship drill or underwater swim practice.
5. Underwater Swimming a. Used to clear landing area, avoiding other
personnel, or burning oil/fuel on the surface of the water.
Brief students that they are not allowed to swim underwater for more than 15 yards.
b. Best underwater stroke is similar to
breaststroke except arms pull further back along the sides for more propulsion.
A maximum of 6 students may be stepping into the pool from the side at one time.

DISCUSSION POINT RELATED INSTRUCTOR ACTIVITY
2.10-6
c. Body Position (1) Horizontal to surface streamlined.
No more than 12 students may be underwater at one time.
(2) Head position controls position of body. (3) Head must be level face down. Do not look
up.
d. Arm action (1) From the starting position (arms extended
forward and together), arms press aft with elbows and wrists flexed to provide maximum propulsion aft and down.
(2) Arms recover by drawing hands forward close
to the body along the centerline. This method provides the swimmer with the least amount of drag.
e. Leg action Use breaststroke frog kick. f. Coordination (1) Method one: Legs kick aft as the arms
extend forward (like breaststroke), then glide. An advantage to this method is that your hands protect your head from underwater debris.
(2) Method two: Legs kick as arms pull aft.
Glide with arms held along the sides.
DISCUSSION POINT RELATED INSTRUCTOR ACTIVITY
2.10-7
6. Steps for successful abandon ship procedure. a. Stare straight ahead with eyes on the horizon.
Cross arms and pinch nose closed.
b. Take one normal breath. c. Step off the platform and cross the legs. d. After water impact, remain in correct body
position until momentum slows then swim underwater 15 yards without breaking the surface
Demonstrate Abandon Ship Drill off tower in organizational clothing.
B. Submerged Burning Oil Swim 1. Justification a. Needed to get a breath if you cannot swim
completely through a burning oil slick underwater.
b. Try to swim upwind or up current to cause slick
to move past you more rapidly.
c. In daytime look for light spots on surface,
which indicate areas that are not aflame. At nighttime look for dark spots.
2. Explain Skill a. Quickly submerge using a feet first surface
dive. Swim two or three body lengths only.
DISCUSSION POINT RELATED INSTRUCTOR ACTIVITY
2.10-8
b. Suspend yourself vertically just under the surface of the water with up-stretched hands and arms, hands just breaking the surface. Support yourself with a modified frog kick.
c. Splash several times in a forward and backward
direction to open a “breathing hole” on surface.
d. Kick yourself upward turning your face to the
side (to protect one side of face from heat and flames being blown in your direction) and take a breath in the “breathing hole”. Quickly submerge again using feet first surface dive and continue underwater swimming.
Demonstrate submerged burning oil swim.
C. Abandon ship drill practice 1. Swimsuit Assist students until they can perform a jump in the
proper body position followed by a 15 yard underwater swim before surfacing.
2. Abandon ship drill practice in organizational
clothing
Start practice off the deep end of the pool and build up to the tower for swimsuit and organizational clothing practice.
3. Abandon ship drill practice in PFD. Direct students to don the PFD and perform the
abandon ship drill. Underwater swimming shall not be practiced with the PFD.
DISCUSSION POINT RELATED INSTRUCTOR ACTIVITY
2.10-9
D. Submerged burning oil practice 1. Have students line up into a maximum of six rows at
the deep end for the submerged burning oil swim.
2. Have students perform submerged burning oil swim tow
times and then exit at the shallow end of pool.

DISCUSSION POINT RELATED INSTRUCTOR ACTIVITY
2.10-10
SUMMARY AND REVIEW A. State Lesson Objectives. Turn to cover page for
objectives B. Review Major Teaching Points. Briefly summarize. APPLICATION As per presentation
Students experiencing difficulty will be remediated.
EVALUATION Performance test ASSIGNMENT Read Chapter 10 and 11 of U.S. Navy Water Survival Instructor’s Manual.
2.11-1
LESSON PLAN January 2005 COURSE TITLE: Basic Swimming and Water
Survival Instructor Training Course, A-012-1014
TERMINAL OBJECTIVE: Completely supported by this lesson topic:
CLASSIFICATION: Unclassified LESSON PLAN NUMBER: 2.11 LESSON TOPIC: Surface Debris, Surface
Burning Oil, and Rough Water Swimming
ALLOTTED LESSON TIME: 1.0 Laboratory
2.0 Upon completion of this unit of instruction, the student will demonstrate knowledge and proficiency in aquatic skills, swimming, and water survival techniques without injury to personnel or damage to equipment.
INSTRUCTIONAL SUPPORT: ENABLING OBJECTIVES: Completely supported by this lesson topic: 1 BSWIC Instructor
2.17 Perform surface debris, surface burning oil and rough water swimming.
1 Qualified Lifeguard Add an in water lifeguard if more than 20 students in deep end.
CRITERION TEST:INSTRUCTIONAL REFERENCE:
Performance Test
U.S. Navy Water Survival Instructor’s Manual
HOMEWORK:
INSTRUCTIONAL AIDS: Read Chapter 11 of reference.
1. Swimming pool 2. Shirt, pants or coveralls, boots 3. Personal flotation device (PFD)

DISCUSSION POINT RELATED INSTRUCTOR ACTIVITY
2.11-2
INTRODUCTION A. Establish Contact Display name and lesson
topic. 1. Introduce self, give rank, current job. 2. State background, schools, duty stations, etc. 3. State question and answer policy. 4. State Training Time Out policy. 5. Ask for medical concern: a. Has anyone gone to the hospital/branch medical
clinic for treatment with the last 24 hours?
b. Has anyone taken any medication or over-the-
counter medications in last 24 hours.?
c. Are there any potentially disqualifying
illnesses/conditions?
B. State Lesson Objectives Turn to cover page of
Lesson Plan and paraphrase objectives.

DISCUSSION POINT RELATED INSTRUCTOR ACTIVITY
2.11-3
C. Establish Readiness 1. Motivating Statements 2. Lesson overview
State how and why students will use material.
a. Lesson Topic: Surface debris, surface burning
oil, and rough water swimming
b. Major Teaching Points: (1) Surface debris, surface burning oil, and
rough water swimming
(2) Student practice of surface oil, surface burning oil and rough water swimming
(3) Practice teaching
DISCUSSION POINT RELATED INSTRUCTOR ACTIVITY
2.11-4
PRESENTATION: A. Surface Debris Swim
Conduct warm-up, stretches and cool-down IAW Annex F. 1. Justification:
a. Oil, fuel, or other debris may be on the
surface following an aircraft ditching or ship sinking.
b. Fuel/oil severely affects the respiratory system and impairs vision.
Demonstrate the surface debris swim stroke while wearing organizational clothing, boots, PFD and gloves
c. This swim breaks a path through surface debris. d. Swim into wind or current. 2. Surface Debris Swim Stroke a. Stroke similar to breaststroke. b. Keep head up, look straight ahead. c. Use modified frog kick, no glide, continuous
kicking.
d. Place hands in front of face, palms facing away, thumbs down, elbows bent. Splash forward and sideways by sweeping the hands forward and out.
e. Scull hands back to start position providing lift to support head.
f. Kick and splash are executed simultaneously. B. Surface Burning Oil Swim 1. Justification: You may have an inflated LPU (or
shipboard PFD) while swimming through burning oil/fuel.
If you have a PFD, never remove it.

DISCUSSION POINT RELATED INSTRUCTOR ACTIVITY
2.11-5
(2) Gain forward momentum using the american
2. Surface burning oil swim stroke
a. Outstretch one arm horizontal to surface with thumb down, surface of water near center of palm.
b. The other hand covers and protects face.
Demonstrate surface burning oil swim while wearing organizational clothing, boots, PFD, and gloves.
c. Splash with outstretched arm, pushing water away from you with thumb down.
d. Rotate in the same direction as you splash and spiral your way upwind or up current.
e. Accomplish body movement by rotating and making forward progress with frog kick.
C. Rough Water Swim 1. Justification a. Useful in rough water swimming – Submerge under
crest, surface and breathe at troughs.
b. Useful in underwater evasive situations. 2. Explain procedures a. Review underwater swimming from previous lesson
guide.
b. Discuss and demonstrate front surface dive: (1) The pike surface dive bends and straightens
like a jackknife with the legs kept straight and together throughout the dive.
DISCUSSION POINT RELATED INSTRUCTOR ACTIVITY
2.11-6
crawl stroke or breaststroke. (3) Sweep the arms backward to the thighs and
turn the palms down.
(4) Tuck the chin to the chest, bend at the
waist about 90 degrees and reach forward and downward with the arms.
(5) Straighten the waist bringing the legs
upward, straight and together.
(6) The final action fully extends the body to
a streamlined nearly vertical position and the weight of the legs and forward momentum drive the swimmer deep underwater without additional arm movement.
(7) Exhaling gently through the nose during the
descent will maintain positive pressure and will prevent water from entering the nasal passages.
Have student swim 25 yards surfacing twice, initially at approximately 7 yards and again at approximately 14 yards, correctly demonstrating the rough water swimming technique.
D. Practice teaching Assign a surface debris, surface burning oil or rough
water swimming technique to each student. Allow students to teach and coach their assigned skills using the other instructor candidates as pretend students. If possible utilize “real students”.
DISCUSSION POINT RELATED INSTRUCTOR ACTIVITY
2.11-7
SUMMARY AND REVIEW A. State Lesson Objectives. Turn to cover page for
objectives B. Review Major Teaching Points. Briefly summarize. APPLICATION As per presentation
Students experiencing difficulty will be remediated.
EVALUATION Performance test ASSIGNMENT Read Chapter 8 of American Red Cross Swimming and Diving

2.12-1
LESSON PLAN January 2005 COURSE TITLE: Basic Swimming and Water
Survival Instructor Training Course, A-012-1014
TERMINAL OBJECTIVE: Completely supported by this lesson topic:
CLASSIFICATION: Unclassified LESSON PLAN NUMBER: 2.12 LESSON TOPIC: Advanced Strokes ALLOTTED LESSON TIME: 1.0 Laboratory
2.0 Upon completion of this unit of instruction, the student will demonstrate knowledge and proficiency in aquatic skills, swimming, and water survival techniques without injury to personnel or damage to equipment.
INSTRUCTIONAL SUPPORT: ENABLING OBJECTIVES: Completely supported by this lesson topic: 1 BSWIC Instructor 1 Qualified Lifeguard 2.18 Perform advanced swimming strokes. Add an in water lifeguard if more than 20 students in deep end.
INSTRUCTIONAL REFERENCE:
CRITERION TEST:
American Red Cross Swimming and Diving
Written exam at end of course ManualHOMEWORK:
INSTRUCTIONAL AIDS: Read Chapter 6 of reference. 1. Swimming pool 2. Kick boards 3. Pull buoy 4. Red Cross Swimming and Diving Video

DISCUSSION POINT RELATED INSTRUCTOR ACTIVITY
2.12-2
INTRODUCTION A. Establish Contact Display name and lesson
topic. 1. Introduce self, give rank, current job. 2. State background, schools, duty stations, etc. 3. State question and answer policy. 4. State Training Time Out policy. 5. Ask for medical concern: a. Has anyone gone to the hospital/branch medical
clinic for treatment with the last 24 hours?
b. Has anyone taken any medication or over-the-
counter medications in last 24 hours.?
c. Are there any potentially disqualifying
illnesses/conditions?
B. State Lesson Objectives Turn to cover page of
Lesson Plan and paraphrase objectives.

DISCUSSION POINT RELATED INSTRUCTOR ACTIVITY
2.12-3
C. Establish Readiness 1. Motivating Statements 2. Lesson overview
State how and why students will use material.
a. Lesson Topic: Advanced Strokes b. Major Teaching Points: (1) Introduction of backcrawl and overarm
sidestroke
(2) Back Crawl (3) Overarm sidestroke

DISCUSSION POINT RELATED INSTRUCTOR ACTIVITY
2.12-4
e. Keep back as straight as possible.
PRESENTATION: A. Introduction of back crawl and overarm sidestroke. Explain to students that these strokes are rarely swum
in Navy survival situations, but that knowledge of all swimming strokes is essential for Navy swim instructors such that they possess a strong background in aquatics.
Conduct warm-up, stretches and cool-down IAW Annex F.
B. Back Crawl This stroke was interested in 1902 and was developed
from the inverted breaststroke and the trudgen.
1. Advantages a. Allows unobstructed breathing. b. It is a fast competitive stroke. c. Can be used for a leisure stroke. 2. Disadvantages It is not a survival stroke. 3. Body position a. Horizontal in the water on the back. b. Keep head aligned with the spine. c. There is a lot of body roll just like the
american crawl.
d. The water line runs from the middle of the top of the head to the tip of the chin, with the ears under water.
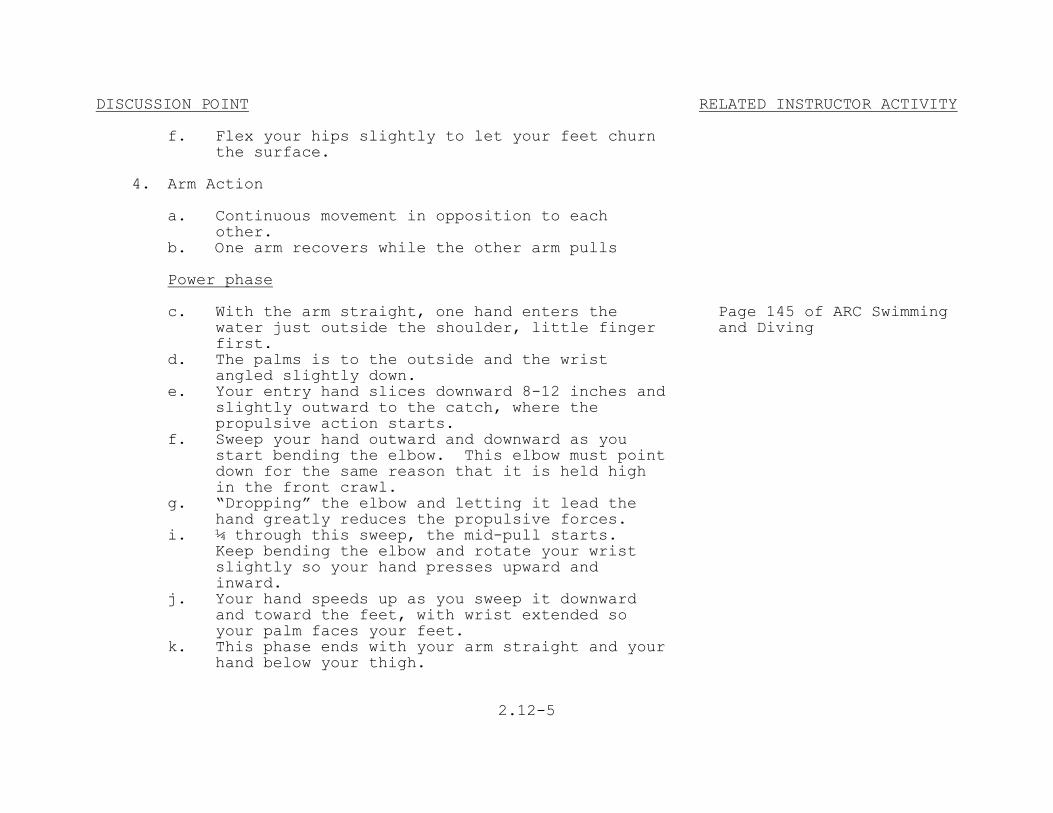
DISCUSSION POINT RELATED INSTRUCTOR ACTIVITY
2.12-5
f. Flex your hips slightly to let your feet churn the surface.
4. Arm Action a. Continuous movement in opposition to each
other.
b. One arm recovers while the other arm pulls Power phase c. With the arm straight, one hand enters the
water just outside the shoulder, little finger first.
Page 145 of ARC Swimming and Diving
d. The palms is to the outside and the wrist angled slightly down.
e. Your entry hand slices downward 8-12 inches and slightly outward to the catch, where the propulsive action starts.
f. Sweep your hand outward and downward as you start bending the elbow. This elbow must point down for the same reason that it is held high in the front crawl.
g. “Dropping” the elbow and letting it lead the hand greatly reduces the propulsive forces.
i. ¼ through this sweep, the mid-pull starts. Keep bending the elbow and rotate your wrist slightly so your hand presses upward and inward.
j. Your hand speeds up as you sweep it downward and toward the feet, with wrist extended so your palm faces your feet.
k. This phase ends with your arm straight and your hand below your thigh.
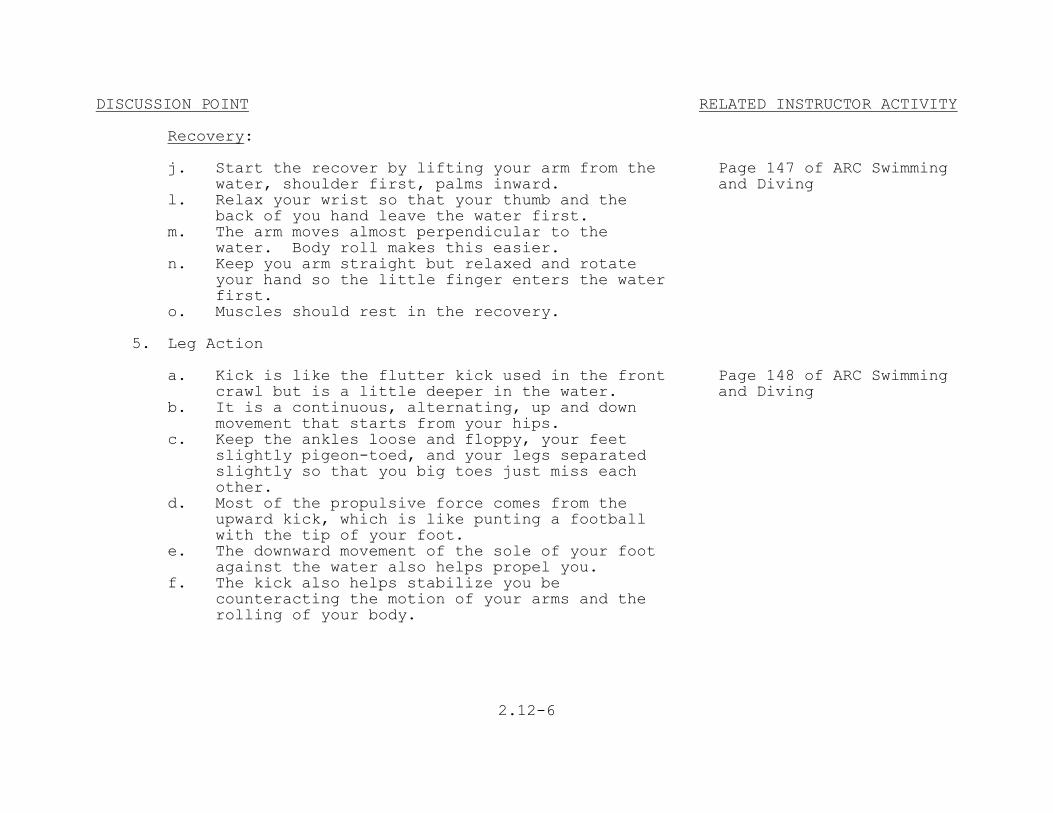
DISCUSSION POINT RELATED INSTRUCTOR ACTIVITY
2.12-6
Recovery:
j. Start the recover by lifting your arm from the
water, shoulder first, palms inward. Page 147 of ARC Swimming and Diving
l. Relax your wrist so that your thumb and the back of you hand leave the water first.
m. The arm moves almost perpendicular to the water. Body roll makes this easier.
n. Keep you arm straight but relaxed and rotate your hand so the little finger enters the water first.
o. Muscles should rest in the recovery. 5. Leg Action a. Kick is like the flutter kick used in the front
crawl but is a little deeper in the water. Page 148 of ARC Swimming and Diving
b. It is a continuous, alternating, up and down movement that starts from your hips.
c. Keep the ankles loose and floppy, your feet slightly pigeon-toed, and your legs separated slightly so that you big toes just miss each other.
d. Most of the propulsive force comes from the upward kick, which is like punting a football with the tip of your foot.
e. The downward movement of the sole of your foot against the water also helps propel you.
f. The kick also helps stabilize you be counteracting the motion of your arms and the rolling of your body.

DISCUSSION POINT RELATED INSTRUCTOR ACTIVITY
2.12-7
6. Breathing Use a regular breathing pattern during each stroke.
Inhale when one arm recovers and exhale when the other arm recovers.
7. Coordination a. Start you body roll to the side of your entry
arm as it starts to enter the water. Show the backcrawl segment of the Red Cross
b. Your body continues to roll as the entry hand reaches the catch and the other arm lifts toward the surface to start its recovery.
Swimming and Diving video.
c. You develop your best timing of arms and legs by slightly adjusting your stroke mechanics until the stroke is smooth and effective.
C. Overarm sidestroke This stroke evolved from the sidestroke in 1871. It
differs from the sidestroke in that the trailing arms recovers out of the water. This reduces the drag of the water on the swimmer.
1. Stroke Mechanics a. Body position, kick, leading arm action, and
breathing are the same as the sidestroke. Page 135-141 of ARC Swimming and Diving
b. Trailing arm recovers out of the water with a “high” elbow, and the hand enters just in front of the face, similar to the front crawl.
c. The trailing hand enters the water as the leading arm finishes its power phase and the legs recover.
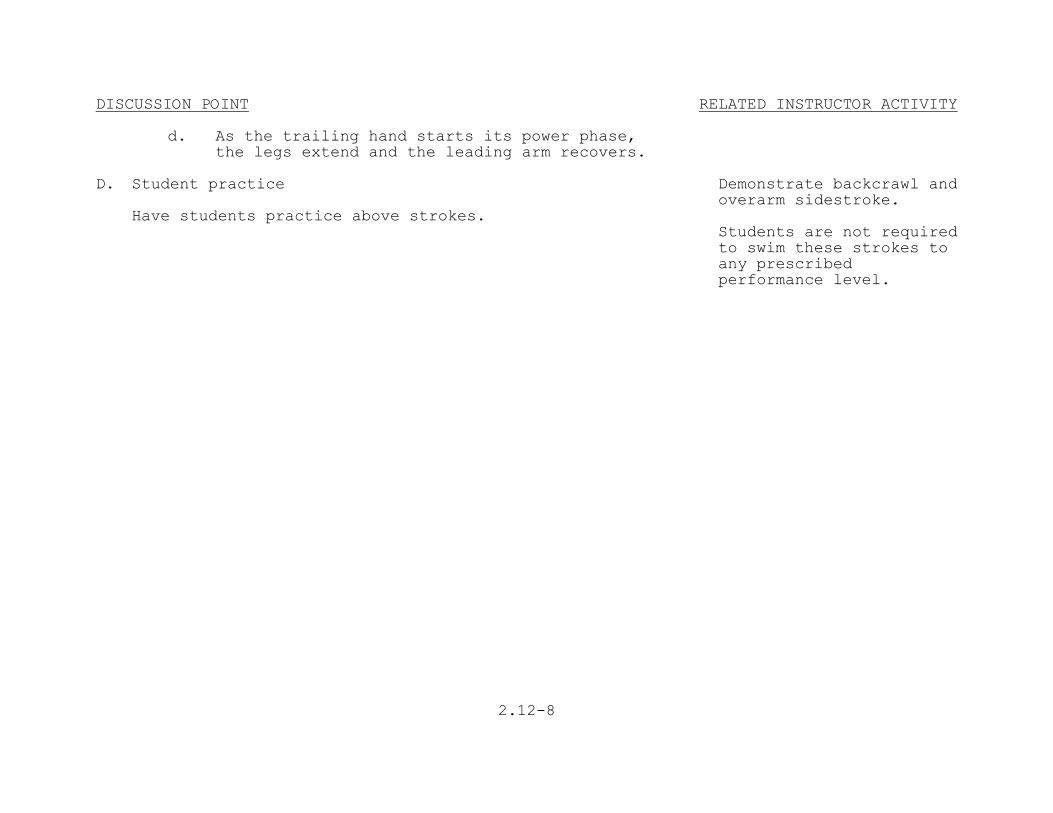
DISCUSSION POINT RELATED INSTRUCTOR ACTIVITY
2.12-8
d. As the trailing hand starts its power phase, the legs extend and the leading arm recovers.
D. Student practice Demonstrate backcrawl and
overarm sidestroke. Have students practice above strokes. Students are not required
to swim these strokes to any prescribed performance level.

DISCUSSION POINT RELATED INSTRUCTOR ACTIVITY
2.12-9
SUMMARY AND REVIEW A. State Lesson Objectives. Turn to cover page for
objectives B. Review Major Teaching Points. Briefly summarize. APPLICATION As per presentation EVALUATION Performance test ASSIGNMENT None

2.13-1
LESSON PLAN January 2005 COURSE TITLE: Basic Swimming and Water
Survival Instructor Training Course, A-012-1014
TERMINAL OBJECTIVE: Completely supported by this lesson topic:
CLASSIFICATION: Unclassified LESSON PLAN NUMBER: 2.13 LESSON TOPIC: Mask, Fins, and Snorkel
Indoctrination ALLOTTED LESSON TIME: 1.0 Classroom
1.0 Laboratory
2.0 Upon completion of this unit of instruction, the student will demonstrate knowledge and proficiency in aquatic skills, swimming, and water survival techniques without injury to personnel or damage to equipment.
INSTRUCTIONAL SUPPORT: ENABLING OBJECTIVES: Completely supported by this lesson topic: 1 BSWIC Instructor 1 Qualified Lifeguard 2.19 Maintain safety swimmer equipment per
current 13-1-6 series manual. Add one in water lifeguard if more than 20 students in deep end.
2.20 Use mask, fins, and snorkel.
INSTRUCTIONAL REFERENCE:
2.21 Don mask, fins, and snorkel.
1. NAVAIR 13-1-6 Series Manual 2. NWP 3.50-1, Naval Search and Rescue
2.22 Perform side/breast/crawl strokes while wearing mask, fins and snorkel.
Manual 3. OPNAVINST 3710.7 NATOPS General Flight
and Operating Instruction 2.23 Perform submerged victim rescue and
spinal management rescue from bottom of pool while wearing mask, fins and snorkel

DISCUSSION POINT RELATED INSTRUCTOR ACTIVITY
2.13-2
INSTRUCTIONAL AIDS: CRITERION TEST: Performance Test 1. Swimming pool 2. Fins HOMEWORK: None 3. Mask 4. Snorkel

DISCUSSION POINT RELATED INSTRUCTOR ACTIVITY
2.13-3
INTRODUCTION A. Establish Contact Display name and lesson
topic. 1. Introduce self, give rank, current job. 2. State background, schools, duty stations, etc. 3. State question and answer policy. 4. State Training Time Out policy. 5. Ask for medical concern: a. Has anyone gone to the hospital/branch medical
clinic for treatment with the last 24 hours?
b. Has anyone taken any medication or over-the-
counter medications in last 24 hours.?
c. Are there any potentially disqualifying
illnesses/conditions?
B. State Lesson Objectives Turn to cover page of
Lesson Plan and paraphrase objectives.

DISCUSSION POINT RELATED INSTRUCTOR ACTIVITY
2.13-4
C. Establish Readiness 1. Motivating Statements 2. Lesson overview
State how and why students will use material.
a. Lesson Topic: Mask, Fins, and Snorkel
Indoctrination
b. Major Teaching Points: (1) Mask (2) Fins (3) Snorkel (4) Care and Preventive Maintenance (5) Surface Diving (6) Student practice of mask, fins and snorkel
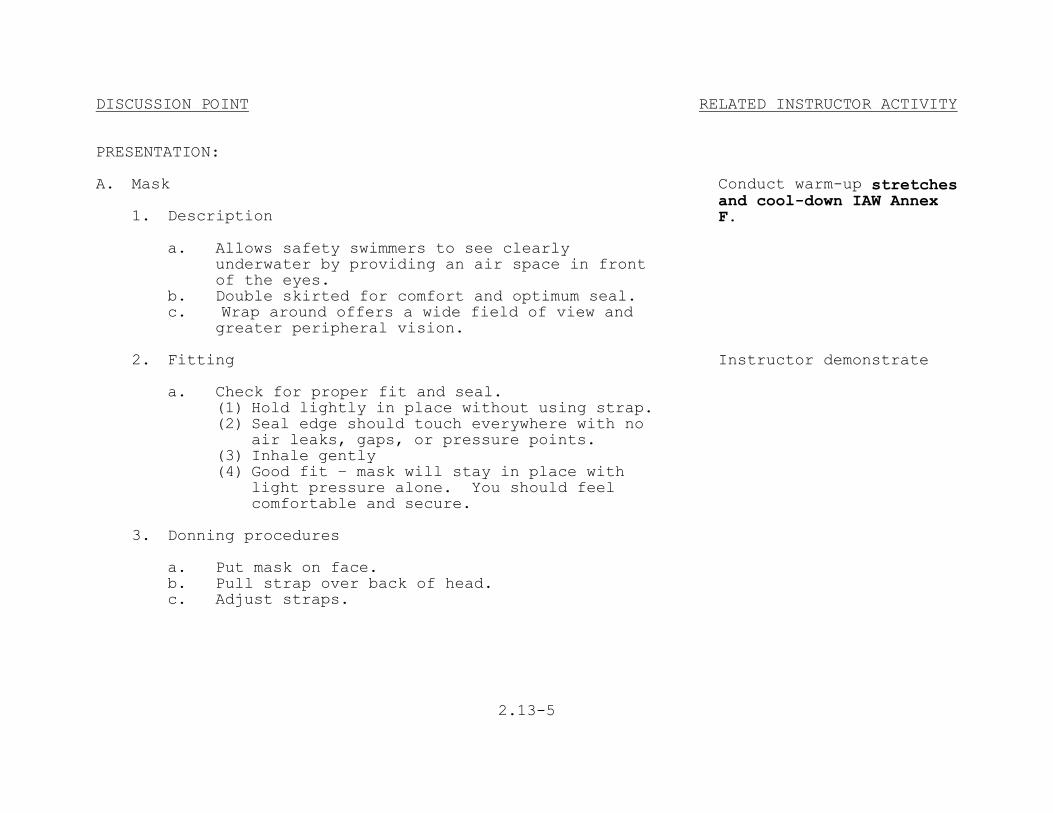
DISCUSSION POINT RELATED INSTRUCTOR ACTIVITY
2.13-5
PRESENTATION: A. Mask 1. Description
Conduct warm-up stretches and cool-down IAW Annex F.
a. Allows safety swimmers to see clearly
underwater by providing an air space in front of the eyes.
b. Double skirted for comfort and optimum seal. c. Wrap around offers a wide field of view and
greater peripheral vision.
2. Fitting Instructor demonstrate a. Check for proper fit and seal. (1) Hold lightly in place without using strap. (2) Seal edge should touch everywhere with no
air leaks, gaps, or pressure points.
(3) Inhale gently (4) Good fit – mask will stay in place with
light pressure alone. You should feel comfortable and secure.
3. Donning procedures a. Put mask on face. b. Pull strap over back of head. c. Adjust straps.
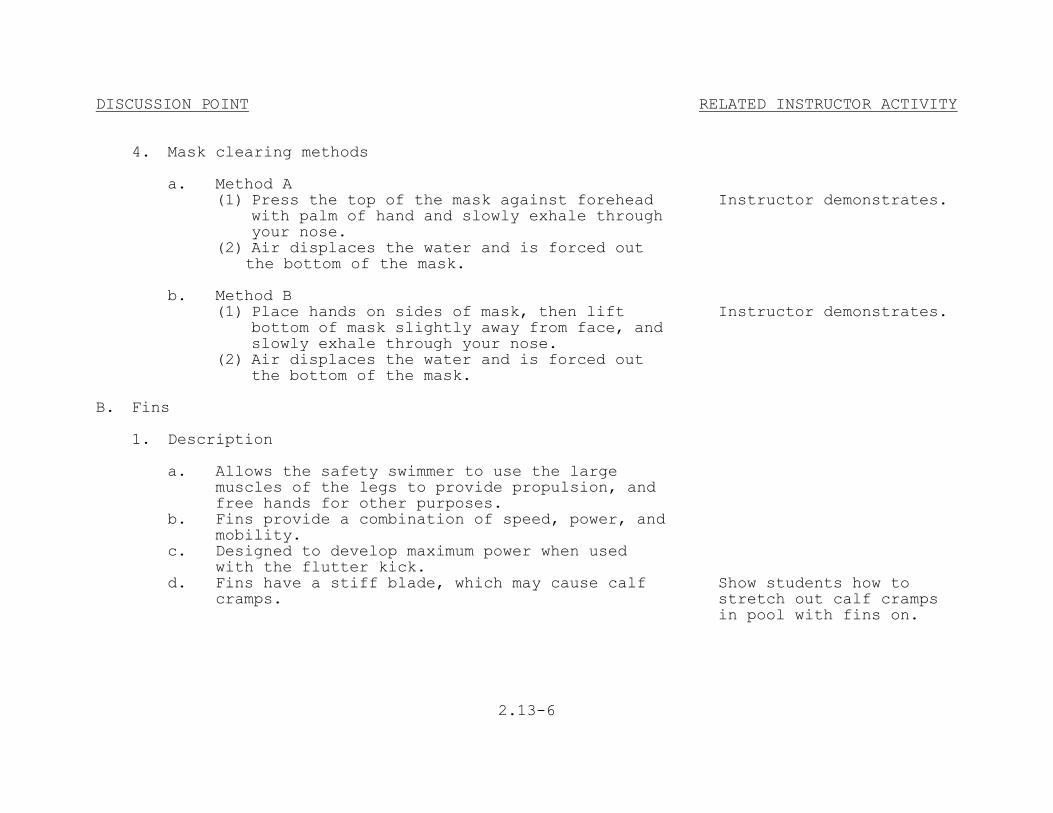
DISCUSSION POINT RELATED INSTRUCTOR ACTIVITY
2.13-6
4. Mask clearing methods a. Method A (1) Press the top of the mask against forehead
with palm of hand and slowly exhale through your nose.
Instructor demonstrates.
(2) Air displaces the water and is forced out the bottom of the mask.
b. Method B (1) Place hands on sides of mask, then lift
bottom of mask slightly away from face, and slowly exhale through your nose.
Instructor demonstrates.
(2) Air displaces the water and is forced out the bottom of the mask.
B. Fins 1. Description a. Allows the safety swimmer to use the large
muscles of the legs to provide propulsion, and free hands for other purposes.
b. Fins provide a combination of speed, power, and mobility.
c. Designed to develop maximum power when used with the flutter kick.
d. Fins have a stiff blade, which may cause calf cramps.
Show students how to stretch out calf cramps in pool with fins on.

DISCUSSION POINT RELATED INSTRUCTOR ACTIVITY
2.13-7
2. Fitting a. Fins come in small, medium, and large sizes, (some
with adjustable heel strap to accommodate different foot sizes). Booties may be worn for foot warmth and comfort. Straps should be adjusted so fins fit snugly. Straps that are too tight can cause painful foot cramps and loose straps will cause the fin to fall off.
b. Use modified flutter kick when swimming with fins. (1) Legs are kept straight knees slightly bent,
toes pointed.
(2) Alternately flutter the legs up and down, moving them at the hip.
(3) Fins are kept underwater when swimming on the surface.
C. Snorkel 1. Description a. Permits the safety swimmer to breathe easily
while working, keeping the face in the water to watch students.
b. Barrel can be straight or gently curved. c. Flexible hose connects barrel to mouthpiece. 2. Fitting Attaches to either side of mask by snorkel keeper
strap.
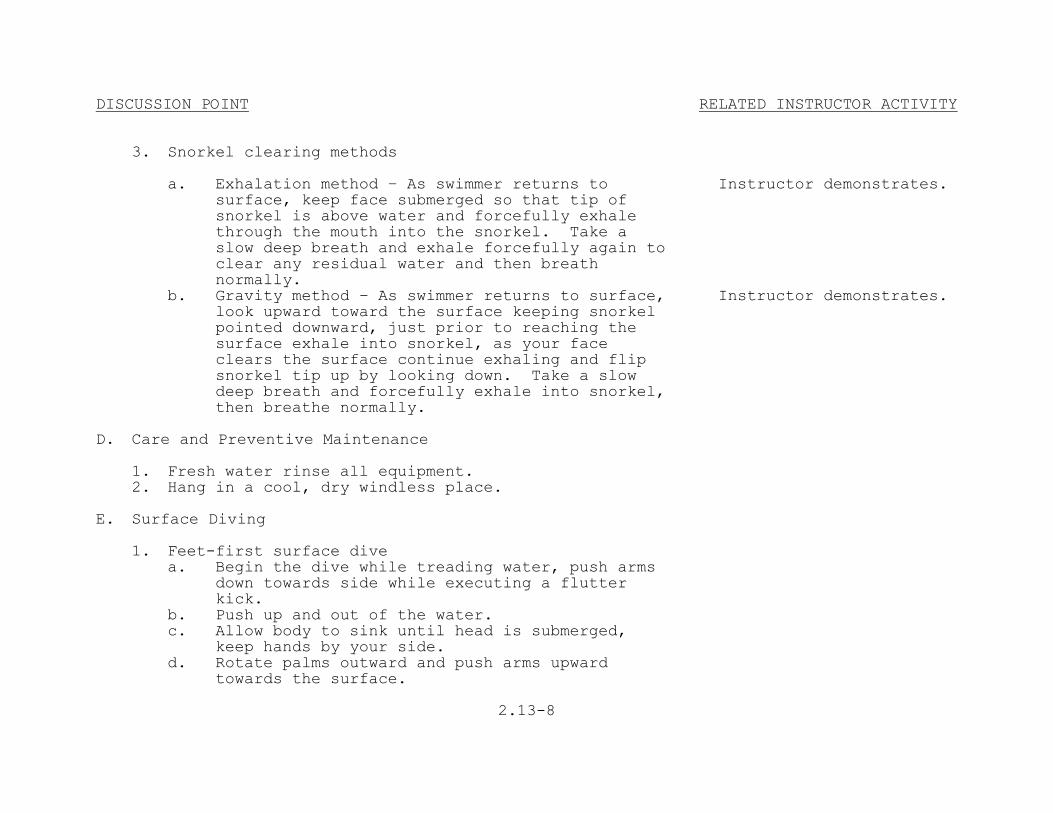
DISCUSSION POINT RELATED INSTRUCTOR ACTIVITY
2.13-8
3. Snorkel clearing methods a. Exhalation method – As swimmer returns to
surface, keep face submerged so that tip of snorkel is above water and forcefully exhale through the mouth into the snorkel. Take a slow deep breath and exhale forcefully again to clear any residual water and then breath normally.
Instructor demonstrates.
b. Gravity method – As swimmer returns to surface, look upward toward the surface keeping snorkel pointed downward, just prior to reaching the surface exhale into snorkel, as your face clears the surface continue exhaling and flip snorkel tip up by looking down. Take a slow deep breath and forcefully exhale into snorkel, then breathe normally.
Instructor demonstrates.
D. Care and Preventive Maintenance 1. Fresh water rinse all equipment. 2. Hang in a cool, dry windless place. E. Surface Diving 1. Feet-first surface dive a. Begin the dive while treading water, push arms
down towards side while executing a flutter kick.
b. Push up and out of the water. c. Allow body to sink until head is submerged,
keep hands by your side.
d. Rotate palms outward and push arms upward towards the surface.

DISCUSSION POINT RELATED INSTRUCTOR ACTIVITY
2.13-9
e. Level out and swim forward underwater. 2. Pike Surface Dive a. Begin while doing the breast, sidestroke or
crawl stroke on the surface.
b. Bend at the waist, and look at the bottom of the pool.
c. Lift your legs completely out of the water. d. Let the weight of your legs force you down,
pull with your arms.
3. Diving precautions a. When diving beneath surface, pain and
discomfort may arise from:
(1) Mask squeeze (2) Sinus squeeze (3) Ear squeeze b. To alleviate pain and discomfort you can
either:
(1) Exhale slightly into mask. (2) Valsalva to equalize sinus and ears. (3) Ascend slightly if equalization will not
occur.
Demonstrate Valsalva maneuver.
Emphasize that if they cannot equalize the pressure using these methods they should surface immediately. Continuing their descent could cause ruptured ear drums and damage to the sinus membranes.

DISCUSSION POINT RELATED INSTRUCTOR ACTIVITY
2.13-10
F. Student practice of mask, fins, and snorkel 1. Have students form two lines, one behind the other
in the shallow end of the pool. Have students in front line take a normal breath and sit on bottom of pool and exhale through their nose. Students in back place their hands on should of front line students to them down while they exhale and then release them. Repeat until students are able to demonstrate skill comfortably. Have students change places and repeat skill. Practice until all students can demonstrate this skill proficiently. Students experiencing difficulty with this skill must be completely remediated before they are allowed to attempt this skill in deeper water.
2. With students still in shallow end of pool, form two
lines facing each other, have students take breath and submerge with mask in hand and put mask on underwater and clear it using method A. Repeat until students can demonstrate skill comfortably.
3. Repeat item #2 above using mask clearing method B. 4. In shallow end, have students form two lines and
take a breath, submerge until snorkel fills with water then surface and clear snorkel using exhalation method.
5. Repeat item #4 using gravity method.

DISCUSSION POINT RELATED INSTRUCTOR ACTIVITY
2.13-11
6. Move students to approximately six foot water depth,
have them don fins, drop mask and snorkel to bottom, submerge and retrieve mask, don it underwater and clear it using their preferred method prior to surfacing. Repeat until students are able to demonstrate skill comfortably.
7. Move student to deep end of pool. Have them hang
onto the side of the pool. Divide students into two groups. First group will have on mask, fins, and snorkel, and swim to center of deep end with second group’s mask. With mask in hand, surface dive to the bottom and leave their mask on the bottom, surface and swim back to the side of the pool. Second group will then swim on the surface to their mask, surface dive to the bottom, retrieve mask and snorkel, put it on their face, clear it with their preferred method and then surface and swim back to the side of the pool. Repeat until students are able to demonstrate skill comfortably. Have students change places and repeat skill.
8. Divide students into two groups and have them swim
laps using fins and modified flutter kick. Have students put hands behind their back while swimming laps. Repeat laps as necessary until student can demonstrate flutter kick comfortably.
9. Have students perform a spinal management rescue
from the bottom of the pool using fins, mask and snorkel. Bring injured person to the shallow end of the pool and have another student assist with removing the fins. Ensure that inline stabilization is maintained during the procedures.

DISCUSSION POINT RELATED INSTRUCTOR ACTIVITY
2.13-12

DISCUSSION POINT RELATED INSTRUCTOR ACTIVITY
2.13-13
SUMMARY AND REVIEW A. State Lesson Objectives. Turn to cover page for
objectives B. Review Major Teaching Points. Briefly summarize. APPLICATION As per presentation EVALUATION Performance test ASSIGNMENT Read Chapter 10 of American Red Cross Swimming and Diving.

2.14-1
LESSON PLAN December 2005 COURSE TITLE: Basic Swimming and Water
Survival Instructor Training Course, A-012-1014
TERMINAL OBJECTIVE: Completely supported by this lesson topic:
CLASSIFICATION: Unclassified LESSON PLAN NUMBER: 2.14 LESSON TOPIC: Swimming for Lifetime
Fitness ALLOTTED LESSON TIME: 0.5 Classroom 1.0 Laboratory
2.0 Upon completion of this unit of instruction, the student will demonstrate knowledge and proficiency in aquatic skills, swimming, and water survival techniques without injury to personnel or damage to equipment.
ENABLING OBJECTIVES:
Completely supported by this lesson topic: INSTRUCTIONAL SUPPORT:
2.24 Perform aerobic exercise. 1 BSWIC Instructor 1 Qualified Lifeguard 2.25 Adjust exercise. Add one in water lifeguard if more than 20 students in deep end.
2.26 State the components of a workout.
INSTRUCTIONAL REFERENCE: 2.27 Identify the phases of a fitness program.
American Red Cross Swimming and Diving manual 2.28 Identify the components of a fitness-
swimming program. INSTRUCTIONAL AIDS:
2.29 Perform effective aquatic exercise Swimming pool
CRITERION TEST: Written exam at end of course
HOMEWORK:Read Chapter 10 of reference.

DISCUSSION POINT RELATED INSTRUCTOR ACTIVITY
2.14-2
INTRODUCTION A. Establish Contact Display name and lesson
topic. 1. Introduce self, give rank, current job. 2. State background, schools, duty stations, etc. 3. State question and answer policy. 4. State Training Time Out policy. 5. Ask for medical concern: a. Has anyone gone to the hospital/branch medical
clinic for treatment with the last 24 hours?
b. Has anyone taken any medication or over-the-
counter medications in last 24 hours?
c. Are there any potentially disqualifying
illnesses/conditions?
B. State Lesson Objectives Turn to cover page of
Lesson Plan and paraphrase objectives.

DISCUSSION POINT RELATED INSTRUCTOR ACTIVITY
2.14-3
C. Establish Readiness 1. Motivating Statements 2. Lesson overview
State how and why students will use material.
a. Lesson Topic: Swimming for lifetime fitness b. Major Teaching Points: (1) Benefits of aquatic exercise (2) Adjusting Exercise Levels (3) Components of a workout (4) Phases of a fitness program (5) Fitness swimming (6) Aquatic exercise (7) Student practice
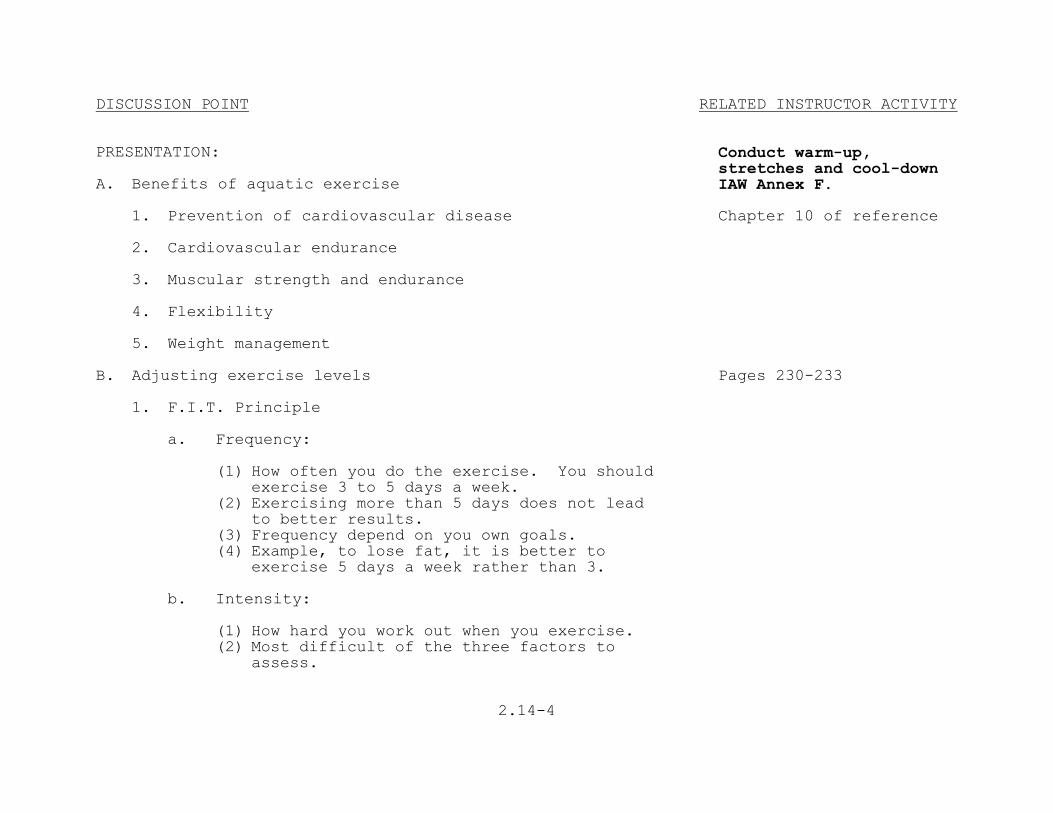
DISCUSSION POINT RELATED INSTRUCTOR ACTIVITY
2.14-4
PRESENTATION: A. Benefits of aquatic exercise
Conduct warm-up, stretches and cool-down IAW Annex F.
1. Prevention of cardiovascular disease Chapter 10 of reference 2. Cardiovascular endurance 3. Muscular strength and endurance 4. Flexibility 5. Weight management B. Adjusting exercise levels Pages 230-233 1. F.I.T. Principle a. Frequency: (1) How often you do the exercise. You should
exercise 3 to 5 days a week.
(2) Exercising more than 5 days does not lead to better results.
(3) Frequency depend on you own goals. (4) Example, to lose fat, it is better to
exercise 5 days a week rather than 3.
b. Intensity: (1) How hard you work out when you exercise. (2) Most difficult of the three factors to
assess.

DISCUSSION POINT RELATED INSTRUCTOR ACTIVITY
2.14-5
(3) Results are best if the intensity of the workout stays at a specific level.
(4) Cardiovascular improvement is slower if you exercise outside this level.
c. Time (1) Amount of time you spend exercising also
affects the benefits.
(2) Spend at least 15 minutes at the recommended level of intensity, not counting the warm-up or cool-down.
(3) A typical aerobic workout lasts 20-30 minutes. Going beyond 60 minutes does not lead to benefits that are proportional to the extra time spent.
2. Target Heart Rate Range a. Resting Heart Rate (RHR) (1) Take when you awake in the morning. (2) Lie quietly for at least 10 minutes. (3) Count your pulse for a full minute. b. Predicted Maximum Heart Rate (MHR) (1) Ideal heart rate range to maintain during
exercise for greatest cardiovascular benefit.
(2) Workout should raise your heart rate between 60-85 percent.

DISCUSSION POINT RELATED INSTRUCTOR ACTIVITY
2.14-6
(3) Calculate Target Heart Rate (MHR)=220 – age (MHR) – (RHR) * 60 percent Add above number to RHR (lower limit) (MHR) – (RHR) * 85 percent Add above number to RHR (upper limit) (4) Check pulse During workout take pulse for 10 seconds Multiply by 6 or compare to chart Refer to chart page 231 3. Rate of perceived exertion (RPE) a. Many factors, such as stress, illness, and
fatigue, can affect heart rates.
b. Obtaining accurate exercise heart rates can be extremely difficult.
c. In initial phase of exercise program identify a number on the RPE scale that corresponds with your perceived intensity, and then check you heart rate to see how the two numbers relate.
Refer to chart on page 233 of reference.
d. Once you understand the relationship between heart rate and RPE, you can rely less on heart rate and more on the way you feel.
C. Components of a Workout 1. Warm-up a. Prepares the body for the increase work. b. Raises deep muscle temperatures, increases
blood flow and helps you adjust to the workout environment.
c. Help prevent injury to muscles and joints. d. 5-10 minutes or 15-20 percent of total workout
time or distance.
DISCUSSION POINT RELATED INSTRUCTOR ACTIVITY
2.14-7
e. Consist of slow walking, jogging or low-intensity swimming.
2. Stretching a. Makes joints more flexible b. Improves range of motion c. Prevent soreness d. Reduce risk of injury e. Do during the warm-up or right after it. 3. Aerobic Set a. Make up 50-70 percent of workout time or
distance
b. Minimum of 15 minutes at target heart rate c. Lower level of intensity will not increase
fitness level as much
4. Muscular development set American College of Sports Medicine recommends that
a fitness program include some exercise for muscular development. The most popular is resistance training (weight training)
a. Be sure to do a warm-up b. 2-3 times a week recommended c. Standard program for beginners is to do 3 sets
of a minimum of 10 reps.
d. In aquatic exercise since it is hard to determine the resistance of the water. 3 sets might not provide the overload needed to increase strength and endurance.

DISCUSSION POINT RELATED INSTRUCTOR ACTIVITY
2.14-8
e. Overload for strength improvement may depend solely on increasing the number of sets and the number of repetitions per set.
f. You must rely on your perception of overload to determine if you are working hard enough.
5. Cool-down A tapering off to let the heart rate, blood
pressure, and metabolic rate go back to their initial levels.
a. Proper cool down helps the blood return from
the working muscles to the brain, lungs, and internal organs.
b. Helps you recover from fatigue and may prevent muscle soreness later.
c. Should last 5-10 minutes or 10 percent of the total time or distance of the workout.
d. Cool-down can be the same as the warm-up and stretching.
e. Do not go to stretching immediately after strenuous activity in the aerobic set or the muscular development set.
D. Phases of a Fitness Program Page 236 of reference. 1. Initial phase a. Low intensity b. Increase you workload slowly and comfortably. c. Move to the next phase when you can maintain 60
percent intensity for at least 15 minutes.
d. May need 10 weeks at this phase before going to next phase.
DISCUSSION POINT RELATED INSTRUCTOR ACTIVITY
2.14-9
2. Improvement phase a. Begins when you can exercise 3 times a week for
15 minutes at 60 percent of target heart rate.
b. Fitness will improve by increasing frequency, intensity or length of time.
c. Will increase more rapidly in this phase than initial phase.
d. Stay well within your target heart rate range. e. Increase the duration before you increase
intensity or frequency.
3. Maintenance Phase a. Begins when you reach the fitness goals that
you set for yourself.
b. Used to sustain the fitness level rather than increase your workload.
c. Exercise at a comfortable level and set different goals.
d. Add variety to your workout (learn a new stroke).
4. Reversibility of Training The physical fitness you gain from exercise can be
lost. If you stop exercising regularly, your fitness level will decrease and you will gradually return to the shape that you were in when you began your exercise program.
a. Better to maintain your current level of
fitness.
DISCUSSION POINT RELATED INSTRUCTOR ACTIVITY
2.14-10
b. Being physically fit once does not make it easier to get back into shape.
c. Fitness declines quickly but can be maintained with as few as two workouts a week.
d. Develop fitness habits you can keep using for a lifetime.
E. Fitness Swimming You should design your fitness-swimming program
carefully. This means starting at the right level and following an effective progression in your exercise plan.
a. Always use: (1) Warm-up (2) Stretching (3) Aerobic set (4) Cool-down (5) Include muscular development set in 2-3
workouts each week.
b. Heart rate should be 10-13 beats below that for
similar exercise on land.
c. A swimmer’s horizontal position and the smaller muscle mass used in swimming prevent the heart rate from increasing as much as in vertical, dry land exercise of the same intensity.
d. Check your heart rate before, during, and after your workout to ensure you are at the right intensity.
e. Check your resting heart rate every few weeks because exercise gradually lowers it. Then recalculate target heart rate.
DISCUSSION POINT RELATED INSTRUCTOR ACTIVITY
2.14-11
Touch the left shoulder blade with the left hand and
F. Aquatic Exercise Aquatic exercise is water activity generally done in a
vertical position with face out of the water.
a. Used for (1) Rehabilitation for athletes (2) Managing weight (3) Stress relief (4) Increase fitness (5) People with disabilities to improve their
fitness, range of motion, muscular strength and endurance.
G. Student practice swimming for lifetime fitness 1. Student safety brief TTO and pool safety
review. 2. Warm-up:
3 minutes of low intensity swimming 3. Stretch a. Side to side stretch:
Arm straight up and grasp the left wrist with the right hand. Slowly lean to the right without bending forward at the waist. Repeat in the opposite direction.
b. Triceps stretch:
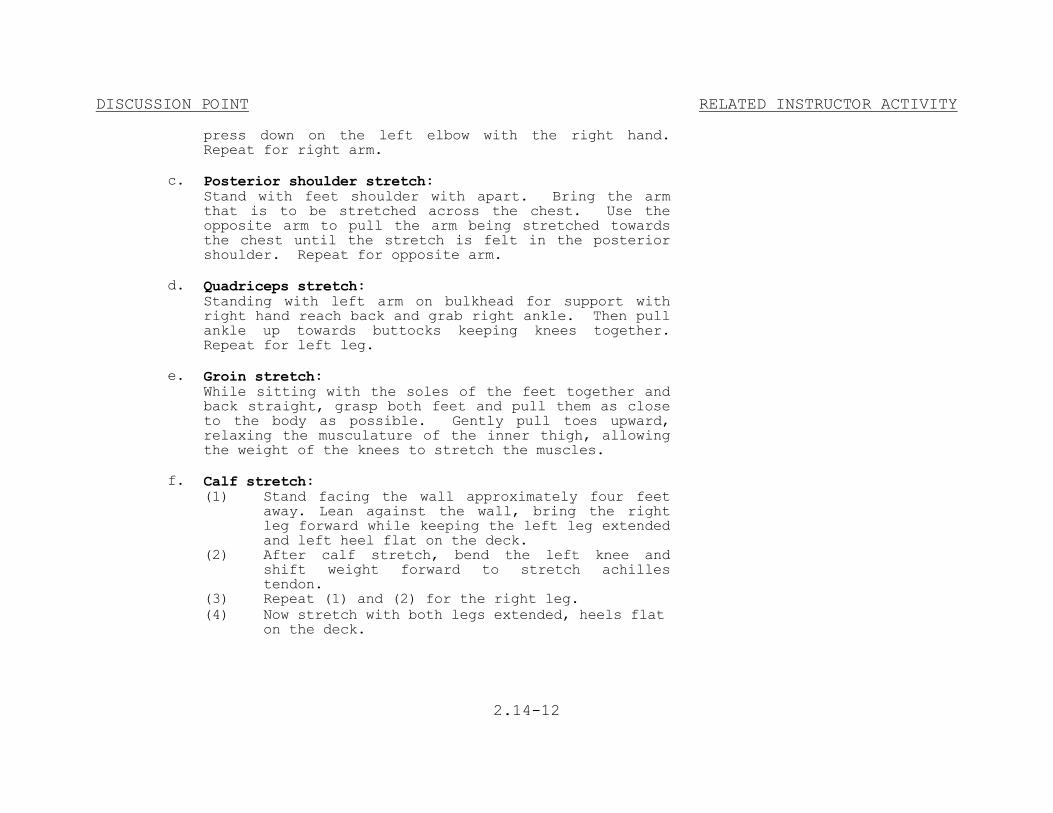
DISCUSSION POINT RELATED INSTRUCTOR ACTIVITY
2.14-12
press down on the left elbow with the right hand. Repeat for right arm.
c. Posterior shoulder stretch: Stand with feet shoulder with apart. Bring the arm
that is to be stretched across the chest. Use the opposite arm to pull the arm being stretched towards the chest until the stretch is felt in the posterior shoulder. Repeat for opposite arm.
d. Quadriceps stretch: Standing with left arm on bulkhead for support with
right hand reach back and grab right ankle. Then pull ankle up towards buttocks keeping knees together. Repeat for left leg.
e. Groin stretch: While sitting with the soles of the feet together and
back straight, grasp both feet and pull them as close to the body as possible. Gently pull toes upward, relaxing the musculature of the inner thigh, allowing the weight of the knees to stretch the muscles.
f. Calf stretch: (1) Stand facing the wall approximately four feet
away. Lean against the wall, bring the right leg forward while keeping the left leg extended and left heel flat on the deck.
(2) After calf stretch, bend the left knee and shift weight forward to stretch achilles tendon.
(3) Repeat (1) and (2) for the right leg. (4) Now stretch with both legs extended, heels flat
on the deck.
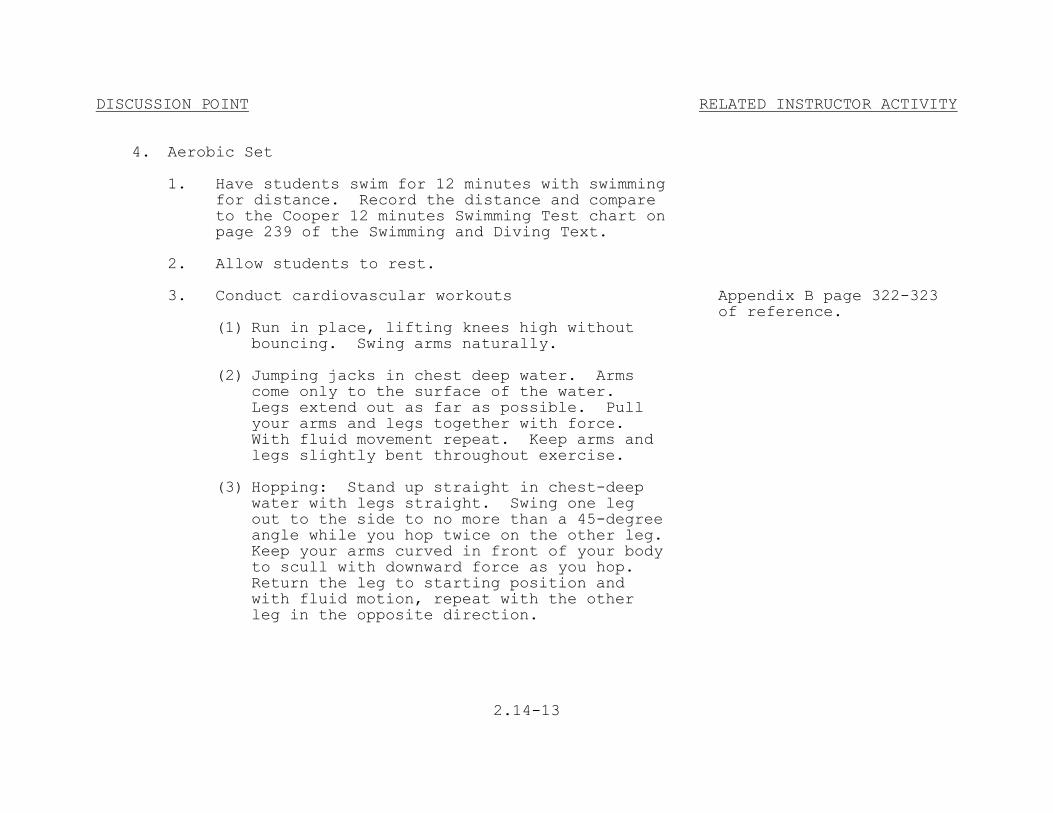
DISCUSSION POINT RELATED INSTRUCTOR ACTIVITY
2.14-13
4. Aerobic Set 1. Have students swim for 12 minutes with swimming
for distance. Record the distance and compare to the Cooper 12 minutes Swimming Test chart on page 239 of the Swimming and Diving Text.
2. Allow students to rest. 3. Conduct cardiovascular workouts Appendix B page 322-323 of reference. (1) Run in place, lifting knees high without
bouncing. Swing arms naturally.
(2) Jumping jacks in chest deep water. Arms
come only to the surface of the water. Legs extend out as far as possible. Pull your arms and legs together with force. With fluid movement repeat. Keep arms and legs slightly bent throughout exercise.
(3) Hopping: Stand up straight in chest-deep
water with legs straight. Swing one leg out to the side to no more than a 45-degree angle while you hop twice on the other leg. Keep your arms curved in front of your body to scull with downward force as you hop. Return the leg to starting position and with fluid motion, repeat with the other leg in the opposite direction.

DISCUSSION POINT RELATED INSTRUCTOR ACTIVITY
2.14-14
5. Muscular Development Set Appendix B pages 323-325 The following exercises are designed to take
advantage of water’s buoyancy and resistance to strengthen and tone the body’s major muscle groups.
a. For all the exercises be sure to: (1) Stand up straight in chest deep water. (2) Feet shoulder width apart (3) Knees slightly bent (4) Abdominals tight and hips tucked under b. Upper Body (1) Stand facing the pool wall. Feet at least
1 foot away from the wall. With arms at your sides, bend the elbows to grasp the side of the pool and pull yourself to the wall. Now push yourself away from the wall. Push and pull vigorously. This strengthens and tones the chest, shoulders, and arms.
(2) Stand erect. With elbows slightly bent,
extend your arms out to the sides at shoulder height. Circle your arms forward. Keep your fingers and wrists firm to increase the resistance. Then reverse the movement.
Works shoulders and upper arms.
(3) With fingers together, palms facing down
pull the arms down to the side. Return to starting position vigorously with palms
Works shoulders and upper back.
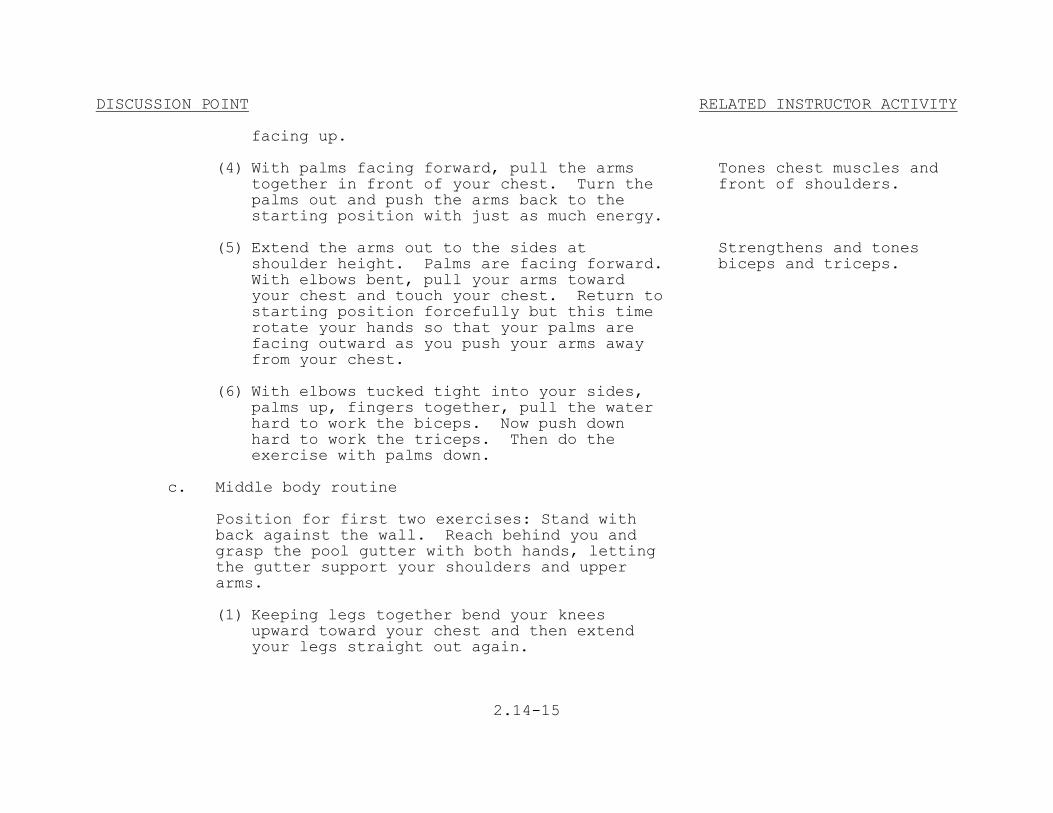
DISCUSSION POINT RELATED INSTRUCTOR ACTIVITY
2.14-15
facing up. (4) With palms facing forward, pull the arms
together in front of your chest. Turn the palms out and push the arms back to the starting position with just as much energy.
Tones chest muscles and front of shoulders.
(5) Extend the arms out to the sides at
shoulder height. Palms are facing forward. With elbows bent, pull your arms toward your chest and touch your chest. Return to starting position forcefully but this time rotate your hands so that your palms are facing outward as you push your arms away from your chest.
Strengthens and tones biceps and triceps.
(6) With elbows tucked tight into your sides,
palms up, fingers together, pull the water hard to work the biceps. Now push down hard to work the triceps. Then do the exercise with palms down.
c. Middle body routine Position for first two exercises: Stand with
back against the wall. Reach behind you and grasp the pool gutter with both hands, letting the gutter support your shoulders and upper arms.
(1) Keeping legs together bend your knees
upward toward your chest and then extend your legs straight out again.

DISCUSSION POINT RELATED INSTRUCTOR ACTIVITY
2.14-16
(2) Draw knees up to the chest and roll the
thighs first to the right and then to the left.
Works hips, inner and outer thighs. Helps to relax the lower back.
(3) Stand facing the pool wall. Float on your
back and rest your lower legs (feet) on the side of the pool. Clasp your hands behind your head. Tuck your chin into your chest and pull yourself forward slightly, tightening your abdominal muscles. Return to starting position.
(4) Float in a prone position and place one
hand on the pool wall or gutter and the other hand directly underneath it for support. With fluid motion pull your knees into your chest and straighten them out to the right. Then pull them into your chest again and straighten them out to the left.
Works the external oblique muscles and lower abdominal.
c. Lower body routines The first two routines are performed vigorously
they could be part of the cardiovascular workout.
(1) Stand up straight with your lower back
pressed against the wall in waist or chest deep water. Lift your right leg so that it is flexed 90 degrees at the hip and 90 degrees at the knee. Extend the leg so that it is nearly straight but not locked. Repeat with the left leg.
Works the quadriceps.

DISCUSSION POINT RELATED INSTRUCTOR ACTIVITY
2.14-17
(2) With shoulders, hips, and knees aligned and
your foot relaxed, try to bring the heel of the right foot back and up to reach the buttock. Alternate with the left foot. Try not to arch your back.
Strengthens and tones the hamstring.
(3) Stand erect in chest deep water. With toes
pointed, lift the right leg out to the side at an angle of no more than 45 degrees. Return to the starting position forcefully and repeat with the other leg. Remember the movement originates from the hip.
Strengthens and tones the inner and outer thighs.
(4) With right foot relaxed, lift the right leg
forward no higher than your hip. Without turning your body, move the leg to the side and return it vigorously to the starting position. Again, the movement is from the hip. Repeat for the left leg
Strengthens and tones the inner and outer thighs.
(5) With knees slightly flexed and feet
together, lift your right leg back just enough to feel the tension in the buttocks. Do not arch the back. Repeat with the left side.
(6) Keeping your right leg straight, gently
pull it away from the midline of the body and make a figure-eight pattern with you foot. Reverse the direction. This movement if from the hip. Repeat with the left leg.
Works the upper legs and buttocks.

DISCUSSION POINT RELATED INSTRUCTOR ACTIVITY
2.14-18
SUMMARY AND REVIEW A. State Lesson Objectives. Turn to cover page for
objectives B. Review Major Teaching Points. Briefly summarize. APPLICATION As per presentation EVALUATION Performance test ASSIGNMENT None

2.15-1
LESSON PLAN January 2005 COURSE TITLE: Basic Swimming and Water
Survival Instructor Training Course, A-012-1014
TERMINAL OBJECTIVE: Completely supported by this lesson topic:
CLASSIFICATION: Unclassified LESSON PLAN NUMBER: 2.15 LESSON TOPIC: Conditioning Swim #1 ALLOTTED LESSON TIME: 1.5 Laboratory
2.0 Upon completion of this unit of instruction, the student will demonstrate knowledge and proficiency in aquatic skills, swimming, and water survival techniques without injury to personnel or damage to equipment.
ENABLING OBJECTIVES:
INSTRUCTIONAL SUPPORT: Completely supported by this lesson topic:
1 BSWIC Instructor 1 Qualified Lifeguard
2.30 Participate in a 50-minute conditioning swim exercise.
Add one in water lifeguard if more than 20 students in deep end.
CRITERION TEST:INSTRUCTIONAL REFERENCE: Written exam at end of course
American Red Cross Swimming and Diving manual HOMEWORK:
INSTRUCTIONAL AIDS: None
Swimming pool

DISCUSSION POINT RELATED INSTRUCTOR ACTIVITY
2.15-2
INTRODUCTION A. Establish Contact Display name and lesson
topic. 1. Introduce self, give rank, current job. 2. State background, schools, duty stations, etc. 3. State question and answer policy. 4. State Training Time Out policy. 5. Ask for medical concern: a. Has anyone gone to the hospital/branch medical
clinic for treatment with the last 24 hours?
b. Has anyone taken any medication or over-the-
counter medications in last 24 hours.?
c. Are there any potentially disqualifying
illnesses/conditions?
B. State Lesson Objectives Turn to cover page of
Lesson Plan and paraphrase objectives.

DISCUSSION POINT RELATED INSTRUCTOR ACTIVITY
2.15-3
C. Establish Readiness 1. Motivating Statements 2. Lesson overview
State how and why students will use material.
a. Lesson Topic: Conditioning Swim #1 b. Major Teaching Points: (1) Benefits of conditioning swimming (2) Student practice of conditioning swim #1

DISCUSSION POINT RELATED INSTRUCTOR ACTIVITY
2.15-4
PRESENTATION: A. Benefits of conditioning swimming 1. Increase muscular strength and endurance
Conduct warm-up, stretches and cool-down IAW Annex F.
2. Improve stroke mechanics 3. Build confidence B. Student practice of condition swim #1 1. Warm-up: 5 minutes of low intensity swimming 2. Stretch a. Side to side stretch:
Arm straight up and grasp the left wrist with the right hand. Slowly lean to the right without bending forward at the waist. Repeat in the opposite direction.
b. Triceps stretch: Touch the left shoulder blade with the left hand and
press down on the left elbow with the right hand. Repeat for right arm.

DISCUSSION POINT RELATED INSTRUCTOR ACTIVITY
2.15-5
c. Posterior shoulder stretch: Stand with feet shoulder with apart. Bring the arm
that is to be stretched across the chest. Use the opposite arm to pull the arm being stretched towards the chest until the stretch is felt in the posterior shoulder. Repeat for opposite arm.
d. Quadriceps stretch: Standing with left arm on bulkhead for support with
right hand reach back and grab right ankle. Then pull ankle up towards buttocks keeping knees together. Repeat for left leg.
e. Groin stretch: While sitting with the soles of the feet together and
back straight, grasp both feet and pull them as close to the body as possible. Gently pull toes upward, relaxing the musculature of the inner thigh, allowing the weight of the knees to stretch the muscles.
f. Calf stretch: (1) Stand facing the wall approximately four feet
away. Lean against the wall, bring the right leg forward while keeping the left leg extended and left heel flat on the deck.
(2) After calf stretch, bend the left knee and shift weight forward to stretch achilles tendon.
(3) Repeat (1) and (2) for the right leg. (4) Now stretch with both legs extended, heels flat
on the deck.
4. Survival techniques practice (1hr) Coach and critique students with any survival skill
that they may be having difficulty with.
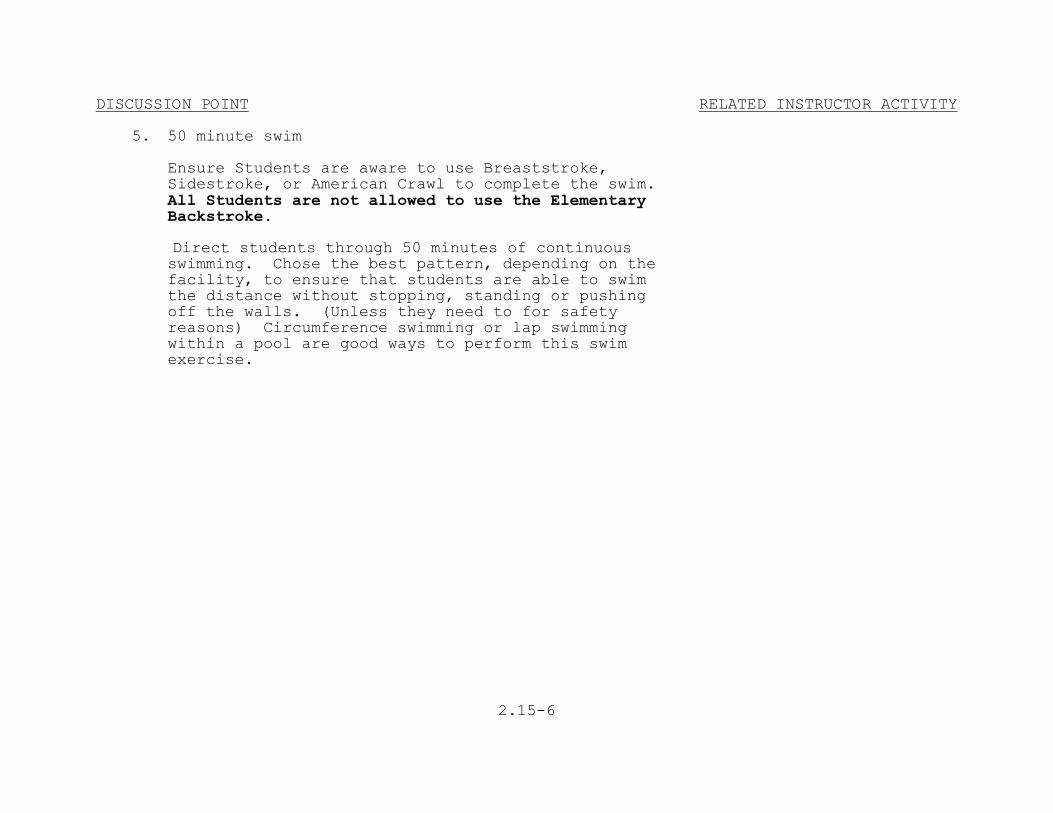
DISCUSSION POINT RELATED INSTRUCTOR ACTIVITY
2.15-6
5. 50 minute swim Ensure Students are aware to use Breaststroke,
Sidestroke, or American Crawl to complete the swim. All Students are not allowed to use the Elementary Backstroke.
Direct students through 50 minutes of continuous
swimming. Chose the best pattern, depending on the facility, to ensure that students are able to swim the distance without stopping, standing or pushing off the walls. (Unless they need to for safety reasons) Circumference swimming or lap swimming within a pool are good ways to perform this swim exercise.

DISCUSSION POINT RELATED INSTRUCTOR ACTIVITY
2.15-7
SUMMARY AND REVIEW A. State Lesson Objectives. Turn to cover page for
objectives B. Review Major Teaching Points. Briefly summarize. APPLICATION As per presentation EVALUATION Performance test ASSIGNMENT None

2.16-1
LESSON PLAN January 2005 COURSE TITLE: Basic Swimming and Water
Survival Instructor Training Course, A-012-1014
TERMINAL OBJECTIVE: Completely supported by this lesson topic:
CLASSIFICATION: Unclassified LESSON PLAN NUMBER: 2.16 LESSON TOPIC: Conditioning Swim #2 ALLOTTED LESSON TIME: 1.5 Laboratory
2.0 Upon completion of this unit of instruction, the student will demonstrate knowledge and proficiency in aquatic skills, swimming, and water survival techniques without injury to personnel or damage to equipment.
ENABLING OBJECTIVES:
INSTRUCTIONAL SUPPORT: Completely supported by this lesson topic:
1 BSWIC Instructor 1 Qualified Lifeguard
2.31 Participate in a 60-minute conditioning swim exercise.
Add one in water lifeguard if more than 20 students in deep end.
CRITERION TEST:INSTRUCTIONAL REFERENCE: Written exam at end of course American Red Cross Swimming and Diving
manual HOMEWORK:
INSTRUCTIONAL AIDS: None
Swimming pool

DISCUSSION POINT RELATED INSTRUCTOR ACTIVITY
2.16-2
INTRODUCTION A. Establish Contact Display name and lesson
topic. 1. Introduce self, give rank, current job. 2. State background, schools, duty stations, etc. 3. State question and answer policy. 4. State Training Time Out policy. 5. Ask for medical concern: a. Has anyone gone to the hospital/branch medical
clinic for treatment with the last 24 hours?
b. Has anyone taken any medication or over-the-
counter medications in last 24 hours.?
c. Are there any potentially disqualifying
illnesses/conditions?
B. State Lesson Objectives Turn to cover page of
Lesson Plan and paraphrase objectives.

DISCUSSION POINT RELATED INSTRUCTOR ACTIVITY
2.16-3
C. Establish Readiness 1. Motivating Statements 2. Lesson overview
State how and why students will use material.
a. Lesson Topic: Conditioning Swim #2 b. Major Teaching Points: (1) Benefits of conditioning swimming (2) Student practice of conditioning swim #2

DISCUSSION POINT RELATED INSTRUCTOR ACTIVITY
2.16-4
PRESENTATION: A. Benefits of conditioning swimming 1. Increase muscular strength and endurance
Conduct warm-up, stretches and cool-down IAW Annex F.
2. Improve stroke mechanics 3. Build confidence B. Student practice of condition swim #2 1. Warm-up: 5 minutes of low intensity swimming 2. Stretch a. Side to side stretch:
Arm straight up and grasp the left wrist with the right hand. Slowly lean to the right without bending forward at the waist. Repeat in the opposite direction.
b. Triceps stretch: Touch the left shoulder blade with the left hand and
press down on the left elbow with the right hand. Repeat for right arm.

DISCUSSION POINT RELATED INSTRUCTOR ACTIVITY
2.16-5
c. Posterior shoulder stretch: Stand with feet shoulder with apart. Bring the arm
that is to be stretched across the chest. Use the opposite arm to pull the arm being stretched towards the chest until the stretch is felt in the posterior shoulder. Repeat for opposite arm.
d. Quadriceps stretch: Standing with left arm on bulkhead for support with
right hand reach back and grab right ankle. Then pull ankle up towards buttocks keeping knees together. Repeat for left leg.
e. Groin stretch: While sitting with the soles of the feet together and
back straight, grasp both feet and pull them as close to the body as possible. Gently pull toes upward, relaxing the musculature of the inner thigh, allowing the weight of the knees to stretch the muscles.
f. Calf stretch: (1) Stand facing the wall approximately four feet
away. Lean against the wall, bring the right leg forward while keeping the left leg extended and left heel flat on the deck.
(2) After calf stretch, bend the left knee and shift weight forward to stretch achilles tendon.
(3) Repeat (1) and (2) for the right leg. (4) Now stretch with both legs extended, heels flat
on the deck.
4. Survival techniques practice (45 minutes) Coach and critique students with any survival skill
that they may be having difficulty with.

DISCUSSION POINT RELATED INSTRUCTOR ACTIVITY
2.16-6
5. 60 minute swim Ensure Students are aware to use Breaststroke,
Sidestroke, or American Crawl to complete the swim. All Students are not allowed to use the Elementary Backstroke.
Direct students through 60 minutes of continuous
swimming. Chose the best pattern, depending on the facility, to ensure that students are able to swim the distance without stopping, standing or pushing off the walls. (Unless they need to for safety reasons) Circumference swimming or lap swimming within a pool is good ways to perform this swim exercise.

DISCUSSION POINT RELATED INSTRUCTOR ACTIVITY
2.16-7
SUMMARY AND REVIEW A. State Lesson Objectives. Turn to cover page for
objectives B. Review Major Teaching Points. Briefly summarize. APPLICATION As per presentation EVALUATION Performance test ASSIGNMENT None
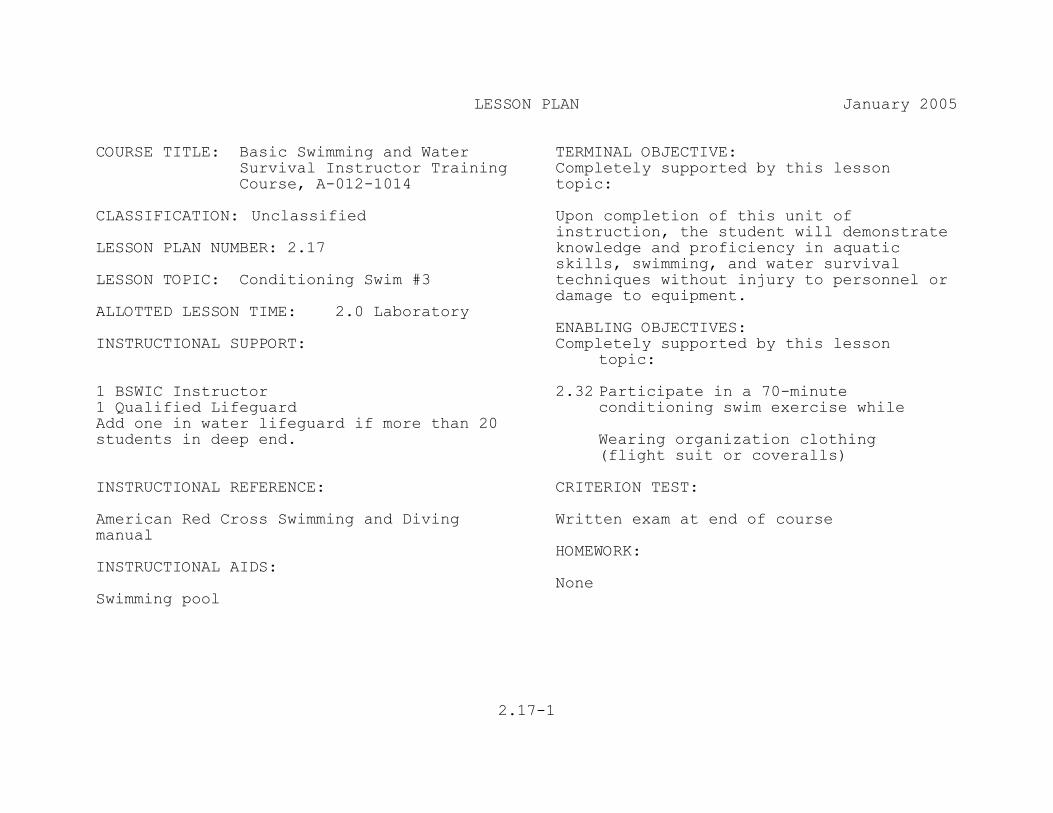
2.17-1
LESSON PLAN January 2005 COURSE TITLE: Basic Swimming and Water
Survival Instructor Training Course, A-012-1014
TERMINAL OBJECTIVE: Completely supported by this lesson topic:
CLASSIFICATION: Unclassified LESSON PLAN NUMBER: 2.17 LESSON TOPIC: Conditioning Swim #3 ALLOTTED LESSON TIME: 2.0 Laboratory
Upon completion of this unit of instruction, the student will demonstrate knowledge and proficiency in aquatic skills, swimming, and water survival techniques without injury to personnel or damage to equipment.
ENABLING OBJECTIVES:INSTRUCTIONAL SUPPORT: Completely supported by this lesson
topic:
1 BSWIC Instructor 1 Qualified Lifeguard
2.32 Participate in a 70-minute conditioning swim exercise while
Add one in water lifeguard if more than 20 students in deep end. Wearing organization clothing
(flight suit or coveralls)
INSTRUCTIONAL REFERENCE:
CRITERION TEST:
Written exam at end of course
American Red Cross Swimming and Diving manual
HOMEWORK:INSTRUCTIONAL AIDS:
NoneSwimming pool

DISCUSSION POINT RELATED INSTRUCTOR ACTIVITY
2.17-2
INTRODUCTION A. Establish Contact Display name and lesson
topic. 1. Introduce self, give rank, current job. 2. State background, schools, duty stations, etc. 3. State question and answer policy. 4. State Training Time Out policy. 5. Ask for medical concern: a. Has anyone gone to the hospital/branch medical
clinic for treatment with the last 24 hours?
b. Has anyone taken any medication or over-the-
counter medications in last 24 hours.?
c. Are there any potentially disqualifying
illnesses/conditions?
B. State Lesson Objectives Turn to cover page of
Lesson Plan and paraphrase objectives.

DISCUSSION POINT RELATED INSTRUCTOR ACTIVITY
2.17-3
C. Establish Readiness 1. Motivating Statements 2. Lesson overview
State how and why students will use material.
a. Lesson Topic: Conditioning Swim #3 b. Major Teaching Points: (1) Benefits of conditioning swimming (2) Student practice of conditioning swim #3

DISCUSSION POINT RELATED INSTRUCTOR ACTIVITY
2.17-4
PRESENTATION: A. Benefits of conditioning swimming 1. Increase muscular strength and endurance
Conduct warm-up stretches and cool-down IAW Annex F.
2. Improve stroke mechanics 3. Build confidence B. Student practice of condition swim #3 1. Warm-up: 5 minutes of low intensity swimming 2. Stretch a. Side to side stretch:
Arm straight up and grasp the left wrist with the right hand. Slowly lean to the right without bending forward at the waist. Repeat in the opposite direction.
b. Triceps stretch: Touch the left shoulder blade with the left hand and
press down on the left elbow with the right hand. Repeat for right arm.
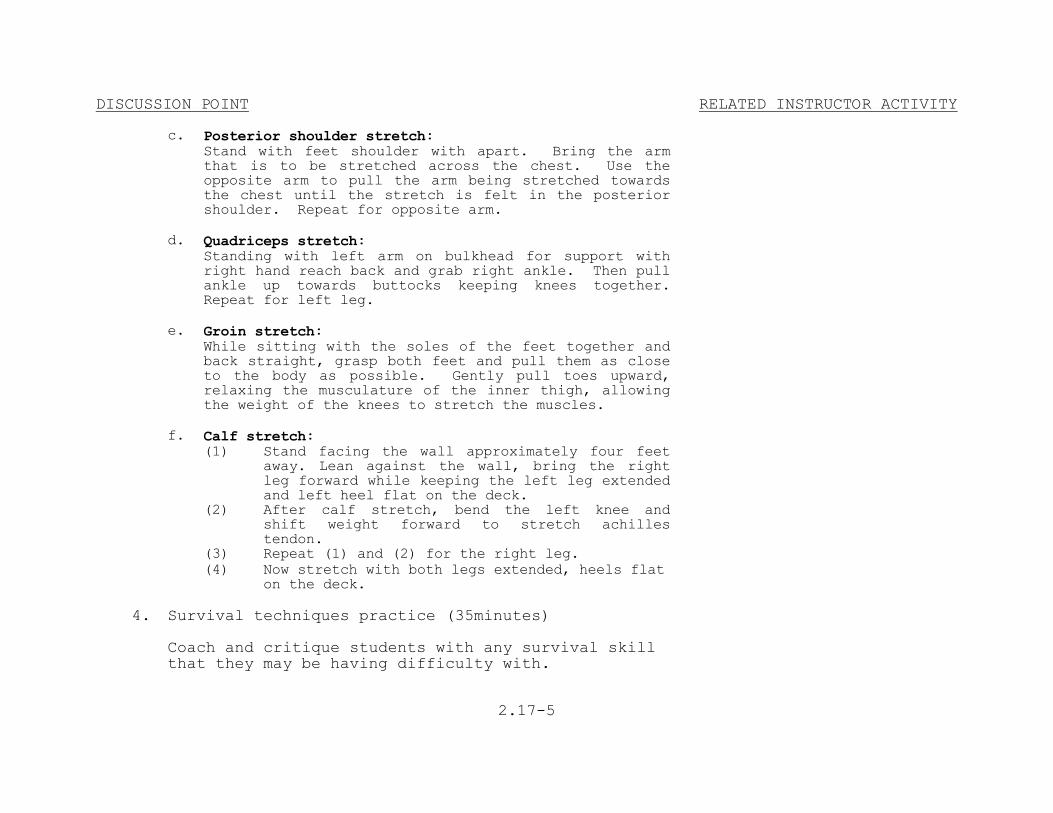
DISCUSSION POINT RELATED INSTRUCTOR ACTIVITY
2.17-5
c. Posterior shoulder stretch: Stand with feet shoulder with apart. Bring the arm
that is to be stretched across the chest. Use the opposite arm to pull the arm being stretched towards the chest until the stretch is felt in the posterior shoulder. Repeat for opposite arm.
d. Quadriceps stretch: Standing with left arm on bulkhead for support with
right hand reach back and grab right ankle. Then pull ankle up towards buttocks keeping knees together. Repeat for left leg.
e. Groin stretch: While sitting with the soles of the feet together and
back straight, grasp both feet and pull them as close to the body as possible. Gently pull toes upward, relaxing the musculature of the inner thigh, allowing the weight of the knees to stretch the muscles.
f. Calf stretch: (1) Stand facing the wall approximately four feet
away. Lean against the wall, bring the right leg forward while keeping the left leg extended and left heel flat on the deck.
(2) After calf stretch, bend the left knee and shift weight forward to stretch achilles tendon.
(3) Repeat (1) and (2) for the right leg. (4) Now stretch with both legs extended, heels flat
on the deck.
4. Survival techniques practice (35minutes) Coach and critique students with any survival skill
that they may be having difficulty with.
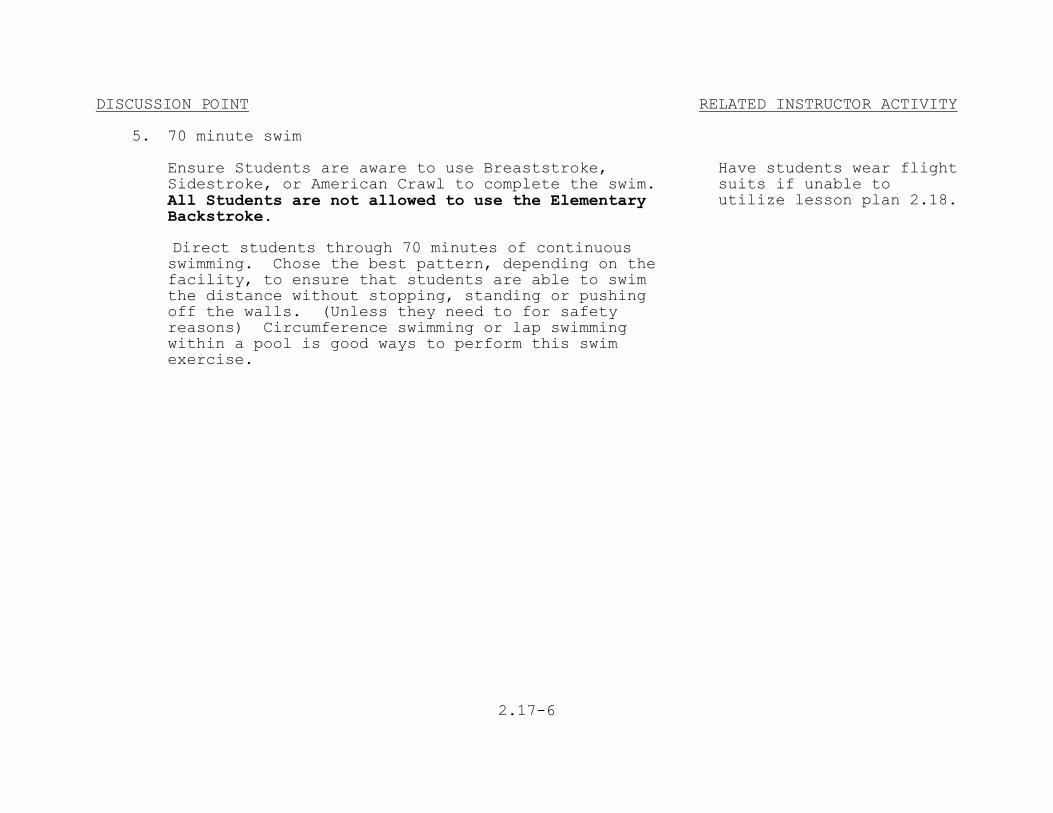
DISCUSSION POINT RELATED INSTRUCTOR ACTIVITY
2.17-6
5. 70 minute swim Ensure Students are aware to use Breaststroke,
Sidestroke, or American Crawl to complete the swim. All Students are not allowed to use the Elementary Backstroke.
Direct students through 70 minutes of continuous
swimming. Chose the best pattern, depending on the facility, to ensure that students are able to swim the distance without stopping, standing or pushing off the walls. (Unless they need to for safety reasons) Circumference swimming or lap swimming within a pool is good ways to perform this swim exercise.
Have students wear flight suits if unable to utilize lesson plan 2.18.

DISCUSSION POINT RELATED INSTRUCTOR ACTIVITY
2.17-7
SUMMARY AND REVIEW A. State Lesson Objectives. Turn to cover page for
objectives B. Review Major Teaching Points. Briefly summarize. APPLICATION As per presentation EVALUATION Performance test ASSIGNMENT None
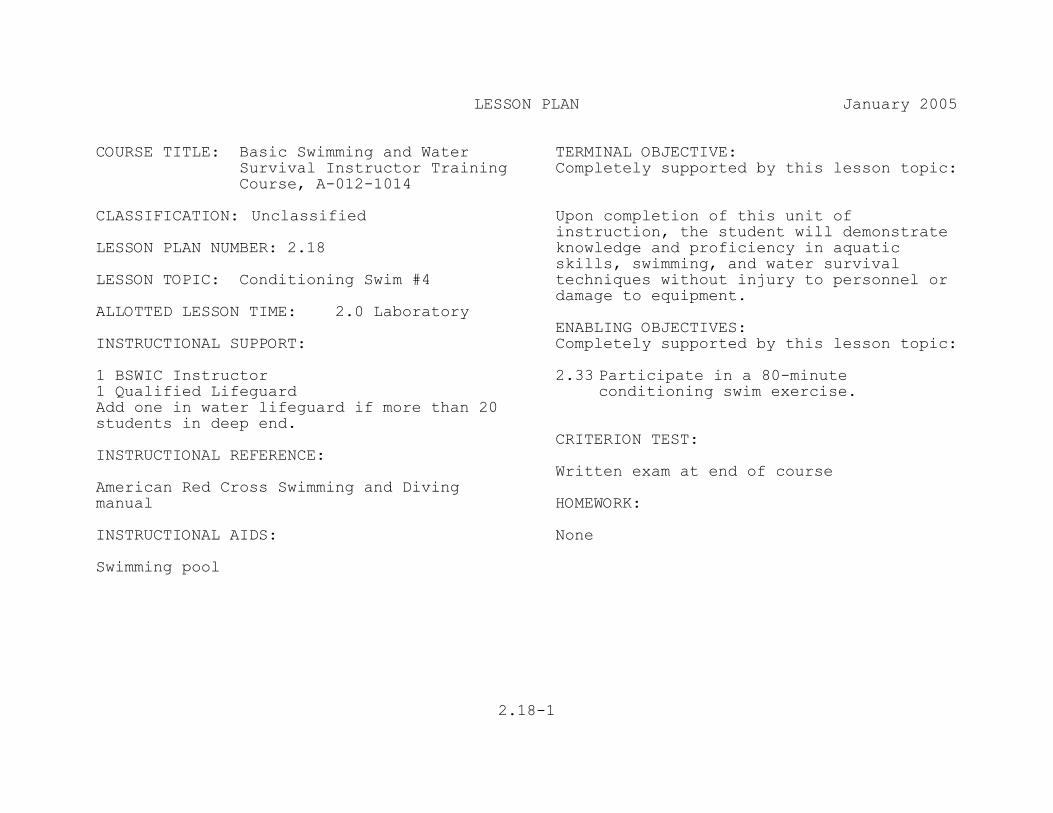
2.18-1
LESSON PLAN January 2005 COURSE TITLE: Basic Swimming and Water
Survival Instructor Training Course, A-012-1014
TERMINAL OBJECTIVE: Completely supported by this lesson topic:
CLASSIFICATION: Unclassified LESSON PLAN NUMBER: 2.18 LESSON TOPIC: Conditioning Swim #4 ALLOTTED LESSON TIME: 2.0 Laboratory
Upon completion of this unit of instruction, the student will demonstrate knowledge and proficiency in aquatic skills, swimming, and water survival techniques without injury to personnel or damage to equipment.
ENABLING OBJECTIVES:INSTRUCTIONAL SUPPORT: Completely supported by this lesson topic:
1 BSWIC Instructor 1 Qualified Lifeguard
2.33 Participate in a 80-minute conditioning swim exercise.
Add one in water lifeguard if more than 20 students in deep end.
CRITERION TEST:INSTRUCTIONAL REFERENCE: Written exam at end of course
American Red Cross Swimming and Diving manual HOMEWORK:
INSTRUCTIONAL AIDS: None
Swimming pool

DISCUSSION POINT RELATED INSTRUCTOR ACTIVITY
2.18-2
INTRODUCTION A. Establish Contact Display name and lesson
topic. 1. Introduce self, give rank, current job. 2. State background, schools, duty stations, etc. 3. State question and answer policy. 4. State Training Time Out policy. 5. Ask for medical concern: a. Has anyone gone to the hospital/branch medical
clinic for treatment with the last 24 hours?
b. Has anyone taken any medication or over-the-
counter medications in last 24 hours.?
c. Are there any potentially disqualifying
illnesses/conditions?
B. State Lesson Objectives Turn to cover page of
Lesson Plan and paraphrase objectives.
DISCUSSION POINT RELATED INSTRUCTOR ACTIVITY
2.18-3
C. Establish Readiness 1. Motivating Statements 2. Lesson overview
State how and why students will use material.
a. Lesson Topic: Conditioning Swim #4 b. Major Teaching Points: (1) Benefits of conditioning swimming (2) Student practice of conditioning swim #4
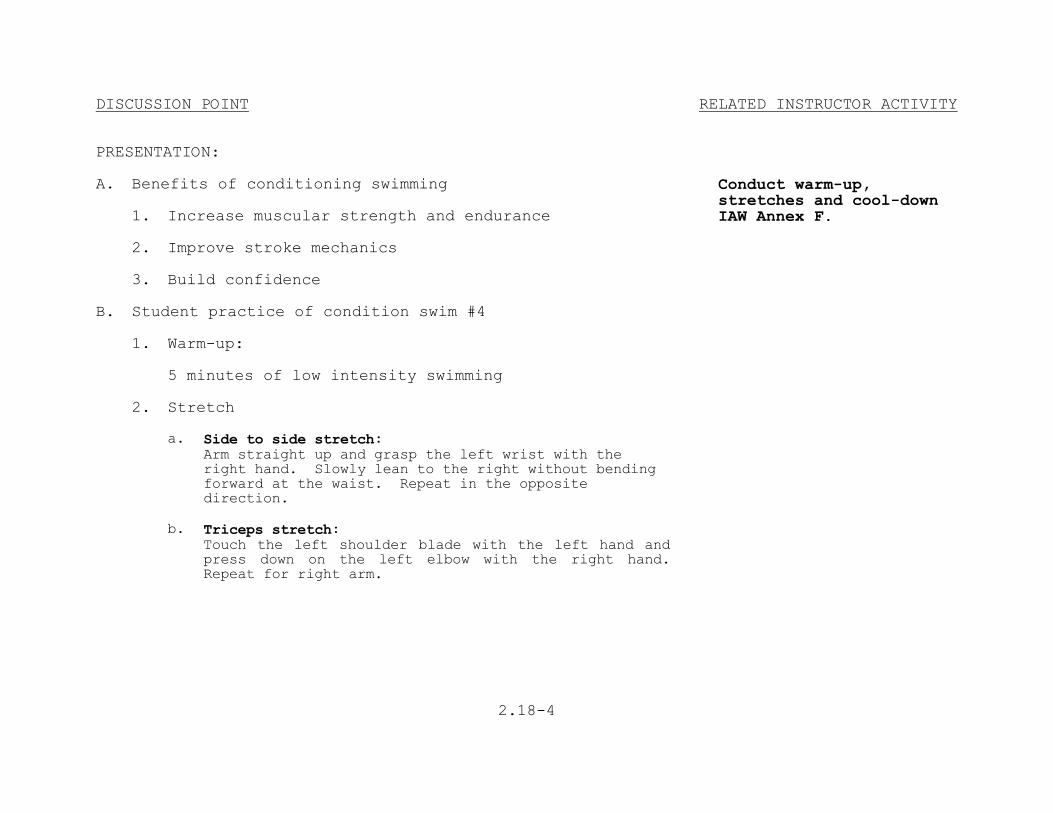
DISCUSSION POINT RELATED INSTRUCTOR ACTIVITY
2.18-4
PRESENTATION: A. Benefits of conditioning swimming 1. Increase muscular strength and endurance
Conduct warm-up, stretches and cool-down IAW Annex F.
2. Improve stroke mechanics 3. Build confidence B. Student practice of condition swim #4 1. Warm-up: 5 minutes of low intensity swimming 2. Stretch a. Side to side stretch:
Arm straight up and grasp the left wrist with the right hand. Slowly lean to the right without bending forward at the waist. Repeat in the opposite direction.
b. Triceps stretch: Touch the left shoulder blade with the left hand and
press down on the left elbow with the right hand. Repeat for right arm.

DISCUSSION POINT RELATED INSTRUCTOR ACTIVITY
2.18-5
c. Posterior shoulder stretch: Stand with feet shoulder with apart. Bring the arm
that is to be stretched across the chest. Use the opposite arm to pull the arm being stretched towards the chest until the stretch is felt in the posterior shoulder. Repeat for opposite arm.
d. Quadriceps stretch: Standing with left arm on bulkhead for support with
right hand reach back and grab right ankle. Then pull ankle up towards buttocks keeping knees together. Repeat for left leg.
e. Groin stretch: While sitting with the soles of the feet together and
back straight, grasp both feet and pull them as close to the body as possible. Gently pull toes upward, relaxing the musculature of the inner thigh, allowing the weight of the knees to stretch the muscles.
f. Calf stretch: (1) Stand facing the wall approximately four feet
away. Lean against the wall, bring the right leg forward while keeping the left leg extended and left heel flat on the deck.
(2) After calf stretch, bend the left knee and shift weight forward to stretch achilles tendon.
(3) Repeat (1) and (2) for the right leg. (4) Now stretch with both legs extended, heels flat
on the deck.
4. Survival techniques practice (25 minutes) Coach and critique students with any survival skill
that they may be having difficulty with.

DISCUSSION POINT RELATED INSTRUCTOR ACTIVITY
2.18-6
5. 80 minute swim Ensure Students are aware to use Breaststroke,
Sidestroke, or American Crawl to complete the swim. All Students are not allowed to use the Elementary Backstroke.
Direct students through 80 minutes of continuous
swimming. Chose the best pattern, depending on the facility, to ensure that students are able to swim the distance without stopping, standing or pushing off the walls. (Unless they need to for safety reasons) Circumference swimming or lap swimming within a pool are good ways to perform this swim exercise.
*note* Students attending BSWSIC continuing to NASC for Instructor Duty are required to swim at least 36 laps in a flight suit or coveralls in 80 minutes or less. NASC-bound students that cannot swim 36 laps in 80 minutes will still receive BSWSIC Certification, but special notice will be sent to NASC for individual training requirements.

DISCUSSION POINT RELATED INSTRUCTOR ACTIVITY
2.18-7
SUMMARY AND REVIEW A. State Lesson Objectives. Turn to cover page for
objectives B. Review Major Teaching Points. Briefly summarize. APPLICATION As per presentation EVALUATION Performance test ASSIGNMENT None

2.19-1
LESSON PLAN January 2005 COURSE TITLE: Basic Swimming and Water
Survival Instructor Training Course, A-012-1014
TERMINAL OBJECTIVE: Completely supported by this lesson topic:
CLASSIFICATION: Unclassified LESSON PLAN NUMBER: 2.19 LESSON TOPIC: Spinal Injury Management for
Divers and SEALS ALLOTTED LESSON TIME: 1.0 Laboratory
2.0 Upon completion of this unit of instruction, the student will demonstrate knowledge and proficiency in aquatic skills, swimming, and water survival techniques without injury to personnel or damage to equipment.
ENABLING OBJECTIVES:
INSTRUCTIONAL SUPPORT: Completely supported by this lesson topic:
1 BSWIC Instructor 1 Qualified Lifeguard Add one in water lifeguard if more than 20 students in deep end.
2.34 Demonstrate Spinal Injury Management Skills per the American Red Cross Lifeguarding Manual.
INSTRUCTIONAL REFERENCE:
CRITERION TEST:
American Red Cross Lifeguarding Performance test Instructor’s Manual
HOMEWORK:INSTRUCTIONAL AIDS:
None1. Swimming pool 2. Backboard

DISCUSSION POINT RELATED INSTRUCTOR ACTIVITY
2.19-2
INTRODUCTION A. Establish Contact Display name and lesson
topic. 1. Introduce self, give rank, current job. 2. State background, schools, duty stations, etc. 3. State question and answer policy. 4. State Training Time Out policy. 5. Ask for medical concern: a. Has anyone gone to the hospital/branch medical
clinic for treatment with the last 24 hours?
b. Has anyone taken any medication or over-the-
counter medications in last 24 hours.?
c. Are there any potentially disqualifying
illnesses/conditions?
B. State Lesson Objectives Turn to cover page of
Lesson Plan and paraphrase objectives.

DISCUSSION POINT RELATED INSTRUCTOR ACTIVITY
2.19-3
C. Establish Readiness 1. Motivating Statements 2. Lesson overview
State how and why students will use material.
a. Lesson Topic: Spinal Injury Management for
Divers and SEALS
b. Major Teaching Points: Who must participate
DISCUSSION POINT RELATED INSTRUCTOR ACTIVITY
2.19-4
PRESENTATION: A. Who must participate in this lesson plan
Conduct warm-up stretches and cool-down IAW Annex F.
Instructors shall follow lesson 9, pages 175-190, of the Red Cross Lifeguarding Instructor’s Manual to conduct this session.
Personnel who are qualified lifeguards in accordance with BUPERSINST 1710.19, but were not trained in aquatic procedures for spinal injury management are required to participate in this lesson plan.

DISCUSSION POINT RELATED INSTRUCTOR ACTIVITY
2.19-5
SUMMARY AND REVIEW A. State Lesson Objectives. Turn to cover page for
objectives B. Review Major Teaching Points. Briefly summarize. APPLICATION As per presentation EVALUATION Performance test ASSIGNMENT Read Chapters 12-13 of U.S. Navy Water Survival Instructor’s Manual.
2.20-1
LESSON PLAN January 2005 COURSE TITLE: Basic Swimming and Water
Survival Instructor Training Course, A-012-1014
TERMINAL OBJECTIVE: Completely supported by this lesson topic:
CLASSIFICATION: Unclassified LESSON PLAN NUMBER: 2.20 LESSON TOPIC: Learning to Conduct the Swim
Tester Course ALLOTTED LESSON TIME: 2.0 Classroom 2.0 Laboratory
2.0 Upon completion of this unit of instruction, the student will demonstrate knowledge and proficiency in aquatic skills, swimming, and water survival techniques without injury to personnel or damage to equipment.
ENABLING OBJECTIVES:INSTRUCTIONAL SUPPORT: Completely supported by this lesson topic:
1 BSWIC Instructor
2.35 State training time out and drop on request procedure.
Student/Staff ratio:
2.36 State safety and mishap procedures. 1 BSWIC Instructor per 20 students INSTRUCTIONAL REFERENCE:
2.37 Demonstrate Lifeguarding skills competency.
1. Navy Swim Tester Curricula 2. U.S. Navy Water Survival Instructor’s
Manual
2.38 Perform survival strokes treading water, survival floating, burning oil swimming and the abandon ship drill per Navy Water Survival Instructor’s manual (P1552/16).
INSTRUCTIONAL AIDS: CRITERION TEST:
Swimming Pool Written exam at end of course HOMEWORK:
Read Chapters 12-13 of reference 2.
DISCUSSION POINT RELATED INSTRUCTOR ACTIVITY
2.20-2
INTRODUCTION A. Establish Contact Display name and lesson
topic. 1. Introduce self, give rank, current job. 2. State background, schools, duty stations, etc. 3. State question and answer policy. 4. State Training Time Out policy. 5. Ask for medical concern: a. Has anyone gone to the hospital/branch medical
clinic for treatment with the last 24 hours?
b. Has anyone taken any medication or over-the-
counter medications in last 24 hours.?
c. Are there any potentially disqualifying
illnesses/conditions?
B. State Lesson Objectives Turn to cover page of
Lesson Plan and paraphrase objectives.
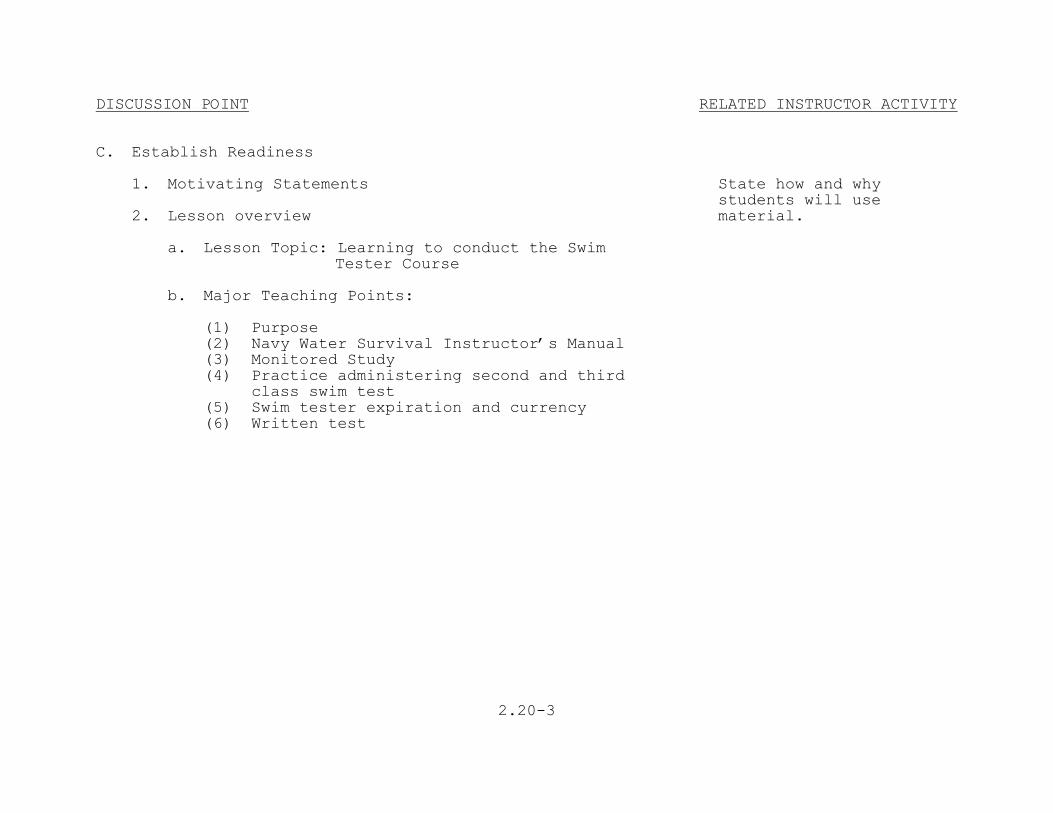
DISCUSSION POINT RELATED INSTRUCTOR ACTIVITY
2.20-3
C. Establish Readiness 1. Motivating Statements 2. Lesson overview
State how and why students will use material.
a. Lesson Topic: Learning to conduct the Swim
Tester Course
b. Major Teaching Points: (1) Purpose (2) Navy Water Survival Instructor’s Manual (3) Monitored Study (4) Practice administering second and third
class swim test
(5) Swim tester expiration and currency (6) Written test
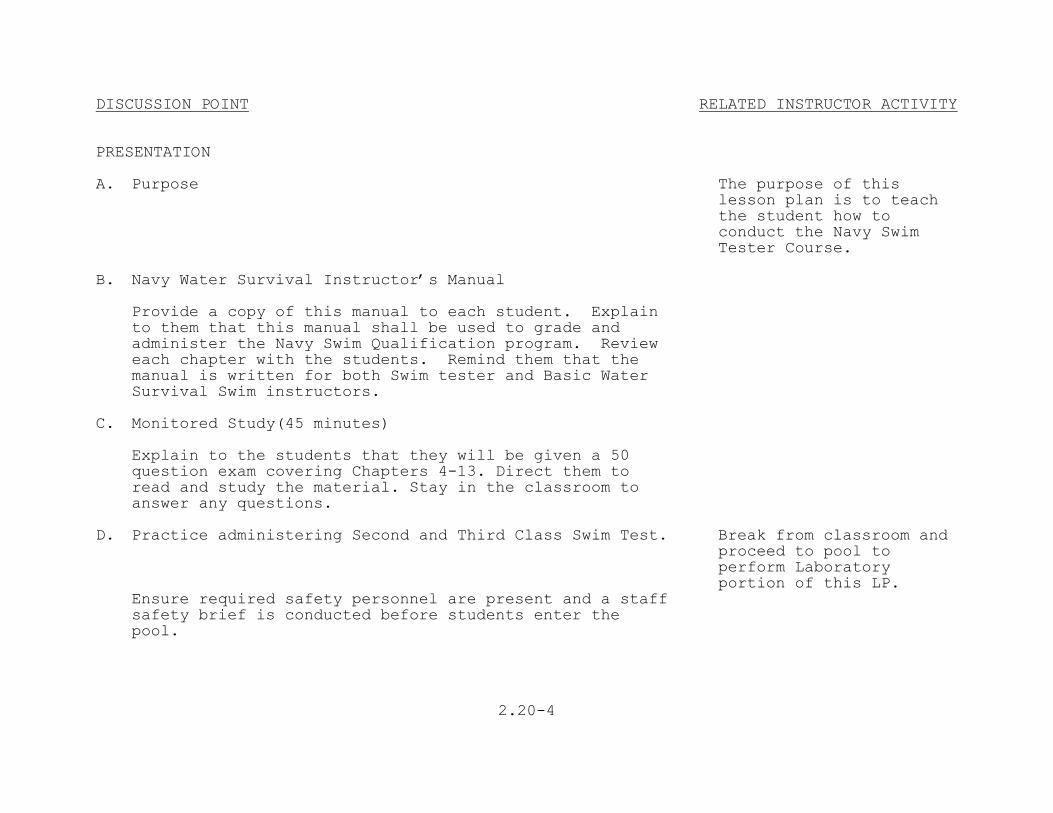
DISCUSSION POINT RELATED INSTRUCTOR ACTIVITY
2.20-4
PRESENTATION A. Purpose The purpose of this
lesson plan is to teach the student how to conduct the Navy Swim Tester Course.
B. Navy Water Survival Instructor’s Manual Provide a copy of this manual to each student. Explain
to them that this manual shall be used to grade and administer the Navy Swim Qualification program. Review each chapter with the students. Remind them that the manual is written for both Swim tester and Basic Water Survival Swim instructors.
C. Monitored Study(45 minutes) Explain to the students that they will be given a 50
question exam covering Chapters 4-13. Direct them to read and study the material. Stay in the classroom to answer any questions.
D. Practice administering Second and Third Class Swim Test. Break from classroom and
proceed to pool to perform Laboratory portion of this LP.
Ensure required safety personnel are present and a staff safety brief is conducted before students enter the pool.

DISCUSSION POINT RELATED INSTRUCTOR ACTIVITY
2.20-5
E. Swim Tester Expiration and Currency Swim tester certification is current as long as member
maintains the command billet for which certification was originally given. If a swim test’s CPR, First Aid or Lifeguard qualification expires before this time, swim tester qualification is suspended immediately until certification is attained.
1. Student safety brief Brief students on
Training Time Out and safety precautions before they enter the pool.
2. Third Class Swim Test Break class into groups as needed. Direct them to
practice teach administering the Third Class Swim Tests. Follow guidance in Chapters 12 and 13 of the Navy Water Survival Instructor's Manual to administer the test.
Conduct warm-up, stretches and cool-down IAW Annex F.
3. Break 4. Second Class Swim Test In same groups, have students practice teach
administering the Second Class Swim Test. Follow guidance in Chapters 12 and 13 of the Navy Water Survival Instructor’s Manual to administer the test.
5. Return to classroom

DISCUSSION POINT RELATED INSTRUCTOR ACTIVITY
2.20-6
F Written Test 1. Test The test is closed book. Must score an 80% or
better to pass.
2. Grading If a student fails the examination, assign them to
restudy the chapters covering the examination questions that were missed. After studying, administer Test B.
3. Service Record Entry Provide Swimmers with a form or certification
indicating successful completion of the Navy Swim Tester Course. Certification of this course should be recorded on page 4 of the enlisted service record or on the administrative remarks page 13 of the officer’s service record.
DISCUSSION POINT RELATED INSTRUCTOR ACTIVITY
2.20-7
SUMMARY AND REVIEW A. State Lesson Objectives. Turn to cover page for
objectives B. Review Major Teaching Points. Briefly summarize. APPLICATION As per presentation EVALUATION Performance test ASSIGNMENT None

2.21-1
LESSON PLAN January 2005 COURSE TITLE: Basic Swimming and Water
Survival Instructor Training Course, A-012-1014
TERMINAL OBJECTIVE: Completely supported by this lesson topic:
CLASSIFICATION: Unclassified LESSON PLAN NUMBER: 2.21 LESSON TOPIC: Skills Test ALLOTTED LESSON TIME: 1.5 Laboratory
Upon completion of this unit of instruction, the student will demonstrate knowledge and proficiency in aquatic skills, swimming, and water survival techniques without injury to personnel or damage to equipment.
ENABLING OBJECTIVES:INSTRUCTIONAL SUPPORT: Completely supported by this lesson topic:
1 BSWIC Instructor 2.39 Perform survival-swimming test. 1 Qualified Lifeguard Add one in water lifeguard if more than 20 students in deep end.
CRITERION TEST:
INSTRUCTIONAL REFERENCE:
Performance test
U.S. Navy Water Survival Instructor’s
HOMEWORK: Manual
NoneINSTRUCTIONAL AIDS:
1. Swimming pool 2. Boots, trousers, shirt or jumpsuit

DISCUSSION POINT RELATED INSTRUCTOR ACTIVITY
2.21-2
INTRODUCTION A. Establish Contact Display name and lesson
topic. 1. Introduce self, give rank, current job. 2. State background, schools, duty stations, etc. 3. State question and answer policy. 4. State Training Time Out policy. 5. Ask for medical concern: a. Has anyone gone to the hospital/branch medical
clinic for treatment with the last 24 hours?
b. Has anyone taken any medication or over-the-
counter medications in last 24 hours.?
c. Are there any potentially disqualifying
illnesses/conditions?
B. State Lesson Objectives Turn to cover page of
Lesson Plan and paraphrase objectives.

DISCUSSION POINT RELATED INSTRUCTOR ACTIVITY
2.21-3
C. Establish Readiness 1. Motivating Statements 2. Lesson overview
State how and why students will use material.
a. Lesson Topic: Skills Test b. Major Teaching Points: (1) First Class Swim Test (2) Abandon Ship Drill/Underwater Swim Test (3) 75 yard organizational clothing swim (4) Treading Water and Survival Floating Test (5) Conduct Skills Test

DISCUSSION POINT RELATED INSTRUCTOR ACTIVITY
2.21-4
PRESENTATION A. First Class Swim Test
Conduct warm-up, stretches and cool-down IAW Annex F.
Explain test logistics and performance standard per Chapters 12 and 13 of The U.S. Navy Water Survival Instructor’s Manual.
B. Abandon Ship Drill/Underwater Swim Test While dressed in pants and shirt, (or jumpsuit) and
boots, step off platform (minimum 5 feet). At water entry legs must be crossed at ankles, and arms crossed, with hand of the arm closest to the chest pinching off the nose with the arm farthest from the chest grasping the biceps of opposite arm. (Illustration and further information found in Chapter 10 of the Navy Water Survival Instructor’s Manual). After water impact, without surfacing, swim 15 yards underwater without breaking the surface.
C. 75 yard organizational clothing swim Explain that the 75-yard organizational swimming test
consists of swimming 25 yards each of the breaststroke, sidestroke, and elementary backstroke. Strokes mechanics are not tested. Passing consists of completion of the distance, utilizing the strokes described, without stopping, standing or holding on the side of the pool. Instructor candidates wear boots, pants, and shirt (candidates who will become instructors at NAVAVSCOLSCOM may wear jumpsuit/coveralls and SV-2, gloves and helmet).
DISCUSSION POINT RELATED INSTRUCTOR ACTIVITY
2.21-5
D. Treading Water And Survival Floating Test: While dressed in boots, shirt and pants or
jumpsuit/coveralls (candidates who will become instructors at NAVAVSCOLSCOM may wear jumpsuit/coveralls and SV-2, gloves and helmet) tread water for 2 minutes followed by 3 minutes of survival floating. After survival floating, don an inherently inflated lifejacket or orally inflate an inflatable lifejacket and perform H.E.L.P. and Huddle positions.
2. Treading water standards Explain to students that only the modified
breaststroke/frog or rotary/egg beater kicks may be used.
2. Prone floating standards Prone floating (survival floating) must conform to
Chapter 13, Second Class Swim Standards, of the U.S. Navy Water Survival Instructor’s Manual.
E. Conduct Skills Test 1. Staff safety brief 2. Administering First Class Swim Test Conduct the First Class Swim Test in accordance with
Chapters 13 and 14 of the U.S. Navy Water Survival Instructor’s Manual. Be certain to utilize First Class Performance standards when grading strokes.

DISCUSSION POINT RELATED INSTRUCTOR ACTIVITY
2.21-6
3. Administer Abandon Ship Drill/Underwater Swim a. Students must step from the tower in increments
so that there is no chance of a swimmer landing on another swimmer.
Brief students on safety precautions and hyperventilation.
b. Students must step from a minimum height of 5
feet. Water depth underneath the platform must be a minimum of 8 feet.
c. Body position must conform to Third Class Swim
Standards identified in Chapter 13 of the U.S. Navy Water Survival Instructor’s Manual.
d. Students may swim any underwater stroke. No
part of the body may break the surface during the 15-yard underwater swim.
4. Administer Organizational Clothing Swim Test
Brief students on safety precautions.
a. Students must swim 75 yards demonstrating 25 yards each of the breaststroke, sidestroke, and elementary backstroke in the order written. Strokes mechanics are not graded.
b. Properly trained swimmers shall pass this test
without extreme physical exertion. Students experiencing difficulty must be removed before requiring rescue.

DISCUSSION POINT RELATED INSTRUCTOR ACTIVITY
2.21-7
c. The 75-yard swim must be continuous without
holding on the edge or pushing off the walls. This will accomplished by either swimming laps in a single lane or swimming a “Z” pattern whereby the swimmer swims 25 yards from shallow end to deep, swims diagonally from deep to shallow, and finishes by swimming from shallow to deep end on the opposite side of the pool from where the swim began.
d. A trained lifeguard IAW BUPERINST 1710.19 will
be in the pool equipped with mask, fins, and rescue tube strategically placed to render assistance as needed. A maximum of 20 students is allowed in the deep end.
5. Administering the Treading Water/Survival Floating
Test:
a. A trained lifeguard in accordance with
BUPERSINST 1710.19 will be in the pool equipped with mask, fins, and rescue tube strategically placed to render assistance as needed. Maximum of 20 students in the deep end at once.
b. Properly trained swimmers can pass this test
without extreme physical exertion. Students experiencing difficulty must be removed before requiring rescue.
c. Only the modified breaststroke or rotary kicks
may be executed while treading water.

DISCUSSION POINT RELATED INSTRUCTOR ACTIVITY
2.21-8
d. After 30 seconds, prone floating must conform
to Chapter 13 of the Navy Water Survival Instructor’s manual, Second Class Standards. Students gasping, breathless, or otherwise not calm and relaxed must be removed immediately.
e. Inflatable lifejackets must be inflated enough
to support the swimmer.

DISCUSSION POINT RELATED INSTRUCTOR ACTIVITY
2.21-9
SUMMARY AND REVIEW A. State Lesson Objectives. Turn to cover page for
objectives B. Review Major Teaching Points. Briefly summarize. APPLICATION As per presentation EVALUATION Performance test ASSIGNMENT None
2.22-1
LESSON PLAN December 2005 COURSE TITLE: Basic Swimming and Water
Survival Instructor Training Course, A-012-1014
TERMINAL OBJECTIVE: Completely supported by this lesson topic:
CLASSIFICATION: Unclassified LESSON PLAN NUMBER: 2.22 LESSON TOPIC: Using Games to Improve
Swimming and Survival Skills
Upon completion of this unit of instruction, the student will demonstrate knowledge and proficiency in aquatic skills, swimming, and water survival techniques without injury to personnel or damage to equipment.
ALLOTTED LESSON TIME: 1.0 Laboratory
(optional at anytime)
ENABLING OBJECTIVES: Completely supported by this lesson topic:
INSTRUCTIONAL SUPPORT: 1 BSWIC Instructor
2.40 Demonstrate improved aerobic fitness, strength, aquatic familiarity and swim skills.
1 Qualified Lifeguard
CRITERION TEST:INSTRUCTIONAL REFERENCE:
Performance test
American Red Cross Water Safety Instructor’s Manual
HOMEWORK:
INSTRUCTIONAL AIDS: None
1. Two water polo goals 2. One ball 3. One pool clock
INTRODUCTION

DISCUSSION POINT RELATED INSTRUCTOR ACTIVITY
2.22-2
A. Establish Contact Display name and lesson
topic. 1. Introduce self, give rank, current job. 2. State background, schools, duty stations, etc. 3. State question and answer policy. 4. State Training Time Out policy. 5. Ask for medical concern: a. Has anyone gone to the hospital/branch medical
clinic for treatment with the last 24 hours?
b. Has anyone taken any medication or over-the-
counter medications in last 24 hours.?
c. Are there any potentially disqualifying
illnesses/conditions?
B. State Lesson Objectives Turn to cover page of
Lesson Plan and paraphrase objectives.
DISCUSSION POINT RELATED INSTRUCTOR ACTIVITY
2.22-3
C. Establish Readiness 1. Motivating Statements 2. Lesson overview
State how and why students will use material.
a. Lesson Topic: Lap Swim/Water Polo b. Major Teaching Points: (1) Introduction (2) Water Polo (3) Seal Show Relay (4) Kick Board Relay

DISCUSSION POINT RELATED INSTRUCTOR ACTIVITY
2.22-4
(d) Reach over opponent to get ball
PRESENTATION A. Introduction Improving swimming strength and endurance skills can be
accomplished in a fun and inventive ways such that the student practices in a fun, worry-free environment. Games and competitive events can increase muscular endurance, coordination and make movements more of a natural reaction.
B. Water Polo 1. Rules
Conduct warm-up, stretches and cool-down IAW Annex F.
a. Start quarters by having teams line up at
opposite sides and sprint for the ball at the half-way point.
b. Quarters are 7 minutes long and are separated by
5-minute rest periods.
c. Team consists of six players and a goal. d. Fouls - - 2 Types (1) Technical: turn ball over to other team
and give a free throw.
(a) Swim over opponent (b) Put ball underwater (c) Come within 2 meters of opponent’s goal
without ball being closer to goal.

DISCUSSION POINT RELATED INSTRUCTOR ACTIVITY
2.22-5
(e) Touch side while having the ball (f) Playing the ball (2) Personnel: Remove player for 30 seconds or
until a goal is made.
(a) Grab opponent (b) Foul a player with a free throw (c) Play the man, not the ball (3) Call fouls with the whistle and give free
throws at location of foul.
e. Goals are scored when center of ball breaks the
plane of the face of the goal.
f. Players can handle the ball with 2 hands.
(Normally only the goalie can put 2 hands on the ball)
g. Players substitute out a goals and quarters. 3. Safety Call fouls and kick out players to control play,
keep play clean, not rough.
C. Seal Show Relay 1. Divide into two or more teams each with a beach
ball. American Red Cross Water Safety Instructor’s
Manual page 182. 2. The first player of each team slips into shallow
water with the team ball.

DISCUSSION POINT RELATED INSTRUCTOR ACTIVITY
2.22-6
3. Have player travel across the swimming area skipping and bouncing the ball off their head.
4. On the return the player treads water while pushing
the ball with the nose.
5. All the players take a turn and the first team done
wins the race.
D. Kickboard Relay Page 182 1. Divide into two or more teams. 2. Half of each team is at opposite sides of the
swimming area.
3. On the signal, the first player from each team kicks
across the swimming area and hands the kickboard to their partner, who proceeds to kick back to the next team member. The team that finishes first wins.
4. Designate different kicks and distances for
variation.

DISCUSSION POINT RELATED INSTRUCTOR ACTIVITY
2.22-7
SUMMARY AND REVIEW A. State Lesson Objectives. Turn to cover page for
objectives B. Review Major Teaching Points. Briefly summarize. APPLICATION As per presentation EVALUATION Performance test ASSIGNMENT None

3.1-1
LESSON PLAN January 2005 COURSE TITLE: Basic Swimming and Water Survival Instructor
Training Course A-012-1014
CLASSIFICATION: Unclassified LESSON PLAN NUMBER: 3.1 LESSON TOPIC: Stress Management &
Suicide Prevention ALLOTTED LESSON TIME: 1.0 Classroom INSTRUCTIONAL SUPPORT: 1 Classroom Instructor INSTRUCTIONAL REFERENCES: 1. NETC Form 1720/2, Supervisor's Guide
for Suicide Prevention 2. NAVAVSCOLSCOMINST 1720.1, Naval
Aviation Schools Command (NAVAVSCOLSCOM) Program for Suicide Prevention
3. Command Fitness Coordinator Exercise Leader Handbook
INSTRUCTIONAL AIDS: 1. Stress Inventory Form 2. Supervisor's Guide to Suicide
Prevention 3. PowerPoint presentation
TERMINAL OBJECTIVE: Completely supported by this lesson topic: 3.0 Upon completion of this unit of
instruction, the student will demonstrate knowledge of subject matter, curricula, policies and procedures necessary of a Navy Basic Water Survival Instructor without injury to personnel or damage to equipment.
ENABLING OBJECTIVES: Completely supported by this lesson topic: 1.13 Define stress and suicide. 1.14 Identify five sources of stress. 1.15 List the detrimental effects of over- stress, including substance abuse. 1.16 Discuss the stress management
strategies of coping, cooperation, and changing.
CRITERION TEST: None HOMEWORK: None

DISCUSSION POINT RELATED INSTRUCTOR ACTIVITY
3.1-2
INTRODUCTION:
A. Establish Contact Display name and lesson topic. 1. Introduce self, give rank, current job. 2. State background, schools, duty stations, etc. 3. State question and answer policy. B. State Lesson Objectives Turn to cover page of Lesson
Plan and paraphrase objectives.
C. Establish Readiness 1. Motivating Statements It is essential that you have a basic
understanding of the effects of stress and the principles of stress management. Leaders must be able to successfully deal with stress personally and be able to assist others.
Emphasize the importance of understanding the effects of stress on ourselves and of successfully dealing with stress. Emphasize the necessity of suicide prevention.
2. Lesson Overview Briefly outline material to be
covered. a. Lesson Topic: Stress Management/Suicide Prevention
b. Major Teaching Points: (1) Sources of Stress

DISCUSSION POINT RELATED INSTRUCTOR ACTIVITY
3.1-3
(2) Symptoms and Detrimental Effects (3) Managing Stress (4) Suicide Prevention

DISCUSSION POINT RELATED INSTRUCTOR ACTIVITY
3.1-4
PRESENTATION: A. Sources of Stress 1. Stress can be defined as the body's and the
mind's reaction to the demands, whether real or perceived, of the environment. Stress may result from many sources.
2. People have different reactions to the same
stress. What is stressful for one person may not be stressful for another. Not all stress, is harmful; some stress can be beneficial up to a point. If stress becomes too intense, prolonged, or frustrating it can become physically or emotionally harmful.
3. Stress unchecked can lead to suicide. 4. The changing nature of the work environment and
major life changes cause individuals to behave differently. For personnel in positions of authority and responsibility, the workplace itself can be a source of stress. You must remain alert for signs of over-stress in your subordinates and yourself. Five examples of stressors most commonly experienced by Naval personnel are:

DISCUSSION POINT RELATED INSTRUCTOR ACTIVITY
3.1-5
a. Decision Making b. Performance Expectations c. Workload/Environment d. Personal Demands e. Changing Life Situations B. Symptoms and Detrimental Effects 1. The first step in handling stress is
identifying what stresses exist in our lives. Once we have identified these stresses we can begin to establish and implement successful strategies. Some stress is good because it can show us when we need to take action. Knowing the early warning signs, symptoms, and detrimental effects allow us to properly deal with stress. Some of the more common and obvious signs of inappropriate stress management are:
a. Alcohol or drug abuse. b. Denial, withdrawal, or isolation. c. Impulsive or "out of character" behavior. d. Improper diet. e. Aggression.

DISCUSSION POINT RELATED INSTRUCTOR ACTIVITY
3.1-6
(3) Self-awareness (Recognize Stress).
f. Anxiety. g. Low productivity and quality of
performance.
h. Health Problems. Health problems: Indigestion,
Diarrhea, Cramping and Headache, are just to name a few.
i. Absenteeism. j. Irritability C. Managing Stress 1. Military personnel need to know the strategies
to manage stress. There are three basic strategies for managing stress: coping, cooperating, and changing.
a. Coping strategies: Each person has several
ways to deal with stress. Each of these stress self-management techniques can be called a "stress buffer". They provide the added strength each of us need in the face of adversity. A keen sense of self-awareness lets us know when to use these stress buffers.
(1) Nutritious diet. (2) Regular vigorous exercise.

DISCUSSION POINT RELATED INSTRUCTOR ACTIVITY
3.1-7
(4) Time management. (5) Take up hobbies (Reading, fishing,
gardening, Sports etc...)
b. Cooperating strategies: Support systems
are critical for handling stress. We all need places where we can go to be listened to and understood. Problems seem easier to handle when others are allowed to help. Here are some possible support groups:
Refer to Supervisor's Guide to Suicide Prevention Handout
(1) Family/Friends (2) Supervisors/Peers (3) Chaplain (4) Flight Surgeon/Appropriate Medical
Personnel
(5) Social groups/Family Service Center c. Changing strategies: You can reduce stress
by making small lifestyle changes such as:
(1) Set realistic goals (2) Relax more (3) Use hobbies as a change (4) Reduce alcohol intake
DISCUSSION POINT RELATED INSTRUCTOR ACTIVITY
3.1-8
2. Stress in and of itself is not bad. It can, however, be very damaging if not controlled and regulated. We all continually deal with stress in our daily living. We should also be aware that there are effective ways to keep it under control. As individuals we must recognize potential problems within others and ourselves and know how and where to gain assistance.
D. Suicide Prevention
1. The following information is designed to give you a basic understanding of suicide, its misconceptions, danger signs, and where to get help. The advice and expert knowledge of a qualified professional are needed whenever there is a serious risk of suicide. Suicide is the Navy's third leading cause of death; first two causes are Motor Vehicle Accidents and Heart Disease.
Definitions: a. Suicide is self-induced death,
intentionally caused. b. A suicide attempt is an intentional act,
causing physical self-harm, where death would have occurred had there been no intervention.
c. A suicide gesture is an intentional act,
causing or intending to cause physical self-harm in a way normally associated with suicide, but which would not have

DISCUSSION POINT RELATED INSTRUCTOR ACTIVITY
3.1-9
caused death, even without intervention. d. Suicide ideation is a statement or pattern
of statements, words, or behaviors which reveal a preoccupation with the idea of self-induced death.
2. Suicide Causes/Facts:
a. Relationships and/or family problems. b. Depression c. Job d. Poor Self esteem e. Health f. Stress g. Finances h. Loss of Hope i. Suicide is the third leading cause of death
after motor vehicle accident and heart disease for Naval personnel.
j. Military rates slightly higher than
national rates.
k. The majority of suicidal personnel project
clues or warnings of intentions.

DISCUSSION POINT RELATED INSTRUCTOR ACTIVITY
3.1-10
3. Suicide risk factors. The risk of suicide is higher among individuals who have:
a. Problems with family, relationships,
depression, job, Navy, and/or finances.
b. Made previous attempts. c. A family history of suicide. d. Experienced a recent suicide of friend or
relative.
e. Threaten suicide. f. Possession of a weapon. g. Specific, well thought out plans. 4. Suicide Warning Signs - You should take
preventative actions if you observe any indication of suicide. Here are the most common warning signs:
a. A verbal statement of a wish to die or a
direct threat of self-harm.
b. An unusual interest in or talk about the
subject of death. This can be through speech, art, letters, etc...
c. Talk about feelings of worthlessness. d. A decline in job performance and/or
personal appearance.

DISCUSSION POINT RELATED INSTRUCTOR ACTIVITY
3.1-11
e. A change in sleeping patterns or appetite. f. Unusual withdrawal, isolation, aggression,
disinterest, moodiness, or crying spells.
g. Making final arrangements, giving away
favorite possessions, writing a will.
h. Becoming accident-prone. i. Depression over the recent death of friend
or relative.
j. Marked changes in behavior or personality. 5. Suicide Myths - People believe many
misconceptions about suicide. Some of the more common myths are:
Refer to Stats by Paygrade Transparency
a. Only certain types of people commit
suicide.
b. People who threaten suicide don't commit
suicide.
c. People who have been unsuccessful are not
serious about committing suicide.
d. Suicide will never happen to anyone you
know.
6. Individuals role in suicide prevention - You
must be prepared to take quick and positive action to prevent suicide. Here are some

DISCUSSION POINT RELATED INSTRUCTOR ACTIVITY
3.1-12
specific techniques: a. Know your personnel/peers. Be alert for
indications of threatened suicidal behavior or suicidal ideation in subordinates and peers. If either is detected, take immediate action, as suicidal behavior is a medical emergency.
b. Be active and concerned. Demonstrate an
interest in the people around you. WATCH! LISTEN! REPORT!
c. Be aware of resources available to assist
you in helping others.
d. Know the suicide warning signs and risk
factors.
e. Know what to do if you discover someone
attempting or threatening suicide:
(1) Remain calm. (2) Call for professional help. (3) Do not leave the individual alone. (4) Escort members with suspected suicidal
behavior to the nearest military medical facility.
(5) Report incident to Command Duty Officer
(CDO).

DISCUSSION POINT RELATED INSTRUCTOR ACTIVITY
3.1-13
(6) Report incident to Command Chaplain for follow-up.
(7) Be familiar with command SOP for
handling suicide incidents.
f. Monitor yourself. Have the courage to seek help. Suicide can be prevented. It is an ALL HANDS responsibility.

DISCUSSION POINT RELATED INSTRUCTOR ACTIVITY
3.1-14
SUMMARY AND REVIEW A. State Lesson Objectives Turn to cover page for
objectives. B. Review Major Teaching Points Briefly summarize. APPLICATION None. EVALUATION None. ASSIGNMENT None.

3.2-1
LESSON PLAN January 2005 COURSE TITLE: Basic Swimming and Water
Survival Instructor Training Course, A-012-1014
TERMINAL OBJECTIVE: Completely supported by this lesson topic:
CLASSIFICATION: Unclassified LESSON PLAN NUMBER: 3.2 LESSON TOPIC: Types of Drowning ALLOTTED LESSON TIME: 1.0 Classroom
3.0 Upon completion of this unit of instruction, the student will demonstrate knowledge of subject matter, curricula, policies and procedures necessary of a Navy Basic Water Survival Instructor without injury to personnel or damage to equipment.
ENABLING OBJECTIVES:
INSTRUCTIONAL SUPPORT: Completely supported by this lesson topic:
1 Classroom Instructor 3.10 Describe the two classes of drowning.
INSTRUCTIONAL REFERENCE: 3.11 State the related physiology of drowning.
1. Text book of Advanced Cardiac Life Support, 2nd Edition, 1987 3.12 Describe the care for victims of
drowning. 2. Drowning and Near Drowning, Redding, Joseph S., M.D. Vol. 74, #1, July 1983,
Post graduate Medicine CRITERION TEST:
Written exam at end of course 3. Submersion Injuries: Drowning and
Near-Drowning, Shaw, Kathy, M.D. Emergency Medicine Clinic of North
HOMEWORK:
America, Vol. 7, #2, May 1989
None

DISCUSSION POINT RELATED INSTRUCTOR ACTIVITY
3.2-2
4. Drowning and Near Drowning, Donaldson, John, CDR. MC, USN and Royall, John LCDR., MC, USNR, Postgraduate Medicine, Vol 64, #1, July 1978
5. Drowning, Near-Drowning, and Ice-water
Submersions, Orlowski, James, M.D. Pediatrics Clinics of North America, Vol. 34, #1, Feb 1987
6. Submersion Injury, Spyker, Daniel,
M.D., Pediatric Clinics of North America, Vol. 32, #1, Feb 1985
7. Resuscitation of Submersion Casualties,
Kizer, Kenneth, M.D. Emergency Medicine Clinics of North America, Vol. 1, #3, Dec. 1983
INSTRUCTIONAL AIDS:
None
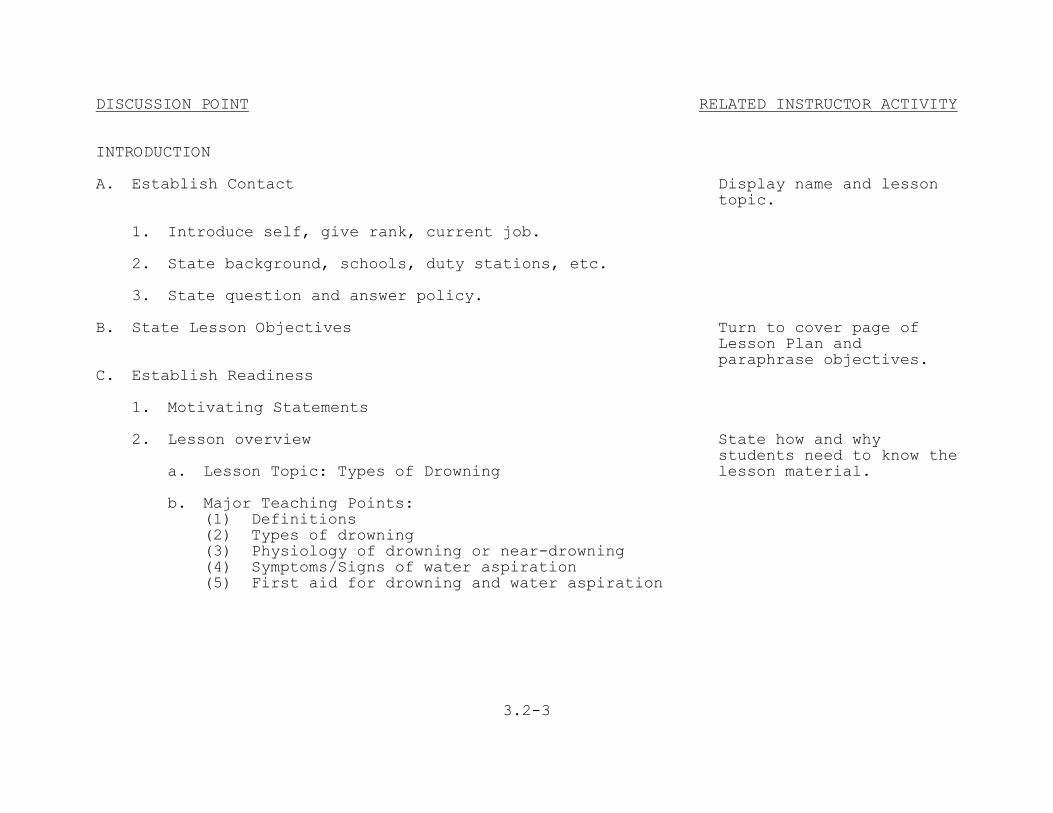
DISCUSSION POINT RELATED INSTRUCTOR ACTIVITY
3.2-3
INTRODUCTION A. Establish Contact Display name and lesson
topic. 1. Introduce self, give rank, current job. 2. State background, schools, duty stations, etc. 3. State question and answer policy. B. State Lesson Objectives Turn to cover page of
Lesson Plan and paraphrase objectives.
C. Establish Readiness 1. Motivating Statements 2. Lesson overview State how and why students need to know the a. Lesson Topic: Types of Drowning lesson material. b. Major Teaching Points: (1) Definitions (2) Types of drowning (3) Physiology of drowning or near-drowning (4) Symptoms/Signs of water aspiration (5) First aid for drowning and water aspiration

DISCUSSION POINT RELATED INSTRUCTOR ACTIVITY
3.2-4
PRESENTATION A. Definitions 1. Drowning: Defined as suffocation by submersion in
a liquid.
2. Near-drowning: When the victim survives, at least
temporarily, after suffocation by submersion in a liquid.
3. Aspiration: A drawing of foreign matter in the upper
respiratory tract into the lungs with a breath.
B. Types of Drowning 1. Dry-drowning . a. Makes up 10-15% of all drowning or near-drowning b. Caused by persistent laryngeal spasm after
aspirating water
c. Only small amounts of water enter the lungs d. Can result in death due to asphyxiation 2. Wet Drowning a. Makes up 85-90% of all drowning or near-drowning b. Caused by relaxation of the laryngeal spasms
which occurred when water was aspirated
c. Large amounts of water flood the lungs. d. Can result in death due to poor oxygen transport
from the drowned lung into the bloodstream
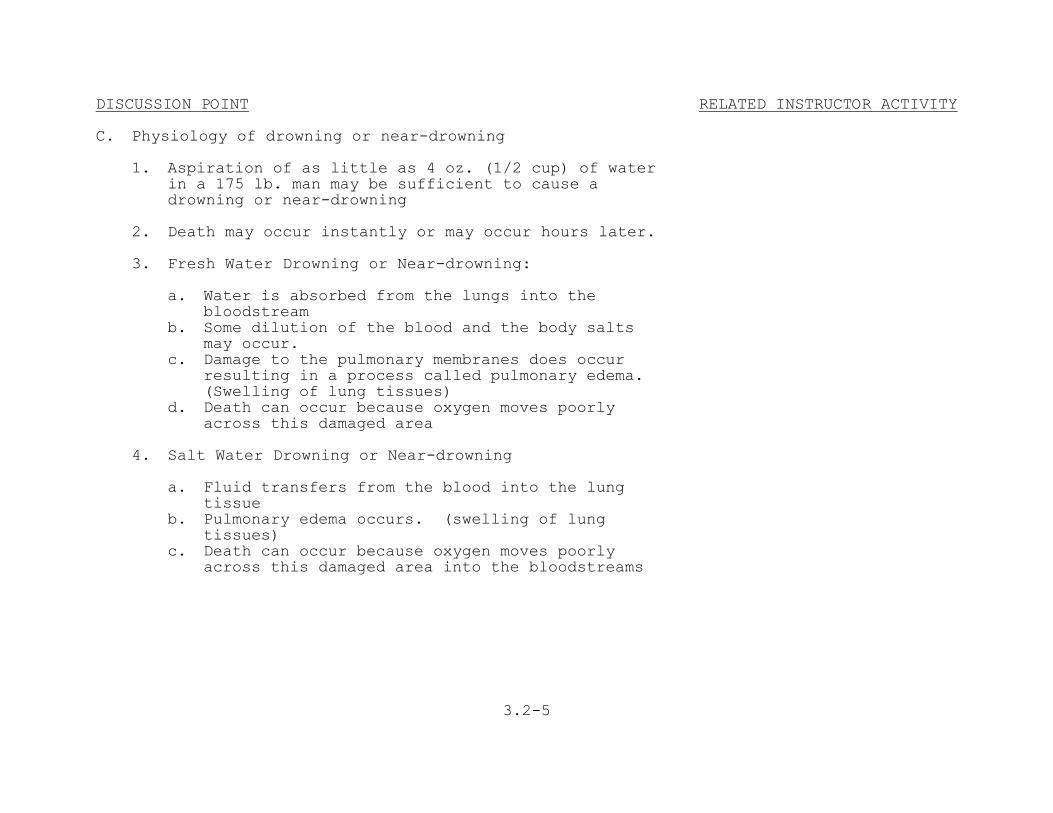
DISCUSSION POINT RELATED INSTRUCTOR ACTIVITY
3.2-5
C. Physiology of drowning or near-drowning 1. Aspiration of as little as 4 oz. (1/2 cup) of water
in a 175 lb. man may be sufficient to cause a drowning or near-drowning
2. Death may occur instantly or may occur hours later. 3. Fresh Water Drowning or Near-drowning: a. Water is absorbed from the lungs into the
bloodstream
b. Some dilution of the blood and the body salts may occur.
c. Damage to the pulmonary membranes does occur resulting in a process called pulmonary edema. (Swelling of lung tissues)
d. Death can occur because oxygen moves poorly across this damaged area
4. Salt Water Drowning or Near-drowning a. Fluid transfers from the blood into the lung
tissue
b. Pulmonary edema occurs. (swelling of lung tissues)
c. Death can occur because oxygen moves poorly across this damaged area into the bloodstreams

DISCUSSION POINT RELATED INSTRUCTOR ACTIVITY
3.2-6
D. Symptoms/Signs of Water Aspiration 1. Instructors shall be alert for these signs and
symptoms because they will must be able to identify a drowning or a near-drowning victim:
a. Uncontrollable coughing b. Rapid breathing c. Shortness of breath d. Pain in the chest e. Bloody, frothy sputum at the mouth or nose
(especially with salt water aspiration)
f. Cyanosis: blue tint of lips, skin (face), under fingernails.
g. Neurologic Symptoms (1) Dilated pupils (variable) (2) Unconsciousness (3) Convulsions (4) Confusion E. First Aid For Drowning and Water Aspiration 1. Administer rescue breathing/CPR if needed 2. Administer oxygen if properly trained to do so 3. Treat victim for shock 4. Seek Advanced Life Support care immediately

DISCUSSION POINT RELATED INSTRUCTOR ACTIVITY
3.2-7
SUMMARY AND REVIEW A. State Lesson Objectives. Turn to cover page for
objectives B. Review Major Teaching Points. Briefly summarize. APPLICATION None EVALUATION Performance test ASSIGNMENT None

3.3-1
LESSON PLAN January 2005 COURSE TITLE: Basic Swimming and Water
Survival Instructor Training Course, A-012-1014
TERMINAL OBJECTIVE: Completely supported by this lesson topic:
CLASSIFICATION: Unclassified LESSON PLAN NUMBER: 3.3 LESSON TOPIC: Teaching and Performing
Extended Sea Survival ALLOTTED LESSON TIME: 1.0 Classroom
3.0 Upon completion of this unit of instruction, the student will demonstrate knowledge of subject matter, curricula, policies and procedures necessary of a Navy Basic Water Survival Instructor without injury to personnel or damage to equipment.
ENABLING OBJECTIVES:INSTRUCTIONAL SUPPORT: Completely supported by this lesson topic:
1 Classroom Instructor 3.13 Name the standard naval life rafts.
INSTRUCTIONAL REFERENCE: 3.14 Describe the methods for righting and
boarding life rafts. 1. U.S. Navy Water Survival Instructor’s
Manual 2. Naval Aviation Water Survival
3.15 State the important elements for survival at sea.
Instructor’s Manual NAVOPMEDPUB P-1550-1 3. Video: Life rafts and Contents
3.16 Explain the personal priorities
during extended sea survival. PIN # 805551 INSTRUCTIONAL AIDS:
3.17 Identify the signs and symptoms of hypothermia.
3.18 Explain the procedures for prevention of hypothermia. 1. Video: Life rafts and Contents
Pin # 805551

DISCUSSION POINT RELATED INSTRUCTOR ACTIVITY
3.3-2
3.19 Identify the signs and symptoms of heat stress and the procedures for prevention.
3.20 Describe the procedures for procuring additional water and food.
3.21 State signs of land. 3.22 Explain the techniques for rafting
ashore.
CRITERION TEST:
Written exam at end of course HOMEWORK:
None

DISCUSSION POINT RELATED INSTRUCTOR ACTIVITY
3.3-3
INTRODUCTION A. Establish Contact Display name and lesson
topic. 1. Introduce self, give rank, current job. 2. State background, schools, duty stations, etc. 3. State question and answer policy. B. State Lesson Objectives Turn to cover page of
Lesson Plan and paraphrase objectives.
C. Establish Readiness 1. Motivating Statements 2. Lesson overview a. Lesson Topic: Teaching and Performing Extended
Sea Survival
State how and why students need to know the lesson material.
b. Major Teaching Points: (1) Types of Naval Life Rafts (2) Righting/Boating Procedures (3) Life raft Survival Equipment (4) Preparation for Successful Survival (5) Life Raft Organization

DISCUSSION POINT RELATED INSTRUCTOR ACTIVITY
3.3-4
PRESENTATION
Display wall charts or raft.
A. Types of Naval Life Rafts 1. LR-1 Life Raft Assembly 2. LRU-18/U Life Raft Assembly 3. LRU-12/A and LRU-13/A (four/seven man) Life Raft
Assembly. 4. LRU-14/A (12man) Life Raft Assembly
Show reference #3 video and explain that this only covers a portion of the rafts that are available to the fleet.
5. LRU-15/A (20man) Life Raft Assembly B. Righting/Boarding Procedures Explained in the video. 1. Righting Procedures 2. Boarding Procedures C. Life raft Survival Equipment Explained in the video. 1. Sea dye markers 2. Flares (MK-13 MOD O/MK124 MOD O/MK-79 MOD O) 3. Water storage bags 4. Canned water 5. Can opener 6. First Aid Kit 7. Sunburn preventive cream 8. Food packet 9. Bailing sponges\buckets
Explain when stocks of canned water are depleted it will be replaced with plastic water bags. explain/demonstrate “slap test”.
10. Hand pump for raft
Tap the top of the can like you would for checking home canned goods.

DISCUSSION POINT RELATED INSTRUCTOR ACTIVITY
3.3-5
11. Lighting a. Hand generated b. SDU-5/E strobe c. SDU-30 matrix d. Flashlights e. Chemical
12. Canopy rib assembly (only applicable rafts) 13. Sectional oars 14. Patching material (adhesive/mechanical) 15. Signal mirror 16. Survival blankets 17. Ground/Air Emergency code card 18. Whistle 19. Compass 20. Pocket knife 21. Nylon utility cord D. Preparation for successful survival 1. Important factors Page 12.9 of ref. 2. a. Mental attitude b. Physical conditioning E. Priorities 1. Flotation a. Life raft b. LPU/Kapok c. Clothing d. Floating debris

DISCUSSION POINT RELATED INSTRUCTOR ACTIVITY
3.3-6
2. First Aid Page 12.13-18 of ref. 2.
a. CPR b. Bleeding c. Shock d. Fractures 3. Shelter a. Hypothermia Pages 12.3-7, 12.16 of Ref. 2.
(1) Signs (2) High Heat Loss Areas (3) Protection b. Heat Stress Pages 12.16, 12.18 of ref 2.
(1) Dehydration (2) Burns (3) Heat exhaustion (4) Heat stroke (5) Protection c. Water Page 12.21 of ref. 2 (1) Bottled/Canned (2) Sea ice d. Food Page 12.21 of ref 2. (1) Fish (2) Birds (3) Seaweed/Plankton

DISCUSSION POINT RELATED INSTRUCTOR ACTIVITY
3.3-7
4. Communications a. Radios/Beacons b. Flares c. Sea dye marker d. Whistle e. Signal mirror F. Life Raft Organization Page 12.11 of ref 2. 1. Leader 2. Assignments a. First Aid b. Communications c. Lookout d. Sea Anchor Tender e. Morale f. Bailer g. CO2 Tender h. Log Keeper 3. Signs of Land Page 12.8 of ref 2. a. Cloud Formations b. Birds at sunset c. Floating Debris d. Sounds e. Discoloration of the Sky 4. Rafting Ashore Approach land from downwind side

DISCUSSION POINT RELATED INSTRUCTOR ACTIVITY
3.3-8
SUMMARY AND REVIEW A. State lesson objectives
Turn to cover page for objectives.
B. Review major teaching points. Briefly summarize. APPLICATION None EVALUATION Written exam at end of course ASSIGNMENT Read Chapter 2 of U.S. Navy Water Survival Instructor’s Manual.

3.4-1
LESSON PLAN January 2005 COURSE TITLE: Basic Swimming and Water
Survival Instructor Training Course, A-012-1014
TERMINAL OBJECTIVE: Completely supported by this lesson topic:
CLASSIFICATION: Unclassified LESSON PLAN NUMBER: 3.4 LESSON TOPIC: Application of Educational
Theory When Teaching Water Survival Skills
ALLOTTED LESSON TIME: 1.0 Classroom
3.0 Upon completion of this unit of instruction, the student will demonstrate knowledge of subject matter, curricula, policies and procedures necessary of a Navy Basic Water Survival Instructor without injury to personnel or damage to equipment.
ENABLING OBJECTIVES:INSTRUCTIONAL SUPPORT: Completely supported by this lesson topic:
1 Classroom Instructor 3.23 Explain educational theory that
applies to teaching aquatics.
INSTRUCTIONAL REFERENCE: CRITERION TEST: U.S. Navy Water Survival Instructor’s Manual
Written exam at end of course
INSTRUCTIONAL AIDS:
HOMEWORK:
U.S. Navy Water Survival Instructor’s Manual
Read Chapter 2 of reference.
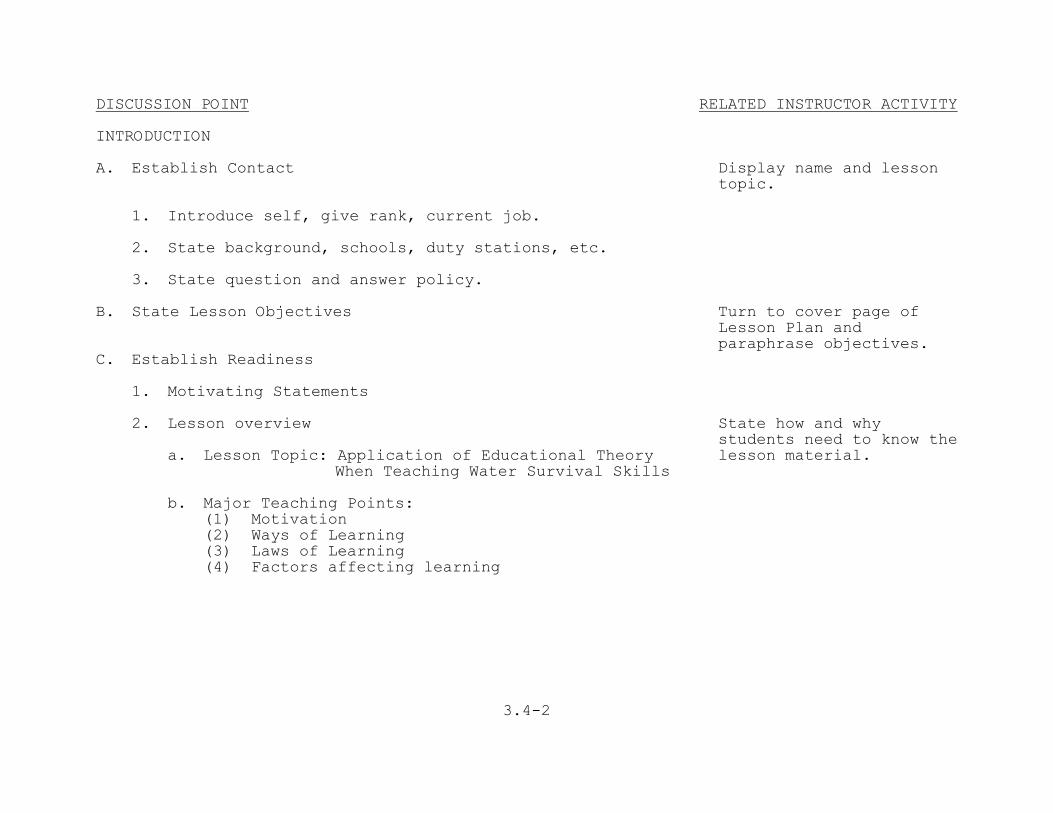
DISCUSSION POINT RELATED INSTRUCTOR ACTIVITY
3.4-2
INTRODUCTION A. Establish Contact Display name and lesson
topic. 1. Introduce self, give rank, current job. 2. State background, schools, duty stations, etc. 3. State question and answer policy. B. State Lesson Objectives Turn to cover page of
Lesson Plan and paraphrase objectives.
C. Establish Readiness 1. Motivating Statements 2. Lesson overview a. Lesson Topic: Application of Educational Theory
When Teaching Water Survival Skills
State how and why students need to know the lesson material.
b. Major Teaching Points: (1) Motivation (2) Ways of Learning (3) Laws of Learning (4) Factors affecting learning

DISCUSSION POINT RELATED INSTRUCTOR ACTIVITY
3.4-3
PRESENTATION A. Motivation Simply stated, this theory proposes that individuals
accomplish higher order needs only after all lower order needs have been relatively well satisfied.
1. Included in lower needs are: a. Physiological requirements b. Safety 2. Included in higher needs are: a. Desire for knowledge b. Self-actualization c. Aesthetics 3. Application of motivational theory a. Needs and drives Ensure that basic needs are met before
expecting students to master survival skills.
(1) Warmth (2) Comfort in the water (3) Lack of apprehension (4) Ability to get a breath (5) Ability to float
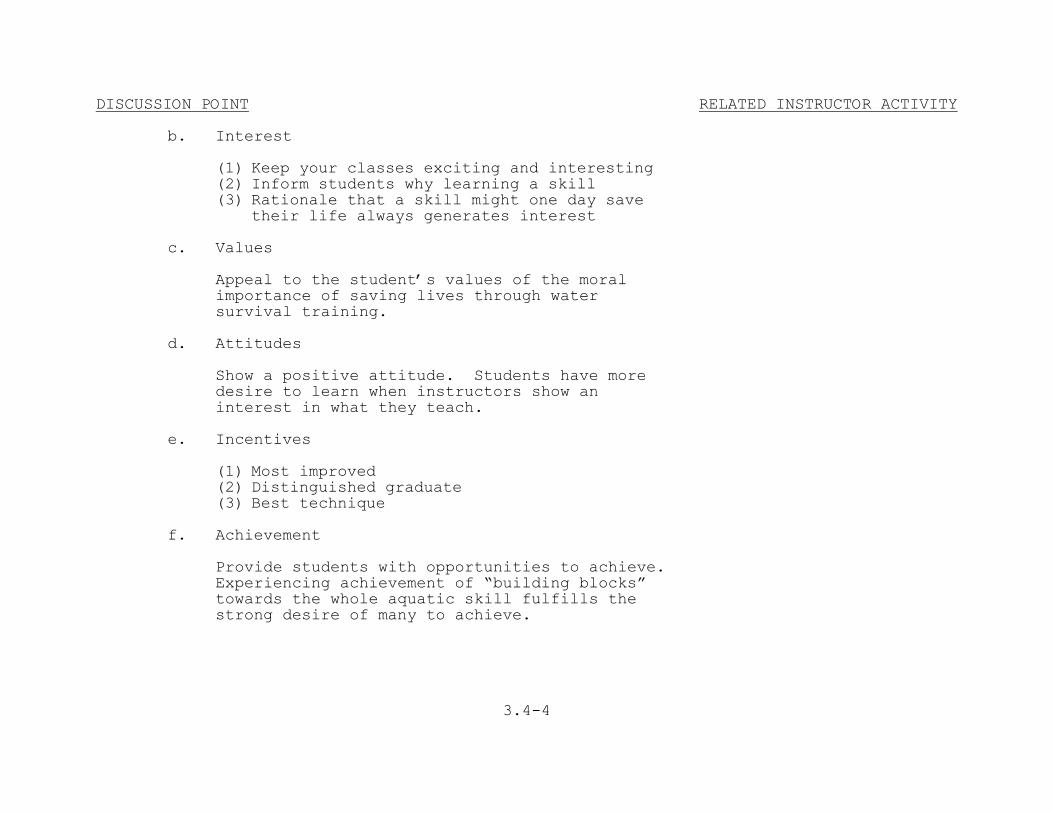
DISCUSSION POINT RELATED INSTRUCTOR ACTIVITY
3.4-4
b. Interest (1) Keep your classes exciting and interesting (2) Inform students why learning a skill (3) Rationale that a skill might one day save
their life always generates interest
c. Values Appeal to the student’s values of the moral
importance of saving lives through water survival training.
d. Attitudes Show a positive attitude. Students have more
desire to learn when instructors show an interest in what they teach.
e. Incentives (1) Most improved (2) Distinguished graduate (3) Best technique f. Achievement Provide students with opportunities to achieve.
Experiencing achievement of “building blocks” towards the whole aquatic skill fulfills the strong desire of many to achieve.

DISCUSSION POINT RELATED INSTRUCTOR ACTIVITY
3.4-5
B. Ways of Learning 1. Imitation Demonstrations of water skills must be accurate and
thorough to provide a precise role model for student to imitate.
2. Trial and Error a. Effective learning technique if students
receive proper supervision, reinforcement of correct procedures and immediate feedback on how to correct errors.
b. Ensure labs and practice sessions are staffed with instructors who can correct students when they make mistakes.
c. Trial and error can be unsafe in the aquatic environment unless students are carefully monitored.
3. Association Association is a comparison of past learning to a
new learning situation.
a. Look for similar movements and techniques that
students already know to assist learning new water skills.
b. EX: the side stroke arm action is similar to picking apples and putting them into a basket, the kick is similar to the movement of the blades of scissors.

DISCUSSION POINT RELATED INSTRUCTOR ACTIVITY
3.4-6
4. Insight a. Insight is the understanding that the whole is
more than the sum of the parts. This term describes a person’s unplanned discovery of a solution to a problem and is often referred to as the “ah-ha” phenomena.
b. Providing the student with a total description
of how the body moves through the water when swimming often helps the student with arm, leg, and timing problems because they can visualize the purpose of the motions instead of just trying to master the movements themselves.
5. Transfer The process of applying past learning to new but
somewhat similar situations a
a. Applying the knowledge of the elementary
backstroke kick assists swimmers to develop the breaststroke kick.
b. Mastery of crawl stroke breathing assists student when learning breaststroke breathing.
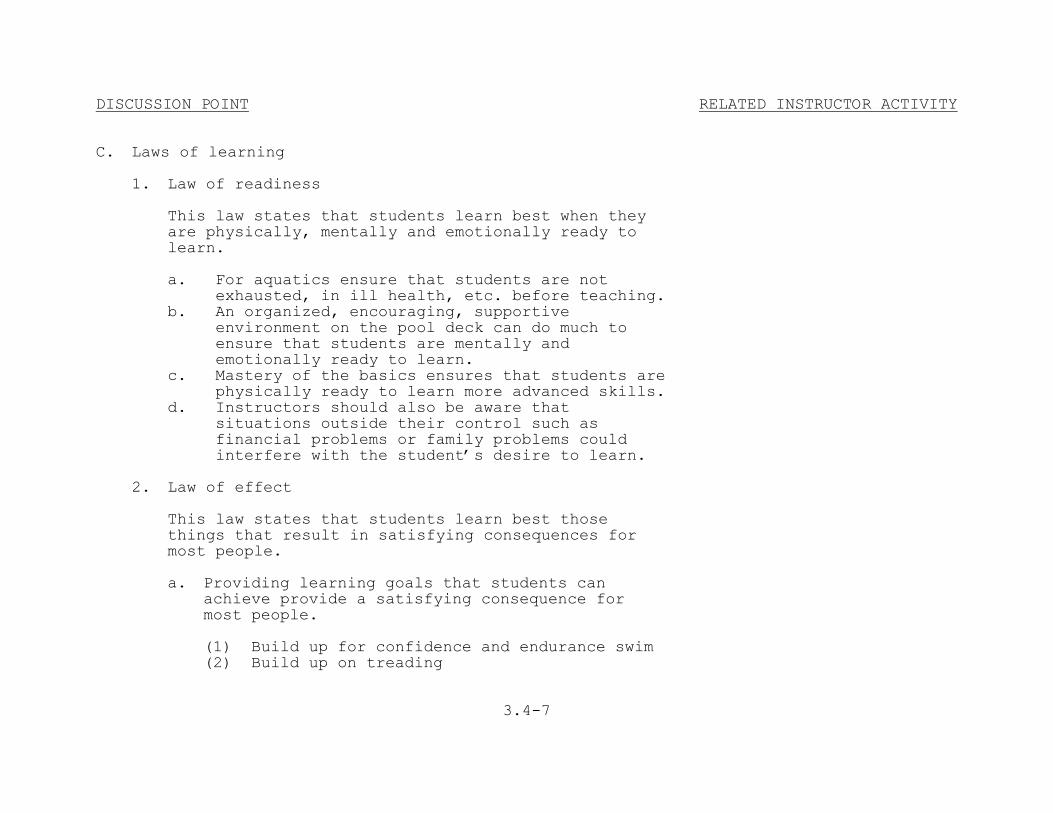
DISCUSSION POINT RELATED INSTRUCTOR ACTIVITY
3.4-7
C. Laws of learning 1. Law of readiness This law states that students learn best when they
are physically, mentally and emotionally ready to learn.
a. For aquatics ensure that students are not
exhausted, in ill health, etc. before teaching.
b. An organized, encouraging, supportive environment on the pool deck can do much to ensure that students are mentally and emotionally ready to learn.
c. Mastery of the basics ensures that students are physically ready to learn more advanced skills.
d. Instructors should also be aware that situations outside their control such as financial problems or family problems could interfere with the student’s desire to learn.
2. Law of effect This law states that students learn best those
things that result in satisfying consequences for most people.
a. Providing learning goals that students can
achieve provide a satisfying consequence for most people.
(1) Build up for confidence and endurance swim (2) Build up on treading
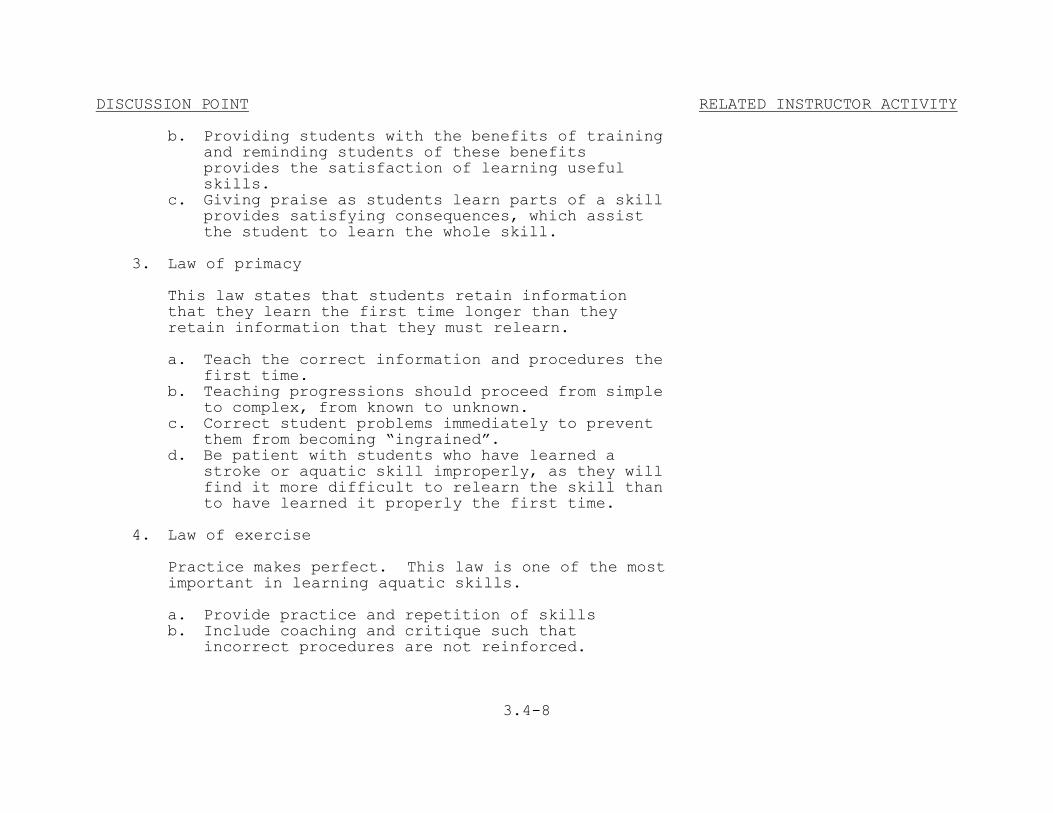
DISCUSSION POINT RELATED INSTRUCTOR ACTIVITY
3.4-8
b. Providing students with the benefits of training and reminding students of these benefits provides the satisfaction of learning useful skills.
c. Giving praise as students learn parts of a skill provides satisfying consequences, which assist the student to learn the whole skill.
3. Law of primacy This law states that students retain information
that they learn the first time longer than they retain information that they must relearn.
a. Teach the correct information and procedures the
first time.
b. Teaching progressions should proceed from simple to complex, from known to unknown.
c. Correct student problems immediately to prevent them from becoming “ingrained”.
d. Be patient with students who have learned a stroke or aquatic skill improperly, as they will find it more difficult to relearn the skill than to have learned it properly the first time.
4. Law of exercise Practice makes perfect. This law is one of the most
important in learning aquatic skills.
a. Provide practice and repetition of skills b. Include coaching and critique such that
incorrect procedures are not reinforced.
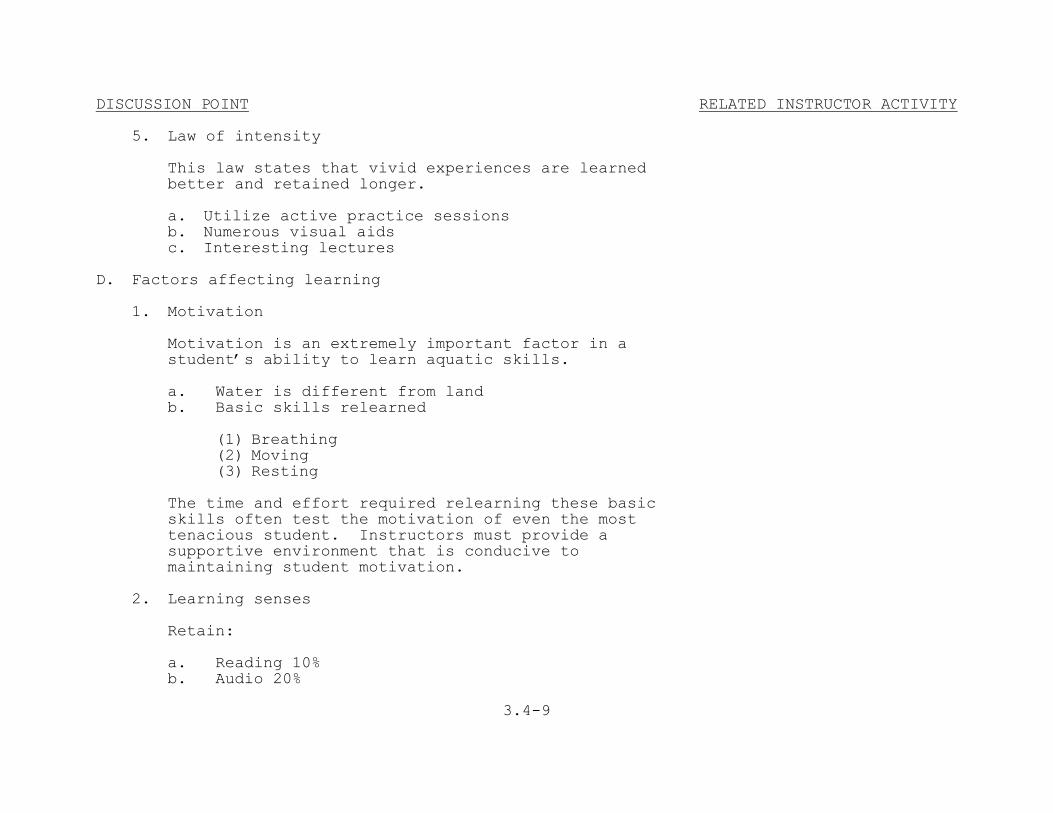
DISCUSSION POINT RELATED INSTRUCTOR ACTIVITY
3.4-9
b. Audio 20%
5. Law of intensity This law states that vivid experiences are learned
better and retained longer.
a. Utilize active practice sessions b. Numerous visual aids c. Interesting lectures D. Factors affecting learning 1. Motivation Motivation is an extremely important factor in a
student’s ability to learn aquatic skills.
a. Water is different from land b. Basic skills relearned (1) Breathing (2) Moving (3) Resting The time and effort required relearning these basic
skills often test the motivation of even the most tenacious student. Instructors must provide a supportive environment that is conducive to maintaining student motivation.
2. Learning senses Retain: a. Reading 10%

DISCUSSION POINT RELATED INSTRUCTOR ACTIVITY
3.4-10
c. Visual 30% d. Audio and visual 50% Stimulation of many senses is the key to learning. 3. Individual differences When teaching aquatics, instructors must be
sensitive to variances that may affect learning.
a. Negative buoyant student may find floating
skills difficult but may find underwater skills easy.
b. Instructors should realize that some skills might be more difficult for some people to learn based on buoyancy or even body build.
c. Many students are raised learning to avoid the water.
d. Backgrounds of this nature often make learning water skills more difficult than for students who were raised with encouragement to swim and participate in water sports.
4. Learning styles Most people prefer one of the five styles of
learning, but use all of the basic learning styles to some extent based on the situation.
a. Concrete learners Prefer an experience-based approach to learning.
They like to be involved with the “real thing” These students prefer to see an aquatic skill demonstration and then try it on their own.

DISCUSSION POINT RELATED INSTRUCTOR ACTIVITY
3.4-11
b. Active learners Learn by taking an active step-by-step approach.
Trail-and –error learning appeals to them. They prefer to learn an aquatic skill by systematically trying out several procedures before figuring out how to perform the skill properly.
c. Reflective learners Observe and make comparisons and contrasts
before drawing conclusions. They learn best from lectures, films, and reading. They prefer to analyze their observations before attempting to try an aquatic skill.
d. Abstract learners Prefer a theory-based analytical approach to
learning. They want to read about the principles behind an aquatic skill and to analyze concepts involved in performing the sill before trying the skill itself.
Research has shown that students learn best and retain
information longer when they are exposed to all four learning styles. Up to 90% retention.
DISCUSSION POINT RELATED INSTRUCTOR ACTIVITY
3.4-12
SUMMARY AND REVIEW A. State lesson objectives
Turn to cover page for objectives.
B. Review major teaching points. Briefly summarize. APPLICATION None EVALUATION Written exam at end of course ASSIGNMENT Read Chapter 3 of U.S. Navy Water Survival Instructor’s Manual.

3.5-1
LESSON PLAN January 2005 COURSE TITLE: Basic Swimming and Water
Survival Instructor Training Course, A-012-1014
TERMINAL OBJECTIVE: Completely supported by this lesson topic:
CLASSIFICATION: Unclassified LESSON PLAN NUMBER: 3.5 LESSON TOPIC: Application of Physical
Principles When Teaching Water Survival Skills
ALLOTTED LESSON TIME: 1.0 Classroom
3.0 Upon completion of this unit of instruction, the student will demonstrate knowledge of subject matter, curricula, policies and procedures necessary of a Navy Basic Water Survival Instructor without injury to personnel or damage to equipment.
ENABLING OBJECTIVES:INSTRUCTIONAL SUPPORT: Completely supported by this lesson topic:
1 Classroom BSWIC Instructor 3.24 Explain physical principles that
apply to teaching aquatics. INSTRUCTIONAL REFERENCE:
CRITERION TEST:
U.S. Navy Water Survival Instructor’s Manual
Written exam at end of course
INSTRUCTIONAL AIDS:
HOMEWORK:
U.S. Navy Water Survival Instructor’s Manual
Read Chapter 3 of reference.

DISCUSSION POINT RELATED INSTRUCTOR ACTIVITY
3.5-2
(11) Law of levers
INTRODUCTION A. Establish Contact Display name and lesson
topic. 1. Introduce self, give rank, current job. 2. State background, schools, duty stations, etc. 3. State question and answer policy. B. State Lesson Objectives Turn to cover page of
Lesson Plan and paraphrase objectives.
C. Establish Readiness 1. Motivating Statements 2. Lesson overview a. Lesson Topic: Application of Physical Principles
When Teaching Water Survival Skills
State how and why students need to know the lesson material.
b. Major Teaching Points: (1) Effects of the water on body temperature (2) Buoyancy (3) Specific gravity (4) Weight of water (5) Center of mass and center of buoyancy (6) Resistance to movement in the water (7) Laminar flow and paddle propulsion (8) Inertia (9) Law of acceleration (10) Law of action and reaction
DISCUSSION POINT RELATED INSTRUCTOR ACTIVITY
3.5-3
PRESENTATION A. Effects of the water on body temperature Heat is crucial to man’s environment. The human body
functions within a very narrow range of internal temperature and contains delicate mechanisms to control that temperature.
1. A swimmer’s experience with temperatures on land
does not give them a basis with which to evaluate the heat problems encountered in the water.
a. Temperatures below 80 degrees Fahrenheit in the
water is uncomfortable.
b. Below 72 degrees Fahrenheit can cause the body to lose heat faster than it can be replaced, leading to dangerous lowering of body core temperature.
2. Heat is transmitted from one place to another in
three ways:
a. Conduction b. Convection c. Radiation 3. Conduction and convection are responsible for the
more rapid cooling of a person in the water than on land, with conduction being the most significant to swimmers.

DISCUSSION POINT RELATED INSTRUCTOR ACTIVITY
3.5-4
4. Conduction Some substances such as iron, helium and water are
excellent conductors of heat. Some, like air, are very poor conductors.
a. A good conductor, if placed between a source of
heat and another substance, will rapidly transfer the heat from one substance to the other.
b. A poor conductor will insulate the substances and appreciably slow the transfer of heat.
c. Since water is a good conductor of heat, an unprotected swimmer can rapidly lose a great deal of body heat to the surrounding water by direct conduction.
d. Since air is a poor conductor much less body heat is lost to the surrounding atmosphere.
5. Convection Convection is the transmission of heat by the
movement of heated fluids.
a. Convection is the principle behind the operation
of most home-heating systems, which set up a flow of air currents based on the natural tendency of warm air to rise and cool air to fall.
b. A swimmer in the water can lose heat not only by
direct conduction to the water, but also by convection currents.

DISCUSSION POINT RELATED INSTRUCTOR ACTIVITY
3.5-5
c. The warmed water next to the swimmer’s body rises and is replace by colder water from below. The warm water then loses heat to the cooler surroundings. Once cooled, the water sinks, only to be warmed again by the swimmer as part of a continuing convection current cycle.
B. Buoyancy Because of buoyancy, the upward force that water exerts
on an object, the swimmer weighs very little, if anything in the water. This feeling of “weightlessness” has been utilized to train astronauts for space travel. Like the astronaut preparing for space travel, inexperienced swimmer may require more time and exposure to become acclimated to perform even the most basic skills in the water.
C. Specific gravity Water has a specific gravity of 1 The specific gravity
of other objects is compared to this number. Objects with a specific gravity of less than 1 float, while objects with a specific gravity greater than 1 sink.
Specific gravity among humans varies by muscle
mass, amount of fat and bone density.
D. Weight of water Because water is much heavier than air, the chest is
surrounded with more pressure than on land. This pressure makes inhaling at the surface of the water more difficult than on land.
DISCUSSION POINT RELATED INSTRUCTOR ACTIVITY
3.5-6
a. The swimmer must inhale more deeply to compensate for water pressure around the chest.
b. This explains why a swimmer’s snorkel is not
much longer than 12”; beyond this depth, the diaphragm muscles can seldom overcome the water pressure around the chest needed to get sufficient breath from a snorkel.
c. Learning to get an efficient air exchange or
“breath control” is perhaps the most essential skill for swimmers to master.
(1) Putting face in the water (2) Bobbing (3) Rhythmic breathing E. Center of mass and buoyancy 1. Center of mass is a point around which an object’s
mass is evenly distributed. For humans, the center of mass is usually located near the hips. Being land creatures, we coordinate our movements by keeping the center of mass balanced and supported.
2. An object’s center of buoyancy is a point around
which it buoyancy is evenly distributed. Because the lungs provide a large buoyant volume of air, most people’s center of buoyancy is located in the chest.
a. In the water, one’s position, motion and
coordination must be related to the center of buoyancy.
DISCUSSION POINT RELATED INSTRUCTOR ACTIVITY
3.5-7
b. The interaction between the center of mass in relationship to the center of buoyancy requires that swimmers must adjust to the simplest tasks such as standing, moving and floating.
F. Resistance to movement in the water Since water is denser than air the swimmer experiences
much more resistance to movement than on land. An object’s form, wave action, and friction contribute to the resistance to its movement through the water.
1. Streamlining in water reduces resistance caused by
the swimmer’s form.
2. Waves caused by water turbulence or the swimmer’s movement through the water produces resistance to swimming. Swimmers can reduce resistance caused by waves that they produce by strict attention to proper skill and technique.
3. The surface texture of the swimmer causes friction, which produces resistance to movement through the water.
4. Resistance is increased dramatically by wearing clothing while swimming.
G. Laminar flow and paddle propulsion 1. A ship is actually pulled, not pushed, through the
water because of the principle of laminar flow. As water moves over the turning propeller blade, its molecules that slow down because of drag create pressure against the blade, while those that speed up pull the propeller toward them with a force called lift. These two forces, lift and drag, propel the ship through the water.

DISCUSSION POINT RELATED INSTRUCTOR ACTIVITY
3.5-8
2. Unlike the ship with a propeller, a canoe is moved forward by the backward push of the paddle. The canoe’s type of motion is called paddle propulsion. Many instructors think that swimmers propel themselves through the water solely by paddle propulsion.
3. Analysis of stroke mechanics has shown that swim
strokes use either one or both forms of propulsion, with laminar flow producing the most efficient movement through the water.
H. Inertia 1. The law of inertia states three thing: a. Force is needed to move a resting body. b. Force is needed to stop a moving body c. Force is needed to change the direction of a
moving body.
2. Understanding static and dynamic inertia promotes
effective swimming. More energy is needed to start a stroke than to keep a stroke moving as the resting swimmer must overcome static inertia. It is more efficient to keep moving than to stop and start repeatedly to avoid repeatedly overcoming static inertia.
DISCUSSION POINT RELATED INSTRUCTOR ACTIVITY
3.5-9
3. Once moving, dynamic inertia allows the swimmer to
rest during glide strokes. Both static and dynamic inertia are the principles behind teaching a student to perfect a glide. Holding the glide allows the survival swimmer to rest because of dynamic inertia; but holding the glide too long may slow the swimmer down so much that they have to work harder to overcome static inertia.
4. As an instructor, you should perfect the student’s
gliding strokes with short rest that allow the swimmer to capitalize on dynamic inertia and at the same time keep static inertia from increasing the energy needed to swim. Emphasizing good streamlining during glides reduces form resistance, additionally helping the swimmer capitalize on the benefits of dynamic inertia.
I. Laws of acceleration The law of acceleration states that the speed of an
object is dependent on the amount of force applied to it and the direction of that force. There are two parts to this law.
1. If X amount of force produces Y amount of speed or
movement, the 2X amount of force will produce 2Y amount of speed or movement. The more force that you use in your stroke in the same direction that you are going, the faster you will swim.

DISCUSSION POINT RELATED INSTRUCTOR ACTIVITY
3.5-10
2. The effect of a force occurs inline with the direction in which the force is applied. Applying this part of the law to aquatics, to swim in a straight line one should direct all propulsive force in that direction. To change direction, one must change the direction of the force of the arms and legs.
J. Law of action and reaction This law states that every action has an equal and
opposite reaction. During paddle propulsion swimming strokes, as the arm pushes against the water, the water pushes back, providing resistance, which allows the swimmer to move forward.
K. Conservation of momentum Conservation of momentum explains why circular stroke
movement is more efficient for swimming than back and forth linear movement.
1. When you use linear movement in your strokes, force
is needed to stop moving in one direction to overcome dynamic inertia, and force is needed again to overcome static inertia as movement starts in another direction.
DISCUSSION POINT RELATED INSTRUCTOR ACTIVITY
3.5-11
2. Circular movements capitalize on dynamic energy by
avoiding forces needed to stop and start. Conservation of momentum explains why instructors often teach students to make believe they’re smoothing sand with their hands during treading water, to avoid fatigue and bobbing, or to “draw a heart” with the breaststroke to encourage non-jerky, non-fatiguing, smooth forward motion.
L. Laws of levers Applying the law of levers has helped researchers
analyze strokes to find the best limb positions and motions for effective swimming. The law of levers states that the product of the force and force arm is equal to the product of the resistance and resistance arms. The law of levers describes the interrelationships among four items.
1. Applied force When swimming the crawl stroke the arm acts as a
lever with the shoulder as the pivot point. The shoulder muscles are the applied force.
2. Force arm The length of bone between the shoulder and muscle
attachment is the force arm.
3. Encountered resistance Encountered resistance is water resistance against
the arm.
DISCUSSION POINT RELATED INSTRUCTOR ACTIVITY
3.5-12
4. Resistance arm The resistance arm is the distance from the shoulder
joint to the middle of the forearm. In the crawl stroke, bending the elbow shortens the resistance arm, reducing the force needed to propel the swimmer. For the same reason, bending the arms during treading water provides more upward force than straight arms.
DISCUSSION POINT RELATED INSTRUCTOR ACTIVITY
3.5-13
SUMMARY AND REVIEW A. State lesson objectives
Turn to cover page for objectives.
B. Review major teaching points. Briefly summarize. APPLICATION None EVALUATION Written exam at end of course ASSIGNMENT Read Chapter 11 of American Red Cross Swimming and Diving.

3.6-1
LESSON PLAN January 2005 COURSE TITLE: Basic Swimming and Water
Survival Instructor Training Course, A-012-1014
TERMINAL OBJECTIVE: Completely supported by this lesson topic:
CLASSIFICATION: Unclassified LESSON PLAN NUMBER: 3.6 LESSON TOPIC: Improving Swimming Speed
Through Training ALLOTTED LESSON TIME: 1.0 Classroom
3.0 Upon completion of this unit of instruction, the student will demonstrate knowledge of subject matter, curricula, policies and procedures necessary of a Navy Basic Water Survival Instructor without injury to personnel or damage to equipment.
ENABLING OBJECTIVES:INSTRUCTIONAL SUPPORT: Completely supported by this lesson topic:
1 Classroom Instructor 3.25 State techniques to improve swimming
speed. INSTRUCTIONAL REFERENCE:
CRITERION TEST:
American Red Cross Swimming and Diving Manual
Written exam at end of course
INSTRUCTIONAL AIDS:
HOMEWORK:
American Red Cross Swimming and Diving Manual
Read Chapter 11 of reference.

DISCUSSION POINT RELATED INSTRUCTOR ACTIVITY
3.6-2
INTRODUCTION A. Establish Contact Display name and lesson
topic. 1. Introduce self, give rank, current job. 2. State background, schools, duty stations, etc. 3. State question and answer policy. B. State Lesson Objectives Turn to cover page of
Lesson Plan and paraphrase objectives.
C. Establish Readiness 1. Motivating Statements 2. Lesson overview a. Lesson Topic: Improving Swimming Speed Through
Training
State how and why students need to know the lesson material.
b. Major Teaching Points: (1) Principles of Training (2) Training Techniques (3) Training Season (4) Open Water Competition

DISCUSSION POINT RELATED INSTRUCTOR ACTIVITY
3.6-3
PRESENTATION A. Principles of Training
Refer to pages 248-250 of reference
1. Specificity The principle of specificity states that the benefits
of exercise relate directly to the activity performed. A runner who trains on the track will not have much improvement in swimming performance. Specific arm muscles do most of the work in swimming, while specific leg muscles are used in running. Still, both activities improve one’s aerobic capacity.
2. Energy Systems Two energy systems supply energy to the muscles. a. Anaerobic energy system: Without oxygen (1) Uses the most rapidly available source of
energy (sugars and carbohydrates stored in the body for muscular activity)
(2) The anaerobic energy system is the primary source of energy for anaerobic exercise.
(3) A person who is fit is usually exercising anaerobically if the heart rate is above 85% level of intensity.
(4) For someone who is unfit or under-fit, exercise may be anaerobic at an intensity much less than 85% level of intensity.

DISCUSSION POINT RELATED INSTRUCTOR ACTIVITY
3.6-4
b. Aerobic energy system Oxygen using For longer lasting exercise, the aerobic energy
system gives the muscles energy.
(1) Breaks down carbohydrates, fats, and
proteins for energy.
(2) Body uses this system for sustained, rhythmic, physical exercise that requires additional effort by the heart and lungs to meet the increased demand by the skeletal muscles for oxygen.
3. The specific energy system the body uses in an
activity depends on how long and intense the activity is.
4. The benefits of training depend on which energy
system is being used.
a. Improvements in the aerobic energy system need
continuous, low to moderate intensity training.
b. Improvements in the anaerobic energy system heed high-intensity, short duration training.
Ex: If you are training to improve your sprint
performance, swimming repeated distances at low intensities is not effective. Swim short distances at high intensities.

DISCUSSION POINT RELATED INSTRUCTOR ACTIVITY
3.6-5
5. Neuromuscular changes At the level of muscles and nerves, one should focus
training on the patterns and speed of movements.
Ex: Training for a backstroke event, you should
train with the backstroke rather than the breaststroke.
a. To improve muscular strength of your upper body,
you should exercise those muscle groups by:
(1) Using pull buoys in some exercises to
concentrate on arm stroke technique
(2) Using resistance training focused on the upper body.
4. Overload Principle of overload states that a body system
improves only if the system is regularly worked at loads greater than normal.
a. You can increase muscular strength by lifting
weights, but the amount of weight must gradually increase if you want to continue increasing your strength.
b. You can increase muscular endurance by increasing the number of repetitions rather than the load.

DISCUSSION POINT RELATED INSTRUCTOR ACTIVITY
3.6-6
5. Progression As your body adapts to any work load, you should
gradually increase that level. You cannot improve more unless the load is raised above the original overload.
B. Training Techniques
Pages 251-253 of reference.
The following are several training techniques that you can use in your workouts to meet specific fitness and training goals. You can use them alone or in variation. Using different techniques also add variety to your workouts.
1. Over Distance This method involves swimming long distances with
moderate exertion with short or no rest periods. Over-distance training is used to improve your endurance. Your heart rate stays in the low to middle level of the target range for the whole swim. You can also use this for a warm-up activity.
2. Fartlek This method gets its mane from the Swedish word that
means, “speed play” and was popularized by runners. It breaks swims into slow and fast lengths of the pool, using the same stroke. It can make long swims more interesting and is good for developing speed and endurance at the same time.

DISCUSSION POINT RELATED INSTRUCTOR ACTIVITY
3.6-7
3. Interval Sets This is one of the most common swimming training
methods. Intervals are a series of repeat swims of the same distance and time interval. They give you a specific rest period between the time spent swimming. Used primarily in the main set of a workout, interval swimming is the best all-around method to develop both speed and endurance.
Ex: “8 X 100on 1:30” The first number
represents the number of times you repeat the distance. The second number is the distance of each swim in yards or meters, and the time is the total amount of time for the swim and rest.
4. Repetition This technique uses swim sets of the same distance
done at close to maximum effort (up to 90% of maximum), but with rest periods as long as or longer than you swim time. Repetition sets develop your speed and anaerobic capacity. This training method is used after you have developed a good aerobic base. It is usually used after the aerobic set as a muscular development set.
5. Sprints These are short; fast swims (100% of effort) to
simulate race conditions. The rest between sprints is usually long enough to let the heart return to its resting rate. Like repetition swims, sprints improve your anaerobic capacity.
DISCUSSION POINT RELATED INSTRUCTOR ACTIVITY
3.6-8
6. Straight sets With this method you swim at a steady speed
throughout the set. Monitoring your time helps you keep an even pace. Distance swimmers often use this method.
7. Negative split sets Negative splitting involves swimming the second half
of each swim period faster than the first half.
Ex: If you swim 200 yards four times, the second
100 should be faster than the first 100 in each repetition.
8. Descending sets Often confused with negative splitting, descending
sets refers to decreasing the time on successive swims. To swim 200 yards four times in a descending set, each 200 would be faster than the 200 preceding it.
9. Ladders Ladders are several swims with regular increases or
decreases in distance. For example, you swim a 25, then a 50, and finally a 75.
10. Pyramids A pyramid is a swim of regular increases and
decreases in distance.
DISCUSSION POINT RELATED INSTRUCTOR ACTIVITY
3.6-9
11. Broken swims Broken swims are timed swims that are faster than
your racing speed and are interrupted by short periods of rest (for ex. 10 seconds). A long rest follows such a swim. On completing the entire swim, you subtract the total time of rest from the final time to determine your swimming time. Broken swims are a highly motivating method of training because they simulate stress conditions of competition while yielding a swimming time that may be faster than your racing time for an actual event. Broken swims are often combined with other variations, such as negative splits or descending swims.
12. Dry land training 1. Dry land training is the use of training
techniques done out of the water to improve swimming skills. These techniques fall into two area:
a. Flexibility b. Resistance training 2. Done properly, resistance training builds both
strength and flexibility.
3. A half hour of resistance training 3X a week, combined with 15 minutes of stretching, can produce favorable results.
4. While most coaches prefer dry land training before a swimming workout, you can do it before or after your swim, depending on your schedule.
DISCUSSION POINT RELATED INSTRUCTOR ACTIVITY
3.6-10
C. Training Season
Pages 254-257 of reference.
Your training should follow three phases to culminate at your goal, the competitive event. The phase of training determines the type of workouts.
1. Early season phase a. 6-8 weeks long b. Focuses on general conditioning to build
foundation
c. Long, easy swims using various strokes to build endurance.
d. Swim at slower rate and make needed changes to your stroke technique, flip turns and breathing patterns.
e. Supplement with dry land exercise to improve strength, flexibility, and cardiovascular conditioning.
2. Mid-season phase a. 8-12 weeks long b. Start to tailor your training to your specific
goals.
c. Workouts increase in distance d. Pay more attention to fine tuning your strokes. e. Quality is the emphasis of the workout. f. Use dry land training at maintenance level

DISCUSSION POINT RELATED INSTRUCTOR ACTIVITY
3.6-11
3. Taper phase The last and shortest part of your training. a. 1-3 weeks b. Decrease swimming distances c. Raise intensity almost to racing speed d. Do more resting between sets e. Use broken swims and descending sets f. Practice starts and turns to improve technique D. Open water competition
Pages 258-263 of reference.
Triathlons and cross-training techniques have led more and more people to open water competitions. Open water swimmers need to consider the psychological and physical differences of open water. A swimmer may feel fear of being disoriented, of hazards in open water (rocks, sandbars, bites and stings from marine life).
1. Anytime you swim in open water you may be at risk
for hypothermia.
a. Be alert of possible hypothermia if the water
temperature is below 70 degrees Fahrenheit.
b. Constant shivering is an important warning signal.
c. An even more critical signal is loss of judgment, which can quickly worsen the effects of the cold.
DISCUSSION POINT RELATED INSTRUCTOR ACTIVITY
3.6-12
2. Following certain precautions helps prevent hypothermia.
a. Practice in cold water. Repeated exposure to
cold water acclimates the body.
b. Second insulate yourself. (1) Most body heat is lost through the head.
Wearing multiple swim caps or a neoprene swim cap helps hold the heat in.
(2) Wear a body suit or vest to insulate your body.
3. Training in the pool Training for open water is much like training for a
long-distance swim.
a. Train in the longest pool available or swim
around the perimeter of the pool.
b. Practice taking your goggles off and putting them on in the deep end without the support of the pool bottom or sides.
c. Practice releasing a cramp in the pool. 4. Training in open water For better or for worse, the best way to train for
open water swimming is by doing it.
a. Never swim alone; swim with a partner or ask the
lifeguard to keep an eye on you.
b. Be aware of certain characteristics of open water.

DISCUSSION POINT RELATED INSTRUCTOR ACTIVITY
3.6-13
(1) Open water is never as calm as the roughest, most crowded pool.
(2) To reduce roughness, recover your elbows higher and roll your shoulders more to keep from catching them on the waves.
c. Getting off course can be a problem in open
water.
(1) Stay on course by looking. You lift your
head after you breathe and before putting your face back in the water.
(2) Practice this in the pool before venturing out into open water.
(3) Alternating breathing or having a friend paddle alongside in a boat also will help you swim in a straight line.
5. The event itself The start of any open water event is usually
chaotic. Races with a lot of swimmers often use staggered stars.
a. If you are unsure of your time, start among
swimmers of moderate ability.
b. If you are too far forward for your ability, you will be in the way as better swimmers climb over and go around you.
c. Staying to the side of the pack means you may swim slightly farther to get on course, but you will avoid the jumble of swimmers in a mass start.
d. For safety, many meets use color-coded caps based on age or ability.

DISCUSSION POINT RELATED INSTRUCTOR ACTIVITY
3.6-14
e. If you are unsure of you ability, request a cap color to alert the lifeguards.
f. If you drop out of an open water event immediately notify the course officials so that everyone is accounted for at the end of the race.

DISCUSSION POINT RELATED INSTRUCTOR ACTIVITY
3.6-15
SUMMARY AND REVIEW A. State lesson objectives
Turn to cover page for objectives.
B. Review major teaching points. Briefly summarize. APPLICATION None EVALUATION Written exam at end of course ASSIGNMENT None

LESSON PLAN January 2005 COURSE TITLE: Basic Swimming and Water
Survival Instructor Training Course, A-012-1014
TERMINAL OBJECTIVE: Completely supported by this lesson topic:
CLASSIFICATION: Unclassified LESSON PLAN NUMBER: 3.7 LESSON TOPIC: Swimmer Qualifications, RTC
and OCS Curricula and other Navy Water Survival Training Programs
3.0 Upon completion of this unit of instruction, the student will demonstrate knowledge of subject matter, curricula, policies and procedures necessary of a Navy Basic Water Survival Instructor without injury to personnel or damage to equipment.
ALLOTTED LESSON TIME: 1.0 Classroom ENABLING OBJECTIVES:
INSTRUCTIONAL SUPPORT: Completely supported by this lesson topic:
1 Instructor INSTRUCTIONAL REFERENCE:
3.26 Describe the curricula and requirements for Navy officer and enlisted accession programs, small boat operators, BUDS and Dive School
1. U.S. Navy Water Survival Instructor’s Manual
CRITERION TEST:
2. MILSPERSMAN Art. 1410380 3. TPEB Curricula Safety Checklist
Written exam at end of course
INSTRUCTIONAL AIDS: HOMEWORK:
Chalkboard/Overhead None
3.7-1

DISCUSSION POINT RELATED INSTRUCTOR ACTIVITY
3.7-2
INTRODUCTION A. Establish Contact Display name and lesson
topic. 1. Introduce self, give rank, current job. 2. State background, schools, duty stations, etc. 3. State question and answer policy. B. State Lesson Objectives Turn to cover page of
Lesson Plan and paraphrase objectives.
C. Establish Readiness 1. Motivating Statements 2. Lesson overview a. Lesson Topic: Swimmer Qualifications, RTC and
OCS Curricula and other Navy Water Survival Training Programs
State how and why students need to know the Lesson material.
b. Major Teaching Points: (1) Navy’s swim qualification test (2) Test descriptions (3) Personnel authorized (4) Navy sites (5) Chain of command (6) TPEB Curricula Safety Checklist

DISCUSSION POINT RELATED INSTRUCTOR ACTIVITY
3.7-3
PRESENTATION A. Navy’s Swim Qualification Tests B. Test Descriptions Describe the test using
Chapter 13 and MILPERSMAN as a reference.
1. Manning, Facility, and Safety requirements Refer students to Chapter 13
2. Test grading Refer Students to Chapter 14
C. Personnel authorized to conduct Navy Swim Qualification
tests
1. Swim tester These individuals are usually located on board ship,
Fleet Training Centers, accession points, or are civilians contracted to conduct Navy Swim Qualification tests. A NETC Navy Swim instructor must train them. They are qualified to conduct the second and third class swim tests. They are not authorized to teach NETC swimming courses.
2. Naval Aviation Water Survival Instructor These individuals are swim instructors located at
BUMED aviation water survival training sites. They are qualified to conduct first, second and third class tests.

DISCUSSION POINT RELATED INSTRUCTOR ACTIVITY
3.7-4
3. Navy Basic Swimming And Water Survival Instructor These individuals are swim instructors located at
NETC commands involved with aquatic training. They are qualified to conduct first, second and third class swim tests and to train the Swim Tester.
D. Navy sites conducting swim qualification tests: 1. Locations conducting third class swim test a. Naval Aviation Schools Command Pensacola, FL b. Boost/NAPS, Newport RI c. Recruit Training Center Great Lakes, IL d. Fleet Training Center Norfolk, VA e. Fleet Training Center San Diego, CA f. Naval Reserve Professional Center NO. LA. g. Colleges with NROTC h. ATG Midpac, Pearl Harbor, HI 2. Locations conducting second class swim test: a. Recruit Training Center Great Lakes, IL b. Some Colleges with NROTC c. Fleet Training Center Norfolk, VA d. Fleet Training Group Norfolk, VA e. Fleet Training Center San Diego, CA f. Naval Aviation Schools Command Pensacola, FL g. Navy Dive School, Panama City, FL h. Ships with a Swim Tester i. MWR’s with a Swim Tester j. BUMED Aviation Water Survival Sites k. BUDS, San Diego, CA l. Fleet Training Center, Pearl Harbor, HI
DISCUSSION POINT RELATED INSTRUCTOR ACTIVITY
3.7-5
3. Locations conducting first class swim tests and Swim Tester Courses.
a. Fleet Training Center San Diego b. Naval Aviation Schools Command Pensacola, FL c. Boost/NAPS, Newport RI d. Recruit Training Center Great Lakes,IL e. Fleet Training Center Norfolk, VA f. Fleet Training Center Pearl Harbor, HI 4. Other courses Navy Swimming And Water Survival
Instructors are authorized to teach.
Instructors must successfully complete local
instructor orientation to be certified to teach the following list of courses:
a. Remedial Swim Q-9E-0010 b. Intermediate Swim Q-050-0605 c. Swimmer Certification Course K-060-2138 d. Third Class Swimmer build up course (CIN
Pending)
E. Chain of Command For Navy Swim Programs 1. CNO 2. NETC (Functional Commander) 3. NASC (Course Curricula Authority) 4. FTC San Diego/NASC (Model Managers) F. TPEB Curricula Safety Checklist 1. While developing any moderate risk training swim
programs, ensure you follow the guidelines as set forth in the NETC TPEB Curricula Safety Checklist
Hand out checklist and internet instructions

DISCUSSION POINT RELATED INSTRUCTOR ACTIVITY
3.7-6
located on the NETC webpage WWW.cnet.navy.mil

DISCUSSION POINT RELATED INSTRUCTOR ACTIVITY
3.7-7
SUMMARY AND REVIEW A. State lesson objectives Turn to cover page for objectives. B. Review major teaching points. Briefly summarize. APPLICATION None EVALUATION Written exam at end of course ASSIGNMENT None

3.8-1
LESSON PLAN January 2005 COURSE TITLE: Basic Swimming and Water
Survival Instructor Training Course, A-012-1014
TERMINAL OBJECTIVE: Completely supported by this lesson topic:
CLASSIFICATION: Unclassified LESSON PLAN NUMBER: 3.8 LESSON TOPIC: Oxygen Administration ALLOTTED LESSON TIME: 2.0 Classroom
3.0 Upon completion of this unit of instruction, the student will demonstrate knowledge of subject matter, curricula, policies and procedures necessary of a Navy Basic Water Survival Instructor without injury to personnel or damage to equipment.
INSTRUCTIONAL SUPPORT: ENABLING OBJECTIVES:
1 Qualified American Red Cross Emergency Response Instructor
Completely supported by this lesson topic:
Student/Staff ratio: Per current Red Cross Emergency Response Instructor’s manual
3.27 Perform Skills, knowledge, and written requirements of the American Red Cross Breathing Devices Module of the Emergency Response
course.
INSTRUCTIONAL REFERENCE: CRITERION TEST: American National Red Cross publications: Written exam at end of course 1. Emergency Response Instructor’s Manual
American Red Cross ISBN 0-8016-9013-7
HOMEWORK:
2. Oxygen Administration American Red Cross ISBN 0-8016-7276-7
None
DISCUSSION POINT RELATED INSTRUCTOR ACTIVITY
3.8-2
INSTRUCTIONAL AIDS:
Video:Emergency Response Stock Number 652019
Emergency Response color transparency #19 Emergency Response Transparency Masters #36-#39
Equipment:
See Lesson 14 American Red Cross Emergency Response Instructor’s Manual
DISCUSSION POINT RELATED INSTRUCTOR ACTIVITY
3.8-3
INTRODUCTION A. Establish Contact Display name and lesson
topic. 1. Introduce self, give rank, current job. 2. State background, schools, duty stations, etc. 3. State question and answer policy. B. State Lesson Objectives Turn to cover page of
Lesson Plan and paraphrase objectives.
C. Establish Readiness 1. Motivating Statements 2. Lesson overview a. Lesson Topic: Operational Risk Management
State how and why students need to know the lesson material.
b. Major Teaching Points: (1) Oxygen Administration Training

DISCUSSION POINT RELATED INSTRUCTOR ACTIVITY
3.8-4
PRESENTATION A. Oxygen Administration Training Use the current Red Cross
Emergency Response Instructor’s Manual to conduct this portion of the Navy Basic Water Survival Instructor Course.

DISCUSSION POINT RELATED INSTRUCTOR ACTIVITY
3.8-5
SUMMARY AND REVIEW A. State lesson objectives Turn to cover page for objectives. B. Review major teaching points. Briefly summarize. APPLICATION None EVALUATION Written exam at end of course ASSIGNMENT None

LESSON PLAN January 2005 COURSE TITLE: Basic Swimming and Water
Survival Instructor Training Course, A-012-1014
TERMINAL OBJECTIVE: Completely supported by this lesson topic:
CLASSIFICATION: Unclassified LESSON PLAN NUMBER: 3.9 LESSON TOPIC: Operational Risk Management ALLOTTED LESSON TIME: .5 Classroom
3.0 Upon completion of this unit of instruction, the student will demonstrate knowledge of subject matter, curricula, policies and procedures necessary of a Navy Basic Water Survival Instructor without injury to personnel or damage to equipment.
INSTRUCTIONAL SUPPORT: ENABLING OBJECTIVES: Completely supported by this lesson topic: 1 Classroom Instructor INSTRUCTIONAL REFERENCE:
3.28 Explain principles that apply to Operational Risk Management.
NETC Operational Risk Management Power CRITERION TEST: Point Presentation Written exam at end of course INSTRUCTIONAL AIDS:
HOMEWORK:NETC Operational Risk Management Power Point Presentation None
3.9-1
DISCUSSION POINT RELATED INSTRUCTOR ACTIVITY
3.9-2
INTRODUCTION A. Establish Contact Display name and lesson
topic. 1. Introduce self, give rank, current job. 2. State background, schools, duty stations, etc. 3. State question and answer policy. B. State Lesson Objectives Turn to cover page of
Lesson Plan and paraphrase objectives.
C. Establish Readiness 1. Motivating Statements 2. Lesson overview a. Lesson Topic: Operational Risk Management
State how and why students need to know the lesson material.
b. Major Teaching Points: (1) ORM Terms (2) 5-Step ORM Process (3) Causes of Risk (4) ORM Principles (5) Benefits of ORM (6) 3 Levels of ORM (7) Time-critical ORM
DISCUSSION POINT RELATED INSTRUCTOR ACTIVITY
3.9-3
PRESENTATION A. Operational Risk Management Use the Current NETC
Operational Risk Management Power point presentation.
B. ORM Terms 1. Hazard: A condition with the potential to cause personal
injury or death, property damage, or mission degradation.
2. Risk: An expression of possible loss in terms of severity
and probability.
3. Severity: The worst credible consequence which can occur as a
result of a hazard.
4. Probability: The likelihood that a hazard will result in a mishap
or loss.
a. Examples (1) Bad weather: High probability flight
operations cancelled.

DISCUSSION POINT RELATED INSTRUCTOR ACTIVITY
3.9-4
(2) Flock of Birds: Moderate chance of engine FOD
(3) Walking on top of slippery aircraft: Some chance of fall producing severe injury.
5. Risk Assessment The process of detecting hazards and assessing
associated risks.
6. Control: A method of reducing risk for an identified hazard
by lowering the probability of occurrence, decreasing potential severity, or both.
7. Operational Risk Management: The process of dealing with risk associated with
military operations, which includes risk assessment, risk decision-making, and implementation of effective risk controls.
C. Operational Risk Management Process 1. Identify hazards 2. Assess hazards 3. make risk decisions 4. Implement controls 5. Supervise 6. A decision making tool 7. Increases ability to make informed decisions 8. Reduces risks to acceptable levels

DISCUSSION POINT RELATED INSTRUCTOR ACTIVITY
3.9-5
D. Operational Risk Management Goal: To optimize operational capability and readiness by
managing risk to accomplish the mission with minimal loss.
E. Causes of Risk 1. Change (the “mother” of risk) 2. Resource constraints 3. New technology 4. Complexity 5. Stress 6. Societal constraints 7. Environmental influences 8. Human nature 9. Speed/Tempo of Operation 10. High energy levels F. Four ORM Principles 1. Accept risk when benefits outweigh the cost. 2. Accept no unnecessary risk. 3. Anticipate and manage risk by planning. 4. Make risk decisions at the right level. G. ORM vs. Non-standard Approach 1. Systematic vs. Random, Individual-Dependent 2. Proactive vs. Reactive 3. Integrates all types of risk into plan vs. Safety as
after-thought once plan is done
4. Common process terms vs. Non-standard 5. Conscious decision based on risk and benefit vs.
“Can Do” regardless of risk.
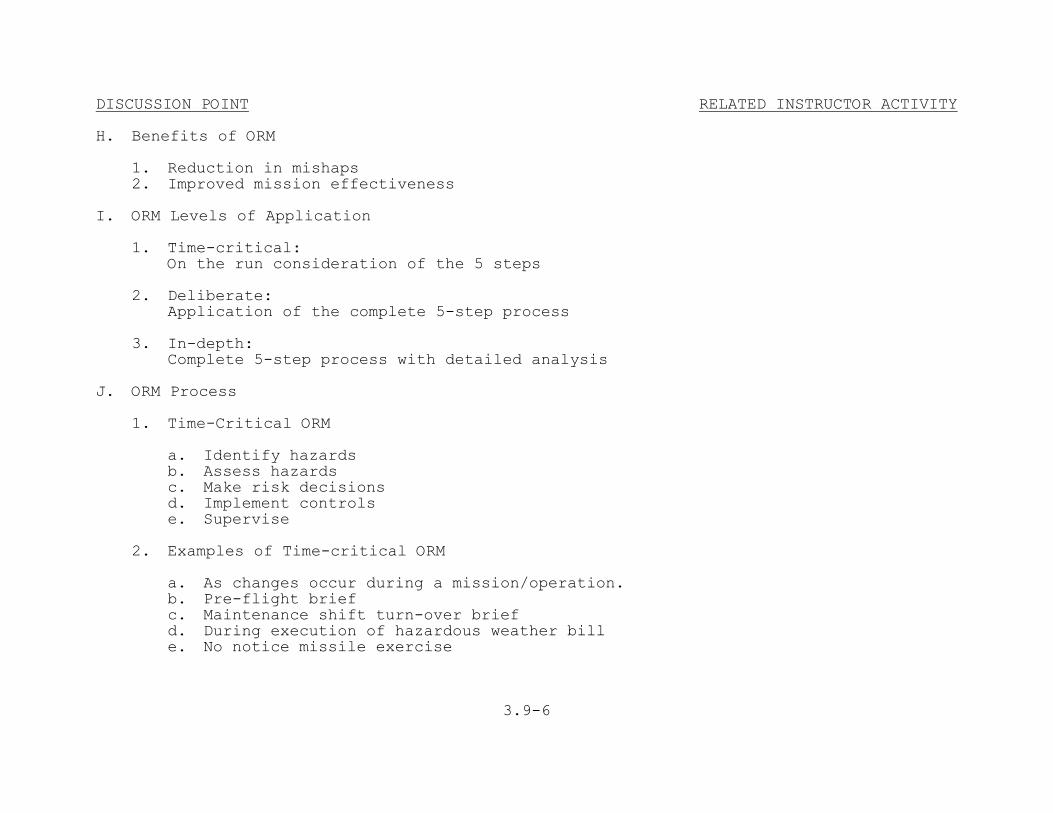
DISCUSSION POINT RELATED INSTRUCTOR ACTIVITY
3.9-6
H. Benefits of ORM 1. Reduction in mishaps 2. Improved mission effectiveness I. ORM Levels of Application 1. Time-critical: On the run consideration of the 5 steps 2. Deliberate: Application of the complete 5-step process 3. In-depth: Complete 5-step process with detailed analysis J. ORM Process 1. Time-Critical ORM a. Identify hazards b. Assess hazards c. Make risk decisions d. Implement controls e. Supervise 2. Examples of Time-critical ORM a. As changes occur during a mission/operation. b. Pre-flight brief c. Maintenance shift turn-over brief d. During execution of hazardous weather bill e. No notice missile exercise
DISCUSSION POINT RELATED INSTRUCTOR ACTIVITY
3.9-7
SUMMARY AND REVIEW A. State lesson objectives
Turn to cover page for objectives.
B. Review major teaching points. Briefly summarize. APPLICATION None EVALUATION Written exam at end of course ASSIGNMENT None

LESSON PLAN January 2005 COURSE TITLE: Basic Swimming and Water
Survival Instructor Training Course, A-012-1014
TERMINAL OBJECTIVE: Completely supported by this lesson topic:
CLASSIFICATION: Unclassified LESSON PLAN NUMBER: 3.10 LESSON TOPIC: Navy Integrated Training
Resources Administration System (NITRAS)
ALLOTTED LESSON TIME: .5 Classroom
3.0 Upon completion of this unit of instruction, the student will demonstrate knowledge of subject matter, curricula, policies and procedures necessary of a Navy Basic Water Survival Instructor without injury to personnel or damage to equipment.
INSTRUCTIONAL SUPPORT: ENABLING OBJECTIVES: Completely supported by this lesson topic: 1 Classroom Instructor INSTRUCTIONAL REFERENCE:
3.29 Explain basic principles that apply to Navy Integrated Training Resources Administration System (NITRAS).
NETCINST 1510.1F CRITERION TEST:
Written exam at end of course HOMEWORK:
None
3.10-1
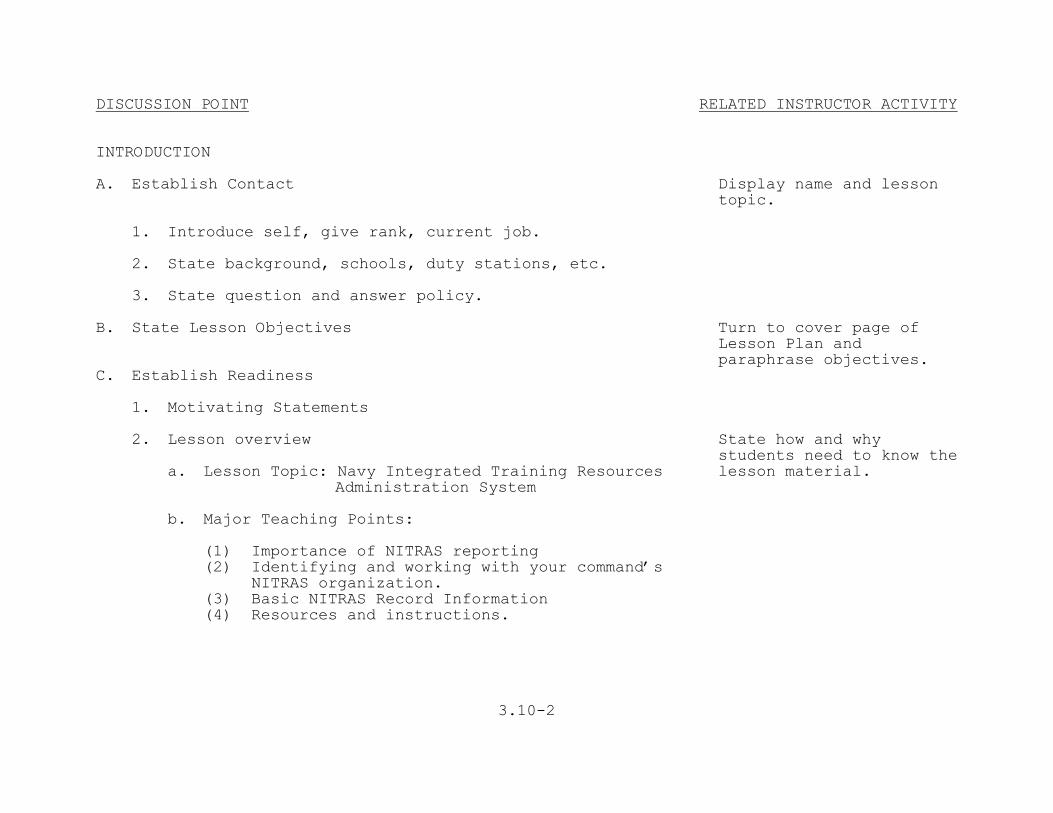
DISCUSSION POINT RELATED INSTRUCTOR ACTIVITY
3.10-2
INTRODUCTION A. Establish Contact Display name and lesson
topic. 1. Introduce self, give rank, current job. 2. State background, schools, duty stations, etc. 3. State question and answer policy. B. State Lesson Objectives Turn to cover page of
Lesson Plan and paraphrase objectives.
C. Establish Readiness 1. Motivating Statements 2. Lesson overview a. Lesson Topic: Navy Integrated Training Resources
Administration System
State how and why students need to know the lesson material.
b. Major Teaching Points: (1) Importance of NITRAS reporting (2) Identifying and working with your command’s
NITRAS organization.
(3) Basic NITRAS Record Information (4) Resources and instructions.

DISCUSSION POINT RELATED INSTRUCTOR ACTIVITY
3.10-3
12. Attrite and reason for attrition.
PRESENTATION A. Navy Integrated Training Resources Administration System
(NITRAS)
B. Importance of NITRAS Reporting 1. Course Documentation 2. Manning Requirements 3, Funding for equipment and resources C. Identifying and working with your command’s NITRAS
organization
Find out who in your command is responsible for nitras
reporting. Ensure your classes are reported to this individual who usually works in CISO.
D. Basic NITRAS records information Many commands have software programs for recording this
information.
1. Name 2. SSN 3. Command 4. UIC 5. CDP/CIN 6. Title of course 7. Student Status (Active, reserve) 8. Class Number 9. Class start and end date 10. Total number of hours 11. Graduate (Pass/Fail)
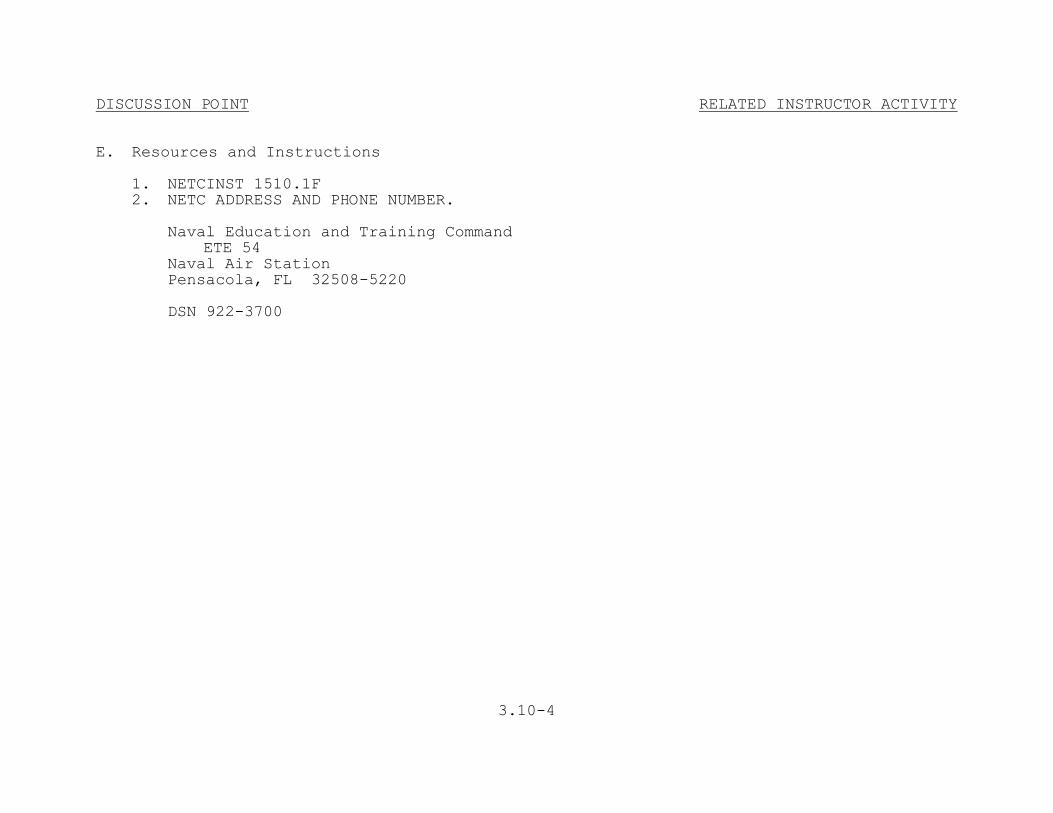
DISCUSSION POINT RELATED INSTRUCTOR ACTIVITY
3.10-4
E. Resources and Instructions 1. NETCINST 1510.1F 2. NETC ADDRESS AND PHONE NUMBER. Naval Education and Training Command ETE 54 Naval Air Station Pensacola, FL 32508-5220 DSN 922-3700

DISCUSSION POINT RELATED INSTRUCTOR ACTIVITY
3.10-5
SUMMARY AND REVIEW A. State lesson objectives
Turn to cover page for objectives.
B. Review major teaching points. Briefly summarize. APPLICATION None EVALUATION Written exam at end of course ASSIGNMENT None