Embed Size (px)
Citation preview
Home Urine Collection
January 2009

TABLE OF CONTENTS
Chapter Page
1 HOME URINE COLLECTION ...................................................................... 1-1
1.1 Background......................................................................................... 1-1 1.2 Overview of the Home Urine Collection Component (HUC) ............ 1-2
2 EQUIPMENT AND SUPPLIES...................................................................... 2-1
2.1 Equipment........................................................................................... 2-1 2.2 Supplies............................................................................................... 2-1 2.3 Inventory Management ....................................................................... 2-2 2.4 Urine Collection Kit Storage .............................................................. 2-3
3 HOME URINE COMPONENT EXAMINATION PROTOCOL ................... 3-1
3.1 Eligibility Criteria ............................................................................... 3-1 3.2 Examination Procedures ..................................................................... 3-2
3.2.1 Recruiting the Participant to Accept the Home Collection ............................................................................ 3-2 3.2.2 Procedures When the SP Accepts the Home Urine Collection Component ........................................................ 3-4 3.2.3 Kit Preparation .................................................................... 3-11 3.2.4 Urine Collection and Shipping Instructions ........................ 3-12 3.2.5 Packing the Urine Collection Kit for the SP to Take Home................................................................................... 3-13 3.2.6 Completing the Exam.......................................................... 3-13
List Appendixes
Appendix
A Talking Points & Home Collection Kit Preparation ........................................ A-1 B Cover Letters (English and Spanish) ............................................................... B-1 C Urine Collection Shipping Instructions (English and Spanish) ....................... C-1 D Sample Reminder Postcards (English and Spanish) ........................................ D-1
iii

iv
TABLE OF CONTENTS
List of Exhibits
Exhibit
2-1 Inventory par levels: home urine collection component .................................. 2-2 3-1 Home Urine Collection screen......................................................................... 3-5 3-2 Access the drop-down box............................................................................... 3-6 3-3 HUC Screen—SP answers “Yes.” ................................................................... 3-7 3-4 USPS Airbill on white Tyvek shipping envelope ............................................ 3-8 3.5 Hard-stop edit .................................................................................................. 3-8 3-6 USPS Airbill scanned successfully.................................................................. 3-9 3-7 Dymo label printout ......................................................................................... 3-9 3-8 Finish exam...................................................................................................... 3-13

1. HOME URINE COLLECTION
1.1 Background
NHANES is the source of national estimates of the prevalence of chronic kidney disease in
the United States. An estimated 7.69 percent of adults aged 20 or older (15.5 million adults) have
physiological evidence of chronic kidney disease determined as a moderately or severely reduced
glomerular filtration rate.1 The two main causes of chronic kidney disease are diabetes and high blood
pressure, which are responsible for up to two-thirds of the cases. The third most frequent cause of chronic
kidney disease, glomerulonephritis, is a group of diseases that cause inflammation and damage to the
kidney's filtering units. Other causes of chronic kidney diseases include:
Inherited diseases, such as polycystic kidney disease, which causes large cysts to form
in the kidneys and damage the surrounding tissue.
Malformations that occur as a baby develops in its mother's womb. For example, a narrowing may occur that prevents normal outflow of urine and causes urine to flow back up to the kidney. This causes infections and may damage the kidneys.
Lupus and other diseases that affect the body's immune system.
Obstructions caused by problems like kidney stones, tumors, or an enlarged prostate gland in men.
Repeated urinary infections.
Microalbuminuria, also referred to as proteinuria (protein excretion in the urine), is an
important indicator of early kidney disease. If a person has “persistent proteinuria” it means they have
chronic kidney disease. When kidney disease progresses, it may eventually lead to chronic kidney failure,
or end stage renal disease (ESRD), when the kidneys permanently fail to work. ESRD usually requires the
patient to undergo dialysis or a kidney transplant.
A urine sample collected for the measurement of protein in the urine (albumin/creatinine
ratio), as well as a blood test for serum creatinine, is recommended by the National Kidney Disease
Education Program as the two diagnostic tests to ascertain early chronic kidney disease. The purpose of
1 Coresh, J., Selvin, E., Stevens, L.A., Manzi, J., Kusek, J.W., Eggers, P., Van Lente, F., and Levey, A.S. Prevalence of chronic kidney disease in
the United States. Journal of the American Medical Association. 2007;298(17): 2038–2047.
1-1
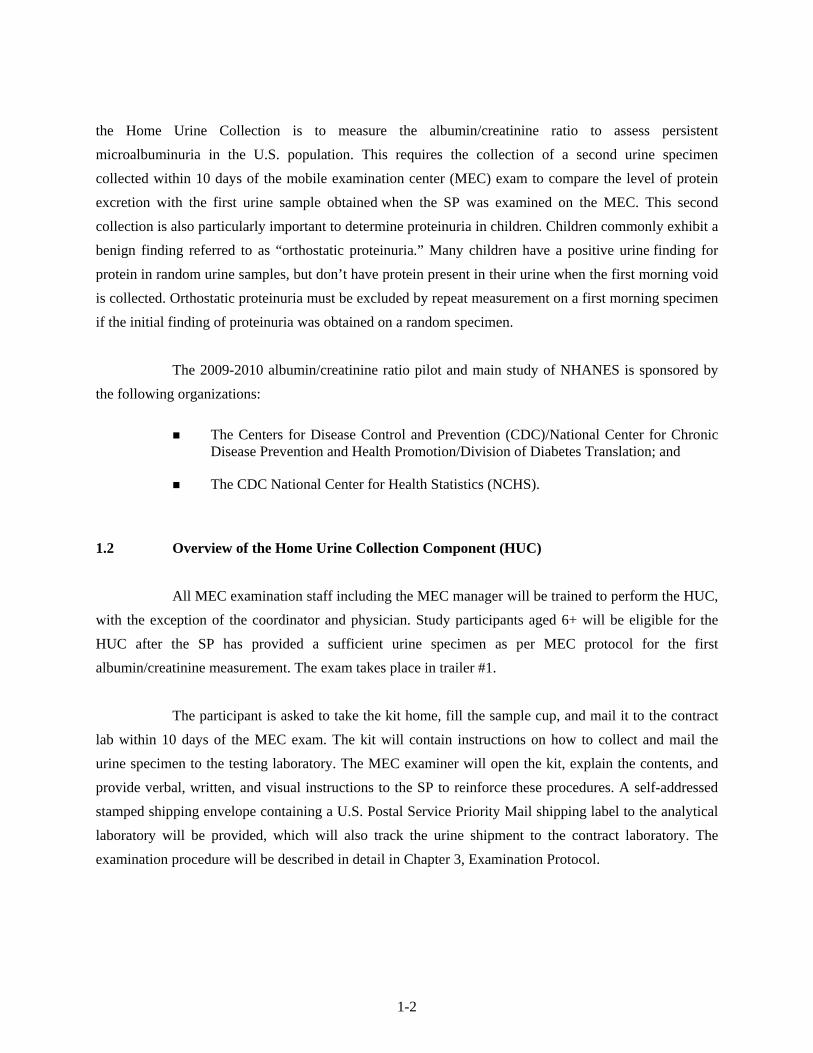
the Home Urine Collection is to measure the albumin/creatinine ratio to assess persistent
microalbuminuria in the U.S. population. This requires the collection of a second urine specimen
collected within 10 days of the mobile examination center (MEC) exam to compare the level of protein
excretion with the first urine sample obtained when the SP was examined on the MEC. This second
collection is also particularly important to determine proteinuria in children. Children commonly exhibit a
benign finding referred to as “orthostatic proteinuria.” Many children have a positive urine finding for
protein in random urine samples, but don’t have protein present in their urine when the first morning void
is collected. Orthostatic proteinuria must be excluded by repeat measurement on a first morning specimen
if the initial finding of proteinuria was obtained on a random specimen.
The 2009-2010 albumin/creatinine ratio pilot and main study of NHANES is sponsored by
the following organizations:
The Centers for Disease Control and Prevention (CDC)/National Center for Chronic
Disease Prevention and Health Promotion/Division of Diabetes Translation; and
The CDC National Center for Health Statistics (NCHS).
1.2 Overview of the Home Urine Collection Component (HUC)
All MEC examination staff including the MEC manager will be trained to perform the HUC,
with the exception of the coordinator and physician. Study participants aged 6+ will be eligible for the
HUC after the SP has provided a sufficient urine specimen as per MEC protocol for the first
albumin/creatinine measurement. The exam takes place in trailer #1.
The participant is asked to take the kit home, fill the sample cup, and mail it to the contract
lab within 10 days of the MEC exam. The kit will contain instructions on how to collect and mail the
urine specimen to the testing laboratory. The MEC examiner will open the kit, explain the contents, and
provide verbal, written, and visual instructions to the SP to reinforce these procedures. A self-addressed
stamped shipping envelope containing a U.S. Postal Service Priority Mail shipping label to the analytical
laboratory will be provided, which will also track the urine shipment to the contract laboratory. The
examination procedure will be described in detail in Chapter 3, Examination Protocol.
1-2
1-3
Participants who agree to provide a home urine specimen will receive a reminder postcard
10 days after the MEC exam if the specimen has not arrived at the contract laboratory. Upon receipt of the
specimen at the laboratory, a remuneration check for $40 is mailed to the participant.
The results of the albumin/creatinine ratio will be reported to the SP. Abnormal findings will
result in an early notification letter from NCHS.

2. EQUIPMENT AND SUPPLIES
The equipment and supplies used in the Home Urine Collection (HUC) are described below:
2.1 Equipment
Dymo label printer.
2.2 Supplies
Home specimen collection kit (pre-assembled in the HANES warehouse)
- White cardboard outer box;
- Styrofoam shipping container;
- Refrigerant gel pack pouch (Polar Pack®);
- One 60 milliliter plastic specimen cup w/ screw on lid;
- One 5”X 5” Ziploc plastic bag with absorbent pad; and
- Temperature monitoring strip (affixed to the inside lid of Styrofoam container).
White Tyvek self-addressed postage-paid shipping envelope, containing:
1. “Human Exempt” label;
2. Shipping label;
3. USPS postage stamp ($4.80); and
4. Priority Mail sticker.
10” x 13” Ziploc plastic bag;
Hard-copy informational cover letter from DHHS/CDC (double-sided English/Spanish);
2-1

Hard-copy color “Urine Collection and Shipping Instructions” (double-sided English/Spanish);
Laminated hard-copy talking points;
Laminated hard-copy color “Urine Collections and Shipping Instructions” (double-sided English/Spanish);
2 permanent markers, heavy point;
2 Dymo polyester labels—1” x 2⅛,” 500 labels per roll;
Monthly calendar;
Confidentiality and image instruction label; and
Jumbo paper clips.
2.3 Inventory Management
The HUC component will be managed by the health technologists. The par level for the
component is set at the following levels (see Exhibit 2-1):
Exhibit 2-1. Inventory par levels: home urine collection component
Home specimen collection kits 330 White Tyvek self-addressed postage-paid shipping envelopes 330 10” x 13” plastic Ziploc bags (Identified as Mini-Grip Bag on Inventory) 1 case Permanent markers, black heavy point 2
Dymo polyester labels—1” x 2⅛ ” 2 rolls
Informational cover letters from DHHS/CDC 330 Urine Collection and Shipping Instructions, English/Spanish 330 Confidentiality label – English/Spanish 2/1 boxes Temperature monitoring strip 20 Paper clip, jumbo
2-2
2-3
2.4 Urine Collection Kit Storage
The urine collection kits (330) are shipped from the warehouse with the start of stand
supplies. The kits must not be stored in the belly compartments due to the temperature sensing strips; they
will be stored in the former anthro room and in the HUC room in trailer #1.

3. HOME URINE COMPONENT EXAMINATION PROTOCOL
3.1 Eligibility Criteria
Sample persons (SPs) aged 6 years and older are eligible for the Home Urine Collection
(HUC) pilot. There are no safety exclusion criteria for HUC. HUC will only be assigned if the SP has
submitted a urine specimen that completes the MEC urine collection protocol for albumin/creatinine
ratio—vessel no. 45. There are two ways the lab will determine HUC eligibility: (1) If the urine specimen
volume is sufficient to fulfill the SPs protocol, HUC will be automatically enabled; or (2) If the urine
specimen volume is not sufficient to fulfill the SPs protocol, but the lab has enough urine to process
vessel no. 45, HUC will be enabled. If the SP has submitted a small quantity of urine, but vessel no. 45
has not been processed by the MEC laboratory staff, the coordinator will not be able to assign the SP to
HUC.
Parents or guardians of children aged 16 years and younger will be required to respond for
the children due to the detailed instructions for the specimen collection and mailing procedures. The
children may accompany the parent to the component, but they are not required to be present.
When the health technologist attempts to recruit an SP who does not speak English and the
health technologist does not speak the language of the SP, a translator who does speak the language of the
SP assists the health technologist. The interpreter stays with the health technologist and the SP for the
entire procedure.
An important aspect of the HUC is the successful recruitment of the SP to agree to
participate in the exam. This requires careful patience on the part of the examiner to encourage the SP to
accept the component and follow through with the collection of the home specimen. To assist the
examiner, talking points have been developed (Appendix A), and a cover letter has been written that
details the home collection in a FAQ format (Appendix B).
3-1
Gaining the cooperation of an SP is easier if the atmosphere in the examination room is
pleasant and makes the SP feel comfortable. Below is a list of suggestions for creating a pleasant
atmosphere in the examination room.
Maintain a clean and uncluttered work area.
Be aware of body image; a positive body image inspires confidence. Maintain a tidy appearance, erect posture, and a smile.
Speak face-to-face with the subject and maintain eye contact. Staring at other areas in the room may cause the SP some uneasiness since it implies that he or she is not important. It also implies disinterest.
Avoid nervous behaviors such as squirming and tapping that can be distracting. The SP may begin to feel nervous, hurried, and anxious because of such behaviors.
3.2 Examination Procedures
The Home Urine Collection ISIS application allows the technician to indicate that the
participant consented to perform the second urine collection, print the specimen label, and scan the USPS
airbill number into the system for tracking the specimen to the laboratory in Minnesota.
Using the standard ISIS format, open the home urine collection application and log the SP
into the exam by scanning the bar code on the SP ID bracelet or manually typing the SP ID when the SP
arrives in the examination room.
3.2.1 Recruiting the Participant to Accept the Home Collection
Invite the SP to participate in the home urine collection with the assistance of the
Recruitment Talking Points:
English:
“NHANES is determining how many people have protein in their urine. To be sure if your urine has increased protein, we need a second urine specimen. Take this urine collection kit home with you so you can collect a urine specimen and mail it to the laboratory. Once the lab has received the
3-2
urine, we will send you a check for $40. If the sample is not received, you will not be paid. Protein detected in urine may be an indicator of weak kidneys. This measure and a blood test for creatinine are recommended by the National Kidney Disease Education Program to detect early chronic kidney disease. You will get results of your urine tests.”
Spanish:
“NHANES está tratando de determinar cuántas personas tienen proteína en la orina. Para estar seguros que la proteína en su orina ha aumentado con el tiempo, necesitamos una segunda muestra de orina. Llévese a su casa estos materiales para tomarse una muestra de orina en su casa y mandarla por correo al laboratorio. Una vez que el laboratorio reciba la muestra le enviaremos un cheque por $40.00. La detección de proteína en la orina podría indicar que los riñones son débiles. El Programa de Educación Nacional sobre la Enfermedad de los Riñones recomienda esta medición y un análisis de sangre para creatinina para detectar enfermedades crónicas del riñón en una fase temprana. Usted recibirá los resultados de los análisis de su orina.”
If an SP initially refuses the component, ask questions to determine the reason for the refusal
and try to address any concerns the SP has in order to have him or her complete the component. Provide
reassurance and encouragement. Review the questions and answers in the cover letter with the SP
(Appendix B). Show the SP the urine collection kit, and describe the procedures. If he or she still refuses,
code the exam as an SP refusal.
3-3
3.2.2 Procedures When the SP Accepts the Home Urine Collection Component
Conveying clear and concise instructions on the home specimen collection and shipping
procedures is essential to the response rate, and to specimen integrity as it is received by the laboratory.
When the SP accepts the home urine component, the examiner will assemble the following materials.
One urine collection kit
One pre-assembled packet that contains:
1. One informational cover letter (Eng/Span 2 pages)
2. One set of color “What To Do: Urine Collection and Shipping Instructions” (Eng/Span 2 pages)
3. One Tyvek self-addressed stamped envelope
4. One 10” x 13” Ziploc plastic bag.
Printed Dymo labels from HUC ISIS application
1 preprinted 3 1/3” X 4” confidentiality label for the larger Ziploc bag
1 preprinted date/time label
The packets will be assembled by MEC staff under the auspices of the chief health tech, who
will assure that there are sufficient packets for each week. Any MEC staff can participate in the assembly
of the packets.
3-4

Exhibit 3-1. Home Urine Collection screen
Access the ISIS application drop-down box adjacent to the question, “Did the SP take a kit
home with them?” The drop-down box indicates either Yes or No. If No is selected, the reason must be
identified on the Finish exam screen from the drop-down box.
3-5
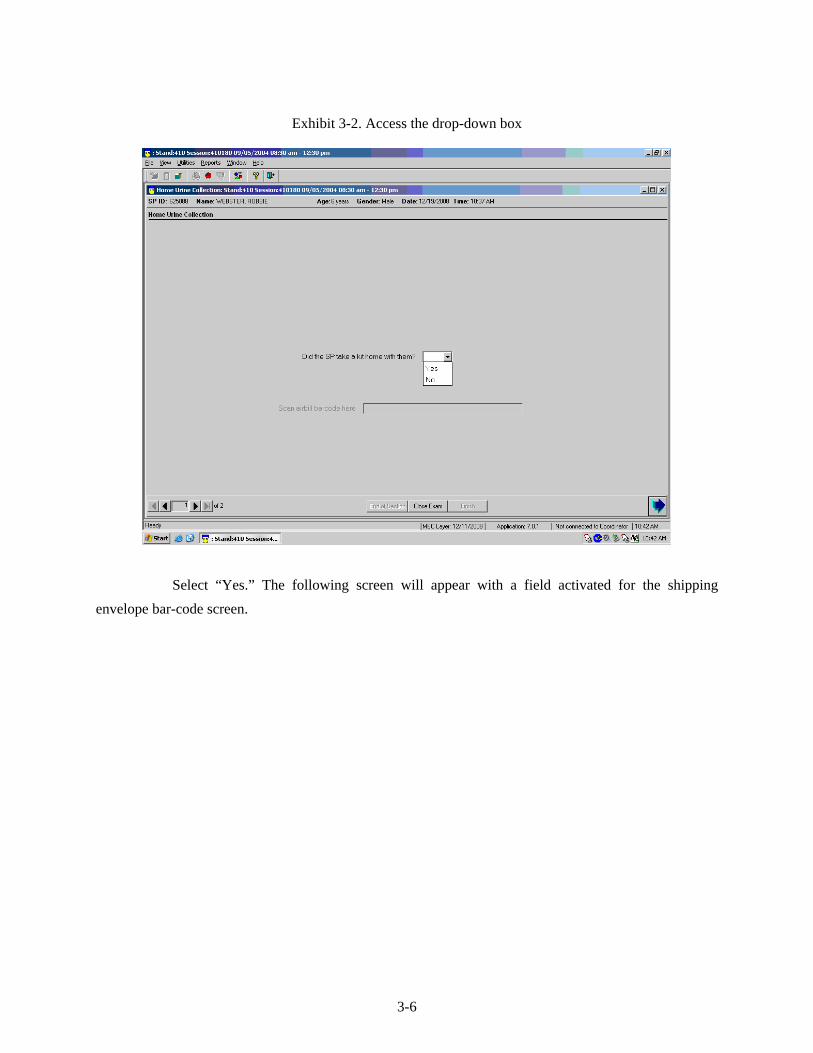
Exhibit 3-2. Access the drop-down box
Select “Yes.” The following screen will appear with a field activated for the shipping
envelope bar-code screen.
3-6

Exhibit 3-3. HUC Screen—SP answers “Yes.”
The USPS bar code will be scanned into this field. All USPS airbill numbers contain 30
numerals. If the airbill field does not contain the requisite number of characters, a hard-edit stop will alert
the examiner to review the field, and the application will not advance to the next screen. When a hard edit
occurs, delete the airbill entry, and re-scan the airbill. If the bar code on the envelope cannot be scanned,
set this envelope aside and retrieve another Tyvek envelope. Return the envelope to the warehouse with
an explanation that the bar code is not scannable.
3-7

Exhibit 3-4. USPS Airbill on white Tyvek shipping envelope
Scan Airbill Bar code
Exhibit 3.5 Hard-stop edit
3-8
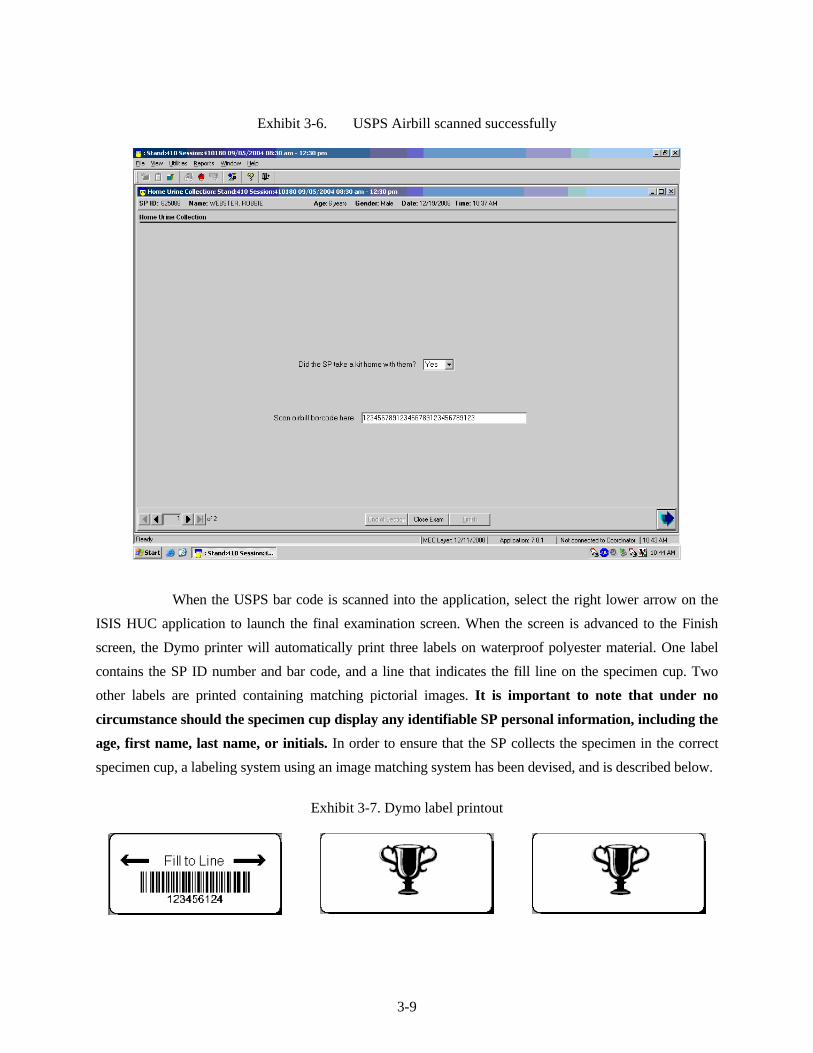
Exhibit 3-6. USPS Airbill scanned successfully
When the USPS bar code is scanned into the application, select the right lower arrow on the
ISIS HUC application to launch the final examination screen. When the screen is advanced to the Finish
screen, the Dymo printer will automatically print three labels on waterproof polyester material. One label
contains the SP ID number and bar code, and a line that indicates the fill line on the specimen cup. Two
other labels are printed containing matching pictorial images. It is important to note that under no
circumstance should the specimen cup display any identifiable SP personal information, including the
age, first name, last name, or initials. In order to ensure that the SP collects the specimen in the correct
specimen cup, a labeling system using an image matching system has been devised, and is described below.
Exhibit 3-7. Dymo label printout
3-9

Confidentiality Label
Experience from the pilot test has shown that SPs tend to write their name somewhere on the
kit. To assist the SP, a specimen cup identification system using computer generated images has been
developed to assure that the SP is using the correct specimen cup. Two labels will be automatically
printed per SP, using the household data to assure that no two SPs in the dwelling unit are given the same
symbol. One label is applied to the specimen cup, the other is applied on the large 10” X 13” Ziploc bag
where the SP’s name is written. Instructions to the SP are provided verbally by the examiner, and written
by way of a label (Confidentiality Label):
English: In order to protect your confidentiality, please do not write your name
anywhere on the urine collection kit. However, it is very important that you urinate into the correct specimen cup. Please make sure that the symbol on this label matches the label on the specimen cup.
Spanish: Para proteger su confidencialidad, por favor no escriba su nombre en ninguna parte de los materiales para tomar la muestra de orina. Sin embargo, es muy importante que orine dentro del envase correcto para tomar la muestra. Por favor asegúrese de que el símbolo de esta etiqueta coincide con la etiqueta en el envase para la muestra.
Date/Time Label
A label that contains fields for the SP to write the date and time of the specimen collection
will be applied to the outside lid of the Styrofoam shipping container.
English: Please write the date and time you collected the urine specimen.
Spanish: Por favor anote la fecha y la hora en que tomó la muestra de orina.
Both the confidentiality and date/time labels are printed at the Westat home office and sent
to the warehouse. These items are present on the HUC inventory list.
3-10

3.2.3 Kit Preparation
After the SP has been successfully recruited, the USPS airbill has been scanned, and the
Dymo labels have printed, follow these steps to label the kit. Prepare the kit by following the instructions
below.
Labeling the Kit
Open the urine collection kit. Confirm that the temperature monitoring strip is affixed
to the inside lid of the Styrofoam shipping container.
Apply the Dymo bar-code label to the specimen cup, aligning the fill line on the label
with the 30 ml line of the specimen cup.
Write the SP’s name with permanent black marker on the 10” x 13” plastic Ziploc
bag. NOTE: This is the only location on the kit where the SP name is identified. Apply the appropriate language confidentiality label to the 10” X 13” Ziploc bag. Apply one image label to the plastic bag beside the instructional label. Apply the second image label to the specimen cup beside the sp id label on the side of
the specimen cup. Do NOT place the image label on the lid of the specimen cup. On the Urine Collection and Shipping Instructions, complete the field: “Mail the kit
no later than __________________” with the date 10 days from the current date. Apply the Date/Time Label to the outside lid of the Styrofoam shipping container.
While the kit is being labeled, the examiner can also present the urine collection and
shipping instructions. All points below are contained in the cover letter, or the Urine Collection and
Shipping Instructions.
3-11

3.2.4 Urine Collection and Shipping Instructions
After the examiner is comfortable with the labeling process, the examiner will be able to
easily present the urine collection and shipping instructions at the same time they prepare the kit. Both the
cover letter and color instruction forms contain all of the information the examiner needs to provide
instructions to the SP. Use them to discuss the procedure, and follow this guideline:
1. Present the two-page informational cover letter and the two-page “What to Do, Urine
Collection and Shipping Instructions.” (English or Spanish)
2. Emphasize that the SP should urinate (pee) into the cup first thing in the morning.
3. While reviewing the steps contained in the “What to Do, Urine Collection and Shipping Instructions,” stress the following specimen collection points: (all of the following points are contained in either the cover letter or the color instructions.)
* The urine sample should be collected within the next 10 days. Point out the top of the first page of the “What to Do, Urine Collection and Shipping Instructions” contains a line: Mail the kit no later than ________________.
* The cup should not be filled to the top—this will avoid spills or leakage during shipment. Instruct the SP to fill the cup to the line on the label.
* Stress to the SP to screw the lid tightly on the specimen cup.
* Emphasize to the SP that it is very important not to mix up specimen cups when there are multiple participants in one family.
* Make sure that the date and time of the urine sample is written on the label on the top of the Styrofoam lid.
* Saturday, Monday, and Tuesday are the best days to collect and mail the urine to assure that the laboratory can process the urine before the weekend.
* The Polar Pack gel refrigerant pack should be placed in the freezer overnight, or for at least 6 hours. It will freeze solid, but it will still fit into the Styrofoam container.
* The sample must be mailed the same day that it is collected; instruct the SP not to collect the sample unless it can be mailed on the same day.
* Point out the toll-free telephone number in the cover letter if the SP has any questions when he or she returns home.
* Inform the SP that a reminder postcard will be sent to him or her if the urine specimen has not been received by the laboratory in 10 days.
3-12

* Instruct the SP that when they remove the kit from the plastic bag, do not discard the plastic bag until the urine collection process is complete. When the sample has been collected and prepared for shipment, the outer plastic bag should be discarded—emphasize to the SP that they should not mail the outer plastic bag to the laboratory.
3.2.5 Packing the Urine Collection Kit for the SP to Take Home
1. Place the urine collection kit into the Ziploc bag.
2. On the top of the first page of the Urine Collection and Shipping Instructions, write the date of the 10th day after the SP’s MEC exam, using the calendar provided.
3. Fold the cover letter and “Urine Collection and Shipping Instructions” together and place into the plastic bag with the urine collection kit and seal the plastic bag.
4. Place the kit into the SP’s basket with his or her belongings after the examination is completed and the SP is released from the component.
3.2.6 Completing the Exam
Exhibit 3-8. Finish exam
3-13

4-1
4. USPS LABEL PRINTING UTILITY
4.1 Warehouse Responsibility
Warehouse staff members prepare the HUC kits. This includes printing the USPS shipping
label. This shipping label routes the kit from the SP to the contract laboratory. This label contains an air
bill number which is used to track the shipment from the SP’s home to the analysis laboratory.
The blank white Tyvek envelopes, stamps, and address labels are sent to the field
individually and assembled in the MEC as needed. On a weekly basis, the MEC examiners make up a set
number (as determined by the chief health tech) of shipping envelopes by putting a preprinted Avery
USPS air bill label and a $4.95 postage label on the white Tyvek envelope. At the end of a stand, the
remaining envelopes are counted as part of the end of stand inventory process, left onboard the MEC, and
continue onto the next MEC site. The stamps are counted and then returned to the warehouse via “transfer
inventory to warehouse inventory sheet.” The remaining preprinted address labels are discarded at the end
of each stand
4.2 USPS Label Utility
The purpose of the USPS Label Printing Utility is to provide the warehouse staff with an
easy way to print USPS mailing labels when preparing the HUC kits.
To print the USPS air bills, click on the USPS Label Generation icon on the desktop. The
application screen is illustrated in Exhibit 4-1.
4-2
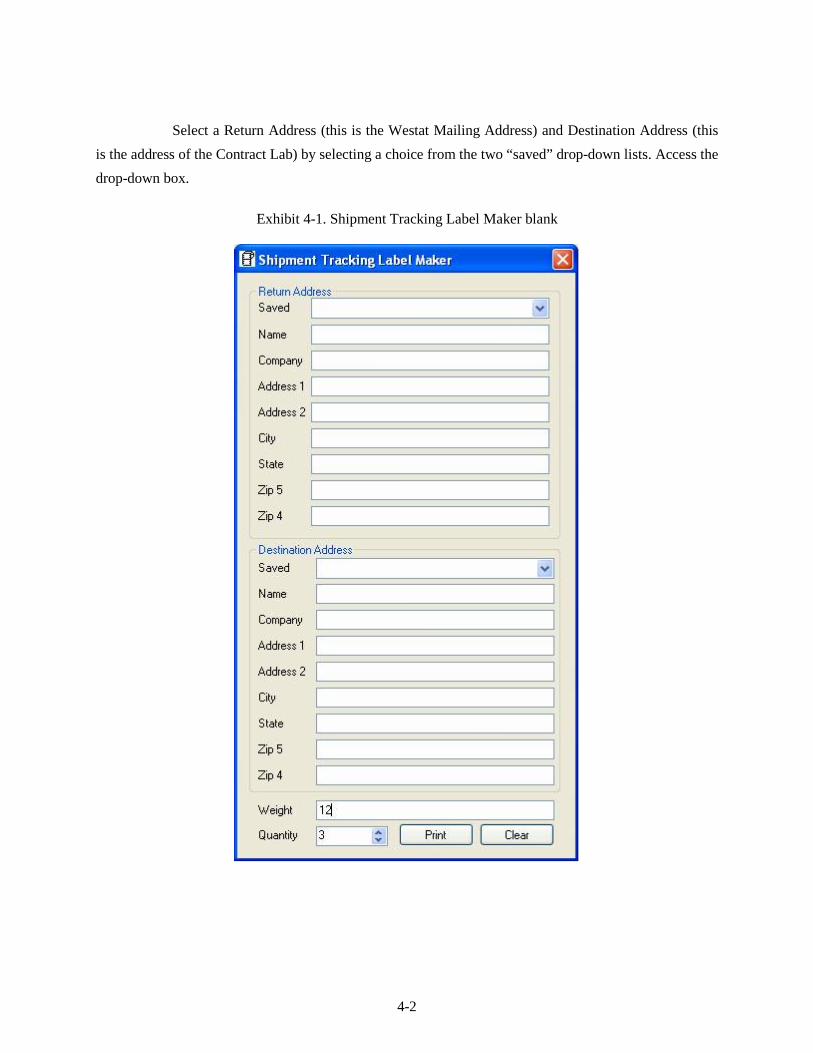
Select a Return Address (this is the Westat Mailing Address) and Destination Address (this
is the address of the Contract Lab) by selecting a choice from the two “saved” drop-down lists. Access the
drop-down box.
Exhibit 4-1. Shipment Tracking Label Maker blank

4-3
The window displays with the correct data in the various fields as illustrated in Exhibit 4-2.
Exhibit 4-2. Shipment Tracking Label Maker completed
Enter the quantity of labels and select the print button.
Once the print button has been selected, the system will connect to the USPS web site and
generate and print the requested number of air bills.

4-4
A sample air bill is illustrated in Exhibit 4-3.
Exhibit 4-3. Sample air bill

Appendix A
Talking Points &
Home Collection Kit Preparation

Important Points from the Cover Letter and Urine Collection and Shipping Instructions
1. Present the two-page informational cover letter and the two-page “What to Do, Urine Collection and Shipping Instructions.” (English or Spanish). 2. Emphasize that the SP should urinate (pee) into the cup first thing in the morning. 3. While reviewing the steps contained in the “What to Do, Urine Collection and Shipping Instructions,” stress the following specimen collection points: (All of the following points are contained in either the cover letter or the color instructions.) * The urine sample should be collected within the next 10 days. Point out the
top of the first page of the “What to Do, Urine Collection and Shipping Instructions” contains a line: Mail the kit no later than ________________.
* The cup should not be filled to the top—this will avoid spills or leakage during
shipment. Instruct the SP to fill the cup to the line on the label. * Stress to the SP to screw the lid tightly on the specimen cup. * Emphasize to the SP that it is very important not to mix up specimen cups
when there are multiple participants in one family. * Make sure that the date and time of the urine sample is written on the label on
the top of the Styrofoam lid. * Saturday, Monday, and Tuesday are the best days to collect and mail the urine
to assure that the laboratory can process the urine before the weekend. * The Polar Pack gel refrigerant pack should be placed in the freezer overnight,
or for at least 6 hours. It will freeze solid, but it will still fit into the Styrofoam container.
* The sample must be mailed the same day that it is collected; instruct the SP
not to collect the sample unless it can be mailed on the same day. * Point out the toll-free telephone number in the cover letter if the SP has any
questions when he or she returns home. * Inform the SP that a reminder postcard will be sent to him or her if the urine
specimen has not been received by the laboratory in 10 days. * Instruct the SP that when they remove the kit from the plastic bag, do not
discard the plastic bag until the urine collection process is complete. When the sample has been collected and prepared for shipment, the outer plastic bag should be discarded—emphasize to the SP that they should not mail the outer plastic bag to the laboratory.
A-1
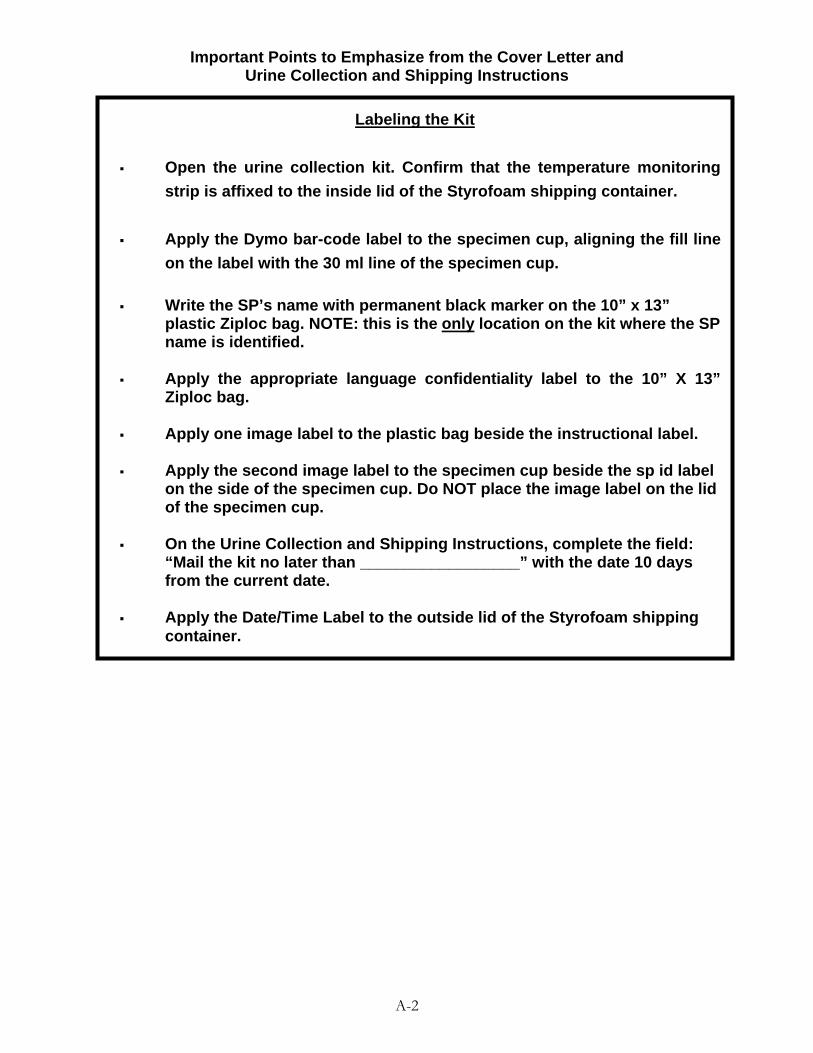
Important Points to Emphasize from the Cover Letter and Urine Collection and Shipping Instructions
A-2
Labeling the Kit
Open the urine collection kit. Confirm that the temperature monitoring
strip is affixed to the inside lid of the Styrofoam shipping container.
Apply the Dymo bar-code label to the specimen cup, aligning the fill line
on the label with the 30 ml line of the specimen cup.
Write the SP’s name with permanent black marker on the 10” x 13”
plastic Ziploc bag. NOTE: this is the only location on the kit where the SP name is identified.
Apply the appropriate language confidentiality label to the 10” X 13”
Ziploc bag. Apply one image label to the plastic bag beside the instructional label.
Apply the second image label to the specimen cup beside the sp id label
on the side of the specimen cup. Do NOT place the image label on the lid of the specimen cup.
On the Urine Collection and Shipping Instructions, complete the field:
“Mail the kit no later than __________________” with the date 10 days from the current date.
Apply the Date/Time Label to the outside lid of the Styrofoam shipping
container.

Appendix B
Cover Letters (English and Spanish)

DEPARTMENT OF HEALTH & HUMAN SERVICES Centers for Disease Control and Prevention
National Center for Health Statistics 3311 Toledo Rd. Hyattsville, Maryland 20782
B-1
Dear Participant, Recently, you participated in the National Health and Nutrition Examination Survey (NHANES) operated by the Centers for Disease Control and Prevention. When you took part in the survey we tested your urine for kidney health. We are writing to ask that you provide us with a second urine sample. Collection of urine is safe and will not cause discomfort. Many studies with children and adults have used home urine collection kits. By collecting this second sample we hope to learn more about the kidney health of the United States. Why are you asking me to provide a second urine sample? Collecting a second urine specimen will help us better understand how many people in the US have kidney disease. People with protein in their urine may have early kidney disease or their kidneys may be normal. Checking a second urine sample for protein gives us more information. Was my first urine sample normal or abnormal? The result of your first test may have been normal or it may have indicated increased protein. If you had a lot of protein in your first urine sample, a separate letter will be mailed to you. What am I supposed to do with this package? We are asking you to provide a urine sample using the enclosed kit provided. Your participation is voluntary. Inside the package you will find …….
“What to do” Urine Collection and Shipping Instruction sheet White cardboard outer box Styrofoam shipping container White refrigerant gel pack pouch Plastic screw cap collection cup with a paper Label Zip-lock bag with absorbent sheet Temperature monitoring strip White shipping envelope with Human Exempt and postage paid labels

What should I do with the PolarPackTm ice pack?
Place the PolarPack in your refrigerator freezer overnight (or at least 6 hours) before collecting the urine. What am I supposed to do with the cup? You will use the cup to collect the urine specimen. Please read and follow the instructions on the “What to do” Urine Collection and Shipping Instruction sheet provided with the kit. What days should I complete the home urine collection and mail the box? Saturday, Monday, and Tuesday are the best days to collect and mail the urine. Do not fill the urine cup unless you can mail the box on the same day. Drop the envelope in any United States Postal Service mailbox as soon as possible after collection. When we receive the box, we will mail you a check for $40. Is there a special time of day to collect the specimen? This is very important. You should urinate (pee) into the cup first thing in the morning. Fill the cup to the line as soon as you get out of bed. What do I do after I have I have urinated (peed) into the cup? Put the lid on tightly, wipe off the outside, and follow the instructions for mailing the cup. Who do I contact if I have questions? Our staff will answer any questions you have Monday-Friday from 8:30 am to 6:00 pm Eastern Time at 1-888-458-4762. You will get the results of your urine test by mail in 3 months.
B-2
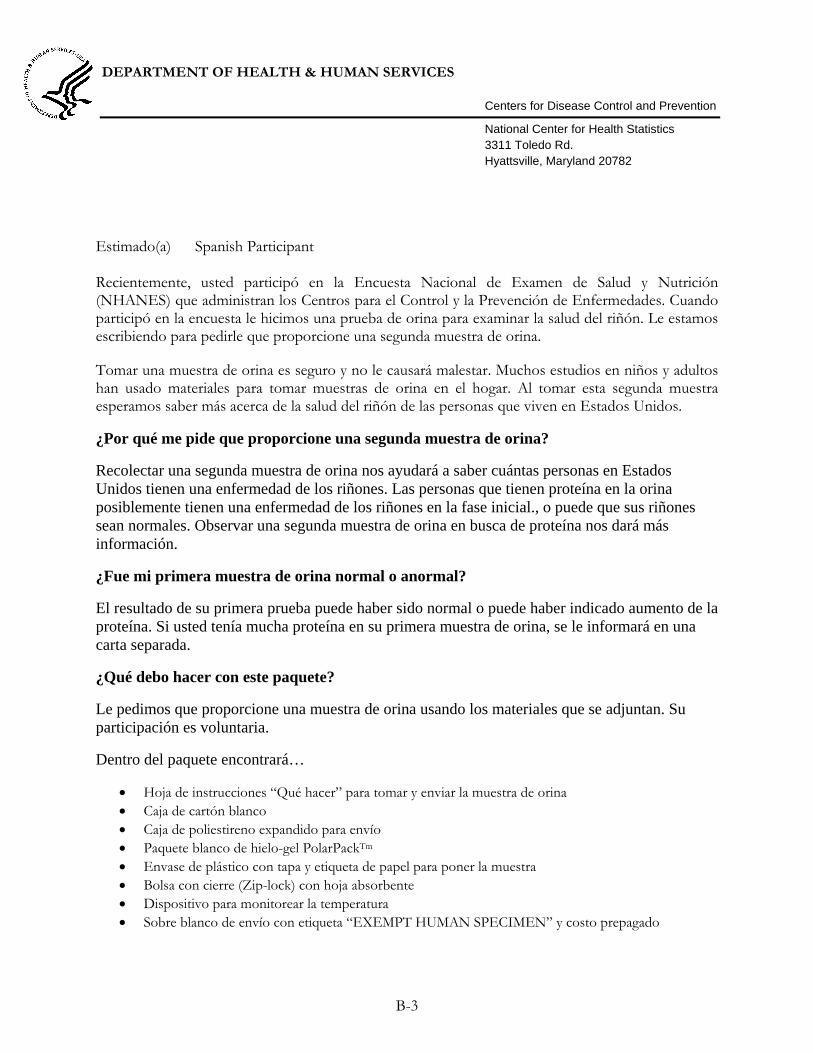
DEPARTMENT OF HEALTH & HUMAN SERVICES Centers for Disease Control and Prevention
National Center for Health Statistics 3311 Toledo Rd. Hyattsville, Maryland 20782
B-3
Estimado(a) Spanish Participant Recientemente, usted participó en la Encuesta Nacional de Examen de Salud y Nutrición (NHANES) que administran los Centros para el Control y la Prevención de Enfermedades. Cuando participó en la encuesta le hicimos una prueba de orina para examinar la salud del riñón. Le estamos escribiendo para pedirle que proporcione una segunda muestra de orina.
Tomar una muestra de orina es seguro y no le causará malestar. Muchos estudios en niños y adultos han usado materiales para tomar muestras de orina en el hogar. Al tomar esta segunda muestra esperamos saber más acerca de la salud del riñón de las personas que viven en Estados Unidos.
¿Por qué me pide que proporcione una segunda muestra de orina?
Recolectar una segunda muestra de orina nos ayudará a saber cuántas personas en Estados Unidos tienen una enfermedad de los riñones. Las personas que tienen proteína en la orina posiblemente tienen una enfermedad de los riñones en la fase inicial., o puede que sus riñones sean normales. Observar una segunda muestra de orina en busca de proteína nos dará más información.
¿Fue mi primera muestra de orina normal o anormal?
El resultado de su primera prueba puede haber sido normal o puede haber indicado aumento de la proteína. Si usted tenía mucha proteína en su primera muestra de orina, se le informará en una carta separada.
¿Qué debo hacer con este paquete?
Le pedimos que proporcione una muestra de orina usando los materiales que se adjuntan. Su participación es voluntaria.
Dentro del paquete encontrará…
Hoja de instrucciones “Qué hacer” para tomar y enviar la muestra de orina Caja de cartón blanco Caja de poliestireno expandido para envío Paquete blanco de hielo-gel PolarPackTm Envase de plástico con tapa y etiqueta de papel para poner la muestra Bolsa con cierre (Zip-lock) con hoja absorbente Dispositivo para monitorear la temperatura Sobre blanco de envío con etiqueta “EXEMPT HUMAN SPECIMEN” y costo prepagado

¿Qué debo hacer con el paquete blanco de hielo-gel PolarPackTm ?
Ponga el paquete blanco de hielo-gel “PolarPack” en el congelador de su refrigerador durante la noche (o por lo menos durante 6 horas) antes de tomar la muestra de orina. ¿Qué debo hacer con el envase de plástico para la muestra de orina? Use el envase de plástico para poner la muestra de orina. Por favor lea y siga las instrucciones para tomar y enviar la muestra de orina de la hoja “Qué hacer” que se proporciona junto con los materiales. ¿Qué días debo tomar la muestra de orina en el hogar y enviar la caja? Sábado, lunes y martes son los mejores días para tomar y enviar la muestra de orina. Es importante que no llene el envase de orina a menos que pueda enviar la caja el mismo día que tome la muestra. Ponga el sobre en cualquier buzón del Servicio Postal de Estados Unidos tan pronto como sea posible después de tomar la muestra. Cuando recibamos la caja, le enviaremos un cheque por $40 dólares. ¿Hay una hora especial del día para tomar la muestra de orina? Esto es muy importante. Debe orinar en el envase de plástico para la muestra de orina tan pronto como se despierte por la mañana. Inmediatamente después de levantarse, orine en el envase de plástico llenándolo hasta la línea. ¿Qué hago después de orinar en el envase de plástico para la muestra de orina? Ponga y ajuste firmemente la tapa, limpie la parte de afuera y siga las instrucciones para enviar el envase de plástico por correo. ¿Con quién me puedo comunicar si deseo hacer alguna pregunta? Nuestro personal responderá cualquier pregunta que desee hacer de lunes a viernes desde las 8:30 de la mañana a 6:00 de la tarde hora del Este en el 1-888-458-4762. Recibirá los resultados de su prueba de orina por correo dentro de 3 meses.
B-4

Appendix C
“What To Do” Urine Collection and Shipping Instructions
English and Spanish

8/20/2009 1 Home Urine Collection Instructions
“WHAT TO DO” Urine Collection and Shipping Instructions
Collect a urine sample and ship it to the laboratory using these instructions. Collect your urine sample as soon as possible - ideally within the next 10 days. However, if you cannot collect it within 10 days then please collect and ship it at your earliest convenience. We will send you a check for $40.00 as soon as you ship the package.
The bag you received in the mobile examination center includes: • Large zip closable bag with a confidentiality statement, your name
written on the bag, and your personal picture sticker
• “WHAT TO DO” Urine Collection and Shipping Instructions sheet
• Department of Health and Human Services Cover Letter
• The home urine collection kit
Your Personal Picture Sticker: Your picture sticker is unique to you and it is found on:
• The large zip closable bag with your name written on it
• Your urine collection cup
• The back of your shipping envelope
The picture sticker identifies your kit from kits assigned to other people in your household. When collecting and shipping your urine, make sure you use the collection cup and shipping envelope marked with your unique picture sticker.
Home Urine Collection Kit Contents: A. White cardboard outer box
B. Styrofoam shipping container
C. Temperature monitoring strip
D. White shipping envelope with Exempt Human Specimen, picture sticker, and postage paid labels
E. White refrigerant gel pack pouch
F. Plastic screw cap urine collection cup with your picture sticker
G. Small zip closable bag with absorbent sheet

8/20/2009 2 Home Urine Collection Instructions
Kit Preparation: 1. Remove kit from the large zip closable
bag. 5. Remove the white refrigerant gel pack pouch and place it
in the freezer compartment of your home freezer for at least 6 hours.
2. Open the white cardboard box. 6. Remove the small zip closable bag from the Styrofoam container.
3. Slide the Styrofoam shipping container out of the cardboard box.
7. Remove the plastic screw cap collection cup from the small zip closable bag (Do not remove the absorbent sheet.)
4. Open the Styrofoam container.
Collect the Urine Sample: Collect the sample when you first wake up for the day.
Whenever possible, mail the sample on the same day you collect the sample.
1. Before you collect your urine, verify that the picture sticker on the cup matches the picture sticker on the zip closable bag that has your name written on it.
2. Wash hands with soap and water.
3. Take the cap off the cup before urinating.
4. Urinate (pee) into the collection cup until it is half full. The inside of the cup and cap should not touch or come into contact with any part of the body, clothing, or external surfaces.
5. Tighten the cap on the half-filled urine cup and wipe off the outside of the cup.
6. Write the date and time you collected the urine on the label on the top of the Styrofoam container.
Pack the Urine Sample: Pack the sample in the shipping container with the ice pack immediately after collection, even if you do not mail the package until later in the day.
Do not include these instructions, the cover letter, or the large zip closable bag with your name in the shipping envelope. Do not add additional packaging.
1. Place the half-filled urine cup back into the zip closable bag.
2. Push the air out of the zip closable bag and securely seal the bag.
3. Place the sealed bag into the Styrofoam container.
4. Place the frozen gel pack from your freezer into the Styrofoam container.

8/20/2009 3 Home Urine Collection Instructions
Pack the Urine Sample continued: 5. Place the Styrofoam lid onto the top of the Styrofoam bottom.
6. Slide the Styrofoam container into the white cardboard shipping box, fold the flaps down, and tuck in the tabs.
7. Verify that the picture sticker on the shipping envelope matches the picture sticker on the bag that has your name written on it.
8. Place the white shipping box inside the white shipping envelope.
9. Remove the adhesive strip, fold the edge over, and seal shut.
Ship the Urine Sample: Use the US Postal Service (USPS) to send the package.
The best way to send the package is to take it to the Post Office.
Or, send the package by one of the following methods:
• Place the kit in your mailbox • Give the kit to a USPS mail carrier
• Drop the kit in a USPS mailbox
If you have any questions call 1-888-458-4762.

8/20/2009 1 Home Urine Collection Instructions
“QUÉ HACER” Instrucciones para recolección y
envío de la muestra de orina
Recolecte una muestra de orina y use estas instrucciones para enviarla al laboratorio. Tome su muestra de orina tan pronto como sea posible - idealmente dentro de los próximos 10 días. Sin embargo, si no puede tomar la muestra dentro de los siguientes 10 días entonces tómela y envíela tan pronto como pueda. Le mandaremos un cheque por $40.00 dólares tan pronto como envíe el paquete. La bolsa que recibió en el centro móvil de examen incluye: • Una bolsa grande con cierre (Ziploc) con una declaración de
confidencialidad, su nombre escrito en la bolsa y una calcomanía impresa con un símbolo elegido únicamente para usted.
• Hoja “QUÉ HACER” Instrucciones para recolección y envío de la muestra de orina
• Carta del Departamento de Salud y Servicios Humanos
• Materiales para tomar la muestra de orina en el hogar
Calcomanía con su símbolo personal: El símbolo impreso en la calcomanía es únicamente para usted y se encuentra en:
• La bolsa grande con cierre (Ziploc) que lleva su nombre escrito
• El envase para la muestra de orina
• El sobre de envío para devolver los materiales
El símbolo distingue sus materiales de los materiales asignados a otras personas de su hogar. Cuando tome y envíe su muestra de orina, asegúrese de que usa el envase para la muestra y el sobre marcado con el símbolo asignado únicamente para usted.
Los materiales para tomar la muestra de orina en el hogar contienen: A. Caja de cartón blanco
B. Caja de poliestireno para envío C. Cinta de monitoreo de la
temperatura D. Sobre blanco de envío con
etiquetas marcadas “Exempt Human Specimen”, el símbolo suyo y franqueo pre pagado
E. Paquete blanco de hielo-gel refrigerante.
F. Envase de plástico con tapa para poner la muestra, marcado con su símbolo.
G. Bolsa pequeña con cierre (Zip-lock) con toalla absorbente

8/20/2009 2 Home Urine Collection Instructions
Preparación de los materiales: 1. Saque los materiales de la bolsa grande
con cierre (Zip-lock).
5. Saque la bolsa blanca de hielo-gel refrigerante y póngala en el congelador de su casa por no menos de 6 horas.
2. Abra la caja de cartón blanco. 6. Saque la bolsa pequeña con cierre (Zip-lock) de la caja de poliestireno.
3. Saque la caja de poliestireno para envío, de la caja de cartón
7. Saque el envase para la muestra de orina de la bolsa pequeña con cierre (Zip-lock). (No saque la toalla absorbente.)
4. Abra la caja de poliestireno.
Recolección de la muestra de orina: Tome la muestra de orina cuando usted se levante.
Si es posible, envíe el paquete con los materiales el mismo día que tome la muestra de orina.
1. Antes de tomar la muestra de orina, verifique que el envase lleva el mismo símbolo que la bolsa con cierre (Zip-lock) con su nombre escrito.
2. Lávese las manos con jabón y agua.
3. Quite la tapa del envase de plástico antes de orinar.
4. Orine dentro del envase de plástico para la muestra y llene hasta la mitad. Ni el interior del envase ni el de la tapa deben tocar o estar en contacto con ninguna parte del cuerpo, ropa o superficies externas.
5. Ajuste la tapa del envase de plástico lleno hasta la mitad y limpie la parte de afuera del envase.
6. Anote la fecha y la hora en que se tomó la muestra en la etiqueta que hay en la tapa de la caja de poliestireno.
Empaque la muestra de orina: Empaque la muestra en la caja de envío con la bolsa de hielo-gel refrigerante inmediatamente después de tomar la muestra, incluso si no la va a enviar hasta más tarde en el día.
No incluya en el sobre de envío estas instrucciones, la carta informativa ni la bolsa grande con cierre (Zip-lock) con su nombre. No añada material adicional de empaque.
1. Ponga el envase de plástico con la orina lleno hasta la mitad en la bolsa con cierre (Zip-lock).
2. Saque el aire de la bolsa con cierre (Zip-lock) y ciérrela bien.
3. Ponga la bolsa cerrada dentro de la caja de poliestireno.
4. Ponga la bolsa blanca de hielo-gel de su congelador dentro de la caja de poliestireno.

8/20/2009 3 Home Urine Collection Instructions
Empaque la muestra de orina continuación:
5. Tape la caja de poliestireno para envío
6. Ponga la caja de poliestireno dentro de la caja de cartón blanco, doble las aletas de la caja hacia abajo y métalas en las ranuras.
7. Verifique que el sobre de envío lleva el mismo símbolo que la bolsa con su nombre escrito.
8. Ponga la caja de cartón blanco dentro del sobre blanco para envío.
9. Quite la cinta adhesiva, doble en el borde y selle para cerrar.
Envíe la muestra de orina: Use el Servicio Postal de Estados Unidos (USPS) para mandar el paquete.
La mejor manera de enviar el paquete es llevarlo a la Oficina de Correos.
O, mandar el paquete por uno de los siguientes métodos:
• Poner el paquete en su buzón de correo
• Darle el paquete a uno de los carteros del correo USPS
• Echar el paquete en un buzón de correo del USPS
Si desea hacer alguna pregunta llame al 1-888-458-4762.

Appendix D
Sample Reminder Postcards (English and Spanish)

D-1

D-2

D-3

D-4