Embed Size (px)
Citation preview

1
Flower Pincushion Size: 10cm square x 7cm high INSTRUCTIONS Materials needed • Fabric 1: 18cm (7in) square – Phoebe blue (100175) • Fabric 2: 18cm (7in) square – Frances lilac (100168) • Fabric 3: 27cm x 20cm (10½in x 8in) – Josephine blue (100174) • Fabric 4: 15cm x 8cm (6in x 3in) – Trickles lilac (130053) • Fibrefill approx. 30g We also recommend using the following: • Sewing machine • Matching thread and a sewing needle for hand sewing • Flower stick or chopstick for turning and stuffing • Thick paper for copying patterns Making the Pincushion 1 Refer to the bullet points below on making the project before you start. Copy all the pattern pieces onto thick paper and cut out the shapes. The fabrics used are shown in Fig A. • Read all the project instructions through before you start. • Use thick paper for copying patterns. • The outer line on a pattern is the sewing line (generally, no seam allowances are included). • Unless otherwise instructed, sew on the outer line of the pattern and then cut out the
shapes after sewing, cutting ⅛in–¼in (3mm–6mm) outside the sewn line. • Stuff well, using a chopstick or similar tool to fill small areas. • Sew up openings with matching thread and small slipstitches. Fig A
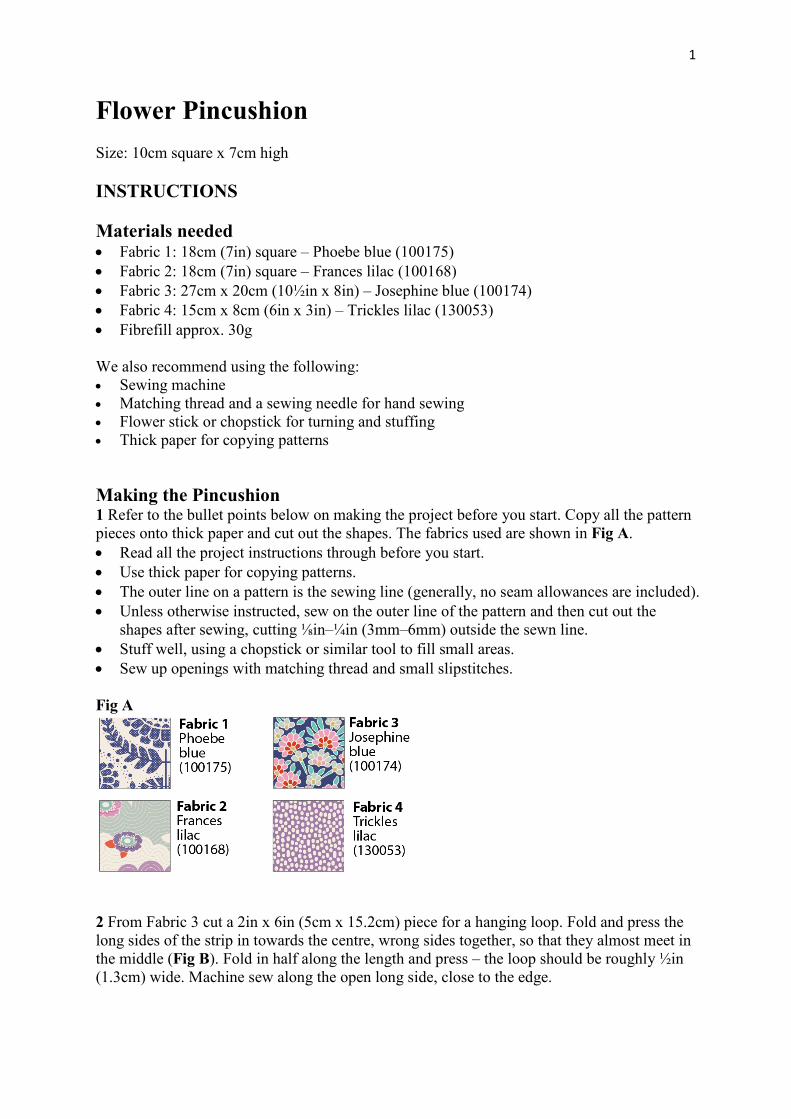
2 From Fabric 3 cut a 2in x 6in (5cm x 15.2cm) piece for a hanging loop. Fold and press the long sides of the strip in towards the centre, wrong sides together, so that they almost meet in the middle (Fig B). Fold in half along the length and press – the loop should be roughly ½in (1.3cm) wide. Machine sew along the open long side, close to the edge.
2
Fig B
3 From Fabric 1 and Fabric 2 cut one 5½in (14cm) square (seam allowance included) for the pincushion. Place the two pieces right sides together. Fold the loop strip double and place it between the layers, with the raw edges pointing outwards (see arrow on Fig C). Use a ¼in (6mm) seam to sew around the edge of the pincushion pieces, leaving an opening for turning, as shown. Fig C
4 To create depth to the pincushion, at a corner re-position the fabrics so that the seams are on top of each other and the corner forms a point, as in Fig D. Sew a seam across the corner ¾in (2cm) down from the point, as shown. Trim off excess fabric about ¼in (6mm) away from the seam. Repeat this on all corners.
3
Fig D
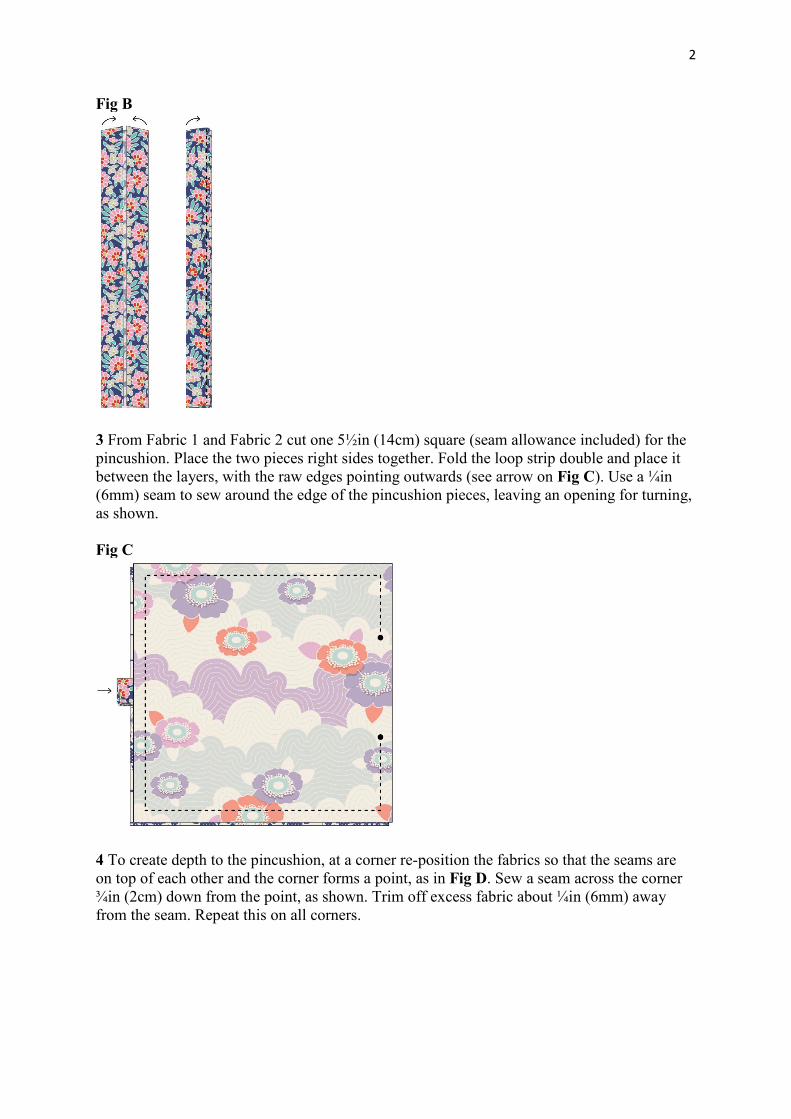
5 Turn the pincushion through to the right side, pushing the corners out neatly using a chopstick or similar tool. Make sure the hanging loop is pulled into place and then press carefully. Stuff the pincushion and then use matching thread and small stitches to sew up the opening (Fig E). Fig E
6 Flower appliqué: Cut a Fabric 3 piece about 5in x 10in (12.7cm x 24.5cm) for the flower. Use the piece of Fabric 4 for the centre circle. Press both fabric pieces in half, right sides together. Trace the flower pattern and the centre circle pattern onto the fabrics and sew all the way around, as shown in Fig F. Fig F
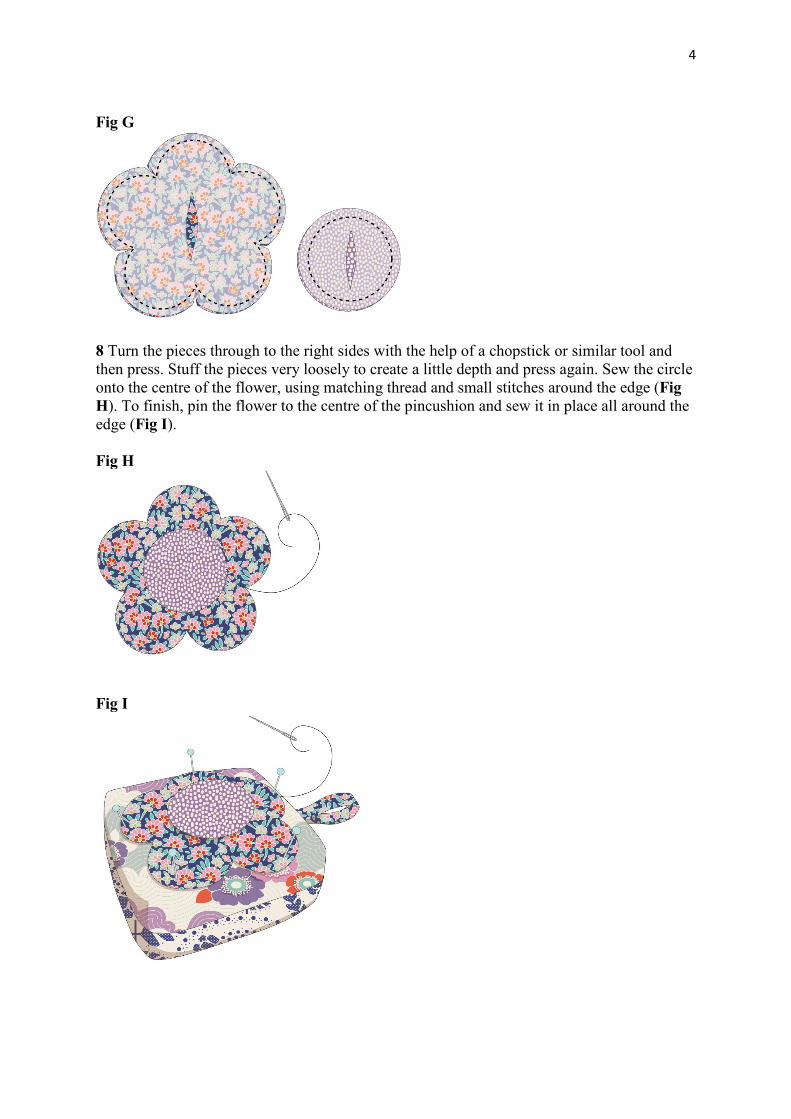
7 Cut out the pieces with a seam allowance and cut notches in the seam allowance between each petal, as shown in Fig G. Carefully cut an opening for turning, cutting through just one layer in the flower and in the centre circle.
4
Fig G
8 Turn the pieces through to the right sides with the help of a chopstick or similar tool and then press. Stuff the pieces very loosely to create a little depth and press again. Sew the circle onto the centre of the flower, using matching thread and small stitches around the edge (Fig H). To finish, pin the flower to the centre of the pincushion and sew it in place all around the edge (Fig I). Fig H
Fig I

Flower Pincushion pattern
Flowerx 2
Flower centrex 2
Add a seam allowance to all pattern pieces. The edges of the patterns mark the seams. Dotted lines indicate openings, divisions between two fabrics and folded edges. ES stands for Extra Seam allowance and if it appears in the pattern, it is important to add a liberal seam allowance. Sew everywhere that a solid line appears in the pattern.
Flower Pincushion Pattern