Embed Size (px)
DESCRIPTION
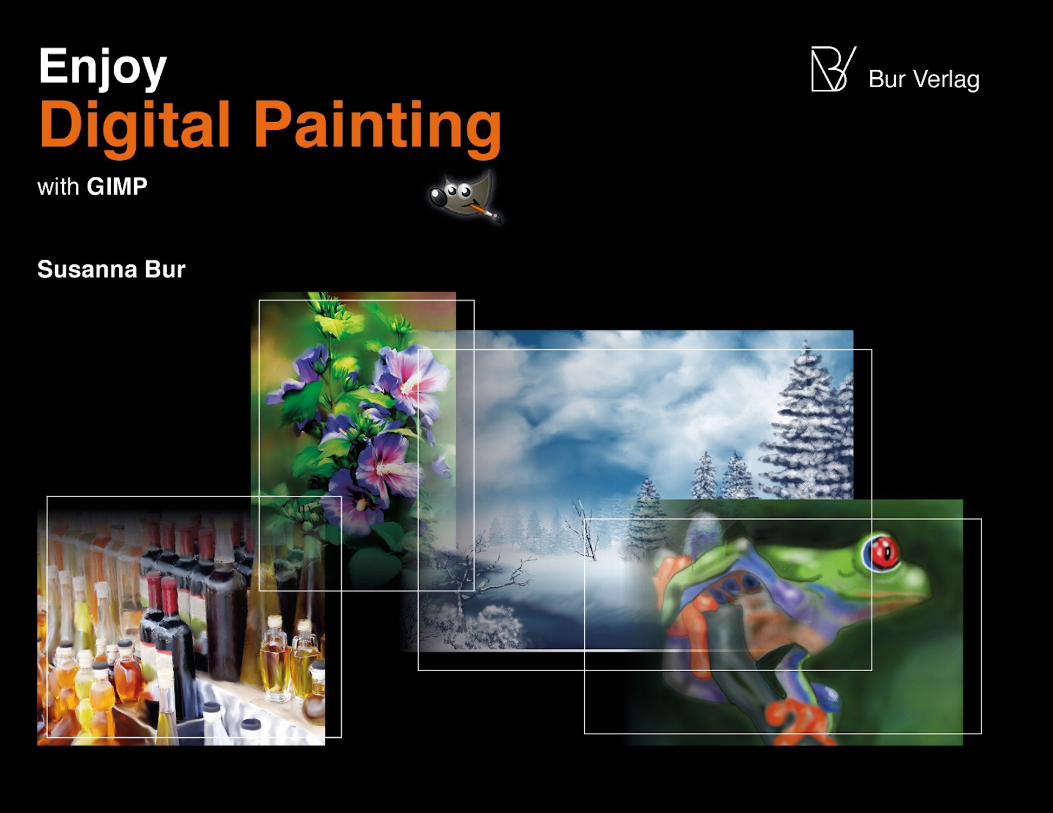
This unique manual shows on the basis of 34 detailed tutorials, how to implement classical painting techniques on the computer. The range is wide: From the very simple smudge technique to drawing with pencil, colored pencils, charcoal and pastels, up to oil, acrylic and watercolor painting as well as mixed media. Give rein to your creative urge to paint beautiful pictures. Your computer's monitor is your window to the digital realm, and GIMP is your tool. Start the journey through your visions, whether abstract or realistic, whether your trip takes you to the flowers in the garden, or fantasy worlds through the sky into space, there are no limits. Learn how to create a painted masterpiece, based upon a photo, in easy steps. This book also contains many practical tips for setting up the free GIMP image editing program, to a perfect tool for the digital painting. Of course, the techniques can be implemented in many other image processing programs.
Citation preview

2
In all of us lies a creative urge to bring beauti-ful objects into being. Who never stood in front of a work of fine art and dreamed of trying to picture his visions in the same way. But the enthusiasm for starting this adventure usually ends in the sobriety of the reality.
The equipment components of a studio are expensive. You are in the need for a room in which you may work. The purchase of materi-als, whether paper, canvas, pencils, brushes, paints, or books about learning the painting is an investment of thousands of (€) ($). Even if you get a set of basic materials for yourself and start initial trials, a disillusion will usually follow in a very short time. It's not so easy get-ting a first feeling of success. A lot of work will be discarded and the used material will be lost. If there is not a separate room for a studio at your disposal, your flat is full of materials and unfinished or finished works. The artist has either to live between this mass or has to clean every day and then has no more desire to un-pack everything again and continue working.
The enthusiasm to express oneself creatively subsides very quickly and the idea is sprea-ding that there is also a talent failure.
In the world of digital painting with GIMP all is different. Each pen, brushes, colors and can-vases, which are ever needed, are in the com-puter. An infinite richness of options is availab-le to make the painting look so real, as if it was created with the original materials.
Whether a picture will be painted with a pencil, pastel, acrylic, oil, watercolor, airbrush, whe-
ther paper or canvas should be rough, smooth, colored, textured, whether it should be small or large, everything is possible.
Never again colors must be mixed to realize the creative visions, never again expensive material has to be bought or discarded. Crea-ting the art is under the artists absolute control, for the works can be changed quickly and sa-ved.
The possibility to undo minor or major errors with a "step backwards" convinces most users.
But beyond that, there are a lot of further ad-vantages of GIMP, like to work with layers, protocols, and particularly the option to save an image under a different name and start completely new, wild experiments.
As a newcomer who has not studied art, you can enjoy many other advantages of GIMP that make the painting easier.
If you do not want to work out free ideas, but after a photo original, deposit it in a layer, re-duce its opacity and draw the template in another layer. So e. g. you do not have to be a master of perspective in order to paint a lands-cape or a city view or fight again with the pro-portions of the inspiring object you want to draw. The required colors can be picked from the original photo and saved in a palette.
Thousands of ready-made brushes are available for free download on the internet and can be used for digital painting. The range va-ries from flowers, animals, buildings, clouds, trees, grass, shrubbery, to human figures and
details such as eyes and hair and much more. Also a wide range of textures is available.
After finishing the painting, you have the ability to further edit the work, e. g. to change it in a monochrome image, in any color that suits y-ou.
The monitor is your window to the digital re-alm, and GIMP is your tool. And it's for free!
Start the journey through your visions, whether abstract or realistic, whether your trip leads you to the flowers in the garden or fantasy wor-lds, or through the sky into space, there are no limits.
And if you want to get your paintings out of the wonderful world of the computer: You can ha-ve it printed on many materials, photographic paper, aluminum, textured watercolor paper, canvas and also fabric .
Start GIMP, dive deeply into the endless world of colors and shapes, catch your dreams, self-actualize in an unanticipated manner. You will be amazed by the possibilities.
Suzanna
Book available: www.amazon.com
www.bur-verlag.de
The sky is not the limit
The colorful imagery of GIMP-Art

3
The sky is not the limit
The colorful imagery of GIMP-Art ....................................................... 2 Introduction ........................................................................................ 6 The GNU Image Manipulation Program ............................................. 7 First steps using GIMP for drawings and paintings ............................ 8 - Examples of brushes and tools ...................................................... 10 - Setup gradients ............................................................................. 11
- Setup palettes ............................................................................... 11
Techniques of painting 1. Smudge: The first feeling of success, Hibiscus ........... 12
2. Smudge, Airbrush-Look: Fotorealism .................................................. 16
3. Smudge, Watercolor Bottles ......................................................... 20
4. Foliage: Jungle .......................................................... 22
5. Foliage: Summer scenery.......................................... 26 6. Drawing, Pencil; Plants .......................................................... 30 7. Drawing, Color Pencils:
Parc ............................................................. 34
8. Drawing, Color Pencils:
Glass Bottles ............................................... 38
9. Drawing, Color Pencils: Steet in Winter ............................................. 42 10. Charcoal: Seesight ...................................................... 46
Content

4
11. Drawing, Pencil: Portrait......................................................... 50
12. Drawing, Color Pencil: Amalfi .......................................................... 52
13. Pastel: Sundown ..................................................... 56 14. Pastel: Tiger ............................................................ 64 15. Pastel: Idylic scene at the riverside ......................... 68 16. Pastel-Portrait: Leonie ......................................................... 74
17. Acrylic Painting: Goldfishpool ................................................ 78 18. Acrylic Painting:
Dream Landscape ....................................... 84
19. Oil Painting: Apples ......................................................... 90 20. Oil Painting: Sailing boat on the river Nil .......................... 94 21. Oil Painting: Winter .......................................................... 98
22. Oil Painting:
Gerbera ..................................................... 102

5
23. Oil Painting: Waterfall .................................................... 106 24. Oil Painting: Autumn in the wood ................................... 114
25. Oil Painting: Smoothe Ocean ......................................... 118
26. Airbrush: Calla .......................................................... 122 27. Airbrush: Tomatoes ................................................... 125
28. Airbrush: Redeye Frog .............................................. 128
29. Layer: Blue Desert ................................................ 132 30. Layer: Fantasy-Landscape ................................... 136
31. Watercolor: Spider ........................................................ 144 32. Bright Watercolor: Riverbank................................................... 148
33. Watercolor: Dancer ....................................................... 152
34. Watercolor: Mountain Landscape in Winter ................... 154
Imprint ........................................................ 160

6
What is the difference between digitaly
painting and traditional painting
Only the technical work equipment.
The computer is the tool. The image manipula-tion programm and the grafic tablet are the equipment.
The GIMP program is for free. You save
the purchasing costs for expensive
canvas, brushes and colors.
The Painting on the computer is not about the gadgets that are possible with a photo manipu-lation program. It really should be drawn and painted.
The mastery of the work equipment – the brus-hes and the grafic tablet is important, practice makes the master here. Start and try it and do not despair. Over time, one gains the con-fidence to freely draw real images.
The ability to save an image.
In traditional painting a past state can never be restored. For digital painting that's no prob-lem. Be aware of this fact and use it. Save each new version from, because if something "went wrong", you can always go back to a previous version.
Infinite variations in drawing and pain-
ting.
Through the various "brushes" as pencil, chalk, charcoal, watercolors, oil paints, etc., any cha-
racters and painting techniques are applied. The canvas is an empty file that my be created in different sizes and colors. With the GIMP program in the basic several brushes are in-cluded.
On the Internet you will find a variety of preset brushes whichcan make work easier.
The digital painting does not cause
clutter in the home.
You do not need a studio to have a place for all the tools and these can be left. A desk and a computer, a good screen and a graphic tab-let are enough, and you have everything available, from pencil to oil paints.
There is no need for space to store all the sketches and photos.
If necessary, you can have print the images on canvas, dibond aluminum, can print on photo paper and other materials.
Very useful when painting with Gimp
are the "layers".
Here, you can always put a new transparent layer on the painted image on which you may go on with painting. This single image layers can then be switched off during the painting process, or can assign different layer styles.
These layer feature is also very useful when you want to redraw a picture.
Add the original image as a level one, reduce the opacity and draw in the other layer on the outlines and details of the original photo. You
can make the picture invisible or appear any time by clicking when needed.
This makes work easier in terms of proportions and perspectives.
From the original photo, you can also create a color palette that allows you to paint the pic-ture with original colors. Creates a new palette by using the pipette to pick up the individual colors from the reference photo.
See: create a palette
Introduction

7
You can download the GIMP image manipula-tion program for free and virus-proof. In this program there are many presets of brushes available. It is also possible to insert the additi-onal package of Gimp Paint Studio.
For the use as a drawing and painting program I recommend, however, to download the GIMP PAINTER (MIXBRUSH. This program includes the MIXBRUSH that extends the program to many GIMP BRUSHES.
Gimp painter (Mixbrush)
Free GIMP version with extensions
With GIMP PAINTER one uses a version which has many numerous brushes more. The also called MIXBRUSH freeware brings all the fea-tures of GIMP added by numerous brush opti-ons to lots of presets and settings.
After unpacking you start GIMP PAINTER by calling the file run_gimp.wsf. By clicking on the BRUSH TOOL, an additional field appears under the tools and you may select the desired brush shape and advanced painting effects.
With GIMP PAINTER one conjures watercolor effects, sponge, chalk painting on the virtual canvas. With the slider and click boxes one uses advanced options such as pigment appli-cation, fade-in, pressure strength, opacity, flow and brings realistic strokes and patterns on simulated surfaces such as canvas, paper or wood. The remaining functionality is like the original GIMP.
With GIMP PAINT STUDIO GIMP will be a power-ful painting tool.
The free add-on package adds additional
GIMP BRUSH, AIRBRUSH, SPRAY, ERASER, INK TYPES, AND SMUDGE-TOOLS.
GIMP PAINT STUDIO is to be attached to a com-plete GIMP system.After unpacking, you copy the contents of directories brushes, palettes in the same paths in the GIMP DIRECTORY. The DIRECTORY TOOL-OPTIONS is to be newly crea-ted and the contents are to be copied into the appropriate folder. Set the files toolrc and ses-sionrc in the GIMP MAIN DIRECTORY.
On the website of the GIMP PAINT STUDIOS you
will find extensive information on downloading and installing.
http://code.google.com/p/gps-gimp-paint-studio/
In GIMP, you open by clicking on the icons BRUSHES, AIRBRUSH, ERASER AND SMUDGE-FINGER an additional set of options and select one of the desired set profiles and advanced painting effects. In addition, GIMP PAINT STU-
DIO provides additional tools for saturation, hue and curve types.
If you need additional brushes, they can be found on the internet to download. There is no problem to install brus-hes from Photoshop.
http://browse.deviantart.com/ http://www.brushlovers.com/
The GNU Image Manipulation Program

8
Before you create an image with GIMP, it is necessary to change the preferences of the program.
Go to the MENU bar, select EDIT-PREFERENCES-ENVIRONMENT.
Set a large number of steps for the undo levels (about 100), so that when you have the oppor-tunity to paint, steps can be reversed.
For the Maximum undo memory size, I also recommend to specify the maximum number, also for the tile cache size and new image si-ze, because for the painting much space is needed.
Set the tool options preferences in that way, you can use PAINT OPTIONS SHARED BETWEEN.
Sort the tools in the toolbox as it is best for y-our work. I have assembled all the tools I need for painting.
The preferences for a NEW IMAGE I've made so as I usually need for my paintings.
A color image you want to print, should have 300 to 360 dpi, a black and white image 400 dpi.
In DATA FOLDER, you can specify which folders are to be accessed by GIMP, so you have the necessary tools for image editing and painting are available here.
Don't change anything to the default path of the program. Create extra folder for the brus-hes, palettes, etc. on the hard disk of your
computer or an external hard drive,into which you copy each desired resource.
So GIMP can access these folders, click the FOLDER ICON at the top left of the brush folder, then right click the BROWSE button, select BRUSH FOLDER. This opens a context menu where you can set the access path.
I put my extra brushes, palettes, etc. onto ex-ternal hard drive in folders. If I need some brushes for painting, so I put them in the folder "custom brushes" (pallets, etc.), so that GIMP has access to it. Then I press the button "Reload brush". If I no longer need these tools, I delete them from the folder "custom brushes". So I prevent that the number of the brushes is too confusing.
First steps using GIMP for drawings and paintings
9
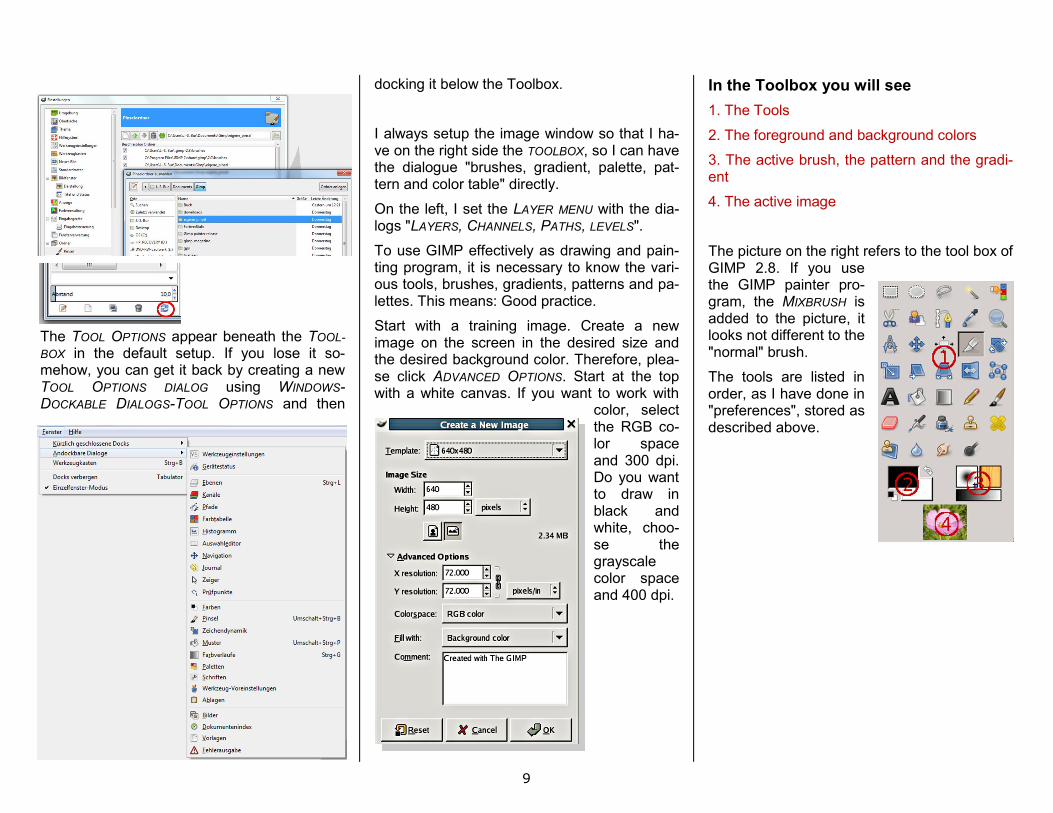
The TOOL OPTIONS appear beneath the TOOL-
BOX in the default setup. If you lose it so-mehow, you can get it back by creating a new TOOL OPTIONS DIALOG using WINDOWS-DOCKABLE DIALOGS-TOOL OPTIONS and then
docking it below the Toolbox.
I always setup the image window so that I ha-ve on the right side the TOOLBOX, so I can have the dialogue "brushes, gradient, palette, pat-tern and color table" directly.
On the left, I set the LAYER MENU with the dia-logs "LAYERS, CHANNELS, PATHS, LEVELS".
To use GIMP effectively as drawing and pain-ting program, it is necessary to know the vari-ous tools, brushes, gradients, patterns and pa-lettes. This means: Good practice.
Start with a training image. Create a new image on the screen in the desired size and the desired background color. Therefore, plea-se click ADVANCED OPTIONS. Start at the top with a white canvas. If you want to work with
color, select the RGB co-lor space and 300 dpi. Do you want to draw in black and white, choo-se the grayscale color space and 400 dpi.
In the Toolbox you will see
1. The Tools
2. The foreground and background colors
3. The active brush, the pattern and the gradi-ent
4. The active image
The picture on the right refers to the tool box of GIMP 2.8. If you use the GIMP painter pro-gram, the MIXBRUSH is added to the picture, it looks not different to the "normal" brush.
The tools are listed in order, as I have done in "preferences", stored as described above.

10
With GIMP you may combine each paint
tool with each brush.
The BUCKET FILL fills with color or pat-tern.
The BLEND fills with gradients
PENCIL: drawings can be created in va-rious degrees of hardness and colors.
PAINTBRUSH: This is the most common-ly used tool in painting. It works with all types of brushes, colors, gradients in
combination. In GIMP PAINTER you will have the MIXBRUSH too. Using the MIXBRUSH super-imposed colors are blurred together.
AIRBRUSH: can be painted with a spray gun
INK: This tool is usually used for calli-graphy.
ERASER: This tool may be used in the sa-me way like aneraser in traditional pain-ting. SMUDGE-FINGER: will blur the colors.
THE COLOR PICKER TOOL is used to select a color on any image opened on
your screen. By clicking a point on an image, you can change the active color to that which is located under the pointer
Choose a tool and add any brush. GIMP pre-sets are also available for each tool.
To access the list of presets, click at the bot-tom of the icon and sel-ect it from the list. You
can also create and save presets.
Set the desired color as the foreground color. You can also work with color gradients.
The opacity, size (scaling) and angle, dynamic and much more you can control in the menus.
Whether water color, acrylic, oil, pastel, each brush is available. Test the possibilities.
Examples for brushes in combination
with tools
Pencil-Tool with brush „round“
Paintbrush-tool with brush „Acrylic“
Paintbrush-tool with brush „round-soft“
Ink-tool

11
Paintbrush-tool with brush „Pastel“ (Chalk)
Paintbrush-tool with brush „grass“, color from gradient.
Paintbrush-tool with brush „a random vegetal“,
color from gradient
Brush „Oilknife“
Mixbrush-tool with brush watercolor
Paintbrush-tool with brush „clouds“ (Foliage)
Paintbrush-tool with brush "Leaves", color from gradi-ent
Smudge-tool with brush „round-soft“
Create New gradient
You can set up your own color gradient by cli-
cking the left arrow button, then go to the GRA-
DIENT MENU with the mouse, then the context menu opens with the submenu New Gradient.
Existing gradients can be duplicated and modi-fied.
Create a new Palette
Proceed equally with setting up a custom pa-lette The colors of the palette, you can deter-mine with the pipette from an existing image

12

13
1 Use a hard PENCIL-BRUSH for dra-wing out the outlines.
For the next step: Copy this layer and keep on working on this new one. So you can always go back on the previous ver-sion, if you'r not satisfied with the dra-wing.
2 I hatched the background with the BRUSH-DUST (GIMP-painter), it can also be done with a CHALK- OR PASTEL- BRU-SHES. The color was picked from a GRADI-
ENT set with the corresponding design.
The lower area is shaded with gray and a
light blue. The shaded background is to be drawn through the glass, so that later the transparency will be clear.
3 Paint the glass bottles colorfully. Start with the rear ones, so the color shows through the bottles in the front.
The contours, which can be seen in the front standing bottles are drawn broken.
8 Drawings, Colorpencils: Glass Bottles
1 2
3
Material

14
4 In the last step, the dark areas are drawn more intensely, and the shadows are to be created in the ap-propriate colors.
Paint with the SMUDGE-TOOL and the default SMUDGE-SOFT to smooth the hatches. Then apply the light areas with white and reduced OPACITY (about 30%).
Blue Bottles
1 I colored the background with a bright blue. With a large BRUSH/
MIDDLE-ROUND SOFT I included two white light sources.
The outlines of the bottles I created on a new layer.
2 Add the blue color, selected from the background with the COLOR-PICKER-TOOL. Paint with a broad brush, I used A17 KNIFE ENDS ANI-
MATED (GPS).
The brush has the character of a charcoal pencil. Put the bright spots on, in white.
4 1
2

15
Glass dasheded
1 I painted the subject and the background with a rough PENCIL BRUSH/P-REAL-PENCIL, cre-ated an outline drawing and the shadows. You can also use a graphite brush for this GRAPHITE - OR CHALK.
2 To make the transparency of glass vi-sible, the background and the base must shine through.
3 Now enhance the shading with the same brush.
The shadows are to be repeatedly paint over, and finally attach white for highlights.
This image is represented by the application of paint in very rough held strokes, I have there-fore not processed on with the SMUDGE-TOOL.
1 2 3

16
Imprint
Publisher: Susanna Bur contact: [email protected]
Layout: Susanna Bur Cover: Jörg Bur
ISBN: 978-3-944306-03-2 Bur-Verlag
www.bur-verlag.de
Print: www.createspace.com
Copyright ©: This work is copyright in its entirety. All rights remain
with the author.
Regardless of the care that was used in the creation of text, images,
and programs, neither the publisher nor the author can accept any
legal responsibility or liability. for any possible errors and their conse-
quences
Available: www.amazon.com
With thanks to:
Bur-Verlag
http://gimpcreative.wordpress.com/
http://www.gimp.org/
https://code.google.com/p/gps-gimp-paint-studio/
http://browse.deviantart.com/?q=gimp+brushes
http://browse.deviantart.com/?q=gimp+brushes
http://browse.deviantart.com/?q=tree+brushes
http://browse.deviantart.com/?q=pastel+brushes
http://www.gimpbrushes.de/
http://free-brushes.com/
http://stylishwebdesigner.com/2000-free-gimp-brushes-for-designers/
http://www.noupe.com/tools/1000-free-high-resolution-gimp-
brushes.html
http://www.texturemate.com/content/brushpacks
http://www.brushdirectory.com/gimp/
http://www.gimpusers.de/
http://www.gimpusers.com/
http://www.gimp-werkstatt.de/index.php
http://de.wikipedia.org/wiki/GIMP

17