Embed Size (px)
Citation preview
8/3/2019 ENGL395 Instructions-Painting Final
http://slidepdf.com/reader/full/engl395-instructions-painting-final 1/5
Thierry Signe
#5951631
ENGL-395
Jeannette Novakovich
Assignment #3
Instruction Set
A 5 Step Guide to Painting Scale Models
with Professional Results
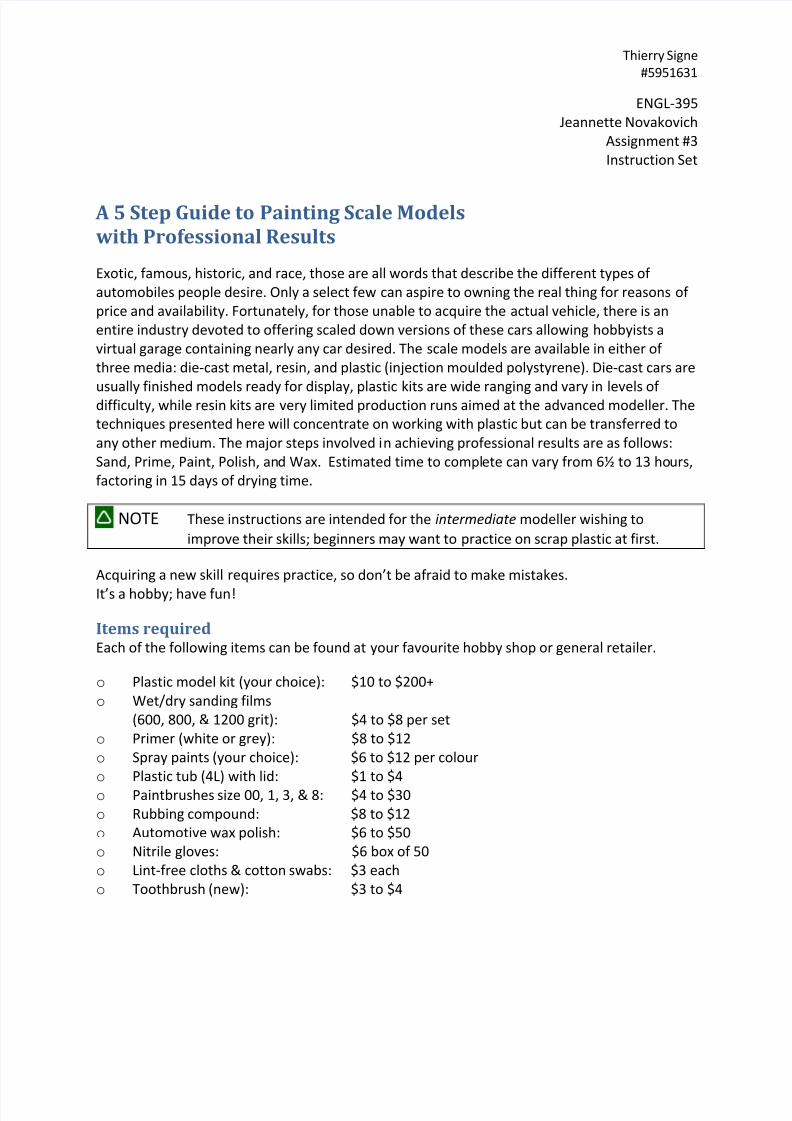
Exotic, famous, historic, and race, those are all words that describe the different types of
automobiles people desire. Only a select few can aspire to owning the real thing for reasons of
price and availability. Fortunately, for those unable to acquire the actual vehicle, there is an
entire industry devoted to offering scaled down versions of these cars allowing hobbyists a
virtual garage containing nearly any car desired. The scale models are available in either of
three media: die-cast metal, resin, and plastic (injection moulded polystyrene). Die-cast cars are
usually finished models ready for display, plastic kits are wide ranging and vary in levels of difficulty, while resin kits are very limited production runs aimed at the advanced modeller. The
techniques presented here will concentrate on working with plastic but can be transferred to
any other medium. The major steps involved in achieving professional results are as follows:
Sand, Prime, Paint, Polish, and Wax. Estimated time to complete can vary from 6½ to 13 hours,
factoring in 15 days of drying time.
NOTE These instructions are intended for the intermediate modeller wishing to
improve their skills; beginners may want to practice on scrap plastic at first.
Acquiring a new skill requires practice, so don’t be afraid to make mistakes.
It’s a hobby; have fun!
Items requiredEach of the following items can be found at your favourite hobby shop or general retailer.
o Plastic model kit (your choice): $10 to $200+
o Wet/dry sanding films
(600, 800, & 1200 grit): $4 to $8 per set
o Primer (white or grey): $8 to $12
o Spray paints (your choice): $6 to $12 per colour
o Plastic tub (4L) with lid: $1 to $4
o Paintbrushes size 00, 1, 3, & 8: $4 to $30
o Rubbing compound: $8 to $12
o Automotive wax polish: $6 to $50
o Nitrile gloves: $6 box of 50
o Lint-free cloths & cotton swabs: $3 each
o Toothbrush (new): $3 to $4
8/3/2019 ENGL395 Instructions-Painting Final
http://slidepdf.com/reader/full/engl395-instructions-painting-final 2/5
Thierry Signe
#5951631
Step 1: SandEstimated time to complete: 3h to 4h + 24h drying time
When first getting a kit, the first impulse is to start painting right away. Unfortunately, this will
give poor results. In order to achieve great results, it is imperative to prepare the surface for
the paint to adhere properly.
Plastic models are made from injection moulded styrene. When an item is cast, flash (mould
line) appears where the two mould halves meet (similar to chocolate Easter bunnies). The
mould lines are very small raised lines that usually run along the side of the roof line, down
each pillar, along the edge of the hood/trunk and carry on down though the lights and
bumpers. Here’s how to get rid of flash.
CAUTION Be sure to differentiate flash from the intentional body panel lines.
a) Gently remove flash starting with 600 grit dry sanding film.
b) Repeat with wet sanding.c) Continue sanding with progressively smoother grades of grit. Alternate dry sanding with
wet sanding, using 800, 1000, and finally with 1200 grit film.
d) Once the flash is removed, wash the model in warm soapy water and leave to dry. This
will remove most oils and sanding residue from the plastic.
e) Brush off all remaining sanding particles left on the car shell using a dry, soft bristled #8
paintbrush.
f) Rinse once more in warm running water. This helps remove any static charge from the
plastic.
g) Shake as much water off the car shell as you can. Now, brush remaining water beads off
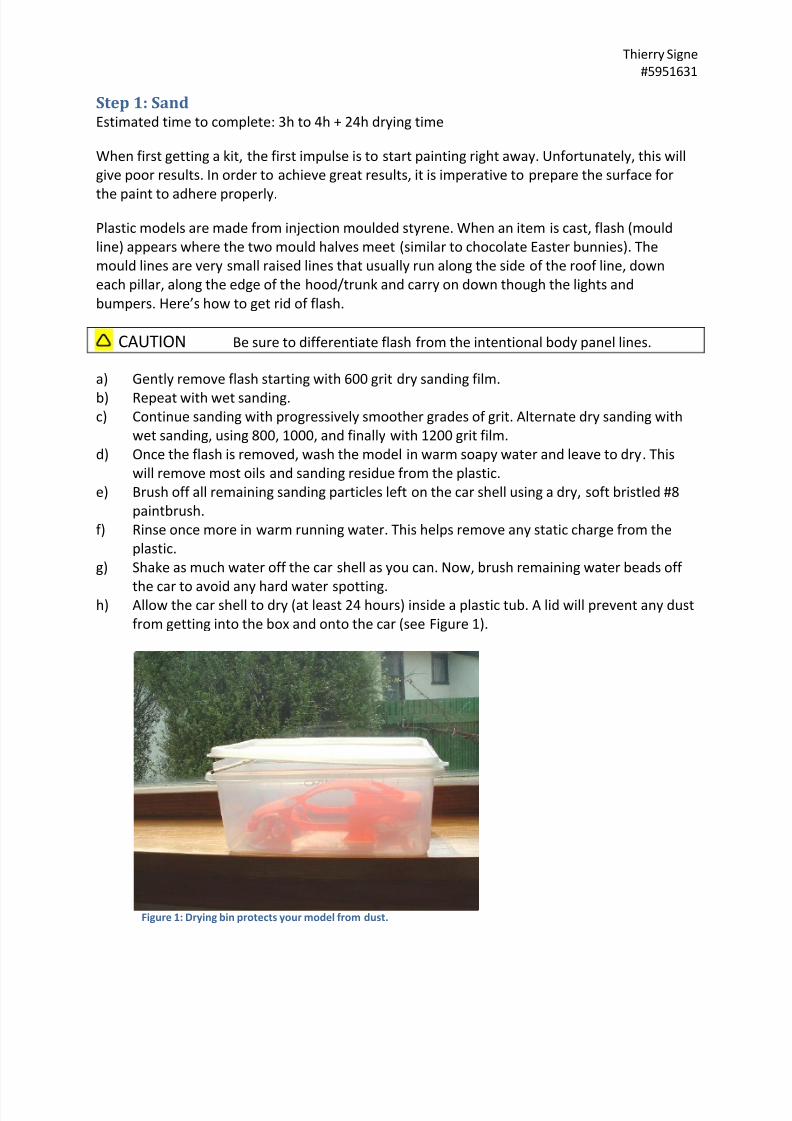
the car to avoid any hard water spotting.h) Allow the car shell to dry (at least 24 hours) inside a plastic tub. A lid will prevent any dust
from getting into the box and onto the car (see Figure 1).
Figure 1: Drying bin protects your model from dust.
8/3/2019 ENGL395 Instructions-Painting Final
http://slidepdf.com/reader/full/engl395-instructions-painting-final 3/5
Thierry Signe
#5951631
Step 2: PrimeEstimated time to complete: 45min to 90min + 1week curing time
The secret to a great paint finish is in priming. A primer is a grey or white flat base coat that
bonds to the plastic surface, acting as a protective barrier, and allowing paint to adhere evenly.
Also, certain types of paints, such as lacquers, may be too harsh for direct contact withpolystyrene.
WARNING Work in a well ventilated area and protect your lungs.
Always wear a filtered breathing mask when spraying paint.
Wear Nitrile gloves to protect hands from harsh chemicals found in
primer solvents.
a) Mist the primer on the car shell from a perpendicular distance of 7-9 inches, moving the
can across gently from side to side.
b) Do not start or stop halfway. Continue past the model before changing directions.
c) After a first misting, replace body in the plastic dust-free container. Wait 30 minutes.
d) Mist a second coat of primer to cover the entire car shell.
e) Replace model in the drying tub. Allow primer to dry for one week.
NOTE The primer will reveal any surface irregularities missed in Step 1.
Repeat Steps 1 and 2 until results are satisfactory.
Step 3: Paint Estimated time to complete: 45min to 90min + 1week curing time
Take your time. Do not rush. Apply three to four coats of finish paint on your car shell in 5 –10minute intervals. While spray painting, if you are too far away, your paint will dry before hitting
the surface, resulting in an orange peel finish. Spray too closely and the paint will go on too
thickly, causing runs and bubbles to appear.
WARNING Work in a well ventilated area and protect your lungs.
Always wear a filtered breathing mask when spraying paint.
Wear Nitrile gloves to protect hands from harsh chemicals found in paint
solvents.
NOTE Prescribed order for painting: Front and rear bumpers, both sides along
the whole length of the car body, then the hood, trunk, and lastly the
roof.
a) Mist a very light coat of paint from a distance of 8 –10 inches, using the same technique
mastered in Step 2.
b) Repeat for a second coat.
c) Spray a third coat bit more heavily by slowing down the movement so it covers the surface.
8/3/2019 ENGL395 Instructions-Painting Final
http://slidepdf.com/reader/full/engl395-instructions-painting-final 4/5
Thierry Signe
#5951631
d) Spray the final coat at a closer distance of 5 –7 inches. This will lend a mirror-like
smoothness to the final coat.
e) Allow the car shell to dry in the tub for one week.
Step 4: Polish
Estimated time to complete: 1h to 3h
Once the paint has cured, it can be polished with a rubbing compound. This important step
smoothes out the paint even further and ensures a perfect preparation for the wax. The
rubbing compound will not take out bad orange peel. If you do have orange peel you will need
to sand the body first before continuing.
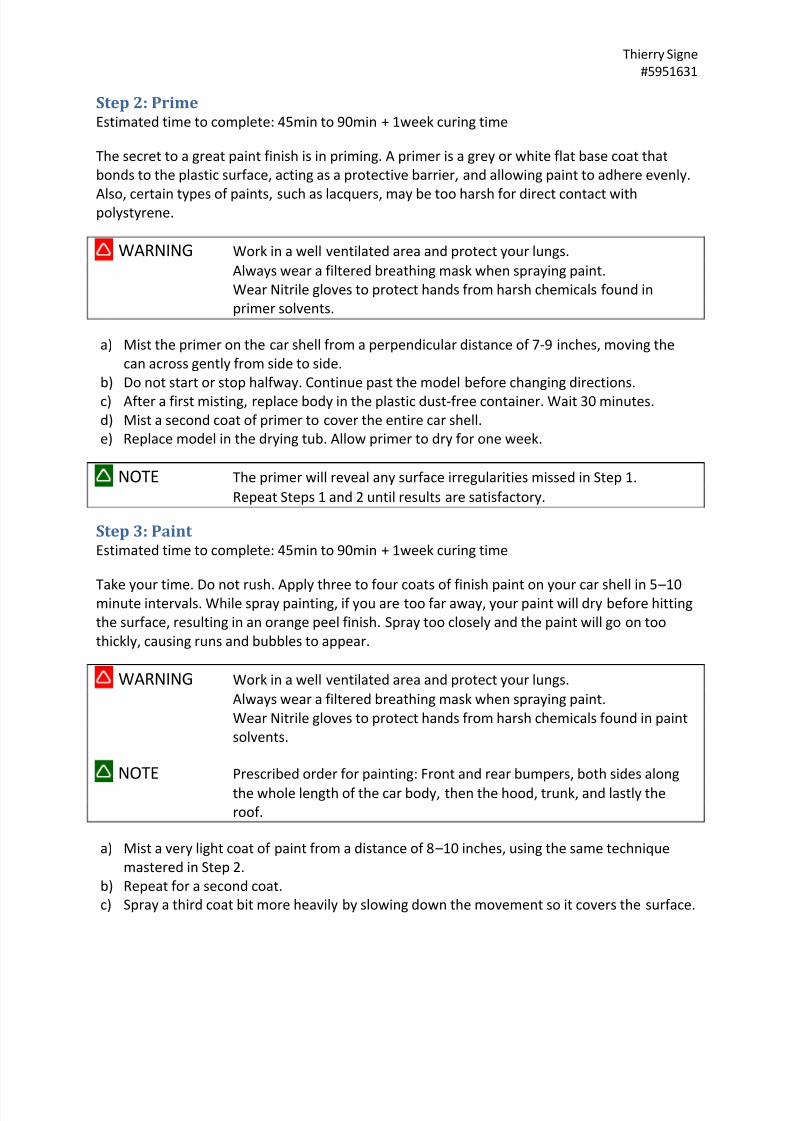
a) First add a small amount of rubbing compound to the lint-free cloth. See Figure 2 for
amount required to rub the front of a car. Use a cotton swab for tight areas.
b) Rub compound in small circular movements by applying very light pressure.
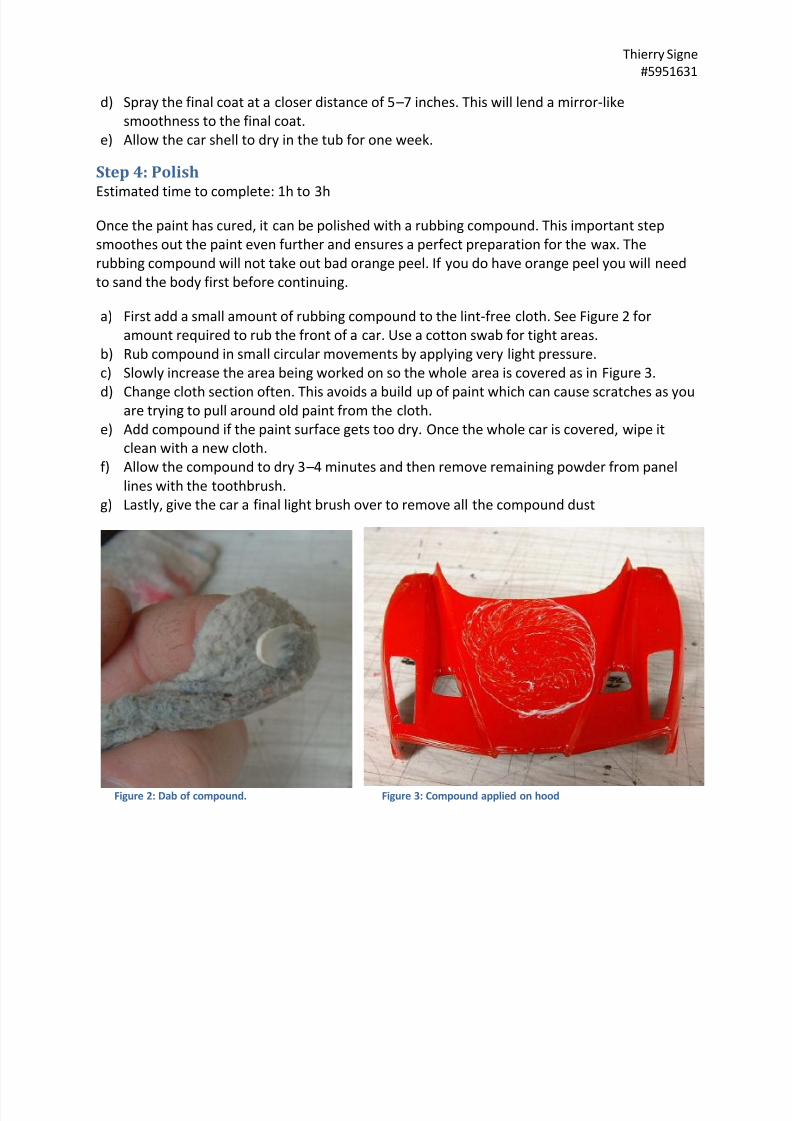
c) Slowly increase the area being worked on so the whole area is covered as in Figure 3.
d) Change cloth section often. This avoids a build up of paint which can cause scratches as youare trying to pull around old paint from the cloth.
e) Add compound if the paint surface gets too dry. Once the whole car is covered, wipe it
clean with a new cloth.
f) Allow the compound to dry 3 –4 minutes and then remove remaining powder from panel
lines with the toothbrush.
g) Lastly, give the car a final light brush over to remove all the compound dust
Figure 2: Dab of compound. Figure 3: Compound applied on hood
8/3/2019 ENGL395 Instructions-Painting Final
http://slidepdf.com/reader/full/engl395-instructions-painting-final 5/5
Thierry Signe
#5951631
Step 5: WaxEstimated time to complete: 1h to 3h
Waxing is the last and easiest step to accomplish. It is how a show-car glossy finish is obtained.
a)
Apply a small amount of wax onto a new cloth (see Figure 2).b) Rub wax in small circular movements by applying very light pressure (see Figure 3).
c) Let wax dry for 1-2 minutes.
d) Wipe clean using light, circular motions.
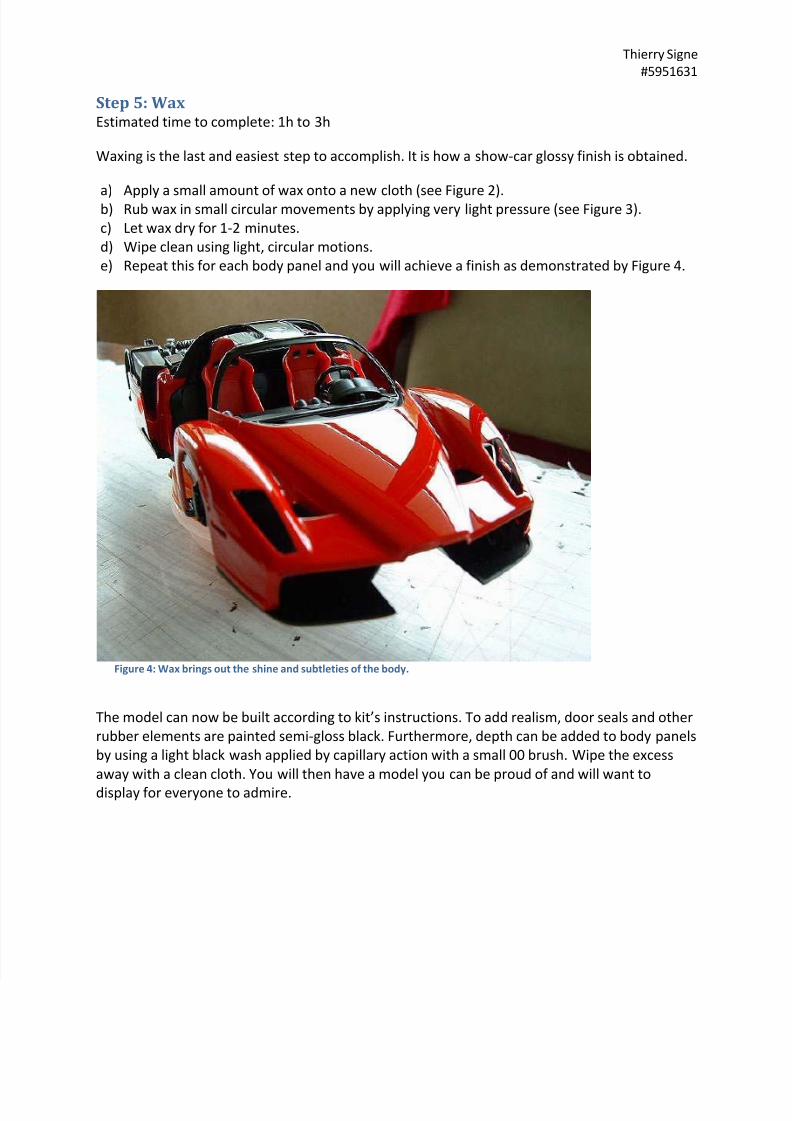
e) Repeat this for each body panel and you will achieve a finish as demonstrated by Figure 4.
Figure 4: Wax brings out the shine and subtleties of the body.
The model can now be built according to kit’s instructions. To add realism, door seals and other
rubber elements are painted semi-gloss black. Furthermore, depth can be added to body panels
by using a light black wash applied by capillary action with a small 00 brush. Wipe the excess
away with a clean cloth. You will then have a model you can be proud of and will want to
display for everyone to admire.