Embed Size (px)
Citation preview
Brava 5.3 X Client User Guide

iii
Table Of Contents Help Contents ..................................................................................................1 New Features in this Release .............................................................................3 What is CSF? ...................................................................................................5 Why CSF? .......................................................................................................7 All Toolbars .....................................................................................................9 Viewing Tools ................................................................................................11
Magnification Tools ......................................................................................11 Zoom and Pan Tools .................................................................................11 Fit All ......................................................................................................11 Fit Width .................................................................................................11 Zoom Buttons ..........................................................................................11 Pan Tool ..................................................................................................12 Magnifier .................................................................................................12 Image Based Zooming ..............................................................................13 Page Thumbnails ......................................................................................13
Display Tools ..............................................................................................14 View Tools ...............................................................................................14 Rotate Tool ..............................................................................................15 Visible Layers...........................................................................................15 Monochrome ............................................................................................15 Background Color .....................................................................................16 Page Control ............................................................................................16 Display Options ........................................................................................17 Mirror......................................................................................................18
File Comparison Tools ..................................................................................18 Compare .................................................................................................18 Set Alignment Points.................................................................................19
Right Mouse Controls ...................................................................................20 Markups........................................................................................................21
Markup Files ...............................................................................................21 Creating Markups ........................................................................................22 Markup Entity Tools .....................................................................................22
Markup Toolbar ........................................................................................22 Select Markup Entity .................................................................................23 Cloud and Polycloud..................................................................................23 Line Arrow ...............................................................................................23 Markup Text.............................................................................................24 Insert Raster Image..................................................................................24 Sketch and Sketch Poly .............................................................................25 Straight Line ............................................................................................26 Poly Line .................................................................................................26 Arc Tool...................................................................................................26 Scratchout ...............................................................................................26 Cross Out ................................................................................................27 Solid and Hollow Shapes............................................................................27 Edit Text Entities .....................................................................................28 Hyperlinks ...............................................................................................28
Changemarks..............................................................................................29 Creating Changemarks ..............................................................................29 Reviewing Changemarks............................................................................30
Brava 5.3 X Client User Guide
iv
Changemarks Filters .................................................................................30 Redaction ...................................................................................................31
CSF with Redaction ...................................................................................31 Blockout for Redaction ..............................................................................32 Burning in Markups...................................................................................32 Find and Redact .......................................................................................34 Redact to Phrase List ................................................................................34 Redact Mouse Tool....................................................................................36
Markup Properties .......................................................................................36 Markup Properties Tools ............................................................................36 Markup Font.............................................................................................37 Highlights ................................................................................................37 Background Fill.........................................................................................38 Line Style and Width .................................................................................38 Markup Color ...........................................................................................39
Editing Markups ..........................................................................................39 Closing Markups ..........................................................................................40 Saving Markups...........................................................................................40 Overlay Markups for Review..........................................................................41 Markup Pages .............................................................................................41 Copying Markups.........................................................................................41 Consolidating Markups .................................................................................42 Changing Markup Ownership.........................................................................42 Publishing Markups in PDF files .....................................................................43
Interactive Tools ............................................................................................45 Select Tool .................................................................................................45 Copy Text...................................................................................................45 Find...........................................................................................................45 Measurement..............................................................................................46
Calibration ...............................................................................................46 Measurement ...........................................................................................46 Measure Line............................................................................................47 Measure Rectangle....................................................................................47 Measure Polygon ......................................................................................48 Measure Polyline.......................................................................................48 Measure Count .........................................................................................49 Measurement Settings...............................................................................50 Measure Magnification Tool ........................................................................50
File Operations...............................................................................................51 Printing Tools..............................................................................................51
Printing ...................................................................................................51 Print a File ...............................................................................................51 Print Region .............................................................................................53 ISO Banners and Watermarks ....................................................................53 Adding, Editing Watermarks/Banners ..........................................................54 Tags .......................................................................................................55 Font Selection ..........................................................................................56 Print to Scale ...........................................................................................56 Line Thickness..........................................................................................59 Print Tips and Troubleshooting ...................................................................59
Publishing Files ...........................................................................................60 Save View as JPG .....................................................................................60 Publishing files to PDF ...............................................................................61
Table Of Contents
v
Publishing files to CSF ...............................................................................61 Security Type...........................................................................................62 User Permissions ......................................................................................63 Expiration Dates .......................................................................................63 Published Output ......................................................................................64 Watermarks on CSF Files ...........................................................................64
About Content Sealed (CSF) Documents ...........................................................65 CSF Publishing & Visual Rights ......................................................................65 Viewing CSF Files in Brava............................................................................66
Hot Keys .......................................................................................................68 Contact Information .......................................................................................71 Index............................................................................................................73

1
HELP CONTENTS
Brava!® Enterprise is web server software designed to help you view and collaborate on native format documents, images, CAD files, and our own secure CSF format quickly and easily.
Choose a topic below to get information on a specific Brava! Enterprise feature.
Toolbars
Markups
Changemarks
Hyperlinks
View Tools
Set Visible Layers
Zoom and Pan Tools
Calibrate and Measure
Copy Text
Find
Print Banners
Compare Files
Hot Keys
Content Sealed Documents
Publishing Files
Contact Information
Suggest New Features for Brava! Enterprise
9
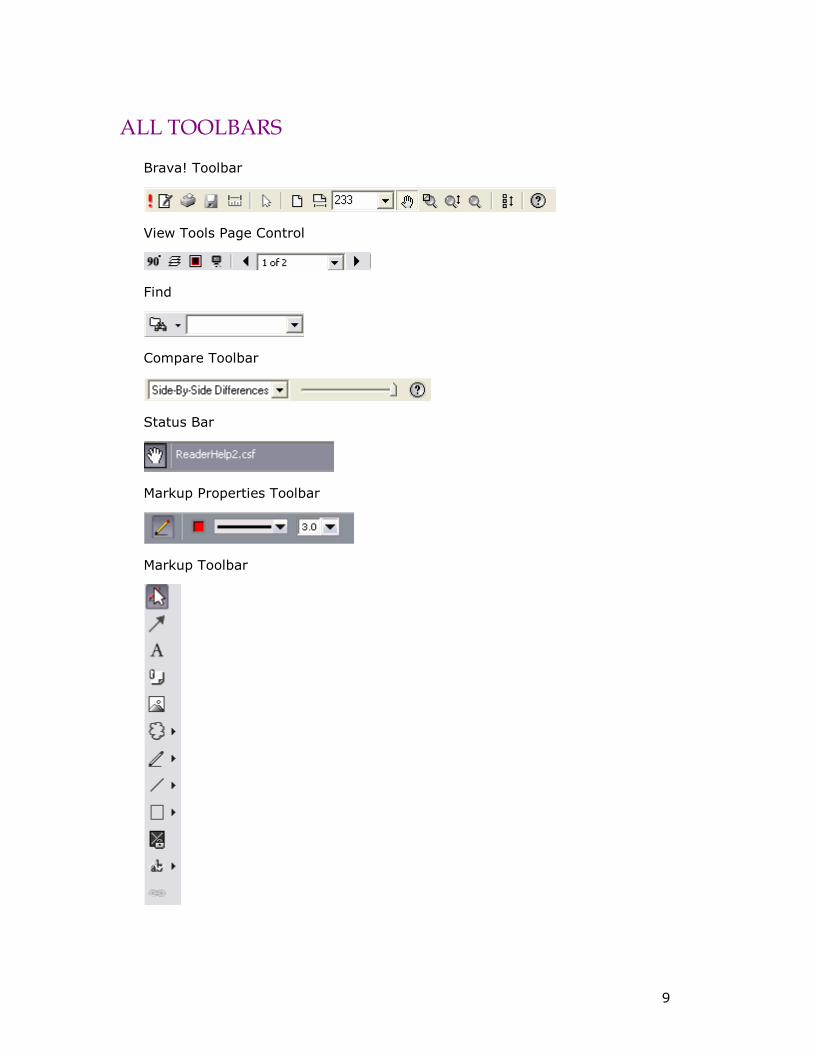
ALL TOOLBARS
Brava! Toolbar
View Tools Page Control
Find
Compare Toolbar
Status Bar
Markup Properties Toolbar
Markup Toolbar
11
VIEWING TOOLS
Magnification Tools
Zoom and Pan Tools
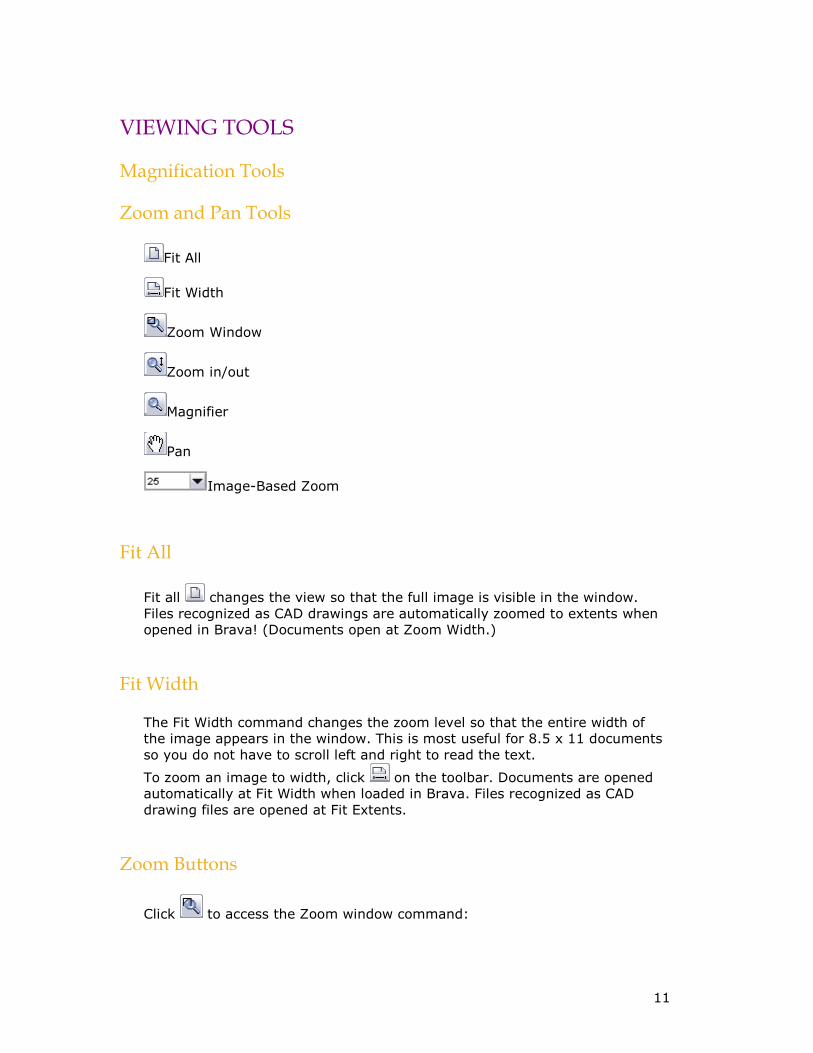
Fit All
Fit Width
Zoom Window
Zoom in/out
Magnifier
Pan
Image-Based Zoom
Fit All
Fit all changes the view so that the full image is visible in the window. Files recognized as CAD drawings are automatically zoomed to extents when opened in Brava! (Documents open at Zoom Width.)
Fit Width
The Fit Width command changes the zoom level so that the entire width of the image appears in the window. This is most useful for 8.5 x 11 documents so you do not have to scroll left and right to read the text.
To zoom an image to width, click on the toolbar. Documents are opened automatically at Fit Width when loaded in Brava. Files recognized as CAD drawing files are opened at Fit Extents.
Zoom Buttons
Click to access the Zoom window command:

Brava 5.3 X Client User Guide
12
Zoom Window. You can change the zoom area by dragging a box, or window, around the area you want to zoom in on. The area within the box will fill the image window. Simply click and hold the left mouse button, then drag the mouse around the area you wish to fill your viewing area. Zoom in/out. While in Zoom Window mode, you can press the right mouse button and move the pointer up and down to zoom in and out of an image. Up increases magnification while down decreases it. OR
Click to access the Zoom in/out control. Hold the left mouse button down while moving the pointer up and down to zoom in and out of the image. Up increases magnification while down decreases it. Note: You can use the hotkeys <+> or <-> to zoom in and out while any tool is active. First click inside of the viewer frame window and then hit the + key to increase magnification or the - key to decrease magnification.
Pan Tool
To pan across an image, click on the toolbar. Note that the mouse pointer changes to a hand icon. Click and hold the left mouse button while dragging the mouse pointer in the direction you wish to move the image. While in pan mode, you can press the right mouse button and move the pointer up and down to zoom in and out of an image. Up increases magnification while down decreases it. As with the Select tool, hyperlinks contained in the document are recognized when moused-over and can be launched when the pan tool is active.
Magnifier
The Magnifier tool summons a rectangular "magnifying glass" in your viewing window. Use this tool to zoom into smaller areas on a larger image. Adjust the magnification by clicking and holding the left mouse button on the zoom adjustment handle. Dragging upward increases magnification while downward decreases it. Move the magnifier by clicking and holding the left mouse button on the magnifier window, then dragging. Resize the magnifier by clicking and holding one of the four corner resize handles and dragging.
Markups
13
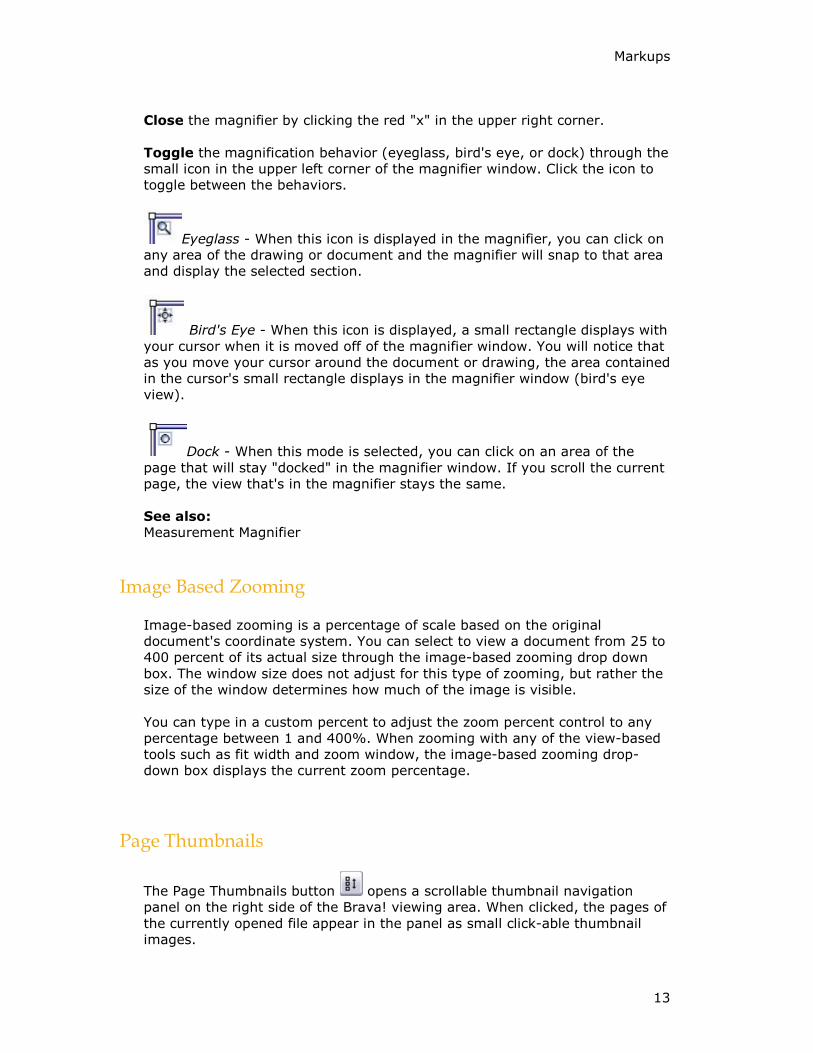
Close the magnifier by clicking the red "x" in the upper right corner. Toggle the magnification behavior (eyeglass, bird's eye, or dock) through the small icon in the upper left corner of the magnifier window. Click the icon to toggle between the behaviors.
Eyeglass - When this icon is displayed in the magnifier, you can click on any area of the drawing or document and the magnifier will snap to that area and display the selected section.
Bird's Eye - When this icon is displayed, a small rectangle displays with your cursor when it is moved off of the magnifier window. You will notice that as you move your cursor around the document or drawing, the area contained in the cursor's small rectangle displays in the magnifier window (bird's eye view).
Dock - When this mode is selected, you can click on an area of the page that will stay "docked" in the magnifier window. If you scroll the current page, the view that's in the magnifier stays the same. See also: Measurement Magnifier
Image Based Zooming
Image-based zooming is a percentage of scale based on the original document's coordinate system. You can select to view a document from 25 to 400 percent of its actual size through the image-based zooming drop down box. The window size does not adjust for this type of zooming, but rather the size of the window determines how much of the image is visible. You can type in a custom percent to adjust the zoom percent control to any percentage between 1 and 400%. When zooming with any of the view-based tools such as fit width and zoom window, the image-based zooming drop-down box displays the current zoom percentage.
Page Thumbnails
The Page Thumbnails button opens a scrollable thumbnail navigation panel on the right side of the Brava! viewing area. When clicked, the pages of the currently opened file appear in the panel as small click-able thumbnail images.

Brava 5.3 X Client User Guide
14
If you click on a Changemark in the current view, the Review Changemarks panel opens in place of the Thumbnails panel. You can open or return to the Thumbnails panel at any time by either clicking the toolbar button, using the hotkey <Ctrl>+<T>, or selecting Page Thumbnails from the View or right mouse button menu. Resizing Page Thumbnails If Thumbnail resizing is enabled by your administrator, you can right click on the Thumbnails panel to display a Page Thumbnails sizing menu and make the image sizes larger or smaller - up to ten increments. Select Reduce Page Thumbnails to decrease the thumbnail image size, or select Enlarge Page Thumbnails to increase their size. If you have enlarged or reduced the thumbnail sizes, selecting Default Size resets them to their original size. The panel itself cannot be resized. Notes:
Thumbnails won't display loaded markups unless the file is a CSF with markups burned in.
Thumbnails will have a red exclamation mark next to them if there are markups on the page (whether the markup is burned in, opened for edit, or opened for review).
Thumbnail images are always drawn with the default background color, all layers on, and non-monochrome, regardless of the main view display settings.
Display Tools
View Tools
You can change the way the image displays within Brava! by using the various view tools. The horizontal Scroll Bar contains buttons for the less frequently used display commands. From left to right, these are:
Rotate
Set Visible Layers
Monochrome
Background Color
Page Control
See Also:
Markups
15
Zoom and Pan Tools Display Options
Rotate Tool
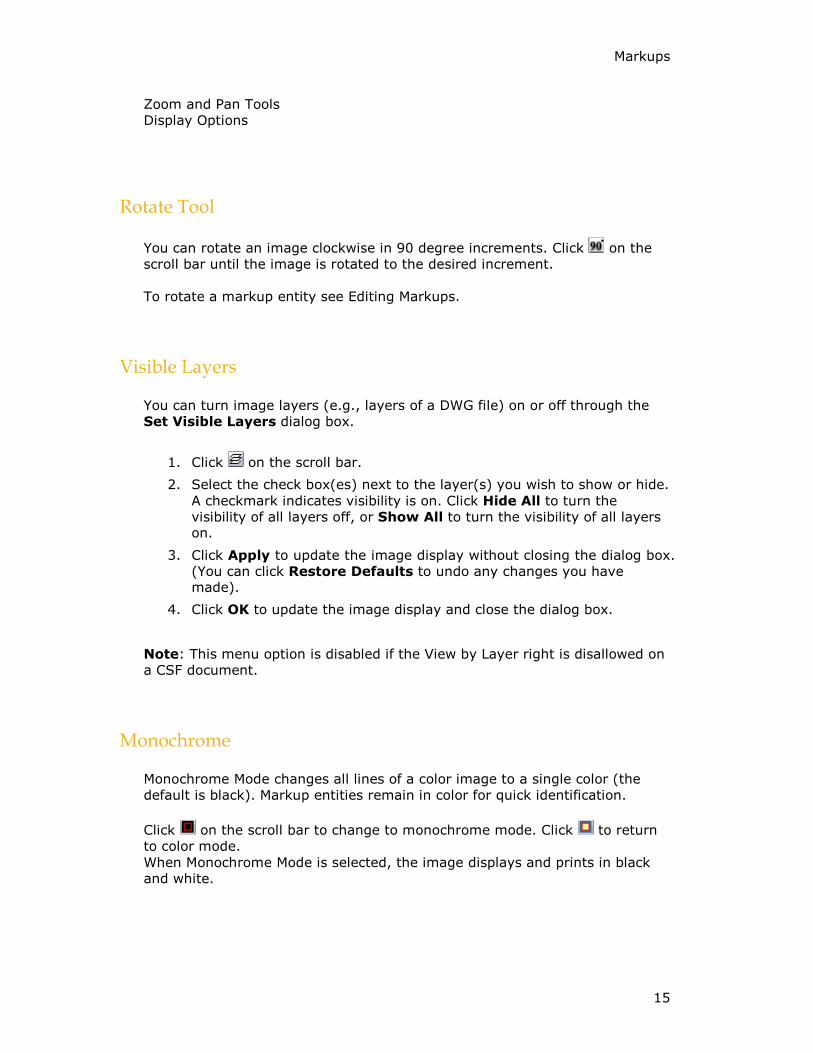
You can rotate an image clockwise in 90 degree increments. Click on the scroll bar until the image is rotated to the desired increment. To rotate a markup entity see Editing Markups.
Visible Layers
You can turn image layers (e.g., layers of a DWG file) on or off through the Set Visible Layers dialog box.
1. Click on the scroll bar.
2. Select the check box(es) next to the layer(s) you wish to show or hide. A checkmark indicates visibility is on. Click Hide All to turn the visibility of all layers off, or Show All to turn the visibility of all layers on.
3. Click Apply to update the image display without closing the dialog box. (You can click Restore Defaults to undo any changes you have made).
4. Click OK to update the image display and close the dialog box.
Note: This menu option is disabled if the View by Layer right is disallowed on a CSF document.
Monochrome
Monochrome Mode changes all lines of a color image to a single color (the default is black). Markup entities remain in color for quick identification. Click on the scroll bar to change to monochrome mode. Click to return to color mode. When Monochrome Mode is selected, the image displays and prints in black and white.
Brava 5.3 X Client User Guide
16
Background Color
You can change the background color of file types with "transparent" background colors, such as monochrome raster and vector file types (color raster files are not affected) to black, white, or gray. If you change the background color to the same color as the selected foreground color for monochrome images, the foreground color will automatically be changed. To change the background color, click on the scroll bar and select Black, White, or Gray from the pop up menu. Background color can also be accessed through the view window right mouse button menu. If you select the Default menu item, Brava! Enterprise will decide through driver directives which background color to use (for example, CAD file backgrounds will use black, office formats will use white, etc.).
Page Control
When you view a multi-page document or drawing file, the paging controls display on the scroll bar.
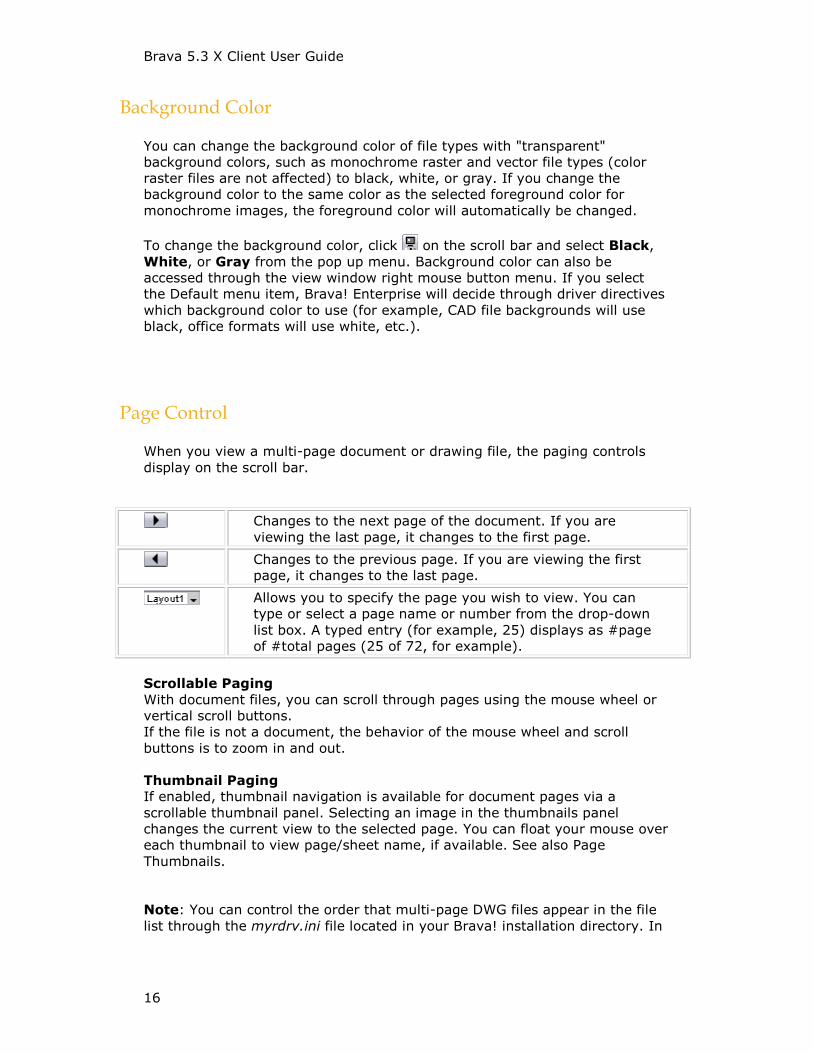
Changes to the next page of the document. If you are viewing the last page, it changes to the first page.
Changes to the previous page. If you are viewing the first page, it changes to the last page.
Allows you to specify the page you wish to view. You can type or select a page name or number from the drop-down list box. A typed entry (for example, 25) displays as #page of #total pages (25 of 72, for example).
Scrollable Paging With document files, you can scroll through pages using the mouse wheel or vertical scroll buttons. If the file is not a document, the behavior of the mouse wheel and scroll buttons is to zoom in and out. Thumbnail Paging If enabled, thumbnail navigation is available for document pages via a scrollable thumbnail panel. Selecting an image in the thumbnails panel changes the current view to the selected page. You can float your mouse over each thumbnail to view page/sheet name, if available. See also Page Thumbnails. Note: You can control the order that multi-page DWG files appear in the file list through the myrdrv.ini file located in your Brava! installation directory. In
Markups
17
the [DWG2DL] section of the file, adjust the value of the PageLoadOrder parameter according to the following preference: 0: Paperspace first 1: Modelspace first 2: Paperspace only 3: Modelspace only 4: Similar to 0 except the last active layout is first. Example: PageLoadOrder=0 If there is only one page, it is loaded.
Display Options
Available from the right mouse button menu are various check boxes that let you alter the way the image displays in the view window such as Fit Width, Fit All, next and previous paging commands, and the edit menu commands (copy, paste, and delete). Select Enable Animation if you would like to turn on this feature. When selected, the image makes animated transitions from one viewpoint to the next when using any of the viewpoint transition tools such as the zooming and rotate tools. When this feature is turned off, the image will snap to each viewpoint change. Select Review Changemarks to display the Review Changemarks frame on the right portion of the viewer window. Select Show Line Weight to display an entity's true line width. If not enabled, the view displays with all controllable vector lines drawn at one pixel thickness regardless of the entities true line width. The one pixel with stays constant at zoomed magnification when this option is disabled. Disabling the Show Line Weight command is useful when viewing files containing entities of unusual thicknesses that can obscure other entities if displayed at their true width. GDI++ support is provided for viewing vector based files with Anti-Alaising (smooth lines). A right mouse menu option "Enable Enhanced Display (Slower)" allows you to turn off Anti-Alaising to improve display performance if desired. If GDI++ is not available, this menu option is grayed out. You can also control the Background color toggle from the right mouse button menu. Select Background Color to switch from white, to gray, to black. Select Default to use the background color determined by the driver directives. You can flip a raster image horizontally with the Mirror tool. Select Mirror to toggle the mirror image on or off.
Brava 5.3 X Client User Guide
18
Mirror
You can flip a raster image horizontally with the Mirror tool. From the right mouse button menu, select Mirror to toggle the mirror image on or off. Notes:
Hotkey for the Mirror tool is <Ctrl> + <F>
You can create markups on images that have been mirrored, however, when the image and markup are reloaded for viewing, you will need to mirror the image again for the markup to display correctly over the image.
When navigating through or doing a print preview on a multi-page document, the mirror setting is retained (persisted) when navigating back and forth through the document pages. In addition, printing when doing a print preview with the mirrored state intact will print the image correctly as seen in the preview.
If a raster file is loaded using INSO, the image is treated as vector and therefore the mirror function will have no effect.
File Comparison Tools
Compare
Brava! Enterprise's Compare feature allows you to perform a graphical comparison of two file versions. This feature is only available if it has been set up and configured by your integration administrator. The Comparison Toolbar appears at bottom of viewing window. The toolbar contains several commands from a drop down menu for different viewing options. Depending on the viewing option chosen, two buttons (align and clear align), and a slider may be present. Overlay Differences (Default View) The compare file version opens overlaid on the open file. The open file displays in red (deleted geometry), and the compare file displays in green (added geometry). Geometry that has not changed (common between both revisions) is grey. Use slider to change transparency for clearer visibility of the file differences - right to dim red (deleted) areas, left to dim green (added) areas. Overlay Both versions are overlaid and both files display at their original colors. Use the slider to change the transparency of each file - left to dim the compare version, right to dim the open version. Side-By-Side Both versions are displayed in a split-screen image. Move the slider to view transparent differences overlaid in each version.
Markups
19
Deletions Only deleted areas (areas present in the open version, but not in the compare version) are displayed in red. Additions Only added areas (areas present in the compare version, but not in the open version) are displayed in green. Unchanged Only areas that are present in both the compare version and open version are displayed in grey. Open File (Only) Only the file that was first opened is displayed (normal colors). Set Alignment points for comparison tool is available. Compare File (Only) Only the file that was opened for compare is displayed (normal colors). Set Alignment points for comparison tool is available. You can close the comparison file (and toolbar) at any time by selecting Close Compare from the File menu. Notes:
Markups are only supported on the "Open File (only)" view
You can use the hot keys below to nudge and re-scale a compare image or drawing to an open drawing, allowing you to interactively make small adjustments to align the files more precisely. This feature is especially useful for comparing two TIFF images that contain the same text but have different line spacing.
Hold down the <Ctrl> key and then press one of these keys to nudge the overlaid "older version" in the desired direction:
<Left arrow> = nudge position left <Right arrow> = nudge position right <Up arrow> = nudge position up <Down arrow> = nudge position down <+> plus key = nudge scale up <-> minus key = nudge scale down
Set Alignment Points
Used with file version comparisons, the Set Alignment Point tool allows you to compare two versions of a file that are of different scales, or world page sizes.

Brava 5.3 X Client User Guide
20
This tool is especially convenient when a major version of a file has multiple sections saved as separate files. The alignment tool allows you to define a single identical location on each file that is used as a common alignment section when the two files are overlaid.
To use the Align tool:
1. Open a document and use the Compare tool to open a second comparison file that is of any scale.
2. Select Open File (Only) from the Comparison Tool drop down list to view the first document you opened.
3. Click on the Set Alignment Points button. The cursor changes to a measurement selection tool and will allow you to precisely select two picking points on the image. Identify a small section of the image that is contained in both the first and second document.
4. Left click on the start point and then left click on an end point of a common section to define the alignment.
5. Select Compare File (Only) from the Comparison Tool drop down list to view the second document you opened for comparison.
6. Click on the Set Alignment Points button and select the exact same points of the section that you chose to use in the first document.
Now, if you select any of the compare features from the drop down list (Overlay, for example), the points placed in the first file are pinned to the points placed in the second file. When alignment is active, both documents display at exactly the same scale.
7. Once you have successfully chosen two identical alignment points in
each document, the Clear Alignment Points button becomes available. You can restore the original view at any time by clicking this button to remove your set alignment points.
Right Mouse Controls
When using certain tools, clicking the right mouse button brings up a pop-up menu containing various display and edit commands. However, when the Pan, Magnifier, and Zoom Window tools are active, the right mouse button can be used as an added navigational control to quickly zoom in and out.
The right mouse button navigation is available whenever you see the right
mouse button image on the far right side of the status toolbar.
Pan tool Zoom Window tool Magnifier tool
Markups
21
While using any of these three tools, you can press and hold the right mouse button while moving the pointer up and down to zoom in and out of an image. Up increases magnification while down decreases it.
MARKUPS
Markup Files
Markups allow you to annotate documents without altering the document itself. All markup entities are saved in a markup file, which is overlaid on the image. There can be more than one author per markup file. A new layer is automatically created for each new markup file author (determined by the login user name), allowing them to see other author's markups, but not edit them. You can create new markups, open an existing markup for editing, overlay one or more markups on a source document for review, or burn-in markups to a CSF file.
The symbol indicates that markup files exist on the server for the current document.
What do you want to do?
Create Markups
Open Markups for Editing/Edit Markups
Overlay Markups for Review
Consolidate Markups
Close Markups
Save Markups
Burn in Markups
Change Markup Ownership
See also: Markup Toolbar
Brava 5.3 X Client User Guide
22
Creating Markups
To markup a document or image, create a new markup file.
1. Click on the Standard toolbar and click New.... 2. Select the desired markup tool from the Markup Toolbar.
Markup Entity Tools
Markup Toolbar
The Markup toolbar contains related groups of markup tools. To invoke the
Markup Toolbar, click on the Standard Toolbar and select New. (The markup tools are only available if your Brava! Server Administrator allows and enables this feature.) Note: Markup tools remain active until another tool is selected. From left to right, the tools are:
Markup Select
Cloud and Polycloud
Line Arrow
Text
Changemark
Insert Raster Image
Sketch and Sketch Poly
Line, Polyline, Arc, Scratchout, and Crossout
Solid and Hollow Shapes (Unfilled/Filled Rectangle, Ellipse, and Poly)
Blockout for Redaction, Find and Redact, Redact to Phrase List
Edit Text (Strikeout, Underline, and Highlight)
Hyperlink

Markups
23
Select Markup Entity
The Select Markup tool allows you to grab markup entities to move, copy, resize, reshape, delete, or change ownership.
1. Click on the Markup toolbar.
2. Once the Select tool is active, click on a markup to select it or press and hold <Shift> while clicking to select multiple markups.
3. To select adjacent markups, click and hold the left mouse button and drag a box around all the markups you wish to select.
4. Edit the markup as desired.
Cloud and Polycloud
You can draw clouds using the Cloud and Polycloud tools .
1. Click and hold the left mouse button and drag the mouse pointer on the image to draw a cloud shape.
2. Release the mouse button to set the entity.
3. For the Polycloud, move the mouse pointer to where you want the first vertex to be and click the left mouse button to set the point. Continue to do this until all points are set.
4. Double-click to set the Polycloud.
5. Edit the markup as desired. If the markup is not currently active, use the Select Markup Tool to pick it.
Line Arrow
The Line Arrow tool allows you to draw an arrow.
1. Click the left mouse button where you want the arrow point to begin and click where you want the line to end.
2. Edit the markup as desired. If the markup is not currently active, use the Select Markup Tool to pick it.
Brava 5.3 X Client User Guide
24
Markup Text
Click on the Markup toolbar to place text directly on the image (as opposed to in an annotation).
1. Click the mouse pointer where you want the text to start and drag a rectangle to dictate the with of the text column and the font height to be used. (The grey "<Text>" displayed is to preview how your text will look)
Note: Single-clicking the text tool causes a new text entity to be created using the last established font height. The new text has no enforced column width until you hit the return key or manually adjust the column width handles.
2. Type the desired text.
3. Edit the markup as desired. You can change the Font, style, size, color, and transparency (of the markup text box).
4. If the markup is not currently active, use the Select Markup Tool to pick it. You can drag the text box to another location and you can adjust the size of the text box by length or height.
To adjust the length, click and drag one of the circular handles on the upper right or left corners. The size of the text does not change.
To adjust the height, click and drag the yellow ball on the lower left section of the text box up or down. The text automatically resizes as you adjust the text box height.
To rotate the text, click and drag the green rotation handle in any direction.
Insert Raster Image
Use this markup tool to insert external raster images (JPG or PNG) into your current markup layer. Once selected, images can be resized and positioned where you want them.
1. Click the button and browse to an existing raster image that you would like to insert.
2. Click Open in the Select Raster File dialog. The mouse cursor changes to a raster image. You can set the raster image by one of the following methods:
a. Left-click and hold in the Brava! window to set the first corner point of the image, drag the mouse to where you want to set the second point, and release.
Markups
25
b. Left-click on a point in the document where you want to center the raster image. The image is inserted into the document matching your orientation and is calculated to its natural size, relative to the document or drawing size.
The new entity can be moved and resized just like any other markup entity.
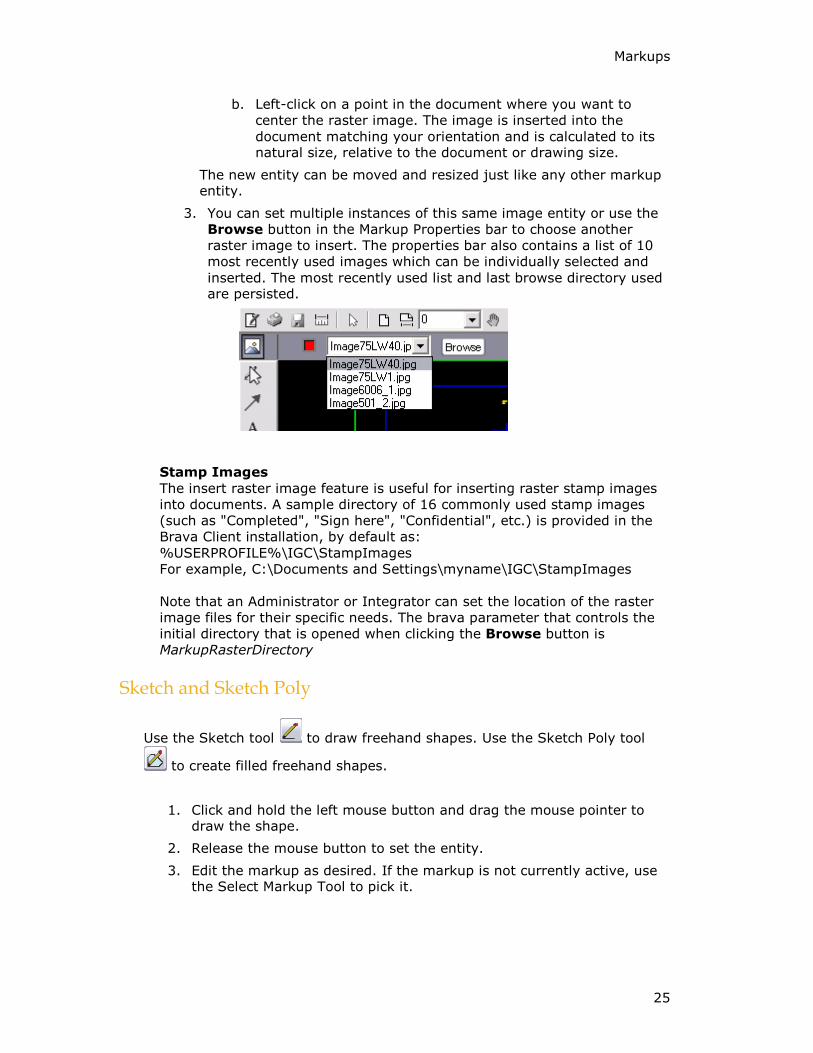
3. You can set multiple instances of this same image entity or use the Browse button in the Markup Properties bar to choose another raster image to insert. The properties bar also contains a list of 10 most recently used images which can be individually selected and inserted. The most recently used list and last browse directory used are persisted.
Stamp Images The insert raster image feature is useful for inserting raster stamp images into documents. A sample directory of 16 commonly used stamp images (such as "Completed", "Sign here", "Confidential", etc.) is provided in the Brava Client installation, by default as: %USERPROFILE%\IGC\StampImages For example, C:\Documents and Settings\myname\IGC\StampImages Note that an Administrator or Integrator can set the location of the raster image files for their specific needs. The brava parameter that controls the initial directory that is opened when clicking the Browse button is MarkupRasterDirectory
Sketch and Sketch Poly
Use the Sketch tool to draw freehand shapes. Use the Sketch Poly tool
to create filled freehand shapes.
1. Click and hold the left mouse button and drag the mouse pointer to draw the shape.
2. Release the mouse button to set the entity.
3. Edit the markup as desired. If the markup is not currently active, use the Select Markup Tool to pick it.
Brava 5.3 X Client User Guide
26
Straight Line
The Line tool allows you to draw straight lines in any direction.
1. Click the left mouse button where you want the line to begin and click where you want the line to end.
2. Edit the markup as desired. If the markup is not currently active, use the Select Markup Tool to pick it.
Poly Line
The Polyline tool allows you to draw a jointed line.
1. Click the left mouse button where you want the line to begin. 2. Move the mouse pointer to where you want the polyline's first vertex
to be and click the left mouse button to set the point. Continue to do this until all points are set.
3. Double-click where you want the polyline to end to set the line. 4. Edit the markup as desired. If the markup is not currently active, use
the Select Markup Tool to pick it.
Arc Tool
You can place an arc using the Arc tool .
1. Click the mouse button where you want to begin. Click again at the
approximate arc center point. Click a third time at the desired end point to set the arc.
2. Edit the markup as desired. If the markup is not currently active, use the Select Markup Tool to pick it.
Scratchout
Similar to the Crossout tool, the Scratchout tool is used to place an easily identified zig-zagging line pattern (rather than an X) through a rectangular region of an image or section of text, marking the area as symbolically invalid.

Markups
27
1. Click and hold the left mouse button and drag the mouse pointer to draw the shape on the image.
2. Release the mouse button to set the entity.
3. Edit the markup as desired. If the markup is not currently active, use the Select Markup Tool to pick it.
Cross Out
The Crossout tool is used to place an “X” over an area of the image.
1. Click and hold the left mouse button and drag the mouse pointer to draw the shape on the image.
2. Release the mouse button to set the entity. 3. Edit the markup as desired. If the markup is not currently active, use
the Select Markup Tool to pick it.
Solid and Hollow Shapes
The Solid Shapes group allows you to draw solid (filled) or hollow (unfilled) Rectangle, Ellipse, or Poly shapes. Hollow markups render just the outline. Select one of the above markup shapes from the Markup toolbar and select your desired options from the markup properties toolbar.
For the Filled or Unfilled Rectangle or Ellipse:
1. Click and hold the left mouse button and drag the mouse pointer to draw the shape.
2. Release the mouse button to set the entity.
For the Filled or Unfilled Poly,
1. Click the left mouse button where you want to set the first vertex of the polygon.
2. Move the mouse pointer to where you want the second vertex and click the left mouse button again.
3. Set any remaining vertices, and then click the left mouse button on the first point to set the entity. You can also double-click the left mouse button at the last vertex position and Brava! automatically fills in the last line segment for you (connecting the last vertex point to the first).
Edit the markup as desired. If the markup is not currently active, use the Select Markup Tool to pick it.
Brava 5.3 X Client User Guide
28
Edit Text Entities
You can underline, strikeout, and highlight text contained in a document.
1. Select your desired edit text tool from the Markup Toolbar.
2. Select a desired color to use.
3. Click on the text you wish to mark up and drag your mouse to the point where you want to stop. The selected text appears highlighted until you release the mouse button - at which point the underline, highlight, or strikeout markups display.
Hyperlinks
A hyperlink contains a pointer to a text, image, sound or video file or a web address. When you launch a hyperlink contained in a Changemark or markup entity, the application associated with that file type is automatically launched and the specified file is loaded. If the hyperlink references a web address, the default browser is launched and goes to the specified URL.
Add a hyperlink
You can attach a hyperlink to a Changemark or to any markup entity. Simply
create the Changemark or markup entity and then click . Type a hyperlink URL in the text box.
To edit a Changemark or entity to add a hyperlink, click to select the
entity and then click to specify a URL. Only one hyperlink URL can be assigned to each markup object.
Launch a hyperlink
To launch a hyperlink from within a Brava! window (while in review mode),
use the select tool to move the cursor over an entity containing a hyperlink (pointer changes to a hand) and left-click.
To launch a hyperlink from the Changemarks Window, click located at the lower right corner. This button is only available when a Changemark contains a hyperlink. You can specify how hyperlinks launch in Brava! by adjusting the applet parameter "HyperlinkLaunch."
default launches each document in its own separate window
Markups
29
one launches all documents in a separate window as Brava!
self launches documents in the frame (if frameset present) that the
Brava! Viewer is in.
top launches documents in the same instance of the browser window
replacing its current contents.
Changemarks
Creating Changemarks
The Changemarks feature allows authors of markups to assign a placeholder and descriptive text and/or a hyperlink to a particular markup. All Changemarks contained in the markup files in the currently open markups appear in the Review Changemarks List. This allows reviewers to step through each Changemark’s annotation in all related documents and images, so no comments are missed. From the Review Changemarks List, Changemarks can be filtered by author, title, or content. The descriptive text contained in the Changemarks can be reviewed and copied to the Clipboard.
1. Click and select New to create a new markup layer or Open for Review to open an existing layer.
2. Click on the Markup toolbar.
3. Draw the shape on the image by clicking and holding the left mouse button, then dragging the shape. Release the mouse button to set the entity.
4. Enter the title of the Changemark in the title text box, and then press <Tab>.
5. Type any descriptive text necessary (this entry is optional and can be quite extensive) in the scrolling window and click OK. You can also copy text to the clipboard and select Paste from the right mouse button menu to add text from another source.
6. You can associate a hyperlink URL (also optional) by clicking while the Changemark is active.
7. You can edit the Changemarks size or position if desired. If the Changemark is not currently active, use the Select Markup Tool to pick it. Double click on the Changemark to edit its contents.
See Also:
Brava 5.3 X Client User Guide
30
Reviewing Changemarks Filtering Changemarks
Reviewing Changemarks
You or subsequent reviewers can view a list of all the Changemarks associated with an image through the Review Changemarks window. If you are reviewing Changemarks that you authored in the active markup file, you can also edit the Changemarks.
1. Open the image with the appropriate markup open or overlaid.
2. From the right mouse button menu, select Review Changemarks. The Review Changemarks panel opens on the right portion of the Brava! viewer.
3. Existing Changemarks can be reviewed by title, author, or date by clicking the appropriate tab. You can add a search filter if desired. (Click All to return all Changemarks to the list.)
4. Click on a resulting Changemarks that you wish to view. The Changemarks text displays in the panel's lower frame.
5. You can progress sequentially through the Changemarks by using the
Next and Previous arrow buttons .
6. The Changemarks entities appear in the Brava! viewer at the same magnification level the author created them. To view the Changemark, the "Review Changemark" panel must be opened. To edit the Changemark, you must be the author, have the markup opened, and click the individual Changemarks you want to edit.
7. You can launch any hyperlinks present, and Brava! will launch the specified URL in a separate browser window.
Note: You can review Changemarks contained in files that have burned in markups.
See also: Creating Changemarks Markup Pages
Changemarks Filters
You can filter Changemarks by content and review the results by title, author, or date. Filter Contents
Markups
31
You can filter the list by a word or phrase appearing in the Changemarks' title or description. To return the list of all Changemarks associated with a file, click All. To filter Changemarks by text content that appears in either the Changemarks title or description, type the word or phrase in the Search text
box and click . Each subsequent search will just search/filter against the list of entries returned from the previous search/filter. Included in the Changemarks list are the tabs "Filter Titles," "Filter by Date," and "Filter by Author." Clicking on these tab fields list the set of currently filtered Changemarks by that attribute (i.e. author, title, and creation date). See also: Reviewing Changemarks
Redaction
CSF with Redaction
About Redaction: Brava! Enterprise and Brava! Desktop software allow the end user to designate a markup file to be burned-in to a published document as a "redaction". This means that the markups associated with that document can never be edited or removed by the end-user. The author has the capability to set a password that will allow only users who know the correct password to view any text and images that have been blocked out. Blockout entities on a markup file remain solid unless the password has been set and is correctly entered by the user. In that case, the blockout entities become transparent. Exposing Blockouts: If the author who published the CSF file established a redaction password, you are prompted to enter that password. If the correct password is entered, any markup entities created with the Blockout tool are transparent (all other markup entities remain unchanged). If no password, Cancel, or an incorrect password is given, the file will open, but any Blockout markup entities remain opaque and areas beneath them are hidden from view. If the publisher set no redaction password, no prompt is presented and the Blockout entities remain opaque, and uneditable. You can not turn off the visibility state of a redaction markup layer. Any text or images hidden by the Blockout entity can not be copied or searched.
Brava 5.3 X Client User Guide
32
Blockout for Redaction
The Blockout for redaction markup entity allows you to place a rectangular cover over an area of a sensitive or confidential document to block only certain portions from being viewed, searched, or copied. If the file being marked up is a CSF file, it must have the markup authoring and burn-in rights enabled and can not already have a redaction markup burned in. Important note: The blockout for redaction entity only blocks information when its markup file has been published to a CSF or PDF file. If the markup with the blockout entities is saved and reloaded, areas covered by the blockout entity can be seen, searched, and copied. Also note that the redaction capabilities physically removes text and blanks out raster image information. Vector information and associated block attributes are not removed from the file. Vector information under the redaction blockouts is covered, however, and is not visible in the published file. To create a Blockout entity:
1. Click and hold the left mouse button and drag the mouse pointer to draw the rectangular shape on the image.
2. Release the mouse button to set the entity. 3. Edit the markup as desired. If the markup is not currently active, use
the Select Markup Tool to pick it. 4. To complete the blockout for redaction, the markup must be burned in
to the current file, otherwise it will just remain a transparent entity. See the Burn-in topic for help on burning in markups.
Additional blockout tools are available from the blockout tool submenu that allow you to find and redact specific phrases contained in a document, or redact to phrase list to find redact various predefined lists of phrases. Exposing Blockouts: If the author who published the CSF file established a blockout for redaction password, then you are prompted to enter that password. If the correct password is entered, any blockout for redaction entities are transparent (all other markup entities remain unchanged). If no or an incorrect password is entered, the Blockout entities remain opaque and areas beneath them are hidden from the viewer. If the publisher set no password for the redaction, no prompt is presented and the Blockout entities remain opaque, and uneditable.
Burning in Markups
You can burn markups into native files or CSF files that have the markup burn-in right enabled. This means that when the burn-in action completes, the markups, as well as the currently set banners and watermarks are included within the newly created CSF file and can never be closed.
Markups
33
To burn-in a markup and save the file as CSF:
1. Open a file and create a markup layer. You may also open markup layers for review.
2. Click on the toolbar and select Burn-in Markup
3. All currently opened markup layers are permanently burned into the file's view. If the editable markup contains blockout for redaction entities, the markup is automatically burned in for redaction.
4. Select Publishing Options.
5. From the Publish Option dialog, select to save the CSF file on a file system (Save to File ), or to send an email with the CSF file attached (Email as attachment).
6. When a user opens a CSF file that has markups burned in, both the markups and document are automatically visible. The user can view and review any Changemarks™ contained in the markup.
Burn in of Markup Entities Markups that don't contain blockout for redaction entities are burned in for the purposes of review only. One or more markups can be burned into a CSF file and any markup that is open for review or edit is stored. The burned in CSF file is a snapshot of the current view and does not change the loaded file state. Burn in of Blockout Entities Markups that contain blockout for redaction entities are burned in to the published CSF file for the purpose of redaction. A redaction allows any Blockout entities to be pre-processed to disallow viewing, copying, or searching on concealed text. When initially burning in a markup that has blockout entities into a CSF file, you have the option of setting a password. A correctly entered password (by the viewer) will cause any blockout entities to become transparent, revealing the hidden portions of text and graphics to viewers who enter the password correctly. If no password is set, the blockout entities remain as solid entities and viewers cannot remove or edit them, nor can they copy or search on the text they conceal. Once a blockout for redaction contained in a markup layer has been burned in, no mechanism exists for you, as the author, to edit or remove that redaction. Burned in markups cannot be closed, however, they can be printed and Changemarks™ can be navigated as they normally would. Burned in markup files may be saved as DXF. See Also: Publishing markups to PDF files
Brava 5.3 X Client User Guide
34
Find and Redact
This tool lets you run a command that finds and redacts (using blockout for redaction entities) multiple instances of a common word or phrase simultaneously.
1. Click the Find and Redact tool from the Markup Toolbar.
2. Enter a find phrase in the "Find and Redact What:" field of the Find and Redact dialog.
3. Optionally, you can enter a reason for redaction in the "Reason for Redaction:" field (up to 69 characters). If this field is populated, the phrase is added as a text attribute to the redaction. When users mouse over the redacted block out area of the document, the who, when, and why information displays. You can use common exemption codes as reasons.
4. Click Redact to find and redact all phrases that match the redaction find string.
5. A dialog appears informing you how many instances were found and redacted. Click OK to return to the Find and Redact dialog.
6. Select Close to exit, or adjust the text string and perform another find and redact.
Important note: Raster/graphic text is not handled by the find and redact function. It is strongly recommended to manually review any bulk redactions for accuracy as extra spacing and line wrapping may cause phrases to not be recognized by the Find command.
Redact to Phrase List
The Redact to Phrase List tool allows you to run a command to find and redact an entire list of phrases in one action.
1. Create a specifically formatted text file containing a list of phrases that you normally redact from your documents, along with a reason or any applicable exemption codes. (Below is an example of how the .txt file content is formatted.)
2. Click the Redact to Phrase List button from the Markup Toolbar.
3. From the Redact to Phrase List dialog, browse to and select the specially formatted phrase list file to use on the current document.
4. Click OK. This command loops through each phrase of the source document and applies a find and redact (and a reason), then moves on to the next phrase in the list.
Markups
35
5. When complete, the number of strings found and redacted displays.
Important notes:
Raster/graphic text is not handled by the find and redact function. It is strongly recommended to manually review any bulk redactions for accuracy as extra spacing and line wrapping may cause phrases to not be recognized by the Find command.
The Undo function does not span multiple pages and will only undo markups added to the current page. If you choose to undo a redact to Phrase List, you must perform an undo on each page, or quit the application without saving the markup.
Redaction list file contents: Before defining the redaction list details, you can have as many lines of comments as you want, provided that they don't begin with the word "!redact!". After the first instance of !redact!, list only redaction exemptions. The examples below list each reason (!redact! <exemption code or explanation>) followed by a list of phrases to redact. Format:
!redact! <text reason1> <list phrase1> <list phrase2> <list phrase3> !redact! <text reason2> <list phrase1> <list phrase2...>
Example txt file:
!redact! (b)(6) irrevocably challenge cabinets extraordinary change !redact! (b)(1)1.5b Information Age !redact! Do not list internal phone numbers 555-211-4356 555-212-2238 !redact! Don't mention any countries United Kingdom
Brava 5.3 X Client User Guide
36
UK Republic of China China
Redact Mouse Tool
An interactive mouse tool is active when using the Blockout for Redaction
markup tool that allows you to place blockout entities on the current image.
The two accompanying markup tools, Find and Redact and Redact to
Phrase List , are command tools and do not have any mouse functions themselves. After invoking either of these commands, the active tool is set to the redaction Blockout tool.
Markup Properties
Markup Properties Tools
The markup properties toolbar is available when creating or editing markup files. You can edit the available markup properties individually or to a group of entities. Use the Select Markup tool to pick and edit one or more markup entities.
Line Style and Line Width
Color
Text Properties Fill Type - The Fill Type properties are only available for the Rectangle, Ellipse, Polygon, and Sketch Polygon tools
Solid
Hollow
Highlight
Hide (Background Fills)

Markups
37
Markup Font
Change the font name, style, and size for markup text through the Markup Text Font dialog box. To change the markup text font:
1. Use the Select tool to select and alter existing text or click to add new text.
2. Select your desired options from the text properties toolbar. You can select the font style, size, and color. The transparency toggle button
allows you to show the markup entity text box with transparent or filled background.
3. Click OK.
Highlights
This tool allows you to draw translucent shapes. Highlights can be selected from the drop down menu as a property for the Rectangle, Ellipse, Polygon, and Sketch Polygon tools. Select one of the above markup shapes from the Markup toolbar and select your desired options from the markup properties toolbar. For the Rectangular or Elliptical Highlight tools:
1. Click and hold the left mouse button and drag the mouse pointer to draw the shape.
2. Release the mouse button to set the entity. For the Poly Highlight:
1. Click the left mouse button where you want to set the first vertex of the polygon.
2. Move the mouse pointer to where you want the second vertex and click the left mouse button again.
3. Set any remaining vertices, and then click the left mouse button on the first point to set the entity. You can also double-click the left mouse button at the last vertex position and Brava! automatically fills in the last line segment for you (connecting the last vertex point to the first).
Edit the markup as desired. If the markup is not currently active, use the Select Markup Tool to pick it.
Brava 5.3 X Client User Guide
38
Background Fill
Background fills are the same color as the current image background color, however they are white when printed. Background fills cover the designated area giving the impression that the area has been hidden; note however that this information is not truly hidden since any text underneath the fill can be searched or copied, or, if the background fill is not part of a redaction markup, the markup can be closed. To truly block out information, a markup containing blockout entities needs to be burned into a CSF file. Background fills can be used to allow extra space for comments and other markups. They can be selected from the drop down menu as a property for the Rectangle, Ellipse, Polygon, and Sketch Polygon tools. Select one of these markup shapes from the Markup toolbar and select your desired options from the markup properties toolbar. To draw a Rectangular or Elliptical Background fills:
1. Click and hold the left mouse button and drag the mouse pointer to draw the shape.
2. Release the mouse button to set the entity. For the Poly Background fills:
1. Click the left mouse button where you want to set the first vertex of the polygon.
2. Move the mouse pointer to where you want the second vertex and click the left mouse button again.
3. Set any remaining vertices, and then click the left mouse button on the first point to set the entity. You can also double-click the left mouse button at the last vertex position and Brava! automatically fills in the last line segment for you (connecting the last vertex point to the first).
Edit the markup as desired. If the markup is not currently active, use the Select Markup Tool to pick it.
Line Style and Width
Change the style and width of markup lines by using the Line Style and Line
Width tools .
1. Select a new line style and line width from the drop down boxes when available from the Markup properties toolbar.
2. You can change the line width of existing markup lines. If the markup is not currently active, use the Select Markup Tool to pick it.
See also: Line Thickness
Markups
39
Markup Color
You can change the color of any markup entity using the16 predefined markup colors. You can also select from a wider range of colors by selecting the "More" button from the markup color list. This summons a color chooser dialog box containing a wide range of color options. Each markup can be a different color and it can be changed at any time.
To change the markup color, click on the markup properties toolbar when available and select the new color from the drop-down.
Editing Markups
You can edit markup entities in the active (editable) markup files. You can create new markup entities or use the Select Markup Tool to select existing entities to resize, reshape, move, or delete.
To open a markup file for editing:
1. Click on the toolbar and select Open....
2. Select the markup you wish to open.
3. Click OK.
4. Click on the Markup toolbar.
5. Select the markup or markups you wish to edit (you can select more than one markup by pressing <Shift> while clicking on the desired markups).
Note: If you are not the author of the markup file, see Changing Markup Ownership.
6. Edit the markup(s) as desired. You can move, resize, delete, or reshape markup entities.
Hold the left mouse button down on any of the 8 resize handles (to resize) or on the entity itself (to move), and then drag.
To delete a selected markup, press <Delete> (on your keyboard or from the right mouse button menu).
To rotate a selected markup, click on the green ball extending from the center of your markup entity. The cursor changes to
. Drag the ball in the direction you wish to rotate and release the mouse button to set the entity.
To change the shape of a selected markup, click on one of the independent edit handles (picking points) and drag.
To add a hyperlink, select the markup and type or select a URL from the hyperlink text box.
Brava 5.3 X Client User Guide
40
7. You can also select and Copy a markup through the right mouse button menu command. Hold down the <Shift> key to select multiple markup entities and click Copy. You can Paste the markups into the same page or use the Copy Markups to All Pages feature.
8. If editing markups on a multi-page document, you can copy selected markups to all pages if your administrator has enabled this feature.
Use the Apply All button in the markup properties bar to copy all copy able entities to all pages of the document. Entities that cannot be copied include strike-throughs, Changemarks, and Block-outs.
Note that a separate undo needs to be performed for each entity copied into each document page if you change your mind. Changes made to a copied entity on one page have no impact on any of the entities contained in other pages.
Closing Markups
To close the currently active markup:
1. Click on the toolbar. 2. To close an editable markup, click Close on the drop-down menu. You
will be prompted to save the file before closing if the markup has not been saved yet or if changes have been made.
3. To close markups that are open for review, select Close Review and select the overlaid markups in the list that you want to close.
Note: You cannot close or edit markups that have been burned in.
Saving Markups
Markup files are saved as MRK or DXF files.
1. Click on the toolbar and select Save, or Save As, or SaveAs DXF.
2. Type the file name in the File Name text box. Makups are saved to the Markups directory within the installed Brava! Server directory unless a different path is specified in server file or the HTML pages. See the Brava! Install Guide in the Brava! Server directory for more information. Markups saved with Save or Save As are stored with the extension *.mrk (markup format). Markups saved with SaveAsDXF are stored in *.dxf format and can be opened in CAD applications.
3. Click OK.
See Also:
Burning in Markups
Publishing Markups to PDF Files

Markups
41
Overlay Markups for Review
Though an image file can have only one active markup associated with it, there can be multiple overlaid, or read-only markups attached. Markups that are open for review can optionally be permanently burned in to the current file for review (not for redaction).
1. Click and select Open for Review....
2. Select the markup file or files you wish to overlay and click OK.
Note: The symbol present in the status bar indicates that markup files exist on the server for the current document.
Markup Pages
Use the Markup Pages Tool to navigate through markups on multi-page documents. From the right mouse button menu, select Review Markup Pages. You can select to view the Next or Previous page that contains markups.
Copying Markups
You can select and Copy a markup through the right mouse button menu command. Hold down the <Shift> key to select multiple markup entities and click Copy. You can Paste the markups into the same page or use the Copy Markups to All Pages feature to copy the selected markups to a specified range of pages.
Copy Markups to All Pages
If editing markups on a multi-page document, you can copy selected markups and apply them to a specified range of pages.
1. Select one or more markup entities you would like to copy and click .
2. In the Copy Markup to Designated Pages dialog, select All pages, or type in a specific page range.
Brava 5.3 X Client User Guide
42
3. Click OK. All copyable entities are copied to All or Designated pages. Entities that cannot be copied include strike-throughs, Changemarks, and Block-outs.
Note that a separate undo needs to be performed for each entity copied into each document page if you change your mind. Once copied, all entities behave as individual entities. In other words, changes made to a copied entity on one page have no impact on any of the entities contained in other pages.
Consolidating Markups
If this feature is enabled by your administrator (via a server parameter), you can transfer all open markup entities into one new consolidated markup file. To do this:
1. Click and select Open.. or Open for Review.... 2. Select the markup files you wish to consolidate. You must open at
least two markups (includes either for edit or for review) to use this feature.
3. Click and select Consolidate Markups The markup entities in markup files opened for review are moved into the markup currently opened for edit. If no markup is opened for edit, a new editable markup is created and all entities are transferred there. All markup files that were opened for review are closed after the command is executed. The entities in the consolidated file retain their original author information and ownership does not change by default. If any markup entities exist that are burned into CSF files, they are not included in the consolidated markup. 4. Save the current consolidated markup. The consolidate command
cannot be undone, however, you can close the markup opened for edit and choose not to save the consolidation.
Changing Markup Ownership
If this feature is enabled by your administrator (via a server parameter), you can take ownership of a markup entity owned by another author. To do this:
1. Open a markup for edit that contains markup entities created by other authors.
2. With the Select Markup tool active , hold down the <Shift> key and click on a markup entity.
3. The author information for that entity changes to your information. 4. Edit the entity as desired as you are the new owner.
Markups
43
This feature is only functional on markup entities in markups currently open for edit. Markups that are burned in for review are not editable.
Publishing Markups in PDF files
When publishing a PDF file that contains markups, there are two ways those markups can be represented in the resulting PDF file.
Comment
The default behavior is for markups to be saved as PDF Comments, meaning that they can be altered from Acrobat Professional. Note that the markup blockout entity does not have a corresponding Acrobat comment, and therefore, the blocked out text is actually removed from the published PDF file.
Burn-in
Alternately, you can select to burn-in the markups on the PDF file meaning that they are part of the document image and are not PDF comments. Changemarks are always transferred over as PDF Comments.
A native file (non-CSF) that contains markups with blockout entities loaded and that is published to PDF will have those blockouts redacted in the output PDF file.
An Administrator can choose the method that you will use to apply markups to published PDF files, or he can choose to let you select the method you prefer. If this is the case, a choice dialog displays when using the Publish to PDF feature on a file containing markups. See Also: Publishing Files to PDF Burning in Markups
45
INTERACTIVE TOOLS
Select Tool
The select tool is used to pick interactive elements in a document or drawing. With it, you can select and copy text or you can launch hyperlinks contained in the document. The cursor changes to a hand when you move it over a hyperlink.
Copy Text
If allowed by Visual Rights, you can select text contained in a CSF, Microsoft Office document or a drawing file and copy it to the Clipboard.
1. Use the Select tool to click and drag a selection box around the text you want to copy. The selected text appears highlighted. The selection box can include as little as one letter, or as much as all of the text contained in the page.
2. From the right mouse button menu, select Copy. You can then paste the contents of the Clipboard into another application such as Notepad or Microsoft Word.
Note: This feature is not permitted if the publisher of the CSF file has disabled the Visual Right "Copy to Clipboard". If the document has the copy to clipboard right enabled, users can copy a specified portion, or the entire page to the clipboard. If not permitted, Print Screen functionality is also disabled.
Find
You can search for text contained in an Office document or drawing file.
1. Type the word or phrase you want to search for in the search edit field .
2. You can specify your search parameters by selecting an option from
the search menu (click the down arrow) .
Down - progressively searches for the next instance in the document.
Up - progressively searches for the previous instance in the document.
Match Case - searches for the text exactly as typed with upper and lower case characters.
Brava 5.3 X Client User Guide
46
3. Click to launch your search. Use F3 to navigate to and highlight the next search instance.
Measurement
Calibration
When measuring distances on 2D files, you must first calibrate the scale you wish to use. For example, if the image contains a component with a marked dimension of 1.5 m, you can use the Calibrate tool to measure the dimension line and enter 1.5 as the scale. The Measure tool will now give measurements in meters.
1. Click and select Calibrate...
2. Click the left mouse button on the first then last point in the distance you will be using as the baseline.
3. Edit the calibration value to use as the scale (the unit that all future measured distances will be based on) and click OK.
The default precision for the Calibrate tool is four (4) decimal places. You can change the unit types and precision calculations through the measurement Settings dialog. See also: Measurement Measure Magnification Tool
Measurement
There are various Measure tools available for drawing and image files under the measurement menu. You must calibrate a baseline distance before the Distance, Polygon, and Rectangle Measure tools will be available.
Distance (Line)
Polygon
Polyline
Rectangle
Measure Count
Measurement Settings
Measure Magnification Tool
Hot Keys
47
Measure Line
Measures the line (distance) between two selected points based on the calibrated baseline. The length of the new line, in terms of the calibrated baseline, will appear in the properties bar above the Brava! viewer window, along with the angle of the new line and the offset difference in y-axis position of the new line.
1. You must first calibrate a baseline distance before the Line tool is available.
2. Click and select Measure Line.
3. Select the Snap checkbox if you would like your measurement points to snap to the nearest picking point or to the midpoint of segments, arcs, and circles. Note: Only CAD-like formats support snap. Raster images and text documents do not perform snap.
4. Click and release the left mouse button where you want to start measuring. An X will appear to mark the first point.
5. Click the left mouse button where you want to finish measuring. Another X marks the end of the line. Note: For certain formats, you can use the Measure Magnification Tool to assist in accurate placement of the points.
6. Creating a new line removes the existing measurements from the properties bar and clears the old line from the image window.
See also: Measurement
Measure Rectangle
Allows you to measure a rectangular area. The width, height, and area of the rectangle display on the properties bar, respectively.
1. You must first calibrate a baseline distance before the Rectangle tool is available.
2. Click and select Measure Rectangle.
3. Select the Snap checkbox if you would like your measurement points to snap to the nearest picking point or to the midpoint of segments, arcs, and circles. Note: Only CAD-like formats support snap. Raster images and text documents do not perform snap.
4. Click and release the left mouse button where you want the rectangle to start.
5. Click again where you want to place the opposite rectangle corner to set the shape. Width, height, and area information displays in the

Brava 5.3 X Client User Guide
48
properties fields. Note: For certain formats, you can use the Measure Magnification Tool to assist in accurate placement of the points.
6. Creating a new rectangle clears the old measurement and removes the old rectangle from the image window.
See also:
Measurement
Measure Polygon
Allows you to measure a polygonal shape. The length of the line between the last point set and the current mouse position, the total perimeter of the polygon (including the current mouse position) and the area of the polygon (including the current mouse position) appear in the properties bar, respectively.
1. You must first calibrate a baseline distance before the Polygon tool is available.
2. Click and select Measure Polygon.
3. Select the Snap checkbox if you would like your measurement points to snap to the nearest picking point or to the midpoint of segments, arcs, and circles. Note: Only CAD-like formats support snap. Raster images and text documents do not perform snap.
4. Click the left mouse button where you want the first point of the polygon. As soon as you move the mouse pointer away from the first point, the measurement information changes in the properties bar.
5. Click the left mouse button where you want the second point, and continue to set the points of the polygon. Notice that the measurement information continues to update. Note: For certain formats, you can use the Measure Magnification Tool to assist in accurate placement of the points.
6. Double-click the left mouse button to set the last point. You will not see accurate measurement information if you have bisected the polygon, creating two or more shapes (the normally blue polygon will turn red when this happens).
7. Creating a new polygon clears the old measurement and removes the old polygon from the image window.
See also:
Measurement
Measure Polyline
Hot Keys
49
Allows you to measure a polyline. The length of the line between the last point set and the current mouse position, the total perimeter of the polyline (including the current mouse position) appear in the properties bar, respectively.
1. You must first calibrate a baseline distance before the Polyline tool is available.
2. Click and select Measure Polyline.
3. Select the Snap checkbox if you would like your measurement points to snap to the nearest picking point or to the midpoint of segments, arcs, and circles. Note: Only CAD-like formats support snap. Raster images and text documents do not perform snap.
4. Click the left mouse button where you want the first point of the polygon. As soon as you move the mouse pointer away from the first point, the measurement information changes in the properties bar.
5. Click the left mouse button where you want the second point, and continue to set the points of the polyline. Notice that the measurement information continues to update. Note: For certain formats, you can use the Measure Magnification Tool to assist in accurate placement of the points.
6. Double-click the left mouse button to set the last point.
7. Creating a new polyline clears the old measurement and removes the old polyline from the image window.
See also: Measurement
Measure Count
The Measure Count tool allows you to easily count items in a drawing - such as fixtures in a floor plan, screws on a design, etc. A marker is placed on the counted item to serve as a placeholder.
1. Click and select Measure Count.
2. Click and release the left mouse button on items you want to count. A marker appears at the selected location indicating the item is included in the total value displayed in the count textbox (indicated by ). To zoom into an area of the drawing to count items, click and hold the mouse button to summon a magnifier window. You can then drag the cursor to an exact location and release the mouse button to set the marker and close the magnifier window.
3. The markers remain on the drawing until cleared, but are hidden from view when another Brava! viewer tool is being used. Click Clear All to remove all counts, click Remove Last to undo only your last selected count.
Brava 5.3 X Client User Guide
50
Measurement Settings
Available from the Measurement drop down menu, the Measurement Settings dialog allows you to select the precision units for measurement values displayed in the resulting value fields when using the measurement tools (distance, area, angle, xz value, and perimeter).
1. Click and select Settings.
2. Select a measuring system from the drop down list. English Architectural includes a precision setting for distance in fractions and can be calibrated in inches or feet. English displays all values in decimals only. Metric systems displays decimal values in meters, centimeters, and millimeters.
3. Select a Unit value from the unit drop down box, then select the degree of precision desired. The Precision (Distance) drop down values only apply to distance measurements. You can select to display the value from the nearest 1 to 1/16th precision in distance, and you can choose to display your other measurement precision values from the nearest 1.0 to 0.00001 decimal value.
4. Click OK to activate your settings. Measurement settings are saved across Brava! Enterprise sessions.
Note: Values are rounded up or down to the nearest precision value. For example, if you are measuring a line that is 6 1/3 inches and you have 1/2 selected in the precision drop down, the value will round up to and read as 6 1/2 in the distance value text box. If the value is exactly in the middle, such as 6 1/4, the displayed value will round down to the nearest 1/2 which would be 6.
Measure Magnification Tool
Calibrate and Measure with the Magnification Tool For certain formats (BMP, PRT, PDF, and CMG) and when using the Set Alignment Points tool, when you place a calibrate or measurement point, a magnification window automatically pops up under your mouse cursor, allowing you more accurate placement of the point for measuring and counting. As long as the left mouse button is held down, you can adjust the position of the point under the magnifier. When you release the left mouse button, the point is committed and the magnifier goes away so that you can dray your measure tool to the next point location. If you release the left mouse button while it is outside the magnifier rectangle, you are indicating that you want to cancel the attempt to place the point.

Hot Keys
51
The magnification level used depends on the file type. If it is entirely raster, then the magnification level is 1 source pixel per screen pixel. Otherwise the magnification level is 1 drawing inch = 1 screen inch. If the current view is already zoomed in beyond the above magnification levels, the magnifier does not display. The magnification tool used in measure does not contain all of the features of the Brava magnifier tool located on the main toolbar.
FILE OPERATIONS
Printing Tools
Printing
If your Brava! Server administrator allows and enables it, you can use the Brava! Printing functions.
Images print as they appear on the screen. If you have a markup open or overlaid, it will print on the image.
What do you want to do?
Print a file
Print a region
Print with ISO banners
Watermark
See Also:
Print to Scale
Print Troubleshooting
Print a File
To print the open image with the default printer settings, click ( or you can use the hotkeys + < P>).
Note: If Printing is disabled by Visual Rights, the print button and menu item will not be available. Additionally, Print Screen functionality will be disabled.
To change the default settings:
Brava 5.3 X Client User Guide
52
1. Click on the toolbar and select Print from the submenu.
2. To change printers click Printer Setup and select a printer from the printer Name drop down box. Click Properties to make any adjustments to the printer properties. You can change the printer's paper tray or change the paper orientation (landscape or portrait) Click OK to close the printer Properties dialog box.
3. From the General tab, specify a Print Range and desired Print Options.
4. Print Range includes All Pages, Current Page, Pages From (specify page numbers), and Current View. Current View only prints the part of the image that occupies the viewing window. Current View attempts to use the paper's entire printable area, so the print out can contain some portion of the image that is not visible in the viewing window.
5. In the Options section, you can set the Number of Copies to print, color options (Original image colors, Vector lines as black, or Grayscale), and set the printed Line Thickness. The Original image colors option is only available if the selected printer supports color printing.
6. Select the Automatically Rotate for Best Fit checkbox if you want Brava! to determine if rotating the image by 90 degrees will allow more of the image to fit on the printed page.
7. If Changemarks are associated with the document, the Print Changemark Information checkbox is enabled. When selected the content associated with each Changemark will print at the end of the print job. Only the Changemarks that fully appear in the printed output page will appear if the output page is a zoomed view. Each note receives a unique number that can be matched up to the text print out. Printed information includes the Changemark title, author, date and time authored, the note content, and any hyperlink reference.
8. Some older printers, and the PDF Distiller and Writer, may not properly invert print outs and many file types print reversed (black background and white foreground). To correct the print out (white background with black foreground), enable the Optimize for PDF/PostScript Printing option in the Print Options dialog. When selected, this causes a bitmap of the current image to be sent to the printer resulting in accurate print outs for the problematic printer or print driver. Note that enabling this option results in a slower print time and a larger print spool file. This option is persisted per printer.
9. Adjust the scale of the document from the Scale tab - see Print to Scale for details.
10. Observe the Print Preview area of the Print dialog to verify the area you wish to print is contained in the printable area of the page (indicated by the dashed blue line).
Note: If the print preview image does not display what you expect, study the textual output in the print preview panel. It displays the image's dimensions, the current scaling (e.g. "Fit to page," "1/50," etc.), the scaled output size (the image's dimensions multiplied by the scaling), the paper size dimensions, and the printable area size. Pay particular attention to the
Hot Keys
53
scaled output size compared to the printable area size; these are depicted, respectively, as the red and blue dashed lines in the preview image. Adjust the paper size or scaling as necessary to obtain the desired output.
11. Click Print to print the file.
You can save your print settings as the defaults to use permanently for subsequent printings. Click Default and then click Save as Defaults. To clear your saved default settings, click Clear Defaults. If Save as Defaults is not selected, the print dialog automatically defaults to the values used for the last print job.
The following settings of the Print dialog box can not be set as default:
1. Print Range: From_To - if selected, the default setting is Current Page.
2. Scale entry always defaults to Fit to Page.
3. Number of Copies to print always defaults to 1.
See also:
Print Region
Printing Tips
Print Region
You can select just a region of an image to print using the Print Region command.
1. Click on the toolbar and select Print Region from the submenu.
2. Click the left mouse button on the viewing window and drag a window around the area of the document you wish to print.
3. The selected area displays (according to the current settings) in the Print Preview area of the Print dialog box. Current Region is automatically selected in the Print Range area. Click Print to print the selected region.
In contrast to printing the Current View option, Print Region only prints the area selected in the dragged rectangle. The print out is cropped and does not try to fill the paper's printable area.
See Also:
Print a File
ISO Banners and Watermarks
The ISO banners are strings of specific information (date, time, page number, user name, etc.) assigned to a location on the document header and footer.
Brava 5.3 X Client User Guide
54
The watermark is a semi transparent character string that stretches from the lower left corner to the upper right corner of the printed or on screen document. Watermarks and print banners can be used to support ISO 9000 and QS 9000 quality standards. They can contain text strings, wildcard values, or, optionally (through integrations API), metadata fields from document management and product life management systems can be extracted and inserted into the banner or watermark. With 9 possible banner/watermark locations, you can add as much text as you need to provide sufficient traceability and status. Any of the banners or watermarks may be defined (added) on the Brava! Server or via html parameters or by you. However, only the strings added by you will be editable; the strings specified on the server or in the html parameters will not be editable. On-Screen Banner and Watermarks All Watermark and banners are printed on the document print-out except for the on screen banner and watermark which can be set independent of the print banners/watermark and are visible only in the Brava viewing window. You can show the Watermark and/or banner values in the Brava viewing window by adding an entry to the Screen Watermark or Screen Banner lines. These settings are useful for displaying a document's classification to the viewer (e.g., proprietary, draft, etc.). You can: Add, edit, or clear a banner or watermark Edit the banner/watermark font Use Tag values
Adding, Editing Watermarks/Banners
You can add, edit, or clear print banners or the watermark if they have not already been defined on the Brava! Server or in the html parameters. Note: Any banner or watermark strings that have been burned into a CSF file will not be editable.
1. Click on the toolbar and select ISO Banners/Watermarks (the button is also available from the Print Dialog).
2. Click on the Watermark or one of the ISO banner folders (e.g., Top Left).
3. Type in the desired text string or % to access the Tag drop down list.
4. Click the Font button to change the font by selecting a font name, Style and size from the Font dialog box. Note: Any change in font style
Hot Keys
55
and name selection will be applied to all defined watermark and banner settings for the current document (you cannot define multiple fonts or styles per document). The Watermark font size is not affected by your font size selection. The Screen Banner is not affected by any Font setting.
5. You can choose to show the Watermark and/or banner values in the viewing window by adding an entry to the Screen Watermark or Screen Banner lines. These settings are useful for displaying a document's classification to the viewer (e.g., proprietary, draft, etc.) and the values can differ from the values entered in the Watermark and banner location lines. Note that On screen banner fonts are not affected by choices made in the Font dialog box.
6. Click List to view all Watermark/ISO Banner strings that are set for the current document. Click Edit to return to the editable list.
7. Click OK to apply your changes and close the ISOBanners/Watermark dialog box.
See also:
Using Tag values
Editing Watermark and Banner fonts
About ISO Banners and Watermarks
Watermarks on CSF files
Tags
To access the Tag drop-down list, enter a percent symbol (%) in the edit field of a print banner or watermark. Print banners and the watermark can contain text strings or one of the available tag values:
%Date Inserts the date the print was spooled. If the tags are viewed on screen, the date at which the screen was last refreshed displays.
%SysDatePlusDays(x) Inserts a date the specified number of days past the system date. Replace "x" with the desired number of days. Negative numbers of days may be entered. Be sure to close the parenthesis when you add the number of days.
%DBString(x) This tag is used to resolve custom tags for products that integrate with Brava! Replace "x" with any printable character except a right parenthesis, ")".
%Time Inserts the time the print was spooled based on a 12 hour clock (AM/PM). If the tags are viewed on screen, the time on which the screen was last refreshed displays.

Brava 5.3 X Client User Guide
56
%MilTime Inserts the time the print was spooled based on a 24 hour clock.
%Title Adds the name of the document.
%Page Adds the page number.
%TotalPages Inserts the total number of pages.
%Login (or %User) Specifies the user name of the person who issued the print.
%% Inserts a single % character.
Note: Tag values are case insensitive. Also, all the tags except %% and %SysDatePlusDays() must be followed by a non-alphanumeric character (such as a space, a %, a comma, a slash) otherwise, they are interpreted as text strings.
Font Selection
The Font Properties dialog box is accessed through then Font button of the ISO Banner/Watermark dialog box. Here, you can choose the font properties to use for your Banner and Watermark print outs, and on screen watermark. Note: You can set the font style, size, and name from the Font Properties dialog box, however, the on screen banner is not affected by your choices, and the Watermark font size is not affected by your font size selection. Select a font name, style, and size from the available choices and click OK. You can review your selection in the review section of the dialog box. The list of available font names is the list that your default printer supports. You can also view your list of available fonts through the fonts list in your Microsoft Word application. If the default font properties have been set in the Brava server parameters (WatermarkBannerFontSize, WatermarkBannerFontStyle, BannerFontName) changes made to these fields in the Font Chooser will not be saved.
Print to Scale
You can print image files to scale through the Scale tab of the Print dialog box. You can scale the original image to fit the page, or scale it to a preset ratio. Select the Use drawing units checkbox to use the document's raw drawing units for scaling instead of normalized units. When selected, one unit is assumed to equal either one millimeter or one inch (depending on the

Hot Keys
57
measurement unit type selected). This option is not selected by default and the document's normalized units are used for scaling. Normalized units are the drawing units converted to a real world unit based on a conversion factor of the document type. For the Measurement Unit Type, you can choose from US Customary (inches) or Metric (millimeters) and select pre-defined drawing scales to set up image-based Print To Scale operations. You can choose to use one of four scaling methods available - Fit to Page, Scale, Fit Inside Banners, and Scale to Ratio where you can enter custom values: Fit to Page Fit to page automatically sizes a document to fit completely on the selected paper size. Fit Inside Banners Select if you would like to squeeze the page to fit within the borders of any banners that might exist. Scale Scale allows you to print a current file to a particular scale, based on the original scale of the image. Select a scale amount from the drop down list. With Full , one inch of the original prints as one inch (1 inch = 1 inch) and with 1/x inch, one foot of the original document prints as a fraction of an inch on paper(1/x inch = 1 foot). It is helpful to know the original scale of the file being printed in order to adjust the printed image accordingly. If unsure, use the Scale To or Fit to Page method, or use trial and error. (If you have Acrobat PDF writer, you can select that option from your printer drop-down name list to print to. You can then preview the file in Acrobat Reader as it will print.) Scale to Scale to x for x also allows you to print a current file to a particular scale, based on the original scale of the image. Enter a scale ratio in the two text boxes. For example, entering 1 and 100, 1 unit (inch or millimeter) of the printed document is equal to 100 units of the original document. (1/100 or 1%) Or, if entering 5 and 1 for example, 5 units of the printed document represents 1 unit of the original (5/1 or 500%). The image is cropped if the scaled image is larger than the paper size. It is helpful to know the original scale of the file being printed in order to adjust the printed image accordingly. Examples: Small scale drawing file where 1 inch = 1 inch:
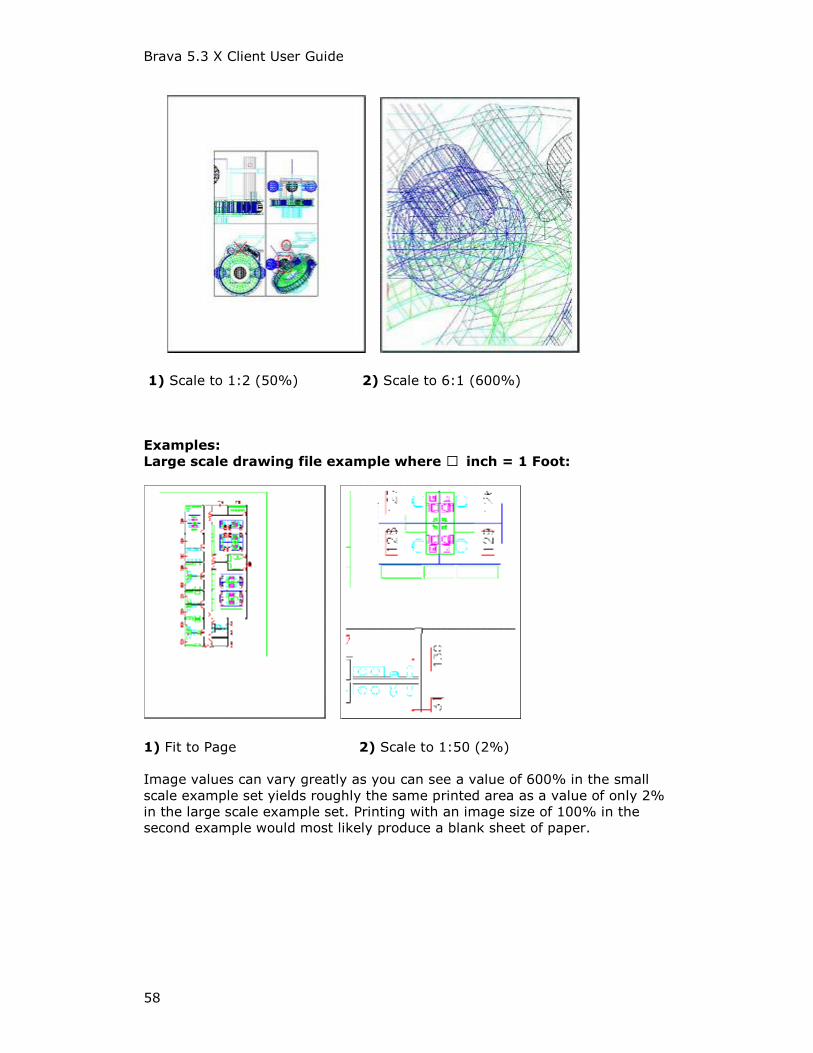
Brava 5.3 X Client User Guide
58
1) Scale to 1:2 (50%) 2) Scale to 6:1 (600%) Examples: Large scale drawing file example where ¼ inch = 1 Foot:
1) Fit to Page 2) Scale to 1:50 (2%) Image values can vary greatly as you can see a value of 600% in the small scale example set yields roughly the same printed area as a value of only 2% in the large scale example set. Printing with an image size of 100% in the second example would most likely produce a blank sheet of paper.
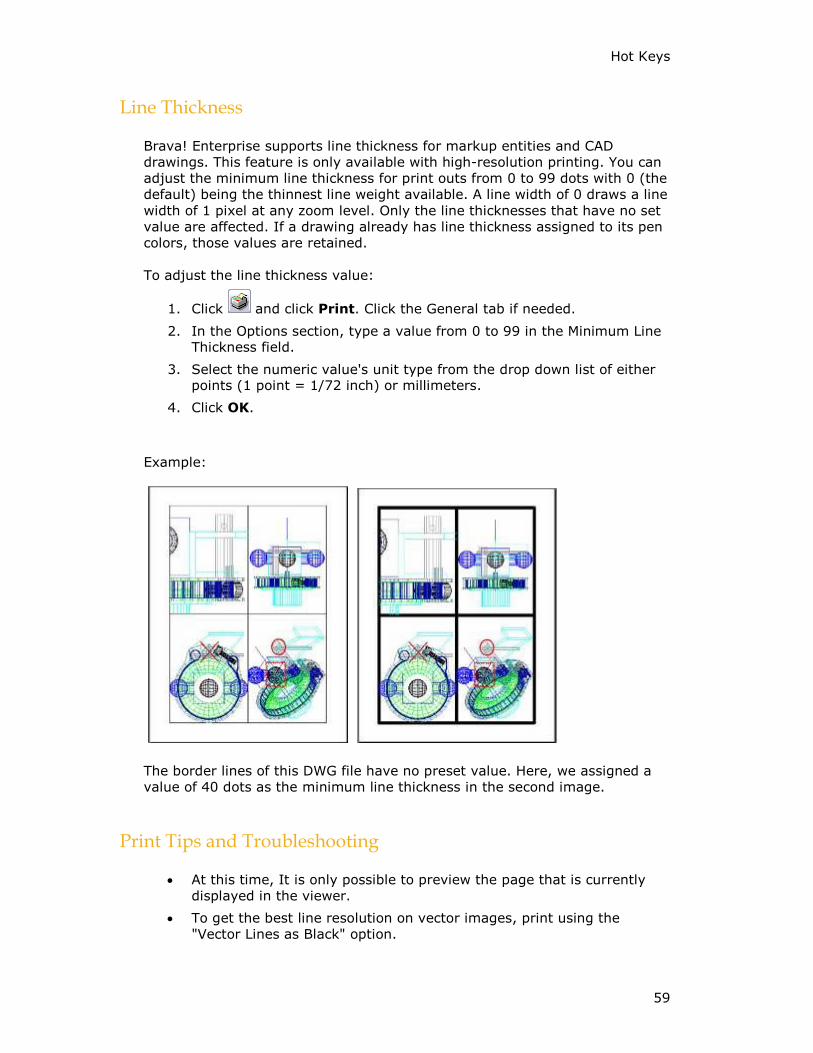
Hot Keys
59
Line Thickness
Brava! Enterprise supports line thickness for markup entities and CAD drawings. This feature is only available with high-resolution printing. You can adjust the minimum line thickness for print outs from 0 to 99 dots with 0 (the default) being the thinnest line weight available. A line width of 0 draws a line width of 1 pixel at any zoom level. Only the line thicknesses that have no set value are affected. If a drawing already has line thickness assigned to its pen colors, those values are retained. To adjust the line thickness value:
1. Click and click Print. Click the General tab if needed.
2. In the Options section, type a value from 0 to 99 in the Minimum Line Thickness field.
3. Select the numeric value's unit type from the drop down list of either points (1 point = 1/72 inch) or millimeters.
4. Click OK.
Example:
The border lines of this DWG file have no preset value. Here, we assigned a value of 40 dots as the minimum line thickness in the second image.
Print Tips and Troubleshooting
At this time, It is only possible to preview the page that is currently displayed in the viewer.
To get the best line resolution on vector images, print using the "Vector Lines as Black" option.
Brava 5.3 X Client User Guide
60
The rotation of the image displayed in the print preview area depends on the rotation of the image in the viewer, the print range selection, and the "Automatically Rotate Image for Best Fit" selection. When the "Current View" print range option is selected, the preview image's base rotation (when the option "Automatically Rotate for Best Fit" is NOT selected) will be the same as the rotation in the viewer. When any print range option other than "Current View" is selected, the preview image's base rotation is 0 degrees (no rotation). Selecting the "Automatically Rotate for Best Fit" option rotates the image in the preview 90 degrees from its base rotation if it results in the image fitting better on the target paper area.
If the print preview image does not display as you expect, study the textual output in the print preview panel. It displays the image's dimensions, the current scaling (e.g. "Fit to page," "1/50," etc.), the scaled output size (the image's dimensions multiplied by the scaling), the paper size dimensions, and the printable area size. Pay particular attention to the scaled output size compared to the printable area size; these are depicted, respectively, as the red and blue dashed lines in the preview image. Adjust the paper size or scaling as necessary to obtain the desired output.
Some older printers, and the PDF Distiller and Writer, may not properly invert print outs and many file types print reversed (black background and white foreground). To correct the print out (white background with black foreground), enable the Optimized PDF Printer mode option in the Print Options dialog. When selected, this causes a bitmap of the current image to be sent to the printer resulting in accurate print outs for the problematic printer or print driver. Note that enabling this option results in a slower print time and a larger print spool file.
Publishing Files
Save View as JPG
You can save the current view displayed in the Brava! Enterprise window as a JPG file. This feature captures the image window as a screen capture and will include all visible elements (e.g., markup entities, magnifier window, measurement indications, etc.).
1. Click on the toolbar and select Save Current View as JPG from the submenu.
2. Browse to and select a location on your file system to save the JPG file.
3. Click Save.
Note: If the Save as JPG Visual Right is disallowed on a CSF document, this menu option is disabled. Also, Print Screen functionality is disabled.

Hot Keys
61
Publishing files to PDF
Brava! Enterprise allows you to publish the currently viewed file to PDF.
1. Open a file that you would like to publish to PDF.
2. From the Brava! Enterprise toolbar, click and select Publish To PDF from the submenu.
3. When Brava! Enterprise finishes publishing, it will ask you whether to Save the PDF to a file system or to generate an email and send the PDF file as an attachment. If Save to file is selected, you are prompted for a directory to save the generated PDF document.
The entire document, including any open markup layers, is published to PDF - not just the current view. Additionally, any banners or watermarks that are set will be burned into the output PDF file. Note: Hyperlinks are not currently supported in the PDF output file. See Also: Publishing Markups in PDF Files
Publishing files to CSF
Brava! Enterprise allows you to securely publish files to Informative Graphics Corporation's proprietary portable format (CSF) from any native application. CSF is a neutral 2D format that is a replica of the source file, including images, graphics, layout, and more. Secure CSF files published with Brava! Enterprise can be opened in Brava! Desktop or the free Brava! Reader. When Brava! Enterprise publishes a file, it collects security information for the published document, converts it to CSF, and asks you where to save and/or preview the generated CSF document. You can create CSF files in two ways. The first is by using the Burn in Markup feature of Brava! Enterprise. The second is through the Save toolbar button:
1. From the Brava! Enterprise toolbar, click and select Publish To CSF from the submenu. The current document must be saved before publishing.
2. If markups are opened (for edit or review) you are prompted to burn them in to the CSF file (see Burning in Markups) or publish only the file without markups. The difference between the Publish File Only and Burn-in Markups options is that with Publish File Only to CSF, markups are not required to be opened and the file cannot be a CSF file. With the markup burn-in option, markups do have to be open, and the loaded file can be a CSF.
Brava 5.3 X Client User Guide
62
3. Publishing Options - Through a true/false server parameter, your Brava! Enterprise server administrator determines whether the CSF file's security options are automatically pulled from the server, or whether you, as the publisher can set the rights visually. In the latter case, an options dialog appears (for all but CSF files that are loaded for the purpose of burning in markups) allowing you to specify certain publishing and security controls.
In the Publish Options dialog you may select:
Security Type
Expiration dates
Permissions (Permit User and Enable Markup)
Watermarks and banners
Create Options
3. When you have chosen your desired options, click Publish. A dialog then prompts you select the published output options for your CSF file. (If you are contributing to a document management system, you may be prompted to enter additional meta data to be associated with the file).
If markups are opened (for edit or review) you are asked if you would like to burn them in to the CSF file (see Burning in Markups) . The difference between the Publish to CSF and Burn-in to CSF options is that with Publish to CSF, markups are not required to be opened and the file cannot be a CSF file. With the markup burn-in option, markups do have to be open, and the loaded file can be a CSF. Rights embedded in the new CSF file If the source file is a CSF file, the rights (including the watermarks and banners) in the original CSF file are applied to the new CSF. For non-CSF files, the Brava! Enterprise application administrator establishes whether default rights defined by the administrator are applied to newly published CSF files, or whether you, as the end-user, can interactively set rights. If you can interactively select rights, the Watermark and Banner settings currently displayed in the Brava! Enterprise viewer are embedded in the CSF file.
Security Type
Select "Password Protected" to grant viewing rights to select individuals. If selected, enter a password and confirmation in the text box. Users will be prompted for the correct password before they will be allowed to view the published file in the CSF Viewer.

Hot Keys
63
User Permissions
The permit section allows you to specify user rights for the sealed document. When the published document is viewed in a CSF reader (Brava! Desktop, Brava! Reader, Brava! Enterprise), users will be able to click on the "Visual Rights™" icon on the user interface to display the rights that are available for that document. Rights that you can control include: User permissions: Print - enables printing of the secure document. Copy to Clipboard - enables text content to be copied to the Clipboard and pasted into another application. Measurement - enables the measurement tool in the CSF reader. View by Layer - enables turning on and off visible layers in the CSF reader. Save As JPEG - enables turning on and off the Save View as JPEG command in the CSF reader. Enable Markup: Review - enables review of markups associated with the published document. Authoring and Review - enables markup creation and editing markups associated with the published document. Burn-in - enables burning in of markups on the published document. When the end-user loads a file, this permission allows the user to burn-in markups that are currently open into a new CSF file. If the loaded file is a CSF file, the new CSF file with burned in markups has the same permissions as the loaded CSF file, the only difference being that the markups are now part of the CSF file.
Expiration Dates
You can set expiration dates for your published documents. The CSF reader checks the date settings and will not allow usage if the user's system date is past the set expiration date.
Brava 5.3 X Client User Guide
64
No Date: Select "Never" as an expiration date if you do not want the published document to expire. Select an absolute or relative date for access rights to expire on the published document. Absolute Date: You can select a specific date for the document to expire by selecting "On" and then selecting a date from the calendar control. Relative Date: You can select an expiration date relative to the date the document is published. Simply choose "In" and use the spin box to input a specified number of days that the document will be usable. If the "In" option button is selected, the expiration absolute date field will update to reflect the entered number of relative days. The expiration date must be at least one day later than the publish date.
Published Output
The final dialog prompts the user for a location and option to publish the newly created CSF file. The default options are saving the CSF to the file system or sending it as an email attachment. Informative Graphics also provides integrations to various third party Content Management Systems where the CSF file can be contributed. Select a publishing option: "File Only" if you only want to create and publish a file as CSF. If this option is selected, a file browser dialog prompts you to select a file location to place the published file. "Email" if you would like to send the published CSF file as an email attachment. If this option is selected, you are presented with an outgoing email message with the CSF file attached. See Also: What is CSF?
Watermarks on CSF Files
If you can interactively set rights (see Publishing files to CSF), you can choose to set on-screen or printed banners and watermarks to your documents that will be saved with the published files. Any banners and watermarks that are set in the secured published file take priority over any banner and watermark settings that exist in the Brava! HTML parameters or in Brava! Reader. Secure HTML parameters for banners
Hot Keys
65
and watermarks will only be valid for the length that the CSF document is open. The watermark stretches from the lower left corner to the upper right corner of the viewing window. These settings are useful for displaying a document's classification to the viewer (e.g., proprietary, draft, etc.) and the values can differ from the values entered in the printed Watermark and banner location lines. You can choose to show the Watermark and/or banner values in the viewing window by adding an entry to the Screen Watermark or Screen Banner lines. Type in banner or watermark text to display on screen or click the "Set Print Banners" button to summon the print banner dialog. You can specify a watermark and define banners at any of the 12 document locations available (top center, bottom right, etc.). Print banners and watermarks can contain text strings or one of the available tag values:
You can set the font style and size of the Watermark through the Font button of the ISO Banner/Watermark dialog box. The font point size is restricted to a numeric value between 8 (minimum) and 300 (maximum). Note that On screen banner fonts are not affected by choices made in the Font dialog box.
Banners and Watermarks are persisted across similar product Brava ActiveX sessions. For example, Banners and Watermarks changed in Brava! Desktop will not be persisted in Brava! Reader and vice-versa.
ABOUT CONTENT SEALED (CSF) DOCUMENTS
CSF Publishing & Visual Rights
Client-side publishing refers to the publishing of a document or drawing to IGC's content sealed format (CSF) on a client machine rather than on the server. Documents can be published to CSF by using either Net-It® Now software (which uses the document's native application on a client's machine to print and then capture and convert the output), one of the Net-It® CAD Plug-ins (which run inside the native application to produce the CSF output files), or by publishing through the Brava! Enterprise add-on component Net-It® Enterprise. Visual RightsTM are assigned per CSF document and deal only with permissions on document content and features within the viewer. Permissions are not limited by users except in the case of password protecting a document and

Brava 5.3 X Client User Guide
66
providing the password to selected users only. With CSF publishing, the publisher can control various attributes of the document including:
set expiration dates for viewing set on screen and printed banners and watermarks that override the
ones set in Brava! Enterprise whether links extraction will occur whether the document is password protected Visual RightsTM permissions determine whether the viewer can:
view and manipulate layers copy to the Clipboard print use the measurement tools review markups author markups burn in markups
Visual Rights are static and once a document is published, the set of rights cannot be changed. Benefits of client side publishing:
In the case of publishing through printing, the author of the document or drawing already has the native application on his system and therefore, that application does not need to be installed on the server.
Necessary fonts and cross references will be present on the client machine.
Scalability is high since the processing is distributed among many client machines.
The original native file never leaves the client machine. In relation to other IGC products, CSF files can be:
contributed to a Net-It Central site. viewed with the freely distributed Brava! Reader. placed on the local file system for uploading to an Application Service
Provider (ASP) page. See Also: Viewing CSF Files Publishing to CSF Blockout for Redaction Burning in Markups
Viewing CSF Files in Brava
Documents can be published to Informative Graphic's content sealed format (What is CSF?) using the document's native application on a client's machine. CSF publishing is accomplished in one of several ways, including using Net-It® Now, Brava! Desktop, a Net-It CAD Plugin, or Net-It Enterprise software which all use the document's native application printing feature to capture and convert the output. The Net-It plug-ins can be run inside of native applications such as Microsoft Word, Excel, PowerPoint, Visio, AutoCAD, Inventor, SolidEdge, etc. to produce the CSF (or 3DF in the cases of 3D
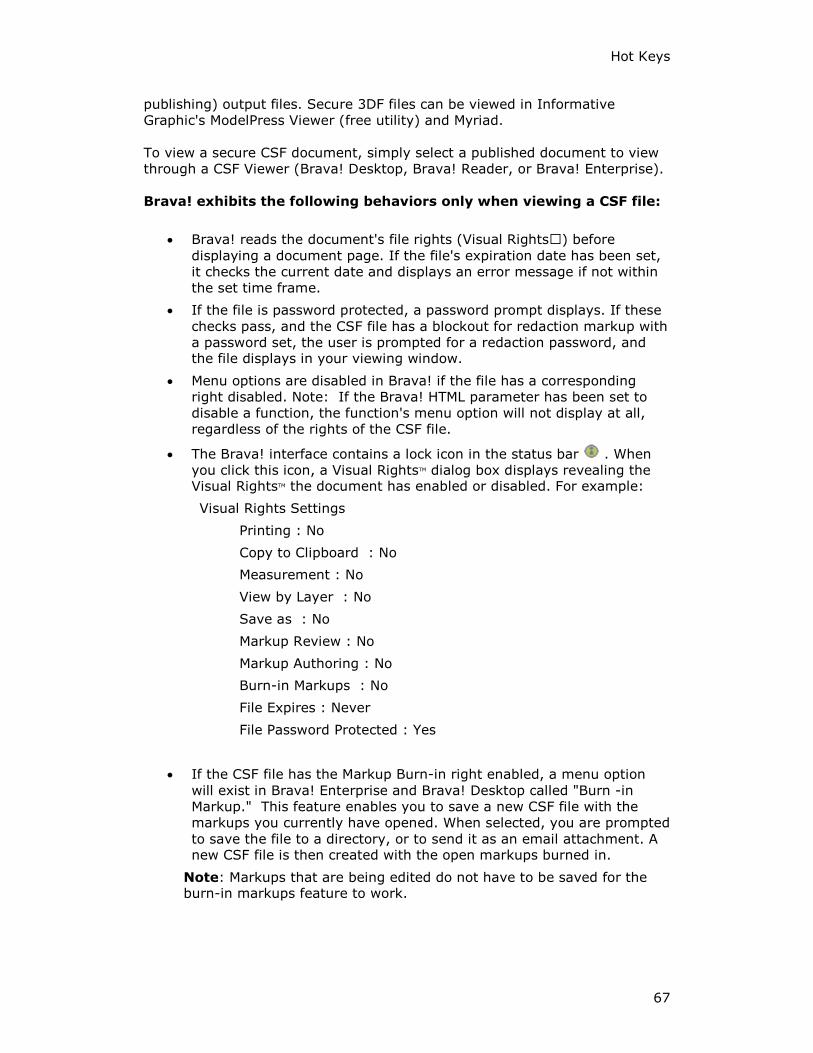
Hot Keys
67
publishing) output files. Secure 3DF files can be viewed in Informative Graphic's ModelPress Viewer (free utility) and Myriad. To view a secure CSF document, simply select a published document to view through a CSF Viewer (Brava! Desktop, Brava! Reader, or Brava! Enterprise). Brava! exhibits the following behaviors only when viewing a CSF file:
Brava! reads the document's file rights (Visual Rights™) before displaying a document page. If the file's expiration date has been set, it checks the current date and displays an error message if not within the set time frame.
If the file is password protected, a password prompt displays. If these checks pass, and the CSF file has a blockout for redaction markup with a password set, the user is prompted for a redaction password, and the file displays in your viewing window.
Menu options are disabled in Brava! if the file has a corresponding right disabled. Note: If the Brava! HTML parameter has been set to disable a function, the function's menu option will not display at all, regardless of the rights of the CSF file.
The Brava! interface contains a lock icon in the status bar . When you click this icon, a Visual RightsTM dialog box displays revealing the Visual RightsTM the document has enabled or disabled. For example:
Visual Rights Settings
Printing : No
Copy to Clipboard : No
Measurement : No
View by Layer : No
Save as : No
Markup Review : No
Markup Authoring : No
Burn-in Markups : No
File Expires : Never
File Password Protected : Yes
If the CSF file has the Markup Burn-in right enabled, a menu option will exist in Brava! Enterprise and Brava! Desktop called "Burn -in Markup." This feature enables you to save a new CSF file with the markups you currently have opened. When selected, you are prompted to save the file to a directory, or to send it as an email attachment. A new CSF file is then created with the open markups burned in.
Note: Markups that are being edited do not have to be saved for the burn-in markups feature to work.
Brava 5.3 X Client User Guide
68
When a CSF file is opened that has markups burned in, the markups are opened in the viewer. The user can view and review any Changemarks™ contained in the markup, but he cannot close or edit the burned in markups. The markup file may be saved as DXF.
The current image displayed in Brava! Enterprise can be saved as a jpg file.
If a loaded CSF file has Save As, Printing, or Copy to Clipboard disabled, your Print Screen function will be disabled. Attempting to use the Print Screen key places a Visual Rights image over the Brava viewing area, obscuring the screen.
Additional notes:
If the document has the copy text right enabled, users can copy the entire page to the clipboard (excluding any areas concealed by a blockout entity).
Banners and watermarks set in the CSF file take priority over any set in the HTML pages.
HOT KEYS
Various tools and commands can be accessed through these shortcut keys:
<Ctrl> + <A> = Help About
<Ctrl> + <B> = Toggle Background Color
<Ctrl> + <C> = Copy to Clipboard
<Ctrl> + <E> = Fit All
<Ctrl> + <F> = Mirror (Flip)
<Ctrl> + <G> = Print Region
<Ctrl> + <H> = Help Contents
<Ctrl> + <L> = Show Layers
<Ctrl> + <M> = Open Markup
<Ctrl> + <N> = New Markup
<Cltrl> + <P> = Print
<Ctrl> + <R> = Open for Review
<Ctrl> + <S> = Save Markup
<Ctrl> + <T> = Thumbnail Panel

Hot Keys
69
<Ctrl> + <V> = Paste
<Ctrl> + <W> = Fit Width
<Ctrl> + <Y> = Redo
<Ctrl> + <Z> = Undo
<Ctrl> + <Shift> + <C> = Close Markup
<Ctrl> + <Shift> + <R> = Close Review
<Ctrl> + <Shift> + <S> = Save As Markup
<Ctrl> + <shift> + <K> = Publish to CSF
<Ctrl> + <shift> + <D> = Publish to PDF
<Ctrl> + <shift> + <J> = Save View As JPG
<Ctrl> + <Space> = Rotate 90 Degrees
<F3> = Find
<+> = Zoom in, <-> = zoom out
<Page Up> = moves to previous page
<Page Down> = moves to next page
<Ctrl> + <Home> = go to first page
<Ctrl> + <End> = go to last page
The following hotkeys can be used while in Compare mode to nudge the overlaid "older version" in the desired direction:
<Ctrl> + <Left arrow> = nudge position left
<Ctrl> + <Right arrow> = nudge position right
<Ctrl> + <Up arrow> = nudge position up
<Ctrl> + <Down arrow> = nudge position down
<Ctrl> + <+> = nudge scale up
<Ctrl> + <-> = nudge scale down
The following hotkeys are available for navigating CAMCAD (*.cc) files with the Brava! Viewer (when Select tool is active):
[mouse click] = "select entire geometry assembly and display it's attributes"
[mouse click] + [CTRL key] = "select specific geometry and display it's attributes"
[mouse click] + [SHIFT key] = "select a specific piece of a geometry and display it's attributes"

73
INDEX
A Alignment Points ...........................19 Animate .......................................17 Apply All ......................................39 Arc tool........................................26
B Background Color.................... 16, 38 Banners/Watermarks ............... 53, 54 Block Out tool ......................... 32, 38 Burn-in ........................................32
C Calibrate tool ................................46 CAMCAD ......................................68 Changemarks ....................28, 29, 30 Closing ........................................40 Cloud tool ....................................23 Compare ................................ 18, 19 Consolidating Markups ...................42 Contact Information ......................71 Copy
Markups ....................................39 Copy............................................45 Copy markups ........................ 39, 41 Count ..........................................49 Create CSF ...................................64 Crossout tool ................................27 CSF .........................5, 31, 32, 65, 66
D Digital Rights .......................... 65, 66 Distance tool .......................... 46, 47 Draw ...........................................38 DXF.............................................40
E Edit Text ......................................28 Editing.........................................39 Ellipse.................................... 22, 27 Elliptical Fills.................................38 Elliptical Highlight..........................37 Expiration Dates ...........................63
F Filled ..................................... 27, 38 Filters ..........................................30 Find....................................... 34, 45 Fit all ...........................................11 Fit Width ......................................11 Fit Window ...................................11 Font ...................................... 37, 56
H Hides
Blockout....................................32 Crossout.............................. 27, 38 Poly Fills....................................38
Hides...........................................32 Hides...........................................38 Highlight ...........................23, 36, 37 Hotkeys .......................................68 Hyperlink ............................... 28, 61
I Image-based Zooming...................13 ISO Banners/Watermark .......... 53, 54
L Line.............................................47 Line Arrow tool .............................23 Line Thickness ..............................59 Line tool.......................................26 Line Weights........................... 17, 59 Line Width tool........................ 17, 38
M Magnifier................................ 12, 50 Markup
Changing Ownership ...................42 Closing Markups .........................40 Consolidating .............................42 Copy to all pages.................. 39, 41 Edit Markups..............................39 Markup Burn-in ..........................32 Markup Color .............................39 Markup Files ..............................21 Markup Fill Type.........................27 Markup Font ..............................37 Markup Pages ............................41 Markup/Save .............................40
Markup ........................................22 Markup ........................................22 Markup ........................................32 Markup ........................................39 Markup ........................................40 Markup toolbar .............................22 Measure.................46, 47, 48, 49, 50 Mirror ..........................................18 Modelspace ..................................16 Monochrome Mode ........................15 Mouse Functions ..................... 20, 36
N New Features .................................3 New Markup .................................22
O Open Markup .......................... 39, 68
Brava 5.3 X Client User Guide
74
Optimized for PDF Printer ......... 51, 59 Overlay Markups ...........................41
P Page Control.................................16 Pan tool ................................. 11, 12 Paperspace...................................16 PDF ....................................... 43, 61 Permissions ..................................63 Poly..................................26, 27, 48 Poly Fill ........................................38 Poly Highlight ...............................37 Polygon tool .................................48 Polyline.................................. 26, 48 Print .................................51, 53, 56 Print Range ..................................51 Print Troubleshooting.....................59 Properties ....................................51 Published Output................43, 61, 64 Publishing files to CSF....................61 Publishing files to PDF....................61 Publishing Markups to PDF files .......43
R Raster
Insert Raster Image....................24 Rectangle............................... 27, 47 Rectangular, Elliptical ....................22 Redaction..........................32, 34, 36 Review..............................30, 41, 68 RightMouse ..................................20 Rotate ................................... 15, 39
S Save Markup .......................... 40, 68 Save View ....................................60 Scale ...........................................56 Scratchout ...................................26 Scrollable Paging...........................16
Search .........................................45 Security Type ...............................62 Select .................................... 23, 45 Sketch tool ...................................25 Solid Shapes.................................27 Stamps ........................................24 Sticky Note...................................29
T Tags ............................................55 Text .................................24, 28, 45 Thumbnails ............................ 13, 16 Toolbars.........................................9 TotalPages Inserts.........................55
U Unfilled Poly .................................27 Unfilled Rectangle .........................27 Unfilled/Filled Rectangle.................22 Units ...........................................50
V View Existing Print Banners ............53 View Tools....................................14
W Watermark ............................. 54, 64 Watermark and Banner ..................64 Why CSF? ......................................7 Wildcards .....................................55
Z Zoom
Image-Based Zoom ....................13 Zoom Extents ...................... 11, 68 Zoom In ....................................11 Zoom Out..................................11 Zoom Width......................... 11, 68 Zoom Window............................11
Zoom...........................................11 Zoom...........................................11