Embed Size (px)
Citation preview

VEGETABLE GROWING GUIDE Beginner’s edition
Northern New York

TABLE OF CONTENTS Asparagus
Beans Beets
Bok Choy Broccoli
Brussels Sprouts Beans, Bush and Pole
Cabbage Carrots
Cauliflower Corn
Cucumber Garlic Leeks
Lettuce Melons Onions
Peas Peppers Potatoes
Radish Spinach
Summer Squash Tomato
Watermelon Winter Squash
Diseases
Pests Beneficial Insects
Resources, Acknowledgements
This Northern NY Growing Guide is a summary of just some of the information available on Cornell’s Home Gardening Web site: http://www.gardening.cornell.edu/homegardening/scene0391.html For complete growing information visit the Web site and consult the resources listed on the last page of this booklet.
Tips • Avoid frost pockets as late killing frosts will
damage spears. • For highest yields, plant all-male hybrids,
such as the Jersey series from Rutgers Uni-versity (Jersey Giant, Jersey King, Jersey Knight).
• If using older varieties, such as Martha
Washington, you can identify the less pro-ductive female plants at flowering and re-place them with male plants. The flowers on male plants are larger and longer than the female flowers, have six stamens and a small nonfunctional pistil. The female flowers have six small, nonfunctional stamens and a well developed, three-lobed pistil.
• Water during dry spells during the first
year. Do not overwater as plants don’t toler-ate water-logged soils.
• Midsummer mulching with hay, straw, leaves
or grass clippings helps control weeds and keep soil from drying out. Regular applica-tions of compost or well-rotted manure pro-vide a steady source of nutrients.
GENERAL INFORMATION Family: Liliaceae
Genus/species: Asparagus officinalis Seed Germination: 10 - 12 days @ 75°F
Lifecycle: Perennial Planting Depth: 1/2 inch Seed Viability: 6 years
Sunlight: Full Sun Height: 5 - 9 Feet
Spread: 2 - 2.5 Feet Flower Color: Green
Foliage Color: Light Green
Major Pests & Diseases Pests: Asparagus beetle
Diseases: Fusarium wilt and crown rot
Asparagus When & How To Plant
Carefully consider site before planting this long-lived perennial. Test soil and apply phosphorus, potassium and lime as indicated before planting. Plant crowns 4 to 6 weeks before average last frost, 18 to 24 inches apart in trenches 8 inches deep. Spread roots in bottom of trench and cover with 1 to 2 inches of soil. Gradually cover with more soil as the plants grow. You can propa-gate by seed, division or separation - Purchase disease-free, 1-year-old crowns for planting. Di-vide plants in early spring, if desired. Asparagus can also be grown from seed, but requires an ex-tra year to establish.
From Seed To Plate 2 years
Desired Soil Characteristics
Prefers loose, deep soils high in organic matter. Prefers pH near 7.0, but tolerates a wide range. Add lime and fertilizer before establishment.
TRY THESE VARIETIES Jersey Knight and Jersey King - Widely adapted, do well in warm climates. Jersey Giant - Good for colder regions. The Jersey series has good resistance to rust and fusarium crown and root rot.
Resource: http://www.gardening.cornell.edu/homegardening/scene0391.html
Tips • Beans require consistent and adequate mois-
ture especially when flowering and developing pods.
• If you water, avoid wetting foliage, which encourages disease. Water early in the day so foliage dries quickly.
• Mulch after second set of leaves develop to help retain moisture.
• For a steady supply make successive plant-ings until mid-late July.
Beans When & How To Plant
Propagate by seed - beans do not like to be transplanted. Plant seed one inch deep and about 2 inches apart, in rows 18 - 36 inches apart. Do not plant until danger of frost has passed and soil has warmed. Cold air temperatures can injure plants and reduce yields.
From Seed To Plate Depends upon variety: 50 –65 Days
Desired Soil Characteristics
Prefers well-drained soil, but with consistent moisture. Only requires average
fertility. pH 6.0 to 6.8.
TRY THESE VARIETIES Green Pod: Bush Bluelake, Charon, Derby, Jade, Provider, Tendergreen Improved, Roma II Yellow Pod (Wax): Golden Butterwax, Golden Rod, Rocdor. Green Pods ( Pole):Blue Lake, Fortex, Kentucky Wonder, Kentucky Blue. Dry Beans: Cabernet, California Red Kidney, Chi-nook 2000, Etna, Fleetwood, Jacob’s Cattle, Mid-night. Miscellaneous: French Horticultural, Romano, Royal Purple Burgundy.
Resource: http://www.gardening.cornell.edu/homegardening/scene0391.html
GENERAL INFORMATION Family: Leguminosae
Genus/species: Phaseolus vulgaris Seed Germination: 8 - 10 days @ 70°F
Lifecycle: Annual Planting Depth: 1/2 inch Seed Viability: 3 years
Sunlight: Full Sun Height: 1—3 Feet Spread: 1—2 feet Flower Color: White
Major Pests & Diseases Diseases: Bacterial Blights, Bean Common
Mosaic Virus, White Mold. Pests: Mexican Bean Beetles, Aphids, Leafhop-
pers, Seed Corn Maggot, Spider Mites.
LEGUMES Beans and all members of the family Leguminosae play an important role in the garden. They have the ability to enrich the soil with nitrogen (N) through bacterial relationships that promote nitrogen fixation. To simplify, legumes are great for the soil and even beginners should consider rotating them with crops that require high amounts of N. Rotate cool season crops with a legume, plant spinach in spring, upon harvest plant beans. Harvest the beans and plant spinach again.
Resource: http://www.gardening.cornell.edu/homegardening/scene0391.html
Tips • Best color and flavor develop under cool con-
ditions and bright sun. When beets mature in warm weather, they are lighter colored, have less sugar and have more pronounced color zoning in the roots.
• Use floating row covers to discourage insects early in the season.
• Keep surrounding area well-weeded and con-sistently watered. Competition and uneven watering can make beets stringy and tough.
GENERAL INFORMATION Family: Chenopodiaceae
Genus/species: Beta vulgaris Seed Germination: 5 - 8 days @ 75°F
Lifecycle: Annual—(Biennial) Planting Depth: 3/4 inch Seed Viability: 4 years
Sunlight: Full Sun Foliage Color: Medium Green—Variegated
Major Pests & Diseases
Diseases: Cercospora Leaf Spot, Scab, Root Rot
Pests: Leafminer
Beets When & How To Plant
Plant in early spring, as soon as you can work the soil, ¾ inch deep and 1 inch apart in rows 12 to 18 inches apart. For continuous harvest, make suc-cessive plantings every three weeks until mid-summer. For winter storage, sow crop about 10 weeks before heavy freeze. Unlike most root crops, beets can be started inside and trans-planted into the garden.
From Seed To Plate Harvest in 45 - 65 days depending upon weather
conditions and specific variety.
Desired Soil Characteristics Prefers well-drained sandy loam to silt loam soil, high in organic matter, with pH between 6.5 and 7 and free of large stones. Good soil structure is important because growth is improved by good soil aeration.
TRY THESE VARIETIES Crosby Green Top, Detroit Dark Red, Early Won-der, Formanova, Golden, Long Season, Lutz green, Red Ace, Red Cloud, Ruby Queen, Warrior.
Storing Beets In order to store beets place in layers of damp sand in a cool, humid place such as a root cellar for two to five months. Remove beet tops, leaving about a half-inch of stem but keep the root end intact to prevent bleeding. Place in layers of damp sand, saw-dust, or peat moss in a plastic container with a tight lid or cover. You can store beets through much of the winter if temperature and humidity levels are correct. You can also pickle, can, or jar beets im-mediately after harvest. Canned beets will keep for more than 12 months.
Resource: http://www.gardening.cornell.edu/homegardening/scene0391.html
Tips. • Spring crops may bolt prematurely if young
plants are exposed to frost or a week of nighttime temperatures below 50 F. Wait until after last frost date to direct seed or transplant out.
• Spring crops require good timing and careful pest control
• Direct-seeded fall crops are easier to grow. • Mulch fall crops heavily and provide adequate
moisture to avoid premature bolting.
GENERAL INFORMATION Family: Brassicaceae
Genus/species: Brassica rapa var. chinensis Seed Germination: 4 - 7 days @ 50°F—80°F
Lifecycle: Biennial—grown as Annual Planting Depth: 1/4—1/2 inch
Seed Viability: 4 years Sunlight: Full Sun to Part Shade
Height: 1 - 2 Feet Spread: 1 - 1.5 Feet
Foliage Color: White Petiole—Green Leaves
Major Pests & Diseases Diseases: Clubroot, Downy Mildew, Alternaria
Leaf Spot. Pests: Cabbage Maggot, Flea Beetles, Cutworms,
Leafminers, Aphids, Seed corn Maggot
Bok or Pac Choy When & How To Plant
Wait until after last frost date to direct seed or transplant out. Start transplants inside 4 to 6 weeks before last frost date. Transplant 6 to 12 inches apart in rows 18 to 30 inches apart. Use the closer spacings for smaller varieties. Plant direct-seeded spring crops ¼ to ½ inch deep and about 1 inch apart in rows 18 to 30 inches apart. Thin to 6- to 12-inch spacings. Use thinnings in salads. For fall crops, sow seed in early August or set out transplants in late August.
Desired Soil Characteristics
Prefers well-drained, fertile soil high in organic matter, pH 6.0 to 7.5. Can tolerate slightly alka-line soil. Needs plentiful, consistent moisture.
TRY THESE VARIETIES
Mei Qing Choi, Tropical Delight, Two Seasons, China Pride, Jade Pagoda, Dynasty ‘Baby’ varieties grow just 6 inches tall while oth-ers may reach 2 feet. Some are more tolerant of cold and heat than others.
Preparing Bok Choy • Boiling 3 - 4 minutes for the stalks, 1 - 1 1/2
minutes for leaves. • Steaming about 6 minutes for the stalks, 2 -
3 minutes for leaves • Stir-fry about 5 minutes for stalks, 2 min-
utes for leaves - the leaves should be just wilted and bright green.
Resource: http://www.gardening.cornell.edu/homegardening/scene0391.html
Tips • Use low nitrogen fertilizer at planting. Too
much nitrogen fertilizer may cause hollow stems.
• Mulch to protect roots, reduce weed compe-tition and conserve moisture.
• To help reduce disease, do not plant broccoli crops in the same location more than once every 3 or 4 years..
• For the most tender and succulent spears, provide consistent and adequate supply of water throughout entire season.
• Space widely if you want to harvest large central heads. Closer spacing will produce smaller central heads. If you harvest secon-dary heads you will get a greater total yield from closer spaced plants. Make sure to harvest central head on time to allow side shoots to form—otherwise your harvest will be small.
GENERAL INFORMATION Family: Brassicaceae
Genus/species: Brassica oleracea var. botrytis (all Brassica olearacea are considered ‘cole crops’ including broccoli, cauliflower, Brussels sprouts
and cabbage) Seed Germination: 4 - 7 days @ 75°F
Lifecycle: Annual Planting Depth: 1/2—3/4 inch
Seed Viability: 3 years Sunlight: Full Sun Height: 2 - 3 Feet Spread: 2 - 3 Feet Flower Color: Yellow
Foliage Color: Medium Green
Major Pests & Diseases Diseases: Clubroot
Pests: Cabbageworms, Flea Beetles, Cabbage Root Maggot, Cabbage Aphids, Cutworms.
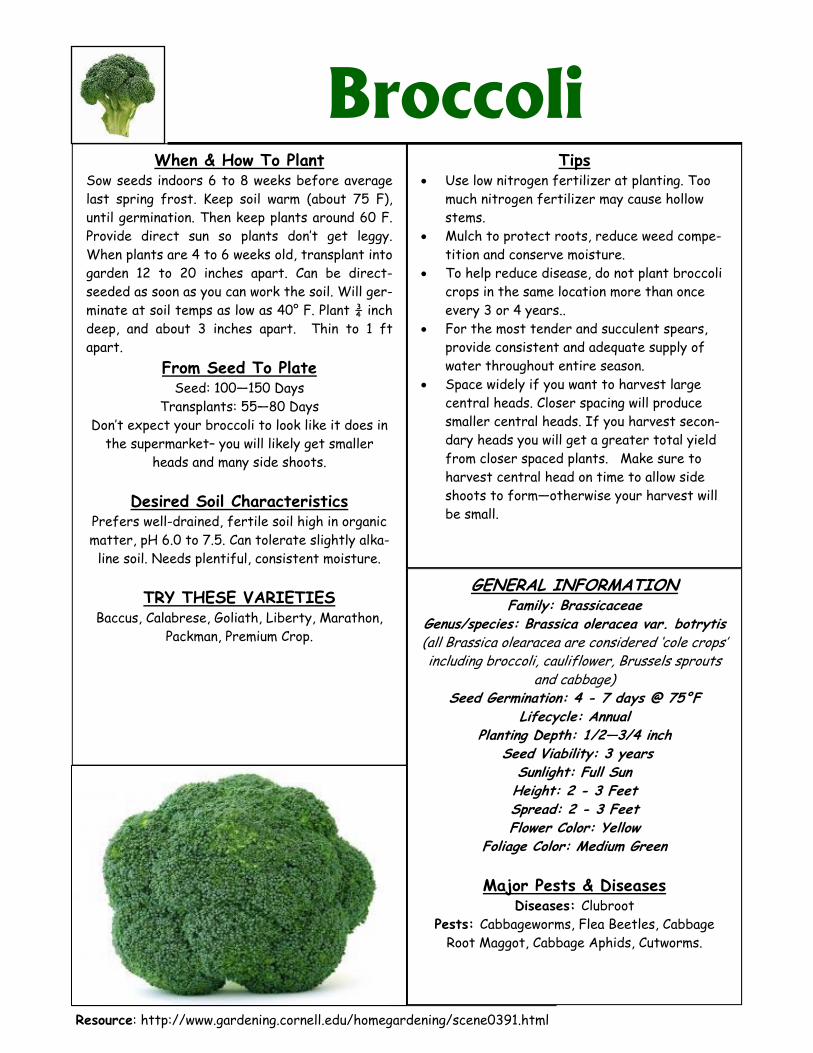
Broccoli When & How To Plant
Sow seeds indoors 6 to 8 weeks before average last spring frost. Keep soil warm (about 75 F), until germination. Then keep plants around 60 F. Provide direct sun so plants don’t get leggy. When plants are 4 to 6 weeks old, transplant into garden 12 to 20 inches apart. Can be direct-seeded as soon as you can work the soil. Will ger-minate at soil temps as low as 40° F. Plant ¾ inch deep, and about 3 inches apart. Thin to 1 ft apart.
From Seed To Plate Seed: 100—150 Days
Transplants: 55—80 Days Don’t expect your broccoli to look like it does in
the supermarket– you will likely get smaller heads and many side shoots.
Desired Soil Characteristics
Prefers well-drained, fertile soil high in organic matter, pH 6.0 to 7.5. Can tolerate slightly alka-
line soil. Needs plentiful, consistent moisture.
TRY THESE VARIETIES Baccus, Calabrese, Goliath, Liberty, Marathon,
Packman, Premium Crop.
Tips • Plants have shallow root systems. Avoid shal-
low cultivation. Mulch to protect roots, re-duce weed competition and conserve mois-ture.
• Use floating row covers to help protect from early insect infestations.
• To help reduce disease, do not plant Brussels sprouts or other cole crops in the same loca-tion more than once every three or four years.
• Shorter plants tend to mature earlier and be more cold tolerant.
• Brussels sprouts can tolerate light shade but this will slow maturity.
• Requires good soil, timely planting and pro-tection from pests.
• Frost improves the flavor of brussel sprouts so make sure not to pick too soon.
Brussels Sprouts When & How To Plant
Direct seed about 4 months before expected fall frost. Plant seed 3 to 4 inches apart, ¼ to ½ inch deep in rows about 30 inches apart. Thin plants to about 18 inches apart. Start transplants in late May and transplant in late June or early July. Space plants 18 to 24 inches apart.
From Seed To Plate Harvest varies from about 80 to 130 days
Desired Soil Characteristics
Prefers well-drained, fertile soil high in organic matter, pH 6.0 to 7.5. Can tolerate slightly alka-
line soil. Needs plentiful, consistent moisture.
TRY THESE VARIETIES Recommended for NY: Oliver, Rubine Red.
Resource: http://www.gardening.cornell.edu/homegardening/scene0391.html
GENERAL INFORMATION Family: Brassicaceae
Genus/species: Brassica oleracea var. gemmifera (all Brassica olearacea are considered ‘cole crops’ including broccoli, cauliflower, Brussels sprouts
and cabbage) Seed Germination: 5 - 8 days @ 45°F—85°F
Lifecycle: Annual Planting Depth: 1/4 - 1/2 inch
Seed Viability: 3-4 years Sunlight: Full Sun Height: 2 - 3 Feet
Spread: 1.5 - 2 Feet Foliage Color: Medium - Dark Green
Major Pests & Diseases Diseases: Clubroot
Pests: Cabbage aphids, Cabbage root maggots, Cabbageworms, Flea Beetles, Cutworms.
Tips • For fall crop, direct seed in summer, or start
transplants in late May and transplant in late June or early July.
• Mulch to protect roots, reduce weed compe-tition and conserve moisture.
• Use floating row cover to protect crop from early pests.
• When heads are mature, they are prone to splitting in response to any stress, especially rain following a dry period. Avoid splitting by choosing varieties that resist splitting and spacing plants closer together.
• To help reduce disease, do not plant cabbage or other cole crops in the same location con-secutively.
• It is important to grow cole crops in a rich soil from the very start or else your harvest will significantly decrease. Adding fertilizer later does not make up for an early lack.
• Excessive nitrogen can be another cause of head splitting.
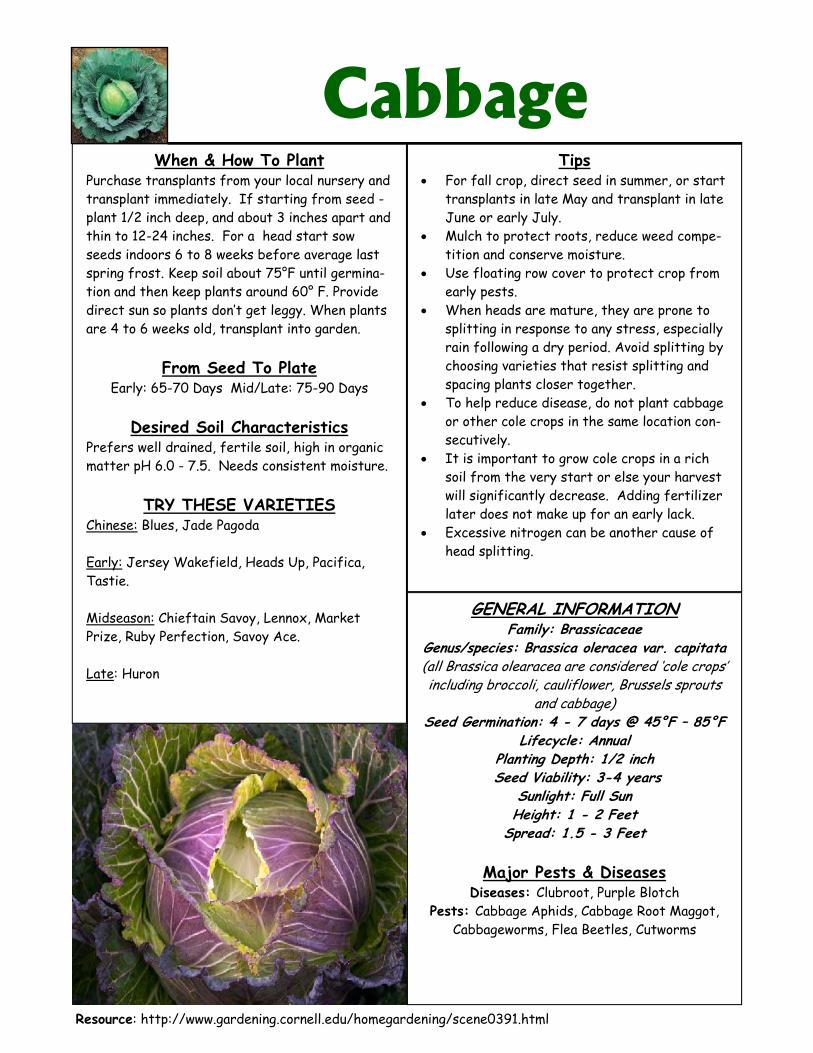
Cabbage When & How To Plant
Purchase transplants from your local nursery and transplant immediately. If starting from seed - plant 1/2 inch deep, and about 3 inches apart and thin to 12-24 inches. For a head start sow seeds indoors 6 to 8 weeks before average last spring frost. Keep soil about 75°F until germina-tion and then keep plants around 60° F. Provide direct sun so plants don’t get leggy. When plants are 4 to 6 weeks old, transplant into garden.
From Seed To Plate Early: 65-70 Days Mid/Late: 75-90 Days
Desired Soil Characteristics
Prefers well drained, fertile soil, high in organic matter pH 6.0 - 7.5. Needs consistent moisture.
TRY THESE VARIETIES Chinese: Blues, Jade Pagoda
Early: Jersey Wakefield, Heads Up, Pacifica, Tastie.
Midseason: Chieftain Savoy, Lennox, Market Prize, Ruby Perfection, Savoy Ace.
Late: Huron
Resource: http://www.gardening.cornell.edu/homegardening/scene0391.html
GENERAL INFORMATION Family: Brassicaceae
Genus/species: Brassica oleracea var. capitata (all Brassica olearacea are considered ‘cole crops’ including broccoli, cauliflower, Brussels sprouts
and cabbage) Seed Germination: 4 - 7 days @ 45°F – 85°F
Lifecycle: Annual Planting Depth: 1/2 inch
Seed Viability: 3-4 years Sunlight: Full Sun Height: 1 - 2 Feet
Spread: 1.5 - 3 Feet
Major Pests & Diseases Diseases: Clubroot, Purple Blotch
Pests: Cabbage Aphids, Cabbage Root Maggot, Cabbageworms, Flea Beetles, Cutworms
Tips • Choose short-season varieties for early
planting and summer eating. Choose longer-season varieties for fall harvest and storage.
• Mulch to keep soil cool, conserve moisture and to keep exposed "shoulders" from turn-ing green and bitter. Another option is to hill soil over the shoulders.
• Sow radishes in the same row. They germi-nate quickly, break the soil crust, and mark the row. Thin and/or harvest radishes be-fore they compete with carrots.
• Make additional plantings every three weeks through midsummer for continuous supply and fall harvest.
• Plant crops for fall harvest about 10 to 12 weeks before first frost.
• Root quality is best when soil temperatures are 60 F to 70 F. The shape of the root is determined within the first few weeks after germination when the new plant extends its taproot deep into the soil. If it encounters obstacles or is damaged, shape and quality of the root will suffer.
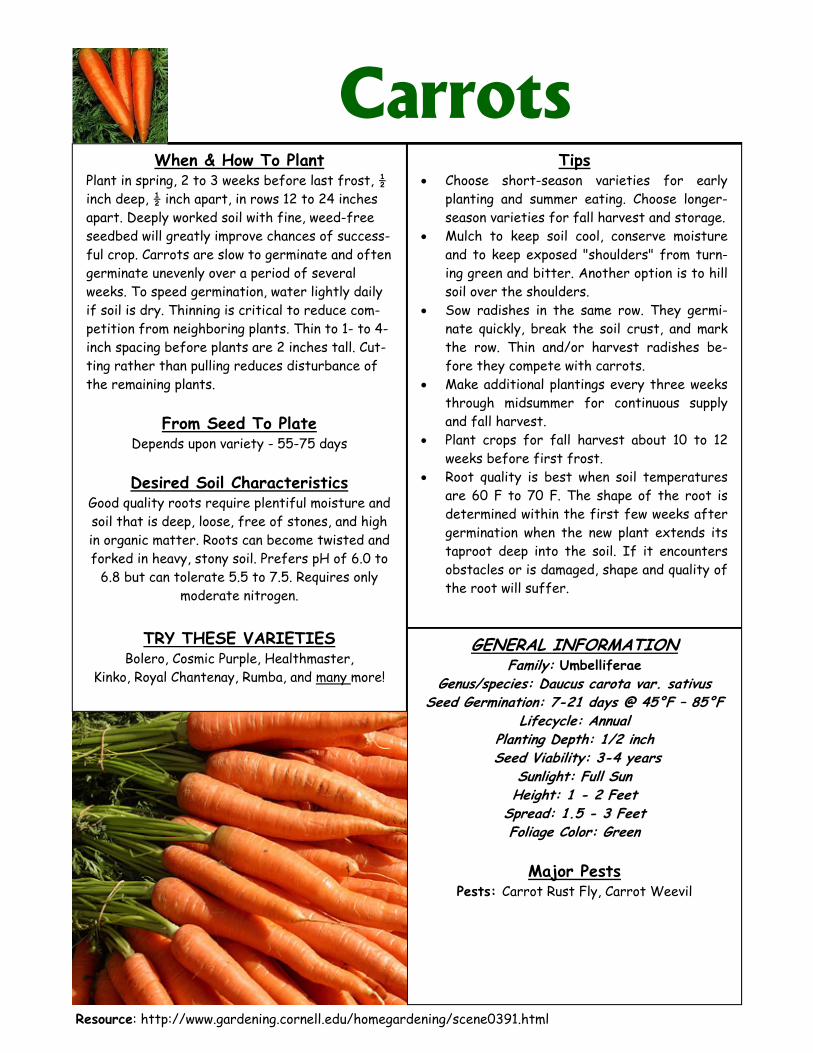
Carrots When & How To Plant
Plant in spring, 2 to 3 weeks before last frost, ½ inch deep, ½ inch apart, in rows 12 to 24 inches apart. Deeply worked soil with fine, weed-free seedbed will greatly improve chances of success-ful crop. Carrots are slow to germinate and often germinate unevenly over a period of several weeks. To speed germination, water lightly daily if soil is dry. Thinning is critical to reduce com-petition from neighboring plants. Thin to 1- to 4-inch spacing before plants are 2 inches tall. Cut-ting rather than pulling reduces disturbance of the remaining plants.
From Seed To Plate Depends upon variety - 55-75 days
Desired Soil Characteristics
Good quality roots require plentiful moisture and soil that is deep, loose, free of stones, and high in organic matter. Roots can become twisted and forked in heavy, stony soil. Prefers pH of 6.0 to
6.8 but can tolerate 5.5 to 7.5. Requires only moderate nitrogen.
TRY THESE VARIETIES
Bolero, Cosmic Purple, Healthmaster, Kinko, Royal Chantenay, Rumba, and many more!
Resource: http://www.gardening.cornell.edu/homegardening/scene0391.html
GENERAL INFORMATION Family: Umbelliferae
Genus/species: Daucus carota var. sativus Seed Germination: 7-21 days @ 45°F – 85°F
Lifecycle: Annual Planting Depth: 1/2 inch
Seed Viability: 3-4 years Sunlight: Full Sun Height: 1 - 2 Feet
Spread: 1.5 - 3 Feet Foliage Color: Green
Major Pests
Pests: Carrot Rust Fly, Carrot Weevil
Tips • This is the fussiest of all the cole crops. • Plentiful & consistent moisture is needed
from the time the seed emerges until fruits begin to fill out.
• Mulch to protect roots, reduce weed compe-tition and conserve moisture.
• Transplant when plants have four or five true leaves.
• To preserve the white color of the curd, use string or rubber bands to secure outside leaves over the head when it is about 2 to 3 inches in diameter. From tying to harvest may take less than a week in summer or as long as a month in fall.
• Too much sun, heat or nitrogen fertilizer can cause “ricey” heads where the curd sepa-rates into small, rice-like grains.
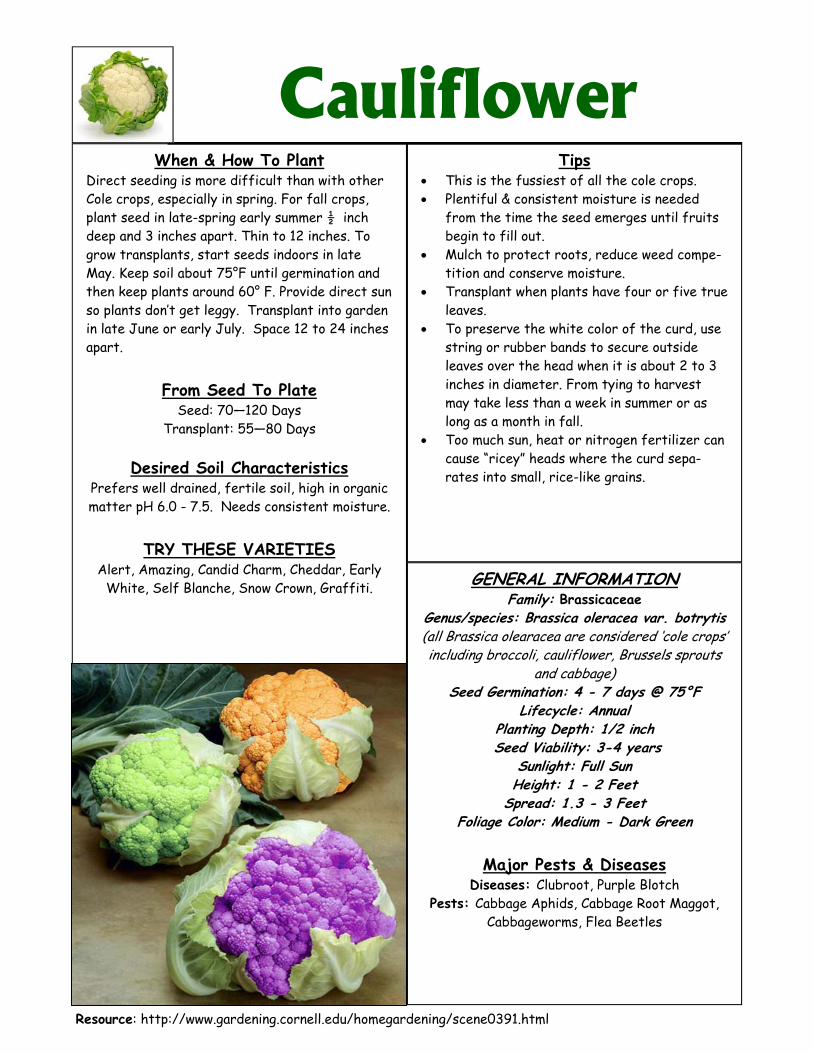
Cauliflower When & How To Plant
Direct seeding is more difficult than with other Cole crops, especially in spring. For fall crops, plant seed in late-spring early summer ½ inch deep and 3 inches apart. Thin to 12 inches. To grow transplants, start seeds indoors in late May. Keep soil about 75°F until germination and then keep plants around 60° F. Provide direct sun so plants don’t get leggy. Transplant into garden in late June or early July. Space 12 to 24 inches apart.
From Seed To Plate Seed: 70—120 Days
Transplant: 55—80 Days
Desired Soil Characteristics Prefers well drained, fertile soil, high in organic matter pH 6.0 - 7.5. Needs consistent moisture.
TRY THESE VARIETIES
Alert, Amazing, Candid Charm, Cheddar, Early White, Self Blanche, Snow Crown, Graffiti.
Resource: http://www.gardening.cornell.edu/homegardening/scene0391.html
GENERAL INFORMATION Family: Brassicaceae
Genus/species: Brassica oleracea var. botrytis (all Brassica olearacea are considered ‘cole crops’ including broccoli, cauliflower, Brussels sprouts
and cabbage) Seed Germination: 4 - 7 days @ 75°F
Lifecycle: Annual Planting Depth: 1/2 inch
Seed Viability: 3-4 years Sunlight: Full Sun Height: 1 - 2 Feet
Spread: 1.3 - 3 Feet Foliage Color: Medium - Dark Green
Major Pests & Diseases
Diseases: Clubroot, Purple Blotch Pests: Cabbage Aphids, Cabbage Root Maggot,
Cabbageworms, Flea Beetles
Tips • Corn is a heavy feeder - particularly of nitro-
gen - and may require several side-dressings of fertilizer for best yields. Look for signs of nutrient deficiency. Purple-tinged leaves are a sign of phosphorus deficiency. Pale green leaves are a sign of nitrogen defi-ciency.
• Some corn varieties need to be isolated from others, especially super sweet, popcorn, ornamental corn and field corn
• Corn plants have many roots close to the sur-face, so cultivate around them with care.
• After the soil has warmed, you can mulch corn to help suppress weeds and retain mois-ture.
• It is not necessary to remove suckers (side sprouts growing from the base of the plant). Studies show that removing them may actu-ally reduce yields.
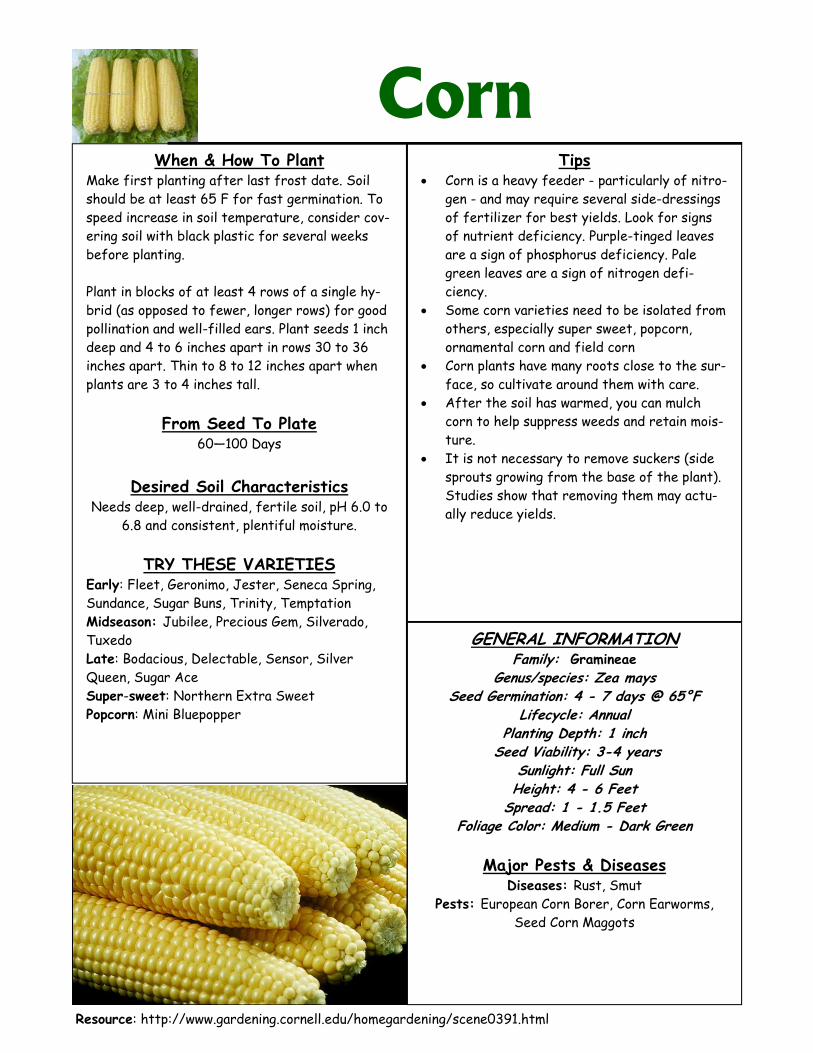
Corn When & How To Plant
Make first planting after last frost date. Soil should be at least 65 F for fast germination. To speed increase in soil temperature, consider cov-ering soil with black plastic for several weeks before planting.
Plant in blocks of at least 4 rows of a single hy-brid (as opposed to fewer, longer rows) for good pollination and well-filled ears. Plant seeds 1 inch deep and 4 to 6 inches apart in rows 30 to 36 inches apart. Thin to 8 to 12 inches apart when plants are 3 to 4 inches tall.
From Seed To Plate 60—100 Days
Desired Soil Characteristics
Needs deep, well-drained, fertile soil, pH 6.0 to 6.8 and consistent, plentiful moisture.
TRY THESE VARIETIES
Early: Fleet, Geronimo, Jester, Seneca Spring, Sundance, Sugar Buns, Trinity, Temptation Midseason: Jubilee, Precious Gem, Silverado, Tuxedo Late: Bodacious, Delectable, Sensor, Silver Queen, Sugar Ace Super-sweet: Northern Extra Sweet Popcorn: Mini Bluepopper
Resource: http://www.gardening.cornell.edu/homegardening/scene0391.html
GENERAL INFORMATION Family: Gramineae
Genus/species: Zea mays Seed Germination: 4 - 7 days @ 65°F
Lifecycle: Annual Planting Depth: 1 inch
Seed Viability: 3-4 years Sunlight: Full Sun Height: 4 - 6 Feet
Spread: 1 - 1.5 Feet Foliage Color: Medium - Dark Green
Major Pests & Diseases
Diseases: Rust, Smut Pests: European Corn Borer, Corn Earworms,
Seed Corn Maggots
Tips • Choose varieties based on desired use, if
planning to pickle choose a pickling variety. To trellis, choose a vining variety.
• Cucumbers are heavy feeders and will re-quire fertilizer at some point throughout the growing season. Plant with compost and feed with an organic fertilizer high in nitro-gen. Pale yellow leaves may indicate a lack of nitrogen.
• Cucumbers are very sensitive to cold, if starting in trays be sure to harden off prior to transplanting.
• Do not plant cucumbers in the same place consecutively.
• Choose disease resistant varieties.
Cucumber When & How To Plant
Direct-seed 1 to 1 ½ inches deep. Hills: 3 to 6 seeds per hill, hills spaced 3 to 5 feet apart. Thin to 2 to 3 plants per hill. Rows: 2 inches apart in rows 5 to 6 feet apart -Thin to 8 to 15 inches apart in rows. For extra early crops, start plants inside 3 to 4 weeks before transplanting. Sow 2 seeds per 2-inch pot. Grow above 70 F during the day and above 60 F at night. Very sensitive to cold tem-peratures, and be careful during transplant to not disturb roots.
From Seed To Plate Depends upon variety - 75 to 90 Days.
Desired Soil Characteristics
Prefers, Well Drained, fertile soil, high in or-ganic matter with pH between 5.8 — 6.8.
TRY THESE VARIETIES
Slicing: Burpless Hybrid II, Greensleeves, Mar-ketmore 76, Marketmore 80, Orient Express, Raider, Spacemaster, Sweet Slice. Pickling: Regal, National. Asian.Burpless: Suyo Long, Tasty Jade And many others!
Resource: http://www.gardening.cornell.edu/homegardening/scene0391.html
GENERAL INFORMATION Family: Cucurbitaceae
Genus/species: Cucumis sativus Seed Germination: 3 - 10 days @ 80° - 90°F
Lifecycle: Annual Planting Depth: 1— 1.5 inches
Sunlight: Full Sun Height: 1—6 Feet Spread: 1—6 Feet Flower Color: Yellow
Foliage Color: Medium Green
Major Pests & Diseases Diseases: Bacterial Wilt, Powdery Mildew, Scab,
Cucumber Mosaic Virus Pests: Cucumber Beetles, Aphids, Squash Vine
Borer
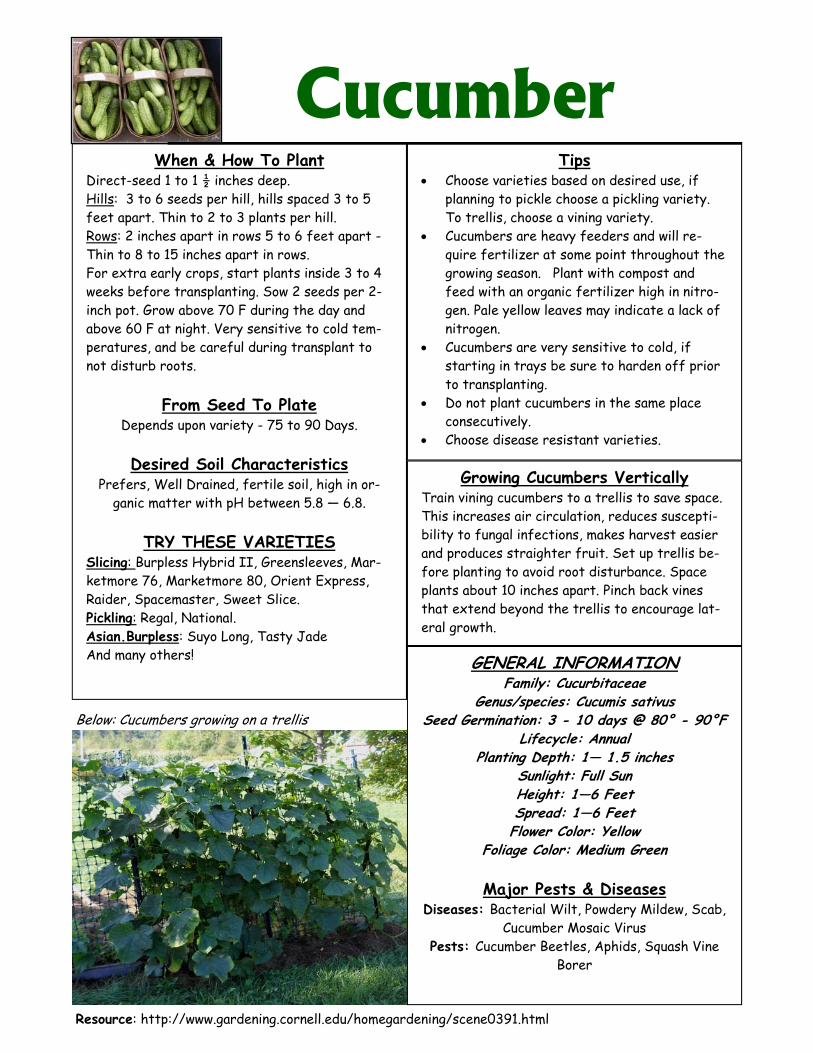
Below: Cucumbers growing on a trellis
Growing Cucumbers Vertically Train vining cucumbers to a trellis to save space. This increases air circulation, reduces suscepti-bility to fungal infections, makes harvest easier and produces straighter fruit. Set up trellis be-fore planting to avoid root disturbance. Space plants about 10 inches apart. Pinch back vines that extend beyond the trellis to encourage lat-eral growth.
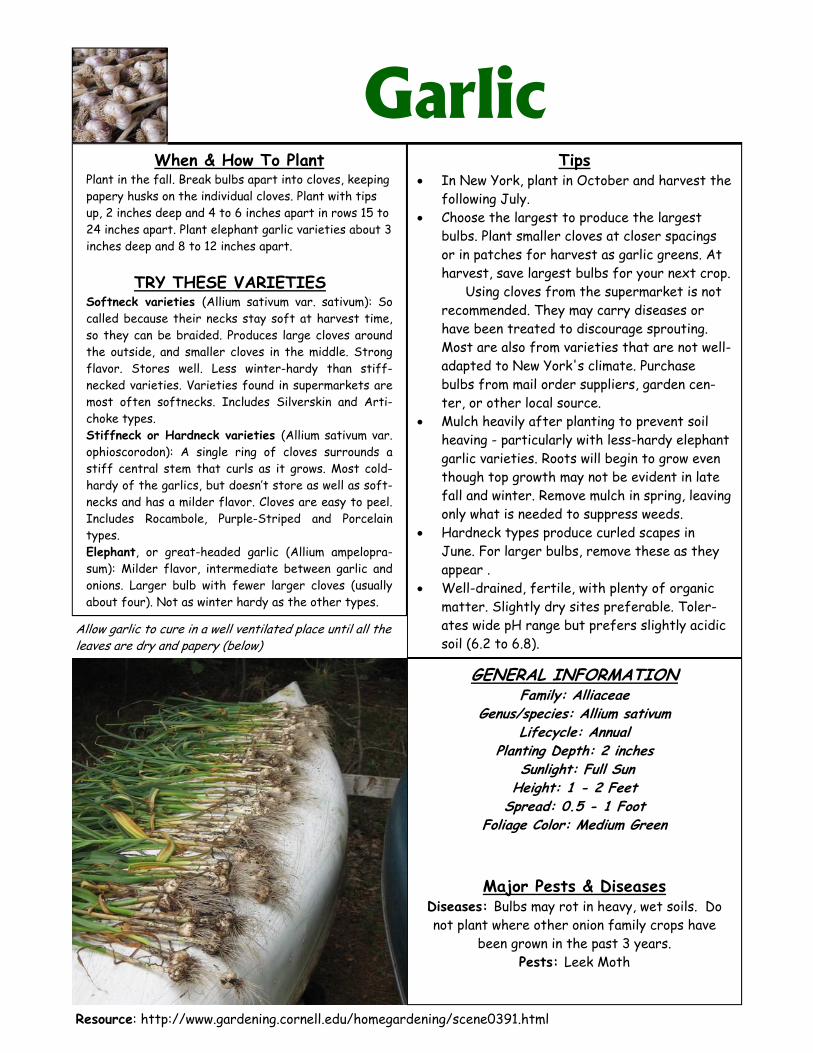
Allow garlic to cure in a well ventilated place until all the leaves are dry and papery (below)
Tips • In New York, plant in October and harvest the
following July. • Choose the largest to produce the largest
bulbs. Plant smaller cloves at closer spacings or in patches for harvest as garlic greens. At harvest, save largest bulbs for your next crop. Using cloves from the supermarket is not recommended. They may carry diseases or have been treated to discourage sprouting. Most are also from varieties that are not well-adapted to New York's climate. Purchase bulbs from mail order suppliers, garden cen-ter, or other local source.
• Mulch heavily after planting to prevent soil heaving - particularly with less-hardy elephant garlic varieties. Roots will begin to grow even though top growth may not be evident in late fall and winter. Remove mulch in spring, leaving only what is needed to suppress weeds.
• Hardneck types produce curled scapes in June. For larger bulbs, remove these as they appear .
• Well-drained, fertile, with plenty of organic matter. Slightly dry sites preferable. Toler-ates wide pH range but prefers slightly acidic soil (6.2 to 6.8).
Garlic When & How To Plant
Plant in the fall. Break bulbs apart into cloves, keeping papery husks on the individual cloves. Plant with tips up, 2 inches deep and 4 to 6 inches apart in rows 15 to 24 inches apart. Plant elephant garlic varieties about 3 inches deep and 8 to 12 inches apart. TRY THESE VARIETIES Softneck varieties (Allium sativum var. sativum): So called because their necks stay soft at harvest time, so they can be braided. Produces large cloves around the outside, and smaller cloves in the middle. Strong flavor. Stores well. Less winter-hardy than stiff-necked varieties. Varieties found in supermarkets are most often softnecks. Includes Silverskin and Arti-choke types. Stiffneck or Hardneck varieties (Allium sativum var. ophioscorodon): A single ring of cloves surrounds a stiff central stem that curls as it grows. Most cold-hardy of the garlics, but doesn’t store as well as soft-necks and has a milder flavor. Cloves are easy to peel. Includes Rocambole, Purple-Striped and Porcelain types. Elephant, or great-headed garlic (Allium ampelopra-sum): Milder flavor, intermediate between garlic and onions. Larger bulb with fewer larger cloves (usually about four). Not as winter hardy as the other types.
Resource: http://www.gardening.cornell.edu/homegardening/scene0391.html
GENERAL INFORMATION Family: Alliaceae
Genus/species: Allium sativum Lifecycle: Annual
Planting Depth: 2 inches Sunlight: Full Sun Height: 1 - 2 Feet
Spread: 0.5 - 1 Foot Foliage Color: Medium Green
Major Pests & Diseases Diseases: Bulbs may rot in heavy, wet soils. Do not plant where other onion family crops have
been grown in the past 3 years. Pests: Leek Moth

Tips • Leeks have shallow root systems and need
consistent moisture and good weed control. Water weekly if weather is dry, and mulch to retain moisture and suppress weeds.
• Grow early or nonhardy varieties for summer harvest. They mature in as little as 50 days after transplanting and will withstand some frost.
• Grow late or hardy varieties for fall and win-ter harvest. They take can take 100 or more days to mature, but can withstand heavy freezes. If well-mulched in fall, they can be harvested through winter and into spring in many places.
• Hill or mound soil around stems several times to blanch as leeks grow.
Leeks When & How To Plant
Start transplants about 8 to 10 weeks before last frost date. Sow seeds in flats about ¼ inch apart and ½ inch deep. Transplant to cell-type containers when they are about 2 inches tall. If you skip this step and continue growing in open flats, simply tease apart and trim roots when transplanting into the garden. Direct seed about 4 weeks before average last frost ½ inch deep, 1 inch apart, in rows 20 inches apart. Thin to 4 to 6 inches apart.
From Seed To Plate Depends on variety : 75— 120 days
Desired Soil Characteristics
Well-drained, rich soil, high in organic matter. Optimum pH is 6.2 to 6.8. Requires plentiful,
even moisture for good yields.
TRY THESE VARIETIES American Flag, Broad London, Electra, King Rich-
ard, Pancho
Resource: http://www.gardening.cornell.edu/homegardening/scene0391.html
GENERAL INFORMATION Family: Alliaceae
Genus/species: Allium ampeloprasum Seed Germination: 5 - 7 days @ 75°F
Lifecycle: Annual Planting Depth: 1/4 - 1/2 inch
Seed Viability: 3 years Sunlight: Full Sun / Part Shade
Height: 1 - 2 Feet Spread: 1.3 - 3 Feet
Foliage Color: Medium - Dark Green
Major Pests & Diseases Diseases: Purple Blotch, Botrytis leaf blight
Pests: Onion maggot, Leek moth, Thrips
Tips • Make succession plantings every week or two.
Grow several varieties with different matur-ity dates for a constant supply. Cut leaf tips at preferred stage and leave the base at-tached to promote further growth.
• Lettuce has a shallow root system. Keep soil moist to keep plants growing continuously. Mulch to retain moisture and suppress weeds (unless slugs are a problem).
• Moisture stress and high temperatures, par-ticularly at night, encourage bolting. Early summer and fall crops do best.
• Use row covers to protect very early plant-ings from cold, to protect young plants from insects, and to shade crops when warm weather arrives.
• Harvest lettuce early in the morning after dew is evaporated to prevent rot. Loose leaf varieties can be picked as soon as the leaves are large enough to eat. Several varieties of young leaves are used as gourmet garnishes.
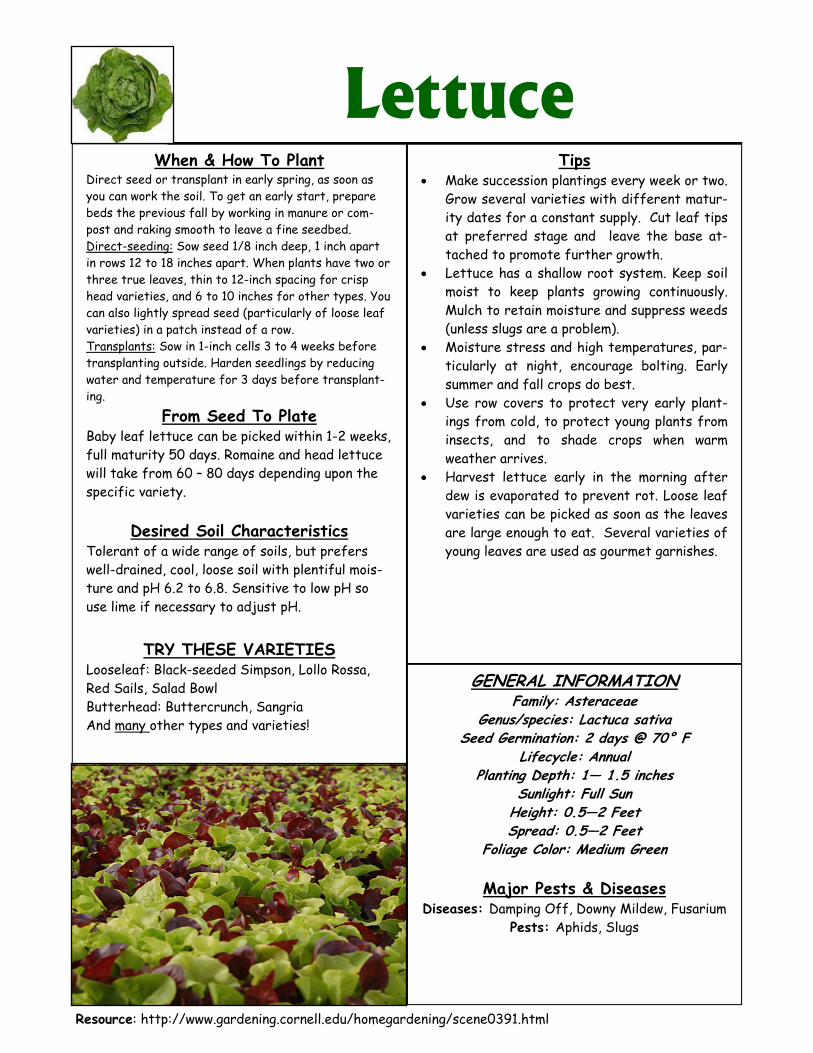
Lettuce When & How To Plant
Direct seed or transplant in early spring, as soon as you can work the soil. To get an early start, prepare beds the previous fall by working in manure or com-post and raking smooth to leave a fine seedbed. Direct-seeding: Sow seed 1/8 inch deep, 1 inch apart in rows 12 to 18 inches apart. When plants have two or three true leaves, thin to 12-inch spacing for crisp head varieties, and 6 to 10 inches for other types. You can also lightly spread seed (particularly of loose leaf varieties) in a patch instead of a row. Transplants: Sow in 1-inch cells 3 to 4 weeks before transplanting outside. Harden seedlings by reducing water and temperature for 3 days before transplant-ing.
From Seed To Plate Baby leaf lettuce can be picked within 1-2 weeks, full maturity 50 days. Romaine and head lettuce will take from 60 – 80 days depending upon the specific variety.
Desired Soil Characteristics Tolerant of a wide range of soils, but prefers well-drained, cool, loose soil with plentiful mois-ture and pH 6.2 to 6.8. Sensitive to low pH so use lime if necessary to adjust pH.
TRY THESE VARIETIES Looseleaf: Black-seeded Simpson, Lollo Rossa, Red Sails, Salad Bowl Butterhead: Buttercrunch, Sangria And many other types and varieties!
Resource: http://www.gardening.cornell.edu/homegardening/scene0391.html
GENERAL INFORMATION Family: Asteraceae
Genus/species: Lactuca sativa Seed Germination: 2 days @ 70° F
Lifecycle: Annual Planting Depth: 1— 1.5 inches
Sunlight: Full Sun Height: 0.5—2 Feet Spread: 0.5—2 Feet
Foliage Color: Medium Green
Major Pests & Diseases Diseases: Damping Off, Downy Mildew, Fusarium
Pests: Aphids, Slugs
Tips • Since they need warm temperatures, it is
helpful to start plants indoors, use plastic mulch to warm soil, and fabric row covers to protect young transplants.
• Avoid disturbing roots when transplanting or thinning.
• When choosing varieties, match days to har-vest with the length of your growing season. Also base your variety choices on disease resistance, fruit size , flavor, and color.
• If growing melons on a trellis, support fruit with slings made from netting, fabric, or pantyhose. Trellising improves air circulation around plants and can help reduce foliar dis-ease problems. Choose small-fruited varie-ties and reduce plant spacing.
• Plants require consistent moisture until polli-nation. Once fruits are about the size of a tennis ball, only water if soil is dry and leaves show signs of wilting.
• Very sensitive to frost and cool tempera-tures.
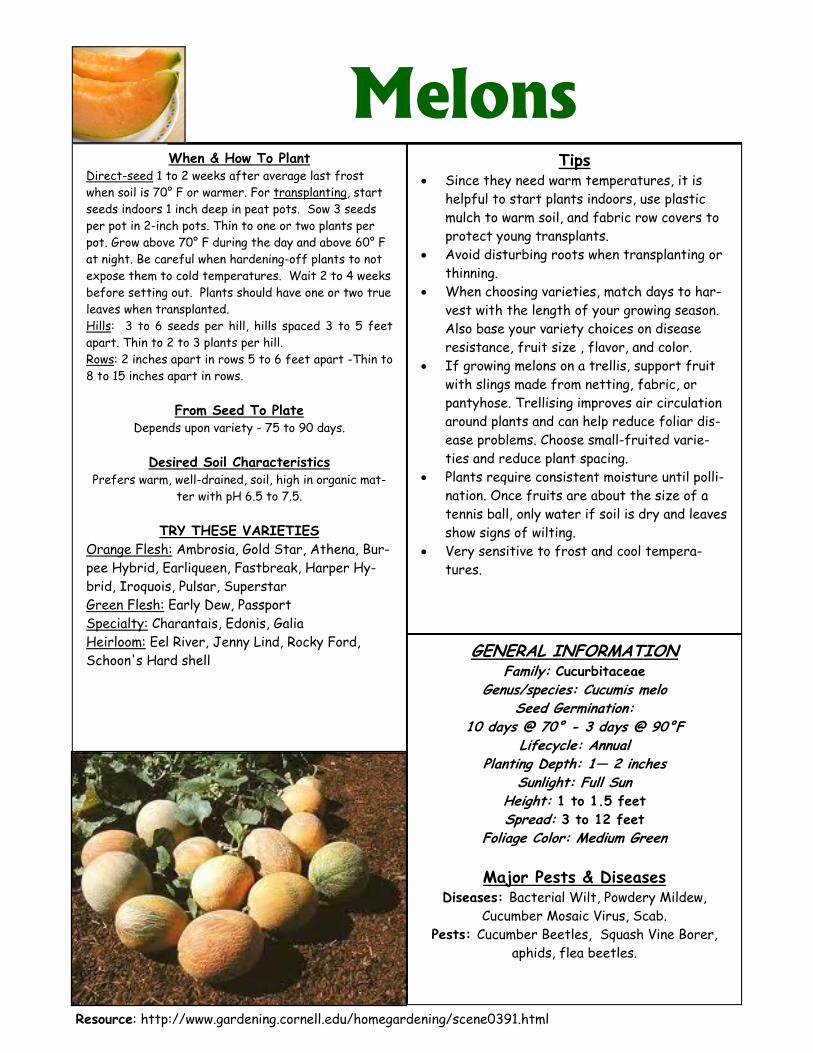
Melons When & How To Plant
Direct-seed 1 to 2 weeks after average last frost when soil is 70° F or warmer. For transplanting, start seeds indoors 1 inch deep in peat pots. Sow 3 seeds per pot in 2-inch pots. Thin to one or two plants per pot. Grow above 70° F during the day and above 60° F at night. Be careful when hardening-off plants to not expose them to cold temperatures. Wait 2 to 4 weeks before setting out. Plants should have one or two true leaves when transplanted. Hills: 3 to 6 seeds per hill, hills spaced 3 to 5 feet apart. Thin to 2 to 3 plants per hill. Rows: 2 inches apart in rows 5 to 6 feet apart -Thin to 8 to 15 inches apart in rows.
From Seed To Plate Depends upon variety - 75 to 90 days.
Desired Soil Characteristics
Prefers warm, well-drained, soil, high in organic mat-ter with pH 6.5 to 7.5.
TRY THESE VARIETIES
Orange Flesh: Ambrosia, Gold Star, Athena, Bur-pee Hybrid, Earliqueen, Fastbreak, Harper Hy-brid, Iroquois, Pulsar, Superstar Green Flesh: Early Dew, Passport Specialty: Charantais, Edonis, Galia Heirloom: Eel River, Jenny Lind, Rocky Ford, Schoon's Hard shell
Resource: http://www.gardening.cornell.edu/homegardening/scene0391.html
GENERAL INFORMATION Family: Cucurbitaceae
Genus/species: Cucumis melo Seed Germination:
10 days @ 70° - 3 days @ 90°F Lifecycle: Annual
Planting Depth: 1— 2 inches Sunlight: Full Sun
Height: 1 to 1.5 feet Spread: 3 to 12 feet
Foliage Color: Medium Green
Major Pests & Diseases Diseases: Bacterial Wilt, Powdery Mildew,
Cucumber Mosaic Virus, Scab. Pests: Cucumber Beetles, Squash Vine Borer,
aphids, flea beetles.
Tips • You can pick onions to use fresh any time.
For storage, first wait until the tops begin to turn brown and fall over, indicating their growing cycle is nearly over. Bend over the remaining tops to speed up the process.
• The bulbs need to cure for a couple of weeks in a well ventilated location. Wait until the leaves are completely dry before trimming them off.
• To grow your own transplants, start seed inside about 8 to 10 weeks before last frost date. Plant 4 or 5 seeds in each cell, or seed in flats 0.5 inch deep and 0.5 inch apart. If tops grow too tall and begin to droop, trim back to about 3 inches tall with scissors. Af-ter hardening off, transplant 2 to 4 weeks before last frost date.
• Sets can be planted outside in early May. • Space 4 inches apart for large bulbs, 2
inches apart for smaller bulbs, or 1 inch apart for scallions. Plant sets about 1 inch deep 2 to 4 weeks before last frost date.
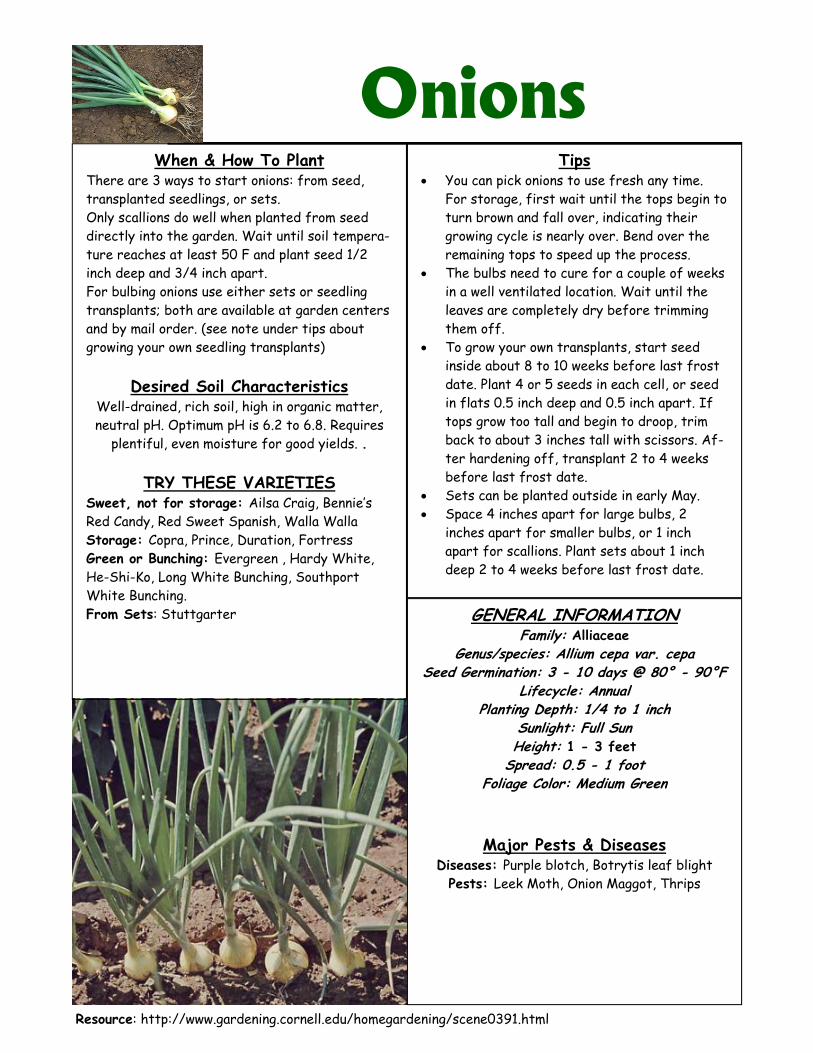
Onions When & How To Plant
There are 3 ways to start onions: from seed, transplanted seedlings, or sets. Only scallions do well when planted from seed directly into the garden. Wait until soil tempera-ture reaches at least 50 F and plant seed 1/2 inch deep and 3/4 inch apart. For bulbing onions use either sets or seedling transplants; both are available at garden centers and by mail order. (see note under tips about growing your own seedling transplants)
Desired Soil Characteristics
Well-drained, rich soil, high in organic matter, neutral pH. Optimum pH is 6.2 to 6.8. Requires
plentiful, even moisture for good yields. .
TRY THESE VARIETIES Sweet, not for storage: Ailsa Craig, Bennie’s Red Candy, Red Sweet Spanish, Walla Walla Storage: Copra, Prince, Duration, Fortress Green or Bunching: Evergreen , Hardy White, He-Shi-Ko, Long White Bunching, Southport White Bunching. From Sets: Stuttgarter
Resource: http://www.gardening.cornell.edu/homegardening/scene0391.html
GENERAL INFORMATION Family: Alliaceae
Genus/species: Allium cepa var. cepa Seed Germination: 3 - 10 days @ 80° - 90°F
Lifecycle: Annual Planting Depth: 1/4 to 1 inch
Sunlight: Full Sun Height: 1 - 3 feet
Spread: 0.5 - 1 foot Foliage Color: Medium Green
Major Pests & Diseases Diseases: Purple blotch, Botrytis leaf blight
Pests: Leek Moth, Onion Maggot, Thrips

Tips • Peas thrive in cool temperatures and stop
growing in hot weather, so plant as early as possible.
• When planting, avoid compacting soil by working it when it’s still too wet. To get an early start, use raised beds if your soil is slow to drain.
• Consider adding inoculant (available from seed catalogs) to the seeds to enhance the roots’ ability to fix nitrogen.
• Make additional plantings through early- to mid- May, or plant varieties with different maturity dates to increase the harvest pe-riod.
• Intercrop peas with fast-growing cool-season crops such as spinach or radishes.
• After final harvest, follow with late squash plantings or fall-harvested cool-season crops such as broccoli, leeks or potatoes.
• Look for powdery mildew resistant varieties., especially for fall crops
• Some varieties need a trellis to grow on, this improves air circulation and discourages pow-dery mildew.
Peas When & How To Plant
Sow seed in spring as soon as you can work the soil - as early as late March or early April de-pending on how quickly the soil warms and dries. Plant seeds 1 to 2 inches deep, 1 to 4 inches apart in rows 18 inches apart. Or sow about 1 inch apart in a 3-inch-wide band. Shallow plant-ing is best when soils are cool and wet. Plant deeper if soil is dry.
Desired Soil Characteristics Prefers well-drained soil, average fertility, high in organic matter. Widely adapted, but prefers
cool, damp weather.
TRY THESE VARIETIES Early shell: Knight, Little Marvel, Maestro, No-vella II, Olympia, Progress No. 9, Sparkle Late shell: Bolero, Frosty, Green Arrow, Lincoln, Mr. Big, Wando Snow pea: Dwarf Gray Sugar, Little Sweetie, Mammoth Melting Sugar, Oregon Sugar Pod II Edible pod (snap) pea: Early Snap, Sugar Ann, Sugar Snap, Super Sugar Mel
Resource: http://www.gardening.cornell.edu/homegardening/scene0391.html
GENERAL INFORMATION Family: Fabaceae
Genus/species: Pisum sativum Seed Germination: 7- 13 days @ 50° - 85°F
Lifecycle: Annual Planting Depth: 1 - 2 inches
Sunlight: Full Sun Height: 1 - 8 Feet
Spread: 0.5 - 1 Feet Flower Color: Violet / White
Foliage Color: Light green / Blue Green
Major Pests & Diseases Diseases: Powdery Mildew
Pests: Aphids
Tips • Well-drained, light, moderately fertile soil,
high in organic matter. Needs steady supply of water for best performance.
• Requires warm temperatures. Using black plastic and row covers can speed early growth.
• Fruiting can be temperamental. If night temperatures drop below 50 or daytime tem-peratures rise over 90, blossoms may drop but plants look fine.
• Too much nitrogen may promote lush vegeta-tive growth but fewer fruits. Peppers usu-ally respond well to the application of phos-phorus.
How Hot To Grow?
Hotness is determined by the amount of capsai-cinoids present in the pepper. Scientists have created a scale from 1-9 to show how hot the most common varieties are based on the concen-tration of capsaicinoids. Consider this when choosing hot varieties
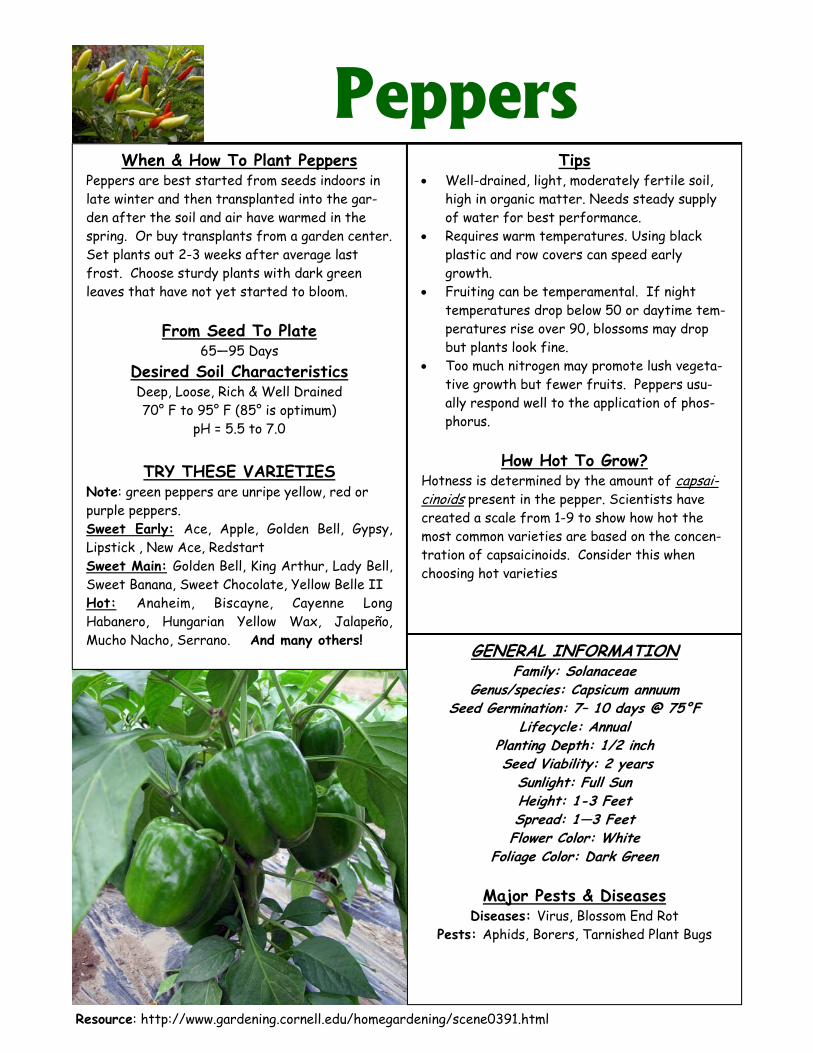
Peppers When & How To Plant Peppers
Peppers are best started from seeds indoors in late winter and then transplanted into the gar-den after the soil and air have warmed in the spring. Or buy transplants from a garden center. Set plants out 2-3 weeks after average last frost. Choose sturdy plants with dark green leaves that have not yet started to bloom.
From Seed To Plate 65—95 Days
Desired Soil Characteristics Deep, Loose, Rich & Well Drained 70° F to 95° F (85° is optimum)
pH = 5.5 to 7.0
TRY THESE VARIETIES Note: green peppers are unripe yellow, red or purple peppers. Sweet Early: Ace, Apple, Golden Bell, Gypsy, Lipstick , New Ace, Redstart Sweet Main: Golden Bell, King Arthur, Lady Bell, Sweet Banana, Sweet Chocolate, Yellow Belle II Hot: Anaheim, Biscayne, Cayenne Long Habanero, Hungarian Yellow Wax, Jalapeño, Mucho Nacho, Serrano. And many others!
Resource: http://www.gardening.cornell.edu/homegardening/scene0391.html
GENERAL INFORMATION Family: Solanaceae
Genus/species: Capsicum annuum Seed Germination: 7– 10 days @ 75°F
Lifecycle: Annual Planting Depth: 1/2 inch Seed Viability: 2 years
Sunlight: Full Sun Height: 1-3 Feet Spread: 1—3 Feet Flower Color: White
Foliage Color: Dark Green
Major Pests & Diseases Diseases: Virus, Blossom End Rot
Pests: Aphids, Borers, Tarnished Plant Bugs
Tips • When the plants are about 6 to 8 inches tall,
‘hill’ the potatoes by hoeing soil loosely around the base of the plants to within about an inch of the lower leaves from both sides of the row. Repeat in about 2 to 3 weeks, gradually building a 6- to 8-inch mound down the row over the plant stems.
• Use row covers to protect from Colorado potato beetles, leaf hoppers and flea bee-tles. Crush the yellow eggs of Colorado po-tato beetles on the undersides of leaves. Re-move adults by hand.
• Potatoes require well-drained soil. If your soil is poorly drained or a heavy clay, con-sider using raised beds.
• Adding organic matter is a good way to im-prove soil before growing potatoes. Go easy on organic matter sources high in nitrogen and nitrogen fertilizer. Too much nitrogen can encourage lush foliage at the expense of tuber production.
Potatoes When & How To Plant
One common way to plant potatoes is to dig a shallow trench about 4 inches deep with a hoe. Place the seed potato pieces with their eyes up (cut sides down) about 8 to 12 inches apart in the trench, and replace soil. Space trenches about 2 to 3 feet apart. Stems and foliage should emerge in about 2 to 4 weeks, depending on soil temperature.
From Seed To Plate Early: 65 days Mid: 80 days Late: > 90 days
Desired Soil Characteristics
Prefers well-drained, light, deep, loose soil, high in organic matter. Unlike most vegetables, pota-
toes tolerate acid soil. Potato scab disease is suppressed with soil pH of 4.8 - 5.5.
TRY THESE VARIETIES
Early: Dark Red Norland, Superior Mid Season: Chieftain - red, high yielding, large Reba, Salem, Yukon Gold Late Season: Elba, Katahdin Specialty: Adirondack Blue, Adirondack Red, French Fingerling, German Butterball
Resource: http://www.gardening.cornell.edu/homegardening/scene0391.html
GENERAL INFORMATION Family: Solanaceae
Genus/species: Solanum tuberosum Start from tubers called ‘seed’ potatoes
Lifecycle: Annual Planting Depth: 1— 1.5 inches
Sunlight: Full Sun Height: 1—6 Feet Spread: 1—6 Feet Flower Color: Yellow
Foliage Color: Medium Green
Major Pests & Diseases Diseases: Early Blight, Late Blight, Scab
Pests: Colorado Potato beetles, Aphids, Flea Beetles, Leaf Hoppers

Tips • Grows best in cool (50 F to 65 F), moist
weather. Hot weather reduces quality and increases pungency
• Plant most winter varieties so that they ma-ture around the first fall frost date. (Frost improves flavor and texture of most winter varieties.)
• Larger winter varieties need more space than spring varieties, so thin to about 6-inches, depending on variety.
• Radishes make a good intercrop along with slower growing crops as they mature quickly and keep weeds from growing.
• Radish are commonly sown in the same row with carrots, parsley, parsnips and other slow germinating crops. The radishes help to break soil crust for the weaker and later-germinating crops, especially carrots.
• Keep soil moist for uninterrupted growth and best quality.
• Adding nitrogen fertilizer or nitrogen rich manure close to planting may produce lush tops and small roots.
Radish When & How To Plant
About 3 to 6 weeks before average last frost, direct seed 1/2 - 1 inch deep, 1 inch apart, in rows 12 inches apart. Thin to about 2-inch spac-ing. Crowded plants may not produce high-quality roots. Use thinings in salads.
For continuous harvest, make additional plantings every 1 to 2 weeks until temperatures average in the mid 60s F, or plant varieties with different maturity dates in a single planting. Resume plant-ing when weather cools in fall.
From Seed To Plate
30-60 days depending upon variety
Desired Soil Characteristics Prefers well-drained, loose soil, high in organic matter, free from stones, with pH 5.8 to 6.8.
Needs plentiful, consistent moisture.
TRY THESE VARIETIES Champion, Cherry Belle, French Breakfast, Icicle, Scarlet Knight, Sparkler. Winter varieties grow more slowly and produce larger roots which hold their quality much longer. Also known as Oriental, Daikon, Japanese, Chi-nese or Spanish radishes. Plant in summer for fall harvest.
Resource: http://www.gardening.cornell.edu/homegardening/scene0391.html
GENERAL INFORMATION Family: Brassicaceae
Genus/species: Raphanus sativus Seed Germination:
3– 4 days @ 55° F to 85°F Lifecycle: Annual
Planting Depth: 0.5— 1.0 inch Sunlight: Full Sun
Height: 0.5 - 1.5 Feet Spread: 0.5—0.75 Feet
Foliage Color: Medium Green
Major Pests & Diseases Diseases: Clubroot
Pests: Cabbage Root Maggot, Flea Beetles

Tips • Spinach seedlings are difficult to transplant.
For spring crops, start inside only if your garden stays too wet in spring to allow direct seeding. Start transplants inside about 3 to 6 weeks before last frost.
• Spinach is shallow-rooted and requires con-sistent moisture to prevent bolting. Water to keep soil moist.
• Mulch after plants are well established to maintain moisture and suppress weeks.
• Use floating row covers to prevent insect damage.
• Do not over fertilize with nitrogen. Only ap-ply supplemental fertilizer if leaves are pale green.
• Use lime to adjust the pH if necessary. Check the pH if germination is poor and leaf tips and margins are yellow or brown.
• Some gardeners have luck with planting in the fall and mulching heavily for an early spring crop.
Spinach When & How To Plant
As soon as you can work the soil in spring, sow seed 1/3 inch deep, 1 inch apart in rows 12 to 18 inches apart. Thin to 2- to 6-inch spacing once seedlings establish. Early planting is critical as dry soil, heat and lengthening days encourage bolting.
Make successive plantings every week or two un-til average last frost date. Use bolt-resistant varieties for later plantings. Sow again in mid- to late summer for fall harvest. Seeds do not ger-minate well in warm soil, so increase seeding rate to compensate.
From Seed To Plate Depends on variety: 45-90 days
Desired Soil Characteristics
Well-drained, fertile soil, high in organic matter. Plentiful, consistent moisture. pH should be at
least 6.0, but preferably in the 6.5 to 7.5 range.
TRY THESE VARIETIES Spring: America, Dark Green Bloomsdale, Indian Summer, Melody, Space, Tyee
Fall: Melody, Tyee, Winter Bloomsdale
Resource: http://www.gardening.cornell.edu/homegardening/scene0391.html
GENERAL INFORMATION Family: Chenopodiaceae
Genus/species: Spinacia oleracea Seed Germination: 3 - 10 days @ 80° - 90°F
Lifecycle: Annual Planting Depth: 1— 1.5 inches Sunlight: Full Sun / Part Shade
Height: 0.5 - 1 Feet Spread: 0.5 - 1 Feet
Foliage Color: Medium Green
Major Pests & Diseases Pests: Leaf miners

Tips • Most summer squash grow on compact vines,
in contrast to the sprawling vines of most winter squash and pumpkins.
• Consistent moisture is needed from the time the seed emerges until fruits begin to fill out.
• Check your squash plants almost daily when they start to flower, the fruit will develop in 2 to 3 days.
• Harvest when small, bigger is not better!
There are four groups of summer squash: Yellow summer squash have long, thin fruits that can be smooth or warty, straight or crooknecked. Zucchini types are also long and cylindrical, of-ten dark green but some varieties are lighter, yellow or even white. Scalloped or patty pan squash look like disc-shaped UFOs. Their edges are scalloped and col-ors range from greenish to yellow to white.. Mideast or Cousa varieties have fruit that is shorter and thicker than zucchini, usually with a pale green skin.
Summer Squash When & How To Plant
Sow seed directly in ground 2-3 weeks after last frost or once soil temperature reaches 70°F. You can also start indoors in small pots, then transplant outdoors 3 weeks after the last frost. Do not rush in early spring for summer squash, they are frost intolerant and need warm tem-peratures. Row covers can be used to increase temperature but they must be removed during flowering to allow pollination. Sow seeds 12 – 18 inches apart in beds and 24 - 28 inches apart in rows.
From Seed To Plate Exact time depends upon variety.
Generally 55-70 days for summer squash.
Desired Soil Characteristics Prefers, well drained, fertile soil, high in organic
matter with pH between 5.8 — 6.8.
TRY THESE VARIETIES Yellow: Fortune, Seneca, Sunburst, Sundance Scalloped: Butter Scallop, Peter Pan, Sunburst Zucchini: Goldrush, Midnight, Multipik, Revenue Mideast: White Bush, Magda, Trieste white
Resource: http://www.gardening.cornell.edu/homegardening/scene0391.html
GENERAL INFORMATION
Family: Cucurbitaceae Genus/species: Cucurbita pepo
Seed Germination: 5 - 10 days @ 75°F Lifecycle: Annual
Planting Depth: 1/2 inch Seed Viability: 6 years
Sunlight: Full Sun Height: 1-3 Feet Spread: 2—4 Feet Flower Color: Yellow
Foliage Color: Medium Green
Major Pests & Diseases Diseases: Bacterial Wilt, Powdery Mildew, Scab,
Viral Disease, Virus. Pests: Squash Bug, Cucumber Beetle, Squash
Vine Borer.

Tips • Set tomato plants deep, burying as much of
the stem as possible. Roots will form along buried stem. (Note: this is the only vegetable that should have its stem buried when plant-ing)
• As plants grow, pinch out most of the sucker shoots and cut off the lowest leaves to in-crease air circulation.
• Stake or trellis larger plants for better air circulation to reduce disease pressure.
Determinate Vs. Indeterminate
• Determinate varieties produce short branches with flowers and fruit on the ends. They will reach a certain size and then stop growing. (ex., Patio, Celebrity, Rutgers)
• Indeterminate varieties (the most common) will continue to grow and produce fruits until killed by frost. (ex., Big Boy, Beef Master)
Spacing Tomatoes
• 1 to 2 feet apart for determinate varieties. • 2 feet apart for staked indeterminate. • 2 - 3 feet apart for un-staked indeterminate.
Tomatoes When & How To Plant Tomatoes
Very sensitive to frost and cold temperatures. Sow seeds indoors 6-8 weeks prior to transplant-ing or buy transplants that are short, sturdy, and dark green. Avoid plants that are tall, leggy, yel-lowish, or have started flowering.
From Seed To Plate 65 -80 days or more, depending on variety
Desired Soil Characteristics
Sandy Loam - pH = 6.0 — 6.8 60° F to 75° F
TRY THESE VARIETIES
Cherry: Supersweet 100, Sungold, Fruity Or-ange, Early Cherry. Heirloom: Cherokee Purple, Green Zebra, Bran-dywine, Striped German. Early: Cascade, Sunrise, Lemon Boy. Main Season: Better Boy, Jetstar. Paste: Roma, Nova, Classica. Grape: Jubilee (note: VF after the variety name indicates a re-sistance to the diseases, Verticillium and Fusa-rium)
Resource: http://www.gardening.cornell.edu/homegardening/scene0391.html
GENERAL INFORMATION Family: Solanaceae
Genus/species: Lycopersicon esculentum Seed Germination: 5 – 14 days @ 75° F
Lifecycle: Annual Planting Depth: 1/2 inch
Seed Viability: 5 to 7 years Sunlight: Full Sun Height: 2 – 6 Feet Spread: 2—6 Feet
Major Pests & Diseases
Diseases/problems: Blossom End Rot, Catfacing, Septoria Leaf Spot, Early Blight, Late Blight, Fusarium wilt, Verticillium wilt. Pests: Tomato Hornworms, Aphids, Stinkbugs, Slugs, Colorado Potato Beetle, Cutworms.

Tips • Mulch plantings after soil has warmed to help
maintain consistent moisture and suppress weeds.
• Consider using black plastic and fabric row covers to speed soil warming.
• If using fabric row covers, remove at flower-ing to allow pollination by bees. Good pollina-tion is critical to fruit set.
• Plants require consistent moisture until polli-nation. Once fruit are about the size of a tennis ball, only water if soil is dry and leaves show signs of wilting.
• To prevent insect damage to developing fruits, place watermelons on pots or pieces of wood.
• Trellising improves air circulation around plants and can help reduce foliar disease problems. Choose small-fruited varieties and reduce plant spacing.
• If growing melons on a trellis, support fruit with slings made from netting or fabric.
Watermelon When & How To Plant
Direct seed 1 to 2 weeks after average last frost when soil is 70 F or warmer. Plant ½ inch deep, 6 seeds per hill, hills 3 feet apart each way for bush varieties, or 3 feet apart in rows 8 feet apart for vining types. Thin to 2 to 3 plants per hill. For transplanting, sow seeds indoors ¼ inch deep in peat pots (2-inch square or bigger), 2 to 4 weeks before setting out. Set outside 2 weeks after average last frost, 3 plants per hill, hills 3 feet apart each way for bush varieties, or 3 feet apart in rows 8 feet apart for vining types. Transplants are delicate. Keep soil intact when transplanting.
From Seed To Plate 70—85 days
Desired Soil Characteristics Prefers warm, well-drained, soil, high in organic matter with pH 6.5 to 7.5. Soil temperatures
below 50 F slow growth. Sandy or light-textured soils that warm quickly in spring are best.
TRY THESE VARIETIES
Crimson Sweet, Moon & Stars, Sugar Baby, Yellow Baby, Yellow Doll. Seedless: Tri-X-Sunrise Bush varieties have more compact vines. Look for disease resistance.
Resource: http://www.gardening.cornell.edu/homegardening/scene0391.html
GENERAL INFORMATION Family: Cucurbitaceae
Genus/Species: Citrullus lanatus Seed Germination: 3 - 10 days @ 70° - 95°F
Lifecycle: Annual Planting Depth: 1 - 2 inches
Sunlight: Full Sun Height: 1 - 2 Feet Spread: 3 - 20 Feet Flower Color: Yellow
Foliage Color: Medium Green Seed Viability: 4 years
Major Pests & Diseases
Diseases: Powdery Mildew, Cucumber Mosaic Virus, Scab, Fusarium Wilt,
Pests: Cucumber beetles, Squash vine borer, Squash bugs, Flea beetles, Aphids
Tips • Plentiful & consistent moisture is needed
from the time the seed emerges until fruits begin to fill out.
• Allow winter squash to ripen fully on the vine before picking, wait until the skin is hard and the stem is tough and woody.
Spacing Winter Squash
• Direct seed ½ to 1 inch deep into hills or rows.
• Sow 4 to 5 seeds per hill. Space hills about 4 to 8 feet apart, depending on the size of the fruit. When the plants are 2 to 3 inches tall, thin to 2 to 3 plants per hill.
• Regular varieties produce very long running vines and need lots of room. Bush types take a little less space.
Storing Winter Squash
Store in a location with low humidity and a tem-perature between 50° and 60° F. Depending upon variety they may store for 3—8 months. Check frequently and discard any that mold or rot.
Winter Squash When & How To Plant
Sow seed directly in ground 2-3 weeks after last frost or once soil temperature reaches 70°F — or sow into trays and transplant 3 weeks after last frost. Harden transplants off gradually by placing them outdoors at night for a week. Young transplants can also be purchased. Be gentle when transplanting to avoid disturbing the roots.
From Seed To Plate Depends upon variety - 75 to 90 days.
Desired Soil Characteristics
Prefers well drained, fertile soil, high in organic matter with pH between 5.8 — 6.8.
TRY THESE VARIETIES
Butternut: Bugle, Harris Betternut, Ponca Baby, Waltham Butternut, Zenith. Acorn: Carnival, Sweet Dumpling, Table Ace, Table King Bush, Table Queen, Tuffy. Buttercup: Amber Cup, Autumn Cup, Burgess Butter-cup, Sweet Mama, Sweet Meat, Scarlet Kabocha.. Hubbard: Blue Ballet, Hubbard, Red Kuri. Miscellaneous: Delicata, Gold Nugget, Harlequin, Vege-table Spaghetti, Sweet Dumpling. Look for bush types if space is limited.
Resource: http://www.gardening.cornell.edu/homegardening/scene0391.html
GENERAL INFORMATION Family: Cucurbitaceae
Genus/species: Cucurbita pepo, C. murschata, C. maxima. Seed Germination: 5 - 10 days @ 75°F
Lifecycle: Annual Planting Depth: 1/2 inch Seed Viability: 6 years
Sunlight: Full Sun Height: 1.5 - 3 Feet Spread: 3 - 5 Feet Flower Color: Yellow
Foliage Color: Medium Green
Major Pests & Diseases Diseases: Bacterial Wilt, Powdery Mildew, Scab,
Virus. Pests: Squash Bug, Cucumber Beetle, Squash
Vine Borer.
Resource: http://www.gardening.cornell.edu/homegardening/scene0391.html
Control Insects Other viruses are transmitted through in-sects. Some insects actually carry viruses with them and transmit them to the plants as they feed. Other insects do not carry diseases, but their feeding sites serve as entry sites for dis-ease organisms. Vegetables should be checked regularly for insects and proper control should be enacted when insects are present.
Use proper sanitation techniques
During the growing season, if a disease is found in the garden infected plant material or entire plants should be removed. Removal should occur during a dry period to help reduce the risk of spreading the infection. If infected tissue is being removed, the pruners should be dipped in a 10% bleach solution between cuts. This will help prevent disease spread to uninfected plant tissue. Any infected plants or plant materials should be bagged and removed from the garden. Diseased tissue should not be composted as the disease may continue to live in the compost.
Many disease-causing organisms survive the winter in plant debris. Cleaning the garden at the end of the growing season can help prevent issues from arising the following spring. Re-moval of all crop debris helps destore overwin-tering populations of diseases. Equipment that has been used in disease-infested gardens should be disinfected in a 10% bleach solution before being used again.
Disease Prevention Provide adequate spacing
Properly spacing plants within the garden also reduces disease pressure.
Use proper watering techniques
Watering the soil, rather than the foliage re-duces infections. This can be done by careful hand watering or by the use of drip or trickle irrigation systems. Gardeners should also avoid working in the garden when the foliage is wet. Fungal and bacterial diseases can be readily spread on hands and clothing when the plants are wet.
Apply mulch
Mulching will reduces splashing of soil onto lower fruit and foliage by the rain, which re-duces the chances of disease spreading to the plants via rain.
Grow vines vertically
If the gardeners are growing vine crops, staking or trellising is important. Trellising helps keep foliage and fruit from coming in contact with the ground. Vertical growing also increases air circulation promoting better drying of foliage.
Properly fertilize
During the growing season, proper fertilization will also help keep vegetable healthy. Plants that are lacking important nutrients will be more prone to diseases as will plants that are excessively lush because of too much nitro-gen. Soil testing helps gardeners determine the correct amount of fertilizers to apply.
These actions will help reduce problems

Group A Group B Group C Group C Group D Group E
Cantaloupe Cucumbers Honeydew melon Pumpkin Squash Watermelon
Brussels sprouts Cabbage Cauliflower Collard Lettuce Mustard Radish Rutabaga Spinach Swiss chard Turnip
Eggplant Potato Okra Pepper Tomato
Beet Carrot Garlic Onion Shallot Sweet potato
Sweet Corn All Beans Cowpeas Peas
Crop Rotation Finally, crop rotation should be used to help reduce disease issues. This practice helps prevent the build up of disease-causing organisms in the soil. Some diseases affect one group of vegetables but not another. Therefore, it is not a good practice to grow plants of the same family in rotation. The current rotation schedule suggested is at least three years for vegetables. The table below provides crop groupings for rotation suggestions.
While these steps may not eliminate all diseases in the garden, these steps will greatly reduce the chances and severity of garden diseases . Learning that sometimes, like in the case of the 2009 late blight outbreak in the Northeast, nothing can be done but to remove and destroy the infected material. Removing the infected material and properly disposing of it at the least can keep the disease spread to a minimum. And while it is disappointing to loose an entire crop, it always reminds us of the importance of diversifying your plantings!
Use proper sanitation techniques During the growing season, if a disease is found in the garden infected plant material or entire plants should be removed. Removal should occur during a dry period to help reduce the risk of spreading the infection. If infected tissue is being removed, the pruners should be dipped in a 10% bleach so-lution between cuts. This will help prevent disease spread to uninfected plant tissue. Any infected plants or plant materials should be bagged and removed from the garden. Diseased tissue should not be composted as the disease may continue to live in the compost. Many disease-causing organisms survive the winter in plant debris. Cleaning the garden at the end of the growing season can help prevent issues from arising the following spring. Removal of all crop debris helps destore overwintering populations of diseases. Equipment that has been used in disease-infested gardens should be disinfected in a 10% bleach solution before being used again.
Disease Prevention

Resource: http://www.gardening.cornell.edu/homegardening/scene0391.html
Keep these points in mind • Most pests are host specific. Cucumber bee-
tles don’t bother broccoli and cabbage-worms don’t bother squash. This lets you focus your actions on just the crop under attack and not your whole garden
• The sooner you address the problem, the easier it will be to manage. Visit your gar-den daily if possible and look for any changes in leaf color, damage to leaves or fruit, size and shape of the plants, etc.
• Many pests are a problem only for certain periods of time. Flea beetles do the most severe damage to young seedlings. Larger plants can tolerate much more damage, for example
• Even organic products can be toxic or caustic - use them with care!
• Always read the entire label, even on non toxic products, and follow the directions exactly
• Most of the less toxic products require pre-cise timing and methods of application to be effective. Read up on them!
• Try to buy pre-mixed products when possi-ble. Buy small quantities that you expect to use up this year
• Good coverage of both leaf surfaces when spraying or dusting is critical, especially with organic or non-toxic products.
Follow these steps when pests appear Identify the Pest
• It’s essential to know your pest, and know its life cycle so you can de-cide the best time to take action
• It’s easy to mis-identify. Coopera-tive Extension offices are glad to help.
• Then you can research your pest on the Web and elsewhere.
Consider your options
• There’s always more than one way to tackle a problem
• Consider the least toxic methods first
• Can your crop tolerate a mild infes-tation, or do you need to take action now?
• Your options will vary with the crop, the pest, the time of year, etc.
Cultural controls include
• Timing of planting • Excluding pests by using rowcover
(see bottom of page) • Handpicking • Traps • Encouraging beneficials
Pest Management
Rowcover is a lightweight spunbond product that can either be laid right on top of young plants, or better yet, held up over plants on wire hoops. To exclude pests such as cabbageworms, leek moths, cucumber beetles and flea bee-tles, cover young transplants right after planting. Be sure to bury or seal up all the edges so insects cannot get inside. Some crops need to be pollinated (peppers, squash, cucumbers). Others (broccoli, spin-ach, onions) do not need pollination so the rowcover can be left in place until harvest.
Resource: http://www.gardening.cornell.edu/homegardening/scene0391.html
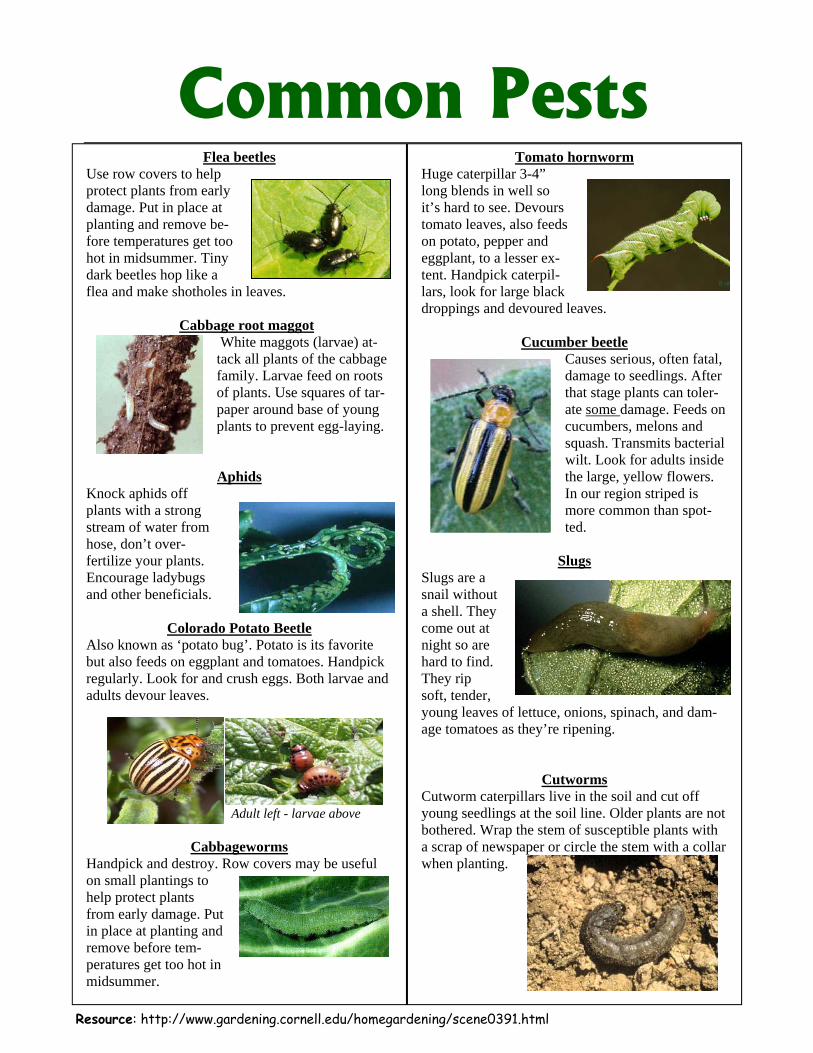
Tomato hornworm Huge caterpillar 3-4” long blends in well so it’s hard to see. Devours tomato leaves, also feeds on potato, pepper and eggplant, to a lesser ex-tent. Handpick caterpil-lars, look for large black droppings and devoured leaves.
Cucumber beetle Causes serious, often fatal, damage to seedlings. After that stage plants can toler-ate some damage. Feeds on cucumbers, melons and squash. Transmits bacterial wilt. Look for adults inside the large, yellow flowers. In our region striped is more common than spot-ted.
Slugs
Slugs are a snail without a shell. They come out at night so are hard to find. They rip soft, tender, young leaves of lettuce, onions, spinach, and dam-age tomatoes as they’re ripening.
Cutworms Cutworm caterpillars live in the soil and cut off young seedlings at the soil line. Older plants are not bothered. Wrap the stem of susceptible plants with a scrap of newspaper or circle the stem with a collar when planting.
Flea beetles Use row covers to help protect plants from early damage. Put in place at planting and remove be-fore temperatures get too hot in midsummer. Tiny dark beetles hop like a flea and make shotholes in leaves.
Cabbage root maggot
White maggots (larvae) at-tack all plants of the cabbage family. Larvae feed on roots of plants. Use squares of tar-paper around base of young plants to prevent egg-laying.
Aphids
Knock aphids off plants with a strong stream of water from hose, don’t over-fertilize your plants. Encourage ladybugs and other beneficials.
Colorado Potato Beetle
Also known as ‘potato bug’. Potato is its favorite but also feeds on eggplant and tomatoes. Handpick regularly. Look for and crush eggs. Both larvae and adults devour leaves.
Cabbageworms Handpick and destroy. Row covers may be useful on small plantings to help protect plants from early damage. Put in place at planting and remove before tem-peratures get too hot in midsummer.
Common Pests
Adult left - larvae above
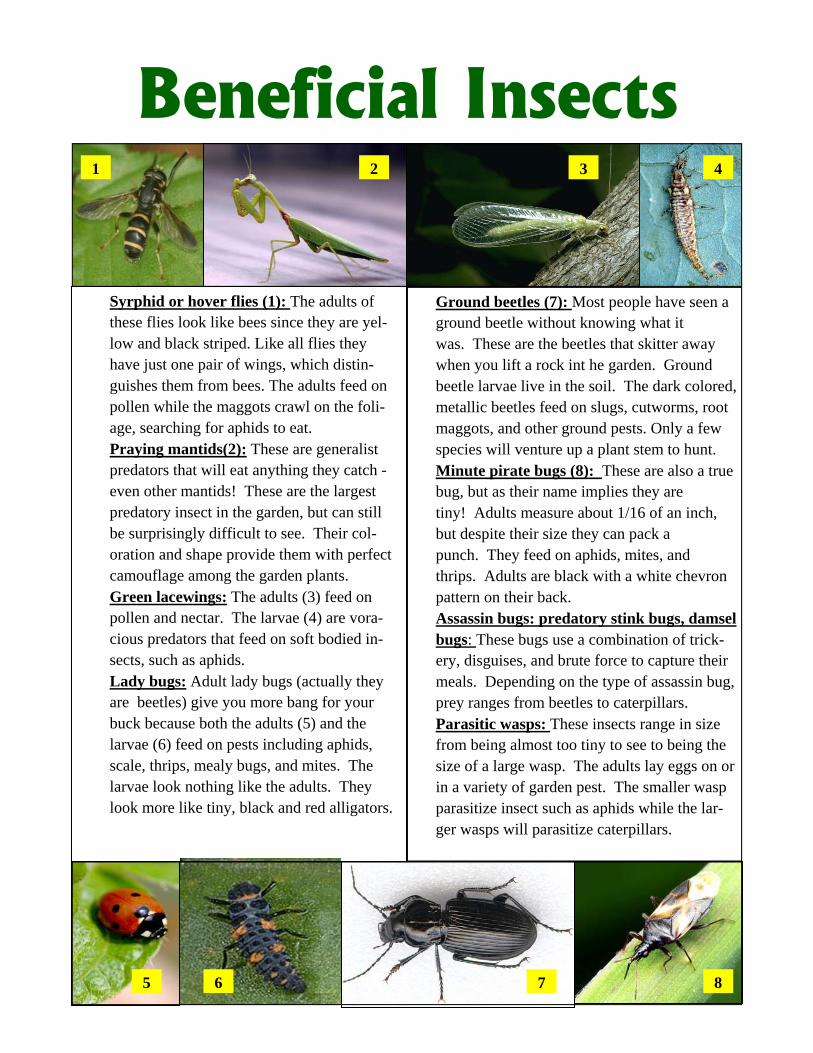
Syrphid or hover flies (1): The adults of these flies look like bees since they are yel-low and black striped. Like all flies they have just one pair of wings, which distin-guishes them from bees. The adults feed on pollen while the maggots crawl on the foli-age, searching for aphids to eat. Praying mantids(2): These are generalist predators that will eat anything they catch - even other mantids! These are the largest predatory insect in the garden, but can still be surprisingly difficult to see. Their col-oration and shape provide them with perfect camouflage among the garden plants. Green lacewings: The adults (3) feed on pollen and nectar. The larvae (4) are vora-cious predators that feed on soft bodied in-sects, such as aphids. Lady bugs: Adult lady bugs (actually they are beetles) give you more bang for your buck because both the adults (5) and the larvae (6) feed on pests including aphids, scale, thrips, mealy bugs, and mites. The larvae look nothing like the adults. They look more like tiny, black and red alligators.
Beneficial Insects
Ground beetles (7): Most people have seen a ground beetle without knowing what it was. These are the beetles that skitter away when you lift a rock int he garden. Ground beetle larvae live in the soil. The dark colored, metallic beetles feed on slugs, cutworms, root maggots, and other ground pests. Only a few species will venture up a plant stem to hunt. Minute pirate bugs (8): These are also a true bug, but as their name implies they are tiny! Adults measure about 1/16 of an inch, but despite their size they can pack a punch. They feed on aphids, mites, and thrips. Adults are black with a white chevron pattern on their back. Assassin bugs: predatory stink bugs, damsel bugs: These bugs use a combination of trick-ery, disguises, and brute force to capture their meals. Depending on the type of assassin bug, prey ranges from beetles to caterpillars. Parasitic wasps: These insects range in size from being almost too tiny to see to being the size of a large wasp. The adults lay eggs on or in a variety of garden pest. The smaller wasp parasitize insect such as aphids while the lar-ger wasps will parasitize caterpillars.
1 2 3 4
5 6 7 8
Northern NY Vegetable Growing Guide
Compiled by Alexander Scharf, Intern
As part of the
“Establishing Organic Teaching Gardens” Project Coordinated by Anne Lenox Barlow, Horticulture Educator
Cornell Cooperative Extension Clinton County
With funding from the Towards Sustainability Foundation
Primary Resource: Cornell’s Home Vegetable Gardening Guidelines http://www.gardening.cornell.edu/homegardening/scene0391.html
Contact information: Cornell Cooperative Extension Clinton County 6064 Route 22 #5 Plattsburgh, NY 12901 (518) 561-7450 http://counties.cce.cornell.edu/clinton/ Other useful resources and Web sites: For a wide range of research-based information useful to home gardeners in New York State: http://www.gardening.cornell.edu/ For ideas and resources for connecting youth with gardening: Cornell’s Garden Based Learning http://blogs.cornell.edu/garden/ The Book of Garden Secrets by Dorothy Patent and Diane Bilderback (second edition 1997) Out of print but a very thorough coverage of cool season vegetable gardening. Published by Firefly Books.
Cornell Cooperative Extension provides equal program and employment opportunities.