Embed Size (px)
DESCRIPTION
dasdas
Citation preview
ACTIONSCRIPT
AS3 101: Variables - Basixby Dru Kepple 27 May 2011 130 Comments
Twice a month, we revisit some of our readers’ favorite posts from throughout the
history of Activetuts+. This classic tutorial was first published in June, 2009 and was
the first in what has become an astounding series.
This is the beginning of a series which will walk through some of the fundamental concepts of
programming, as they apply to ActionScript 3.0. To kick things off, we'll talk about variables.
AS3 101
This tut is aimed squarely at those who have little-to-no scripting experience, but if you've used
variables without really getting into the intricacies of datatyping and casting, you may want to
follow along.
Thanks also to Davide Di Stefano for allowing us to deface his icon.
Introduction
Over the following steps, we'll build a simple example, the main feature of which is the row of
buttons that act as a group. The currently selected button has a different appearance, it can't be
clicked on again and the appearance is restored to its original state when another button is
clicked. We'll use a variable to keep track of what's going on.
Step 1: What are Variables?
First things first: let's define what a variable is. If you remember high school mathematics, you
may recall that variables are "stand-in" values. That is, they are symbols (usually single letters,
such as "x", or the "E" and "m" in E=mc2) which represent a numeric value. It is understood that
the value might change depending on other factors in an equation.
In programming, a variable is exactly the same thing, with two main exceptions. First, in
programming, a variable can hold more than just a number. It can hold a sequence of text
characters (called a "string"), it can denote true or false (called a "boolean"), or it can hold
something much more complex, like a date, an XML document, or a movie clip.
The second main difference with mathematics is that programming variables usually have
descriptive names, rather than just a single-letter name. There are exceptions, of course: "x,"
"y," and "z" are commonly used to reference positions and "i" is commonly used denote the
current iteration through a loop. A name which is relevant to the value being stored is not only
common, but also helpful in keeping your program legible. For instance, if you wanted to keep
track of how many particles you have on screen, you might name your variable "particleCount"
or "totalParticles."
Like mathematic variables, programmatic variables have the potential for being changed
during the course of the program. For instance, if you started with 10 particles, the variable
"particleCount" would have the numeric value of 10. However, if you generated 10 more
particles, the variable would then have the numeric value of 20. This is one of the key features
of variables. You have a name that references a value, but that value is not necessarily going to
be the same every time you access it. This is a mysterious but powerful aspect of variables.
You'll learn to appreciate this, even if it's confusing at first.
To sum up this definition, a variable is basically a container to which you assign a name and in
which you put a value. You can always get the value contained inside by referencing the variable
by name and you can put a new value inside the container at any point. Any time you access the
variable by name, you get the current value contained therein. For further reading, you may
want to see what Wikipedia has to say about variables.
Step 2: Declaring a Variable
Enough theory, let's actually get to work with making variables. Create a new Flash document
(ActionScript 3.0). Click on the first frame of the first layer (it should be the only frame).

Open up the Actions panel by choosing Window > Actions (or pressing F9 on Windows or Opt-
F9 on Mac).
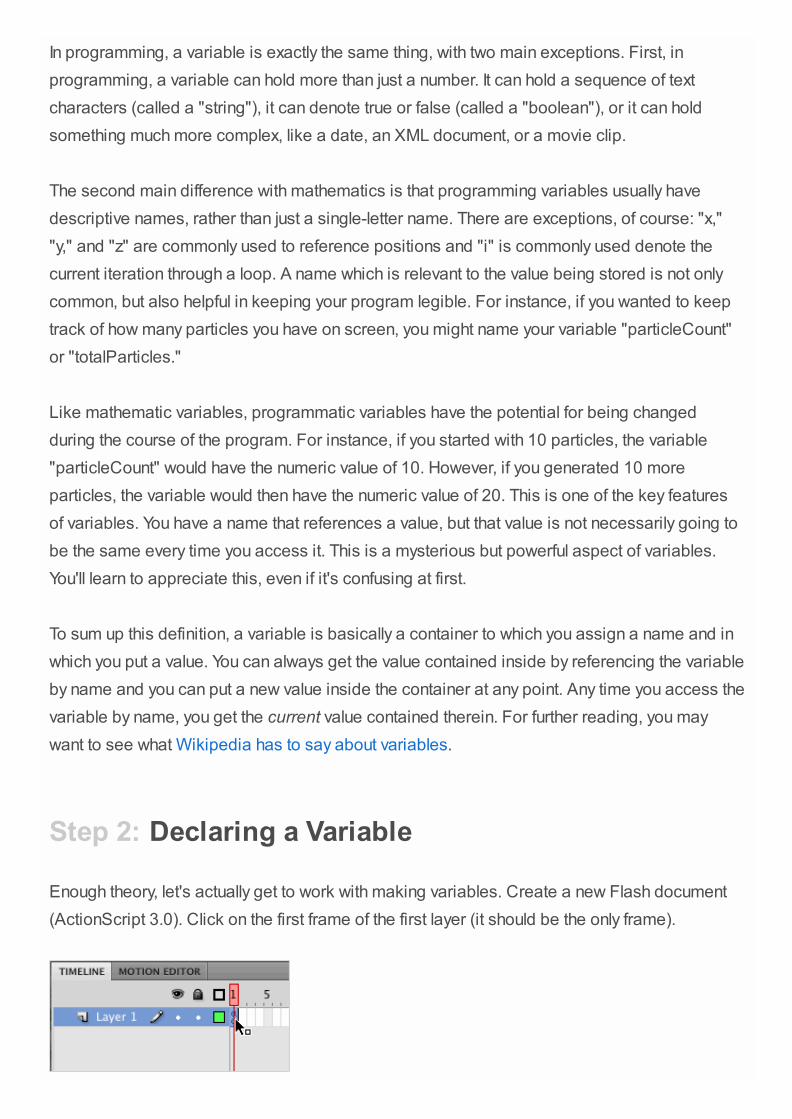
In the Actions panel, type the following:
1 var message;
At this point, the varible is declared. This means that the container exists, but currently has no
associated value.
This is the bare minimum you need to declare a variable. The word "var" is known as a
keyword, meaning it's reserved by the ActionScript language and has a specific meaning. In
this case, it declares a variable. It needs to be followed by the variable name you want to use; if
you don't follow the var keyword with a variable name you'll get an error when you try to test the
movie.
Step 3: Naming your Variables
There are a few rules you should follow when naming your variables. Some are enforced by the
ActionScript compiler, others are just conventions which, when followed, help you and others
make better sense of your code.
First, the ActionScript language dictates that you can only use certain characters in your
variable name. These are any alpha-numeric characters (letters and numbers), the underscore
and the dollar sign. Any other character (hyphens, the space, the period, etc) is not allowed.
Usually this is because many other characters have special significance in ActionScript.
ActionScript also imposes the rule that the variable name must not start with a number.
Numbers are, however, allowed after the first character.
It also bears mentioning that ActionScript is case-sensitive, meaning that you must match the
letter's case when referring to a variable. In otherwords, the variable "message" is not the same
as the variable "MESSAGE". This may seem restrictive as first, but there are actually good
reasons for enforcing this. Space doesn't permit a discourse on these reasons, however. For
now, just learn to type your variables' names exactly the same each time you want to use them.
The ActionScripting community at large has come to a general consensus on how to name your
variables, although the following rules are more conventions and guidelines, rather than being
enforced by ActionScript.
For starters, you should use descriptive names. This is a sort of self-documenting technique. If
you name your variable "message," it's likely you already have an idea of what the intended role
of the contained value is. If it were simply "m," then that's far less clear. It's tempting to use
abbreviated variable names and while you are initially writing your script it might mean less
typing and still make sense. The next person to look at your code, or you yourself six months
later, will likely be confused.
Another convention is the use of camel case. This is a technique for turning two or more words
into a single word. Remember that you can't use spaces (or any other white space, for that
matter) in your names, so if you wanted to use the phrase "total particles" you have to find a
way of getting rid of that space. "totalparticles" works, but the separation between the words is
lost. Camel case is a method of capitalization that says that the entire word is lower case
except for the first letter of each word, with the exception of the first letter of the first word. In
other words, applying camel case to "total particles" results in "totalParticles".
There are more guidelines for choosing variable names, but they start to get more esoteric
from here. For now, keep in mind the above rules and you'll be off to a great start. Wikipedia
has a few articles on the subject, including a short section in the previously linked article on
variables in general, this article on naming conventions, and a short article on an effect called
shadowing. Some other interesting reads are this list of bad variable names,this
pronouncement of the two worst variables names ever and this anecdote describing why
variable names matter.
Step 4: Setting a Value
Now that our variable is declared, we can put a value into it. On the next line of the Actions
panel, type the following code:
We start by simply using the variable by its name. Then we follow it with an equals sign, which is
known as the assignment operator. Following that, we have a quoted sequence of characters
(ending with a semi-colon, which is just the way you end lines in ActionScript - you'll see a lot of
terminating semicolons in code).
The assignment operator requires that there be something on either side of it. It works by taking
the value on the right side ("Hello", in this case) and putting it into the variable on the left side
(message).
If we were to run this code, we would have a variable named "message," which contains a
value of "Hello." It's not doing anything else, so there's nothing to see at the moment, but it may
be a good idea to test the movie anyway to make sure you don't get any errors, in case you
typed something in wrong.
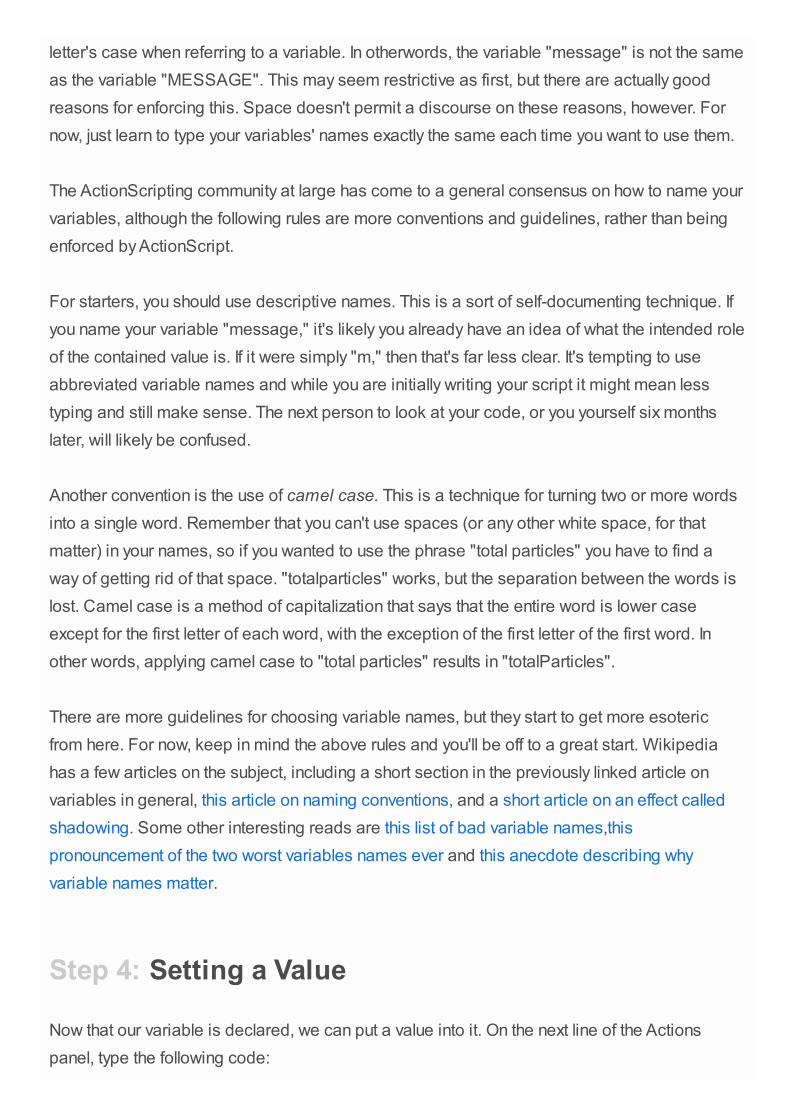
The script should look like this so far:
Step 5: Getting the Value
We now have a named container that has a value inside of it. Let's access that value. In this
case, we'll simply trace the value to the Output panel.
1 message = "Hello";
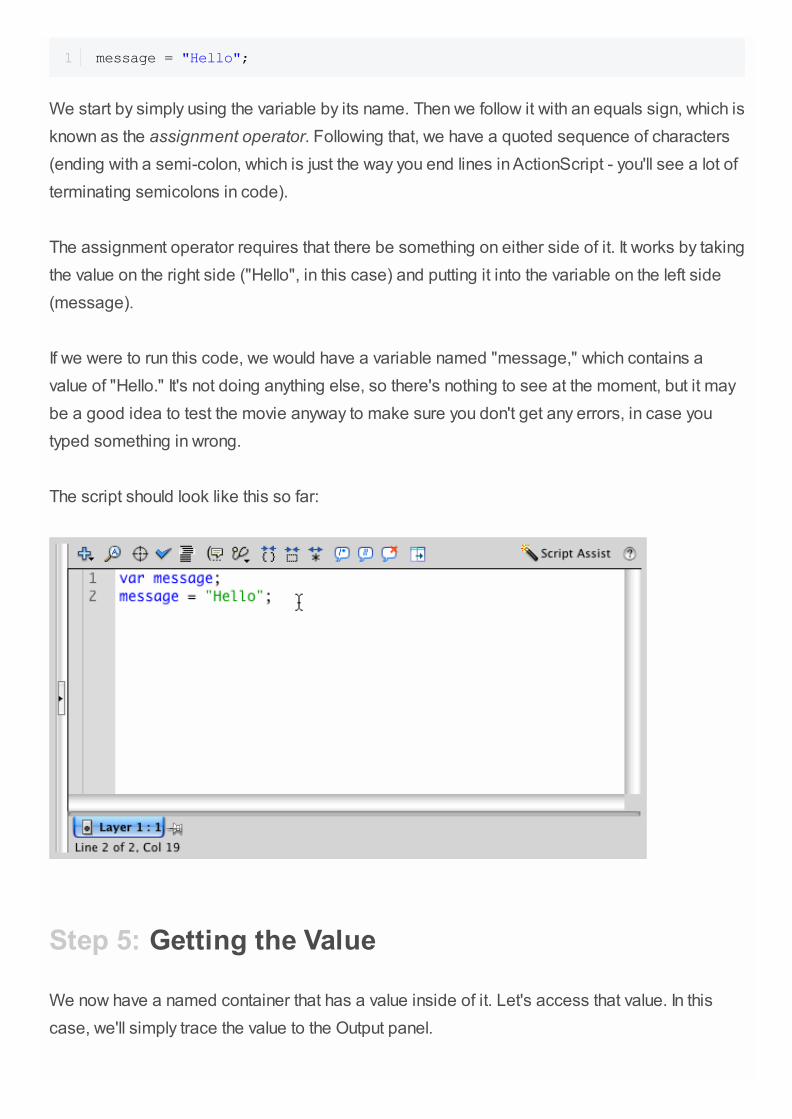
On a new line of code, write the following:
The whole script will look like this:
As you may know, the trace function takes whatever you pass to it in between the parentheses
and puts it into the Output panel. When you test the movie, you should see the Output panel
open automatically and the value of the message variable ("Hello", without the quotes) printed
to it.
Any time you use the variable by name and are not putting it on the left side of the assignment
operator (the equals sign), you are asking ActionScript to get the value contained by the
variable and use that value. This is called evaluating the variable.
Step 6: Manipulating the Value
Now let's prove that we can put different values into the same container. On the next line, let's
1 trace(message);
set the value of the message variable again:
And then on the line after that, trace it out again:
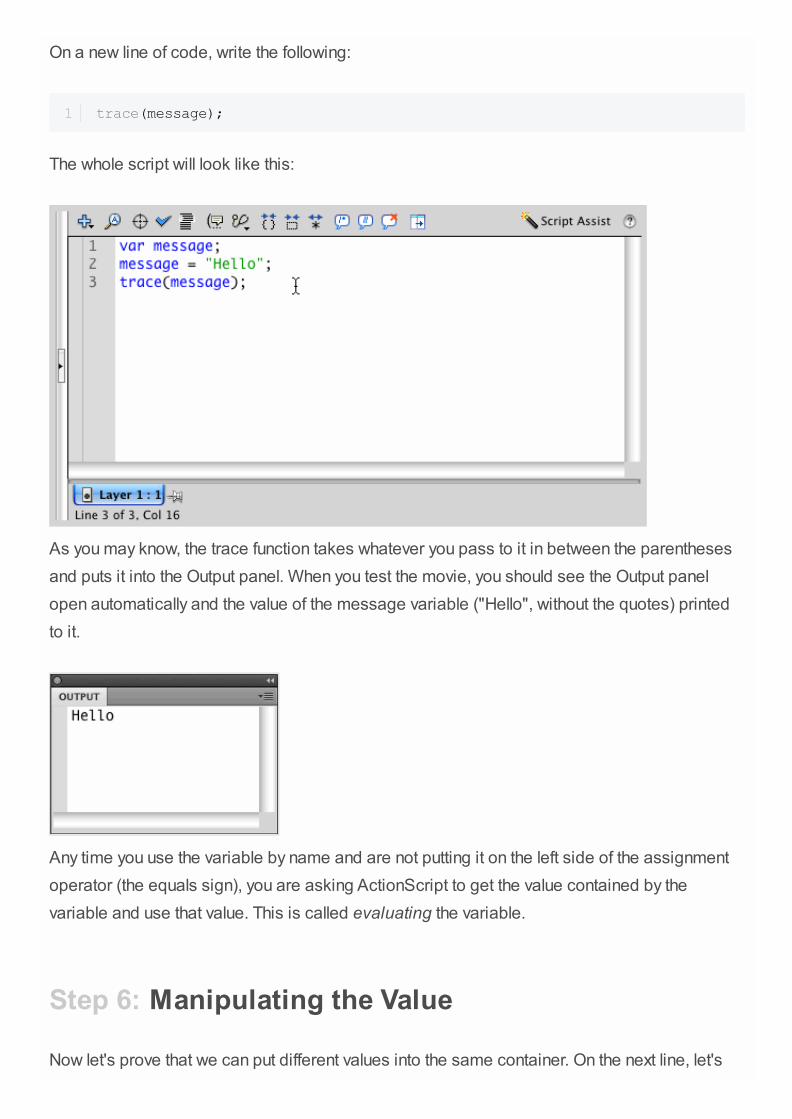
The whole script will look like this:
Run the movie and you should now have two traces:
Notice that lines 3 and 5 are identical – they both trace message, but they produce different
results! Each time we ask for message to be traced, the current value of the variable is
evaluated and used. First it gets set to "Hello" and that shows up in the Output panel. After that
we set it to "How are you?" and then that shows up in the Output panel.
It's not rocket science, but this is one of the more confounding aspects of using variables. If you
can master this, you'll be well on your way to becoming an ActionScript guru.
1 message = "How are you?";
1 trace(message);
Step 7: Understanding Datatypes
ActionScript supports something called strong typing. It's an interesting language in that it's
only strongly-typed if you tell it to be so and it can be strongly-typed at certain points and
weakly-typed in others. There is something to be said for the ease of use of a weakly-typed
language, but most serious programmers will be able to talk for a few hours on the merits of
strong typing. So what is it?
Strong typing simply means that when we declare a variable, we can also declare what kind of
value can be put into it. That is, if we say that our message variable can only contain a string (as
it happens to do so currently), then if we tried to put a number or date into it, ActionScript will
complain in the form of an error. Causing errors might seem like a hindrance, but when you
empower the computer to catch your errors for you, you actually end up saving time. Weakly
typing your variables will avoid compiler errors, but might allow logical errors (for instance,
trying to uppercase a number), in which case things can fail without warning. Allowing room for
compiler errors through strongly-typing your code actually saves you time in the long run.
A datatype is, in a nutshell, the type of data that a value is. That is, values can be a string, a
number, a boolean, a date, an XML document, a movie clip and many more built-in types - even
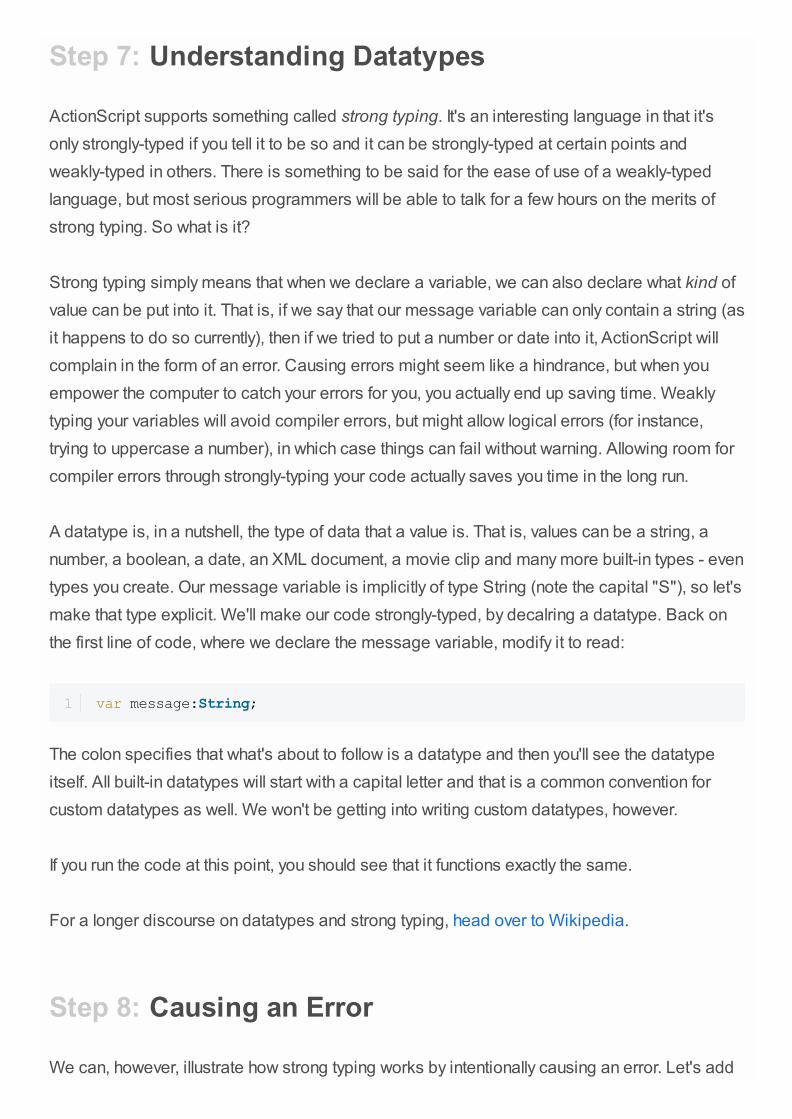
types you create. Our message variable is implicitly of type String (note the capital "S"), so let's
make that type explicit. We'll make our code strongly-typed, by decalring a datatype. Back on
the first line of code, where we declare the message variable, modify it to read:
The colon specifies that what's about to follow is a datatype and then you'll see the datatype
itself. All built-in datatypes will start with a capital letter and that is a common convention for
custom datatypes as well. We won't be getting into writing custom datatypes, however.
If you run the code at this point, you should see that it functions exactly the same.
For a longer discourse on datatypes and strong typing, head over to Wikipedia.
Step 8: Causing an Error
We can, however, illustrate how strong typing works by intentionally causing an error. Let's add
1 var message:String;
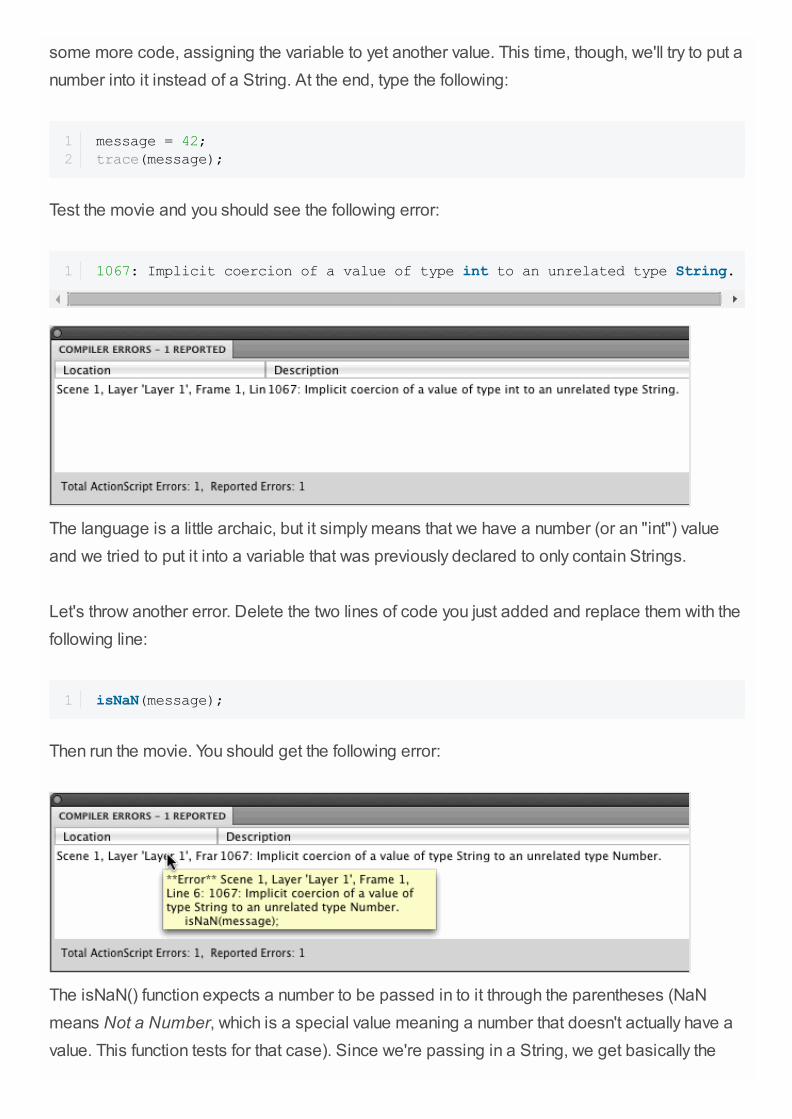
some more code, assigning the variable to yet another value. This time, though, we'll try to put a
number into it instead of a String. At the end, type the following:
Test the movie and you should see the following error:
The language is a little archaic, but it simply means that we have a number (or an "int") value
and we tried to put it into a variable that was previously declared to only contain Strings.
Let's throw another error. Delete the two lines of code you just added and replace them with the
following line:
Then run the movie. You should get the following error:
The isNaN() function expects a number to be passed in to it through the parentheses (NaN
means Not a Number, which is a special value meaning a number that doesn't actually have a
value. This function tests for that case). Since we're passing in a String, we get basically the
12
message = 42;trace(message);
1 1067: Implicit coercion of a value of type int to an unrelated type String.
1 isNaN(message);
reverse error of what we had before.
Note that if you remove the String datatype from the variable and then re-run these two
experiments, you won't get an error. The code will actually execute and in this case the lack of
datatyping isn't such a big deal. In larger projects, having this kind of insurance can prevent
errors and bugs that bring down your whole movie.
Step 9: Create a Button
That should be enough of an introduction; let's see a specific use of variables in action. We'll
now start making the button group example shown at the start of this tutorial.
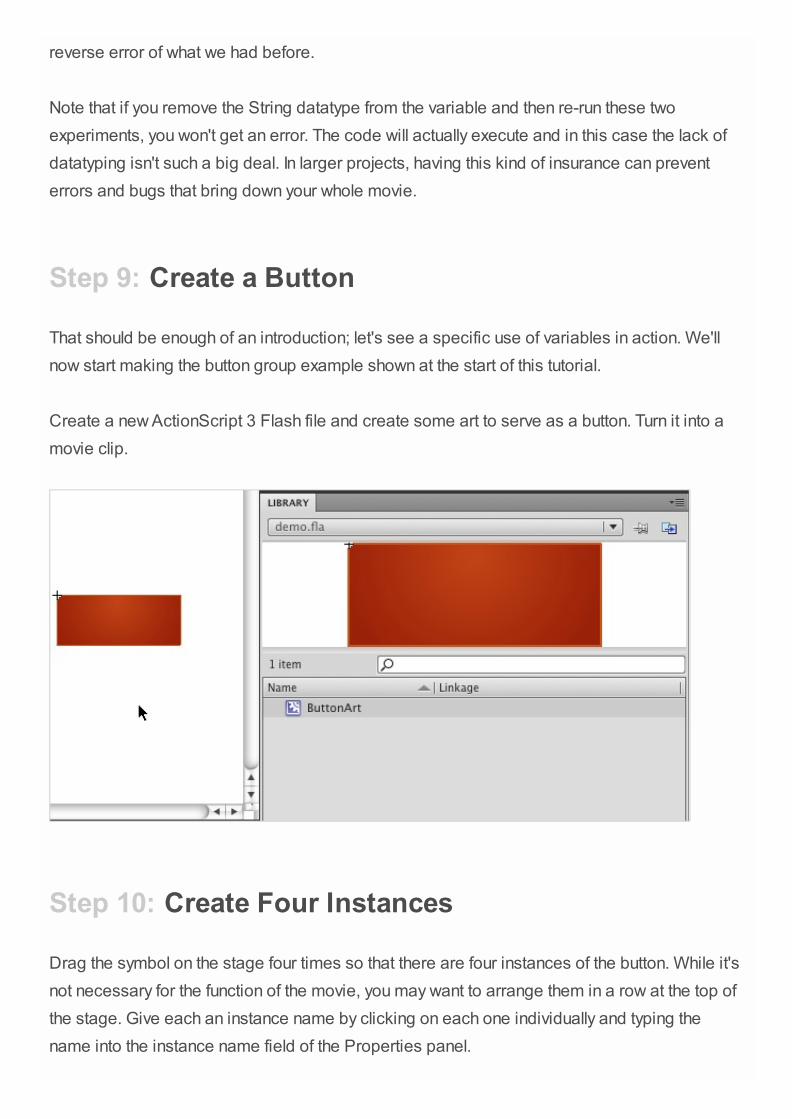
Create a new ActionScript 3 Flash file and create some art to serve as a button. Turn it into a
movie clip.
Step 10: Create Four Instances
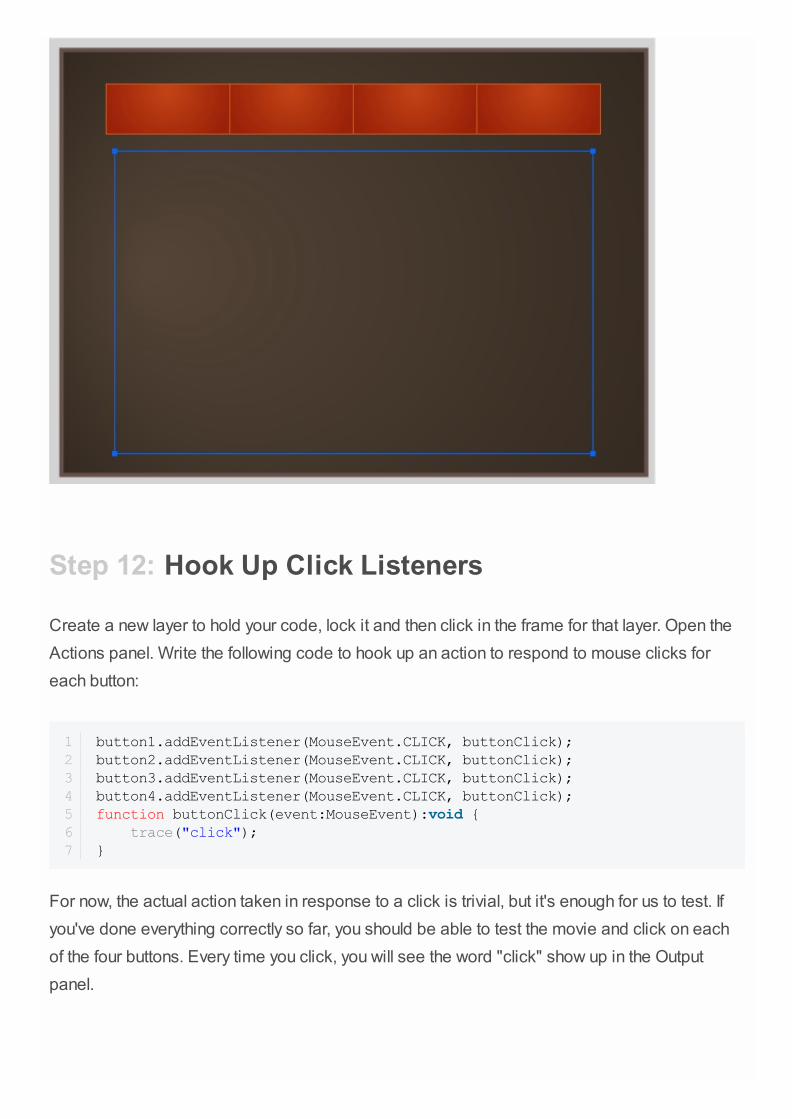
Drag the symbol on the stage four times so that there are four instances of the button. While it's
not necessary for the function of the movie, you may want to arrange them in a row at the top of
the stage. Give each an instance name by clicking on each one individually and typing the
name into the instance name field of the Properties panel.

I've named my buttons "button1," "button2,""button3," and "button4." For simplicity in following
along with the code, be consistent and use my names.
Step 11: Create a Text Field
Underneath the row of buttons, create a dynamic text field, give it an instance name (I used
"output") and go ahead and make it as big as will fit on the stage. The purpose of this text field
will be to log the names of the buttons as they are clicked. We don't need too much horizontal
space but should have as much vertical space as possible.
Step 12: Hook Up Click Listeners
Create a new layer to hold your code, lock it and then click in the frame for that layer. Open the
Actions panel. Write the following code to hook up an action to respond to mouse clicks for
each button:
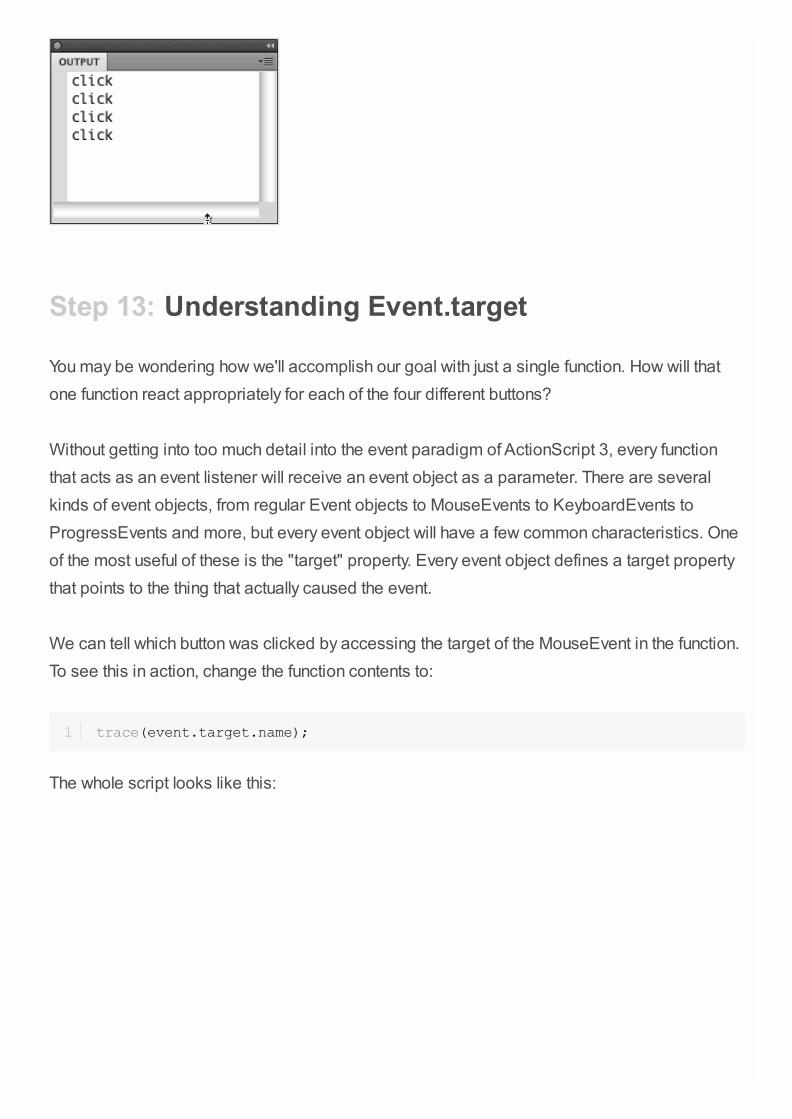
For now, the actual action taken in response to a click is trivial, but it's enough for us to test. If
you've done everything correctly so far, you should be able to test the movie and click on each
of the four buttons. Every time you click, you will see the word "click" show up in the Output
panel.
1234567
button1.addEventListener(MouseEvent.CLICK, buttonClick);button2.addEventListener(MouseEvent.CLICK, buttonClick);button3.addEventListener(MouseEvent.CLICK, buttonClick);button4.addEventListener(MouseEvent.CLICK, buttonClick);function buttonClick(event:MouseEvent):void { trace("click");}
Step 13: Understanding Event.target
You may be wondering how we'll accomplish our goal with just a single function. How will that
one function react appropriately for each of the four different buttons?
Without getting into too much detail into the event paradigm of ActionScript 3, every function
that acts as an event listener will receive an event object as a parameter. There are several
kinds of event objects, from regular Event objects to MouseEvents to KeyboardEvents to
ProgressEvents and more, but every event object will have a few common characteristics. One
of the most useful of these is the "target" property. Every event object defines a target property
that points to the thing that actually caused the event.
We can tell which button was clicked by accessing the target of the MouseEvent in the function.
To see this in action, change the function contents to:
The whole script looks like this:
1 trace(event.target.name);
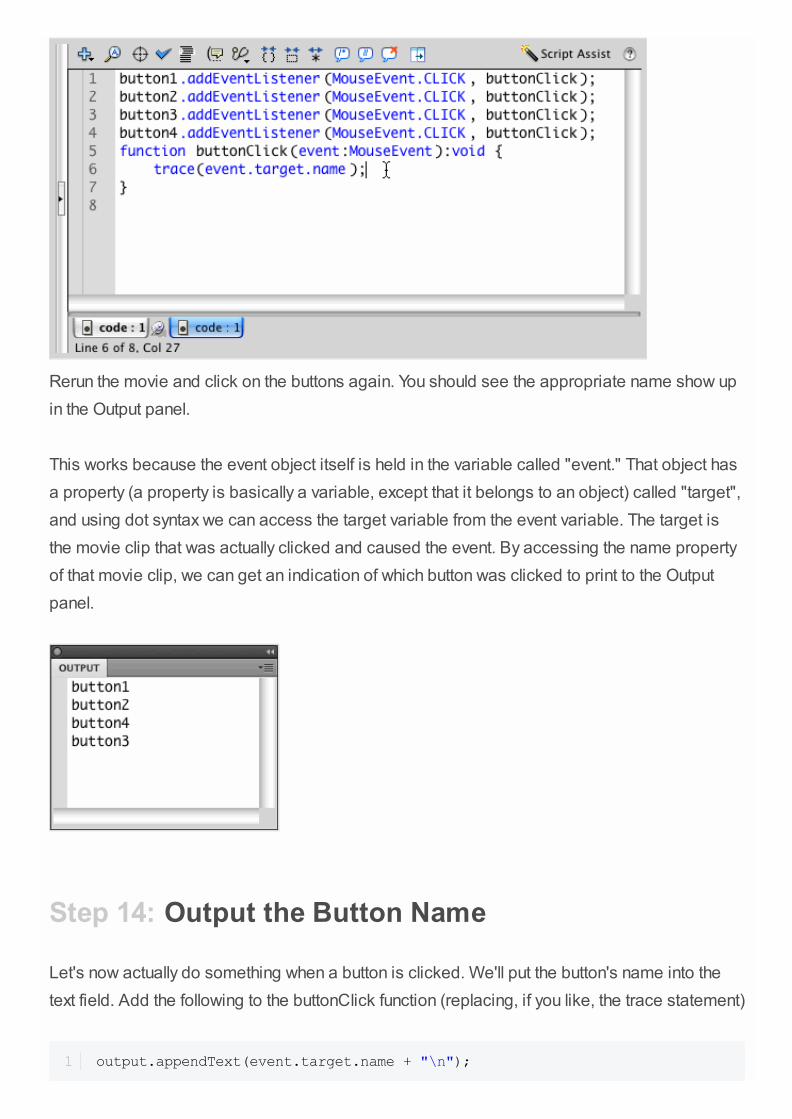
Rerun the movie and click on the buttons again. You should see the appropriate name show up
in the Output panel.
This works because the event object itself is held in the variable called "event." That object has
a property (a property is basically a variable, except that it belongs to an object) called "target",
and using dot syntax we can access the target variable from the event variable. The target is
the movie clip that was actually clicked and caused the event. By accessing the name property
of that movie clip, we can get an indication of which button was clicked to print to the Output
panel.
Step 14: Output the Button Name
Let's now actually do something when a button is clicked. We'll put the button's name into the
text field. Add the following to the buttonClick function (replacing, if you like, the trace statement)
1 output.appendText(event.target.name + "\n");
The first line puts the name of the clicked button into the text field. The appendText() method will
take the current text and add to it. We'll put a newline character (the "\n") at the end of the
added text to make sure the next bit of text added will be on a new line.
The second line makes sure that the last line of text is always visible. In a nutshell, this line sets
the scroll amount (which line of text is at the top of the visible area) to the maximum amount
based on how many lines there are.
Step 15: Create a Selected State
Remember that our goal is to make the clicked button the selected button, so we want to
visually represent that. To easily make a visual change to the button, we'll just set the alpha to
something slightly transparent.
Replace the trace statement with the following:
The alpha property of a movie clip adjusts the transparency and ranges from 0 to 1, with 1
being fully opaque. Therefore, 0.7 is something that's 70% opaque, or 30% transparent.
Run the movie and click on a button. You should see it change. Of course, we still have quite a
bit to implement, so once a button obtains the selected look, it stays that way.
Step 16: Disable Event.target
You'll notice that if you click on a button, you can continue to click on it, as evidenced by the
name showing up each time you click. We want something like a group of tab buttons, where a
button that is currently selected can't be clicked. We can easily accomplish this by setting the
mouseEnabled property of the recently-clicked button (still event.target) to false.
2 output.scrollV = output.maxScrollV;
1 event.target.alpha = 0.7;
1 event.target.mouseEnabled = false;
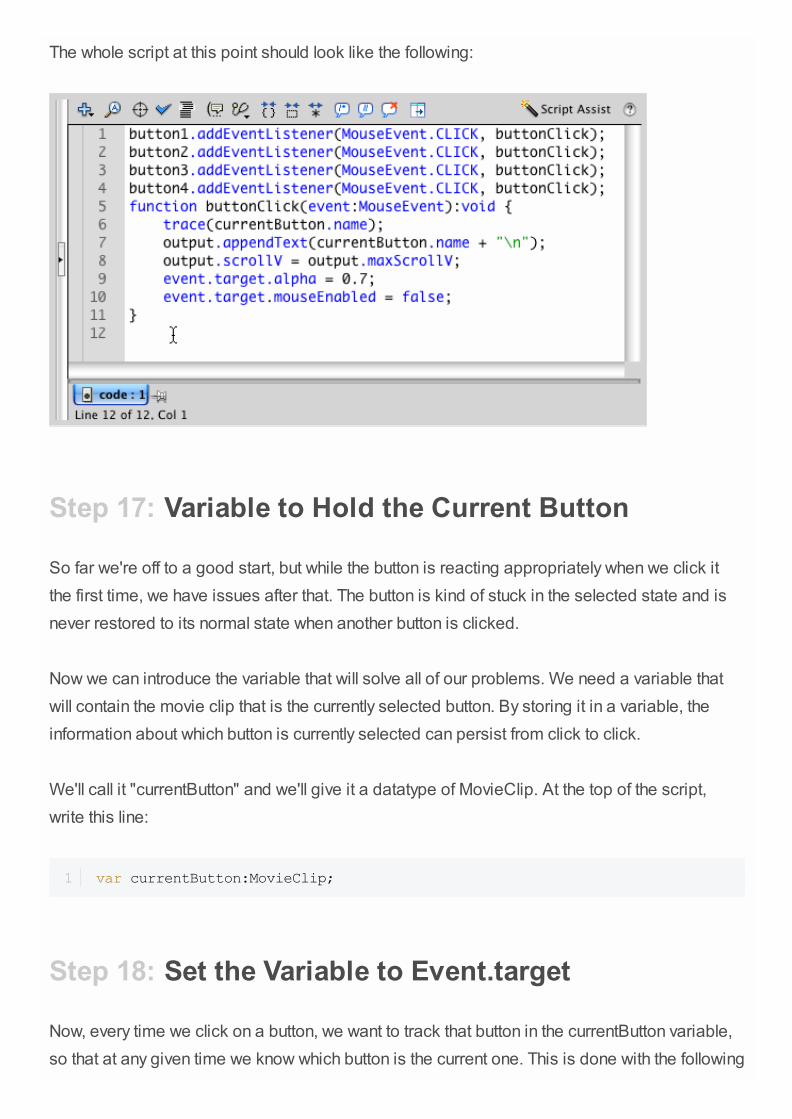
The whole script at this point should look like the following:
Step 17: Variable to Hold the Current Button
So far we're off to a good start, but while the button is reacting appropriately when we click it
the first time, we have issues after that. The button is kind of stuck in the selected state and is
never restored to its normal state when another button is clicked.
Now we can introduce the variable that will solve all of our problems. We need a variable that
will contain the movie clip that is the currently selected button. By storing it in a variable, the
information about which button is currently selected can persist from click to click.
We'll call it "currentButton" and we'll give it a datatype of MovieClip. At the top of the script,
write this line:
Step 18: Set the Variable to Event.target
Now, every time we click on a button, we want to track that button in the currentButton variable,
so that at any given time we know which button is the current one. This is done with the following
1 var currentButton:MovieClip;
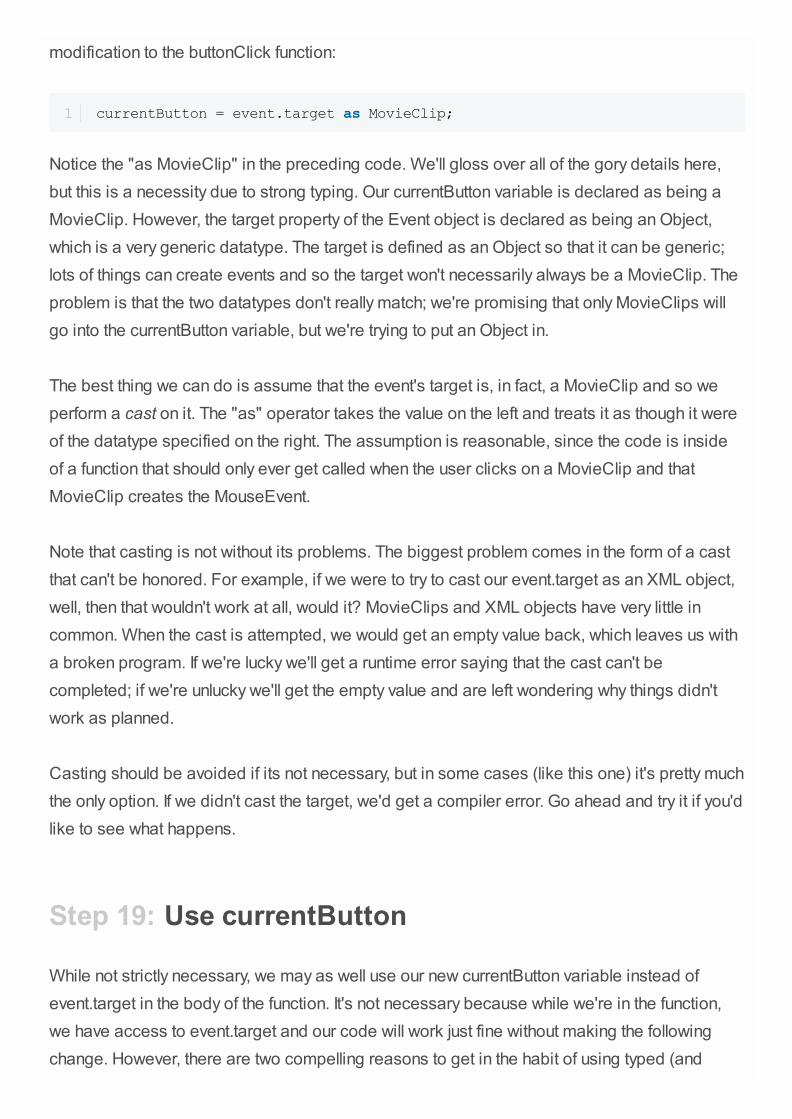
modification to the buttonClick function:
Notice the "as MovieClip" in the preceding code. We'll gloss over all of the gory details here,
but this is a necessity due to strong typing. Our currentButton variable is declared as being a
MovieClip. However, the target property of the Event object is declared as being an Object,
which is a very generic datatype. The target is defined as an Object so that it can be generic;
lots of things can create events and so the target won't necessarily always be a MovieClip. The
problem is that the two datatypes don't really match; we're promising that only MovieClips will
go into the currentButton variable, but we're trying to put an Object in.
The best thing we can do is assume that the event's target is, in fact, a MovieClip and so we
perform a cast on it. The "as" operator takes the value on the left and treats it as though it were
of the datatype specified on the right. The assumption is reasonable, since the code is inside
of a function that should only ever get called when the user clicks on a MovieClip and that
MovieClip creates the MouseEvent.
Note that casting is not without its problems. The biggest problem comes in the form of a cast
that can't be honored. For example, if we were to try to cast our event.target as an XML object,
well, then that wouldn't work at all, would it? MovieClips and XML objects have very little in
common. When the cast is attempted, we would get an empty value back, which leaves us with
a broken program. If we're lucky we'll get a runtime error saying that the cast can't be
completed; if we're unlucky we'll get the empty value and are left wondering why things didn't
work as planned.
Casting should be avoided if its not necessary, but in some cases (like this one) it's pretty much
the only option. If we didn't cast the target, we'd get a compiler error. Go ahead and try it if you'd
like to see what happens.
Step 19: Use currentButton
While not strictly necessary, we may as well use our new currentButton variable instead of
event.target in the body of the function. It's not necessary because while we're in the function,
we have access to event.target and our code will work just fine without making the following
change. However, there are two compelling reasons to get in the habit of using typed (and
1 currentButton = event.target as MovieClip;
casted, if need be) variables where possible.
The first reason is the main reason. As mentioned in the last step about casting, event.target is
not typed as a MovieClip. Yet we know that it is, so we cast it as such. Think back to step 9,
where we deliberately typed a variable as one thing and tried to use it as another, which caused
errors. Now, if we go and tell the variable currentButton to set its alpha to 0.7, currentButton is a
MovieClip and MovieClip has an alpha property and all is good. If we accidentally tried to set
the aplah property (it happens more often than you would think), Flash would complain about it
and let us know and we'd be able to correct our mistake quickly. Using event.target (which is a
very generic, loosely-typed variable), it may take longer to find that typo.
The second reason has to do with performance. In this particular case, we're not going to see
huge gains from using a typed variable instead of event.target. In ActionScript 3, it is faster to
use a value out of a single typed variable that it is out of an untyped property (as event.target
is). In critical applications this might give you an extra few processor cycles.
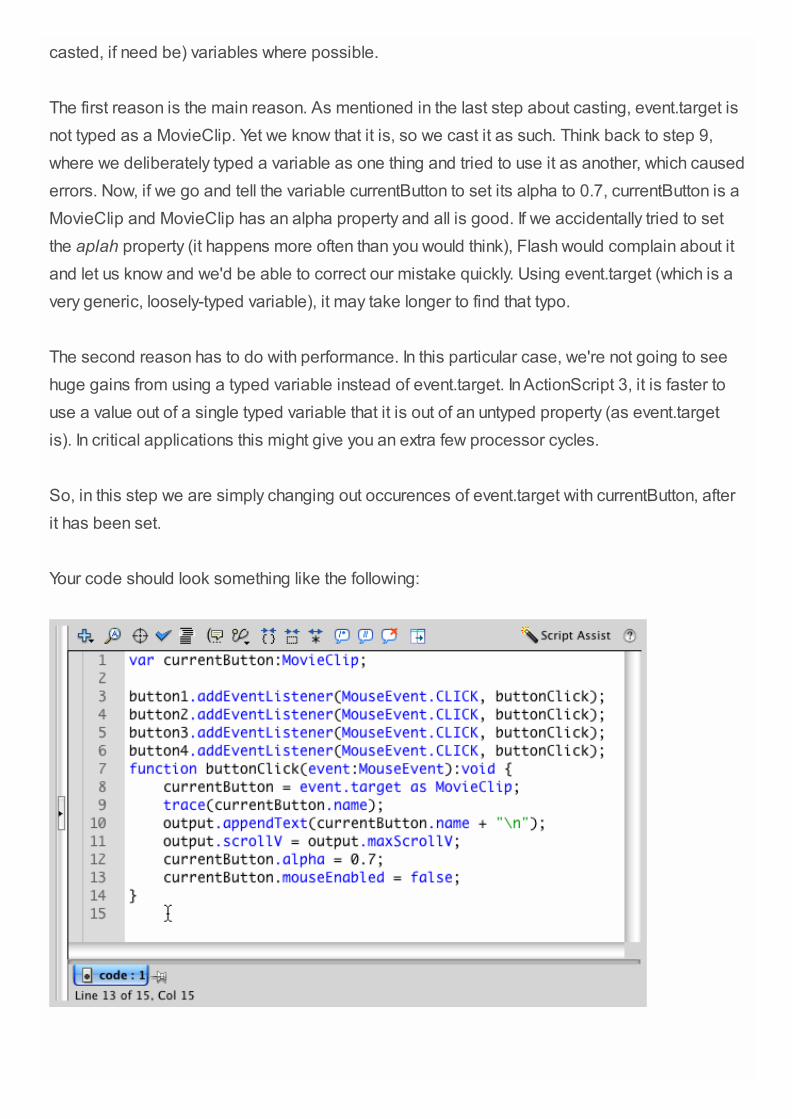
So, in this step we are simply changing out occurences of event.target with currentButton, after
it has been set.
Your code should look something like the following:

Step 20: Deselect the Old Current Button
Now that we have a variable declared and holding a value, we can use it to restore the visual
appearance of the previously selected button. That is, if you click on button1 and it changes
appearance, then you click on button2, we want button1 to look normal again.
The next bit of code needs to happen before we set the currentButton variable. Otherwise, we'll
be affecting the current button, not the previous button.
This will restore the previous button's appearance, but we won't be able to click on it. We
previously disabled it by setting its mouseEnabled property to false, so we can enable it by
setting it back to true. Place this code immediately after the last bit of code we wrote:
The code should look like this:
Step 21: Check for null Value
1 currentButton.alpha = 1;
1 currentButton.mouseEnabled = true;
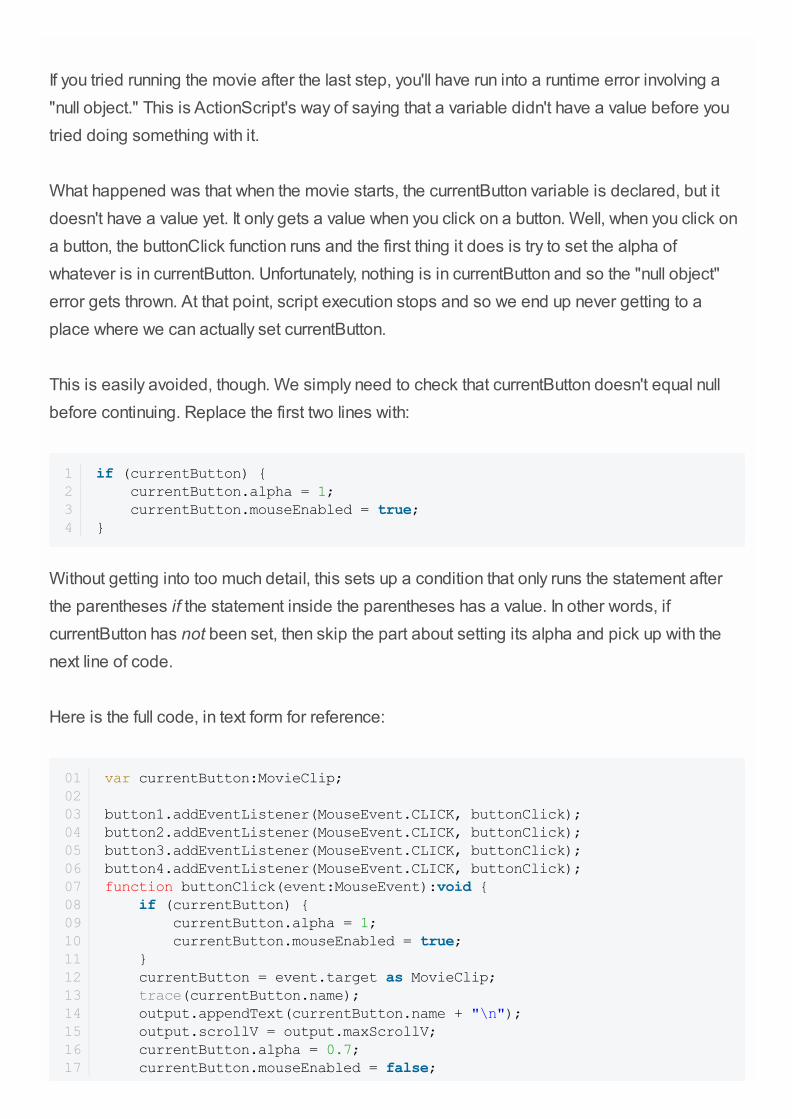
If you tried running the movie after the last step, you'll have run into a runtime error involving a
"null object." This is ActionScript's way of saying that a variable didn't have a value before you
tried doing something with it.
What happened was that when the movie starts, the currentButton variable is declared, but it
doesn't have a value yet. It only gets a value when you click on a button. Well, when you click on
a button, the buttonClick function runs and the first thing it does is try to set the alpha of
whatever is in currentButton. Unfortunately, nothing is in currentButton and so the "null object"
error gets thrown. At that point, script execution stops and so we end up never getting to a
place where we can actually set currentButton.
This is easily avoided, though. We simply need to check that currentButton doesn't equal null
before continuing. Replace the first two lines with:
Without getting into too much detail, this sets up a condition that only runs the statement after
the parentheses if the statement inside the parentheses has a value. In other words, if
currentButton has not been set, then skip the part about setting its alpha and pick up with the
next line of code.
Here is the full code, in text form for reference:
1234
if (currentButton) { currentButton.alpha = 1; currentButton.mouseEnabled = true;}
0102030405060708091011121314151617
var currentButton:MovieClip; button1.addEventListener(MouseEvent.CLICK, buttonClick);button2.addEventListener(MouseEvent.CLICK, buttonClick);button3.addEventListener(MouseEvent.CLICK, buttonClick);button4.addEventListener(MouseEvent.CLICK, buttonClick);function buttonClick(event:MouseEvent):void { if (currentButton) { currentButton.alpha = 1; currentButton.mouseEnabled = true; } currentButton = event.target as MovieClip; trace(currentButton.name); output.appendText(currentButton.name + "\n"); output.scrollV = output.maxScrollV; currentButton.alpha = 0.7; currentButton.mouseEnabled = false;

At this point, you have created a variable. It has a name and a datatype. It stores several
different values over time, so that at certain points in time you can track the current value and do
something with it. You learned about casting and why variables are the building block of all
programs of any complexity.
I hope you enjoyed this beginner's article, feel free to leave questions and opinions in the
comments section. We have plenty more tutorials planned for the AS3 101 series, so stay
tuned!
18 }