Embed Size (px)
Citation preview
© DZONE, INC. | DZONE.COM
CO
NT
EN
TS
ABOUT CONTINUOUS INTEGRATION & DEVOPS
Continuous Integration is one of several core concepts that must be considered when implementing a DevOps culture within an organization. The core principles of a DevOps implementation are summarized by what Gene Kim describes as "The Three Ways". The First way is to move towards systems thinking—that is, evaluating the performance of the system as a whole. This usually involves organizational changes at a cultural level.
The second way, and what we will be focusing on here, involves amplifying feedback loops.
The Second Way is about creating the right to left feedback loops. The goal of almost any process improvement initiative is to shorten and amplify feedback loops so necessary corrections can be continually made.
The outcomes of the Second Way include understanding and responding to all customers, internal and external, shortening and amplifying all feedback loops, and embedding knowledge where we need it.
— Gene Kim The Three Ways: The Principles Underpinning DevOps
Continuous integration helps to fulfill this second principle. The continuous review, build, and inspection of software allows us to address potential issues as soon as possible. It also promotes transparency as all team members have access to the analytical artifacts produced by the system.
CI TOOLING
There are many tools that can be used to implement a continuous integration system. For the purposes of this reference card we will be focusing on the following:
Get
Mor
e R
efca
rdz!
Vis
it D
Zone
.com
/Ref
card
z087
CO
NT
INU
OU
S I
NT
EG
RA
TIO
N S
ER
VE
RS
& T
OO
LS
TOOL DESCRIPTION
Apache Maven 3.3.3
Apache Maven is A software project management and comprehension tool. Based on the concept of a project object model (POM), Maven can manage a project’s build, reporting and documentation from a central piece of information.
Git 2.5.5 A version control system that is widely used for software de-velopment and other version control tasks. It is a distributed revision control system with an emphasis on speed, data integrity, and support for distributed, non-linear workflows.
Jenkins 2.0 Jenkins is an open source automation server with an unpar-alleled plugin ecosystem to support practically every tool as part of your delivery pipelines. Whether your goal is con-tinuous integration, continuous delivery or something else entirely, Jenkins can help automate it. Jenkins 2.0 provides built-in support for delivery pipelines, improved usability and full backwards compatibility.
SonarQube 5.5
An open platform for managing code quality, including static code analysis.
Gerrit 2.12.x Provides web based code review and repository manage-ment for the Git version control system.
SonaType Nexus 3.0.x
A repository for Java artifacts (e.g., JAR and WAR files). Version 3 provides additional support for docker-formatted container images, NPM (node package manager), Bower (HTML, CSS, Javascript repository), and NuGet (Microsoft
.NET package manager)
THE DEMO CI PIPELINEA graphical representation of the CI pipeline is available at raw.githubusercontent.com/kharyam/dzone-ci-demo-app/master/images/ci-pipeline-overview.png The pipeline consists of the following steps:
1. Developer clones code from the authoritative Git repository managed by Gerrit.
2. Developer pushes a code change into the pending changes repository managed by Gerrit.
Continuous IntegrationServers and Tools
UPDATED BY KHARY A. MENDEZ
About CI and Devops
CI Tooling
The Demo CI Pipeline
The CI Server Docker Image
Manual Installation...& more!
BROUGHT TO YOU IN PARTNERSHIP WITH
3 CONTINUOUS INTEGRATION SERVERS & TOOLS
3. The team lead reviews the code change in pending changes repository.
4. The team lead approves the code changes in the pending changes repository.
5. The team lead submits the code changes into the authoritative Git repository.
6. Gerrit triggers the Jenkins CI pipeline via a change-merged Git hook.
7. The Checkout stage of the pipeline is run.
8. The Checkout stage clones the source code from the authoritative git repository.
9. The Build stage performs a maven build of the code.
10. The Analyze stage calls SonarQube to perform static code analysis.
11. The Archive stage uploads the WAR file into the Nexus repository. It also archives unit test results within Jenkins.
12. The Deploy to Development stage deploys the WAR from Nexus into the development servers. *
13. Upon authorized approval the Deploy to Test stage deploys the WAR into the test servers. *
14. Upon authorized approval the Deploy to Production stage deploys the WAR into the production servers. *
*Note that the last three steps are considered part of the Continuous Deployment (CD) process, however this can also be handled by the Jenkins pipeline. These steps are simply placeholders that can be implemented if CD is desired.
There are two options for continuing with this reference card. The tools can be installed manually following the section Manually Installing the CI Server Tools or you can use an example docker-formatted container image, described in the section Using the CI Server docker-formatted Container Image.
USING THE CI SERVER DOCKER-FORMATTED CONTAINER IMAGE
A docker-formatted container image was created for the configuration described in this reference card. See https://hub.docker.com/r/kharyam/ciserver/.
For more background information on Docker refer to the Getting Started with Docker Refcard.
Use the following steps to run the container image.
1. Pull the container image docker pull kharyam/ciserver
2. Start the container image $ docker run -d -p 8081-8084:8081-8084 -p 29418:29418 -p 40396:40396 --name=ciserver kharyam/ciserver:latest a75ac65d97ad5c.... (1)
(1) This is the ID of the container started by the docker engine
3. The initial login to Jenkins will require a password printed when Jenkins initially comes up. You can issue the following command to obtain this password. $ docker logs ciserver 2>&1 | grep -A1 "Please use" Please use the following password to proceed to installation: 4a9bb0ea09cb4f21aa8d9fc506661a80 (2)
(2) Use this password for the initial Jenkins login described in the section Install and Configure Jenkins
Continue with the section Manually Installing the CI Server Tools, skipping the steps noted as unnecessary for container images.
MANUALLY INSTALLING THE CI SERVER TOOLS
Here we describe how to install and configure the above tools on a linux server. Once completed you will be able to test out a continuous integration flow. These steps were tested on Fedora 23 but may be easily tweaked for other linux distributions.
Note: The configuration described herein is for demonstration / learning purposes and not meant for production use. For example, we will be using embedded databases for Gerrit and SonarQube while in production you would use a dedicated database such as PostgreSql or MySQL.
Choose a location to install the software and configuration information for the CI server, for example /opt/ciserver. We will refer to this location as $CI_HOME.
INSTALL AND CONFIGURE JAVA, MAVEN AND GITNote: You can skip this section if using the container image.
Note: If you are using Red Hat Enterprise Linux or CentOS, replace the dnf command with yum.
1. Install Java, maven, and git: $ sudo dnf install java-1.8.0-openjdk-devel maven git gitweb
INSTALL AND CONFIGURE NEXUSNote: You can skip to Step 4 if using the container image. Nexus may take several minutes to start the first time.
1. Download Nexus 3.0.x at sonatype.com/download-oss-sonatype.
2. Extract the archive: $ tar -xf nexus-3.0.0-03-unix.tar.gz -C $CI_HOME
Note: By default Nexus will run on port 8081. This can be changed by updating $CI_HOME/nexus-3.0.0-03/etc/org.sonatype.nexus.cfg.
3. Start Nexus using the default configuration: $ cd $CI_HOME/nexus-3.0.0-03/bin $ ./nexus start Starting Nexus
4. Open your browser to http://localhost:8081 and you should see the Nexus welcome screen. Sign in as admin with the password admin123.
© DZONE, INC. | DZONE.COM
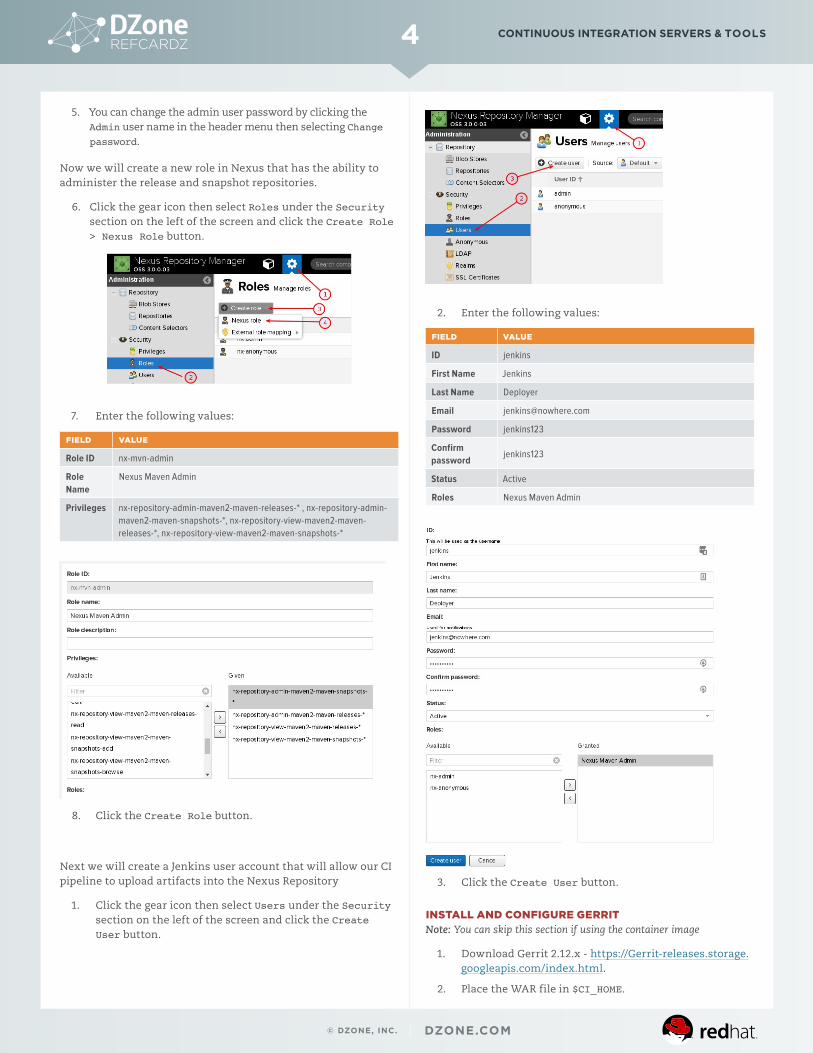
5. You can change the admin user password by clicking the Admin user name in the header menu then selecting Change password.
Now we will create a new role in Nexus that has the ability to administer the release and snapshot repositories.
6. Click the gear icon then select Roles under the Security section on the left of the screen and click the Create Role > Nexus Role button.
7. Enter the following values:
FIELD VALUE
Role ID nx-mvn-admin
Role Name
Nexus Maven Admin
Privileges nx-repository-admin-maven2-maven-releases-* , nx-repository-admin-maven2-maven-snapshots-*, nx-repository-view-maven2-maven-releases-*, nx-repository-view-maven2-maven-snapshots-*
8. Click the Create Role button.
Next we will create a Jenkins user account that will allow our CI pipeline to upload artifacts into the Nexus Repository
1. Click the gear icon then select Users under the Security section on the left of the screen and click the Create User button.
2. Enter the following values:
FIELD VALUE
ID jenkins
First Name Jenkins
Last Name Deployer
Email [email protected]
Password jenkins123
Confirm password
jenkins123
Status Active
Roles Nexus Maven Admin
3. Click the Create User button.
INSTALL AND CONFIGURE GERRITNote: You can skip this section if using the container image
1. Download Gerrit 2.12.x - https://Gerrit-releases.storage.googleapis.com/index.html.
2. Place the WAR file in $CI_HOME.
4 CONTINUOUS INTEGRATION SERVERS & TOOLS
© DZONE, INC. | DZONE.COM
3. Initialize Gerrit: $ java -jar Gerrit.war init --batch -d $CI_HOME/Gerrit
4. Add the following to the end of $CI_HOME/Gerrit/etc/Gerrit.config: [gitweb] cgi = /var/www/git/gitweb.cgi
5. Change the port Gerrit runs on from 8080 to 8082. Edit $CI_HOME/Gerrit/etc/Gerrit.config and replace all occurrences of 8080 with 8082.
6. Change the authentication type from OPENID to DEVELOPMENT_BECOME_ANY_ACCOUNT. Edit $CI_HOME/Gerrit/etc/Gerrit.config and replace all occurrences of OPENID with DEVELOPMENT_BECOME_ANY_ACCOUNT.
Note: Gerrit supports many authentication schemes including OPENID and LDAP. For our demonstration purposes we will enable a simple developmental authentication scheme, not meant for use in production. Refer to https://Gerrit-review.googlesource.com/Documentation/config-Gerrit.html#auth for more information on Gerrit’s authentication support.
7. Download the latest bouncy castle security JAR from here www.bouncycastle.org/latest_releases.html.
8. Copy the JAR file to $CI_HOME/Gerrit/lib.
9. Restart Gerrit: $ $CI_HOME/Gerrit/bin/Gerrit.sh restart
10. You should now be able to access the Gerrit home page via http://localhost:8082.
INSTALL AND CONFIGURE SONARQUBENote: You can skip this section if using the container image. Just note the default username is admin, with password admin.
1. Download SonarQube - sonarqube.org/downloads. $ unzip sonarqube-5.5.zip -d $CI_HOMEsonar.web.port=8084 $ echo "sonar.web.port=8084" >> $CI_HOME/sonarqube-5.5/conf/sonar.properties $ cd $CI_HOME/sonarqube-5.5/bin/linux-x86-64 $ ./sonar.sh start
2. You should now be able to log in to the web console by pointing your browser to http://localhost:8084 Sign in as admin with the password admin.
INSTALL AND CONFIGURE JENKINSNote: You can skip to Step 3 if using the container image.
1. Download Jenkins - https://Jenkins.io/2.0/ $ mv Jenkins.war $CI_HOME
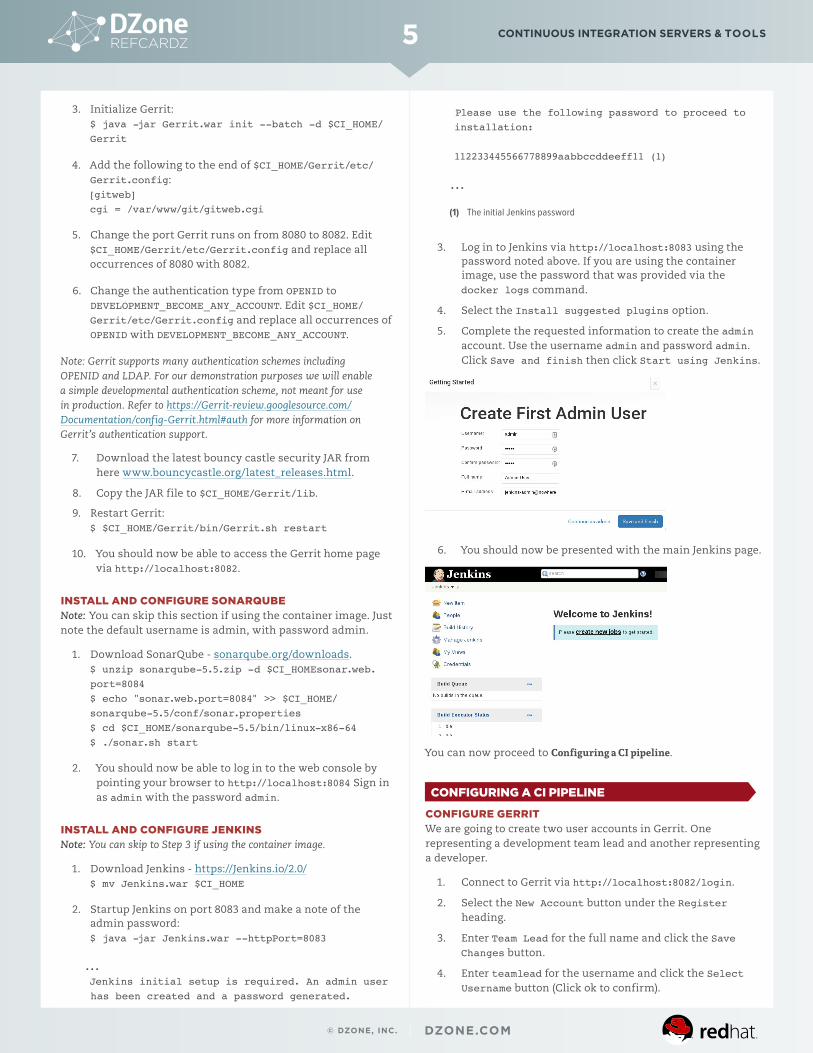
2. Startup Jenkins on port 8083 and make a note of the admin password: $ java -jar Jenkins.war --httpPort=8083 ... Jenkins initial setup is required. An admin user has been created and a password generated.
Please use the following password to proceed to installation: 112233445566778899aabbccddeeff11 (1) ...
(1) The initial Jenkins password
3. Log in to Jenkins via http://localhost:8083 using the password noted above. If you are using the container image, use the password that was provided via the docker logs command.
4. Select the Install suggested plugins option.
5. Complete the requested information to create the admin account. Use the username admin and password admin. Click Save and finish then click Start using Jenkins.
6. You should now be presented with the main Jenkins page.
You can now proceed to Configuring a CI pipeline.
CONFIGURING A CI PIPELINE
CONFIGURE GERRITWe are going to create two user accounts in Gerrit. One representing a development team lead and another representing a developer.
1. Connect to Gerrit via http://localhost:8082/login.
2. Select the New Account button under the Register heading.
3. Enter Team Lead for the full name and click the Save Changes button.
4. Enter teamlead for the username and click the Select Username button (Click ok to confirm).
5 CONTINUOUS INTEGRATION SERVERS & TOOLS
© DZONE, INC. | DZONE.COM
5. Paste the ssh public key that you use for Git (e.g., ~/.ssh/id_rsa.pub) into the Add SSH Public Key text box and click the Add button.
a. If you are using the container image, you can generate an ssh key pair by following these steps:
i. Log in to your container $ docker exec -it ciserver /bin/bash
ii. Generate a key pair $ ssh-keygen Generating public/private rsa key pair. Enter file in which to save the key (/opt/ci-server/.ssh/id_rsa): (1) Created directory '/opt/ci-server/.ssh'. Enter passphrase (empty for no passphrase): (1) Enter same passphrase again: (1) Your identification has been saved in /opt/ci-server/.ssh/id_rsa. Your public key has been saved in /opt/ci-server/.ssh/id_rsa.pub. The key fingerprint is: SHA256:ApTkVs+jY/N85pLY4WTKOJ1n2SOojs7B8Fi6F4/wsOg ci-server@2cdd3e3d74de The keys randomart image is: +---[RSA 2048]----+ | .o.. | | o.. | | + + | | . . . . | |. . * S | | | |+=++ + Xo=o | | | |oE+.oo o o.. | +----[SHA256]-----+ Note: Press enter when prompted.
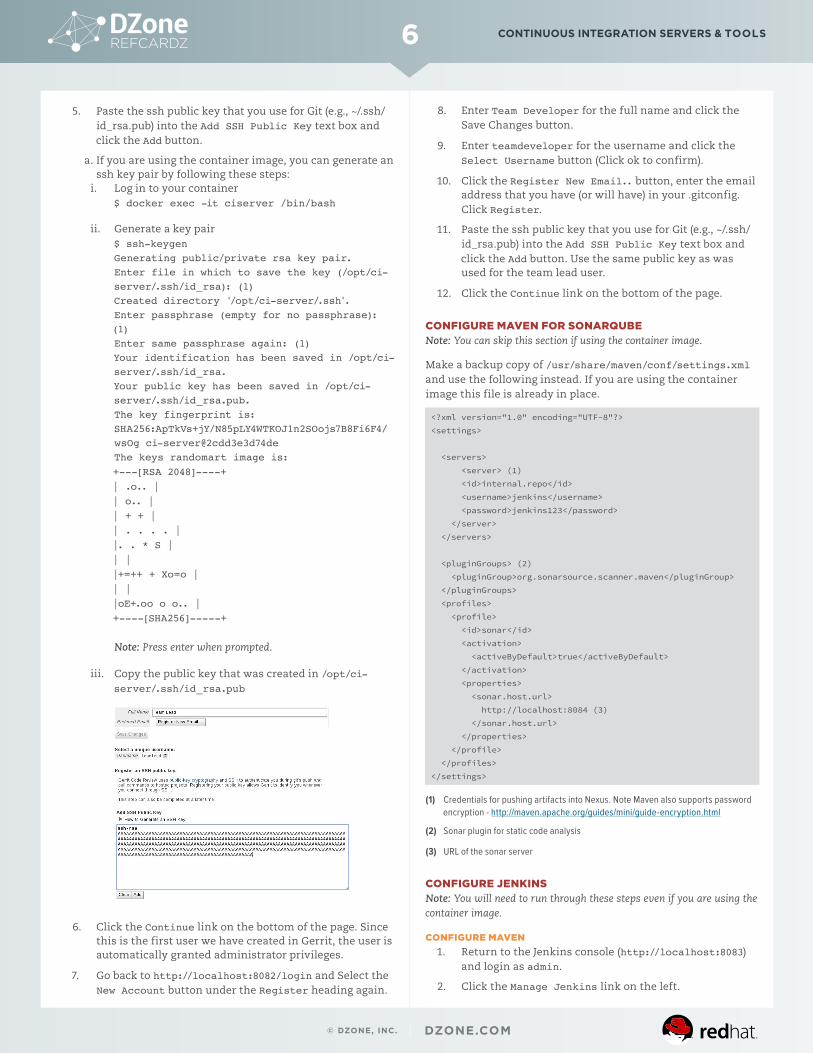
iii. Copy the public key that was created in /opt/ci-server/.ssh/id_rsa.pub
6. Click the Continue link on the bottom of the page. Since this is the first user we have created in Gerrit, the user is automatically granted administrator privileges.
7. Go back to http://localhost:8082/login and Select the New Account button under the Register heading again.
8. Enter Team Developer for the full name and click the Save Changes button.
9. Enter teamdeveloper for the username and click the Select Username button (Click ok to confirm).
10. Click the Register New Email.. button, enter the email address that you have (or will have) in your .gitconfig. Click Register.
11. Paste the ssh public key that you use for Git (e.g., ~/.ssh/id_rsa.pub) into the Add SSH Public Key text box and click the Add button. Use the same public key as was used for the team lead user.
12. Click the Continue link on the bottom of the page.
CONFIGURE MAVEN FOR SONARQUBENote: You can skip this section if using the container image.
Make a backup copy of /usr/share/maven/conf/settings.xml and use the following instead. If you are using the container image this file is already in place.
(1)
<?xml version="1.0" encoding="UTF-8"?> <settings> <servers> <server> (1) <id>internal.repo</id> <username>jenkins</username> <password>jenkins123</password> </server> </servers> <pluginGroups> (2) <pluginGroup>org.sonarsource.scanner.maven</pluginGroup> </pluginGroups> <profiles> <profile> <id>sonar</id> <activation> <activeByDefault>true</activeByDefault> </activation> <properties> <sonar.host.url> http://localhost:8084 (3) </sonar.host.url> </properties> </profile> </profiles> </settings>
Credentials for pushing artifacts into Nexus. Note Maven also supports password encryption - http://maven.apache.org/guides/mini/guide-encryption.html
(2) Sonar plugin for static code analysis
(3) URL of the sonar server
CONFIGURE JENKINSNote: You will need to run through these steps even if you are using the container image.
CONFIGURE MAVEN1. Return to the Jenkins console (http://localhost:8083)
and login as admin.
2. Click the Manage Jenkins link on the left.
6 CONTINUOUS INTEGRATION SERVERS & TOOLS
© DZONE, INC. | DZONE.COM
3. Click Global Tool Configuration.
4. At the very bottom, click Add Maven. For the name specify M3. Deselect Install automatically and set the value of MAVEN_HOME to /usr/share/maven.
5. Click the Save button at the bottom of the page.
INSTALL ADDITIONAL PLUGINS1. On the Manage Jenkins page, select Manage Plugins.
2. Click the Available tab and type sonarqube in the search filter.
3. Select the check box next to SonarQube Plugin and click the Install without restart button.
4. Repeat the previous steps to install the Sidebar Link plugin by specifying sidebar link in the search filter.
SET JAVA_HOME1. Navigate to Manage Jenkins > Configure System.
2. Under Global Properties select Environment Variables.
3. Enter JAVA_HOME for the name and /usr/lib/jvm/java-1.8.0 as the value.
4. Click the Save button at the bottom of the page.
ADD LINKS TO SONARQUBE, NEXUS AND GERRIT (OPTIONAL)These steps will create links on the main Jenkins page to the Nexus, Gerrit, and SonarQube pages.
1. Navigate to Manage Jenkins > Configure System
2. Under Additional Sidebar Links enter the following information:
FIELD VALUE
Link URL http://localhost:8084
Link Text SonarQube
Link Icon gear.png
3. Click the Add Link button and enter the following values for Nexus:
FIELD VALUE
Link URL http://localhost:8081
FIELD VALUE
Link Text Nexus
Link Icon gear.png
4. Click the Add Link button and enter the following values for Gerrit:
FIELD VALUE
Link URL http://localhost:8082
Link Text Gerrit
Link Icon gear.png
5. Click the Save button at the bottom of the screen.
PUSH CODE TO GERRITThese directions will refer to $GIT_HOME as the directory where you store your git projects, for example ~/git. With these steps we will create a new project in Gerrit, seeding it with source code from an existing GitHub repository.
Note: If you are using the container image, you can perform these steps within the container. Log in to the container and create a git directory within the home directory: mkdir ~/git && cd ~/git.
1. Clone the demo application (https://github.com/kharyam/dzone-ci-demo-app) from GitHub and remove the .git directory: $ cd $GIT_HOME $ git clone https://github.com/kharyam/dzone-ci-demo-app.git $ rm -fr $GIT_HOME/dzone-ci-demo-app/.git
2. Create a new project named Demo in Gerrit as the teamlead user: $ ssh -p 29418 teamlead@localhost gerrit create-project Demo --empty-commit
3. Clone the new project as the teamdeveloper user: $ cd $GIT_HOME $ git clone ssh://teamdeveloper@localhost:29418/Demo.git
4. Move the files from the GitHub project into the Gerrit project: $ mv $GIT_HOME/dzone-ci-demo-app/* $GIT_HOME/Demo $ mv $GIT_HOME/dzone-ci-demo-app/.gitignore $GIT_HOME/Demo
5. Install the Gerrit Git commit hook. This hook will append a change-id to the commit message, which is required
7 CONTINUOUS INTEGRATION SERVERS & TOOLS
© DZONE, INC. | DZONE.COM
by Gerrit. For more information see Gerrit-review.googlesource.com/Documentation/user-changeid.html. $ cd $GIT_HOME/Demo $ gitdir=$(git rev-parse --git-dir); scp -p -P 29418 teamdeveloper@localhost:hooks/commit-msg ${gitdir}/hooks/
6. Commit and push the code to Gerrit. Note: If you are running this within the container, run the following commands first: $ git config --global user.name “teamdeveloper” $ git config --global user.email “[email protected]” (1) $ cd $GIT_HOME/Demo $ git add . (1) $ git commit -am “Initial commit” (2) $ git push origin HEAD:refs/for/master (3) Counting objects: 20, done. Delta compression using up to 8 threads. Compressing objects: 100% (11/11), done. Writing objects: 100% (20/20), 3.32 KiB | 0 bytes/s, done. Total 20 (delta 0), reused 0 (delta 0) remote: Processing changes: new: 1, refs: 1, done remote: remote: New Changes: remote: http://localhost:8082/6 Initial commit remote: To ssh://teamdeveloper@localhost:29418/Demo.git
(1) Recursively stage all files into the local Git repository
(2) Commit all newly added / modified files into the local Git repository
(3) Push the commit into the remote Gerrit repository. HEAD:refs/for/master is a special Git reference used by Gerrit to stage changes for review prior to making them available on the authoritative Git repository.
7. Now if you navigate to the Open Reviews in Gerrit (http://localhost:8082/#/q/status:open) you will see the pending review for this initial commit.
CREATE THE JENKINS PROJECTHere we will create a new Jenkins project that will deploy our Continuous Integration Pipeline. The Pipeline itself is defined in the Jenkinsfile of our sample project.
1. Login to the Jenkins console (http://localhost:8083/) as the admin user.
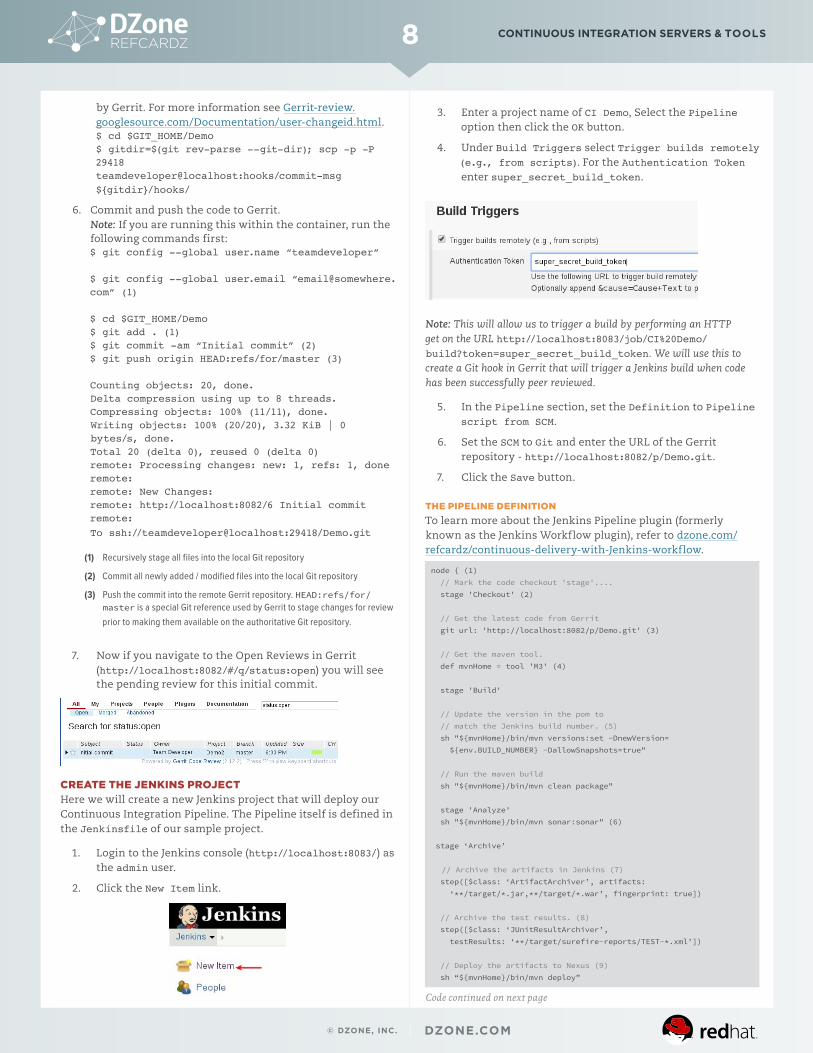
2. Click the New Item link.
3. Enter a project name of CI Demo, Select the Pipeline option then click the OK button.
4. Under Build Triggers select Trigger builds remotely (e.g., from scripts). For the Authentication Token enter super_secret_build_token.
Note: This will allow us to trigger a build by performing an HTTP get on the URL http://localhost:8083/job/CI%20Demo/build?token=super_secret_build_token. We will use this to create a Git hook in Gerrit that will trigger a Jenkins build when code has been successfully peer reviewed.
5. In the Pipeline section, set the Definition to Pipeline script from SCM.
6. Set the SCM to Git and enter the URL of the Gerrit repository - http://localhost:8082/p/Demo.git.
7. Click the Save button.
THE PIPELINE DEFINITIONTo learn more about the Jenkins Pipeline plugin (formerly known as the Jenkins Workflow plugin), refer to dzone.com/refcardz/continuous-delivery-with-Jenkins-workflow.
node { (1) // Mark the code checkout 'stage'.... stage 'Checkout' (2) // Get the latest code from Gerrit git url: 'http://localhost:8082/p/Demo.git' (3) // Get the maven tool. def mvnHome = tool 'M3' (4) stage 'Build' // Update the version in the pom to // match the Jenkins build number. (5) sh "${mvnHome}/bin/mvn versions:set -DnewVersion= ${env.BUILD_NUMBER} -DallowSnapshots=true" // Run the maven build sh "${mvnHome}/bin/mvn clean package" stage 'Analyze' sh "${mvnHome}/bin/mvn sonar:sonar" (6)
stage ‘Archive’ // Archive the artifacts in Jenkins (7) step([$class: ‘ArtifactArchiver’, artifacts: ‘**/target/*.jar,**/target/*.war’, fingerprint: true]) // Archive the test results. (8) step([$class: ‘JUnitResultArchiver’, testResults: ‘**/target/surefire-reports/TEST-*.xml’]) // Deploy the artifacts to Nexus (9) sh “${mvnHome}/bin/mvn deploy”
Code continued on next page
8 CONTINUOUS INTEGRATION SERVERS & TOOLS
© DZONE, INC. | DZONE.COM
(1)
stage concurrency:1, name: 'Deploy to Development' (10) echo 'Simulating deployment to Development Environment' echo "Downloading WAR file from http://localhost:8081/ repository/maven-releases/org/example/cisampleapp/${env. BUILD_NUMBER}/cisampleapp-${env.BUILD_NUMBER}.war" echo 'Deploying WAR file to development server(s)' sleep 2 stage concurrency:1, name: 'Deploy to Test' timeout(time: 7, unit: 'DAYS') { (11) input message: 'Do you want to deploy to Test?', submitter: 'admin' (12) } echo 'Simulating deployment to Test Environment' echo "Downloading WAR file from http://localhost:8081/ repository/maven-releases/org/example/cisampleapp/${env. BUILD_NUMBER}/cisampleapp-${env.BUILD_NUMBER}.war" echo 'Deploying WAR file to Test server(s)' sleep 5 stage concurrency:1, name: 'Deploy to Production' timeout(time: 7, unit: 'DAYS') { input message: 'Do you want to deploy to Production?', submitter: 'admin' } echo 'Simulating deployment to Production Environment' echo "Downloading WAR file from http://localhost:8081/ repository/maven-releases/org/example/cisampleapp/${env. BUILD_NUMBER}/cisampleapp-${env.BUILD_NUMBER}.war" echo 'Deploying WAR file to production server(s)' sleep 5 }
The node specifies that the contained steps will run on a Jenkins node. Optionally a node label can be specified to restrict the steps to run a specific node.
(2) Defining the first stage in the pipeline, named Checkout.
(3) Checkout the source code from our Git repository.
(4) Define the location of the Maven command line, from our previously configured M3 definition in the Jenkins configuration.
(5) Prior to running the build, use the maven set:versions command to update the version in our POM file with the Jenkins build number. This gives will give us code traceability back to the Jenkins build.
(6) Run the sonar plugin to perform static code analysis.
(7) Archive the built JARs and WARs within Jenkins. Record fingerprints for traceability.
(8) Archive the unit test results to enable the generation of trends.
(9) Issue the Maven deploy command to upload our artifacts (POM and WAR file) into Nexus. It will be versioned by the Jenkins build number as set by the Maven set:versions command.
(10) Simulate an automatic deployment to the development servers. concurrency:1 indicates that if there are multiple instances of this pipeline running only one may run this stage at a time. The WAR file would be downloaded from Nexus and deployed to application servers in the development environment.
(11) Simulate a deployment to the test environment.
(12) The input message will prompt before deploying into the specified environment. The submitter option specifies a user or group allowed to execute the step. In this case only the admin user can deploy to test or production.
CREATE THE GIT HOOK IN GERRITNote: You can skip this section if you are using the container image
We will create a hook in Gerrit that will automatically start our Jenkins pipeline when code has been successfully peer reviewed and submitted into the authoritative Git repository
managed by Gerrit. Note that it assumes the Jenkins login is admin/admin and the project name is CI Demo.
Note: We are using Gerrit to manage code review and promotion however other techniques and tools can be incorporated as well. An example would be the use of the Git flow workflow nvie.com/posts/a-successful-git-branching-model.
For more information on the change-merged Gerrit hook refer to review.typo3.org/Documentation/config-hooks.html#_change_merged.
$ mkdir ${CI_HOME}/gerrit/hooks $ printf '#!/bin/sh if [ $8 == \"Demo\" ]; then curl -u admin:admin http://localhost:8083/job/CI%%20Demo/build\?token=super_secret_build_token > /tmp/results.txt fi ' > ${CI_HOME}/gerrit/hooks/change-merged $ chmod 555 ${CI_HOME}/gerrit/hooks/change-merged
TESTING THE CI PIPELINE
APPROVE THE INITIAL CODE CHECKIN WITHIN GERRIT1. Log in to gerrit (http://localhost:8082/login) as the
Team Lead user.
2. Select All > Open. There will be a pending peer review labeled Initial commit.
3. Click the Initial commit link.
(1) This section lists all files that are modified and need to be removed as part of the review. Clicking a file in the list will reveal a diff from the previous version of the file. The diff screen also allows comments to be placed on lines of a file.
(2) Reply… allows a reviewer to submit overall feedback on a set of changes.
(3) The default behavior of Gerrit requires that at least one person of sufficient
9 CONTINUOUS INTEGRATION SERVERS & TOOLS
© DZONE, INC. | DZONE.COM

privilege give a vote of +2 in order for a change to be eligible for submission into the authoritative Git repository. This button provides a quick means of doing so.
4. Select the Reply… button
5. Enter a textual description and choose the +2 option so that the code can be submitted into the authoritative repository. Click the Post button.
6. Note that a Submit button is now available. This will place the change into the authoritative repository. Open a browser tab to the Jenkins CI Demo project (http://localhost:8083/job/CI%20Demo/).
7. Now click the Submit button in Gerrit and switch back to the Jenkins tab. A new build should start shortly, since our change-merged hook will be called by Gerrit.
8. If you hover the mouse over the Deploy to Test stage, you will be prompted to deploy to the test environment. Since the pipeline only allows the admin user to deploy, we can click the Proceed button. Repeat for Production.
VIEW THE NEXUS AND SONARQUBE RESULTSVerify the WAR file was uploaded into Nexus:
1. Log in to Nexus via http://localhost:8081/ using admin/admin123.
2. Select Browse > Components > maven-releases.
3. cisampleapp should be visible with its corresponding version number. Click it and you should see the WAR, pom and their corresponding checksums in the repository.
VIEW THE SONARQUBE ANALYSIS RESULTS1. Login to SonarQube via http://localhost:8084/ using
admin/admin.
2. The cisample application should be visible, click it.
3. Under Code Smells notice the rating of C.
4. Click the C then click the Listener.java source file.
5. Expand each item in the source code to reveal the code smells.
6. Explore other areas of the SonarQube interface.
UPDATE THE CODEHere we resolve some of the code smells and exercise the pipeline once again.
1. Update the Listener.java source file located in ${GIT_HOME}/Demo/src/main/java/org/example/Listener.java
a. Remove the line public int thisIsBad = 0;.b. Add the @Override annotation above each method: package org.example; import javax.servlet.ServletContextEvent; public class Listener implements javax.servlet.ServletContextListener { @Override public void contextDestroyed(ServletContextEvent arg0) { System.out.println("CI/CD Application initialized"); } @Override public void contextInitialized(ServletContextEvent arg0) { System.out.println("CI/CD Application exiting"); } ...
2. Commit and push the changes to Gerrit: $ git commit -am "Resolved some SonarQube issues" $ git push origin HEAD:refs/for/master
APPROVE THE CODE IN GERRIT1. Log back in to Gerrit as the teamlead user.
2. A new open peer review is now listed.
10 CONTINUOUS INTEGRATION SERVERS & TOOLS
© DZONE, INC. | DZONE.COM
3. Click the issue then click the file listing to view the diff.
4. Comments can be added to the diff by clicking the line number in one of the margins.
5. Click the browser back button to return to the previous screen.
6. Click the Code-Review+2 button to approve the change.
7. Click the Submit button to submit the change into the authoritative Git repository. Verify another build has started in Jenkins.
Verify SonarQube has fewer issues
8. Log in to SonarQube and note the number of Code Smells has decreased from five to two.
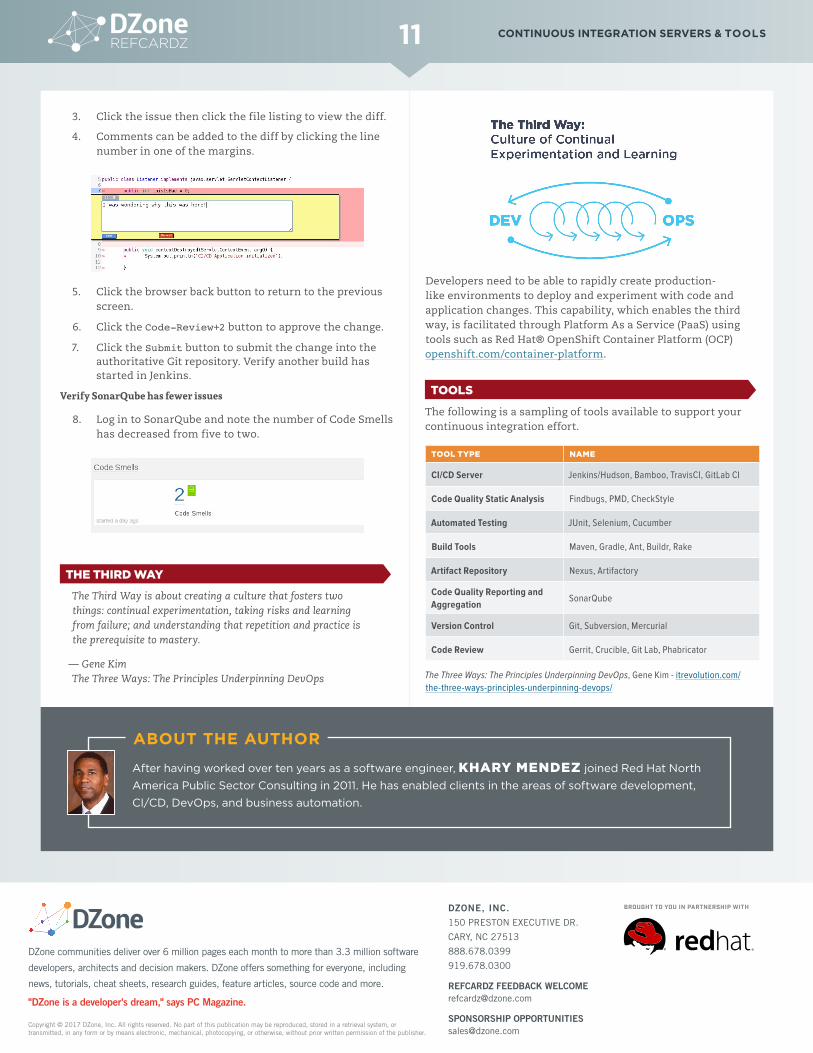
THE THIRD WAY
The Third Way is about creating a culture that fosters two things: continual experimentation, taking risks and learning from failure; and understanding that repetition and practice is the prerequisite to mastery.
— Gene Kim The Three Ways: The Principles Underpinning DevOps
Developers need to be able to rapidly create production-like environments to deploy and experiment with code and application changes. This capability, which enables the third way, is facilitated through Platform As a Service (PaaS) using tools such as Red Hat® OpenShift Container Platform (OCP) openshift.com/container-platform.
TOOLS
The following is a sampling of tools available to support your continuous integration effort.
TOOL TYPE NAME
CI/CD Server Jenkins/Hudson, Bamboo, TravisCI, GitLab CI
Code Quality Static Analysis Findbugs, PMD, CheckStyle
Automated Testing JUnit, Selenium, Cucumber
Build Tools Maven, Gradle, Ant, Buildr, Rake
Artifact Repository Nexus, Artifactory
Code Quality Reporting and Aggregation
SonarQube
Version Control Git, Subversion, Mercurial
Code Review Gerrit, Crucible, Git Lab, Phabricator
The Three Ways: The Principles Underpinning DevOps, Gene Kim - itrevolution.com/the-three-ways-principles-underpinning-devops/
DZONE, INC.
150 PRESTON EXECUTIVE DR.
CARY, NC 27513
888.678.0399
919.678.0300
REFCARDZ FEEDBACK [email protected]
SPONSORSHIP OPPORTUNITIES [email protected]
Copyright © 2017 DZone, Inc. All rights reserved. No part of this publication may be reproduced, stored in a retrieval system, or transmitted, in any form or by means electronic, mechanical, photocopying, or otherwise, without prior written permission of the publisher.
DZone communities deliver over 6 million pages each month to more than 3.3 million software
developers, architects and decision makers. DZone offers something for everyone, including
news, tutorials, cheat sheets, research guides, feature articles, source code and more.
"DZone is a developer's dream," says PC Magazine.
After having worked over ten years as a software engineer, KHARY MENDEZ joined Red Hat North America Public Sector Consulting in 2011. He has enabled clients in the areas of software development, CI/CD, DevOps, and business automation.
ABOUT THE AUTHOR
BROUGHT TO YOU IN PARTNERSHIP WITH
11 CONTINUOUS INTEGRATION SERVERS & TOOLS