Embed Size (px)
DESCRIPTION
A few tricks to take you beyond the basics of Microsoft Office 2010. GCPS Tech Tips. Microsoft Word 2010: Adding A Watermark. WORD 2010: Adding A Watermark. - PowerPoint PPT Presentation
Citation preview

Gwinnett County Public Schools
A few tricks to take you beyond the basics of Microsoft Office 2010
Microsoft Word 2010: Adding A Watermark
GCPS Tech Tips
WORD 2010: Adding A Watermark
Gwinnett County Public Schools is committed to providing information related to student technology use in a manner that is clear, concise, organized, accessible, and current. To that end, GCPS has provided articles and handouts on its web site.
The following resource is provided for information only and is NOT an official policy or procedure of Gwinnett County Public Schools. This resource may be used by schools and the school communities to share information and ideas around student technology use.
Should a conflict between the information on this site and the existing policy, regulation or rule occur, then the official or approved policy, rule or regulation supersedes the resources in this document.
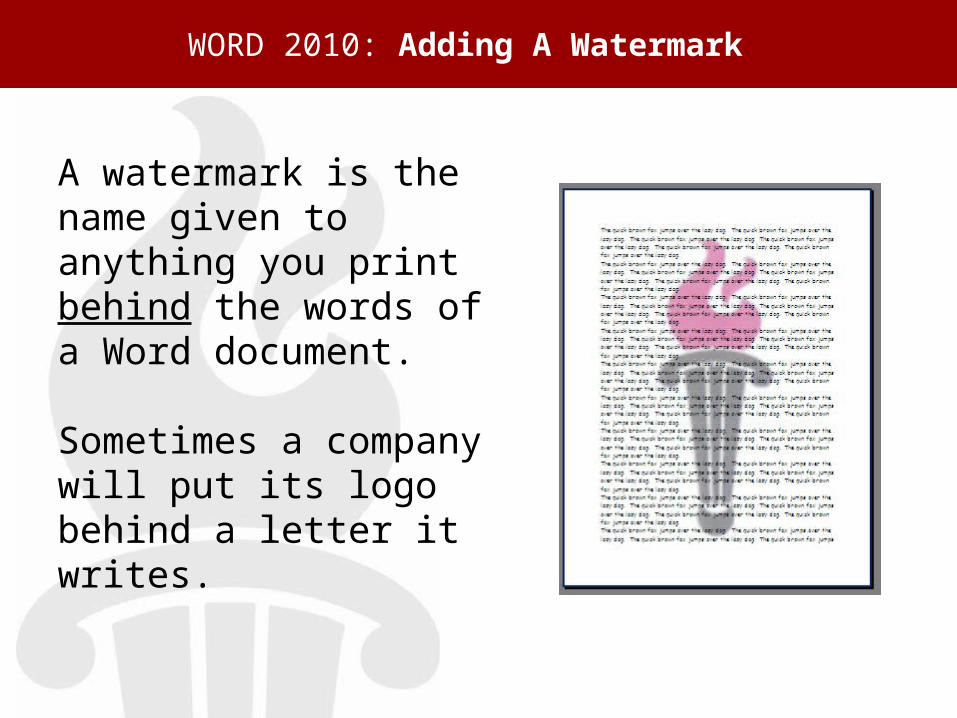
A watermark is the name given to anything you print behind the words of a Word document.
Sometimes a company will put its logo behind a letter it writes.
WORD 2010: Adding A Watermark
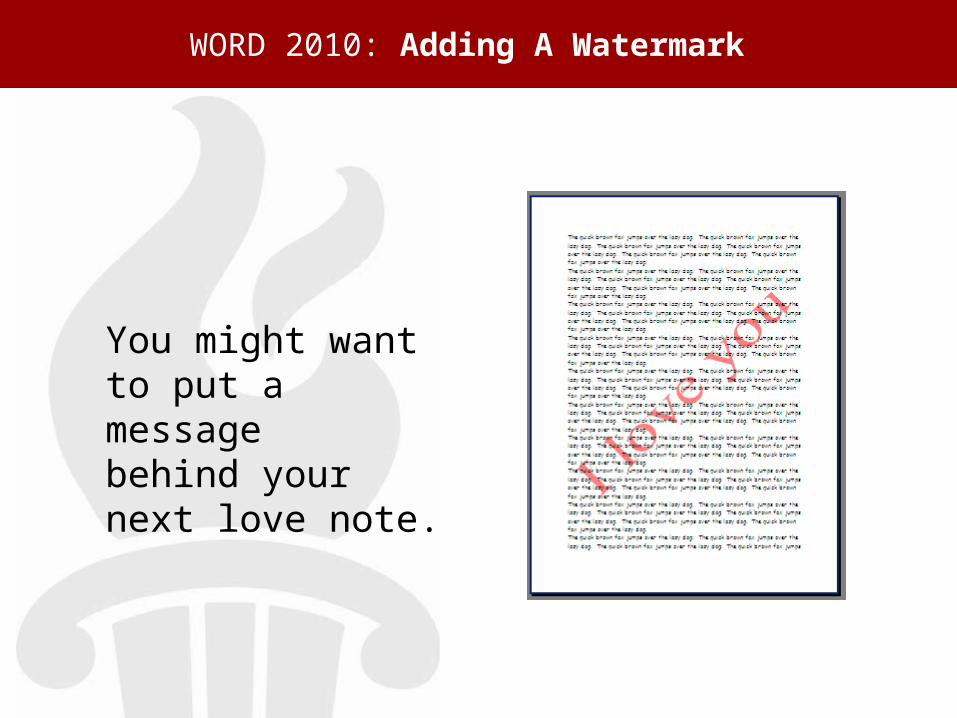
You might want to put a message behind your next love note.
WORD 2010: Adding A Watermark
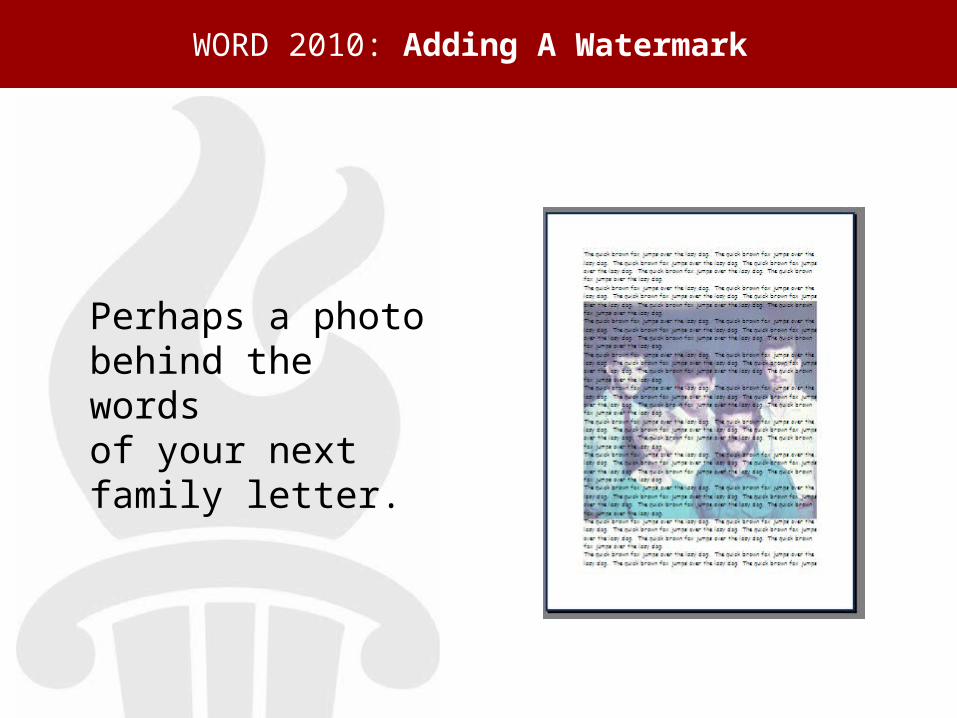
Perhaps a photo behind the words of your next family letter.
WORD 2010: Adding A Watermark
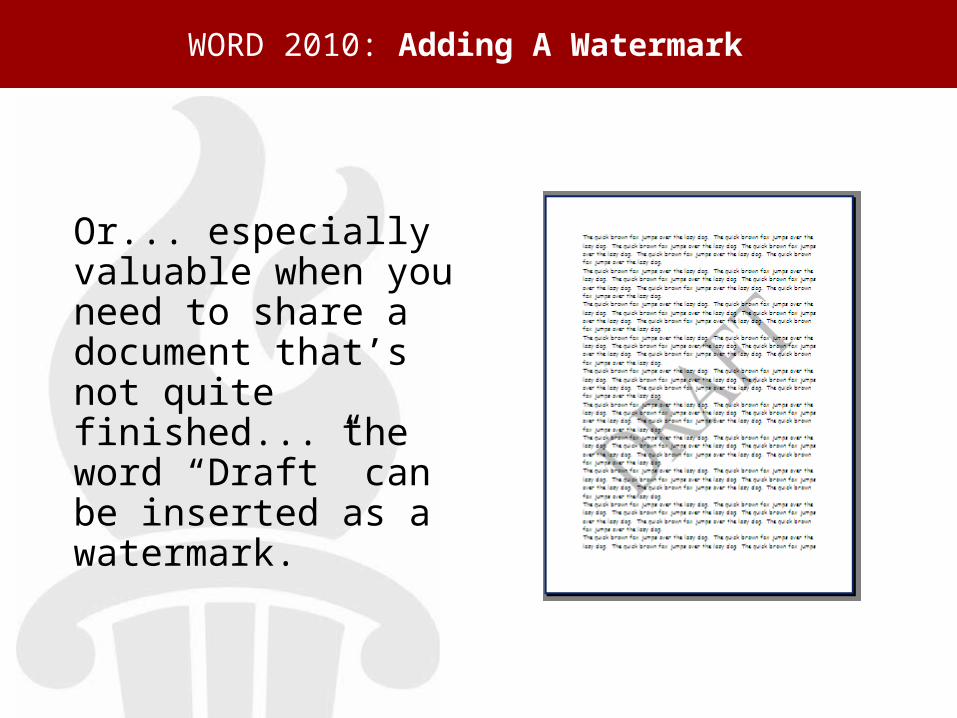
Or... especially valuable when you need to share a document that’s not quite finished... the word “Draft” can be inserted as a watermark.
WORD 2010: Adding A Watermark
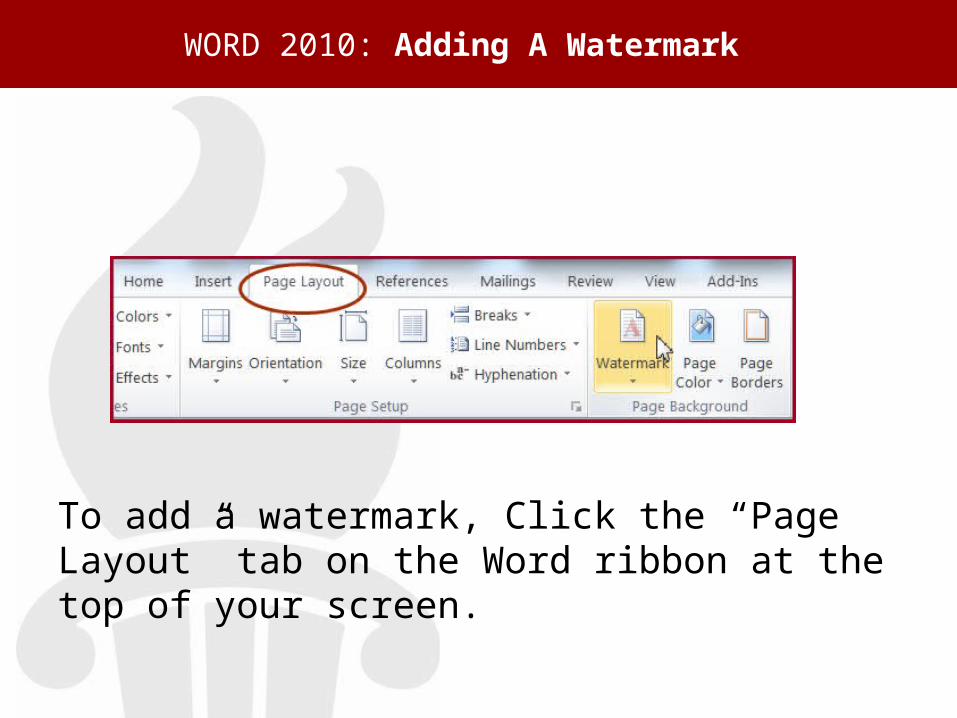
To add a watermark, Click the “Page Layout” tab on the Word ribbon at the top of your screen.
WORD 2010: Adding A Watermark
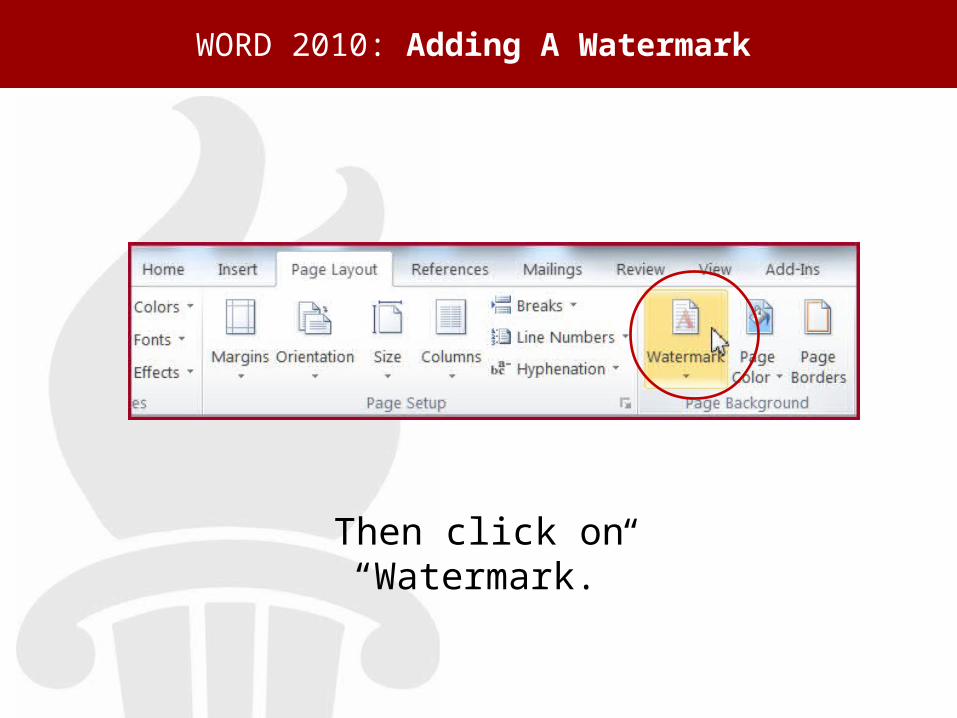
Then click on “Watermark.”
WORD 2010: Adding A Watermark
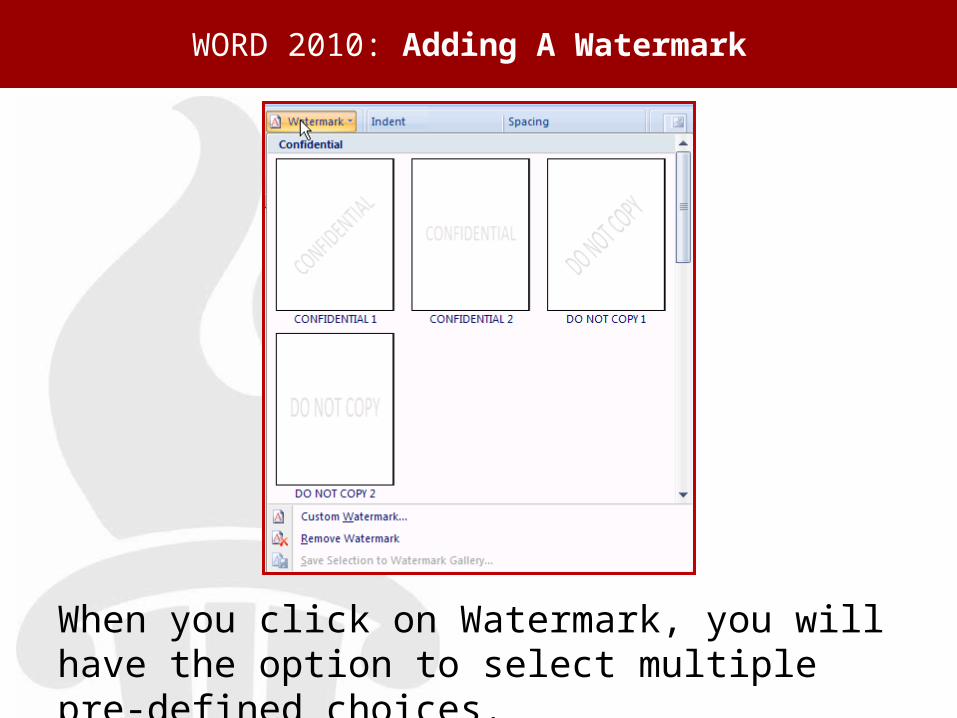
When you click on Watermark, you will have the option to select multiple pre-defined choices.
WORD 2010: Adding A Watermark
WORD 2007: Adding a watermark
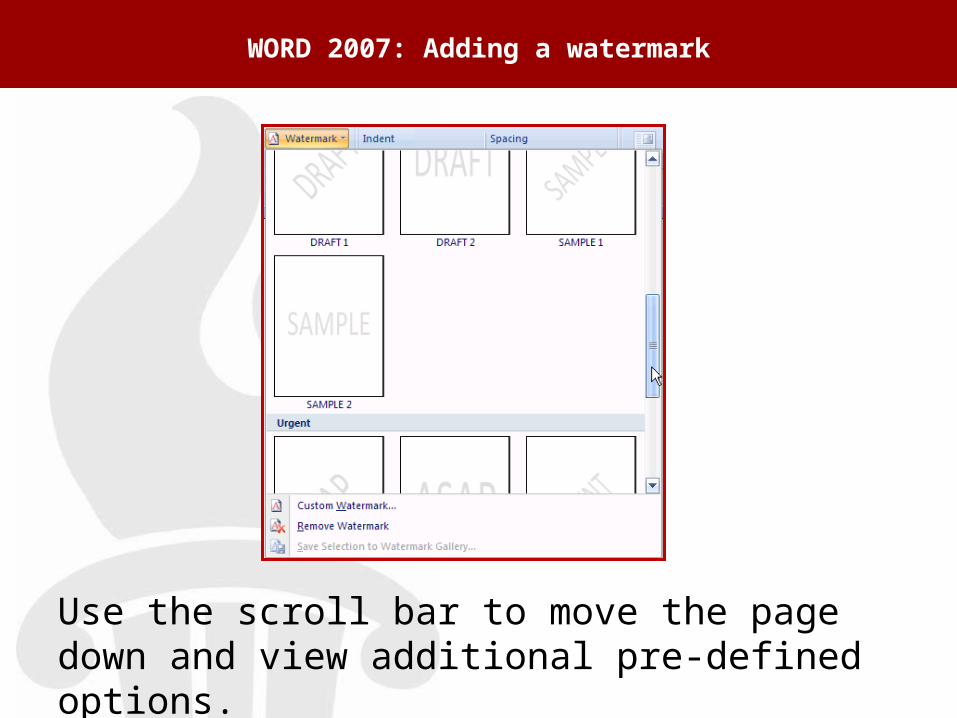
Use the scroll bar to move the page down and view additional pre-defined options.
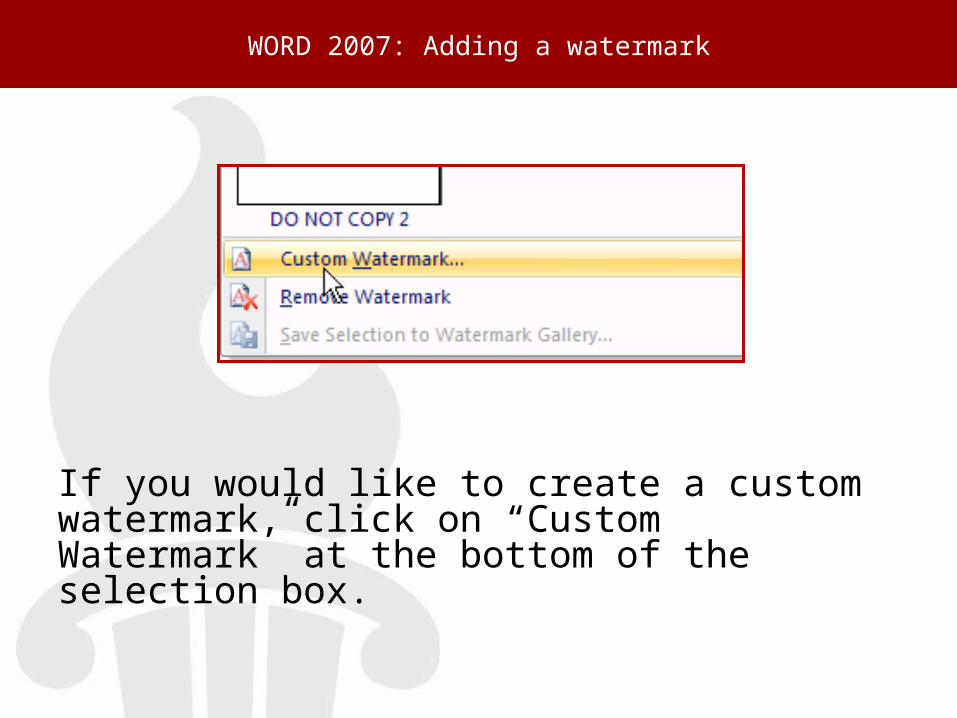
If you would like to create a custom watermark, click on “Custom Watermark” at the bottom of the selection box.
WORD 2007: Adding a watermark
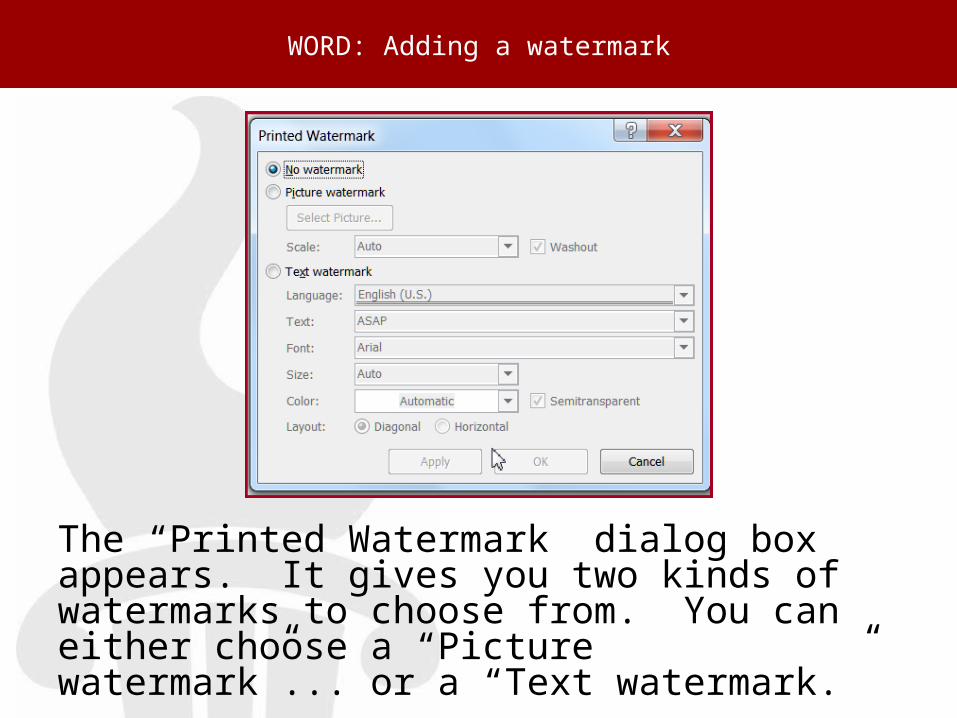
The “Printed Watermark” dialog box appears. It gives you two kinds of watermarks to choose from. You can either choose a “Picture watermark”... or a “Text watermark.”
WORD: Adding a watermark
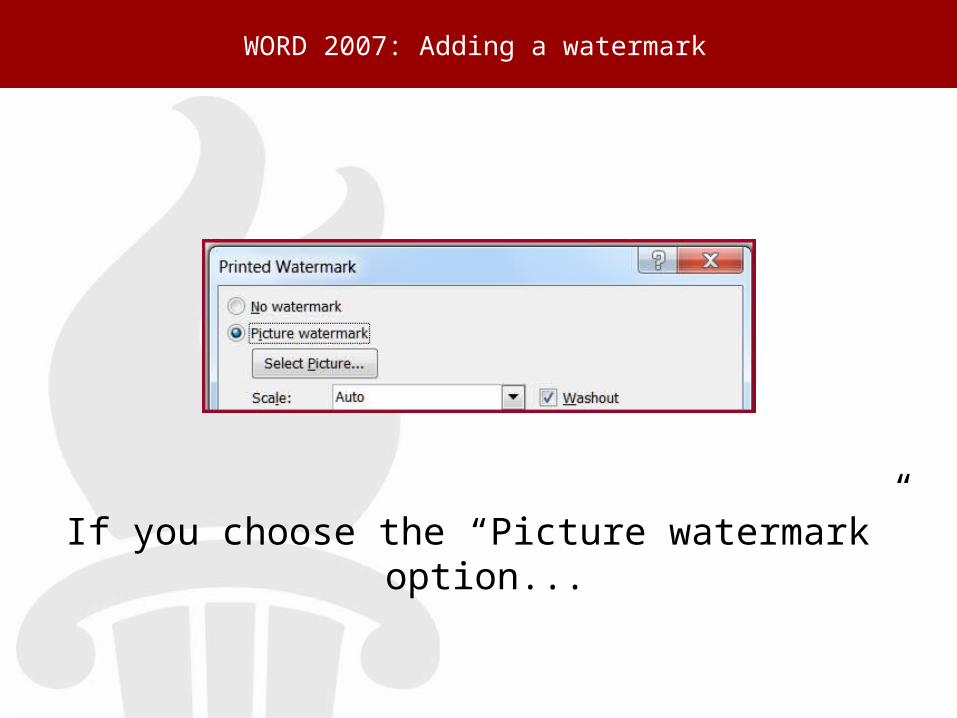
If you choose the “Picture watermark” option...
WORD 2007: Adding a watermark
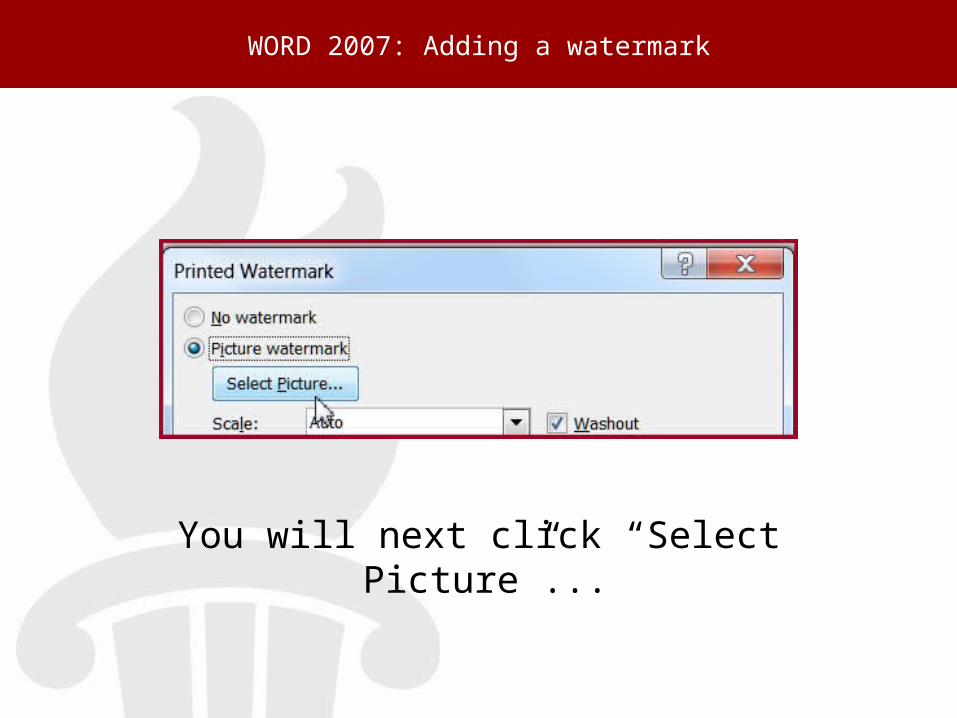
You will next click “Select Picture”...
WORD 2007: Adding a watermark
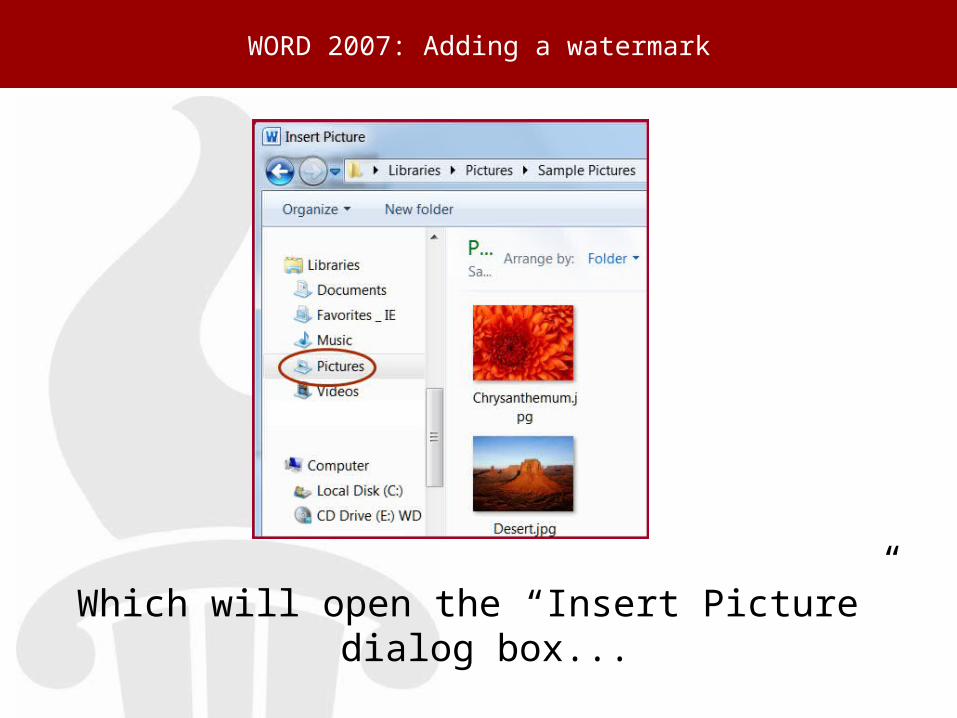
Which will open the “Insert Picture” dialog box...
WORD 2007: Adding a watermark
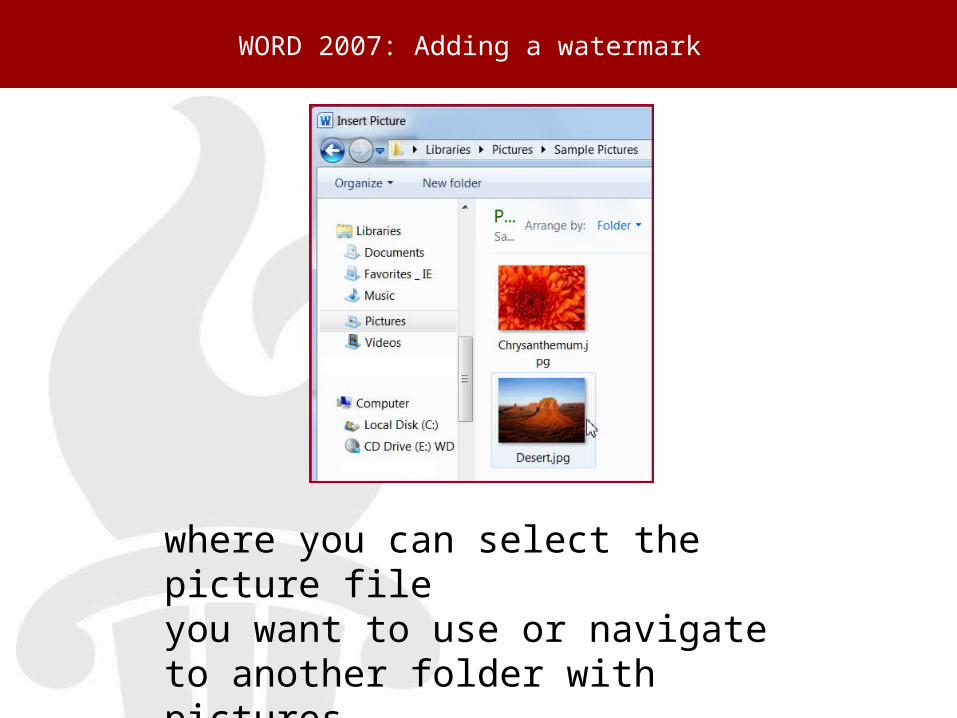
where you can select the picture file you want to use or navigate to another folder with pictures...
WORD 2007: Adding a watermark
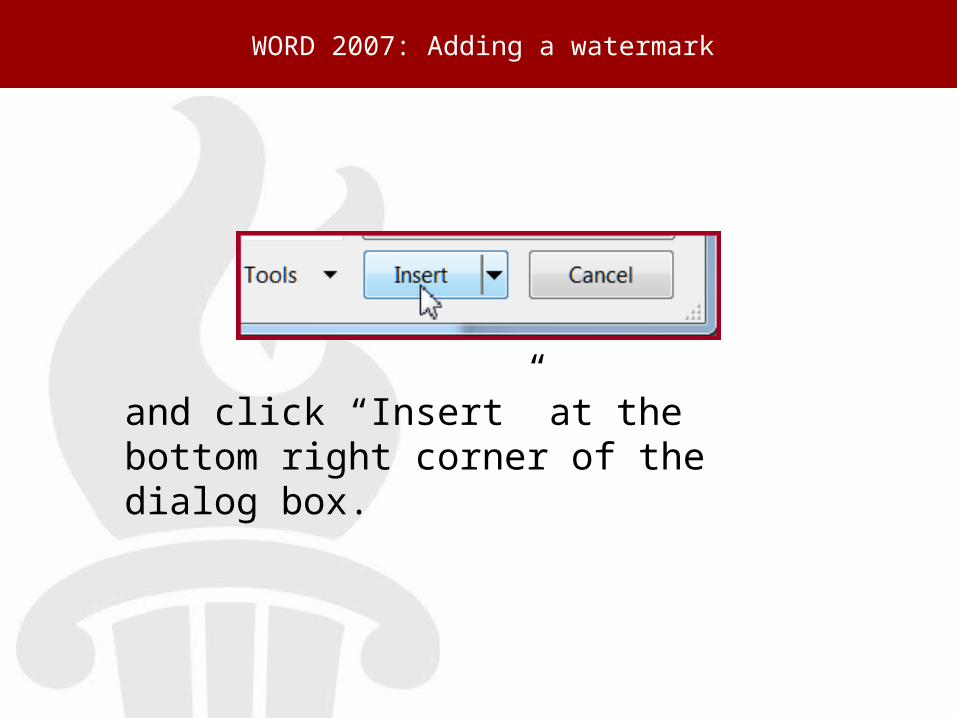
and click “Insert” at the bottom right corner of the dialog box.
WORD 2007: Adding a watermark
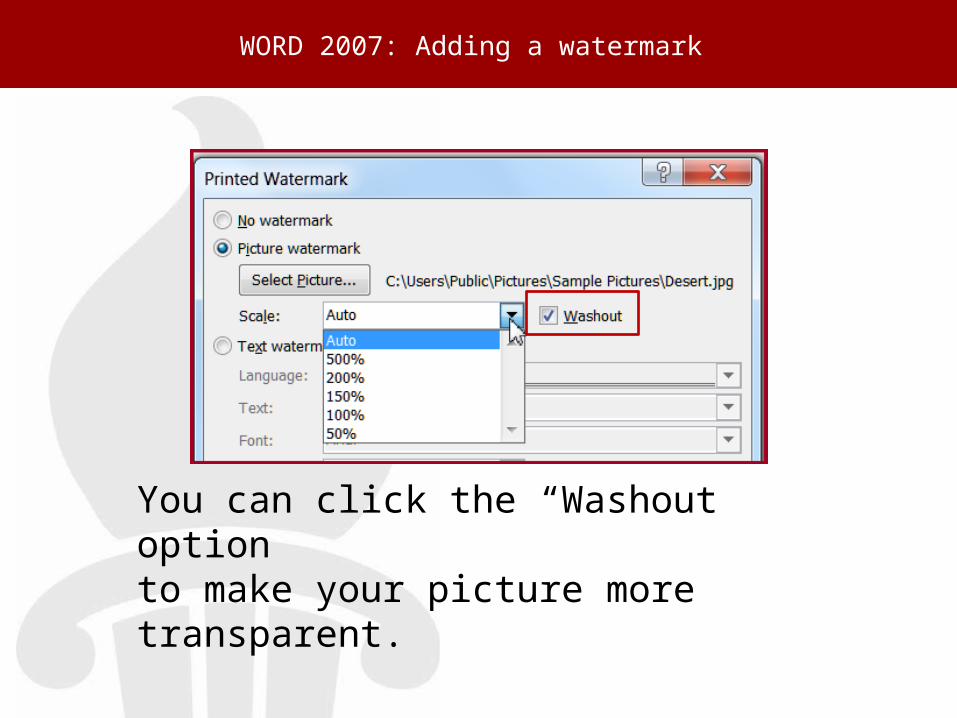
You can click the “Washout” option to make your picture more transparent.
WORD 2007: Adding a watermark
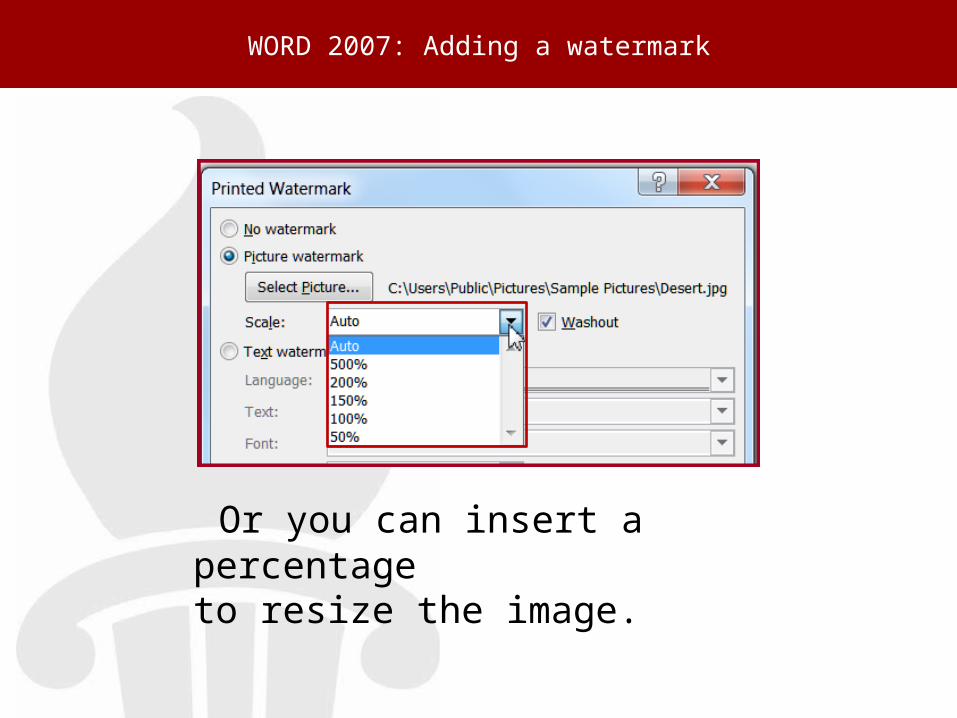
Or you can insert a percentage to resize the image.
WORD 2007: Adding a watermark
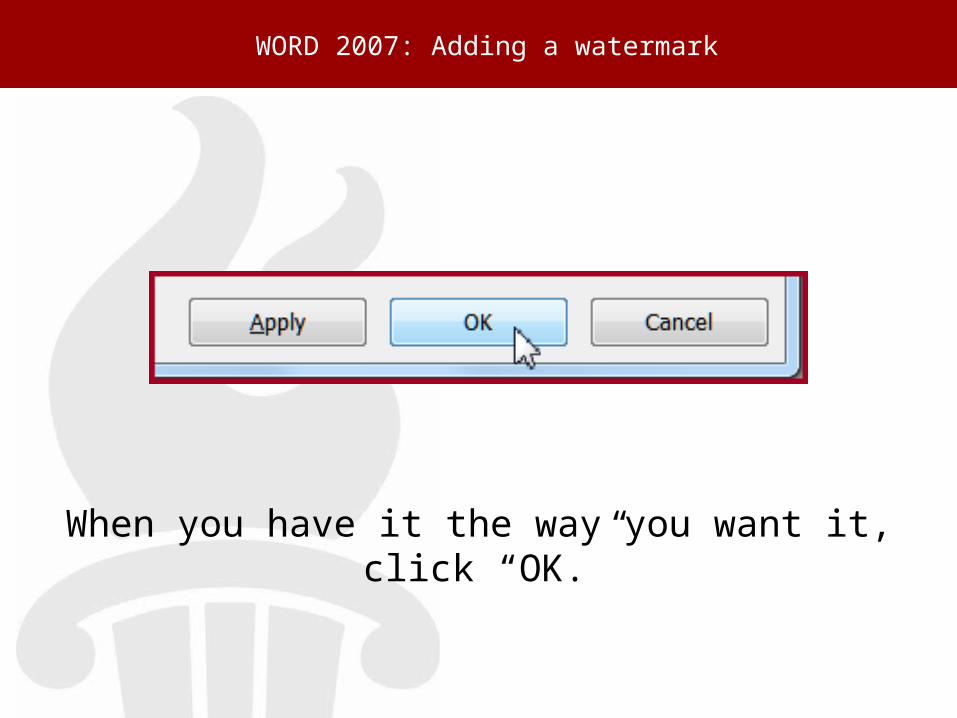
When you have it the way you want it, click “OK.”
WORD 2007: Adding a watermark
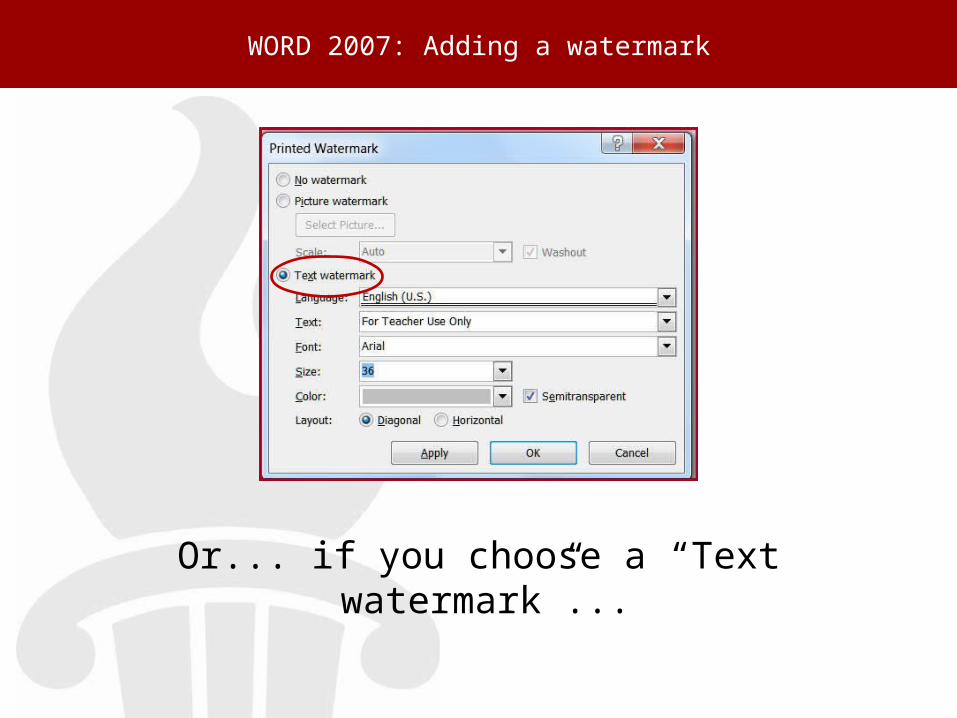
Or... if you choose a “Text watermark”...
WORD 2007: Adding a watermark
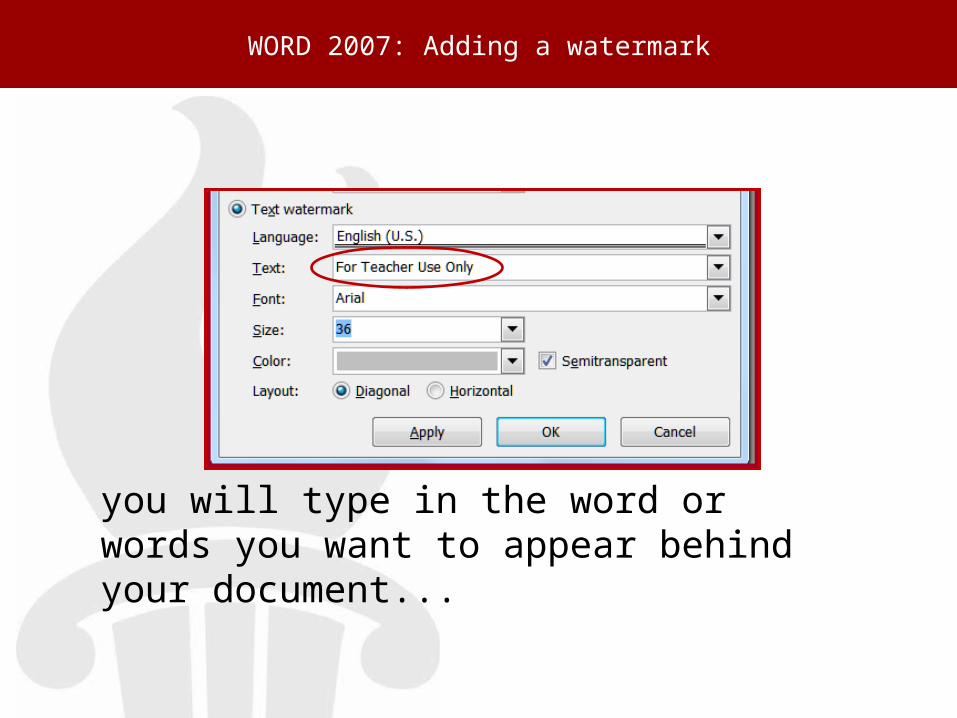
you will type in the word or words you want to appear behind your document...
WORD 2007: Adding a watermark
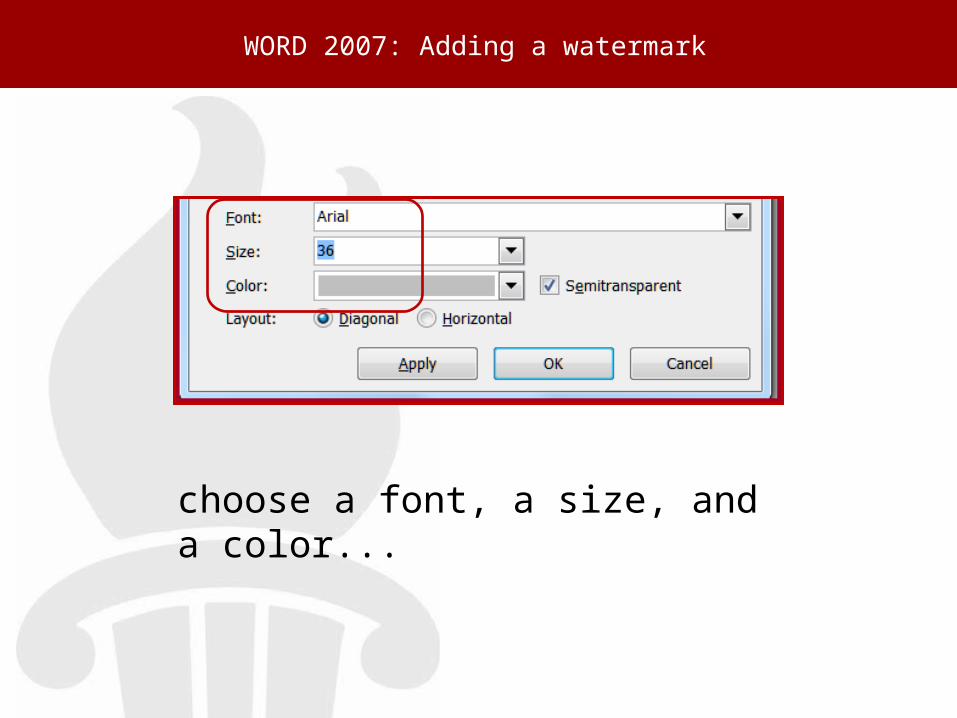
choose a font, a size, and a color...
WORD 2007: Adding a watermark

and indicate whether you want the watermark semi-transparent or not...
WORD 2007: Adding a watermark
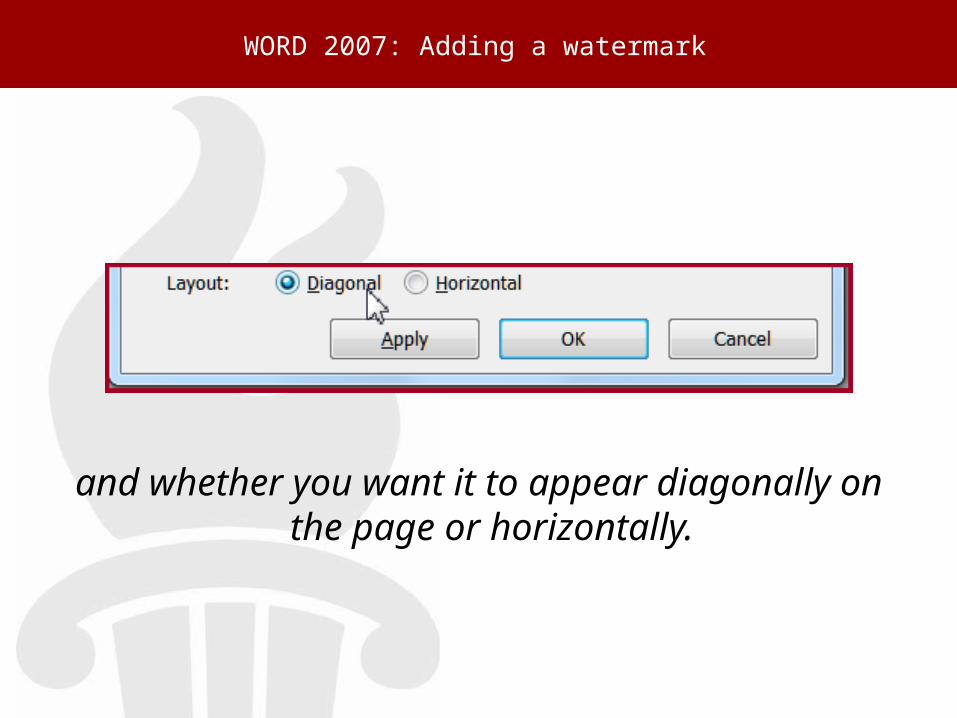
and whether you want it to appear diagonally on the page or horizontally.
WORD 2007: Adding a watermark
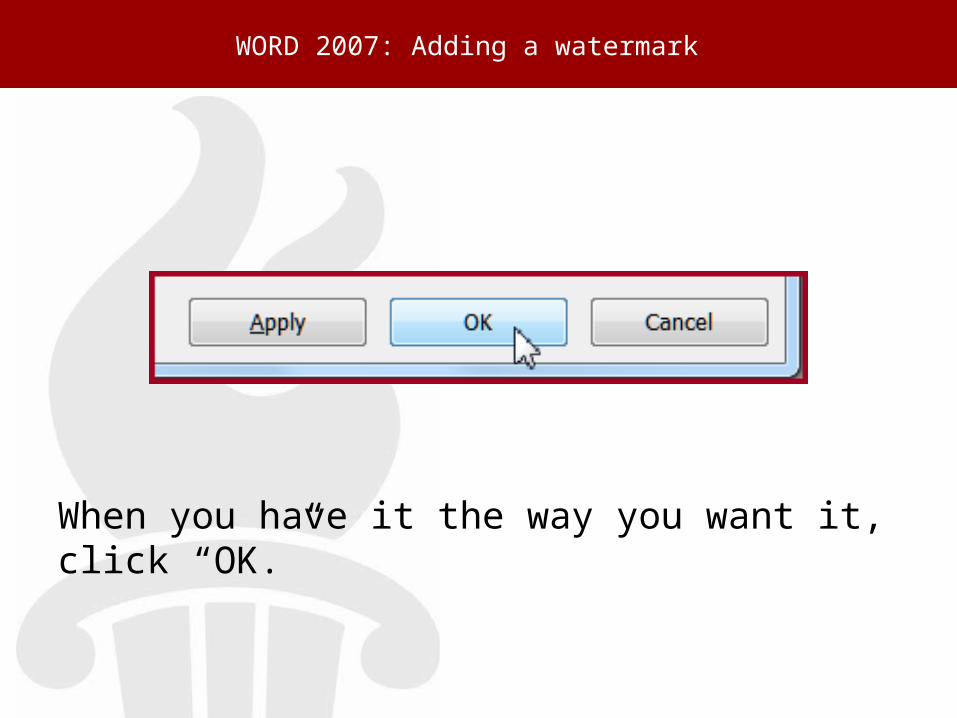
When you have it the way you want it, click “OK.”
WORD 2007: Adding a watermark
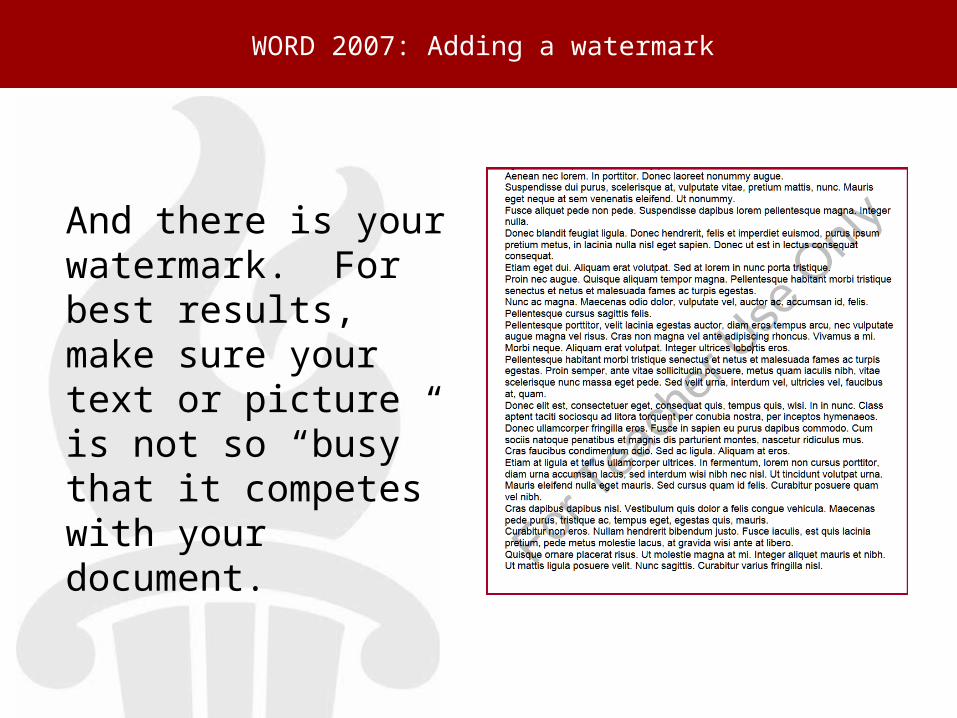
And there is your watermark. For best results, make sure your text or picture is not so “busy” that it competes with your document.
WORD 2007: Adding a watermark
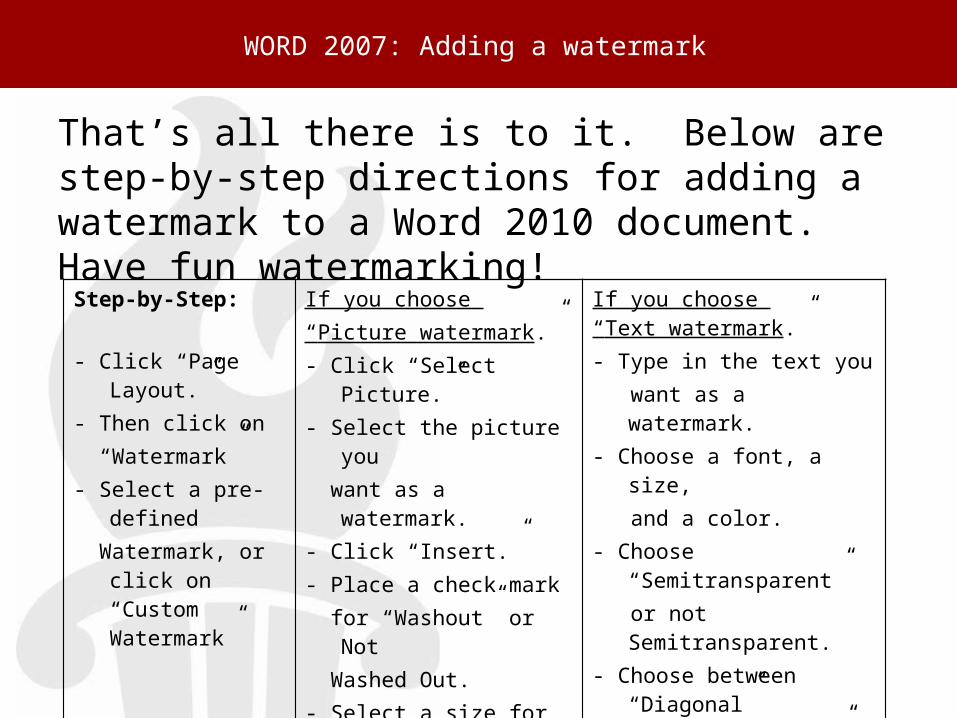
That’s all there is to it. Below are step-by-step directions for adding a watermark to a Word 2010 document. Have fun watermarking!
Step-by-Step:
- Click “Page Layout.”- Then click on “Watermark”- Select a pre-defined Watermark, or click
on “Custom Watermark”
If you choose “Picture watermark.”- Click “Select Picture.”- Select the picture you want as a watermark. - Click “Insert.”- Place a check mark for “Washout” or Not Washed Out. - Select a size for the image. - And click “OK.”
If you choose “Text watermark.”- Type in the text you want as a watermark.- Choose a font, a size, and a color.- Choose “Semitransparent” or not Semitransparent.- Choose between “Diagonal” and “Horizontal.” - And click “OK.”
WORD 2007: Adding a watermark


![[Speak2me] Pitching: basics, tips&tricks](https://img.pdfslide.us/doc/110x75/58aea8031a28abd43a8b65f9/speak2me-pitching-basics-tipstricks.jpg)