Embed Size (px)
Citation preview
Word Processing 2010 Stage 1
West Auckland Telephone 837 7600
Material in this manual must not be reproduced without the permission of SeniorNet West Auckland Inc.
Tutors & Phone Numbers
…………………………….......…………………………….
……………………………………………………………….
August 2013
TABLE OF CONTENTSSeniorNet West Auckland Page 1
Microsoft
Word 2010
Stage One
Word Processing 2010 Stage 1
Introduction..............................................................................3How to start..............................................................................3Lesson One................................................................................4Ex 1.1: Exploring the Word window.............................................4Ex 1.2: Manipulating Windows – Maximize , Restore & Minimize Windows...................................................................................6Ex 1.3: The “Open” Dialog Box...................................................7Ex 1.4: Opening a File................................................................7Ex 1.5: Navigating through a Document......................................8Ex 1.6: Simple Formatting.........................................................9Lesson Two..............................................................................11Ex 2.1: Indenting using the tab key...........................................11Ex 2.2: Creating a Folder..........................................................12Ex 2.3: Saving a Document.......................................................13Ex 2.4 : Using the Home Ribbon for Formatting and Cut, Copy and Paste.......................................................................................14Ex 2.5: More experimenting......................................................17Lesson Three...........................................................................18Ex 3.1: Checking the Spelling...................................................18Ex 3.2: Hidden Characters and Page Breaks.............................20Ex 3.3: Further Spell Check......................................................21Ex 3.4: The Filing System.........................................................22Ex 3.5: Creating Folders...........................................................24Lesson Four.............................................................................27Ex 4.1 Highlighting..................................................................27Ex 4.2: Symbols & Clip Art.......................................................28Ex 4.3: Borders and Shading.....................................................30Ex 4.4: Deleting Files & Folders...............................................31About Printing.........................................................................32Notes......................................................................................34
SeniorNet West Auckland Page 2
Word Processing 2010 Stage 1
INTRODUCTION
Word 2010 is similar to Word 2007 but significantly different from previous versions of Word and it has been necessary to create a course using, for the most part, exercises from previous manuals but with changes that allow the use of the new interface.
New features are introduced progressively during the course and members with little or no experience, as well as those with experience of earlier versions, should have no difficulties.
Our Word Processing course for Word 2010 has been split into 3 stages of 4 weeks each. Those who complete the full course will have acquired a good understanding of the most common features of the program.
As always there are many features within the Word program that are not fully covered in our course. With the confidence gained by completing it you will be able to experiment further.
Tutors offer their services voluntarily and aim to pass on knowledge and skills they themselves have acquired, often only recently. Members are encouraged to help each other. It makes the tutor’s task easier and adds greatly to the fun! Practice may not always make perfect but at least it will jog the memory and is good preparation for the next session. Tutors rely on that.
The manual does not claim to be perfect and is subject to periodic revision. Neither tutor nor member has to prove anything to anyone. With patience and appreciation for each other’s needs, strengths and limitations; with goodwill and a sense of humour, you will enjoy this course.
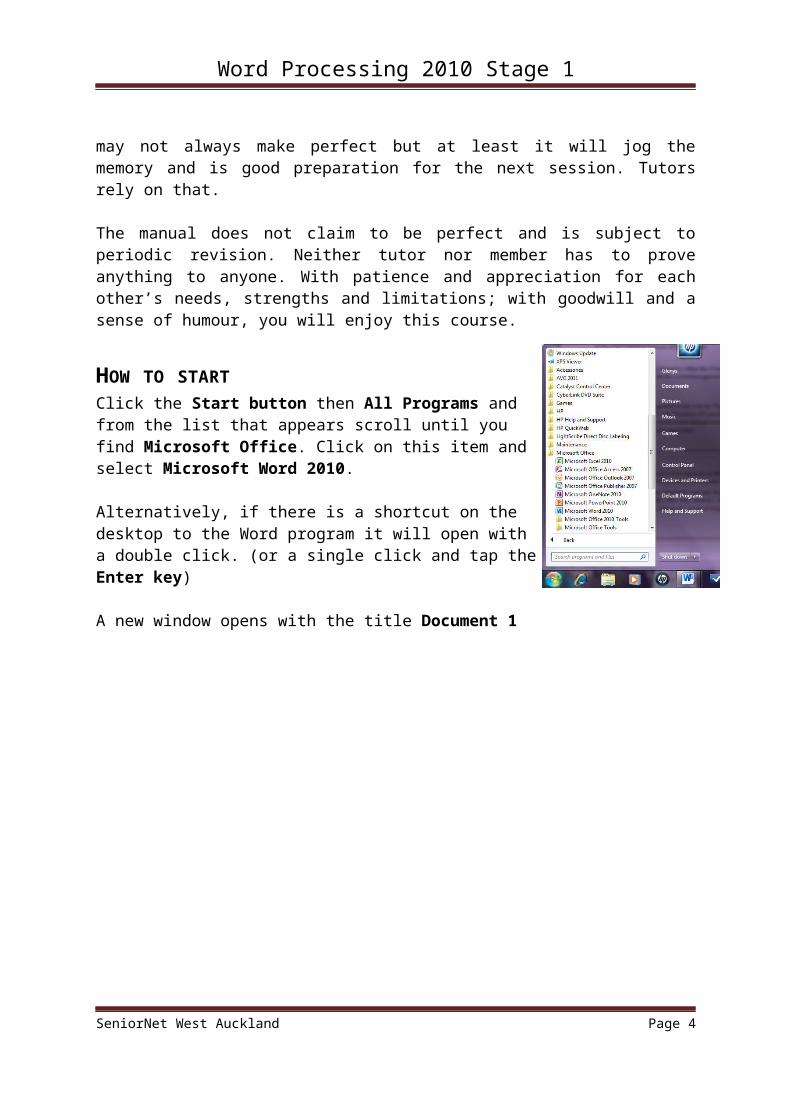
HOW TO STARTClick the Start button then All Programs and from the list that appears scroll until you find Microsoft Office. Click on this item and select Microsoft Word 2010.
Alternatively, if there is a shortcut on the desktop to the Word program it will open with a double click. (or a single click and tap the Enter key)
A new window opens with the title Document 1
SeniorNet West Auckland Page 3
Word Processing 2010 Stage 1
MICROSOFT WORD 2010LESSON ONE
In this lesson Exploring the Word window Manipulating Windows Opening files Navigating through a document Basic formatting Closing
EX 1.1: EXPLORING THE WORD WINDOW
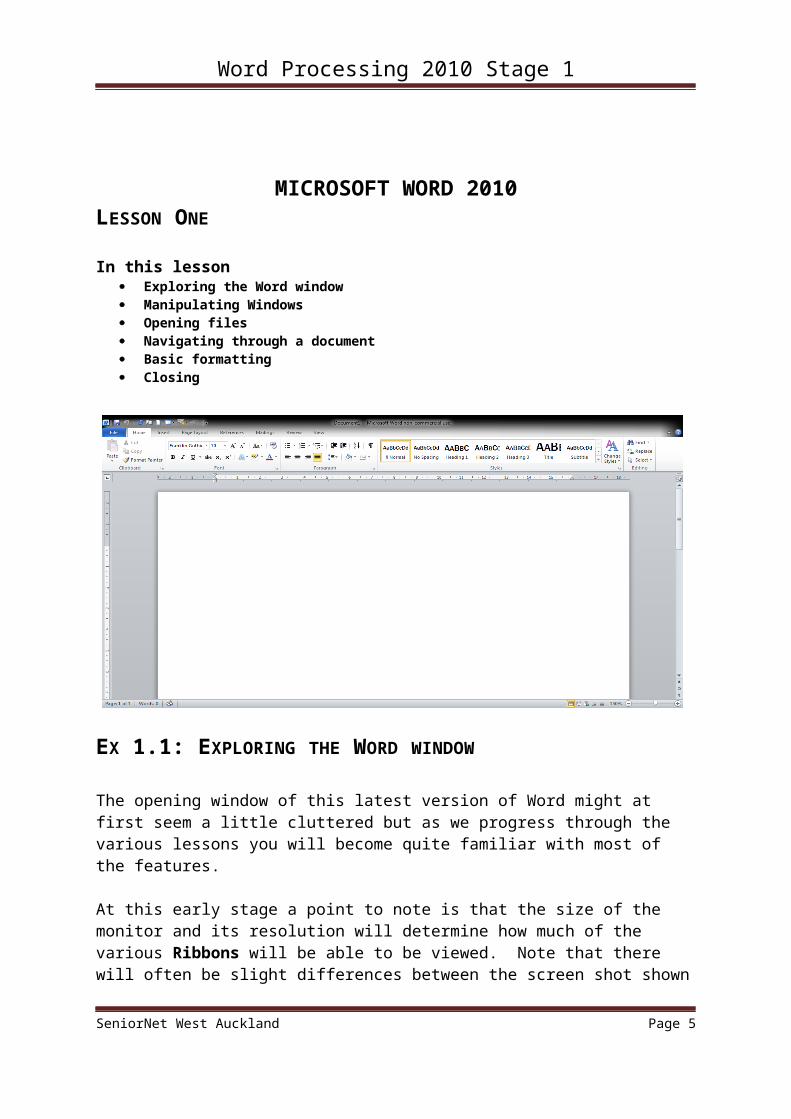
The opening window of this latest version of Word might at first seem a little cluttered but as we progress through the various lessons you will become quite familiar with most of the features.
At this early stage a point to note is that the size of the monitor and its resolution will determine how much of the various Ribbons will be able to be viewed. Note that there will often be slight differences between the screen shot shown above and the computer you are using. This is because screens can easily be personalised i.e. changed to suit the user.
Title Bar This is the bar at the very top of the window. It displays the name of the document you are working on. It also includes the standard Minimize, Restore and Close buttons.
SeniorNet West Auckland Page 4
Word Processing 2010 Stage 1
The Ribbon Across the top of the screen you will see one of the main features of this version of Word. By default, a new document window opens with the Home tab of the Ribbon activated. This is the tab that we will initially use. By clicking on the tabs for Insert, Page Layout etc the other varieties of Ribbons become available to us.
To restore Ribbons if they are not visible, double click on the Home Ribbon.
The File MenuThis is the large button at the top left corner of the Word window. A click on this will reveal a menu of useful shortcuts together with a list of recently opened files. By pointing the cursor at some of these we have access to further options.
Quick Access ToolbarJust to the right of the Office Button is the Quick Access toolbar. It is a convenient place to store often used Word commands. More items can be added by right clicking a button on an open ribbon and choosing Add to Quick Access Toolbar. Please do not add extra buttons on the club’s computers.
RulersA vertical ruler at the left and a horizontal ruler just beneath the ribbon should be shown on the Word page. If not, open the View ribbon and put a tick next to Ruler in the Show group – (be careful not to tick Gridlines)
Task PaneThe Task Pane will automatically appear at the right side of the Word screen when needed. It helps complete common tasks.
Status Bar and Zoom ControlInformation and tools for zoom control are at the foot of the screen, right hand side and are self-explanatory.
As we progress the Ribbons and buttons within them will become more familiar. In the meantime spend a little time opening the various ribbons and without clicking hold the mouse over some of the buttons to see the options available.
Help Menu = F1 = Help or - ? in a circle at right hand top of screen
SeniorNet West Auckland Page 5
Word Processing 2010 Stage 1
EX 1.2: MANIPULATING WINDOWS – MAXIMIZE, RESTORE & MINIMIZE WINDOWS
MaximizeIn order to Maximize (make full screen) an active Window you can either:
Click on the “Maximize” button in the top right corner, or Double-click on the Title bar, or Click on the appropriate Minimized task icon in the Taskbar at the
right bottom of the screen.
RestoreIn order to Restore (Intermediate display mode – neither Maximized nor Minimized) you can either:
Click on the “Restore” button in the top right corner, or Double-click on the Title bar
MinimizeIn order to Minimize the active Window and place it as an icon in the Taskbar at the bottom of the screen, you:
Click on the “Minimize” button in the top right corner.
Resizing and MovingWhen the window is in the restore display mode (neither maximized, nor minimized) it can be resized and/or moved.
Ensure that the window is in the Restore mode.
Move the pointer up to the top border line. Wriggle it until it changes into the re-size handle. Drag the borderline up and down by this handle.
Do a similar exercise with the right and left borderlines and resize handle
Move the pointer to the bottom right corner, where the borderlines meet. Wriggle until you see the resize handle. Drag it along and watch the window change shape.
To move the Window. Place the mouse pointer in the title bar of Document 1 and drag the document about. Drag and release the mouse button at various positions of the window. Finally, place the window roughly back in its original position again and maximize.
SeniorNet West Auckland Page 6
Word Processing 2010 Stage 1
EX 1.3: THE “OPEN” DIALOG BOX
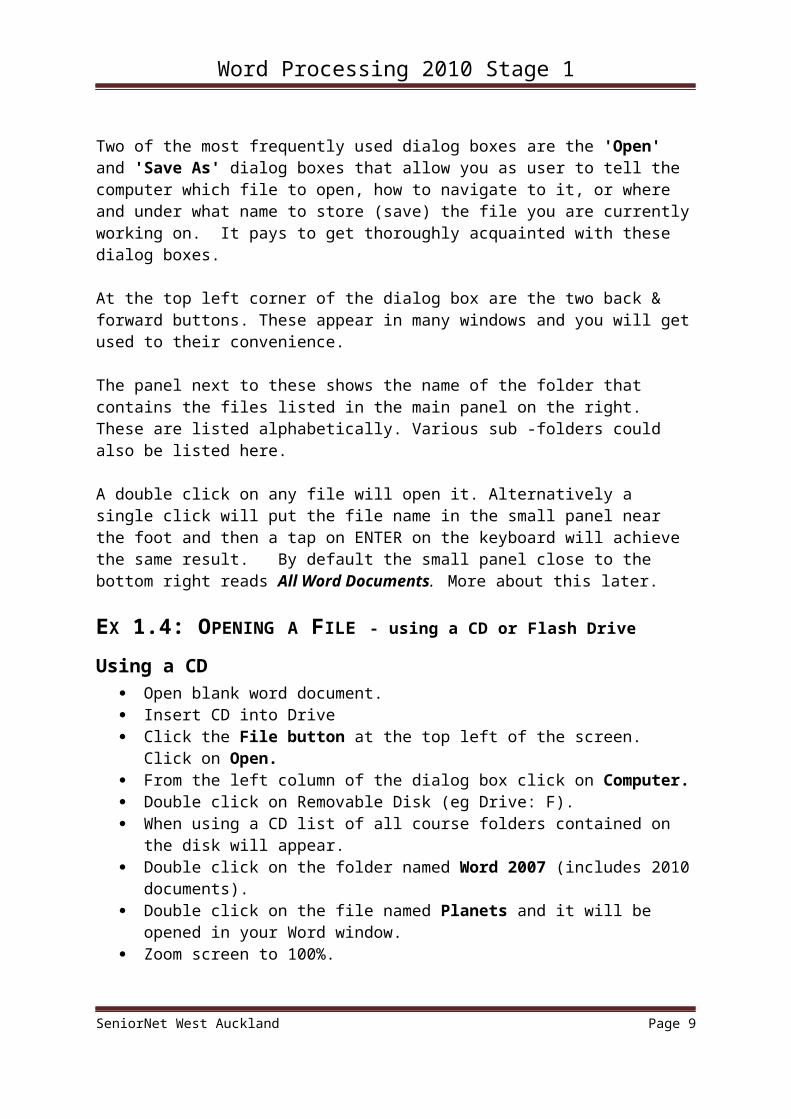
Dialog boxes provide a means of input by the user to the application that is running (having a dialogue). Open Dialogue Box
Two of the most frequently used dialog boxes are the 'Open' and 'Save As' dialog boxes that allow you as user to tell the computer which file to open, how to navigate to it, or where and under what name to store (save) the file you are currently working on. It pays to get thoroughly acquainted with these dialog boxes.
At the top left corner of the dialog box are the two back & forward buttons. These appear in many windows and you will get used to their convenience.
The panel next to these shows the name of the folder that contains the files listed in the main panel on the right. These are listed alphabetically. Various sub -folders could also be listed here.
A double click on any file will open it. Alternatively a single click will put the file name in the small panel near the foot and then a tap on ENTER on the keyboard will achieve the same result. By default the small panel close to the bottom right reads All Word Documents. More about this later.
EX 1.4: OPENING A FILE - using a CD or Flash Drive
Using a CD Open blank word document. Insert CD into Drive Click the File button at the top left of the screen. Click on Open. From the left column of the dialog box click on Computer. Double click on Removable Disk (eg Drive: F). When using a CD list of all course folders contained on the disk will
appear. Double click on the folder named Word 2007 (includes 2010
documents).
SeniorNet West Auckland Page 7
Word Processing 2010 Stage 1
Double click on the file named Planets and it will be opened in your Word window.
Zoom screen to 100%.
Using a Flash Drive/Memory Stick Open a blank word document. Insert Flash Drive into USB port Click the File button at the top left of the screen. Click on Open. From the left column of the dialog box click on Computer. Double click on Removable Disk (eg Drive: F ). When using a Flash Drive, a list of all course folders contained on
the drive will appear. Click on SNWA Coursework Course Files Word 2007. Double click on the file Planets. Zoom screen to 100%.
In a similar way open the file named Speed. This time, let’s look at the Dialog Box as on previous page.Hover your mouse over the W (Windows icon). The cursor will show 2 images for the 2 open files and their names will appear on the Task Bar at the foot of the screen. On the Task Bar the currently open active window is shown in a darker (or stronger) colour than any others. Clicking on any of these documents on the task bar will make that document the active one.
Arrange for both these windows to be in the restore mode. They are then able to be moved and any portion of the inactive one can be clicked to make it active.
Close the Speed document, click the File and choose Close. Do not click the RED X (top right hand corner of screen) as this closes out of the Word program.
Remember the Undo Button on Quick Access bar at top left corner of the window.
EX 1.5: NAVIGATING THROUGH A DOCUMENT
There are various ways in which the Cursor can be repositioned. You will by now have realised that there can only be one place for the Cursor in the document.
SeniorNet West Auckland Page 8
Word Processing 2010 Stage 1
1. Place the Cursor somewhere in the middle of a line of text. Use any of the arrow keys to change its position.
2. Tap the Home key and the Cursor moves to the beginning of the line.
3. Tap the End key and the Cursor moves to the end of the line.
4. Holding down the Shift key changes the result of a key press, justas holding down the Ctrl key.
5. Hold the Ctrl key down and tap Home (i.e. Press Ctrl + Home ) and see the Cursor move to the start of the document. Press Ctrl + End and Cursor moves to the very end of the document.
6. Choose File / Close and if asked to save changes click No.
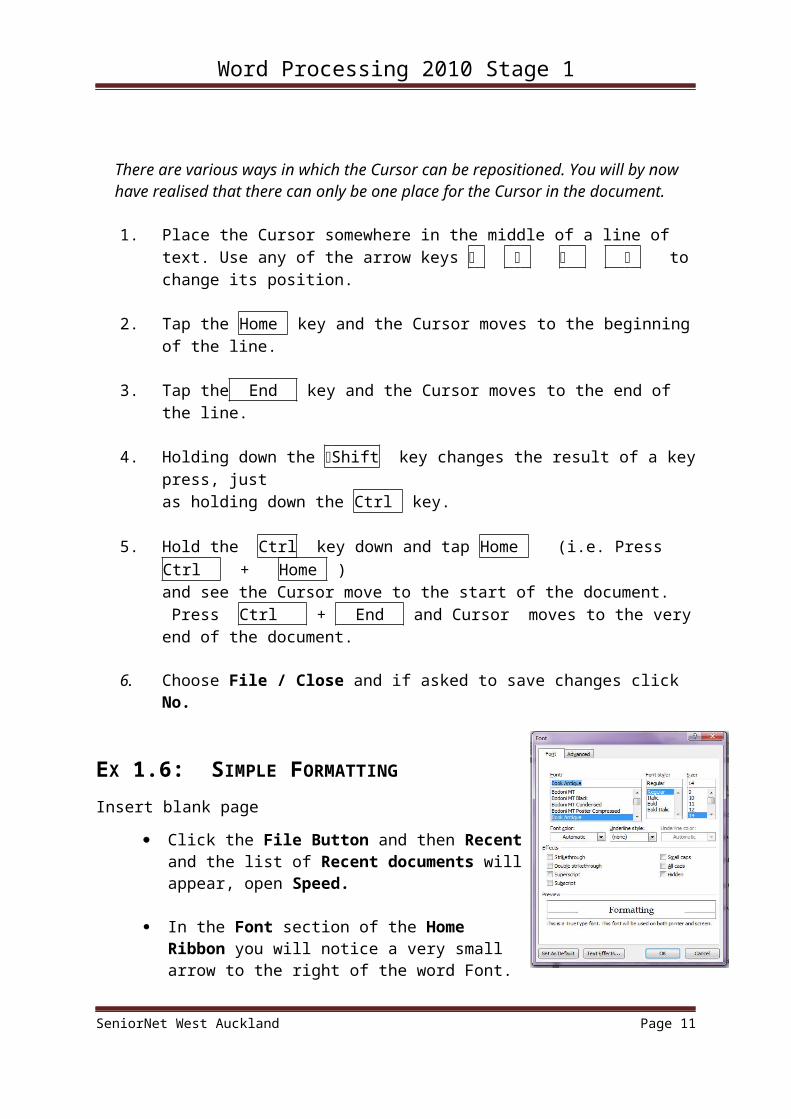
EX 1.6: SIMPLE FORMATTINGInsert blank page
Click the File Button and then Recent and the list of Recent documents will appear, open Speed.
In the Font section of the Home Ribbon you will notice a very small arrow to the right of the word Font. Click on this arrow and the Font Dialog Box opens.
Click on the Question Mark at the right end of the title bar and a Help window opens.
Click on the Question Mark at the left end of this new window and you will see that it can be minimised thus enabling it to be activated again while you are working on a document.
Close the Help window and leave the Font dialog box open.
Of the 3 panels at the top there are 2 that have scroll bars within them. Whenever there is more information than there is room
SeniorNet West Auckland Page 9
Word Processing 2010 Stage 1
for, a scroll bar is automatically included.In some smaller panels a reveal arrow ▼ is used for the same purpose.
To change the formatting within a document, the wording to
be changed must be highlighted first
SeniorNet West Auckland Page 10
Word Processing 2010 Stage 1
Close the Font Dialog box and then highlight the complete document. The easiest way to do this, especially for a large document, is to use the Select All command or Control A. or
In the Editing group of commands at the right end of the Home Ribbon click on Select then from the menu that appears click on Select All.
Open the Font Dialog Box again.In the Font panel choose any style you like (remember the scroll bar).Make sure you try Webdings and the 3 Wingdings fonts.Alter the Style and the Size if you wish.
Click OK and you are returned to your document.
With your tutor’s help try some of the other options in this dialog box.
More exercises using different methods of formatting are to follow in other lessons.
If time permits open the Roses document and experiment further.
Finally, close the documents and when asked if you want to save changes click No.
Shutting Down
When we want to shut down the computer we do it by means of the Start menu.
Having first made sure that we have closed all applications and documents by checking the taskbar - we click on the Start button.
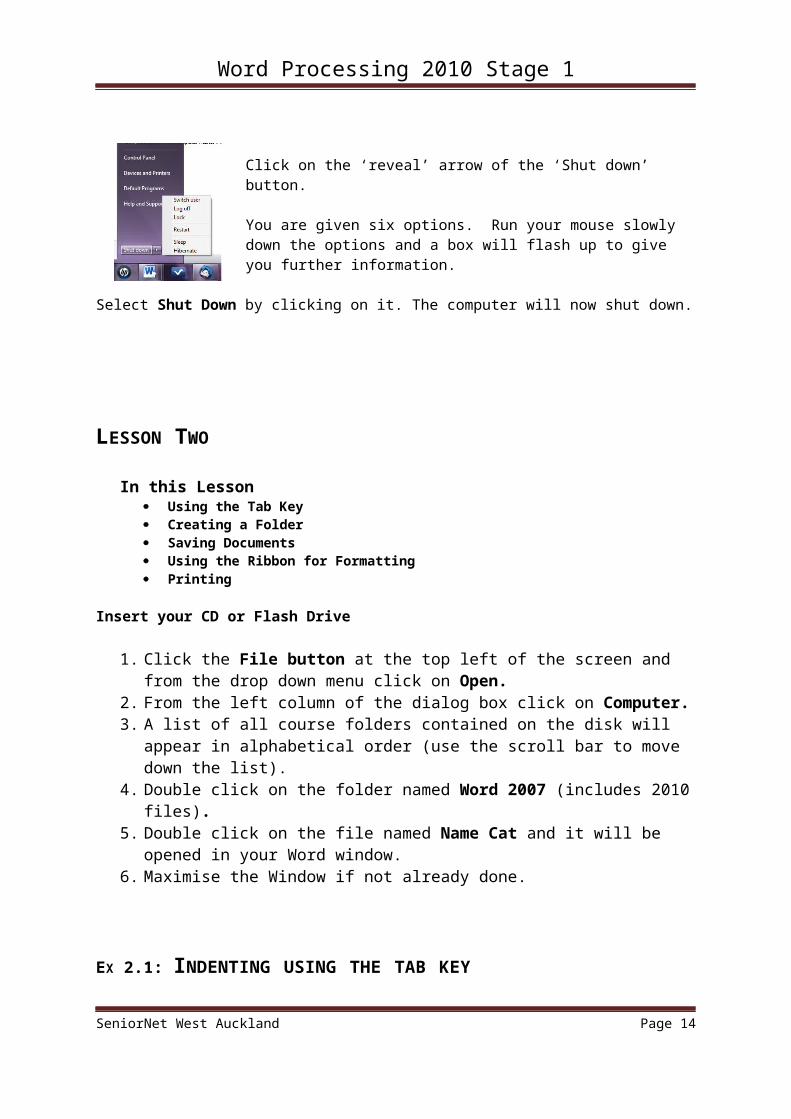
Click on the ‘reveal’ arrow of the ‘Shut down’ button.
You are given six options. Run your mouse slowly down the options and a box will flash up to give you further information.
Select Shut Down by clicking on it. The computer will now shut down.
SeniorNet West Auckland Page 11
Word Processing 2010 Stage 1
LESSON TWO
In this Lesson Using the Tab Key Creating a Folder Saving Documents Using the Ribbon for Formatting Printing
Insert your CD or Flash Drive
1. Click the File button at the top left of the screen and from the drop down menu click on Open.
2. From the left column of the dialog box click on Computer. 3. A list of all course folders contained on the disk will appear in
alphabetical order (use the scroll bar to move down the list).4. Double click on the folder named Word 2007 (includes 2010 files). 5. Double click on the file named Name Cat and it will be opened in
your Word window.6. Maximise the Window if not already done.
EX 2.1: INDENTING USING THE TAB KEY
From the Editing group of commands (at the right of the Home Ribbon) choose Select then Select All (or Control A).
Open the Font Dialog Box and change the font to Times New Roman and change the size to 16, OK.
Deselect by clicking in a white space on the right hand side of the document.
Place the Cursor at the end of the text (Control End) and start a new line by a tap on the Enter .. key. Add the following
Else how can he keep up his tail perpendicular, (tap Enter .. )
Or spread out his whiskers, or cherish his pride?
SeniorNet West Auckland Page 12
Word Processing 2010 Stage 1
There are a few mistakes that need correction:Press Ctrl + Home to go to the start of text
1. In line 4, change diferent to different by adding f at the right place.2. In lines 8 and 12, sensable should read sensible.3. Check your own typing for errors, and make any corrections you find.4. By default the Tab Key aligns the Cursor by a pre set tab stop of ½”.
Setting special tab stops will be dealt with in later lessons.5. Disregarding the title, indent each alternate line, starting with the second line like this:6. Place the Cursor mark at the start of the line and press (just a tap)
the tab key Tab 7. To go to the start of each alternate line you may find it easier using
the and Home keys without using the mouse8. Note: If you need to undo a tab space, put the Cursor at the start of
the word and use Bksp 9. Divide the text into verses of four lines each by inserting a blank line between them.
EX 2.2: CREATING A FOLDER
On your home computers you should save your documents to suitably named folders. This is covered fully in a later lesson. In the classroom we need to create a folder in which to save various documents created during lessons.
As we are unable to add anything to the course CD we will save our work to the computer’s hard drive. For practice at home you could also follow this procedure.
1. From the dark Panel in the start menu click on Documents.2. On the blue bar of the window that opens, click on New Folder.3. While it is still blue key the name you wish to call the folder and
Enter..4. If you make a typing error, the folder can be renamed by clicking on
it with the Right Mouse Button and from the menu that appears choose Rename.
5. Key in correct name for the folder and Enter6. Close this window (click the close button top right corner)
SeniorNet West Auckland Page 13
Word Processing 2010 Stage 1
EX 2.3: SAVING A DOCUMENT
While we are working with a document we are just using the computer's "temporary memory".
It is not until we save the document to the Documents folder on the hard drive or to our Flash Drive that our work is safely stored away.
If we close a document without saving it (either deliberately or accidentally) all our current work is lost forever.
If, after altering an existing file, we click on Save that file will be permanently changed.
If', however, we use the Save As command and give it a new file name we then have two files -- one as it was and another one with the alterations made to it.
For all NEW documents we should use the Save As command although, if for a new document we accidentally click Save the computer recognises that we have made an error and displays the Save As dialog box.
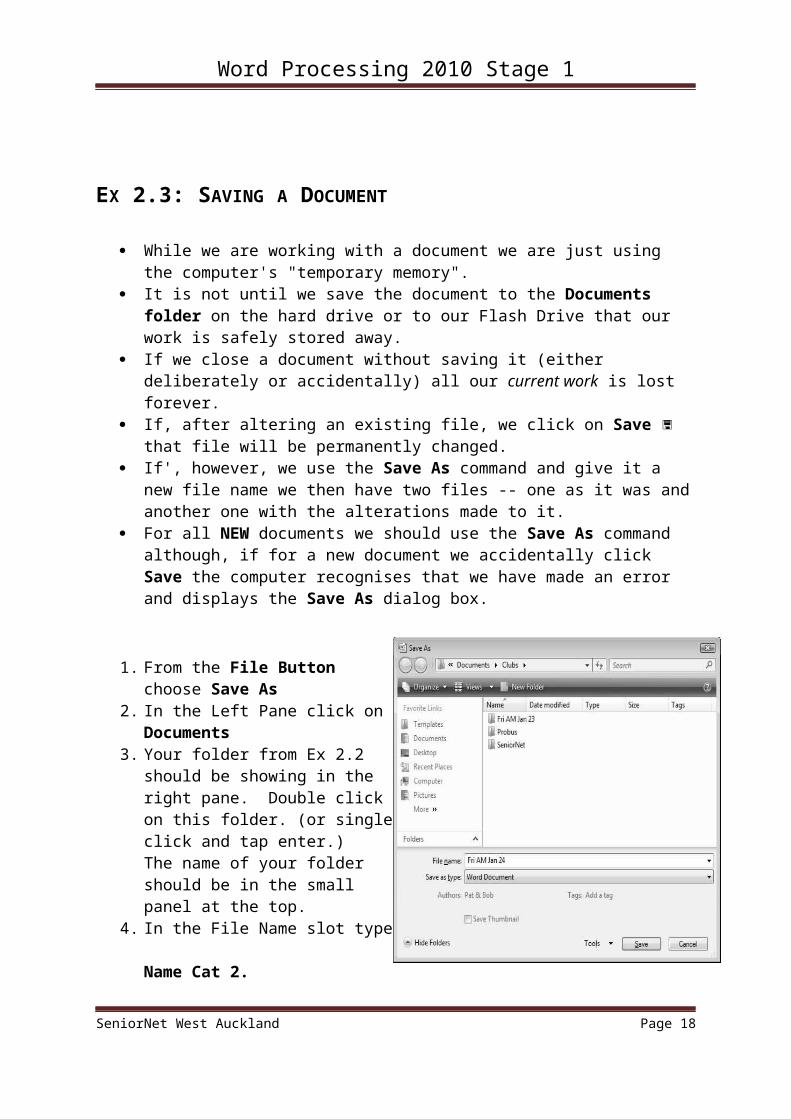
1. From the File Button choose Save As
2. In the Left Pane click on Documents
3. Your folder from Ex 2.2 should be showing in the right pane. Double click on this folder. (or single click and tap enter.)The name of your folder should be in the small panel at the top.
4. In the File Name slot type Name Cat 2.
5. By default the Save as type slot should read Word Document.
6. Finally, click the Save button in the bottom right corner.
Carrying out the above steps with care ensures the file is saved to the correct folder.You will notice that the Title Bar of the window now reads Name Cat 2.
SeniorNet West Auckland Page 14
Word Processing 2010 Stage 1
1. Close the document by using the File Button and choosing Close. To exit out of Word click the X at the top right of the screen.
2. Now to open it again. From the Start Menu re-open the Word 2007/2010 program. Then click the File Button and choose Open.
3. In the left panel click on Documents and then in the right panel double click on the name of your folder.
4. When that folder opens double click Name Cat 2.
Change the title to Red and Italic then click the Save button on the Quick Access barand close the document.
EX 2.4 : USING THE HOME RIBBON FOR FORMATTING AND CUT, COPY AND PASTE
1. Open the file named Retread from your disk
Office Button / Open / Computer / My Disk / Word 2007 / Retread
Note that the name of the file is now in the title bar of the document window.
The window should be maximised. If not, do so.
2. The document shows a ditty of four verses. Each verse is numbered.
Your first task is to centre align the verses:
a. From the Editing group of commands (at the right of the Home Ribbon) choose Select then Select All (Ctrl A).
b. In the Paragraph Section of the Ribbon click the Centre Align button. Deselect by clicking elsewhere.
c. Highlight the title and from the Font section make it bold or (Ctrl B).
3. Put the verses in order:a. Highlight all of verse 2, including its number.
SeniorNet West Auckland Page 15
Word Processing 2010 Stage 1
b. From the Clipboard panel at the left of the ribbon choose Cut. (Ctrl X)
c. Place the cursor in the blank line under verse 1. d. Choose Paste or Ctrl V.
SeniorNet West Auckland Page 16
Word Processing 2010 Stage 1
4. By the same method, place verse 3 in its proper place and see that a blank line separates each verse. Where there are no blank lines between verses create them. (Place the cursor at the end of the last line of a verse and tap Enter )
5. a. Highlight all of verse 2.b. On the Font panel of the Ribbon click the reveal button ▼ to the
right of the Font Colour button and select the colour Green.
c. Similarly, colour verse 4 in Orange.d. To identify your copy add your initials at the foot, right aligned.
6. Check the appearance of the document when printed: a. From the Office Button choose Print then Print Previewb. Move the pointer over the active page. It changes to a magnifying
glass.Click once to zoom in. Click again to zoom out.
c. Click Close Print Preview (The RED X)
7. Save the document with a new name:Using Save would normally save all the changes to the original file. However, the original file is on the CD and can’t be overwritten. But you can save the changes by making a new file.
a. Choose Save As... and follow the instructions from the previous exercise.
b. In the File name slot type Renewed and click Save.
8. Printing the document:
a. Make sure the printer is on and switched to your computer. (Ask your tutor). Click Print from the File Button
b. When printing is completed, close the document.If or when asked to save changes, click No.
SeniorNet West Auckland Page 17
Word Processing 2010 Stage 1
Keyboard ShortcutsThere is usually more than one way to carry out simple tasks. We have used the Font dialog box and also some parts of the ribbons. You will become familiar with
other methods as you progress. Keyboard shortcuts are useful and where appropriate they will be shown in brackets in some future exercises.
Useful Keyboard Shortcuts for Word 2007/2010
Formatting Editing Frequently Used
Bold Ctrl+B Undo Ctrl+Z New Ctrl+N
Italic Ctrl+I Cut Ctrl+X New Page Ctrl+Enter
Underline Ctrl+U Copy Ctrl+C Save Ctrl+S
Centre Ctrl+E Paste Ctrl+V Print Ctrl+P
Left Align Ctrl+L Select All Ctrl+A Help F1
Right Align Ctrl+R Find Ctrl+F Line spacing
Control 2
SeniorNet West Auckland Page 18
Word Processing 2010 Stage 1
EX 2.5: MORE EXPERIMENTINGOpen the file named Foreign Lands from your disk.
From the Office button choose Save As to save a new document to your folder with the name FLands.
Correct the word spacing and close the line spacing in this poem.
Make the title bold (Ctrl+B) and by using the Font portion of the ribbon change the font to Times New Roman size 14.
Click the Save button on the Quick Access bar (Ctrl+S). This will save your work up to this point. (A good habit to remember)For the rest of the text choose Garamond size 12.
Using Enter .. split each line (in a logical place) into 2 lines.
Change the beginning letter into a capital letter on these alternate lines. Try clicking in the first word of the line and (Shift+F3) Tap F3 more than once to see all options.Also try the button in the Font panelDivide the poem into 5 verses of 4 lines each.
Select the whole poem and Centre align (Ctrl+E).
Change the colour of the title to Red
From the File button hover the cursor over Print then click Print Preview.
Finally Save the document, close all open documents, exit Word then shut down.
SeniorNet West Auckland Page 19
Word Processing 2010 Stage 1
LESSON THREE
In this lesson Using the Spell Checker Window Views Page Set up & Margins Hidden Characters, Line Spacing & Page breaks. Files, Folders & Sub Folders.
EX 3.1: CHECKING THE SPELLING
After inserting your CD or Flash Drive, open the Word 2007 Program
Open the file named News and maximize the window.
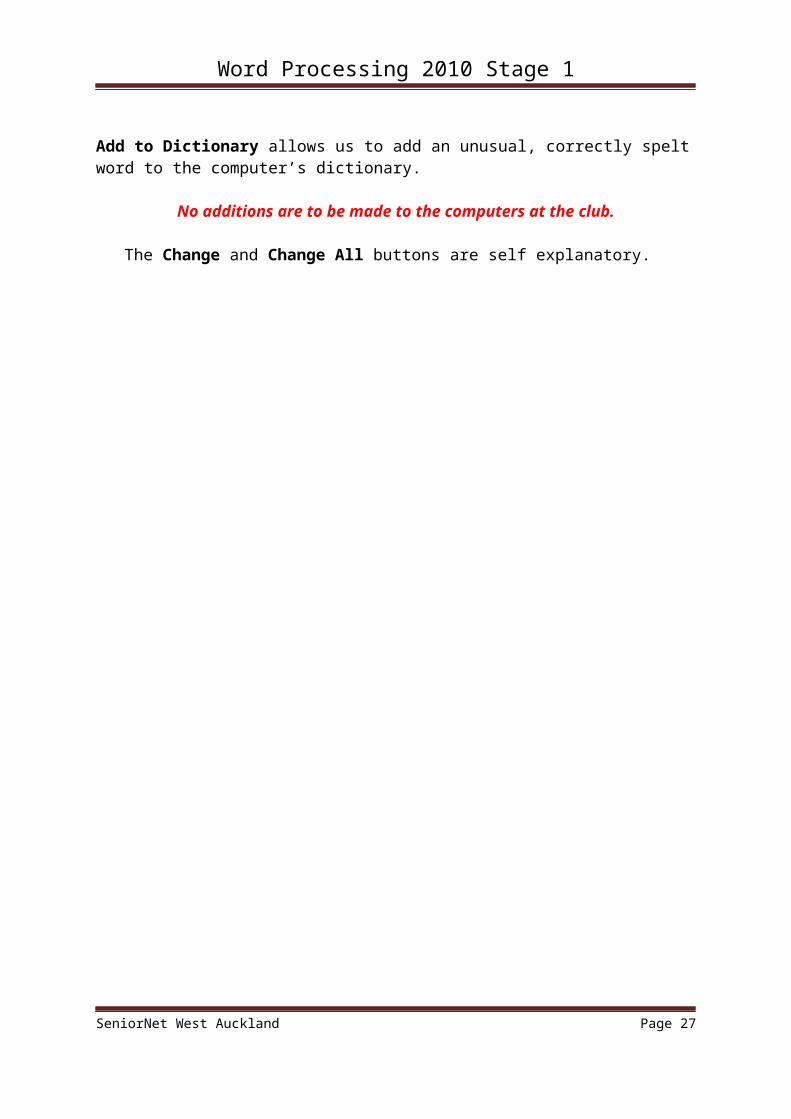
From the Review Ribbon click the button
The Spelling – Grammar dialog window appears, which says (at the top) that the word hestations is not in the dictionary.
You will notice that the wrongly spelt word is highlighted in red and suggestions for its replacement are listed.
We are given the option of Ignore Once or Ignore All. Ignore All means that if we are happy with the spelling, the spell check will not identify it again during the spell check of this document.
Add to Dictionary allows us to add an unusual, correctly spelt word to the computer’s dictionary.
No additions are to be made to the computers at the club. The Change and Change All buttons are self explanatory.
SeniorNet West Auckland Page 20
Word Processing 2010 Stage 1
Repeated wordIf a word has been repeated in the text, the second instance of the word can be removed by clicking on the Delete key.
Now carry on with the exercise.
1. In the Suggestions panel only one word is highlighted. Click the Change button to accept it. The misspelled word is automatically changed and the spelling checker has moved to the next word not in its dictionary.
2. The suggestion for SeniorNet is not acceptable; it must remain a single word. Click Ignore All to carry on.
3. Suggestions for Lv are not suitable. Use the top panel as a Word Processor and change Lv to Level then click Change. (Third line from top).
4. Continue making changes where appropriate until you get the message that the check is finished.
5.
From the Office button choose Save As and save to your folder with the name newsletter. Do not close the file. The title bar displays the new name.
Window Views
1. Open the View ribbon. The Print Layout button is highlighted. This is the view that should be used for normal word processing. It shows the document with its margins as it will finally be printed.
2. Try Full Screen Reading then close with the X in the corner3. Try Web Layout and then click on Outline and click on Close.4. Note. There should be a tick next to Ruler
SeniorNet West Auckland Page 21
Note: The spell checker did not correct the word ‘envelops’ in the 2nd paragraph. You must always read the text as well as the spelling.

Word Processing 2010 Stage 1
5. Click the Zoom button and zoom down to 50%. Click OK then return to 100%. Also try the zoom slider at the bottom right of the screen.
SeniorNet West Auckland Page 22

Word Processing 2010 Stage 1
Page Layout
Margins control the white space around the edges of a page. The space is specified as top margin, bottom margin, right or left margin.
1. Open the Page Layout ribbon.2. In the Page Set Up panel click on Margins. Note the range of
preset margins then choose Custom Margins.3. In the Dialog Box alter the Left and Right margins to 2cm. and click
OK4. Check the document and note that the margins shown on the
horizontal ruler are as you set. The top and bottom margins can be set in the same manner.
EX 3.2: HIDDEN CHARACTERS AND PAGE BREAKS
Working on News document in the third part of the letter, between I hope ... and ... computer at home looks like one paragraph. In fact it holds two paragraphs. How does one know that?
The word processor can display several special characters, such as tabs, paragraph marks and spaces. They are not normally shown and are never printed. Seeing them can help to show what you are doing. Their display can be turned on or off (toggled) by the Show / Hide ¶ button on the Paragraph section of the Home Ribbon.
1. a. On the Home ribbon Paragraph Section click the Show/ Hide button ¶ (sometimes referred to as the “backwards P”)
Dots (between words) and paragraph symbols (¶) now appear in the text.
b. ¶, the paragraph symbol, is a character in its own right. It is added to the text each time you tap Enter .. The dot ( ) represents a space character and is added each time you tap Spacebar .. Do not confuse the dot with the full stop, which prints at the base of the line.The first paragraph in this section ends with ... family tree. A new one starts with Then there is....
c. Place the Cursor in the line beginning with I hope to and from the Paragraph section of the Home ribbon click the Line Spacing button and choose 2.0 (Ctrl+2) to get double spacing.
SeniorNet West Auckland Page 23

Word Processing 2010 Stage 1
Note that the whole paragraph is affected, without you having explicitly highlighted it. The effect is confined to the particular paragraph. It does notinvolve any other paragraph.
1. A page break determines where a new page begins when you print a document. Word normally handles these automatically, but they can be overridden.
2. a. Place the Cursor in front of letter I in I hope to.... in the third paragraph of the document.
b. Press (Ctrl+Enter) and you are on a new page.(Can also be done by opening the Insert ribbon and choosing Page Break
3. To undo the page break: a. Make sure that the Show/ Hide option ( ¶ on Home Ribbon ) is
still enabled and go back to the previous page.
You can now see the page break as a dotted line and marked as such.
b. Highlight it, or place the Cursor at start of the dotted break line, tap Delete.
c. Click the Show / Hide ¶ button again to hide the special characters.
d. Close the document, but do NOT save it.
EX 3.3: FURTHER SPELL CHECK
From the CD/Flashdrive, open the file named Bits
Spell Check
1. For this exercise use the right mouse button to click on the red underlined words. Select the correct spelling from the pop-up menu
SeniorNet West Auckland Page 24
Word Processing 2010 Stage 1
or re-type the correction in the document. (..caries in the first line has not been picked up. Neither would be grate in a sentence like 'He was a grate man'. You still need to be alert!)
2. Save the file to your folder using the Save As command, name it 2 Bits and close the document.
EX 3.4: THE FILING SYSTEM
The average home computer has many thousands of files stored on the hard disk. Most of these files are required to make all the various programs operate successfully.
Because our own documents are also stored on this same disk, a very good filing system is obviously necessary. The locations of various files are stored in folders and our own folders can be named to suit ourselves.
As we type a document the computer refers to this as a “document” but when we save it, it is referred to as a “file”.When we produce a document, give it a file name and save it, the computer automatically adds an extension to its file name, depending on which program was used to create it.
If you save a file using the Microsoft Word 2007 or 2010 program and, say, give it the name My letter the application automatically adds its own extension .docx for 2007 thus saves it as My letter.docx, or for 2010 it saves as My Letter with no extension. These “tags” are always preceded by a full stop.
Examples are:- Word 97-2003 files .doc Word 2007 .docx Word 2010 .docx Text files .txt Works Data base .wdb
As you progress through the various courses you will become more familiar with the above.
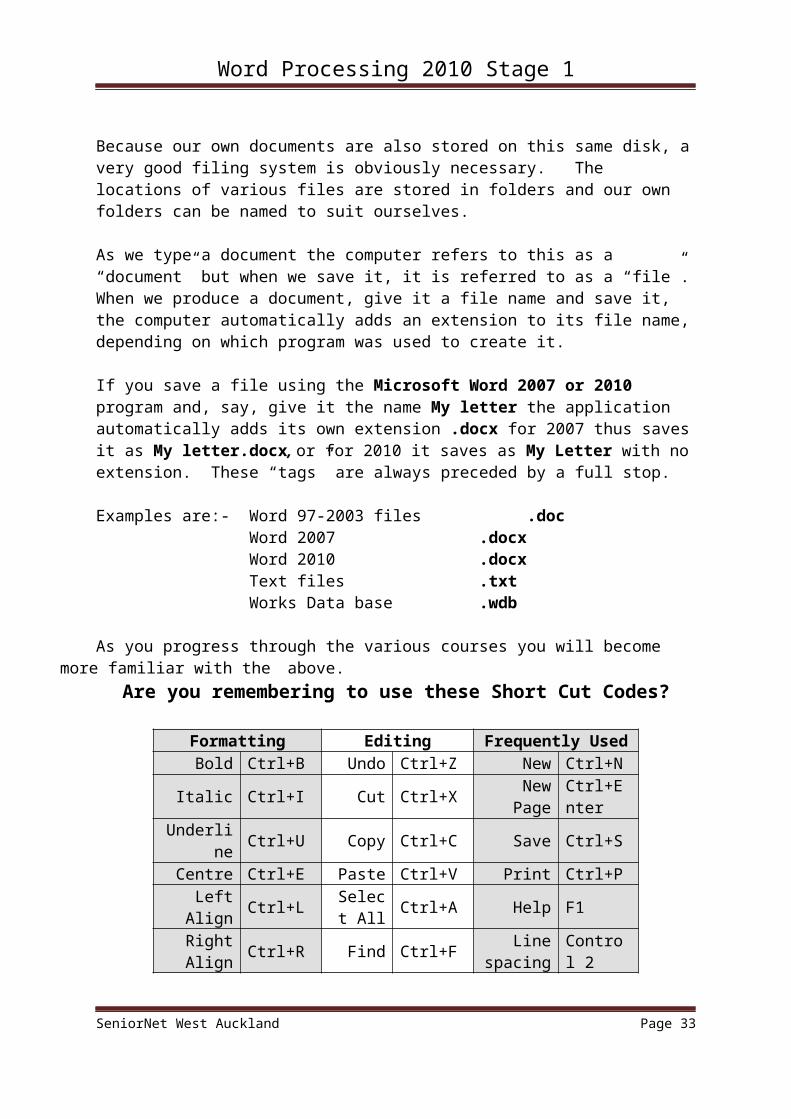
Are you remembering to use these Short Cut Codes?
Formatting Editing Frequently UsedBold Ctrl+B Undo Ctrl+Z New Ctrl+NItalic Ctrl+I Cut Ctrl+X New Page Ctrl+Enter
Underline Ctrl+U Copy Ctrl+C Save Ctrl+S
SeniorNet West Auckland Page 25
Word Processing 2010 Stage 1
Centre Ctrl+E Paste Ctrl+V Print Ctrl+P
Left Align Ctrl+L Select All Ctrl+A Help F1
Right Align Ctrl+R Find Ctrl+F Line spacing Control 2
SeniorNet West Auckland Page 26
Word Processing 2010 Stage 1
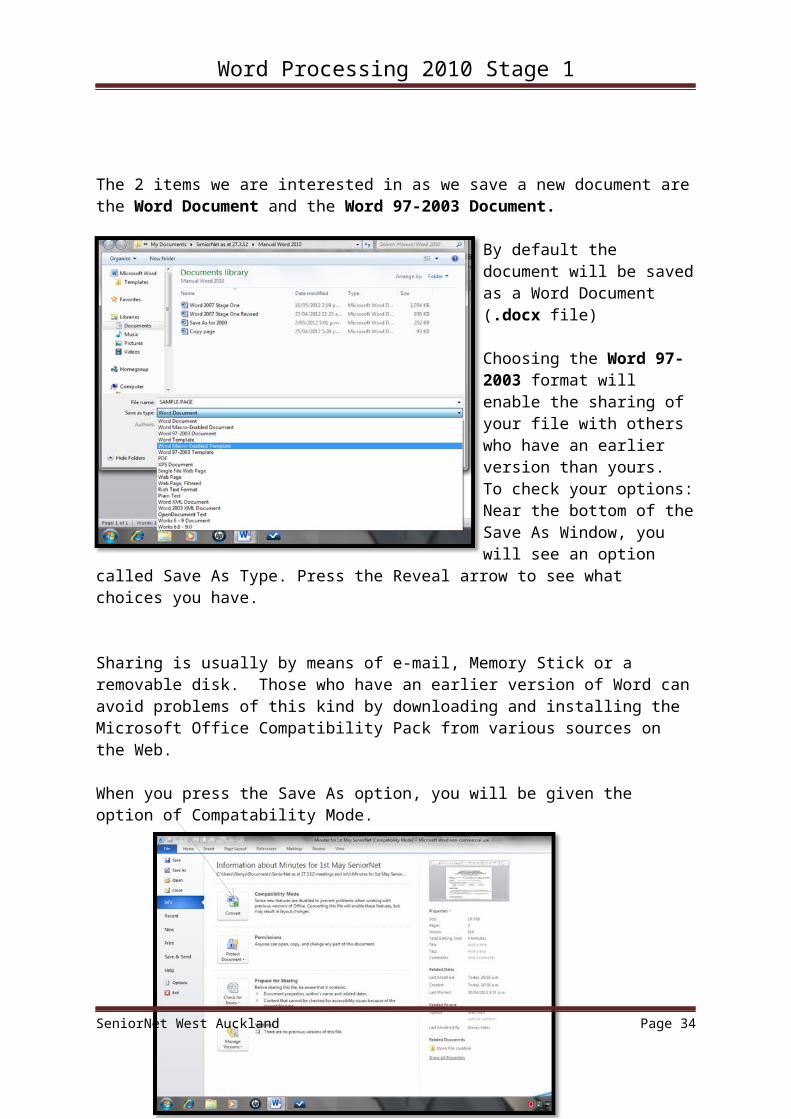
The 2 items we are interested in as we save a new document are the Word Document and the Word 97-2003 Document.
By default the document will be saved as a Word Document (.docx file)
Choosing the Word 97-2003 format will enable the sharing of your file with others who have an earlier version than yours. To check your options: Near the bottom of the Save As Window, you will see an option called Save As Type. Press the Reveal arrow to see what choices you have.
Sharing is usually by means of e-mail, Memory Stick or a removable disk. Those who have an earlier version of Word can avoid problems of this kind by downloading and installing the Microsoft Office Compatibility Pack from various sources on the Web.
When you press the Save As option, you will be given the option of Compatability Mode.
SeniorNet West Auckland Page 27
Word Processing 2010 Stage 1
EX 3.5: CREATING FOLDERS
When you use a program and save your work, or when you install a program, you’re creating files. You can store your own files in many locations --on the hard disk drive, on a CD or Flash Drive. To better organize these files they can be stored in folders.
Windows 7 include folders named Documents, Pictures, Music and on newer computers Videos.
We can save our Word Processing files into the Documents Folder or better still save them into various Sub Folders within it.
Just saving them “loose” into the Documents folder is fine for oddments but it is so much better to organize many of them into sub folders such as Correspondence—Clubs—Recipes—Gardening etc
From the Start button open the Documents folder (from the black portion) This is one of the Windows Explorer windows where we can find all our files.
Then open your own folder.
Left Click on New Folder and while this is highlighted name it Recipes.
(If you have made a typing error you can right click on the word and when the menu pops up choose Rename (with a left click) and re-type over the top while it is highlighted in blue.)
SeniorNet West Auckland Page 28
Word Processing 2010 Stage 1
Create a Sub Folder within the Recipe folder
Open the Recipe folder with a double click (Left Button) Choose New Folder Name this folder Cakes
Make 2 more sub folders, one named Meals and one named Desserts.
Saving a document to a sub folder
MINIMIZE THE WINDOWS EXPLORER WINDOW.Look at the small box at the top of the window after each step in the following.
Open a new Word document and type 2 or 3 lines of a fruit cake recipe.
From the Office button choose Save As. In the left pane click on Documents then on Your Folder and Open and then on the Recipes folder and Open (or double click them both.)
Click on Cakes and then on Open (or double click Cakes) Change the File Name to Fruitcake and Click Save
Close all windows.
Restore the Windows Explorer window from the Task Bar at the foot of the screen.
Find the file: Documents / Your Folder / Recipes / Cakes / Fruitcake (and there is your saved document)
If there is insufficient time to complete the following project close any open documents and Shut down OR save your work to your own flashdrive.
SeniorNet West Auckland Page 29
Word Processing 2010 Stage 1
HOME PROJECTPractice Cut, Copy & Paste
By now you should know the method of opening a file from your CD/flash drive. If not refer to exercise 1.4.
From your CD open the Word 2007 folder the open the file named Dorothy
I am such a busy bee You are telling me! Dorothy begins with D I should pay my entrance fee The hidden side you cannot see Drinking milk is good for thee
Using Cut, Copy and Paste methods and no typing of text, change the poem to look the same as the copy below:
Note: Create 3 Blank lines at the top (tap Enter 3 times) and start your new copy on the third line
Drinking milk is good for theeYou are telling me!The hidden side you cannot seeYou are telling me!I should pay my entrance feeYou are telling me!Dorothy begins with DYou are telling me!I am such a busy beeYou are telling me!
SeniorNet West Auckland Page 30
Word Processing 2010 Stage 1
LESSON FOUR
In this lesson Highlighting Methods Inserting Symbols & Clip Art Borders & Shading Printing
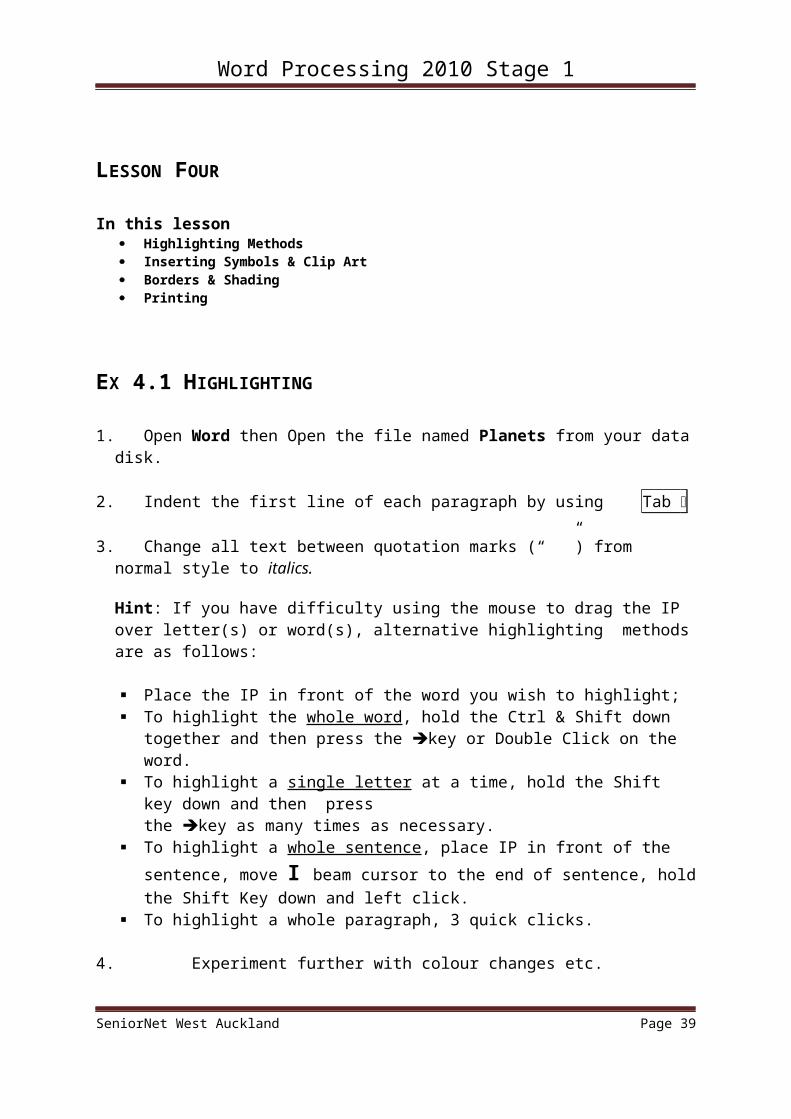
EX 4.1 HIGHLIGHTING
1. Open Word then Open the file named Planets from your data disk.
2. Indent the first line of each paragraph by using Tab
3. Change all text between quotation marks (“ ”) from normal style to italics.
Hint: If you have difficulty using the mouse to drag the IP over letter(s) or word(s), alternative highlighting methods are as follows:
Place the IP in front of the word you wish to highlight; To highlight the whole word, hold the Ctrl & Shift down together and
then press the key or Double Click on the word. To highlight a single letter at a time, hold the Shift key down and
then press the key as many times as necessary.
To highlight a whole sentence, place IP in front of the sentence, move I beam cursor to the end of sentence, hold the Shift Key down and left click.
To highlight a whole paragraph, 3 quick clicks.
4. Experiment further with colour changes etc.
5. Close the document without saving.
SeniorNet West Auckland Page 31
Word Processing 2010 Stage 1
EX 4.2: SYMBOLS & CLIP ART
Symbols are special characters that can be inserted into a Word document. Some symbols are already available to us on the keyboard such as the question mark and the dollar sign. Some can be added to a document by just changing the font (Wingdings etc). Others are easily accessible by using the Symbol panel of the Insert Ribbon.Inserting symbols
1. Start a blank Word document. Office Button / New / Blank Document
2. Type your first and last names and Enter ..3. As font, choose Symbol, size 18, and type your name again.4. Highlight this second line and change the font to Wingdings. 5. You have seen three print versions of your name. 6. It would be nice if you could remember which keystroke produced
which symbol in a non alpha-numeric font. 7. The Word program provides a means of inserting unusual font
characters by displaying a character map of a chosen font.8. Tap Enter twice and click the Insert Tab of the Ribbon 9. At the right of the ribbon click on Symbols. Recently used symbols
are shown here. Click on More Symbols. The Symbol window that appears has 2 tabs. See that the Symbols tab has been selected and in the Font slot choose Wingdings.
10. If necessary, move the Symbol window so that you can see some blank space in the document behind.
11. Either double-click on some characters or select and click Insert each time to place those characters in the document.
12. For now click Close.13. Close this document without
saving.
SeniorNet West Auckland Page 32
INVITATION
Genevieve would like you to come to her
9th birthday party When?
On March 16th
Where?At her home in Wellington Drive
What time?Starting at 2 o’clock
Please let her know if you’ll be there
Word Processing 2010 Stage 1
1. From your CD/flashdrive open the file named Invite. 2. Place the cursor in the space under the heading, centred.3. From the Insert Ribbon and in the Illustrations panel click on Clip
Art.4. In the Task Pane at the right type Birthday in the search box and
click Go.5. Click on the picture and it will be inserted at the position of the cursor
point.6. Now insert symbols similar to the above.
You will find the book symbol in the Wingdings font You will find the house symbol in the Webdings font You will find the clock symbol in the Wingdings font You will find the phone symbol in the Wingdings font Deselect all italics, and change to bold where indicated
SeniorNet West Auckland Page 33
Word Processing 2010 Stage 1
Make the symbols larger by highlighting them individually and clicking on the button next to the font size on the Home ribbon.
Symbols are treated as text and their size can be changed as font sizes are changed—you will notice that they sit on the same line as the text.
7. Finally save your work to your own folder with the name Invitation then close the document
EX 4.3: BORDERS AND SHADING
From your CD or Flash Drive open the file named Blue Eyes.
1. a. Immediately save it to your folder with a new file name My Poemb. From the Home Ribbon choose Select then Select all (Ctrl+A)
then change the font to Book Antiqua size 16 and deselect.c. Divide the poem into 4 verses of 4 lines each by putting a blank
line after each fourth line (tap Enter)d. Using the Tab key, indent the 2nd and 4th lines of each verse.e. Highlight the 2nd verse and change into Italic text. Do the same
for verse 4.
2. a. Highlight the poem and centre it. b. Change the font of the title to Arial size 20 and make it bold. c. Put one extra blank line below the title.
3. a. Highlight the first verse and from the Paragraph section of the Home ribbon click on the reveal arrow beside this button and choose the bottom item Borders & Shading.
b. In the dialog box, select the Border tab. Ensure that the Apply to box reads Paragraph
c. In the Line Style panel scroll until you see the double line and select it.
d. In the Setting panel, select Shadow. Look at the sample in the Preview panel to the right then click OK.
4. a Highlight the third verse and select a border of your choice. BEFORE clicking OK, select the Shading tab and choose a pale colour from the Fill panel.Look in the preview panel then click OK.
SeniorNet West Auckland Page 34
Word Processing 2010 Stage 1
Note: To delete a border, highlight its content and from Borders & Shading select None and OK. To delete a background colour, highlight and from Borders & Shading select Shading and then select No Colour from the Fill Box and OK.
5. a. Print Preview the document. Do not actually print it but click Close.
b. Click the Save button on the Quick Access bar and close the document and exit from Word.
EX 4.4: DELETING FILES & FOLDERS
If you have been Saving onto SeniorNet computers, at the end of this course we must delete the folder that was created in which to save our work.
From the Start button open the Documents folder. Locate your folder in the right hand panel and single click with the
left mouse button. Tap the Delete key on the keyboard. Alternatively click with the right button and from the menu that
appears choose Delete. When asked if you want to send it to the Recycle Bin click Yes. Return to the Desktop and open the Recycle Bin folder. Locate
your file and delete it.
When a folder is deleted all the files in that folder are also deleted. If only an individual file is to be deleted the folder must be opened and that particular file selected for deletion.
Where to from here
A further two stages of this course are available. It is not essential that you carry straight on with either of them but they should be done in order.
Stage Two will cover such things as Revision, Inserting pictures into a document, Clip Art, Tables, Bullets & Numbering of paragraphs, Tabs and Indents, and more.
Stage Three will include a more in-depth look at some features, WordArt, some Picture enhancement, Text Boxes, Drawing & Shapes and more.
SeniorNet West Auckland Page 35
Word Processing 2010 Stage 1
After completing Stage One you are welcome to participate in other courses that are available. (Refer to the latest schedule of courses and prices for details.)
ABOUT PRINTING
The computer you are using at the club is networked to a printer which is shared by other computers in the room. You may have to wait your turn before being able to print.
There should be no need to alter any settings, but if there are any problems, consult with the tutor first.
To start printing1. From the File button select Print and your preview will show in
the right hand column. You may have to use the slide bar to check your formatting.If any editing is required, press Open and do that now in your original document.
2. From the File button click Print, select from the many options. You may also want to go to Page SetUp. Click Print on the top left.
Problems
1. If you get a blank page following a printed one, you possibly have blank lines at the end of the document extending into the next page. In that case you are actually instructing the printer to print a blank page. Go back to the document and delete any superfluous blank lines. Click the Show / Hide button to help with this.Finally check Print Preview again.
2. If you find that even though you thought you had set the text in columns, but it doesn't print that way, check that you actually set specific Tabs and used tab spacing.
SeniorNet West Auckland Page 36
Word Processing 2010 Stage 1
SeniorNet West Auckland Page 37
Word Processing 2010 Stage 1
SeniorNet West Auckland Page 38
Word Processing 2010 Stage 1
NOTES
SeniorNet West Auckland Page 39