Embed Size (px)
Citation preview

Forget boring cardboard coffee sleeves! This fancy felt version is so much prettier! And
it's surprisingly easy to make. :)
Happy stitching!Wendi
Throughout the pattern, the purple text links to supply sources or online video tutorialsdemonstrating the techniques used.
Materials you'll need:• 1 sheet wool felt (I used Babbling Brook)• scraps of wool felt for the flowers and butterflies• embroidery thread in assorted colors• 2 inches hook & loop tape• freezer paper and Sulky Sticky FabriSolvy (optional)
Step 1Transfer the pattern to the felt. I useSulky Sticky FabriSolvy every time Iwork with felt. I love it!
If you're wondering how it works with felt,read this post.
Step 2Embroider the design and trim the edgesof the felt to size.
I'm going to applique all the flowers andbutterflies, so all I stitched here are thestems and butterfly trails.
I used backstitch for the stems with fourstrands of green thread, and runningstitch for the butterfly trails with twostrands of light blue thread.

Step 3Soak out the Sulky Sticky FabriSolvy incold water and let it dry flat. Don't wring,twist or even smoosh it. Just set it on atowel and let it dry overnight.
Look! Now I know exactly where eachapplique piece goes!
Step 4Applique and embroider the rest of yourdesign.
Use freezer paper to cut out the tinyapplique pieces it will help keep yourcutting accurate.
I used whipstitch to applique the pieces,French knots for all the dots, and simplestraight stitches for everything else.
Everything is stitched with two strands ofthread.
Step 5Cut a second piece of felt to match thefirst.
Sew the prickly, hook half of the hook &loop tape to the end of the embroideredpiece.
Sew the soft, loop half of the hook & looptape to the blank piece of felt.
I used a sewing machine to attach thesepieces, but you could also sew by hand.
Did you have fun?I hope so! Please visit Shiny Happy World for more patterns,plus lots of free projects and helpful tutorials.
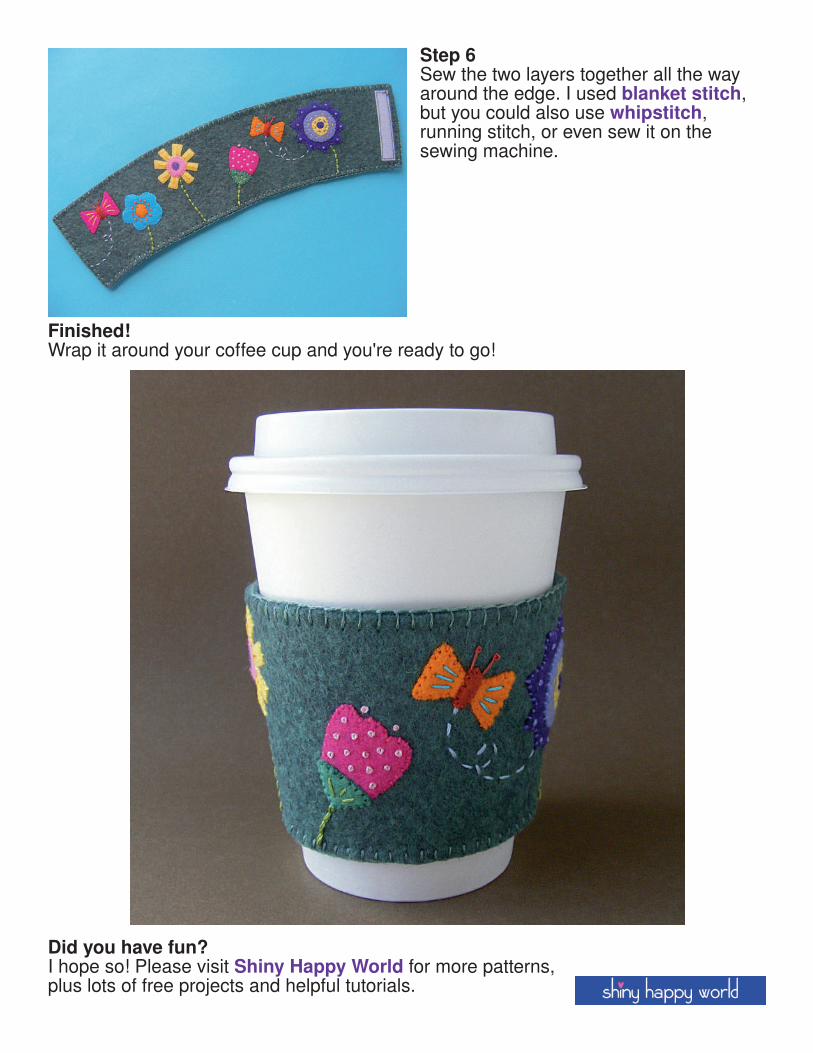
Step 6Sew the two layers together all the wayaround the edge. I used blanket stitch,but you could also use whipstitch,running stitch, or even sew it on thesewing machine.
Finished!Wrap it around your coffee cup and you're ready to go!
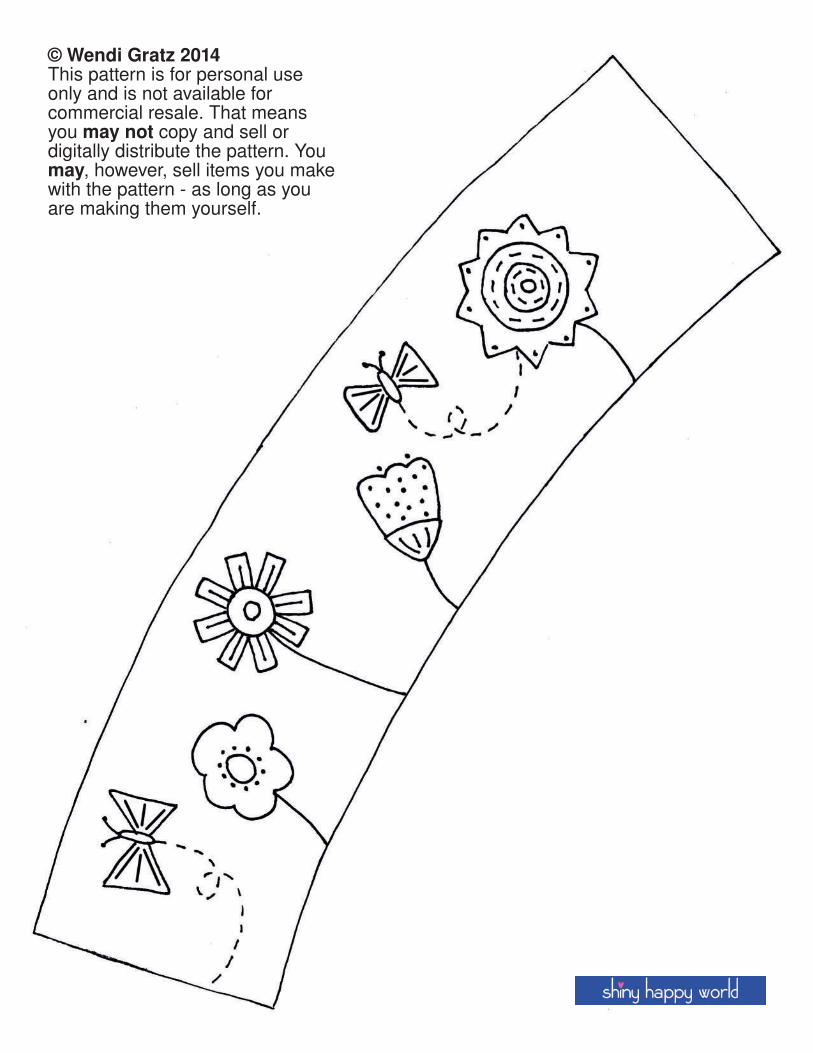
© Wendi Gratz 2014This pattern is for personal useonly and is not available forcommercial resale. That meansyou may not copy and sell ordigitally distribute the pattern. Youmay, however, sell items you makewith the pattern as long as youare making them yourself.