Embed Size (px)
Citation preview
Operating instructions
Washer-Disinfector
PG 8527 / PG 8528
To avoid the risk of personal injury or
damage to the appliance,
it is essential that
you read these operating instructions
before installation and use. M.-Nr. 10 317 051
en - CA

2
Safety Instructions and Warnings . . . . . . . . . . . . . . . . . . . . . . . . . . . . . . . . . . . . 6
Correct Use. . . . . . . . . . . . . . . . . . . . . . . . . . . . . . . . . . . . . . . . . . . . . . . . . . . . . 6
Using Accessories . . . . . . . . . . . . . . . . . . . . . . . . . . . . . . . . . . . . . . . . . . . . . . 10
Symbols on the Washer-Disinfector . . . . . . . . . . . . . . . . . . . . . . . . . . . . . . . . . 10
Disposing of Your Old Washer-Disinfector . . . . . . . . . . . . . . . . . . . . . . . . . . . . 10
Intended Use . . . . . . . . . . . . . . . . . . . . . . . . . . . . . . . . . . . . . . . . . . . . . . . . . . . . 11
User profiles. . . . . . . . . . . . . . . . . . . . . . . . . . . . . . . . . . . . . . . . . . . . . . . . . . . . . . 12
Guide to the Washer-Disinfector . . . . . . . . . . . . . . . . . . . . . . . . . . . . . . . . . . . . 13
Operating Controls . . . . . . . . . . . . . . . . . . . . . . . . . . . . . . . . . . . . . . . . . . . . . . . . 16
Display Operation . . . . . . . . . . . . . . . . . . . . . . . . . . . . . . . . . . . . . . . . . . . . . . . . . 18
Example of a selection list . . . . . . . . . . . . . . . . . . . . . . . . . . . . . . . . . . . . . . . . 18
Example of a program sequence display. . . . . . . . . . . . . . . . . . . . . . . . . . . . . 19
Context menu . . . . . . . . . . . . . . . . . . . . . . . . . . . . . . . . . . . . . . . . . . . . . . . . . . . . 20
Change the display language . . . . . . . . . . . . . . . . . . . . . . . . . . . . . . . . . . . . . . . . 21
Change the operating level . . . . . . . . . . . . . . . . . . . . . . . . . . . . . . . . . . . . . . . . . . 22
Start delay . . . . . . . . . . . . . . . . . . . . . . . . . . . . . . . . . . . . . . . . . . . . . . . . . . . . . . . 24
Change the heating type . . . . . . . . . . . . . . . . . . . . . . . . . . . . . . . . . . . . . . . . . . . . 26
Current faults . . . . . . . . . . . . . . . . . . . . . . . . . . . . . . . . . . . . . . . . . . . . . . . . . . . . . 26
Loading packages. . . . . . . . . . . . . . . . . . . . . . . . . . . . . . . . . . . . . . . . . . . . . . . . . 26
Automatic mobile unit recognition. . . . . . . . . . . . . . . . . . . . . . . . . . . . . . . . . . . 27
Application . . . . . . . . . . . . . . . . . . . . . . . . . . . . . . . . . . . . . . . . . . . . . . . . . . . . . . 28
Protein testing . . . . . . . . . . . . . . . . . . . . . . . . . . . . . . . . . . . . . . . . . . . . . . . . . . . . 28
How to load the washer-disinfector . . . . . . . . . . . . . . . . . . . . . . . . . . . . . . . . . . . . 29
Surgical instruments . . . . . . . . . . . . . . . . . . . . . . . . . . . . . . . . . . . . . . . . . . . . . . . 30
Ophthalmology . . . . . . . . . . . . . . . . . . . . . . . . . . . . . . . . . . . . . . . . . . . . . . . . . . . 31
Anesthesia instruments (AN) . . . . . . . . . . . . . . . . . . . . . . . . . . . . . . . . . . . . . . . . . 32
Baby bottles. . . . . . . . . . . . . . . . . . . . . . . . . . . . . . . . . . . . . . . . . . . . . . . . . . . . . . 33
OR shoes . . . . . . . . . . . . . . . . . . . . . . . . . . . . . . . . . . . . . . . . . . . . . . . . . . . . . . . 34
Laboratory equipment . . . . . . . . . . . . . . . . . . . . . . . . . . . . . . . . . . . . . . . . . . . . . . 35
Chemical processes and technology. . . . . . . . . . . . . . . . . . . . . . . . . . . . . . . . . 37
Adding liquid detergents and neutralizers . . . . . . . . . . . . . . . . . . . . . . . . . . . . 42
Dispensing systems. . . . . . . . . . . . . . . . . . . . . . . . . . . . . . . . . . . . . . . . . . . . . . . . 43
Message "Fill DOS [X] container" . . . . . . . . . . . . . . . . . . . . . . . . . . . . . . . . . . . 43
Adding liquid detergents and neutralizers . . . . . . . . . . . . . . . . . . . . . . . . . . . . 43
Message "Check dispensing system [X]" . . . . . . . . . . . . . . . . . . . . . . . . . . . . . 44
Priming the dispensing system. . . . . . . . . . . . . . . . . . . . . . . . . . . . . . . . . . . . . 44
Contents
3
Operation . . . . . . . . . . . . . . . . . . . . . . . . . . . . . . . . . . . . . . . . . . . . . . . . . . . . . . . 45
Main Switch - On/Off . . . . . . . . . . . . . . . . . . . . . . . . . . . . . . . . . . . . . . . . . . . . . . . 45
Switching On . . . . . . . . . . . . . . . . . . . . . . . . . . . . . . . . . . . . . . . . . . . . . . . . . . . . . 45
Starting a program. . . . . . . . . . . . . . . . . . . . . . . . . . . . . . . . . . . . . . . . . . . . . . . . . 46
Program sequence . . . . . . . . . . . . . . . . . . . . . . . . . . . . . . . . . . . . . . . . . . . . . . . . 48
End of program . . . . . . . . . . . . . . . . . . . . . . . . . . . . . . . . . . . . . . . . . . . . . . . . . . . 48
Turning off . . . . . . . . . . . . . . . . . . . . . . . . . . . . . . . . . . . . . . . . . . . . . . . . . . . . . . . 48
Cancelling a program . . . . . . . . . . . . . . . . . . . . . . . . . . . . . . . . . . . . . . . . . . . . . . 48
Interrupting a program. . . . . . . . . . . . . . . . . . . . . . . . . . . . . . . . . . . . . . . . . . . . . . 49
Barcode scanner (optional) . . . . . . . . . . . . . . . . . . . . . . . . . . . . . . . . . . . . . . . . 50
Barcode scan functions. . . . . . . . . . . . . . . . . . . . . . . . . . . . . . . . . . . . . . . . . . . . . 50
Barcode scan with conveyor belt connected. . . . . . . . . . . . . . . . . . . . . . . . . . 51
User scan Load . . . . . . . . . . . . . . . . . . . . . . . . . . . . . . . . . . . . . . . . . . . . . . . . . . . 51
User scan Cancel load . . . . . . . . . . . . . . . . . . . . . . . . . . . . . . . . . . . . . . . . . . . 51
User scan Unload . . . . . . . . . . . . . . . . . . . . . . . . . . . . . . . . . . . . . . . . . . . . . . . . . 52
Skip user scan for unloading . . . . . . . . . . . . . . . . . . . . . . . . . . . . . . . . . . . . . . 52
Scan load. . . . . . . . . . . . . . . . . . . . . . . . . . . . . . . . . . . . . . . . . . . . . . . . . . . . . . . . 53
Cancel load scan . . . . . . . . . . . . . . . . . . . . . . . . . . . . . . . . . . . . . . . . . . . . . . . 54
Skip load scan . . . . . . . . . . . . . . . . . . . . . . . . . . . . . . . . . . . . . . . . . . . . . . . . . 54
Using loading packages. . . . . . . . . . . . . . . . . . . . . . . . . . . . . . . . . . . . . . . . . . 54
Loading packages. . . . . . . . . . . . . . . . . . . . . . . . . . . . . . . . . . . . . . . . . . . . . . . . . 56
Add loading package . . . . . . . . . . . . . . . . . . . . . . . . . . . . . . . . . . . . . . . . . . . . 57
Display loading package . . . . . . . . . . . . . . . . . . . . . . . . . . . . . . . . . . . . . . . . . 58
Delete loading package . . . . . . . . . . . . . . . . . . . . . . . . . . . . . . . . . . . . . . . . . . 59
Move loading package . . . . . . . . . . . . . . . . . . . . . . . . . . . . . . . . . . . . . . . . . . . 60
Process documentation . . . . . . . . . . . . . . . . . . . . . . . . . . . . . . . . . . . . . . . . . . . 61
Maintenance of the washer-disinfector . . . . . . . . . . . . . . . . . . . . . . . . . . . . . . . 62
Routine maintenance . . . . . . . . . . . . . . . . . . . . . . . . . . . . . . . . . . . . . . . . . . . . . . . 62
Process validation . . . . . . . . . . . . . . . . . . . . . . . . . . . . . . . . . . . . . . . . . . . . . . . . . 62
Routine checks . . . . . . . . . . . . . . . . . . . . . . . . . . . . . . . . . . . . . . . . . . . . . . . . . . . 62
Cleaning the filters in the wash cabinet . . . . . . . . . . . . . . . . . . . . . . . . . . . . . . . . . 63
Cleaning the flat filter . . . . . . . . . . . . . . . . . . . . . . . . . . . . . . . . . . . . . . . . . . . . 63
Cleaning the filter in front of the circulation pumps. . . . . . . . . . . . . . . . . . . . . 64
Cleaning the spray arms . . . . . . . . . . . . . . . . . . . . . . . . . . . . . . . . . . . . . . . . . . . . 65
Cleaning the control panel and glass door (Optional) . . . . . . . . . . . . . . . . . . . . . 66
Cleaning the front of the washer-disinfector . . . . . . . . . . . . . . . . . . . . . . . . . . . . . 66
Contents
4
Cleaning the wash cabinet . . . . . . . . . . . . . . . . . . . . . . . . . . . . . . . . . . . . . . . . . . 66
Cleaning the door seal. . . . . . . . . . . . . . . . . . . . . . . . . . . . . . . . . . . . . . . . . . . . . . 66
Mobile units, baskets and inserts . . . . . . . . . . . . . . . . . . . . . . . . . . . . . . . . . . . . . 67
Built-in printer (Option) . . . . . . . . . . . . . . . . . . . . . . . . . . . . . . . . . . . . . . . . . . . . . 68
Replacing the print paper. . . . . . . . . . . . . . . . . . . . . . . . . . . . . . . . . . . . . . . . . 68
Replacing the ribbon cartridge. . . . . . . . . . . . . . . . . . . . . . . . . . . . . . . . . . . . . 68
Customer Service . . . . . . . . . . . . . . . . . . . . . . . . . . . . . . . . . . . . . . . . . . . . . . . . 69
Electrical connection . . . . . . . . . . . . . . . . . . . . . . . . . . . . . . . . . . . . . . . . . . . . . . 70
Plumbing. . . . . . . . . . . . . . . . . . . . . . . . . . . . . . . . . . . . . . . . . . . . . . . . . . . . . . . . 71
Technical data . . . . . . . . . . . . . . . . . . . . . . . . . . . . . . . . . . . . . . . . . . . . . . . . . . . 72
Optional equipment . . . . . . . . . . . . . . . . . . . . . . . . . . . . . . . . . . . . . . . . . . . . . . . 73
OXIVARIO and ORTHOVARIO Optional Processes . . . . . . . . . . . . . . . . . . . . . 74
Intended Use . . . . . . . . . . . . . . . . . . . . . . . . . . . . . . . . . . . . . . . . . . . . . . . . . . . . . 74
Applications . . . . . . . . . . . . . . . . . . . . . . . . . . . . . . . . . . . . . . . . . . . . . . . . . . . 74
Safety instructions and warnings. . . . . . . . . . . . . . . . . . . . . . . . . . . . . . . . . . . . . . 75
Connecting the H2O2 container(s) . . . . . . . . . . . . . . . . . . . . . . . . . . . . . . . . . . . . . 75
Optional equipment DK + WRG . . . . . . . . . . . . . . . . . . . . . . . . . . . . . . . . . . . . . 76
Functional description . . . . . . . . . . . . . . . . . . . . . . . . . . . . . . . . . . . . . . . . . . . . . . 76
Intended application. . . . . . . . . . . . . . . . . . . . . . . . . . . . . . . . . . . . . . . . . . . . . 76
SAFETY INSTRUCTIONS AND WARNINGS . . . . . . . . . . . . . . . . . . . . . . . . . . . . . 76
Applicable standard programs . . . . . . . . . . . . . . . . . . . . . . . . . . . . . . . . . . . . . . . 77
Disposing of an old appliance . . . . . . . . . . . . . . . . . . . . . . . . . . . . . . . . . . . . . . 78
Contents
5
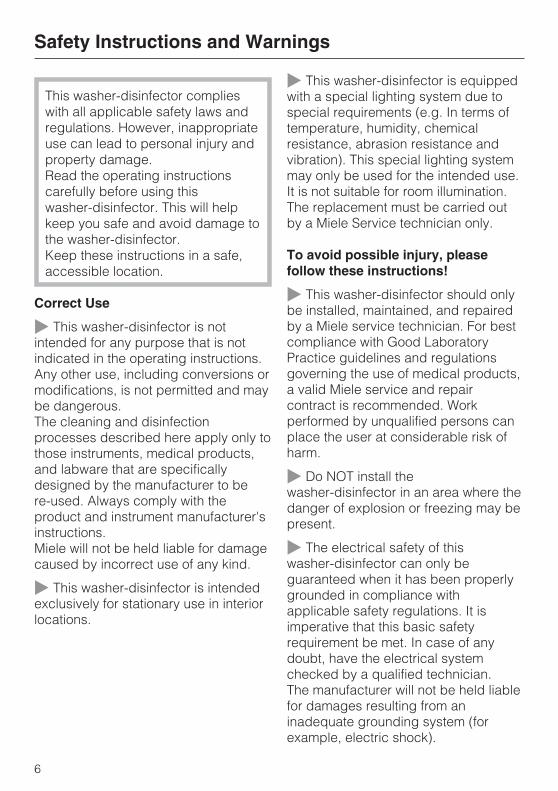
This washer-disinfector complies
with all applicable safety laws and
regulations. However, inappropriate
use can lead to personal injury and
property damage.
Read the operating instructions
carefully before using this
washer-disinfector. This will help
keep you safe and avoid damage to
the washer-disinfector.
Keep these instructions in a safe,
accessible location.
Correct Use
� This washer-disinfector is not
intended for any purpose that is not
indicated in the operating instructions.
Any other use, including conversions or
modifications, is not permitted and may
be dangerous.
The cleaning and disinfection
processes described here apply only to
those instruments, medical products,
and labware that are specifically
designed by the manufacturer to be
re-used. Always comply with the
product and instrument manufacturer's
instructions.
Miele will not be held liable for damage
caused by incorrect use of any kind.
� This washer-disinfector is intended
exclusively for stationary use in interior
locations.
� This washer-disinfector is equipped
with a special lighting system due to
special requirements (e.g. In terms of
temperature, humidity, chemical
resistance, abrasion resistance and
vibration). This special lighting system
may only be used for the intended use.
It is not suitable for room illumination.
The replacement must be carried out
by a Miele Service technician only.
To avoid possible injury, please
follow these instructions!
� This washer-disinfector should only
be installed, maintained, and repaired
by a Miele service technician. For best
compliance with Good Laboratory
Practice guidelines and regulations
governing the use of medical products,
a valid Miele service and repair
contract is recommended. Work
performed by unqualified persons can
place the user at considerable risk of
harm.
� Do NOT install the
washer-disinfector in an area where the
danger of explosion or freezing may be
present.
� The electrical safety of this
washer-disinfector can only be
guaranteed when it has been properly
grounded in compliance with
applicable safety regulations. It is
imperative that this basic safety
requirement be met. In case of any
doubt, have the electrical system
checked by a qualified technician.
The manufacturer will not be held liable
for damages resulting from an
inadequate grounding system (for
example, electric shock).
Safety Instructions and Warnings
6
� A damaged or leaking
washer-disinfector is is a hazard to your
safety. Immediately turn off the
washer-disinfector at the power switch
and contact the Miele Service
Department.
� Washer-disinfector operators must
be trained on a regular basis. Untrained
personnel must not be allowed access
to the washer-disinfector or its controls.
� Always exercise caution when
handling the processing chemicals for
this washer-disinfector (detergent,
neutralizer, saponifier, rinsing agent,
etc.). These products can cause
irritation and burning.
Comply with the applicable safety
regulations! Use protective eyewear
and gloves. Always follow the
manufacturer's safety
recommendations when using process
chemicals (see material safety data
sheets).
� The washer-disinfector is designed
for use with water and designated
processing chemicals only. The
washer-disinfector must not be
operated with organic solvents or
flammable liquids. This may cause an
explosion or damage to rubber and
plastic components, which in turn
allows liquid substances to leak out.
� The water in the wash chamber is
NOT safe to drink.
� Take care when sorting items with
sharp, pointed ends. Position them in
the washer-disinfector so that you will
not hurt yourself or create a danger for
others.
� When operating this
washer-disinfector, beware of the high
temperatures involved. If you bypass
the electrical lock to open the door,
there is the danger of scalding and
heat or chemical burns. If disinfectants
have been used, there is also the
danger of inhaling toxic vapour.
� The door seal and the operation of
the steam condenser should be
regularly checked, as volatile toxic or
chemical substances (e.g. aldehyde in
the disinfection agent) may be created
in the wash water during preparation.
Opening the door of the
washer-disinfector during a program
interruption therefore poses a major
risk.
� If you are exposed to toxic vapours
or processing chemicals, consult the
chemical manufacturer's material safety
data sheets for emergency procedures.
� Always allow mobile units, modular
baskets, inserts, and loads to cool
before removing. Be sure to empty any
water from concave items into the wash
chamber before removing.
� After drying with the drying unit,
leave the door open at first, to allow the
items and inserts to cool down.
� If the boiler has been programmed
to "BOILER READY", always beware of
hot water and steam when opening the
door! Looking from the unclean side,
the inlet pipe is located beneath the
right basket guide rail.
� Steam heating is permissible up to a
pressure of 1000 kPa (10 bar). This
corresponds to a water steam
temperature of 179°C.
Safety Instructions and Warnings
7
� Do NOT hose down the
washer-disinfector or the immediate
vicinity, e.g., with a water hose or
pressure washer.
� Before servicing the
washer-disinfector, disconnect it from
the power supply.
The following points should be
observed, to assist in maintaining
quality standards when processing
medical devices and critical labware,
to protect patients, and to avoid
damage to property!
� If the washer-disinfector is being
used for disinfection ordered by the
authorities, the steam condenser and
its connections to the rinsing chamber
and outlet discharge must be
disinfected before any repair or
exchange.
� Only authorized persons may
interrupt a program, and only in
exceptional cases.
� It is the responsibility of the operator
to routinely check that the required
cleaning and disinfection standards for
medical devices are being met.
Therefore, process results have to be
regularly tested and documented, both
thermo-electrically and through
inspection. For thermochemical
processes, additional testing is
required using chemical or biological
indicators.
� For thermal disinfection, the
appropriate temperatures and holding
times, as required by microbiological
and public health standards and
guidelines, must be used to achieve the
required degree of infection control.
� The processing of medical devices
is carried out by means of thermal
disinfection.
The disinfection of other items that are
not heat-resistant (e.g. OR shoes) can
be carried out using the CHEM-DESIN
program with the addition of a chemical
disinfectant.
The disinfection parameters are based
on the recommendation of the
disinfectant manufacturer. Always
observe their specifications for
handling, applications and efficacy.
These chemo-thermal processes are
not suitable for processing medical
devices.
� Under certain circumstances, the
process chemicals can cause damage
to the washer-disinfector. It is
recommended to follow the
recommendations of the process
chemical manufacturers. In the event of
damages or concerns about possible
material incompatibilities, please
consult Miele.
� Do not use any abrasive process
chemicals with the washer-disinfector.
They increase the wear on machine
components (e.g. spray arm supports).
If such agents are used for manual
pre-treatment of containers or
instruments, they must be completely
removed before placing the items in the
washer-disinfector!
Safety Instructions and Warnings
8
� Pre-treating (e. g. with cleaning
agents or disinfectants), some types of
soiling and the interaction of certain
processing chemicals can cause
foaming. Suds can have an adverse
effect on the cleaning and disinfecting
results obtained. Pre-treatment agents
need to be completely removed before
placing the items in the
washer-disinfector.
� The process must be adjusted so
that no foam escapes the wash
chamber. Escaping foam jeopardizes
the safe operation of the
washer-disinfector.
� The processing must be checked
regularly by the operator in order to
detect any foaming.
� To avoid damage to the
washer-disinfector and the associated
accessories by the effect of process
chemicals, introduced contamination or
their interaction, the instructions in the
chapter "Chemical Process
Technology" must be followed.
� Even when a chemical additive (e.g.
a cleaning agent) is recommended, the
washer-disinfector manufacturer takes
no responsibility for the effect of such
chemicals on the labware/instruments
involved.
Note that formulation changes, storage
conditions, etc., that are not disclosed
by the manufacturer may adversely
affect the cleaning results obtained.
� When using process chemicals,
always follow the instructions opf the
chemicals manufacturer. To avoid
material damage and the possibility of
violent chemical reactions (e.g.
hydrogen gas reaction), always comply
with the manufacturer's intended
application(s) for a given cleaning
agent.
� For critical applications, where very
high processing requirements have to
be met, it is strongly recommended that
all process-related factors (processing
chemicals, water quality, etc.) be
discussed in advance with Miele.
� In addition, for applications that
demand especially stringent cleaning
and rinsing results, (e.g., chemical
analysis) the operator must ensure that
quality control occurs on a regular
basis, to meet the standards involved.
� Only use mobile units, modular
baskets, and inserts as intended by the
manufacturer.
Hollow items must be positioned for full
exposure to rinse water.
� Empty all liquids from containers
and hollow items before loading them
into the washer-disinfector.
� Ensure that no acid or solvent
residues, especially hydrochloric acid
or chloride solutions, get inside the
wash chamber. Never place corroding
ferrous materials in the
washer-disinfector. Only trace amounts
of any organic solvents should be
present in any soiling.
Safety Instructions and Warnings
9
� To avoid corrosive damage, make
sure the stainless steel housing does
not come into contact with
solutions/steam containing hydrochloric
acid.
� After any work on the water supply
system, the water lines to the
washer-disinfector must be bled.
Otherwise some components of the
washer-disinfector may be damaged.
� Please be sure to follow the
installation instructions in this manual
and in the installation manual.
Using Accessories
� Whatever the application, only Miele
accessories should be connected to
this washer-disinfector. Consult Miele
for details on the type of equipment to
use.
� Only Miele mobile units, modular
baskets, and inserts should be used. If
Miele accessories are altered in any
way, or mobile units and inserts from
another manufacturer are used, Miele
cannot assure the cleaning and
disinfection results. Damage or injury
caused in this way are excluded from
the warranty.
� Only use process chemicals that are
approved by their manufacturer for the
application involved. Any negative
effects on labware or instruments and
the washer-disinfector itself are the
liability of the chemical manufacturer.
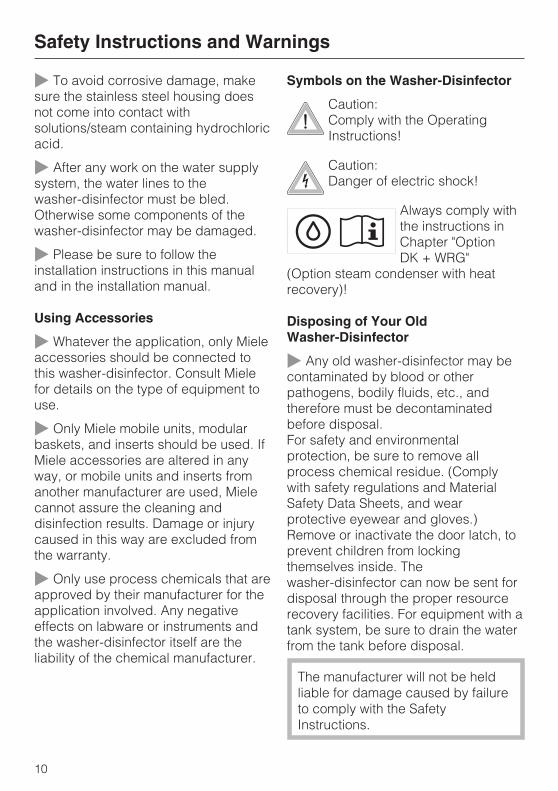
Symbols on the Washer-Disinfector
Caution:
Comply with the Operating
Instructions!
Caution:
Danger of electric shock!
Always comply with
the instructions in
Chapter "Option
DK + WRG"
(Option steam condenser with heat
recovery)!
Disposing of Your Old
Washer-Disinfector
� Any old washer-disinfector may be
contaminated by blood or other
pathogens, bodily fluids, etc., and
therefore must be decontaminated
before disposal.
For safety and environmental
protection, be sure to remove all
process chemical residue. (Comply
with safety regulations and Material
Safety Data Sheets, and wear
protective eyewear and gloves.)
Remove or inactivate the door latch, to
prevent children from locking
themselves inside. The
washer-disinfector can now be sent for
disposal through the proper resource
recovery facilities. For equipment with a
tank system, be sure to drain the water
from the tank before disposal.
The manufacturer will not be held
liable for damage caused by failure
to comply with the Safety
Instructions.
Safety Instructions and Warnings
10
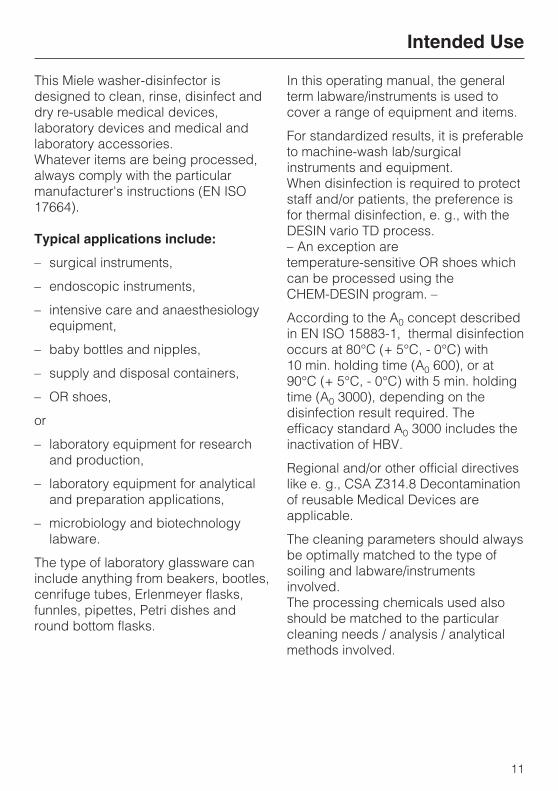
This Miele washer-disinfector is
designed to clean, rinse, disinfect and
dry re-usable medical devices,
laboratory devices and medical and
laboratory accessories.
Whatever items are being processed,
always comply with the particular
manufacturer's instructions (EN ISO
17664).
Typical applications include:
– surgical instruments,
– endoscopic instruments,
– intensive care and anaesthesiology
equipment,
– baby bottles and nipples,
– supply and disposal containers,
– OR shoes,
or
– laboratory equipment for research
and production,
– laboratory equipment for analytical
and preparation applications,
– microbiology and biotechnology
labware.
The type of laboratory glassware can
include anything from beakers, bootles,
cenrifuge tubes, Erlenmeyer flasks,
funnles, pipettes, Petri dishes and
round bottom flasks.
In this operating manual, the general
term labware/instruments is used to
cover a range of equipment and items.
For standardized results, it is preferable
to machine-wash lab/surgical
instruments and equipment.
When disinfection is required to protect
staff and/or patients, the preference is
for thermal disinfection, e. g., with the
DESIN vario TD process.
– An exception are
temperature-sensitive OR shoes which
can be processed using the
CHEM-DESIN program. –
According to the A0 concept described
in EN ISO 15883-1, thermal disinfection
occurs at 80°C (+ 5°C, - 0°C) with
10 min. holding time (A0 600), or at
90°C (+ 5°C, - 0°C) with 5 min. holding
time (A0 3000), depending on the
disinfection result required. The
efficacy standard A0 3000 includes the
inactivation of HBV.
Regional and/or other official directives
like e. g., CSA Z314.8 Decontamination
of reusable Medical Devices are
applicable.
The cleaning parameters should always
be optimally matched to the type of
soiling and labware/instruments
involved.
The processing chemicals used also
should be matched to the particular
cleaning needs / analysis / analytical
methods involved.
Intended Use
11
For re-usable items to be safe for
continued use, the cleaning result must
meet certain minimum standards for
disinfection, sterilization and residue
levels.
Re-usable medical products are best
cleaned with the DESIN vario TD
process or, as appropriate, with the
ORTHOVARIO or OXIVARIO processes.
Also important for acceptable cleaning
results is the use of suitable loading
accessories (mobile units, modules,
inserts). See the section on
"Applications" for examples.
The washer-disinfector is designed to
rinse with tap water or processed water
(e.g., distilled water, pure water,
deionized water, demineralized water)
depending on the quality required for
your application(s). The water quality
selected is especially important for
labware intended for analytical uses.
Under EN ISO 15883, this
washer-disinfector is suitable for
process validation.
User profiles
Daily-routine operators
For daily routine tasks, the operating
personnel must be instructed in the
basic functions and the loading of the
washer-disinfector and should receive
regular training. Basic knowledge of the
machine-based processing of medical
devices is required.
Daily routine work takes place on
operating levels A and C.
Daily-routine supervisors
Advanced knowledge of the
machine-based processing of medical
devices is required for more complex
tasks such as program interruption or
program cancellation.
These tasks take place on operating
level B.
Service tasks and administration
Additional expertise is required for
changing the processes or adjusting
the washer-disinfector, e. g. the
accessories that are used or the site
conditions.
Validations require special expertise in
the machine-based processing of
medical products, in the processing
technology and the applicable
standards and legislation.
Service tasks and validations are
carried out on operating level D.
Intended Use
12
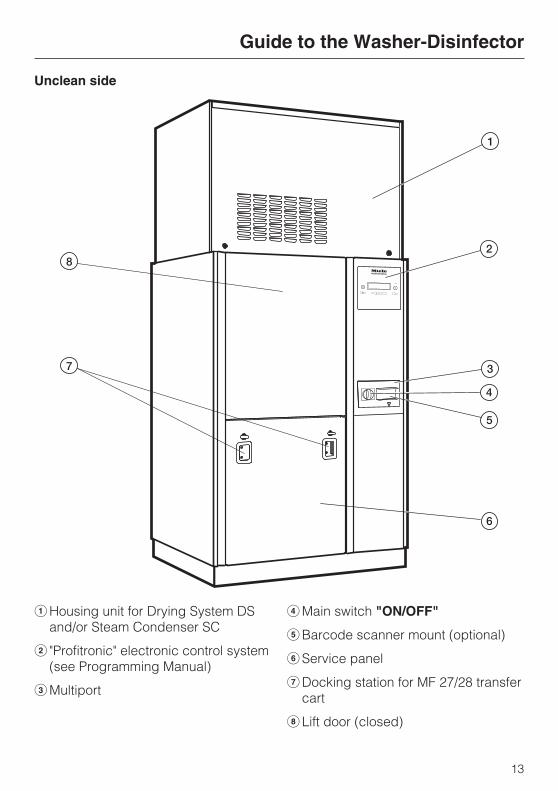
Unclean side
�Housing unit for Drying System DS
and/or Steam Condenser SC
� "Profitronic" electronic control system
(see Programming Manual)
�Multiport
�Main switch "ON/OFF"
�Barcode scanner mount (optional)
�Service panel
�Docking station for MF 27/28 transfer
cart
Lift door (closed)
Guide to the Washer-Disinfector
13
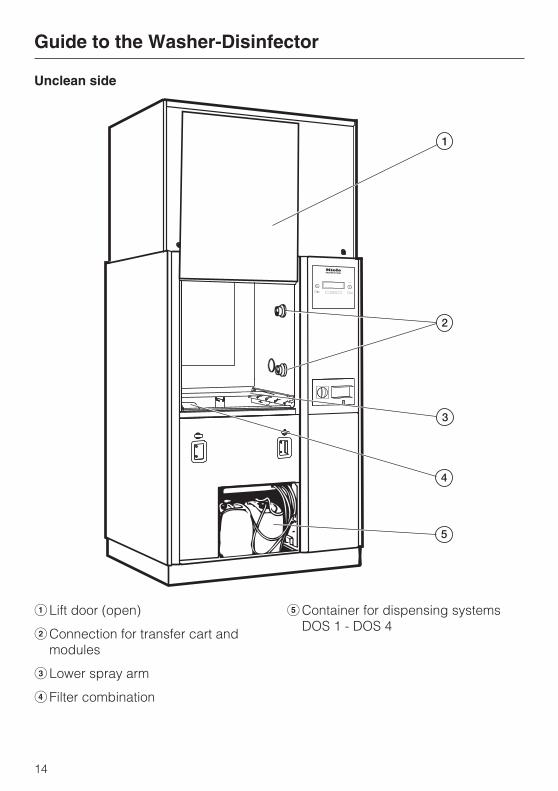
Unclean side
�Lift door (open)
�Connection for transfer cart and
modules
�Lower spray arm
�Filter combination
�Container for dispensing systems
DOS 1 - DOS 4
Guide to the Washer-Disinfector
14
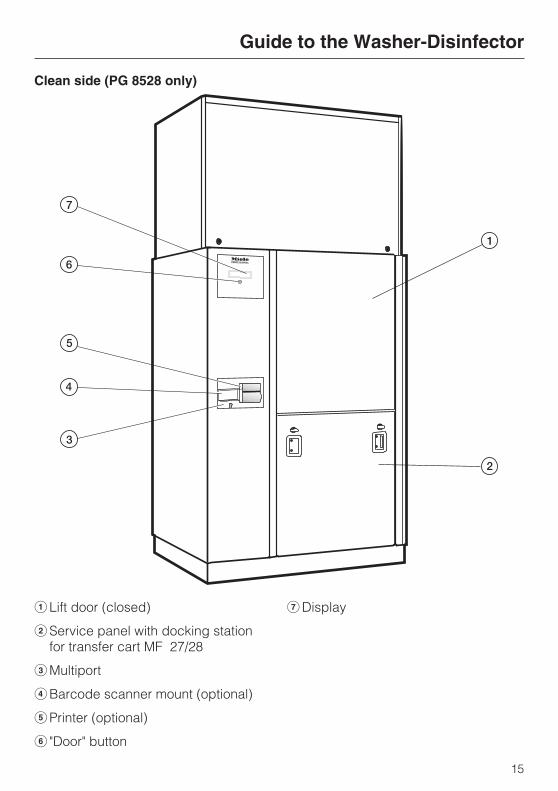
Clean side (PG 8528 only)
�Lift door (closed)
�Service panel with docking station
for transfer cart MF 27/28
�Multiport
�Barcode scanner mount (optional)
�Printer (optional)
� "Door" button
�Display
Guide to the Washer-Disinfector
15
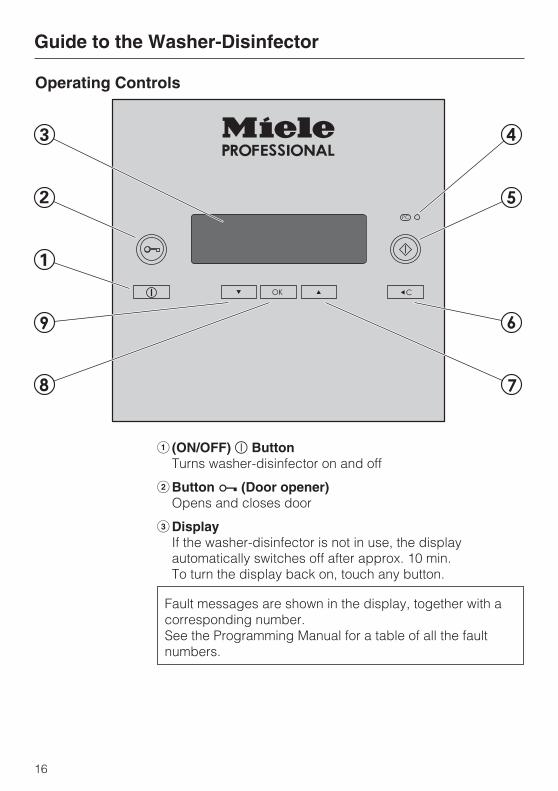
Operating Controls
� (ON/OFF) � Button
Turns washer-disinfector on and off
�Button � (Door opener)
Opens and closes door
�Display
If the washer-disinfector is not in use, the display
automatically switches off after approx. 10 min.
To turn the display back on, touch any button.
Fault messages are shown in the display, together with a
corresponding number.
See the Programming Manual for a table of all the fault
numbers.
Guide to the Washer-Disinfector
16
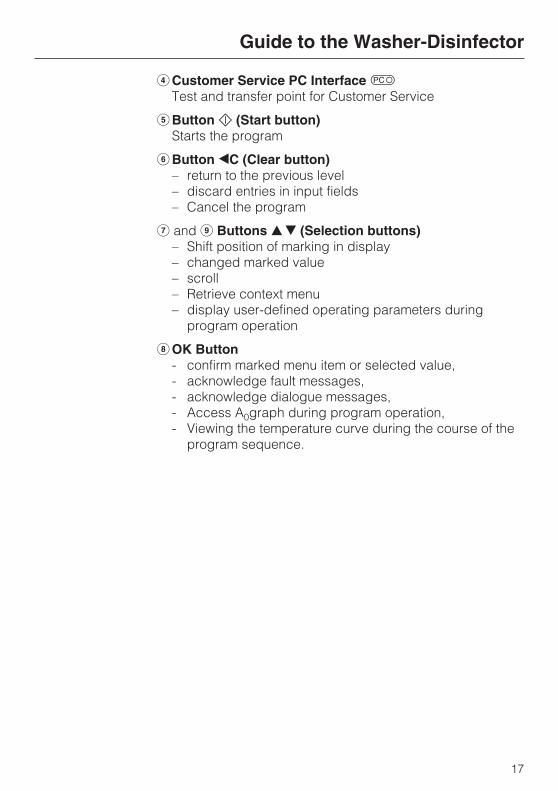
�Customer Service PC Interface �
Test and transfer point for Customer Service
�Button � (Start button)
Starts the program
�Button �C (Clear button)
– return to the previous level
– discard entries in input fields
– Cancel the program
� and Buttons � (Selection buttons)
– Shift position of marking in display
– changed marked value
– scroll
– Retrieve context menu
– display user-defined operating parameters during
program operation
OK Button
- confirm marked menu item or selected value,
- acknowledge fault messages,
- acknowledge dialogue messages,
- Access A0graph during program operation,
- Viewing the temperature curve during the course of the
program sequence.
Guide to the Washer-Disinfector
17
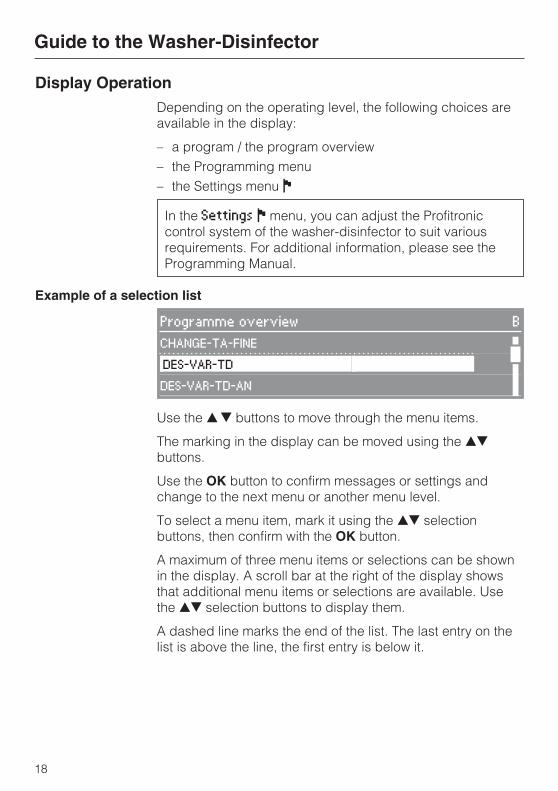
Display Operation
Depending on the operating level, the following choices are
available in the display:
– a program / the program overview
– the Programming menu
– the Settings menu �
In the Settings � menu, you can adjust the Profitronic
control system of the washer-disinfector to suit various
requirements. For additional information, please see the
Programming Manual.
Example of a selection list
Programme overview B
CHANGE-TA-FINE
DES-VAR-TD
DES-VAR-TD-AN �Use the � buttons to move through the menu items.
The marking in the display can be moved using the �
buttons.
Use the OK button to confirm messages or settings and
change to the next menu or another menu level.
To select a menu item, mark it using the � selection
buttons, then confirm with the OK button.
A maximum of three menu items or selections can be shown
in the display. A scroll bar at the right of the display shows
that additional menu items or selections are available. Use
the � selection buttons to display them.
A dashed line marks the end of the list. The last entry on the
list is above the line, the first entry is below it.
Guide to the Washer-Disinfector
18

Example of a program sequence display
DES-VAR-TD A
Main wash 55,2 °C
Time remaining 0:35 h
While a program is running, the following appears in the
display:
– the program name
– the operating level
– the program segment
– the water temperature
(or the air temperature in the program segment "Dry")
– the estimated time remaining or the program time
completed so far
– any fault messages or notices
Guide to the Washer-Disinfector
19
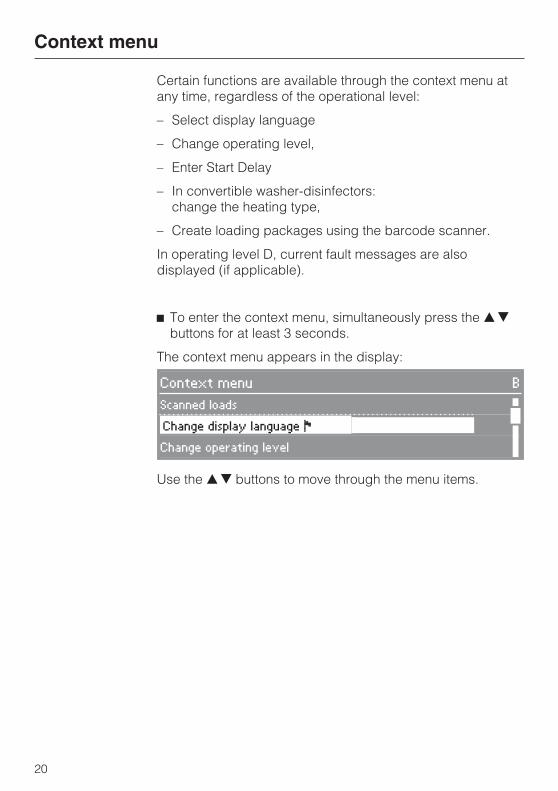
Certain functions are available through the context menu at
any time, regardless of the operational level:
– Select display language
– Change operating level,
– Enter Start Delay
– In convertible washer-disinfectors:
change the heating type,
– Create loading packages using the barcode scanner.
In operating level D, current fault messages are also
displayed (if applicable).
� To enter the context menu, simultaneously press the �
buttons for at least 3 seconds.
The context menu appears in the display:
Context menu B
Scanned loads
Change display language �
Change operating level �Use the � buttons to move through the menu items.
Context menu
20
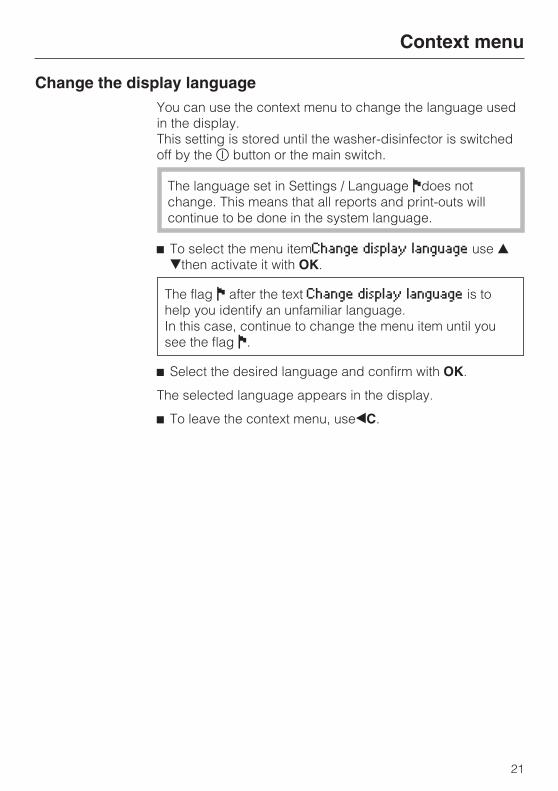
Change the display language
You can use the context menu to change the language used
in the display.
This setting is stored until the washer-disinfector is switched
off by the � button or the main switch.
The language set in Settings / Language �does not
change. This means that all reports and print-outs will
continue to be done in the system language.
� To select the menu itemChange display language use �
then activate it with OK.
The flag � after the text Change display language is to
help you identify an unfamiliar language.
In this case, continue to change the menu item until you
see the flag �.
� Select the desired language and confirm with OK.
The selected language appears in the display.
� To leave the context menu, use�C.
Context menu
21
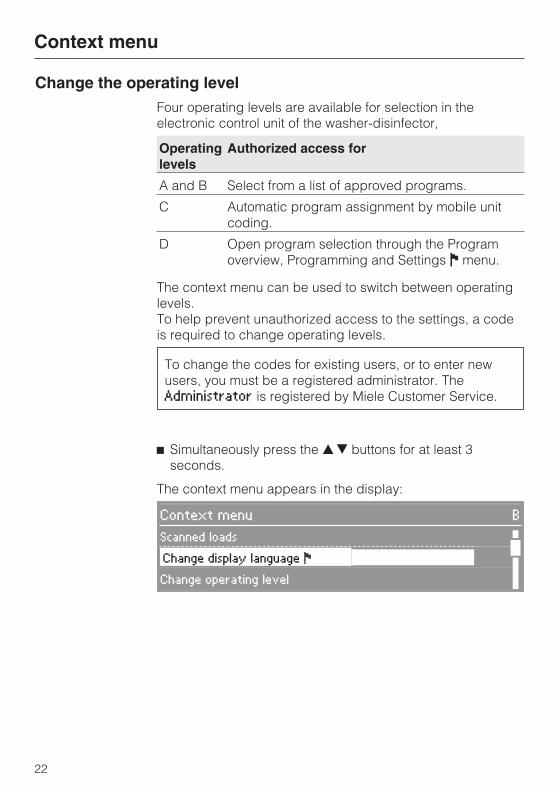
Change the operating level
Four operating levels are available for selection in the
electronic control unit of the washer-disinfector,
Operating
levels
Authorized access for
A and B Select from a list of approved programs.
C Automatic program assignment by mobile unit
coding.
D Open program selection through the Program
overview, Programming and Settings � menu.
The context menu can be used to switch between operating
levels.
To help prevent unauthorized access to the settings, a code
is required to change operating levels.
To change the codes for existing users, or to enter new
users, you must be a registered administrator. The
Administrator is registered by Miele Customer Service.
� Simultaneously press the � buttons for at least 3
seconds.
The context menu appears in the display:
Context menu B
Scanned loads
Change display language �
Change operating level �
Context menu
22
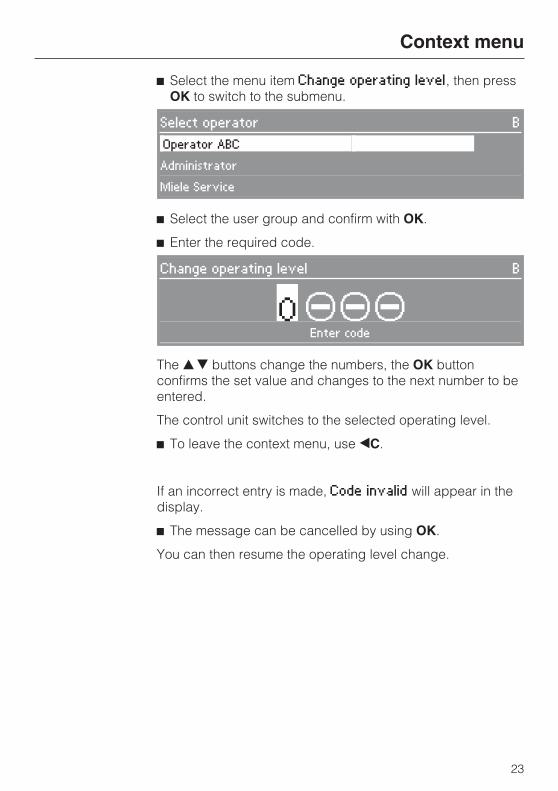
� Select the menu item Change operating level, then press
OK to switch to the submenu.
Select operator B
Operator ABC
Administrator
Miele Service
� Select the user group and confirm with OK.
� Enter the required code.
Change operating level B
0 � � �Enter code
The � buttons change the numbers, the OK button
confirms the set value and changes to the next number to be
entered.
The control unit switches to the selected operating level.
� To leave the context menu, use �C.
If an incorrect entry is made, Code invalid will appear in the
display.
� The message can be cancelled by using OK.
You can then resume the operating level change.
Context menu
23

Start delay
The start time for a program can be pre-selected.
� To use this feature, go to the Delay start menu item and
confirm.
� To activate the Start Delay option, go to menu item
Activate and select Yes .
Delay start B
Activate Yes
Delay start
� To use this feature, go to Delay start and confirm.
The start time menu will appear.
Delay start B
17:48Enter time
� Use the numbers to enter the desired start time, then
confirm.
� Keep pressing the �C button until the Main menu appears
in the display.
� To select a program, go to Programme overview.
Programme overview B
CHANGE-TA-FINE
DES-VAR-TD
DES-VAR-TD-AN �� Select a program and use the � button to start.
Context menu
24
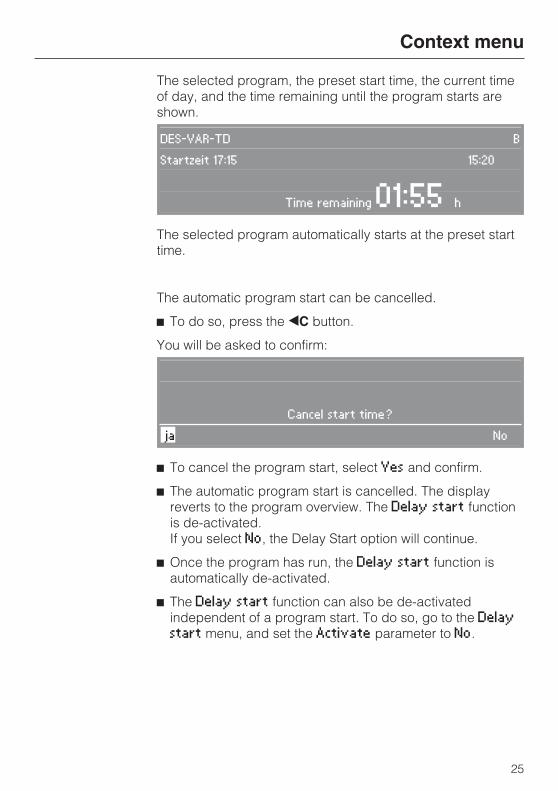
The selected program, the preset start time, the current time
of day, and the time remaining until the program starts are
shown.
DES-VAR-TD B
Startzeit 17:15 15:20
Time remaining 01:55 h
The selected program automatically starts at the preset start
time.
The automatic program start can be cancelled.
� To do so, press the �C button.
You will be asked to confirm:
Cancel start time?
ja No
� To cancel the program start, select Yes and confirm.
� The automatic program start is cancelled. The display
reverts to the program overview. The Delay start function
is de-activated.
If you select No, the Delay Start option will continue.
� Once the program has run, the Delay start function is
automatically de-activated.
� The Delay start function can also be de-activated
independent of a program start. To do so, go to the Delay
start menu, and set the Activate parameter to No.
Context menu
25
Change the heating type
In convertible washer-disinfectors, you can use the context
menu to change the heating type - e. g. from electric to steam
heating.
� Select the menu item Steam/Electric, then use OK to
activate.
� Change the heating type as desired, e. g., to
Steam+electric, then confirm the selection with OK.
The new heating type is saved.
� To leave the context menu, use�C.
Current faults
In operating level D the current fault messages can be read
under this menu item.
� Select the menu item and confirm using OK.
The current fault messages are displayed.
� Use OK to scroll through the fault messages.
� To leave the context menu, use�C.
Loading packages
If a barcode scanner is connected to the washer-disinfector
and load scan is activated, loading packages can be created
with this menu item in the Context menu.
All stages in connection with the barcode scanner are
described in the "Barcode scanner" section.
Context menu
26
The automatic mobile unit recognition
feature assigns a program place to a
mobile unit. For this to work, the mobile
units must be coded with a magnetic
strip (with a bit combination).
In operating level C, each coded
mobile unit is assigned to the
corresponding program place.
When a coded unit is inserted into the
machine and the washer-disinfector
door closes, the automatic mobile unit
recognition selects the assigned
program.
See "Mobile unit coding" in the
washer-disinfector Programming
Manual for information on how to
code a mobile unit and assign
programs.
Make sure that no metallic parts
or pieces are stuck to the magnetic
strip or its underside.
Attached metallic objects can cause
the coding to be misread or be
unreadable.
Mobile units with side coupling are
coded with tracks that have Bit 6 set
to I.
Mobile units without side coupling
must be coded with tracks that do
NOT contain Bit 6.
The magnetic strips in
washer-disinfectors PG 8527 /
PG 8528 must contain black
magnets.
Automatic mobile unit recognition
27
The washer-disinfector can be fitted
with various mobile units, adapted to
the type and shape of the items that
need to be cleaned and disinfected;
they can be equipped with a wide
variety of modules and inserts.
Mobile units, modules and inserts
should be properly selected to
match the application involved.
On the following pages you will find
loading examples and additional
information.
Before EVERY program start,
conduct the following visual
inspection:
– Are the items properly sorted, loaded
and connected in the
washer-disinfector?
– Are the spray arms clean and can
they rotate freely?
– Is the flat filter free of debris (remove
any coarse material and clean the
filter as needed)?
– Is the flat filter horizontally aligned
with the wash chamber and is the
seal flush with the wash chamber?
– Is the adapter properly connected to
the water supply for the spray arms
and nozzles?
– Are the process chemical dispensers
full (detergent, neutralizer, etc.)?
After EVERY program completion,
conduct the following visual
inspection:
– Inspect the labware or instruments
for cleanliness.
– Have any hollow items been
dislodged from their proper position
on the nozzles?
Any items that were dislodged
from the adapters during a program
cycle must be washed again.
– Are the cavities and channels in
hollow items cleaned through?
– Are the nozzles and connections
firmly attached to the mobile
units/inserts?
Protein testing
After washing, items used in medical
applications should be checked at
random for proteins.
Application
28
How to load the
washer-disinfector
Select mobile units, baskets and
inserts appropriate for the
application.
– Always load items in such a way that
all surfaces will be exposed to the
cleaning water. This ensures that the
items will be properly cleaned.
– Do not nest any items inside other
items. Keep each item separate.
– Hollow items must be arranged for
complete inside exposure to the
cleaning water.
– Instruments with long, narrow hollows
must be loaded so that they can be
completely flushed with washwater
and rinsewater.
– Hollow items should be inverted and
placed in suitable mobile units,
modules and inserts so that water
can flow in and out unrestricted.
Protective netting can be used to
avoid damage to sensitive
instruments or glass breakage.
– Lightweight items can be secured
with cover nets (e.g. A 6), and small
parts can be placed in a small item
mesh tray, so that they do not block
the spray arms or become attached
to the magnetic strip on the automat-
ic mobile unit recognition.
– Deep based items should be
arranged at an angle, so that water
can run off easily.
– Tall, narrow hollow items should be
placed in the center of the mobile
unit for best water coverage.
– Mobile units with an adapter must be
properly connected.
– Modules must be properly
connected to the mobile unit.
– The spray arms must not be blocked
by items that are too tall or hang
through the baskets. Gently rotate
the arms by hand to check mobility.
– To avoid corrosion, use only
unblemished instruments made of
stainless steel.
– Heat-sensitive instruments should be
cleaned and disinfected with a
thermochemical process only.
NEVER process disposable
instruments in the
washer-disinfector.
Prepare items before loading
Empty all items before loading into the
machine. Comply with all applicable
infection-control regulations.
Ensure that no acid or solvent
residues, especially hydrochloric
acid or chlorides, get inside the
washer-disinfector.
Instrument sorting
Whenever possible, instruments should
be reprocessed in washer-disinfectors
without pre-soaking.
Application
29
Surgical instruments
The wait-time before processing
surgical instruments should be as short
as possible and should not exceed two
hours.
The instruments should be processed
using the program DES-VAR-TD.
For surgical instruments with a longer
wait time, use the OXIVARIO or
ORTHOVARIO process (see section on
"Optional features").
Surgical instruments, even those for
minimally invasive procedures, should
be thermally disinfected for best
results.
Whenever possible, demineralized
water should be used for rinsing
(conductivity ~ 15 �S/cm) for a spotless
result and to avoid corrosion. The use
of tap water with more than 100 mg
chloride/L entails the risk of corrosion.
When processing instruments for
minimally invasive procedures, e.g.,
minimal invasive surgery an intensive
internal cleaning result is imperative.
Only the programs DES-VAR-TD and
OXIVARIO are suitable for thorough
cleaning. Always observe the specific
loading instructions, and all applicable
procedures, including for the use of
appropriate detergents for these
sensitive instruments.
For rinsing, use demineralized water
with a conductivity of ~15 �S/cm.
Very narrow-lumen instruments must
be pre-cleaned manually where
necessary. Follow the instrument
manufacturer's instructions!
Most rigid sterilization containers can
be processed thermally with the
CONTAINER program. For anodized
alumium containers, demineralized
water must be used for cleaning and
rinsing.
They should not be cleaned at 93 °C
mit and 10 min holding time with an
alkaline detergent.
When processing surgical container
with a disinfection standard A0=600 the
program CONTAINER-600 must later
be programmed by Miele.
The mobile units for surgical
instruments and sterilization
containers come with their own
operating instructions.
Application
30
Ophthalmology
Using the E 929/1 mobile unit,
ophthalmological surgical instrument
sets can be cleaned and disinfected
automatically.
For rinsing, use demineralized water
with a conductivity of ~15 �S/cm
(microsiemens per centimetre).
In addition, the rinse water must have a
low endotoxin and pyrogen content!
The upper level is equipped with
separate connections for hollow
instruments, e.g. rinse and suction
grips and cannulae.
Silicone holders and stoppers fitted on
the mesh tray fix and secure the
instruments to the inlet hose of the
mobile unit.
The lower level of the mobile unit is
fitted with E 441/1 inserts or E 142
mesh trays to prepare instruments
without a hollow body.
In washer-disinfectors used to
process small-calibre
ophthalmological instruments,
plastic mesh must not be used.
The mobile units for
ophthalmological surgical instrument
sets come with their own instructions
for use.
Mobile unit E 929 (for
ophthalmological surgical
instruments) must only be used in
washer-disinfectors that do NOT
have a dispensing system with a
flow rate of 465 mL/min installed.
Ophtalmological instruments
must not be treated in
washers-disinfectors with steam
condenser with heat recovery
(DK+WRG option)!
Application
31
Anesthesia instruments (AN)
Anaesthetic instruments should be
thermally disinfected using the program
DES-VAR-TD-AN.
If no sterilization will occur after
washing, germ growth will need to
be inhibited during storage.
Because this requires thorough
drying, a sufficient amount of drying
time must be selected.
The units for anaesthesia
instruments come with their own
instructions for use.
Application
32
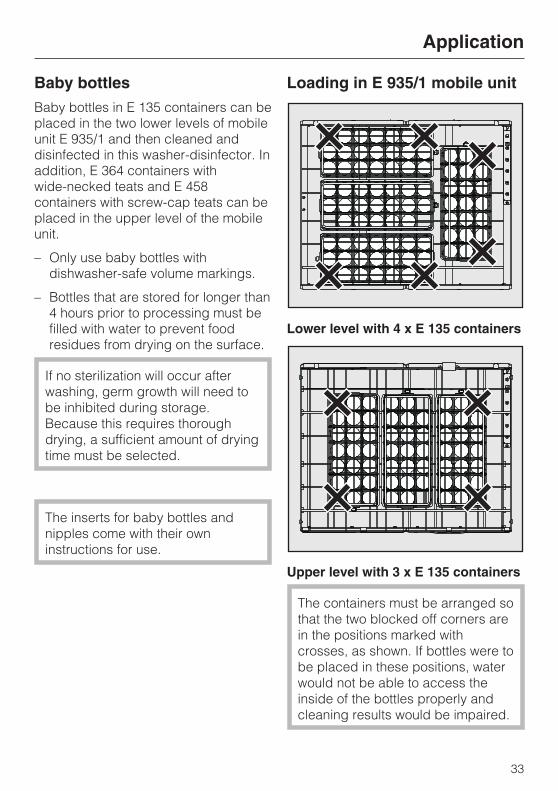
Baby bottles
Baby bottles in E 135 containers can be
placed in the two lower levels of mobile
unit E 935/1 and then cleaned and
disinfected in this washer-disinfector. In
addition, E 364 containers with
wide-necked teats and E 458
containers with screw-cap teats can be
placed in the upper level of the mobile
unit.
– Only use baby bottles with
dishwasher-safe volume markings.
– Bottles that are stored for longer than
4 hours prior to processing must be
filled with water to prevent food
residues from drying on the surface.
If no sterilization will occur after
washing, germ growth will need to
be inhibited during storage.
Because this requires thorough
drying, a sufficient amount of drying
time must be selected.
The inserts for baby bottles and
nipples come with their own
instructions for use.
Loading in E 935/1 mobile unit
Lower level with 4 x E 135 containers
Upper level with 3 x E 135 containers
The containers must be arranged so
that the two blocked off corners are
in the positions marked with
crosses, as shown. If bottles were to
be placed in these positions, water
would not be able to access the
inside of the bottles properly and
cleaning results would be impaired.
Application
33

OR shoes
OR shoes made of
temperature-sensitive material and/or
insoles must be thermochemically
cleaned and disinfected at 60°C
(program CHEM-DISIN).
A thermal disinfection program
(SHOE-TD-75/2) can be used as long
as the manufacturer has confirmed the
thermal stability of the product(s).
For information on the efficacy of
thermochemical disinfection, contact
the disinfectant manufacturer directly.
OR shoes should only be cleaned
and disinfected in a
washer-disinfector that has been
installed for that application.
If OR shoes are processed with
other applications in a
washer-disinfector, the operator
must assess the risks associated
with this.
Mobile unit E 975/1 with a suitable
insert can be used for this purpose,
e.g.
– Insert E 930 for up to shoe size 43
(European), size 10 (US) can be
placed in the lower level of mobile
unit E 975/1,
– Insert E 931 for up to shoe size 48
(European), size 15 (US).
When OR shoes are cleaned, large
quantities of lint can accumulate. For
this reason, be sure to check the
wash cabinet filters frequently and
clean as needed (see the “Cleaning
the wash cabinet filters” section in
“Maintenance of the
washer-disinfector”).
Application
34
Laboratory equipment
Wide-necked labware, e. g., beakers,
wide-necked Erlenmeyer flasks and
Petri dishes, or cylindrical items, e. g.,
test tubes, can be cleaned inside and
out by the rotating spray arms. For
proper cleaning, load these items in
whole, half or quarter inserts and place
them in an empty lower basket or upper
basket with spray arm.
For narrow-necked equipment, e. g.,
narrow-necked Erlenmeyer flasks,
round-bottomed flasks, measuring
cylinders and pipettes, you will need to
use injector baskets or injector
modules.
This section only covers basic
information on how to prepare and load
labware.
How to load the machine
– Petri dishes and similar items should
be loaded in a suitable insert, with
the soiled side facing center.
– Load pipettes with the tip facing
down.
– Quarter baskets should be arranged
as far from the centre as possible.
– Do not let glass items protrude near
the door opening.
Prepare items before loading
� Empty all glassware before loading
into the machine. Comply with all
applicable infection-control
regulations.
Ensure that no acid or solvent
residues, especially hydrochloric
acid or chlorides, get inside the
machine.
� Remove all agar residue from Petri
dishes.
� Remove all blood residue and clots
from test tubes.
� Remove all stoppers, corks, labels,
sealing wax residue, etc.
� Small parts, such as stoppers and
plugs, should be secured in suitable
small parts baskets.
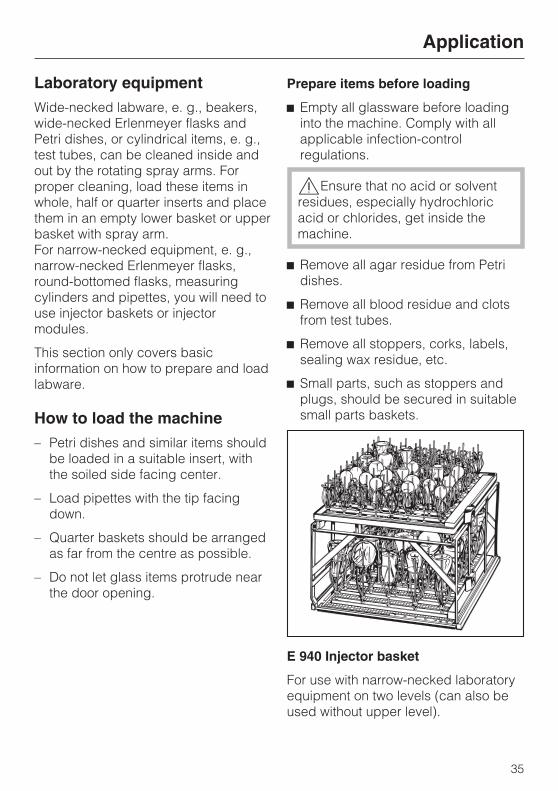
E 940 Injector basket
For use with narrow-necked laboratory
equipment on two levels (can also be
used without upper level).
Application
35
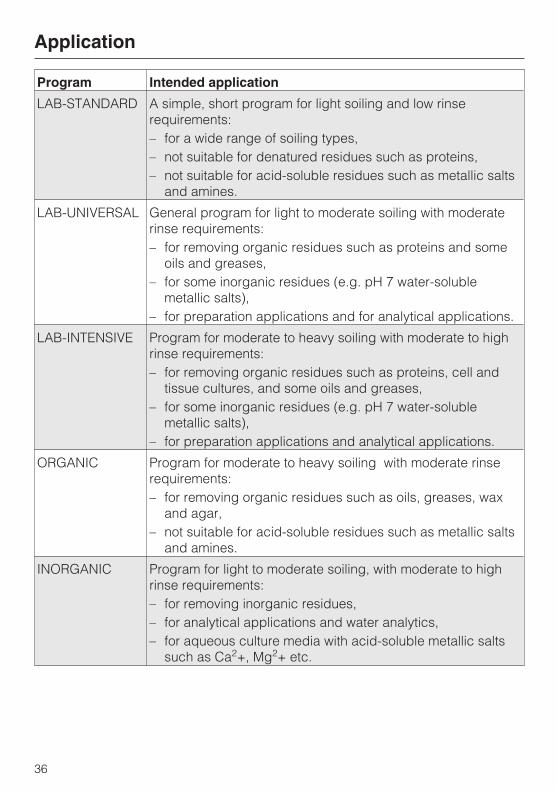
Program Intended application
LAB-STANDARD A simple, short program for light soiling and low rinse
requirements:
– for a wide range of soiling types,
– not suitable for denatured residues such as proteins,
– not suitable for acid-soluble residues such as metallic salts
and amines.
LAB-UNIVERSAL General program for light to moderate soiling with moderate
rinse requirements:
– for removing organic residues such as proteins and some
oils and greases,
– for some inorganic residues (e.g. pH 7 water-soluble
metallic salts),
– for preparation applications and for analytical applications.
LAB-INTENSIVE Program for moderate to heavy soiling with moderate to high
rinse requirements:
– for removing organic residues such as proteins, cell and
tissue cultures, and some oils and greases,
– for some inorganic residues (e.g. pH 7 water-soluble
metallic salts),
– for preparation applications and analytical applications.
ORGANIC Program for moderate to heavy soiling with moderate rinse
requirements:
– for removing organic residues such as oils, greases, wax
and agar,
– not suitable for acid-soluble residues such as metallic salts
and amines.
INORGANIC Program for light to moderate soiling, with moderate to high
rinse requirements:
– for removing inorganic residues,
– for analytical applications and water analytics,
– for aqueous culture media with acid-soluble metallic salts
such as Ca2+, Mg
2+ etc.
Application
36
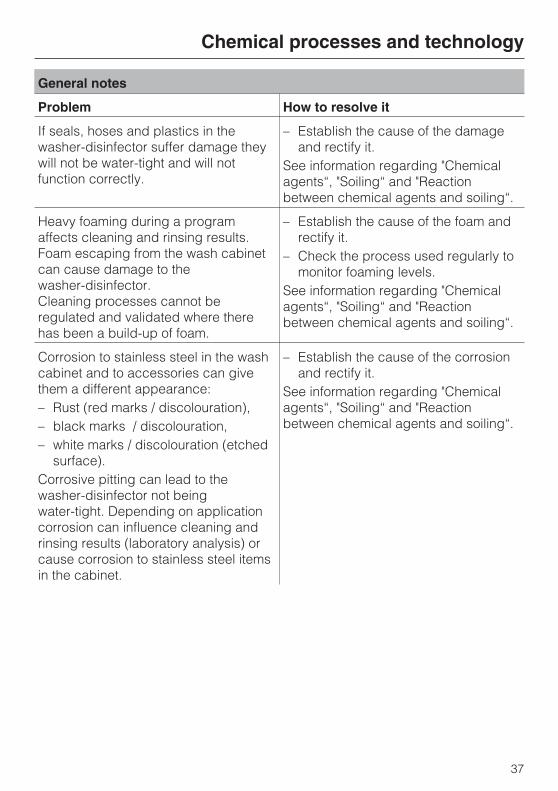
General notes
Problem How to resolve it
If seals, hoses and plastics in the
washer-disinfector suffer damage they
will not be water-tight and will not
function correctly.
– Establish the cause of the damage
and rectify it.
See information regarding "Chemical
agents“, "Soiling“ and "Reaction
between chemical agents and soiling“.
Heavy foaming during a program
affects cleaning and rinsing results.
Foam escaping from the wash cabinet
can cause damage to the
washer-disinfector.
Cleaning processes cannot be
regulated and validated where there
has been a build-up of foam.
– Establish the cause of the foam and
rectify it.
– Check the process used regularly to
monitor foaming levels.
See information regarding "Chemical
agents“, "Soiling“ and "Reaction
between chemical agents and soiling“.
Corrosion to stainless steel in the wash
cabinet and to accessories can give
them a different appearance:
– Rust (red marks / discolouration),
– black marks / discolouration,
– white marks / discolouration (etched
surface).
Corrosive pitting can lead to the
washer-disinfector not being
water-tight. Depending on application
corrosion can influence cleaning and
rinsing results (laboratory analysis) or
cause corrosion to stainless steel items
in the cabinet.
– Establish the cause of the corrosion
and rectify it.
See information regarding "Chemical
agents“, "Soiling“ and "Reaction
between chemical agents and soiling“.
Chemical processes and technology
37
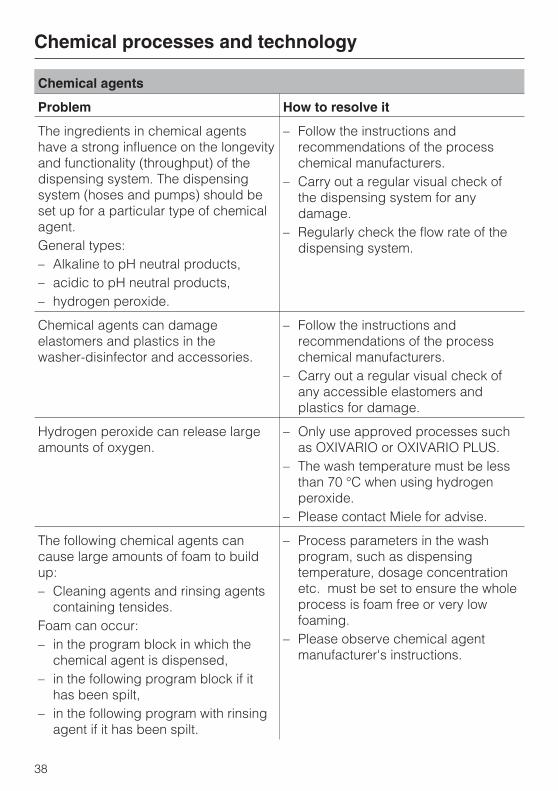
Chemical agents
Problem How to resolve it
The ingredients in chemical agents
have a strong influence on the longevity
and functionality (throughput) of the
dispensing system. The dispensing
system (hoses and pumps) should be
set up for a particular type of chemical
agent.
General types:
– Alkaline to pH neutral products,
– acidic to pH neutral products,
– hydrogen peroxide.
– Follow the instructions and
recommendations of the process
chemical manufacturers.
– Carry out a regular visual check of
the dispensing system for any
damage.
– Regularly check the flow rate of the
dispensing system.
Chemical agents can damage
elastomers and plastics in the
washer-disinfector and accessories.
– Follow the instructions and
recommendations of the process
chemical manufacturers.
– Carry out a regular visual check of
any accessible elastomers and
plastics for damage.
Hydrogen peroxide can release large
amounts of oxygen.
– Only use approved processes such
as OXIVARIO or OXIVARIO PLUS.
– The wash temperature must be less
than 70 °C when using hydrogen
peroxide.
– Please contact Miele for advise.
The following chemical agents can
cause large amounts of foam to build
up:
– Cleaning agents and rinsing agents
containing tensides.
Foam can occur:
– in the program block in which the
chemical agent is dispensed,
– in the following program block if it
has been spilt,
– in the following program with rinsing
agent if it has been spilt.
– Process parameters in the wash
program, such as dispensing
temperature, dosage concentration
etc. must be set to ensure the whole
process is foam free or very low
foaming.
– Please observe chemical agent
manufacturer's instructions.
Chemical processes and technology
38
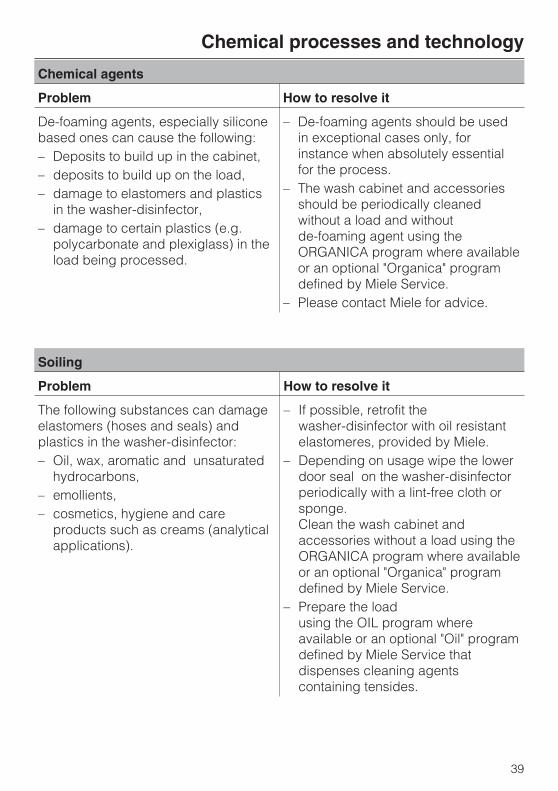
Chemical agents
Problem How to resolve it
De-foaming agents, especially silicone
based ones can cause the following:
– Deposits to build up in the cabinet,
– deposits to build up on the load,
– damage to elastomers and plastics
in the washer-disinfector,
– damage to certain plastics (e.g.
polycarbonate and plexiglass) in the
load being processed.
– De-foaming agents should be used
in exceptional cases only, for
instance when absolutely essential
for the process.
– The wash cabinet and accessories
should be periodically cleaned
without a load and without
de-foaming agent using the
ORGANICA program where available
or an optional "Organica" program
defined by Miele Service.
– Please contact Miele for advice.
Soiling
Problem How to resolve it
The following substances can damage
elastomers (hoses and seals) and
plastics in the washer-disinfector:
– Oil, wax, aromatic and unsaturated
hydrocarbons,
– emollients,
– cosmetics, hygiene and care
products such as creams (analytical
applications).
– If possible, retrofit the
washer-disinfector with oil resistant
elastomeres, provided by Miele.
– Depending on usage wipe the lower
door seal on the washer-disinfector
periodically with a lint-free cloth or
sponge.
Clean the wash cabinet and
accessories without a load using the
ORGANICA program where available
or an optional "Organica" program
defined by Miele Service.
– Prepare the load
using the OIL program where
available or an optional "Oil" program
defined by Miele Service that
dispenses cleaning agents
containing tensides.
Chemical processes and technology
39
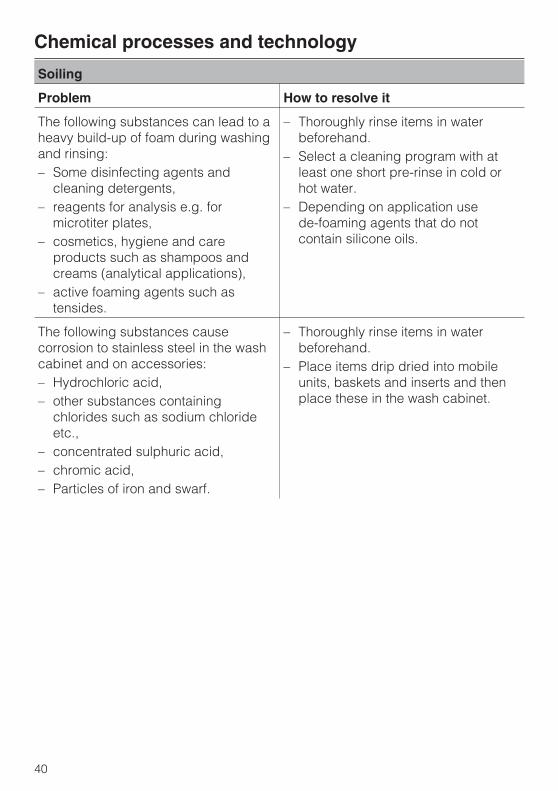
Soiling
Problem How to resolve it
The following substances can lead to a
heavy build-up of foam during washing
and rinsing:
– Some disinfecting agents and
cleaning detergents,
– reagents for analysis e.g. for
microtiter plates,
– cosmetics, hygiene and care
products such as shampoos and
creams (analytical applications),
– active foaming agents such as
tensides.
– Thoroughly rinse items in water
beforehand.
– Select a cleaning program with at
least one short pre-rinse in cold or
hot water.
– Depending on application use
de-foaming agents that do not
contain silicone oils.
The following substances cause
corrosion to stainless steel in the wash
cabinet and on accessories:
– Hydrochloric acid,
– other substances containing
chlorides such as sodium chloride
etc.,
– concentrated sulphuric acid,
– chromic acid,
– Particles of iron and swarf.
– Thoroughly rinse items in water
beforehand.
– Place items drip dried into mobile
units, baskets and inserts and then
place these in the wash cabinet.
Chemical processes and technology
40
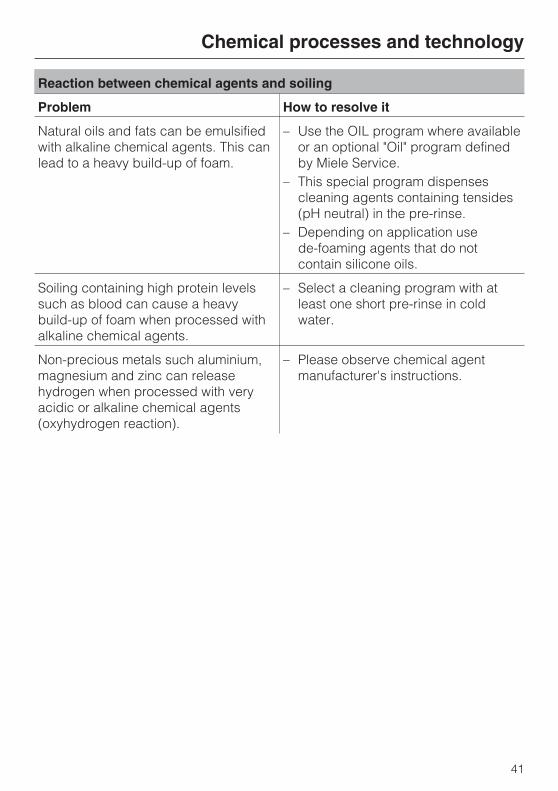
Reaction between chemical agents and soiling
Problem How to resolve it
Natural oils and fats can be emulsified
with alkaline chemical agents. This can
lead to a heavy build-up of foam.
– Use the OIL program where available
or an optional "Oil" program defined
by Miele Service.
– This special program dispenses
cleaning agents containing tensides
(pH neutral) in the pre-rinse.
– Depending on application use
de-foaming agents that do not
contain silicone oils.
Soiling containing high protein levels
such as blood can cause a heavy
build-up of foam when processed with
alkaline chemical agents.
– Select a cleaning program with at
least one short pre-rinse in cold
water.
Non-precious metals such aluminium,
magnesium and zinc can release
hydrogen when processed with very
acidic or alkaline chemical agents
(oxyhydrogen reaction).
– Please observe chemical agent
manufacturer's instructions.
Chemical processes and technology
41
Use only detergents and
neutralizers specially designed for
use in washers-disinfectors, and
observe the manufacturer's
recommendations for use! ALWAYS
refer to the information regarding
toxicologically harmless residual
amounts.
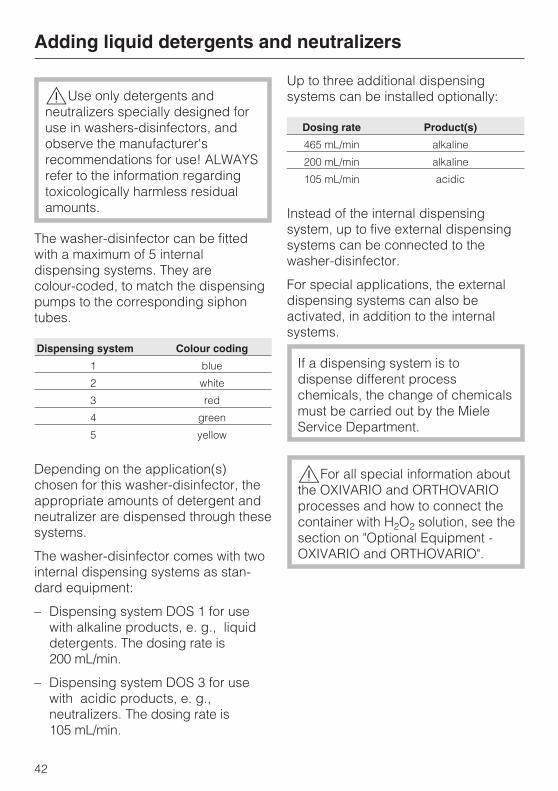
The washer-disinfector can be fitted
with a maximum of 5 internal
dispensing systems. They are
colour-coded, to match the dispensing
pumps to the corresponding siphon
tubes.
Dispensing system Colour coding
1 blue
2 white
3 red
4 green
5 yellow
Depending on the application(s)
chosen for this washer-disinfector, the
appropriate amounts of detergent and
neutralizer are dispensed through these
systems.
The washer-disinfector comes with two
internal dispensing systems as stan-
dard equipment:
– Dispensing system DOS 1 for use
with alkaline products, e. g., liquid
detergents. The dosing rate is
200 mL/min.
– Dispensing system DOS 3 for use
with acidic products, e. g.,
neutralizers. The dosing rate is
105 mL/min.
Up to three additional dispensing
systems can be installed optionally:
Dosing rate Product(s)
465 mL/min alkaline
200 mL/min alkaline
105 mL/min acidic
Instead of the internal dispensing
system, up to five external dispensing
systems can be connected to the
washer-disinfector.
For special applications, the external
dispensing systems can also be
activated, in addition to the internal
systems.
If a dispensing system is to
dispense different process
chemicals, the change of chemicals
must be carried out by the Miele
Service Department.
For all special information about
the OXIVARIO and ORTHOVARIO
processes and how to connect the
container with H2O2 solution, see the
section on "Optional Equipment -
OXIVARIO and ORTHOVARIO".
Adding liquid detergents and neutralizers
42
Optional equipment - OXIVARIO
For the OXIVARIO process, dispensing
systems 2 and 5 are needed, to
dispense a hydrogen peroxide solution
(H2O2 solution).
The dispensing systems for H2O2
solution are colour-coded black.
The dosing rate for system 2 is 105
mL/min. Dispensing system 5 runs the
H2O2 solution through the
washer-disinfector.
The OXIVARIO option makes
dispensing system DOS 5
unavailable for dispensing any other
processing chemical.
Optional equipment - ORTHOVARIO
For the ORTHOVARIO process, the
washer-disinfector must be fitted with
an additional dispensing pump in
dispensing system DOS 4 (add-on
equipment):
– Dispensing system DOS 4 (green) for
dispensing a special tenside
detergent. The dosing rate is
105 mL/min.
The ORTHOVARIO option makes the
DOS 4 dispensing system
unavailable for dispensing chemical
disinfectants.
Dispensing systems
Four 10-L containers of processing
chemicals can be placed behind the
service panel in the washer-disinfector.
Any additional containers will need to
be set up outside the
washer-disinfector.
Use caution when handling
processing chemicals! Some of
these products are corrosive or
cause irritation.
Always follow all applicable safety
regulations and observe the
manufacturer's material safety data
sheets!
Use protective eyewear and gloves.
Message "Fill DOS [X] container"
� Refill or replace the container
indicated on the display.
[x] Instead of an X, the number of the dispensing
system involved will appear.
Fill the container(s) when you see a
prompt on the display, e. g., Fill
DOS1 container. This will prevent
containers from becoming
completely empty and needing to be
primed (cleared of air).
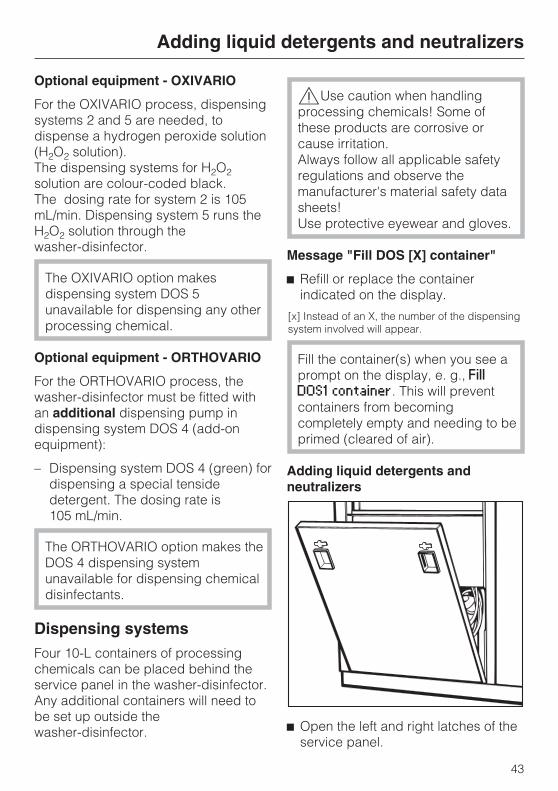
Adding liquid detergents and
neutralizers
� Open the left and right latches of the
service panel.
Adding liquid detergents and neutralizers
43
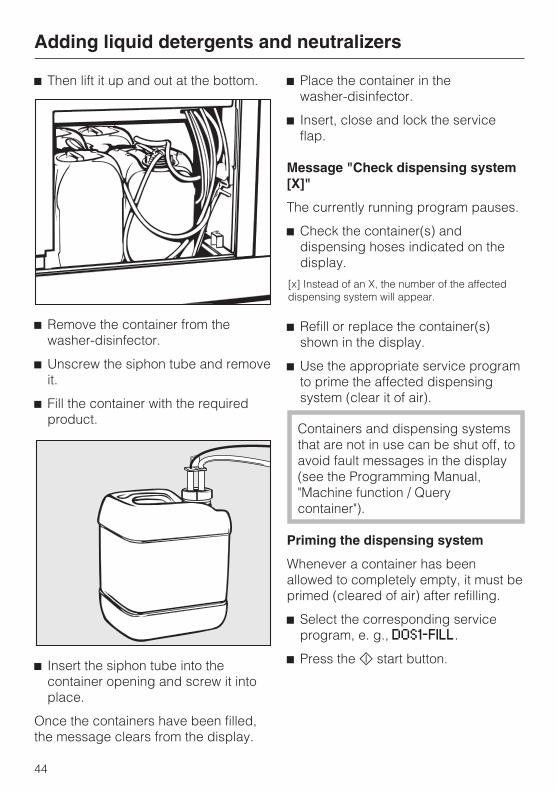
� Then lift it up and out at the bottom.
� Remove the container from the
washer-disinfector.
� Unscrew the siphon tube and remove
it.
� Fill the container with the required
product.
� Insert the siphon tube into the
container opening and screw it into
place.
Once the containers have been filled,
the message clears from the display.
� Place the container in the
washer-disinfector.
� Insert, close and lock the service
flap.
Message "Check dispensing system
[X]"
The currently running program pauses.
� Check the container(s) and
dispensing hoses indicated on the
display.
[x] Instead of an X, the number of the affected
dispensing system will appear.
� Refill or replace the container(s)
shown in the display.
� Use the appropriate service program
to prime the affected dispensing
system (clear it of air).
Containers and dispensing systems
that are not in use can be shut off, to
avoid fault messages in the display
(see the Programming Manual,
"Machine function / Query
container").
Priming the dispensing system
Whenever a container has been
allowed to completely empty, it must be
primed (cleared of air) after refilling.
� Select the corresponding service
program, e. g., DOS1-FILL.
� Press the � start button.
Adding liquid detergents and neutralizers
44
Main Switch - On/Off
The main switch disconnects the user
side of the washer-disinfector from the
power supply.
� Turn the main switch to I ON.
Once the start procedure is completed,
the washer-disinfector is ready to
operate.
The following message may appear: "
"New power frequency 60Hz Flow
rates automatically adjusted" or "New
power frequency 50Hz Flow rates
automatically adjusted".
During the start procedure, the
Profitronic detected a different power
frequency and adjusted the flow rate
of the dispensing pump accordingly.
Before operation, you will need to
check whether the change in power
frequency was caused by a fault in
the power supply.
If so, incorrect amounts of
processing chemicals would be
dispensed during the program.
The fault message can only be
confirmed in operating level D and in
the service mode.
Switching On
� Hold down the � button for at least
1.5 sec.
The actuating time for the � button
can be set up to a maximum of 10
sec. (see for the section on "System
functions /Actuating time ON/OFF
Button" in the ).
Depending on the set operating level,
the following will appear in the display:
Operating
levels
Displayed
A and B A list of approved
programs.
C Instructions for Automatic
Mobile Unit Recognition.
D Select from:
– Program Overview
– Programming
– Settings �.
If the washer-disinfector is not in use,
the display automatically switches off
after approx. 10 min.
To turn the display back on, touch
any button.
Operation
45
Opening and closing the door
� Press the � button.
The door raises or lowers.
To open the door on the clean side
(PG 8528), the following must also
apply:
– Programs with a process statement
must have been completed without
fault in accordance with the program
parameters,
or
– the interlock function has been
activated, i. e., door mechanism is
set to one of the following
parameters:
- interlock,
- door clean + interlock,
- door unclean + interlock.
(see Programming Manual under
"Machine functions / Door
mechanism").
If the pre-heater has been
programmed for heating, always
beware of hot water or steam exiting
the open door! Looking from the
unclean side, the inlet pipe is
located beneath the right basket
guide rail.
Starting a program
You can find detailed and important
information regarding the Miele
default programs in the program
overview chart in the accompanying
Programming Manual.
Any program or dosing changes
in connection with the preparation of
medical devices must be
documented.
In such cases, the
washer-disinfector results (cleaning,
disinfection) will need to be
re-validated.
If a barcode scanner is connected to
the washer-disinfector and the user
or load scan is activated, the
selected program cannot be started
until scanning is completed.
All work steps in connection with the
barcode scanner are described in
the "Barcode scanner" section.
Operation
46

Option Steam condenser with
heat recovery (DK+WRG):
After extended standstill times such
as weekends, start the FILL BOILER
utility before starting operation.
For hygienic reasons, the AD water
from the steam condenser and the
boiler is replaced by fresh, cold AD
water.
Operating levels A and B
A list of all selectable programs
appears in the display.
� Select the desired program with �,
then confirm with OK.
� Press the � start button.
The program runs.
Operating level D
� Select the menu item Programme
overview and confirm with OK.
� Select the desired program with �,
then confirm with OK.
� Press the � start button.
The program runs.
Operating level C
Make sure that no metallic parts
or pieces are stuck to the magnetic
strip or its underside.
Attached metallic objects can cause
the coding to be misread or be
unreadable.
Before pressing the start button
to begin the program, it is essential
to check that the program required
for this mobile unit is the one
shown in the display!
Otherwise, inadequate cleaning and
disinfection could result!
Always make sure that mobile units
with automatic recognition (AWK)
are properly coded.
Option Steam condenser with heat
recovery (DK+WRG)
Always comply with the instructions
in Chapter "Option Steam condenser
with heat recovery (DK+WRG)".
� Push the coded mobile unit into
place in the washer-disinfector.
� Close the door � and press the
start button �.
The program runs.
Operation
47
Program sequence
Once started, the program proceeds
automatically.
As it proceeds, the program steps are
shown on the display.
Detailed information on the program
sequences is available in the
Programming Manual.
Do not change the printer paper
roll or ribbon cartridge when a
program is running.
End of program
� Once the program ends, you will see
Programme finished in the display.
Turning off
� Press the � button.
If the machine is to be left off for
several days, be sure to turn the main
switch to 0 OFF.
Cancelling a program
A program can only be interrupted
or cancelled in operating levels B
and D.
In operating levels B or D
� Press the �C button.
The program is interrupted.
The following prompts appear in the
display:
Cancel programme (OK)
or continue (Clear)?
In cases involving mandatory
decontamination, disinfectant must
be added to the contaminated water
before it can be released into the
public sewer system. The door on
the unclean side can be opened for
this purpose.
� Confirm program cancellation with
the OK button.
Programme cancelled,
Water drainage appears in the
display.
After the water has drained away, the
program list is displayed again.
Operation
48
Interrupting a program
A program can only be interrupted
or cancelled in operating levels B
and D.
If the door must be opened for urgent
reasons, e. g., if items are moving
around too much, or the cleaning
performance needs to be checked
(deliberate intervention):
If a program with process statement
is interrupted and then continued,
make sure to check the display
upon program completion. If the
display reads Process parameters
not achieved, the door was opened
after process parameter monitoring
began, and so the process
parameter was not achieved. The
program may need to be repeated.
In operating levels B or D
� Press the �C button.
The program is interrupted.
The following prompts appear in the
display:
Cancel programme (OK)
or continue (Clear)?
� Open the door �
Note PG 8528:
Which door of the washer-disinfector
can be opened depends on which
setting has been programmed under
"Machine function/Door mechanism"
(see the Programming Manual).
The door on the unclean side of the
washer-disinfector can always be
opened, no matter which parameter
has been set.
The door on the clean side can only be
opened if one of the following
parameters are set:
- Interlock,
- Door clean + Interlock,
- Door unclean + Interlock.
When using the
washer-disinfector as a medical
device (as per EN ISO 15883,
CAN/CSA Z.15883), the door
interlock function should be off.
Caution! Items in the machine
may be hot. There is danger of
burning or scalding.
In programs with thermochemical
disinfection, steam containing high
levels of disinfectant can escape!
� Arrange items securely. Take all
necessary infection control measures
and wear gloves.
� Close the door �.
� Press the �C button.
The program continues.
Operation
49
Barcode scanners can be connected to the
washer-disinfector via the multiport on the unclean side and,
if available, on the clean side as well.
The configuration of the serial interface for the barcode
scanner is described in the section "PC / Print functions /
Interface configuration" in the Programming Manual.
Barcode scan functions
All barcode scanner functions are available at every
operating level:
– Scan loading operator
– Scan unloading operator
– Scan the load
The scanned barcodes are used to record the users and/or
loads in the wash protocol.
User scan and load scan can be activated independently of
each other. Activation is described in the section "System
functions / Barcode" in the Programming Manual.
Barcode scanner (optional)
50
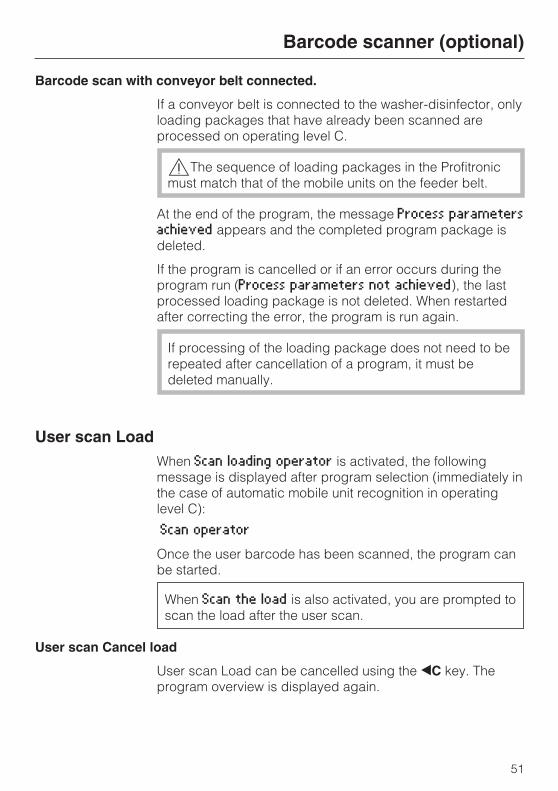
Barcode scan with conveyor belt connected.
If a conveyor belt is connected to the washer-disinfector, only
loading packages that have already been scanned are
processed on operating level C.
The sequence of loading packages in the Profitronic
must match that of the mobile units on the feeder belt.
At the end of the program, the message Process parameters
achieved appears and the completed program package is
deleted.
If the program is cancelled or if an error occurs during the
program run (Process parameters not achieved), the last
processed loading package is not deleted. When restarted
after correcting the error, the program is run again.
If processing of the loading package does not need to be
repeated after cancellation of a program, it must be
deleted manually.
User scan Load
When Scan loading operator is activated, the following
message is displayed after program selection (immediately in
the case of automatic mobile unit recognition in operating
level C):
Scan operator
Once the user barcode has been scanned, the program can
be started.
When Scan the load is also activated, you are prompted to
scan the load after the user scan.
User scan Cancel load
User scan Load can be cancelled using the �C key. The
program overview is displayed again.
Barcode scanner (optional)
51
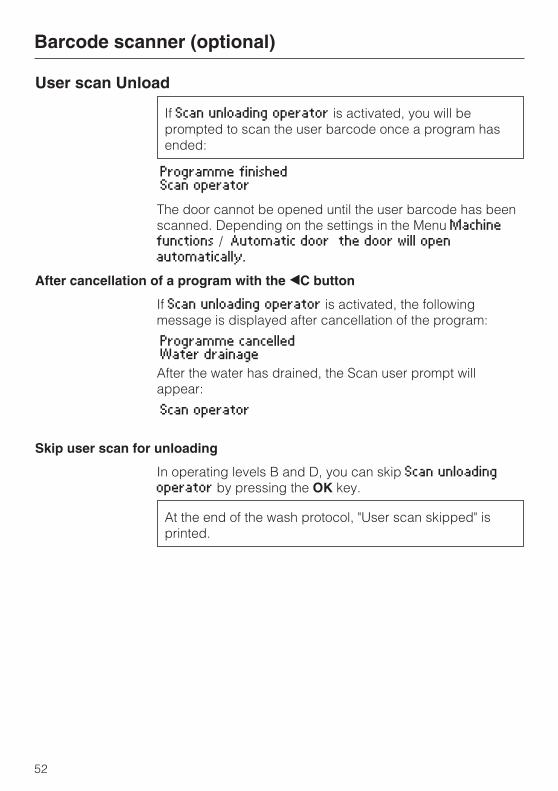
User scan Unload
If Scan unloading operator is activated, you will be
prompted to scan the user barcode once a program has
ended:
Programme finished
Scan operator
The door cannot be opened until the user barcode has been
scanned. Depending on the settings in the Menu Machine
functions / Automatic door the door will open
automatically.
After cancellation of a program with the �C button
If Scan unloading operator is activated, the following
message is displayed after cancellation of the program:
Programme cancelled
Water drainage
After the water has drained, the Scan user prompt will
appear:
Scan operator
Skip user scan for unloading
In operating levels B and D, you can skip Scan unloading
operator by pressing the OK key.
At the end of the wash protocol, "User scan skipped" is
printed.
Barcode scanner (optional)
52

Scan load
When load scanning is switched on, the following message
prompts the operators to scan the load:
Scan the load A
� Scan the load
� Scan the first barcode of the load.
In the Scan the load menu the barcode numbers of the
scanned load are listed.
Scan the load A
0987664
� Scan further barcodes if applicable.
If a scanned barcode already exists, the following query
appears:
Load already scanned. Accept?
A maximum of 99 load barcodes can be scanned. After that
the following message appears:
Max. number of entries reached
The last scanned barcode can be deleted from the list with
�C. To prevent unintentional removal from the list you will be
prompted to confirm the deletion:
Delete last entry?
Barcode scanner (optional)
53
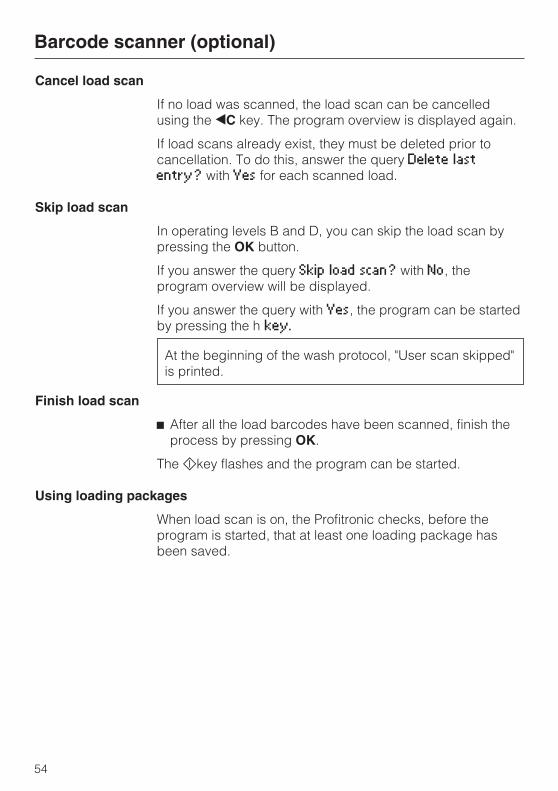
Cancel load scan
If no load was scanned, the load scan can be cancelled
using the �C key. The program overview is displayed again.
If load scans already exist, they must be deleted prior to
cancellation. To do this, answer the query Delete last
entry? with Yes for each scanned load.
Skip load scan
In operating levels B and D, you can skip the load scan by
pressing the OK button.
If you answer the query Skip load scan? with No, the
program overview will be displayed.
If you answer the query with Yes, the program can be started
by pressing the h key.
At the beginning of the wash protocol, "User scan skipped"
is printed.
Finish load scan
� After all the load barcodes have been scanned, finish the
process by pressing OK.
The �key flashes and the program can be started.
Using loading packages
When load scan is on, the Profitronic checks, before the
program is started, that at least one loading package has
been saved.
Barcode scanner (optional)
54
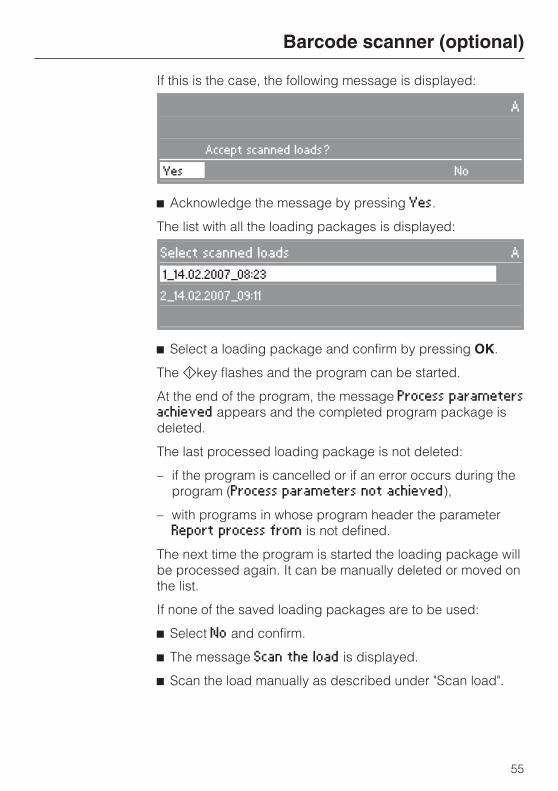
If this is the case, the following message is displayed:
A
Accept scanned loads?
Yes No
� Acknowledge the message by pressing Yes.
The list with all the loading packages is displayed:
Select scanned loads A
1_14.02.2007_08:23
2_14.02.2007_09:11
� Select a loading package and confirm by pressing OK.
The �key flashes and the program can be started.
At the end of the program, the message Process parameters
achieved appears and the completed program package is
deleted.
The last processed loading package is not deleted:
– if the program is cancelled or if an error occurs during the
program (Process parameters not achieved),
– with programs in whose program header the parameter
Report process from is not defined.
The next time the program is started the loading package will
be processed again. It can be manually deleted or moved on
the list.
If none of the saved loading packages are to be used:
� Select No and confirm.
� The message Scan the load is displayed.
� Scan the load manually as described under "Scan load".
Barcode scanner (optional)
55
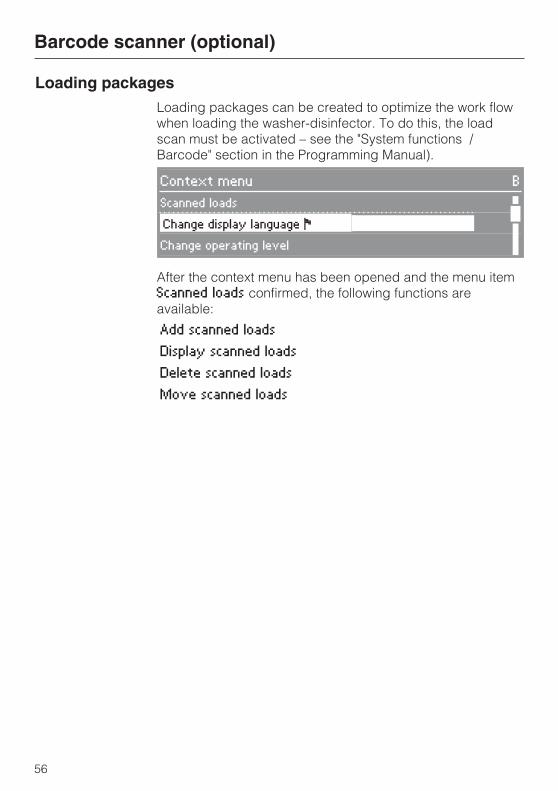
Loading packages
Loading packages can be created to optimize the work flow
when loading the washer-disinfector. To do this, the load
scan must be activated – see the "System functions /
Barcode" section in the Programming Manual).
Context menu B
Scanned loads
Change display language �
Change operating level �After the context menu has been opened and the menu item
Scanned loads confirmed, the following functions are
available:
Add scanned loads
Display scanned loads
Delete scanned loads
Move scanned loads
Barcode scanner (optional)
56
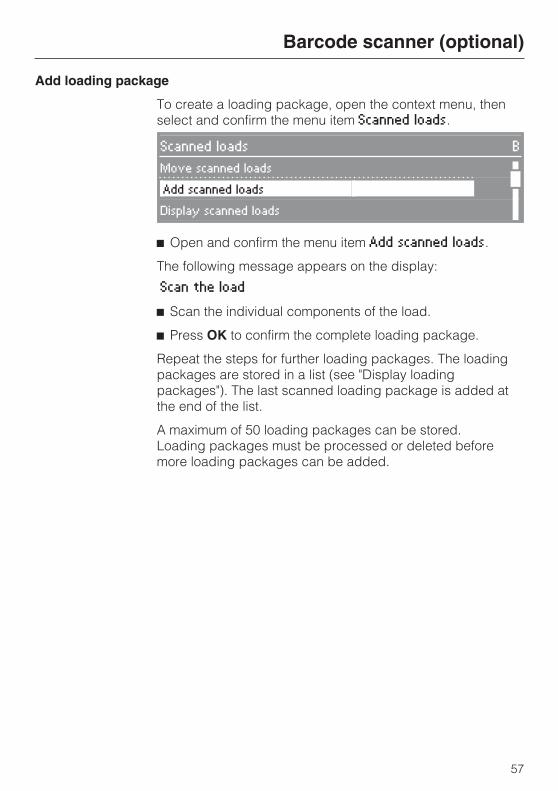
Add loading package
To create a loading package, open the context menu, then
select and confirm the menu item Scanned loads.
Scanned loads B
Move scanned loads
Add scanned loads
Display scanned loads �� Open and confirm the menu item Add scanned loads.
The following message appears on the display:
Scan the load
� Scan the individual components of the load.
� Press OK to confirm the complete loading package.
Repeat the steps for further loading packages. The loading
packages are stored in a list (see "Display loading
packages"). The last scanned loading package is added at
the end of the list.
A maximum of 50 loading packages can be stored.
Loading packages must be processed or deleted before
more loading packages can be added.
Barcode scanner (optional)
57
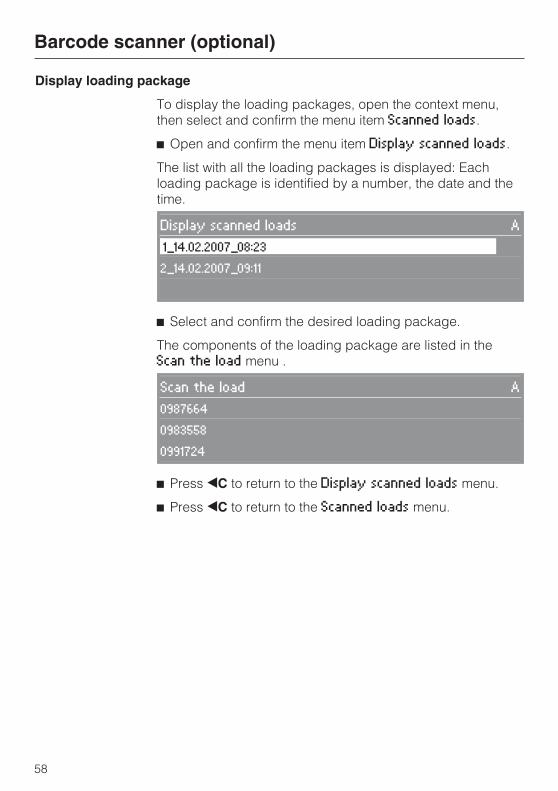
Display loading package
To display the loading packages, open the context menu,
then select and confirm the menu item Scanned loads.
� Open and confirm the menu item Display scanned loads.
The list with all the loading packages is displayed: Each
loading package is identified by a number, the date and the
time.
Display scanned loads A
1_14.02.2007_08:23
2_14.02.2007_09:11
� Select and confirm the desired loading package.
The components of the loading package are listed in the
Scan the load menu .
Scan the load A
0987664
0983558
0991724
� Press �C to return to the Display scanned loads menu.
� Press �C to return to the Scanned loads menu.
Barcode scanner (optional)
58
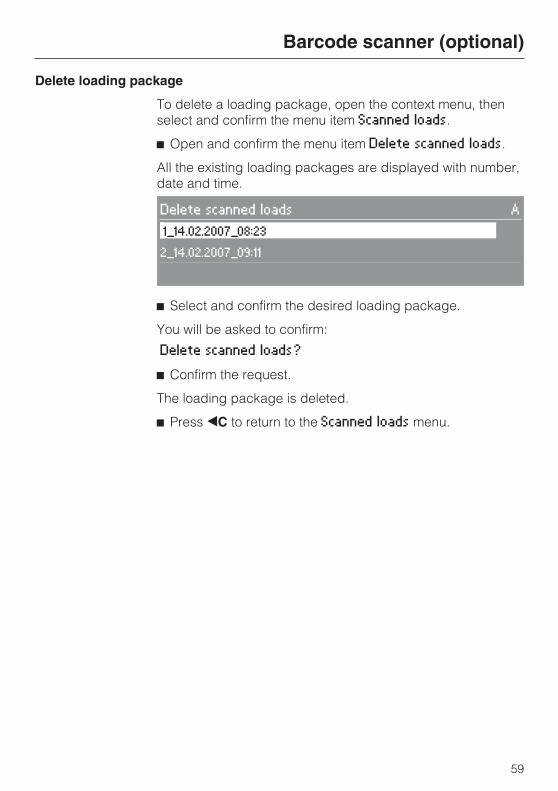
Delete loading package
To delete a loading package, open the context menu, then
select and confirm the menu item Scanned loads.
� Open and confirm the menu item Delete scanned loads.
All the existing loading packages are displayed with number,
date and time.
Delete scanned loads A
1_14.02.2007_08:23
2_14.02.2007_09:11
� Select and confirm the desired loading package.
You will be asked to confirm:
Delete scanned loads?
� Confirm the request.
The loading package is deleted.
� Press �C to return to the Scanned loads menu.
Barcode scanner (optional)
59

Move loading package
To move a loading package, open the context menu, then
select and confirm the menu item Scanned loads.
� Open and confirm the menu item Move scanned loads.
All the existing loading packages are displayed with number,
date and time.
Move scanned loads A
1_14.02.2007_08:23
2_14.02.2007_09:11
3_14.02.2007_10:31
� Select the desired loading package.
� Move the loading package using � to the desired
position and confirm.
The list will be saved in the new sequence.
� Press �C to return to the Scanned loads menu.
Barcode scanner (optional)
60
The washer-disinfector provides the
option of documenting the cleaning
processes (process documentation).
External process documentation
software or an internal or external
printer can be used for process
documentation.
Network connection
A 5 m long interface cable is included
for connecting the washer-disinfector
with suitable network components (e.g.
hub, switch).
It is connected to the Profitronic
Ethernet interface and is rolled up in the
control cabinet of the
washer-disinfector.
Only Miele Technical Service may
connect the cable to another
interface.
Serial interface
The cable may also be used to connect
the washer-disinfector to an external
device via the Profitronic RS 232
interface. An RJ45 / Sub-D adapter
plug is included.
For instructions on how to configure
the interface, refer to the section on
PC/Print functions in the
Programming Manual.
If connecting a printer or PC, please
note the following:
– Only use an industry-standard PC
(IEC 60950).
– Select a printer or PC that is suited to
the
installation location
– The maximum length for an extension
cable from the serial interface to the
printer or PC is 10 m and from the
Ethernet interface 100 m.
– A crossover cable is required for
direct connection between the
washer-disinfector and a PC.
Further information about suitable
printers and software solutions may
be obtained from Miele Sales or
Miele Customer Service.
Process documentation
61
Routine maintenance
After every 2000 hours of operation,
or at least once a year Miele Service
will need to perform routine
maintenance on the
washer-disinfector.
Maintenance covers the following
points:
– electrical integrity,
– door mechanics, door seals
– connectors and fittings in the wash
comparment,
– water intake and drainage,
– internal and external dispensing
systems,
– spray arms,
– filter combination,
– sump with drain pump and
non-return valve,
– steam condenser,
– all mobile units, modules, and inserts
if applicable:
– the drying unit.
During maintenance, the following
function checks are run:
– a program test run,
– electrothermal measurement,
– seal testing,
– all safety-related measurement
systems (fault report)
– the safety features.
Process validation
It is the responsibility of the operator to
routinely check that the required
cleaning and disinfection processes
are functioning properly.
In some countries, this is also required
by national legislation, regulations, or
recommendations.
Operators are also required to conduct
such checks under international stan-
dard EN ISO 15883, ; CAN/CSA
Z15883.
Routine checks
Before each day's use, the operator
must conduct a series of routine
checks. A routine checklist is supplied
with the washer-disinfector.
The following items must be checked:
– the filters in the wash cabinet,
– the spray arms in the
washer-disinfector and on the
baskets and inserts,
– the wash cabinet and the door seals,
– the mobile units, modules, and
inserts.
Maintenance of the washer-disinfector
62
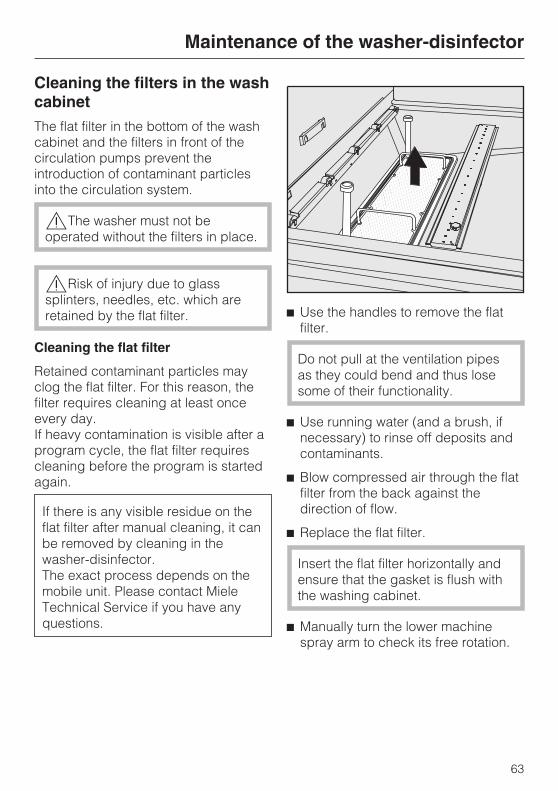
Cleaning the filters in the wash
cabinet
The flat filter in the bottom of the wash
cabinet and the filters in front of the
circulation pumps prevent the
introduction of contaminant particles
into the circulation system.
The washer must not be
operated without the filters in place.
Risk of injury due to glass
splinters, needles, etc. which are
retained by the flat filter.
Cleaning the flat filter
Retained contaminant particles may
clog the flat filter. For this reason, the
filter requires cleaning at least once
every day.
If heavy contamination is visible after a
program cycle, the flat filter requires
cleaning before the program is started
again.
If there is any visible residue on the
flat filter after manual cleaning, it can
be removed by cleaning in the
washer-disinfector.
The exact process depends on the
mobile unit. Please contact Miele
Technical Service if you have any
questions.
� Use the handles to remove the flat
filter.
Do not pull at the ventilation pipes
as they could bend and thus lose
some of their functionality.
� Use running water (and a brush, if
necessary) to rinse off deposits and
contaminants.
� Blow compressed air through the flat
filter from the back against the
direction of flow.
� Replace the flat filter.
Insert the flat filter horizontally and
ensure that the gasket is flush with
the washing cabinet.
� Manually turn the lower machine
spray arm to check its free rotation.
Maintenance of the washer-disinfector
63
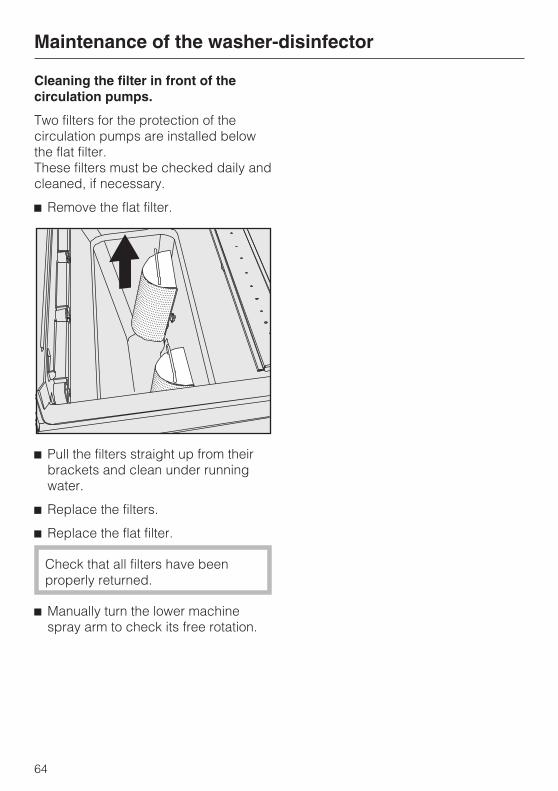
Cleaning the filter in front of the
circulation pumps.
Two filters for the protection of the
circulation pumps are installed below
the flat filter.
These filters must be checked daily and
cleaned, if necessary.
� Remove the flat filter.
� Pull the filters straight up from their
brackets and clean under running
water.
� Replace the filters.
� Replace the flat filter.
Check that all filters have been
properly returned.
� Manually turn the lower machine
spray arm to check its free rotation.
Maintenance of the washer-disinfector
64
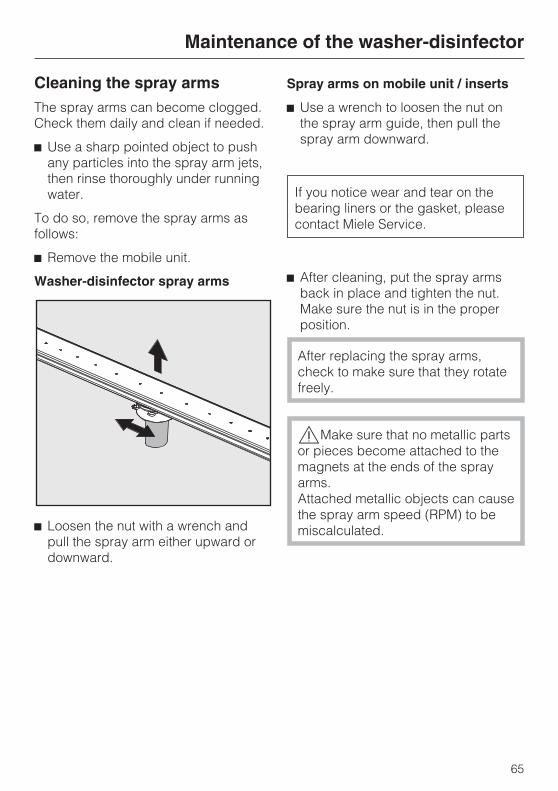
Cleaning the spray arms
The spray arms can become clogged.
Check them daily and clean if needed.
� Use a sharp pointed object to push
any particles into the spray arm jets,
then rinse thoroughly under running
water.
To do so, remove the spray arms as
follows:
� Remove the mobile unit.
Washer-disinfector spray arms
� Loosen the nut with a wrench and
pull the spray arm either upward or
downward.
Spray arms on mobile unit / inserts
� Use a wrench to loosen the nut on
the spray arm guide, then pull the
spray arm downward.
If you notice wear and tear on the
bearing liners or the gasket, please
contact Miele Service.
� After cleaning, put the spray arms
back in place and tighten the nut.
Make sure the nut is in the proper
position.
After replacing the spray arms,
check to make sure that they rotate
freely.
Make sure that no metallic parts
or pieces become attached to the
magnets at the ends of the spray
arms.
Attached metallic objects can cause
the spray arm speed (RPM) to be
miscalculated.
Maintenance of the washer-disinfector
65
Cleaning the control panel and
glass door (Optional)
� Press � to switch off the
washer-disinfector.
� Clean the control panel and the glass
door with a damp cloth or a standard
glass cleaner.
To disinfect, use an approved
cleaning agent.
Do NOT use abrasive or
all-purpose cleaners.
The chemicals contained in these
products can seriously damage the
surface of the glass.
Cleaning the front of the
washer-disinfector
� To clean the stainless steel exterior,
use a damp cloth and dish liquid or a
non-abrasive stainless steel cleaner.
� To help prevent re-soiling
(fingerprints, etc.), a stainless steel
conditioner can be used after
cleaning.
Do NOT use thinner or
ammonium-based cleaners.
They can damage the surface.
NEVER hose down the
washer-disinfector or the immediate
vicinity, e.g., with a water hose or
pressure washer.
Cleaning the wash cabinet
The wash cabinet is mostly
self-cleaning.
If you notice a build-up of deposits,
please contact Miele Service.
Cleaning the door seal
To remove soiling, clean the door seal
regularly with a damp cloth.
Damaged or leaky door seals should
be replaced by Miele Service.
Maintenance of the washer-disinfector
66
Mobile units, baskets and
inserts
To ensure that the mobile units, baskets
and inserts function properly, they must
be checked daily. A checklist is
supplied with the washer-disinfector.
Check the following points:
– Are the rollers in proper condition
and are they securely attached to the
mobile unit / insert?
– Are the counter-nuts on the guide
rails firmly secured?
– Is the mobile unit connection
correctly set and firmly screwed on?
– For mobile units in the modular
system, are the caps in the module
connections working properly?
– Are all spray jets, spray sleeves and
hose adapters securely attached to
the mobile unit / insert?
– Are all spray jets, spray sleeves and
hose adapters unclogged so that
water can flow through?
– Are all caps, covers and fasteners
securely attached to the spray
sleeves?
– Is the magnetic strip of the Automatic
Mobile Unit Recognition free of
adhering metallic items?
– Are the screws in the magnet rails for
Automatic Mobile Unit Recognition
tightly secured?
If there are spray arms:
– Do the spray arms rotate freely?
– Are the spray jets clogged? See the
section on "Cleaning and Care /
Cleaning the spray arms".
– Are the magnets in place on the
spray arm ends?
– Are the magnets on the spray arms
free of attached metal parts?
Mobile units, modules and inserts
must also undergo routine
maintenance within the framework of
periodical maintenance of the
washer-disinfector every 2000
operating hours or at least once
per year.
See Maintenance of the
washer-disinfector.
Maintenance of the washer-disinfector
67
Built-in printer (Option)
Replacing the print paper
When the red indicator light behind the
front panel on the printer comes on,
replace the paper roll. Check the print
paper regularly.
To do this:
� Open the front panel of the printer by
the upper edge, and pull down.
� Remove the empty paper roll and
spindle together from the holder, fit
the new roll onto the spindle, and
install them back into the printer.
� Guide the paper up and over the
paper transport roller (slit behind the
ribbon cartridge). Press the grey
paper transport button until the paper
re-emerges above the ribbon
cartridge.
� Guide the paper through the slit in
the front panel. Shut the panel.
Replacement paper rolls (58 mm wide /
outer diameter approx. 50 mm) can be
obtained from Miele Service.
Replacing the ribbon cartridge
� Open the front panel of the printer by
the upper edge, and pull down.
� The ribbon cartridge is above the
paper roll. Pull it forward and out of
the holder and replace it with a new
one. The paper must be guided
between the ribbon and the cartridge
housing.
� On the right, turn the small wheel for
manual ribbon transport clockwise
until the ribbon is taut.
� Guide the paper through the slit in
the front panel. Shut the panel.
Replacement ribbon cartridges can be
obtained from Miele Service.
Maintenance of the washer-disinfector
68
Repairs should only be carried
out by Miele Service.
Work performed by unqualified
persons can place the user at
considerable risk of harm.
To help avoid unnecessary service
calls, please be sure to check first
whether a fault message is due to
operator error.
See the "Messages" section in the
Programming Manual for an
overview of the various fault
messages that can appear in the
display.
If a fault occurs and cannot be
corrected using the "Operating
Instructions" and "Programming
Manual", please contact Miele Service.
For contact information see last page
of the operating instructions.
When contacting the service
department, you will need to quote the
model and serial number of your
washer-disinfector. This information can
be found on the data plate (see
"Electrical Connection").
Customer Service
69
All electrical work must be carried
out by a qualified electrician in
accordance with local and national
safety regulations.
– Installation, repairs and other work
by unqualified persons could be
dangerous. The manufacturer can
not be held responsible for
unauthorized work.
– For hard-wired machines connection
should be made via a suitable
isolator, with an on-off switch which
is easily accessible for servicing and
maintenance work after the machine
has been installed. An electrical
safety test must be carried out after
installation and after any servicing
work. When switched off there must
be an all-pole contact gap of at least
3 mm in the mains connection
switch.
– For extra safety it is advisable to
protect the machine with a 30 mA
residual current device (RCD).
– Check that the phase rotation is
correct when connecting the
machine.
� For technical data see the data plate
or wiring diagram supplied.
The washer-disinfector must only be
operated with the voltage, frequency
and fusing shown on the data plate.
The data plate is on the cover plate
behind the service panel of the unclean
side.
The wiring diagram is secured to the
inner side of the service panel.
This machine can be converted in
accordance with the conversion
diagram and wiring diagram supplied.
Further notes on electrical
connection are given on the
installation diagram supplied with
the machine.
WARNING:
THIS APPLIANCE MUST BE
GROUNDED
Electrical connection
70
Water connection
This washer-disinfector must be
connected to the water supply in
accordance with all national and
local plumbing codes. Please refer
to the installation diagram supplied
with the machine.
Water in the
washer-disinfector is not suitable
for drinking.
If the water supply has a high iron
content there is a danger of corrosion
occurring on items being processed in
the machine, as well as in the machine
itself.
If the chloride content of the water
exceeds 100 mg/l the risk of corrosion
to items being processed in the
machine will be further increased.
The washer-disinfector is designed so
that it may be connected to a water
supply without an extra non-return
valve, unless required by code.
Taps and drain connections should be
situated as close to the
washer-disinfector as possible, and be
easily accessible.
The machine is designed for
connection to cold, hot and DI water.
If there is no hot water supply, the
intake valve for the warm water
connection should be connected to the
cold water supply.
Refer to the Installation Diagram for
more information.
Large area filters, supplied with the
machine, are to be installed in the hose
attached to the water supply.
Do not shorten or damage the
hoses!
Do not remove the filters in the
hoses.
Plumbing
71
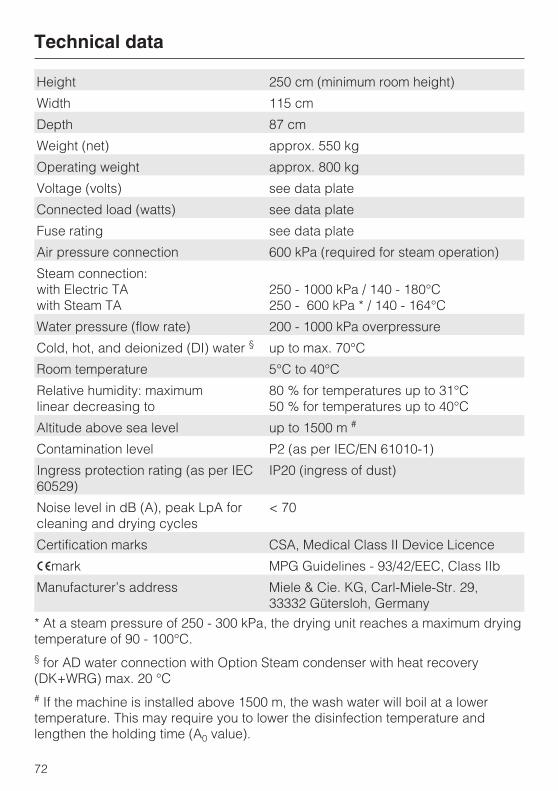
Height 250 cm (minimum room height)
Width 115 cm
Depth 87 cm
Weight (net) approx. 550 kg
Operating weight approx. 800 kg
Voltage (volts) see data plate
Connected load (watts) see data plate
Fuse rating see data plate
Air pressure connection 600 kPa (required for steam operation)
Steam connection:
with Electric TA
with Steam TA
250 - 1000 kPa / 140 - 180°C
250 - 600 kPa * / 140 - 164°C
Water pressure (flow rate) 200 - 1000 kPa overpressure
Cold, hot, and deionized (DI) water§
up to max. 70°C
Room temperature 5°C to 40°C
Relative humidity: maximum
linear decreasing to
80 % for temperatures up to 31°C
50 % for temperatures up to 40°C
Altitude above sea level up to 1500 m#
Contamination level P2 (as per IEC/EN 61010-1)
Ingress protection rating (as per IEC
60529)
IP20 (ingress of dust)
Noise level in dB (A), peak LpA for
cleaning and drying cycles
< 70
Certification marks CSA, Medical Class II Device Licence
�mark MPG Guidelines - 93/42/EEC, Class IIb
Manufacturer’s address Miele & Cie. KG, Carl-Miele-Str. 29,
33332 Gütersloh, Germany
* At a steam pressure of 250 - 300 kPa, the drying unit reaches a maximum drying
temperature of 90 - 100°C.
§for AD water connection with Option Steam condenser with heat recovery
(DK+WRG) max. 20 °C
#If the machine is installed above 1500 m, the wash water will boil at a lower
temperature. This may require you to lower the disinfection temperature and
lengthen the holding time (A0 value).
Technical data
72
optional modules:
– Drying unit
– Steam condenser
– Steam condenser with heat recovery (DK+WRG) – not available in all countries.
– Pre-heater
– Conductivity detector
– Report printer
– Barcode scanner connection
– Up to 3 additional internal dispensing systems
– OXIVARIO (after-sale option through Miele Service)
– ORTHOVARIO (after-sale option through Miele Service)
– Glass doors and wash cabinet lighting
– Combination steam/electric wash cabinet heating
Water softener
If your tap water hardness is � 4 gr/gal, you should plan to install a water softener.
The "PG 8597 Aquasoft system" is suitable (up to 40 gr/gal).
Optional equipment
73
Intended Use
The washer-disinfector can be
equipped (or retro-fitted) for the
OXIVARIO process, with two additional
dispensing pumps and an intermediate
reservoir for hydrogen peroxide solution
(H2O2solution). In this case, the DOS 2
dispensing system will dispense the
H2O2solution.
For the ORTHOVARIO process, the
DOS 4 dispensing system must be
equipped (fitted) with a special
dispensing pump for a special tenside
detergent.
The OXIVARIO PLUS, OXIVARIO and
ORTHOVARIO programs are available
for the special processes.
The OXIVARIO process uses active
oxygen release under alkaline
conditions. The detergent used in this
process must be tenside-free, with a
pH value between 11 and 11.5.
The ORTHOVARIO process uses a
material-tolerant tenside detergent in
the first cleaning phase, and active
oxygen release in the second phase,
produced at a pH between 10.0 and
11.0 at a slightly higher temperature of
65°C.
Applications
The OXIVARIO process uses alkaline
cleaning, and is designed to meet the
special demands involved in the
preparation of surgical instruments.
This process is especially suited to the
preparation of OP instruments, i. e.,
from HF (high frequency) surgery,
orthopaedic surgery,
instruments that dry out during long
delays until preparation, and for
instruments affected by antiseptics.
The OXIVARIO PLUS process is
designed to prevent iatrogenic prion
transmission (vCJK).
The cleaning processes are gentle
enough for minimally invasive
instruments, including ophthalmic, as
long as the manufacturer has approved
alkaline cleaning methods for them.
However, this process is not suitable for
anodized aluminium. The materials in
titanium alloys, e.g., implants, may vary
in terms of material tolerance.
Colour-coding can change, resulting in
errors. Consult the manufacturer for
verification.
The ORTHOVARIO program is
designed for the material-tolerant
preparation of alkaline-sensitive
instruments made of aluminum, in
particular for instruments used in
orthopaedics, e.g., for motor systems.
The oxidative effects of this process
make it unsuitable for titanium alloys,
in particular for colour-coded
implants.
The processes clean so
thoroughly that, to prevent
damages, instruments with metal
surfaces sliding across each other
must be carefully attended to with
suitable material immediately
following preparation.
OXIVARIO and ORTHOVARIO Optional Processes
74
Safety instructions and
warnings
These safety instructions and
warnings are in addition to those
found at the beginning of the
Installation and Operating
Instructions!
� The H2O2solution must only be used
in special containers from "Ecolab" or
"Dr. Weigert", with the matching
adapters.
� Always read and comply with the
material safety data sheets from the
manufacturers of the process
chemicals.
� Exercise care when handling
H2O2solution - it is a corrosive
substance!
Always comply with all applicable
safety regulations!
Use protective eyewear and gloves.
� Follow the manufacturer's
instructions for disposal of empty
containers.
� The H2O2solution must never be
mixed with any other processing
chemicals. A violent chemical reaction,
such as a flash fire, may occur.
� Only special tenside detergents
from "Ecolab" or "Dr. Weigert" should be
used.
Connecting the H2O
2
container(s)
The hose line for the H2O2 container is
identified by a black label. It is supplied
without an adapter, because the
extraction systems for each container
differ by manufacturer.
� Connect the appropriate adapter
from the manufacturer to the (black)
hose line.
� Connect the H2O2 container.
� Start the DOS2-FILL service program.
In contrast to the other processing
chemicals, the H2O2 container should
be completely empty before you
exchange it.
� Wait until you see Fill container DOS
2 in the display before installing a
new container with H2O2-, then start
the DOS2-FILL service program.
� If the display shows Check
dispensing system 2, check the
container and dispensing line. The
program automatically pauses for
this.
OXIVARIO and ORTHOVARIO Optional Processes
75
Functional description
Washers-disinfectors with a steam
condenser with heat recovery
(DK+WRG) are identified with this
symbol.
The variant Steam condenser with heat
recovery (DK+WRG) may be used only
with a built-in boiler.
In this variant, the steam condenser is
connected to the AD water and not to
the cold water supply. The AD water
used as cooling medium flows through
the steam condenser, where it is
preheated, into the boiler of the
washer-disinfector.
Thus, heating the boiler water requires
less energy. Compared to a connection
of the steam condenser to the fresh
water supply, this variant also reduces
the overall water consumption.
Due to the modified water conduits in
the washer-disinfector, the water inlet
times increase in purge blocks using
warm AD water.
Intended application
Washers-disinfectors with Steam
condenser with heat recovery
(DK+WRG) may be only used in
medical applications.
For optimum utilization of the heat
recovery system, operate the
washer-disinfector without extended
standstill times.
After extended standstill times
such as weekends, start the FILL
BOILER utility before starting
operation.
For hygienic reasons, the AD water
from the steam condenser and the
boiler is replaced by fresh, cold AD
water.
SAFETY INSTRUCTIONS AND
WARNINGS
These safety instructions and
warnings apply in addition to those
found at the beginning of the
Operating Instructions!
� Ophthalmological instruments must
not be treated in washers-disinfectors
with the Steam condenser with heat
recovery (DK+WRG) option!
� When using the heat recovery
function, do not lower the boiler
temperature of 90 °C. For sensitive
wash ware such as optical instruments
for example, select a process without
thermal shocks. For instance, use warm
water in the last purge block before the
thermal disinfection.
� In the case of very delicate wash
ware, please verify whether it is suited
for the treatment in a process with
potential changes in temperature.
Please follow the instructions provided
by the manufacturers of the wash ware
and the instruments.
Optional equipment DK + WRG
76
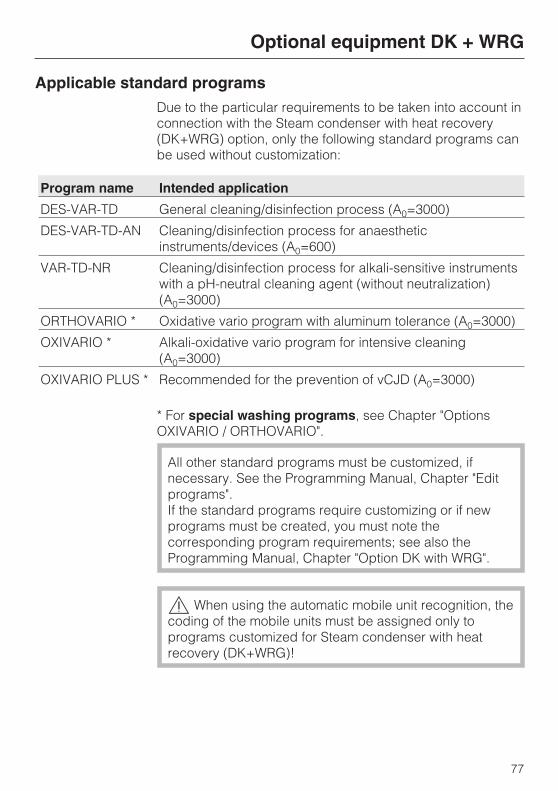
Applicable standard programs
Due to the particular requirements to be taken into account in
connection with the Steam condenser with heat recovery
(DK+WRG) option, only the following standard programs can
be used without customization:
Program name Intended application
DES-VAR-TD General cleaning/disinfection process (A0=3000)
DES-VAR-TD-AN Cleaning/disinfection process for anaesthetic
instruments/devices (A0=600)
VAR-TD-NR Cleaning/disinfection process for alkali-sensitive instruments
with a pH-neutral cleaning agent (without neutralization)
(A0=3000)
ORTHOVARIO * Oxidative vario program with aluminum tolerance (A0=3000)
OXIVARIO * Alkali-oxidative vario program for intensive cleaning
(A0=3000)
OXIVARIO PLUS * Recommended for the prevention of vCJD (A0=3000)
* For special washing programs, see Chapter "Options
OXIVARIO / ORTHOVARIO".
All other standard programs must be customized, if
necessary. See the Programming Manual, Chapter "Edit
programs".
If the standard programs require customizing or if new
programs must be created, you must note the
corresponding program requirements; see also the
Programming Manual, Chapter "Option DK with WRG".
When using the automatic mobile unit recognition, the
coding of the mobile units must be assigned only to
programs customized for Steam condenser with heat
recovery (DK+WRG)!
Optional equipment DK + WRG
77
Old electric and electronic equipment
often contains valuable materials.
However, it also may contain harmful
substances that were necessary for
safe use. Improperly disposing of
appliances in your household waste
can be detrimental to health and the
environment. This is why it is important
NEVER to dispose of your old
appliance in the regular household
garbage.
Instead, please contact your local
community waste collection point to
return and recycle electric and
electronic appliances.
If the appliance is being stored for
disposal, please make sure it has been
child-proofed.
Disposing of an old appliance
78

79
M.-Nr. 10 317 051 / 00
0297
Subject to change without notice / Creation date 2016-01-08
![Adopting a new cleaner disinfector to optimise cleanliness ... · swab testing of multiple high-touch surfaces], ... Adopting a new cleaner disinfector to optimise cleanliness and](https://img.pdfslide.us/doc/110x75/5b7b44677f8b9a474a8c4f2f/adopting-a-new-cleaner-disinfector-to-optimise-cleanliness-swab-testing.jpg)