Embed Size (px)
Citation preview
SystemC Headstart

SystemC Headstart 2
Copyright © 2008 by Doulos Ltd. All rights reserved.
All intellectual property rights, including copyright, patents, design rights and know-how in orrelating to the course or course materials provided or made available in connection with thecourse remain the sole property of Doulos Ltd or their respective owners and no copies may bemade of course materials unless expressly agreed in writing by Doulos Ltd.
All trademarks acknowledged.
Doulos takes great care in developing and maintaining materials to ensure they are an effectiveand accurate medium for communicating design know-how. However, the information providedon a Doulos training course may be out of date or include omissions, inaccuracies or other errors.Except where expressly provided otherwise in agreement between you and Doulos, allinformation provided directly or indirectly through a Doulos training course is provided “as is”without warranty of any kind.
Doulos hereby disclaims all warranties with respect to this information, whether express orimplied, including the implied warranties of merchantability, satisfactory quality and fitness for aparticular purpose. In no event shall Doulos be liable for any direct, indirect, incidental special orconsequential damages, or damages for loss of profits, revenue, data or use, incurred by you orany third party, whether in contract, tort or otherwise, arising for your access to, use of, orreliance upon information obtained from or through a Doulos training course. Doulos reservesthe right to make changes, updates or corrections to the information contained in its trainingcourses at any time without notice.
Doulos Limited, Church Hatch, 22 Market place, Ringwood, Hants, BH24 1AW, UK
Tel: +44 (0) 1425 471223Email: [email protected]
SystemC HeadstartVersion 2

SystemC Headstart 2
SystemC Headstart Version 2 Copyright © 2008 by Doulos Ltd. All Rights Reserved 1
ContentsContents............................................................................................................... 1
Introduction .......................................................................................................... 3
The Doulos SystemC Headstart Kit................................................................... 5
Installing SystemC ............................................................................................... 7
Linux Install ....................................................................................................... 8
Visual C++ 2005 Express Edition Install.......................................................... 10
Visual C++ 2008 Express Edition Install.......................................................... 13
SystemC Projects............................................................................................... 15
Building on Linux............................................................................................. 16
Building with Visual C++ 2003 .NET................................................................ 18
Building with Visual C++ 2005 EE................................................................... 19
Building with Visual C++ 2008 EE................................................................... 21
Example Projects ............................................................................................... 23
SystemC Example Project............................................................................... 24
SystemC Example Project (C++-ish)............................................................... 26
SystemC Example Project (VHDL DUT) ......................................................... 27
Conclusion ......................................................................................................... 31

SystemC Headstart
2 Copyright © 2008 by Doulos Ltd. All Rights Reserved SystemC Headstart Version 2
SystemC Headstart Version 2 Copyright © 2008 by Doulos Ltd. All Rights Reserved 3
Introduction

SystemC Headstart
4 Copyright © 2008 by Doulos Ltd. All Rights Reserved SystemC Headstart Version 2
SystemC Headstart Version 2 Copyright © 2008 by Doulos Ltd. All Rights Reserved 5
The Doulos SystemC Headstart Kit
The Doulos SystemC™ Headstart Kit helps you to get started with SystemC. The kit is intendedto help with the basic questions such as
• How do I install SystemC?
• How do I create a SystemC project using my particular compiler and operating system (OS)?
• Is it possible to co-simulate SystemC and a hardware description language (HDL)?
• What problems might I encounter, and how should I solve them?
The Headstart Kit includes a simple example design but is not intended to teach SystemC itself.There is a tutorial on our website at
http://www.doulos.com/knowhow/systemc/tutorial
which covers the basics, but to be able to use SystemC for a real project, you would be wise totake proper training: see
http://www.doulos.com/content/training/systemc_fundamental_training.php
For a thorough reference, you can download the SystemC Language Reference Manual via theOpen SystemC Initiative (OSCI) website, http://www.systemc.org - you'll need to register first.
For a handy pocket-sized reference (well, for those with fairly large pockets!) see our SystemCGolden Reference Guide. The Golden Reference Guide is included on our SystemC trainingcourses, or you can buy one by following the links from
http://www.doulos.com/webshop/
Now let's start at the beginning, with SystemC installation.

SystemC Headstart
6 Copyright © 2008 by Doulos Ltd. All Rights Reserved SystemC Headstart Version 2
SystemC Headstart Version 2 Copyright © 2008 by Doulos Ltd. All Rights Reserved 7
Installing SystemCSystemC can be installed on a range of operating systems and with various C++ compilers. Thissection gathers together our experience for both Linux and Windows based systems.
Whatever platform or compiler you are using, make sure you read the INSTALL andRELEASENOTES files which are part of the SystemC distribution.
At the time of writing, the version of the SystemC library is 2.2.0.
SystemC Headstart
8 Copyright © 2008 by Doulos Ltd. All Rights Reserved SystemC Headstart Version 2
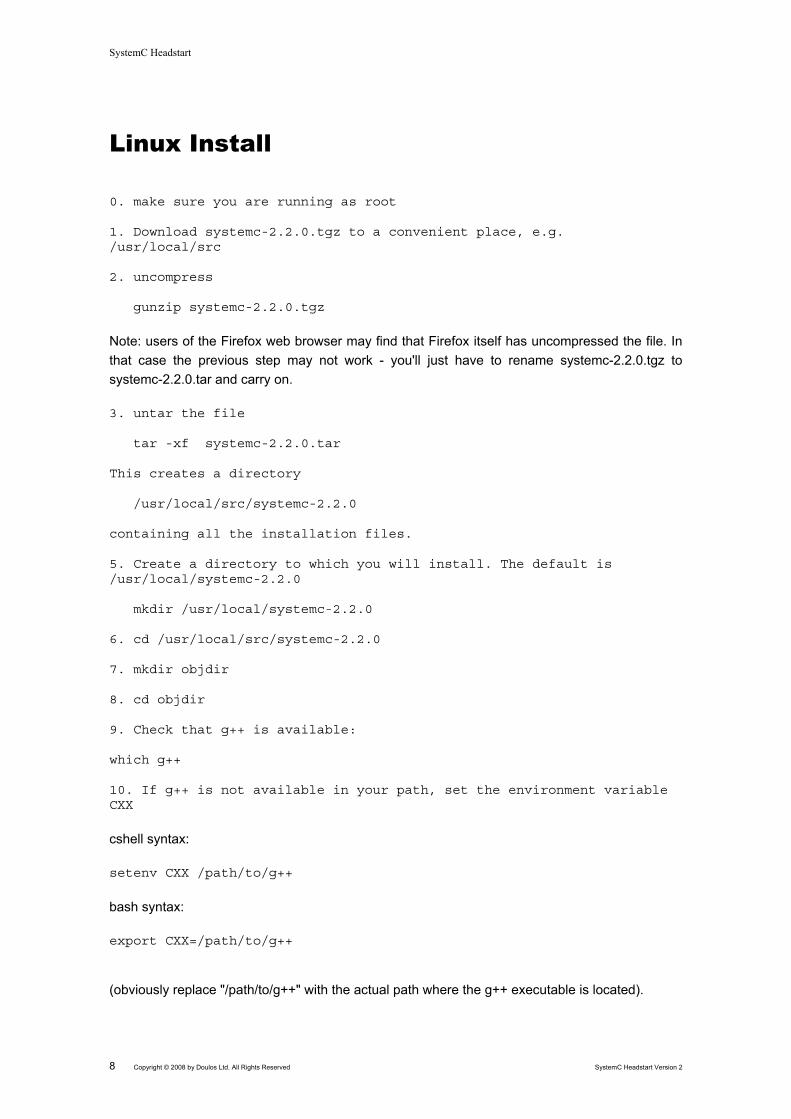
Linux Install
0. make sure you are running as root
1. Download systemc-2.2.0.tgz to a convenient place, e.g./usr/local/src
2. uncompress
gunzip systemc-2.2.0.tgz
Note: users of the Firefox web browser may find that Firefox itself has uncompressed the file. Inthat case the previous step may not work - you'll just have to rename systemc-2.2.0.tgz tosystemc-2.2.0.tar and carry on.
3. untar the file
tar -xf systemc-2.2.0.tar
This creates a directory
/usr/local/src/systemc-2.2.0
containing all the installation files.
5. Create a directory to which you will install. The default is/usr/local/systemc-2.2.0
mkdir /usr/local/systemc-2.2.0
6. cd /usr/local/src/systemc-2.2.0
7. mkdir objdir
8. cd objdir
9. Check that g++ is available:
which g++
10. If g++ is not available in your path, set the environment variableCXX
cshell syntax:
setenv CXX /path/to/g++
bash syntax:
export CXX=/path/to/g++
(obviously replace "/path/to/g++" with the actual path where the g++ executable is located).
SystemC Headstart Version 2 Copyright © 2008 by Doulos Ltd. All Rights Reserved 9
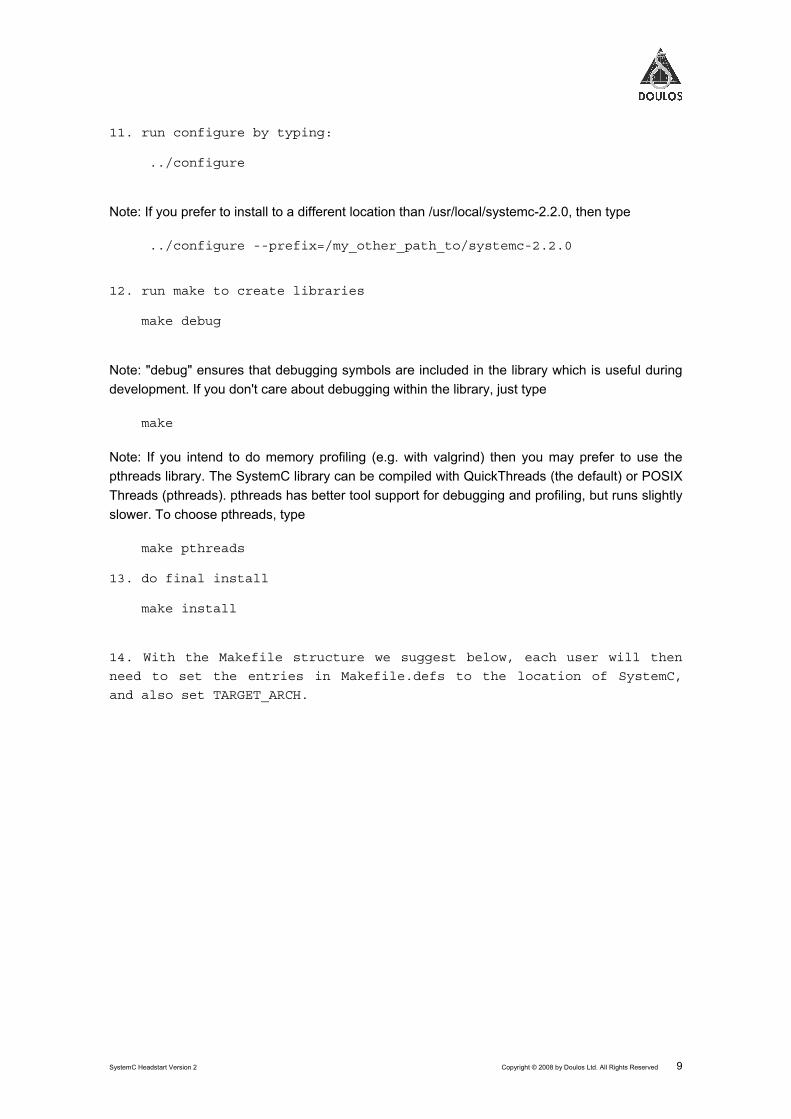
11. run configure by typing:
../configure
Note: If you prefer to install to a different location than /usr/local/systemc-2.2.0, then type
../configure --prefix=/my_other_path_to/systemc-2.2.0
12. run make to create libraries
make debug
Note: "debug" ensures that debugging symbols are included in the library which is useful duringdevelopment. If you don't care about debugging within the library, just type
make
Note: If you intend to do memory profiling (e.g. with valgrind) then you may prefer to use thepthreads library. The SystemC library can be compiled with QuickThreads (the default) or POSIXThreads (pthreads). pthreads has better tool support for debugging and profiling, but runs slightlyslower. To choose pthreads, type
make pthreads
13. do final install
make install
14. With the Makefile structure we suggest below, each user will then
need to set the entries in Makefile.defs to the location of SystemC,
and also set TARGET_ARCH.
SystemC Headstart
10 Copyright © 2008 by Doulos Ltd. All Rights Reserved SystemC Headstart Version 2
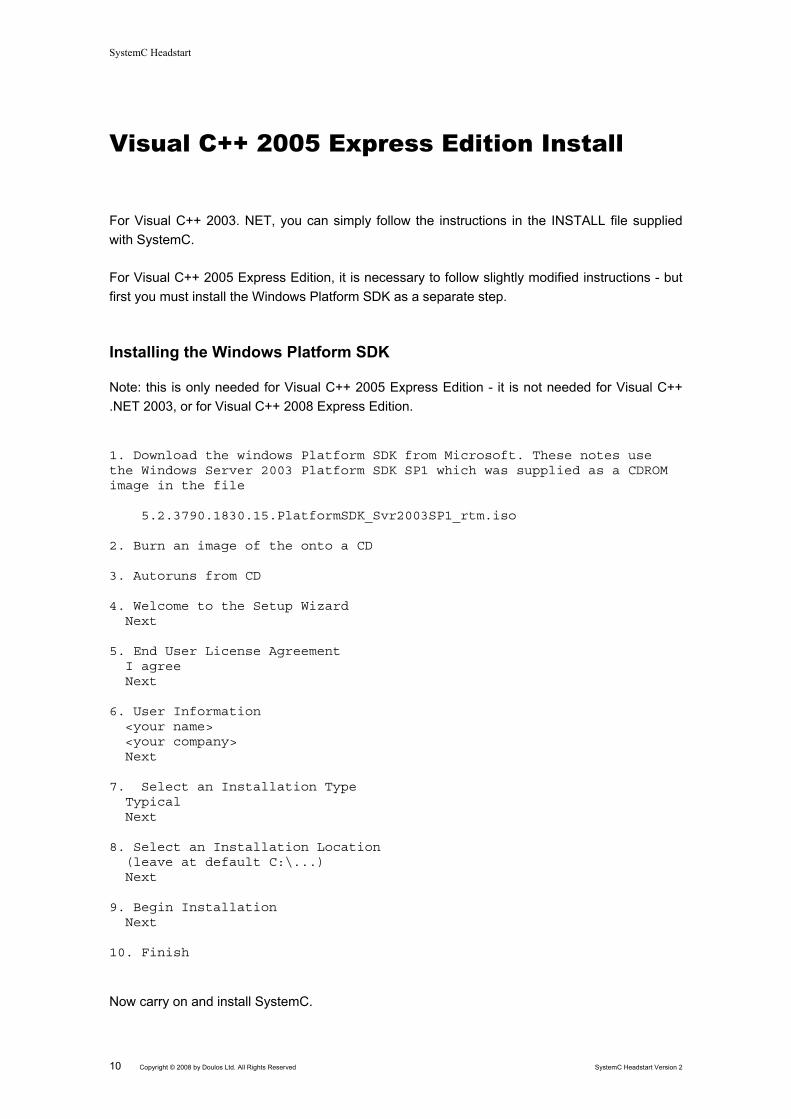
Visual C++ 2005 Express Edition Install
For Visual C++ 2003. NET, you can simply follow the instructions in the INSTALL file suppliedwith SystemC.
For Visual C++ 2005 Express Edition, it is necessary to follow slightly modified instructions - butfirst you must install the Windows Platform SDK as a separate step.
Installing the Windows Platform SDK
Note: this is only needed for Visual C++ 2005 Express Edition - it is not needed for Visual C++.NET 2003, or for Visual C++ 2008 Express Edition.
1. Download the windows Platform SDK from Microsoft. These notes usethe Windows Server 2003 Platform SDK SP1 which was supplied as a CDROMimage in the file
5.2.3790.1830.15.PlatformSDK_Svr2003SP1_rtm.iso
2. Burn an image of the onto a CD
3. Autoruns from CD
4. Welcome to the Setup Wizard Next
5. End User License Agreement I agree Next
6. User Information <your name> <your company> Next
7. Select an Installation Type Typical Next
8. Select an Installation Location (leave at default C:\...) Next
9. Begin Installation Next
10. Finish
Now carry on and install SystemC.
SystemC Headstart Version 2 Copyright © 2008 by Doulos Ltd. All Rights Reserved 11
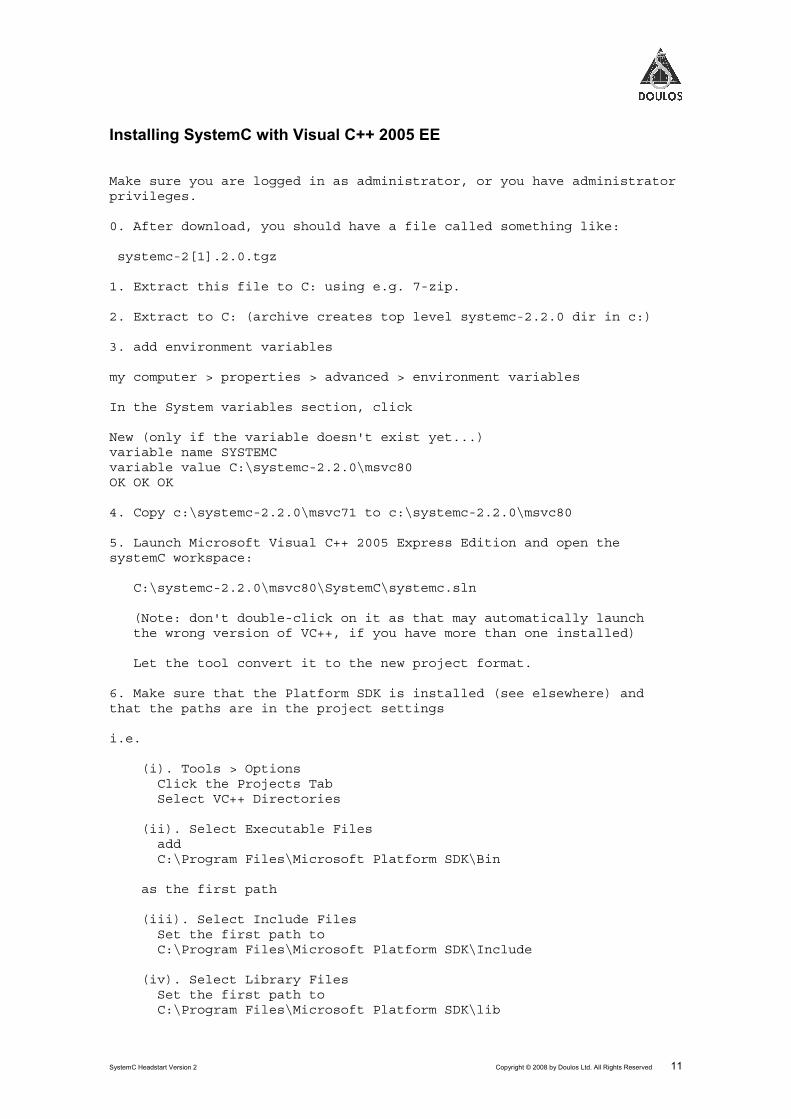
Installing SystemC with Visual C++ 2005 EE
Make sure you are logged in as administrator, or you have administratorprivileges.
0. After download, you should have a file called something like:
systemc-2[1].2.0.tgz
1. Extract this file to C: using e.g. 7-zip.
2. Extract to C: (archive creates top level systemc-2.2.0 dir in c:)
3. add environment variables
my computer > properties > advanced > environment variables
In the System variables section, click
New (only if the variable doesn't exist yet...)variable name SYSTEMCvariable value C:\systemc-2.2.0\msvc80OK OK OK
4. Copy c:\systemc-2.2.0\msvc71 to c:\systemc-2.2.0\msvc80
5. Launch Microsoft Visual C++ 2005 Express Edition and open thesystemC workspace:
C:\systemc-2.2.0\msvc80\SystemC\systemc.sln
(Note: don't double-click on it as that may automatically launch the wrong version of VC++, if you have more than one installed)
Let the tool convert it to the new project format.
6. Make sure that the Platform SDK is installed (see elsewhere) andthat the paths are in the project settings
i.e.
(i). Tools > Options Click the Projects Tab Select VC++ Directories
(ii). Select Executable Files add C:\Program Files\Microsoft Platform SDK\Bin
as the first path
(iii). Select Include Files Set the first path to C:\Program Files\Microsoft Platform SDK\Include
(iv). Select Library Files Set the first path to C:\Program Files\Microsoft Platform SDK\lib

SystemC Headstart
12 Copyright © 2008 by Doulos Ltd. All Rights Reserved SystemC Headstart Version 2
(v). Click OK
Note: the settings above apply per user.
7. Select menu Build> Batch Build
Select All Build
(takes a few minutes!)
You'll get a lot of warnings. If you don't like them, set the macro _CRT_SECURE_NO_DEPRECATE in the macro settings for the project.
Note: the following settings apply per user.
8. In VC++.NET, Select Tools -> Options . . . and theProjects and Solutions -> VC++ Directories tab
9. Select show directories for: Library files
10. Select the 'New' icon and enter: $(SYSTEMC)\SystemC\debug
11. Select show directories for: Include files
12. Select the 'New' icon and enter: $(SYSTEMC)\..\src
Note: you should remove any Library and Include directories from old versions of SystemC youmay have installed previously.
13. Click OK

SystemC Headstart Version 2 Copyright © 2008 by Doulos Ltd. All Rights Reserved 13
Visual C++ 2008 Express Edition Install
Make sure you are logged in as administrator, or you have administratorprivileges.
0. After download, you should have a file called something like:
systemc-2[1].2.0.tgz
1. Extract this file to C: using e.g. 7-zip.
2. Extract to C: (archive creates top level systemc-2.2.0 dir in c:)
3. add environment variables
my computer > properties > advanced > environment variables
In the System variables section, click
New (only if the variable doesn't exist yet...)variable name SYSTEMCvariable value C:\systemc-2.2.0\msvc90OK OK OK
4. Copy c:\systemc-2.2.0\msvc71 to c:\systemc-2.2.0\msvc90
5. Launch Microsoft Visual C++ 2005 Express Edition and open thesystemC workspace:
C:\systemc-2.2.0\msvc90\SystemC\systemc.sln
(Note: don't double-click on it as that may automatically launch the wrong version of VC++, if you have more than one installed)
Let the tool convert it to the new project format.
6. Select menu Build> Batch Build
Select All Build
(takes a few minutes!)
You'll get a lot of warnings. If you don't like them, set the macro _CRT_SECURE_NO_WARNINGS in the macro settings for the project.
Note: the following settings apply per user.
7. In VC++.NET, Select Tools -> Options . . . and theProjects and Solutions -> VC++ Directories tab
8. Select show directories for: Library files
9. Select the 'New' icon and enter: $(SYSTEMC)\SystemC\debug
SystemC Headstart
14 Copyright © 2008 by Doulos Ltd. All Rights Reserved SystemC Headstart Version 2
10. Select show directories for: Include files
11. Select the 'New' icon and enter: $(SYSTEMC)\..\src
Note: you should remove any Library and Include directories from old versions of SystemC youmay have installed previously.
12. Click OK
SystemC Headstart Version 2 Copyright © 2008 by Doulos Ltd. All Rights Reserved 15
SystemC Projects
SystemC Headstart
16 Copyright © 2008 by Doulos Ltd. All Rights Reserved SystemC Headstart Version 2
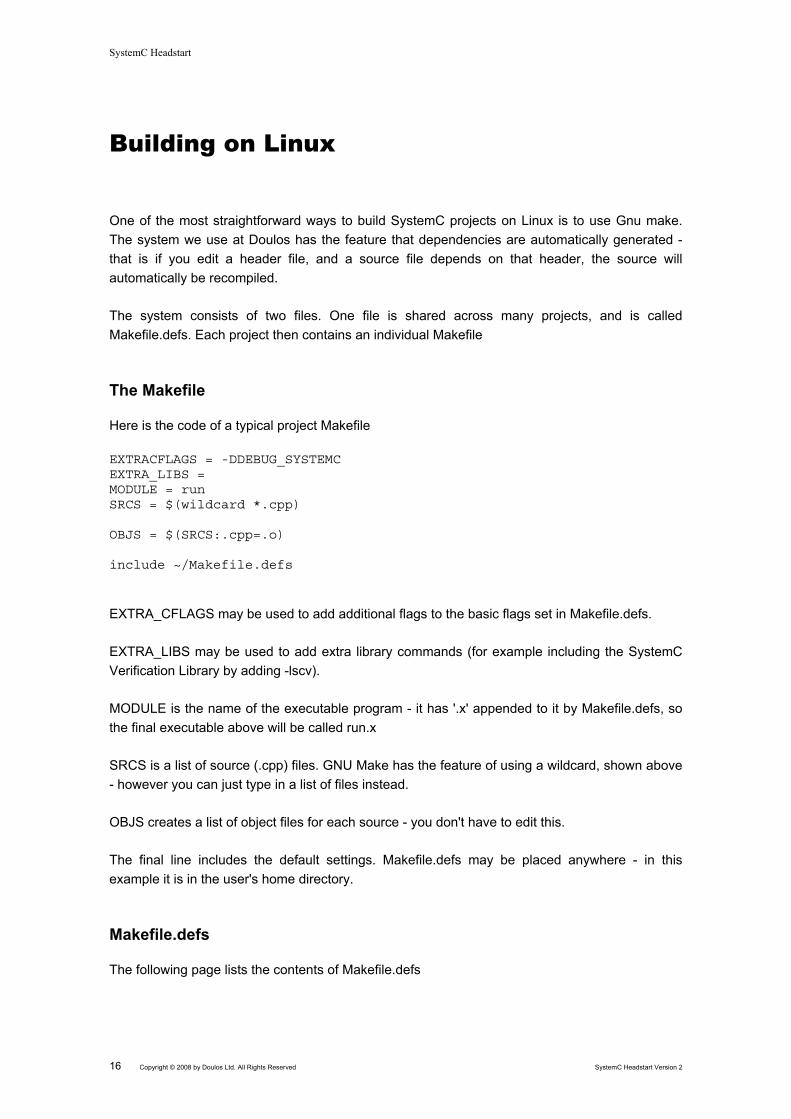
Building on Linux
One of the most straightforward ways to build SystemC projects on Linux is to use Gnu make.The system we use at Doulos has the feature that dependencies are automatically generated -that is if you edit a header file, and a source file depends on that header, the source willautomatically be recompiled.
The system consists of two files. One file is shared across many projects, and is calledMakefile.defs. Each project then contains an individual Makefile
The Makefile
Here is the code of a typical project Makefile
EXTRACFLAGS = -DDEBUG_SYSTEMCEXTRA_LIBS =MODULE = runSRCS = $(wildcard *.cpp)
OBJS = $(SRCS:.cpp=.o)
include ~/Makefile.defs
EXTRA_CFLAGS may be used to add additional flags to the basic flags set in Makefile.defs.
EXTRA_LIBS may be used to add extra library commands (for example including the SystemCVerification Library by adding -lscv).
MODULE is the name of the executable program - it has '.x' appended to it by Makefile.defs, sothe final executable above will be called run.x
SRCS is a list of source (.cpp) files. GNU Make has the feature of using a wildcard, shown above- however you can just type in a list of files instead.
OBJS creates a list of object files for each source - you don't have to edit this.
The final line includes the default settings. Makefile.defs may be placed anywhere - in thisexample it is in the user's home directory.
Makefile.defs
The following page lists the contents of Makefile.defs
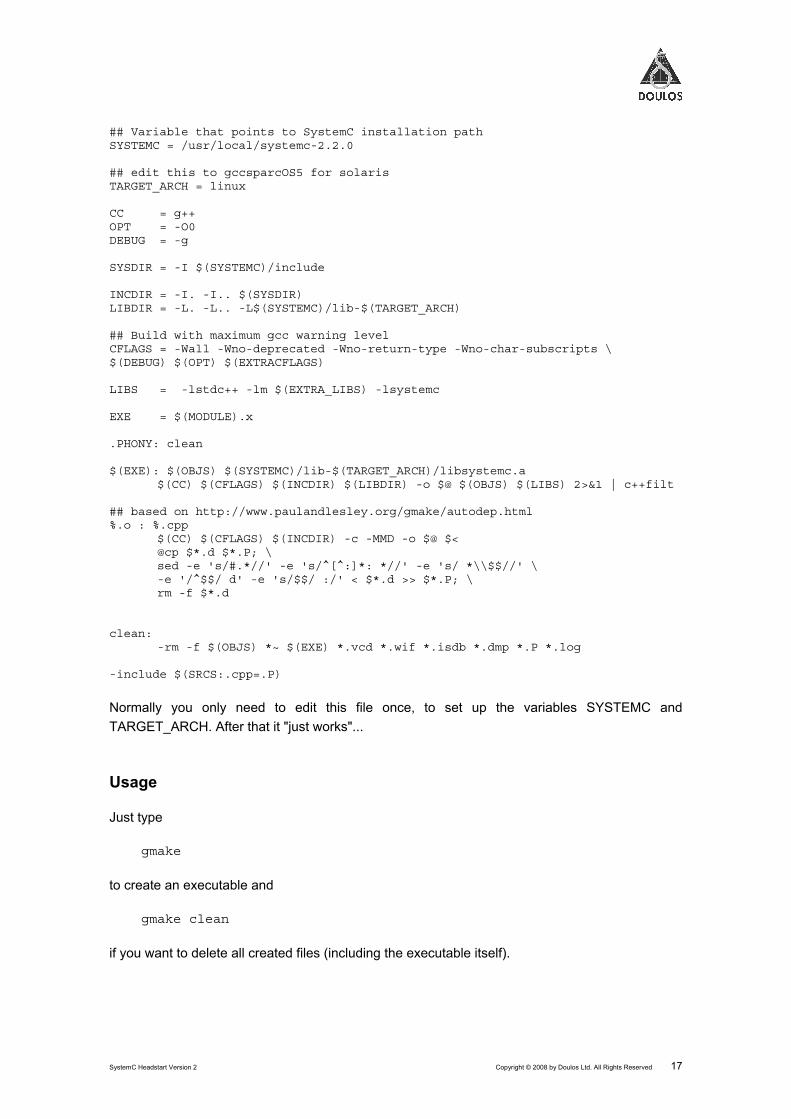
SystemC Headstart Version 2 Copyright © 2008 by Doulos Ltd. All Rights Reserved 17
## Variable that points to SystemC installation pathSYSTEMC = /usr/local/systemc-2.2.0
## edit this to gccsparcOS5 for solarisTARGET_ARCH = linux
CC = g++OPT = -O0DEBUG = -g
SYSDIR = -I $(SYSTEMC)/include
INCDIR = -I. -I.. $(SYSDIR)LIBDIR = -L. -L.. -L$(SYSTEMC)/lib-$(TARGET_ARCH)
## Build with maximum gcc warning levelCFLAGS = -Wall -Wno-deprecated -Wno-return-type -Wno-char-subscripts \$(DEBUG) $(OPT) $(EXTRACFLAGS)
LIBS = -lstdc++ -lm $(EXTRA_LIBS) -lsystemc
EXE = $(MODULE).x
.PHONY: clean
$(EXE): $(OBJS) $(SYSTEMC)/lib-$(TARGET_ARCH)/libsystemc.a$(CC) $(CFLAGS) $(INCDIR) $(LIBDIR) -o $@ $(OBJS) $(LIBS) 2>&1 | c++filt
## based on http://www.paulandlesley.org/gmake/autodep.html%.o : %.cpp
$(CC) $(CFLAGS) $(INCDIR) -c -MMD -o $@ $<@cp $*.d $*.P; \sed -e 's/#.*//' -e 's/^[^:]*: *//' -e 's/ *\\$$//' \-e '/^$$/ d' -e 's/$$/ :/' < $*.d >> $*.P; \rm -f $*.d
clean:-rm -f $(OBJS) *~ $(EXE) *.vcd *.wif *.isdb *.dmp *.P *.log
-include $(SRCS:.cpp=.P)
Normally you only need to edit this file once, to set up the variables SYSTEMC andTARGET_ARCH. After that it "just works"...
Usage
Just type
gmake
to create an executable and
gmake clean
if you want to delete all created files (including the executable itself).
SystemC Headstart
18 Copyright © 2008 by Doulos Ltd. All Rights Reserved SystemC Headstart Version 2
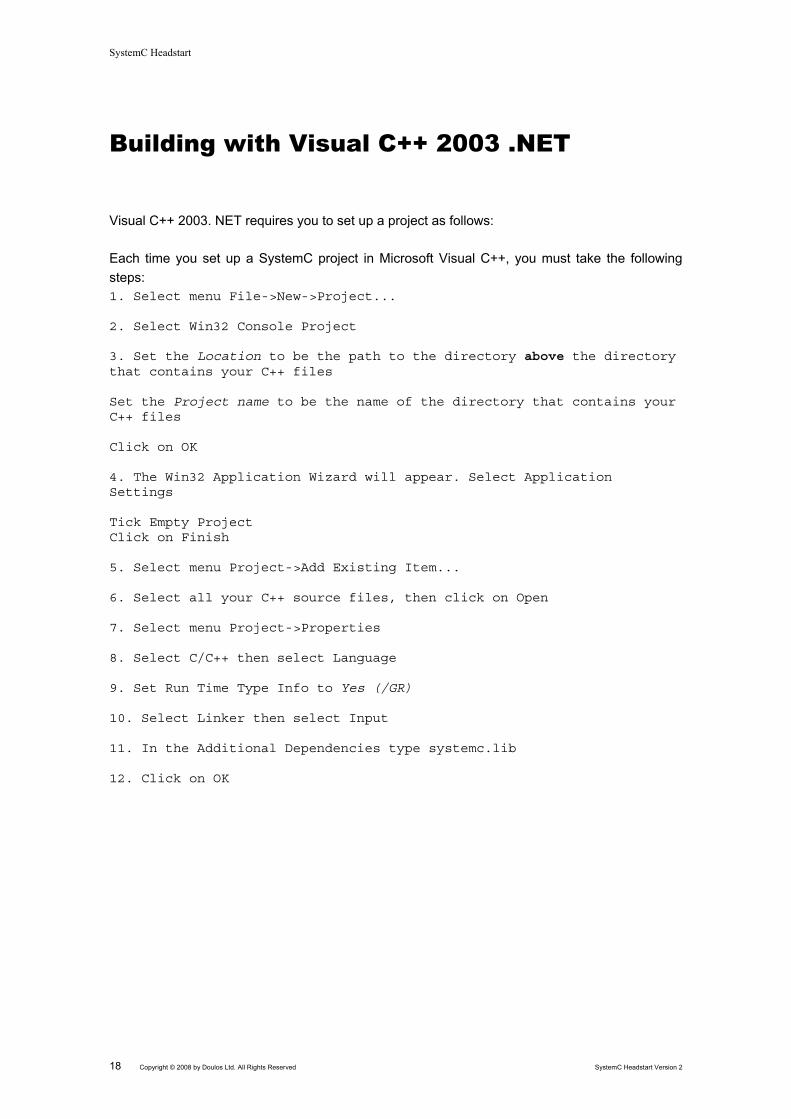
Building with Visual C++ 2003 .NET
Visual C++ 2003. NET requires you to set up a project as follows:
Each time you set up a SystemC project in Microsoft Visual C++, you must take the followingsteps:1. Select menu File->New->Project...
2. Select Win32 Console Project
3. Set the Location to be the path to the directory above the directorythat contains your C++ files
Set the Project name to be the name of the directory that contains yourC++ files
Click on OK
4. The Win32 Application Wizard will appear. Select ApplicationSettings
Tick Empty ProjectClick on Finish
5. Select menu Project->Add Existing Item...
6. Select all your C++ source files, then click on Open
7. Select menu Project->Properties
8. Select C/C++ then select Language
9. Set Run Time Type Info to Yes (/GR)
10. Select Linker then select Input
11. In the Additional Dependencies type systemc.lib
12. Click on OK
SystemC Headstart Version 2 Copyright © 2008 by Doulos Ltd. All Rights Reserved 19
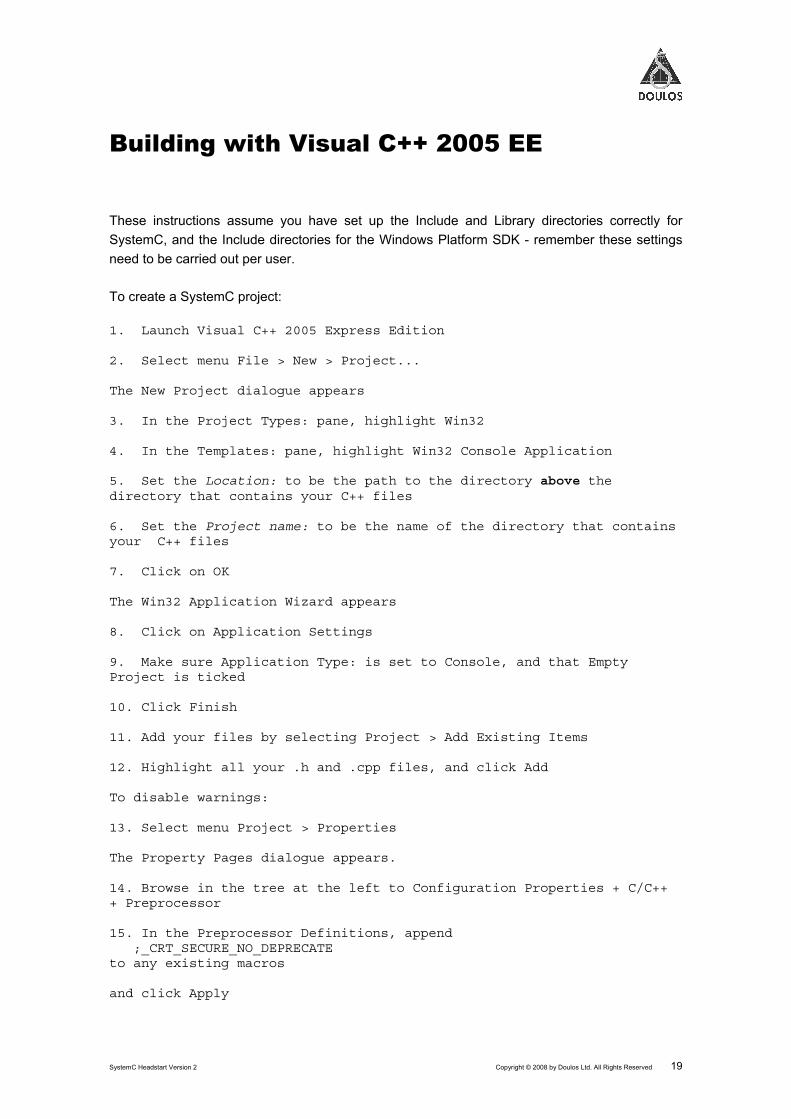
Building with Visual C++ 2005 EE
These instructions assume you have set up the Include and Library directories correctly forSystemC, and the Include directories for the Windows Platform SDK - remember these settingsneed to be carried out per user.
To create a SystemC project:
1. Launch Visual C++ 2005 Express Edition
2. Select menu File > New > Project...
The New Project dialogue appears
3. In the Project Types: pane, highlight Win32
4. In the Templates: pane, highlight Win32 Console Application
5. Set the Location: to be the path to the directory above thedirectory that contains your C++ files
6. Set the Project name: to be the name of the directory that containsyour C++ files
7. Click on OK
The Win32 Application Wizard appears
8. Click on Application Settings
9. Make sure Application Type: is set to Console, and that EmptyProject is ticked
10. Click Finish
11. Add your files by selecting Project > Add Existing Items
12. Highlight all your .h and .cpp files, and click Add
To disable warnings:
13. Select menu Project > Properties
The Property Pages dialogue appears.
14. Browse in the tree at the left to Configuration Properties + C/C+++ Preprocessor
15. In the Preprocessor Definitions, append ;_CRT_SECURE_NO_DEPRECATEto any existing macros
and click Apply

SystemC Headstart
20 Copyright © 2008 by Doulos Ltd. All Rights Reserved SystemC Headstart Version 2
16. Select Configuration Properties + C/C++ + Code Generation andchange the Runtime Library to Multi-threaded Debug (/MTd)
17. Select Configuration Properties + C/C++ + General and set Detect 64bit Portability Issues to No
18. Select Configuration Properties + C/C++ + Command Line and add theoption
/vmg
in the Additional Options: pane at the bottom
19. Select Configuration Properties + Linker + Input and in theAdditional Dependencies: line add
systemc.lib
20. Click OK
Now you can build your project - the quickest way to build and run is Ctrl + F5.
Note - the settings above apply to one configuration - the debug configuration by default. Youmay need to repeat them for the Release configuration if you want to use Release mode.
SystemC Headstart Version 2 Copyright © 2008 by Doulos Ltd. All Rights Reserved 21
Building with Visual C++ 2008 EE
These instructions assume you have set up the Include and Library directories correctly forSystemC - remember these settings need to be carried out per user.
To create a SystemC project:
1. Launch Visual C++ 2008 Express Edition
2. Select menu File > New > Project...
The New Project dialogue appears
3. In the Project Types: pane, highlight Win32
4. In the Templates: pane, highlight Win32 Console Application
5. Set the Location: to be the path to the directory above thedirectory that contains your C++ files
6. Set the Project name: to be the name of the directory that containsyour C++ files
7. Click on OK
The Win32 Application Wizard appears
8. Click on Application Settings
9. Make sure Application Type: is set to Console, and that EmptyProject is ticked
10. Click Finish
11. Add your files by selecting Project > Add Existing Items
12. Highlight all your .h and .cpp files, and click Add
To disable warnings:
13. Select menu Project > Properties
The Property Pages dialogue appears.
14. Browse in the tree at the left to Configuration Properties + C/C+++ Preprocessor
15. In the Preprocessor Definitions, append ;_CRT_SECURE_NO_WARNINGSto any existing macros
and click Apply
SystemC Headstart
22 Copyright © 2008 by Doulos Ltd. All Rights Reserved SystemC Headstart Version 2
16. Select Configuration Properties + C/C++ + Code Generation andchange the Runtime Library to Multi-threaded Debug (/MTd)
17. Select Configuration Properties + C/C++ + General and set Detect 64bit Portability Issues to No
18. Select Configuration Properties + C/C++ + Command Line and add theoption
/vmg
in the Additional Options: pane at the bottom
19. Select Configuration Properties + Linker + Input and in theAdditional Dependencies: line add
systemc.lib
20. Click OK
Now you can build your project - the quickest way to build and run is Ctrl + F5.
Note - the settings above apply to one configuration - the debug configuration by default. Youmay need to repeat them for the Release configuration if you want to use Release mode.
SystemC Headstart Version 2 Copyright © 2008 by Doulos Ltd. All Rights Reserved 23
Example ProjectsThis section shows three example projects. The first is plain C++; the second is an example ofco-simulation with VHDL; and the final version is essentially the same as the first, but in a more"C++-ish" style of coding.
The examples are supplied in two versions - one has windows line endings and is in the archiveheadstartfiles.zip.
The other has unix line endings, and is in the file headstartfiles.tar.gz.
To use the Window files unzip the archive using an unzip program.
To use the Unix/Linux programmes, untar and unzip the files as follows:
gunzip headstartfiles.tar.gz tar -xf headstartfiles.tar
In either case, you will get a folder headstart, containing three subfolders:
dut_systemc
dut_systemc_cppstyle
dut_vhdl
and a file
Makefile.defs
SystemC Headstart
24 Copyright © 2008 by Doulos Ltd. All Rights Reserved SystemC Headstart Version 2
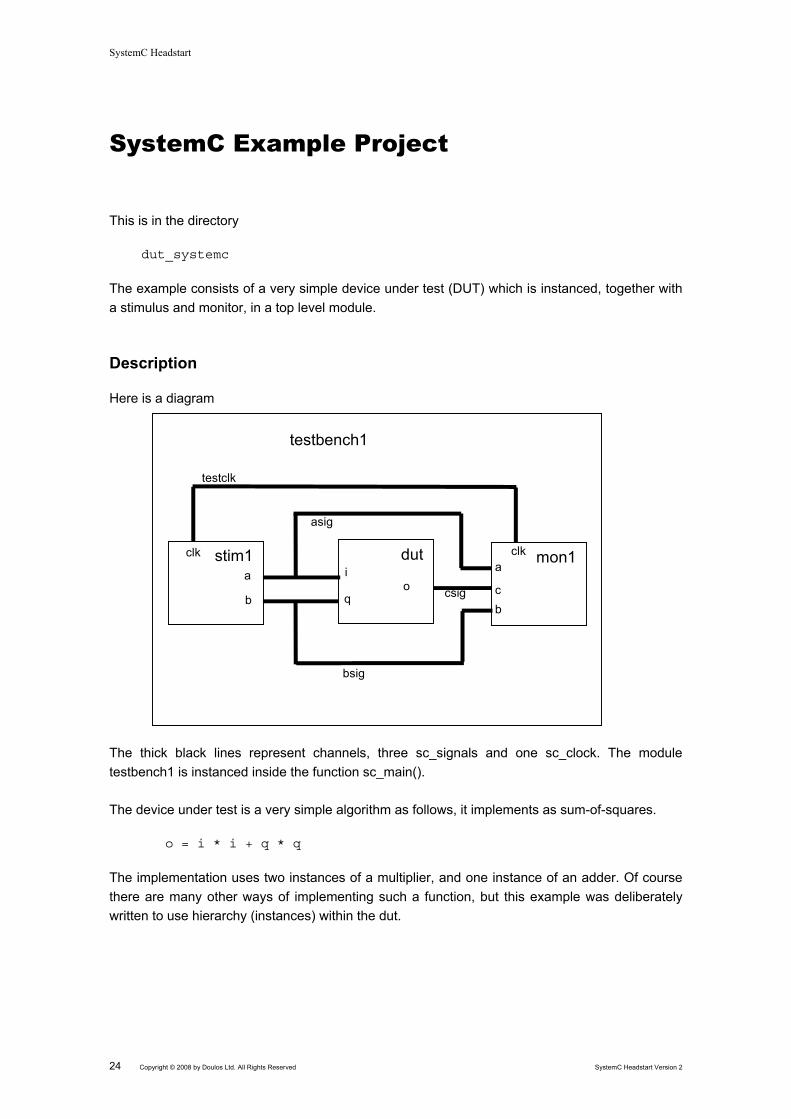
SystemC Example Project
This is in the directory
dut_systemc
The example consists of a very simple device under test (DUT) which is instanced, together witha stimulus and monitor, in a top level module.
Description
Here is a diagram
The thick black lines represent channels, three sc_signals and one sc_clock. The moduletestbench1 is instanced inside the function sc_main().
The device under test is a very simple algorithm as follows, it implements as sum-of-squares.
o = i * i + q * q
The implementation uses two instances of a multiplier, and one instance of an adder. Of coursethere are many other ways of implementing such a function, but this example was deliberatelywritten to use hierarchy (instances) within the dut.
testbench1
duti
qo
stim1
b
clk
amon1
c
clka
b
testclk
asig
bsig
csig
SystemC Headstart Version 2 Copyright © 2008 by Doulos Ltd. All Rights Reserved 25
Compiling (Linux)
Make sure you edit headstart/Makefile.defs so that the variables SYSTEMC andTARGET_ARCH are correct.
cd headstart/dut_systemc/
gmake
./run.x
The program should run, and lots of numbers appear!
Compiling (Visual C++ 2005 EE)
Make sure you've set up your environment correctly, especially the variable SYSTEMC.
Double-click on the file
headstart\dut_systemc\dut_vc2005\dut_2005.sln
Visual C++ should start. The quickest way to run is to use Ctrl-F5, which builds and runs theprogram.
The program should run, and lots of numbers appear!
Compiling (Visual C++ 2008 EE)
Make sure you've set up your environment correctly, especially the variable SYSTEMC.
Double-click on the file
headstart\dut_systemc\dut_vc2008\dut_2008.sln
Visual C++ should start. The quickest way to run is to use Ctrl-F5, which builds and runs theprogram.
The program should run, and lots of numbers appear!
SystemC Headstart
26 Copyright © 2008 by Doulos Ltd. All Rights Reserved SystemC Headstart Version 2
SystemC Example Project (C++-ish)
This is in the directory
dut_systemc_cppstyle
The only difference between this example and the previous example is the style of coding. If youare an experienced C++ programmer, you may have noticed that SystemC makes a number ofmacros available, such as SC_MODULE and SC_CTOR.
This version of the example replaces those macros with traditional C++ constructs. Also allinstances are made using pointers - and this allows forward declaration of the modules ratherthan inclusion of header files.
SystemC Headstart Version 2 Copyright © 2008 by Doulos Ltd. All Rights Reserved 27
SystemC Example Project (VHDL DUT)
This is in the directory
dut_vhdl
Description
The DUT is replaced by a VHDL implementation - but the surrounding testbench, stimulus, andmonitor are still SystemC.
The example has been written so that it will work with Mentor ModelSim/Questa, and CadenceIncisive Unified Simulator. These simulators can both set and recognise special macros - here isthe top level (main.cpp) showing the use of the macros
#include "systemc.h"#include "testbench.h"
#ifdef MTI_SYSTEMC
// export top level to modelsimSC_MODULE_EXPORT(testbench);
#elif NCSC
// export top level to Cadence IncisiveNCSC_MODULE_EXPORT(testbench);
#else
// top level instanced in sc_main for use with OSCI// reference simulatorint sc_main(int argc, char * argv[]){ testbench testbench1("testbench"); sc_start(); return 0;}#endif
The macro MTI_SYSTEMC is set by Modelsim. SC_MODULE_EXPORT tells Modelsim the toplevel of the design.
NCSC and NCSC_MODULE_EXPORT perform the same function for Incisive.
The code for the dut looks like this
SystemC Headstart
28 Copyright © 2008 by Doulos Ltd. All Rights Reserved SystemC Headstart Version 2
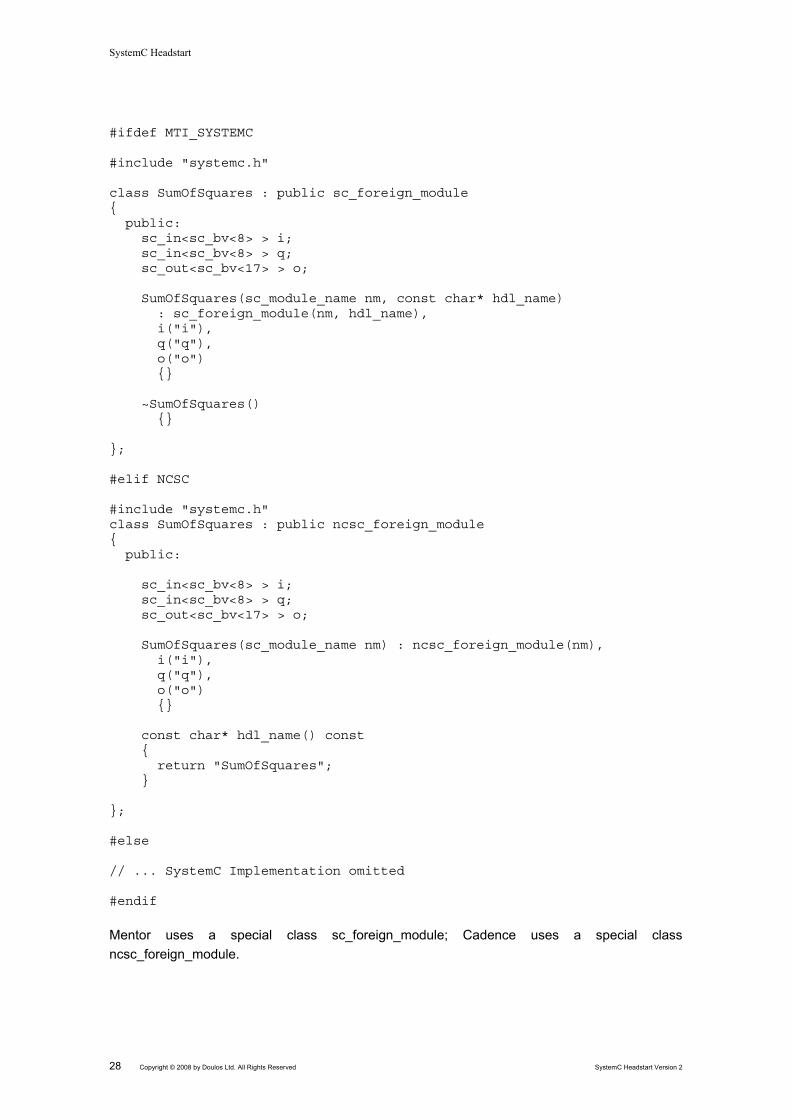
#ifdef MTI_SYSTEMC
#include "systemc.h"
class SumOfSquares : public sc_foreign_module{ public: sc_in<sc_bv<8> > i; sc_in<sc_bv<8> > q; sc_out<sc_bv<17> > o;
SumOfSquares(sc_module_name nm, const char* hdl_name) : sc_foreign_module(nm, hdl_name), i("i"), q("q"), o("o") {}
~SumOfSquares() {}
};
#elif NCSC
#include "systemc.h"class SumOfSquares : public ncsc_foreign_module{ public:
sc_in<sc_bv<8> > i; sc_in<sc_bv<8> > q; sc_out<sc_bv<17> > o;
SumOfSquares(sc_module_name nm) : ncsc_foreign_module(nm), i("i"), q("q"), o("o") {}
const char* hdl_name() const { return "SumOfSquares"; }
};
#else
// ... SystemC Implementation omitted
#endif
Mentor uses a special class sc_foreign_module; Cadence uses a special classncsc_foreign_module.
SystemC Headstart Version 2 Copyright © 2008 by Doulos Ltd. All Rights Reserved 29
Compiling
To compile and simulate these designs, you will need either Modelsim/Questa, or Incisive, andyou will require the correct licence features to compile and simulate both VHDL and SystemC.
ModelSim/Questa on Windows
Make sure that the vsim executable is in your path.
Double-click headstart/dut_vhdl/scripts/start_modelsim.bat
If it doesn't work, check your path again - or alternatively edit start_modelsim.bat so that it usesthe full path to vsim, rather than just the name "vsim".
Modelsim should run, compile, simulate, and display waveforms. You'll see that the dut is shownin a different colour as it comes from VHDL.
ModelSim/Questa on Linux
Make sure that the vsim executable is in your path.
cd headstart/dut_vhdl/script ./start_modelsim.bat
If it doesn't work, check that vsim is in your path by typing
which vsim
which should return the path.
Also check the script is executable
chmod +x start_modelsim.bat
Modelsim should run, compile, simulate, and display waveforms. You'll see that the dut is shownin a different colour as it comes from VHDL.
Incisive on Linux
Execute the script as follows
cd headstart/dut_vhdl/script ./start_ncsim.csh
If it doesn't work: check which version of Incisive you have installed. If it is an older version, editthe script so that it says:
SystemC Headstart
30 Copyright © 2008 by Doulos Ltd. All Rights Reserved SystemC Headstart Version 2
#!/bin/cshncsc_run -GNU -top testbench -access +rwc -v93 -gui *.cpp dut.vhd
This is because the irun command was only introduced in later versions.
To view waveforms, edit the start_ncsim.csh script and add the option -gui.
Cleaning up (Linux)
You can run the script clean.csh to tidy up the files, e.g.
cd headstart/dut_vhdl/script ./clean.csh
Notes on co_simulation
The examples above are for two particular tools - you can of course carry out co-simulation inmost simulators - for instance Aldec Riviera, Synopsys VCS-MX, Synopsys System Studio,CoWare Platform Architect and so on. On a Doulos training course, we try wherever possible tosupply the tools you normally use in your day-to-day work.
SystemC Headstart Version 2 Copyright © 2008 by Doulos Ltd. All Rights Reserved 31
ConclusionThis short guide, together with the files included, will help you get started with the initial steps forusing SystemC - installing the library, creating projects, compiling, and even co-simulation withand HDL.
For more information on SystemC training and other resources, see http://www.doulos.com
If you have any queries about this Headstart Kit, you can email [email protected] with yourquestions.

SystemC Headstart
32 Copyright © 2008 by Doulos Ltd. All Rights Reserved SystemC Headstart Version 2