Embed Size (px)
Citation preview

Using Picasa 3 to Manage Your Photos
1
Using Picasa 3 to Manage Your Photos By Scott Badger
Installing Picasa 1. Go to www.google.com and then log into your Google account.
2. Click More > even more.
3. You will see all of the Google products.
4. Scroll down and click the Picasa link.
Using Picasa 3 to Manage Your Photos
2
5. Click Download Picasa 3.
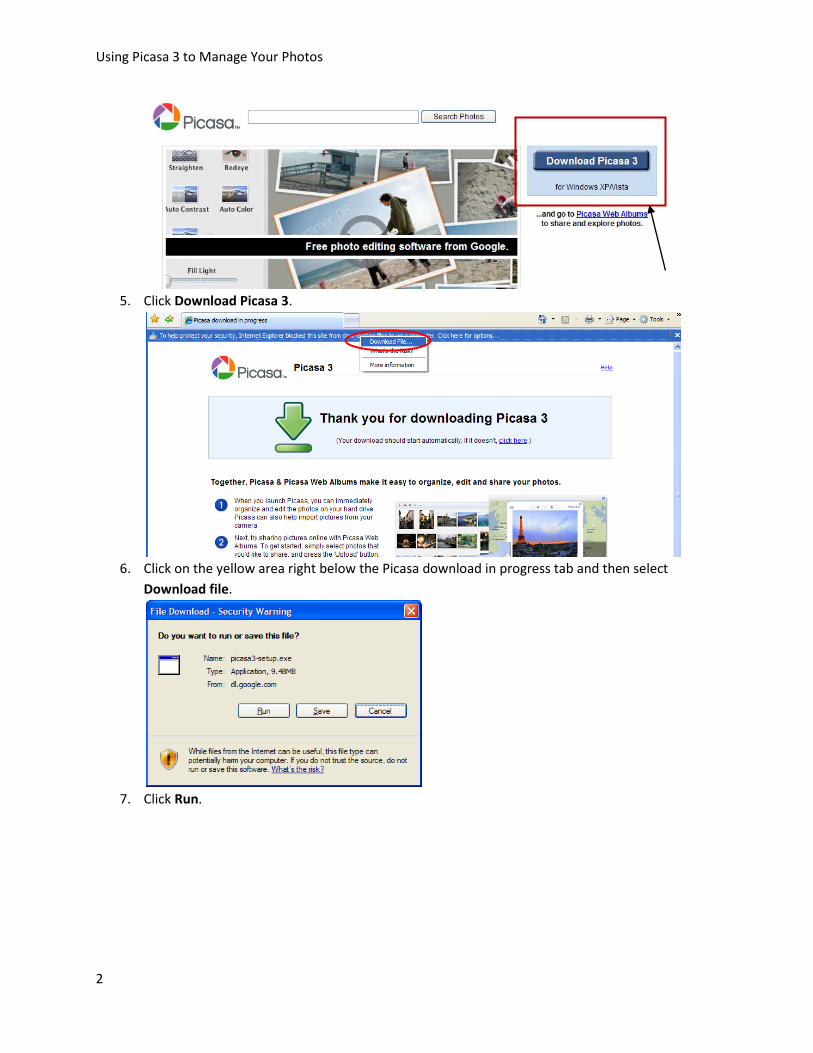
6. Click on the yellow area right below the Picasa download in progress tab and then select
Download file.
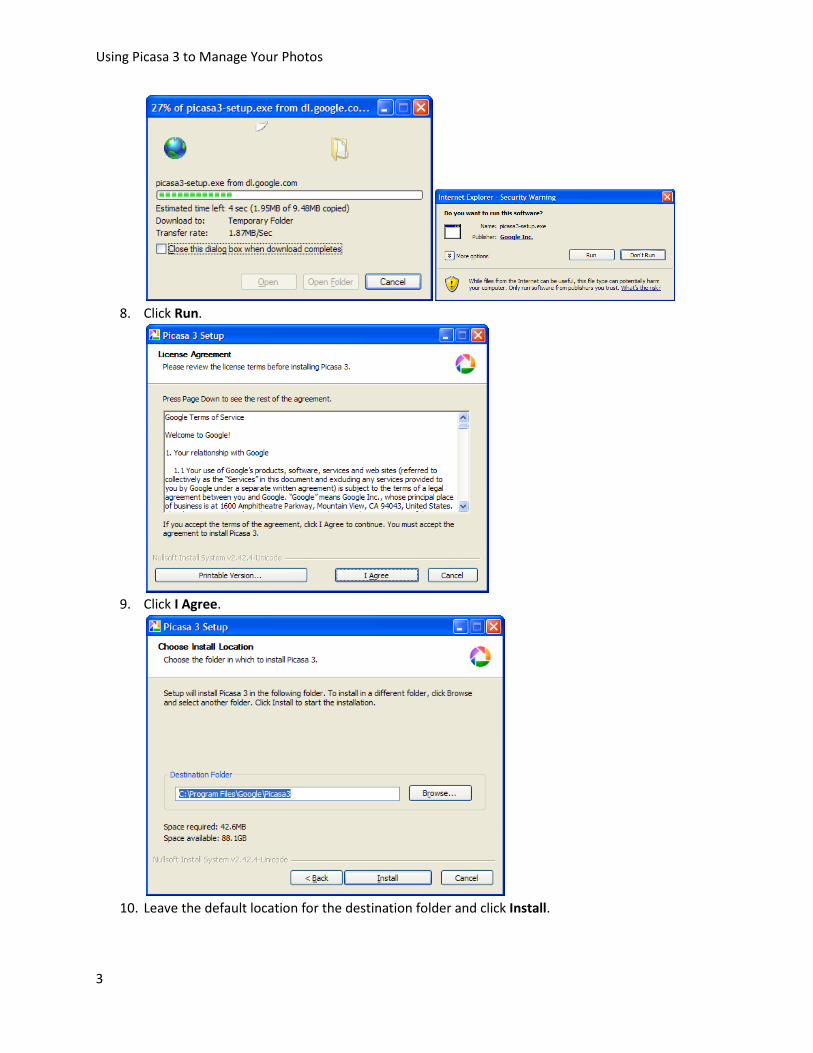
7. Click Run.
Using Picasa 3 to Manage Your Photos
3
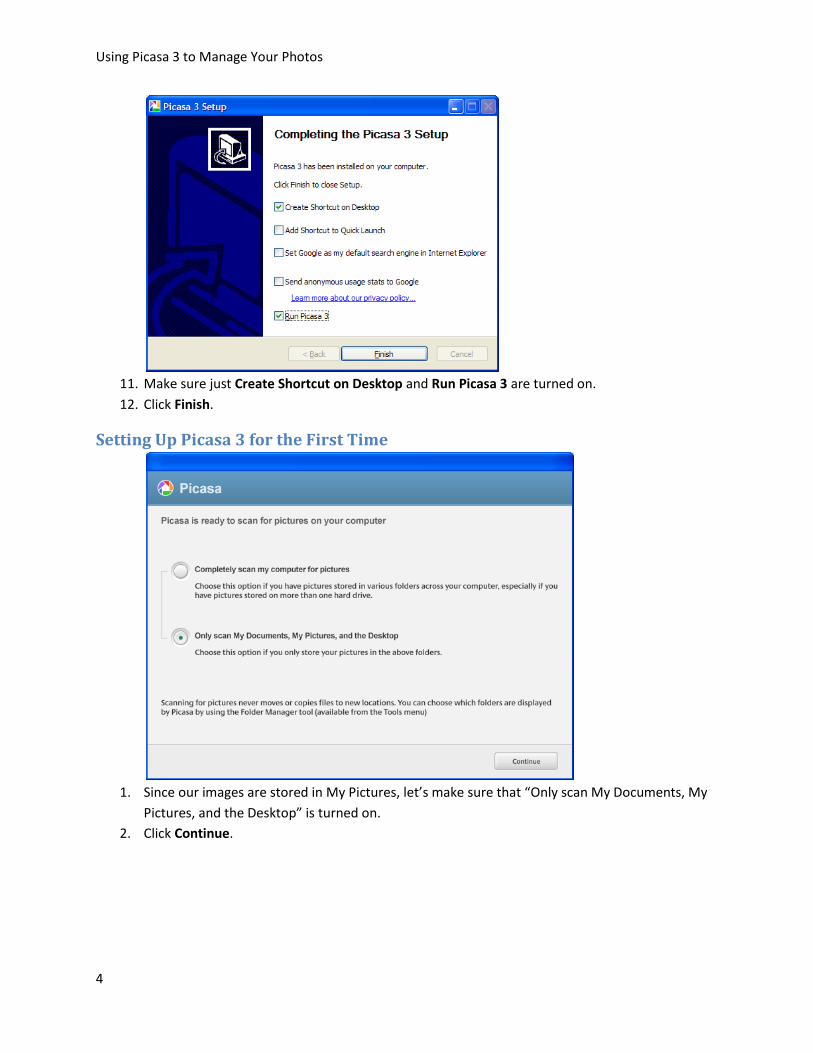
8. Click Run.
9. Click I Agree.
10. Leave the default location for the destination folder and click Install.
Using Picasa 3 to Manage Your Photos
4
11. Make sure just Create Shortcut on Desktop and Run Picasa 3 are turned on.
12. Click Finish.
Setting Up Picasa 3 for the First Time
1. Since our images are stored in My Pictures, let’s make sure that “Only scan My Documents, My
Pictures, and the Desktop” is turned on.
2. Click Continue.

Using Picasa 3 to Manage Your Photos
5
3. Here we are turning on “Use Picasa Photo Viewer as the default viewer for these file types” and
we checked off all of the images file types.
Note: If you click off “Don’t use Picasa Photo Viewer”, Windows Gallery will be used when you
double-click on an image within your Windows Explore.
Using Picasa 3 to Manage Your Photos
6
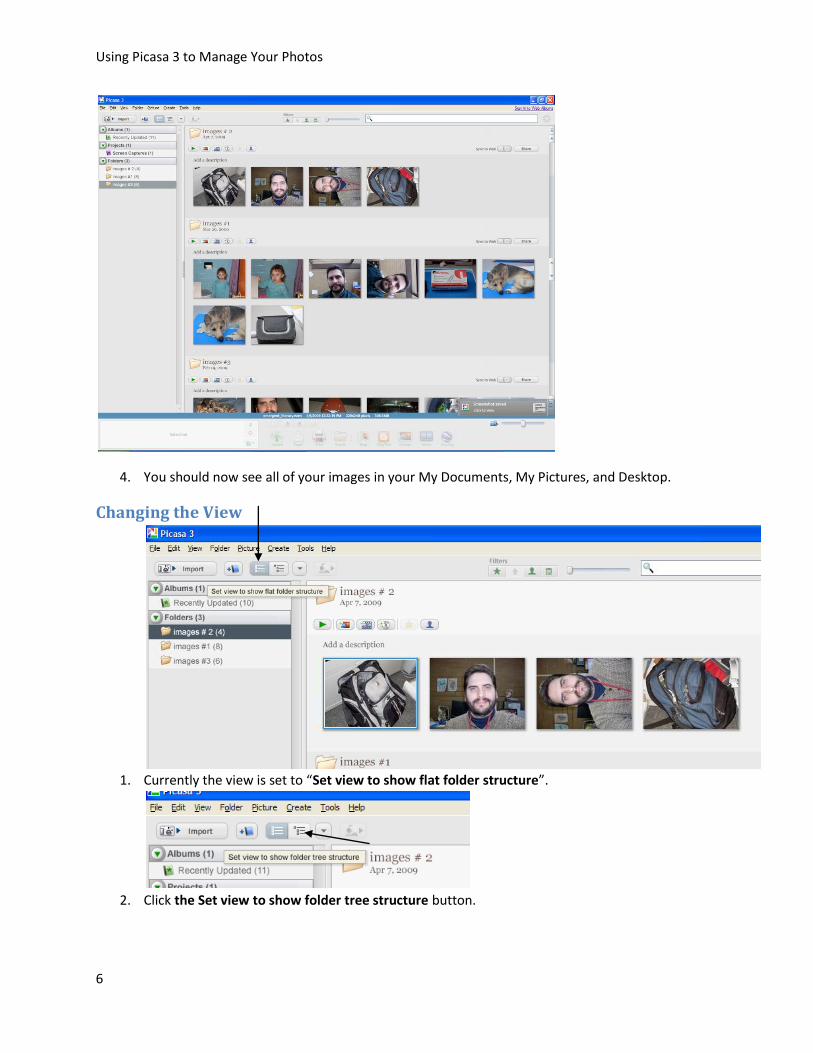
4. You should now see all of your images in your My Documents, My Pictures, and Desktop.
Changing the View
1. Currently the view is set to “Set view to show flat folder structure”.
2. Click the Set view to show folder tree structure button.
Using Picasa 3 to Manage Your Photos
7
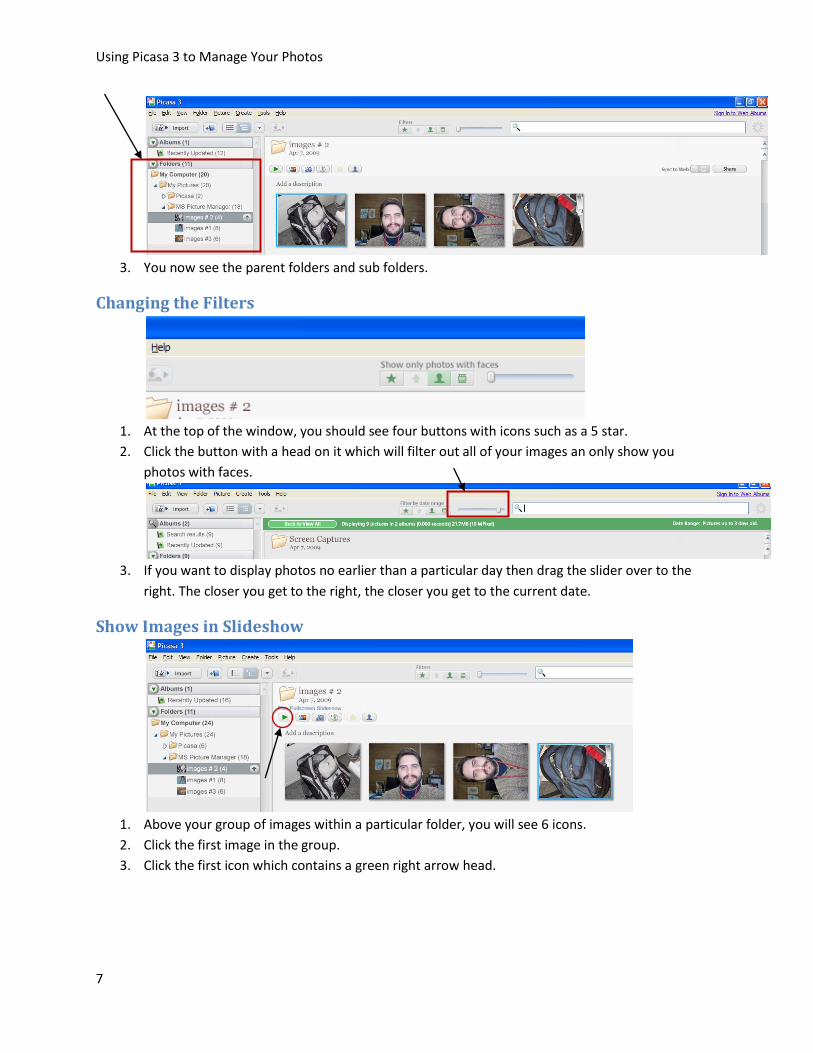
3. You now see the parent folders and sub folders.
Changing the Filters
1. At the top of the window, you should see four buttons with icons such as a 5 star.
2. Click the button with a head on it which will filter out all of your images an only show you
photos with faces.
3. If you want to display photos no earlier than a particular day then drag the slider over to the
right. The closer you get to the right, the closer you get to the current date.
Show Images in Slideshow
1. Above your group of images within a particular folder, you will see 6 icons.
2. Click the first image in the group.
3. Click the first icon which contains a green right arrow head.

Using Picasa 3 to Manage Your Photos
8
4. The slideshow will open and you will want to press the play button (right arrow head in hollow
circle) to play your slide show.
Edit Your Photo in Picasa
1. Double-click the image that you want to edit.
Using Picasa 3 to Manage Your Photos
9
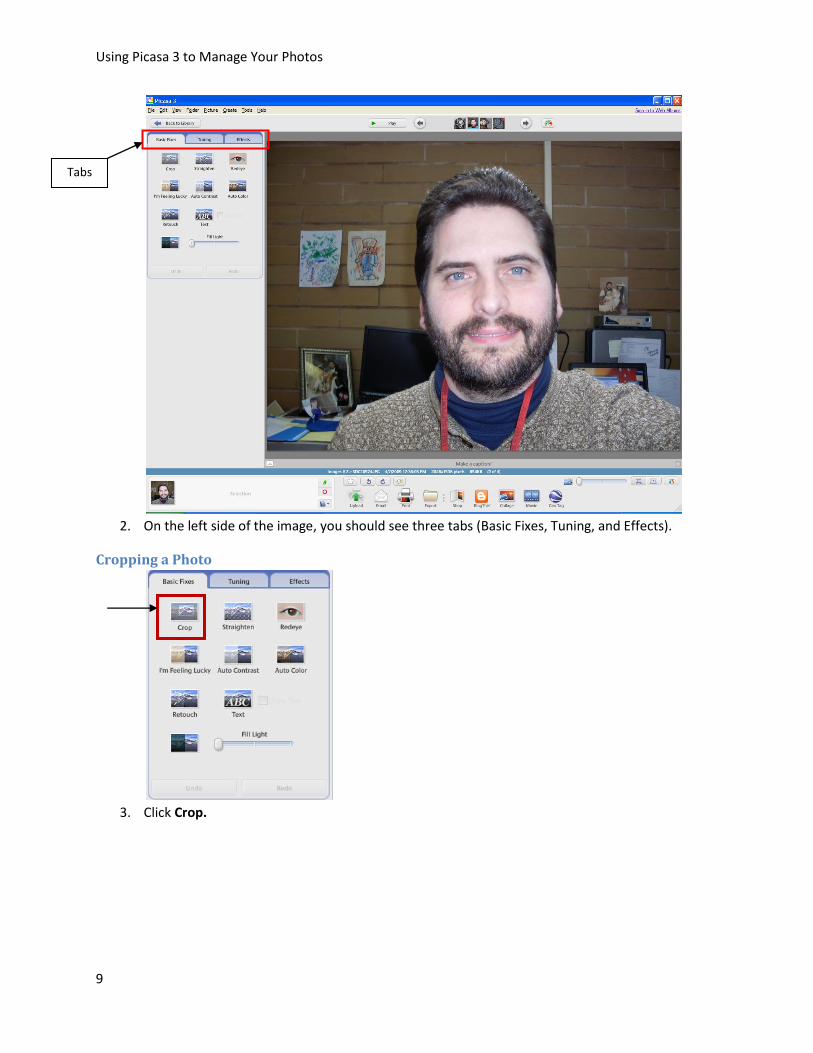
2. On the left side of the image, you should see three tabs (Basic Fixes, Tuning, and Effects).
Cropping a Photo
3. Click Crop.
Tabs
Using Picasa 3 to Manage Your Photos
10
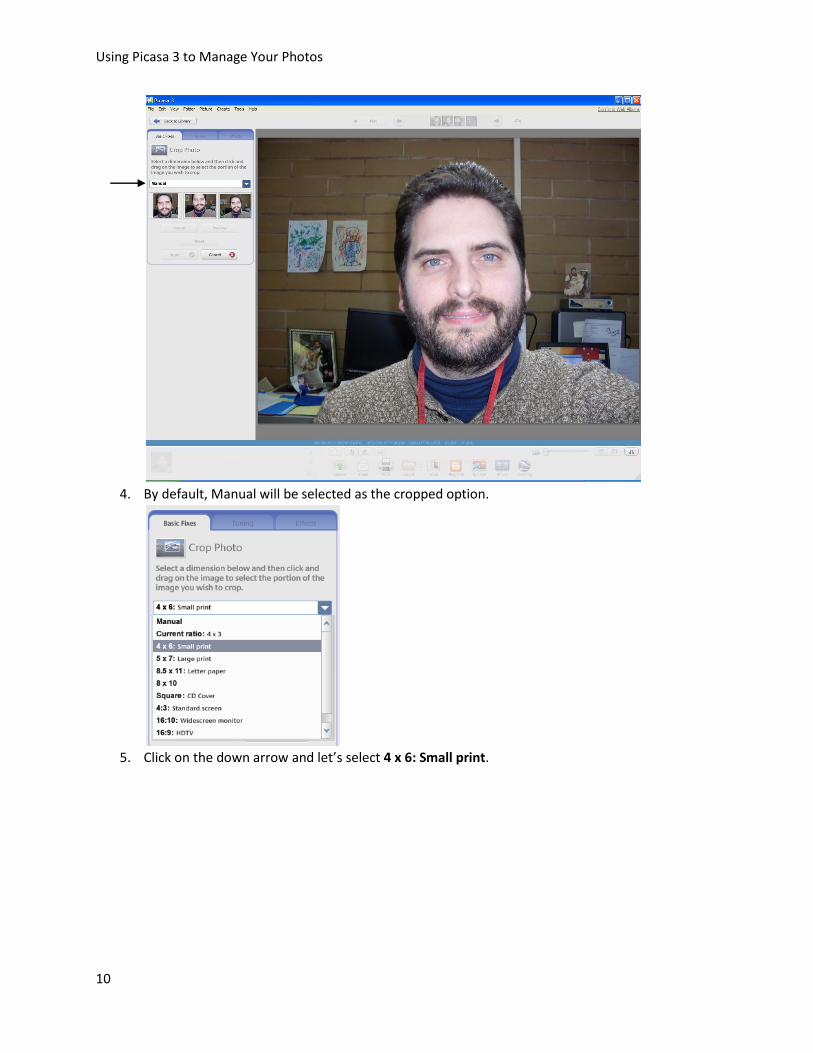
4. By default, Manual will be selected as the cropped option.
5. Click on the down arrow and let’s select 4 x 6: Small print.

Using Picasa 3 to Manage Your Photos
11
6. Select the thumbnail that you like the best.
7. Click Apply.
8. The image as been cropped to the size you just selected.
Straightening Your Picture
9. Click the Straighten option on the Basic Fixes tab.
Using Picasa 3 to Manage Your Photos
12
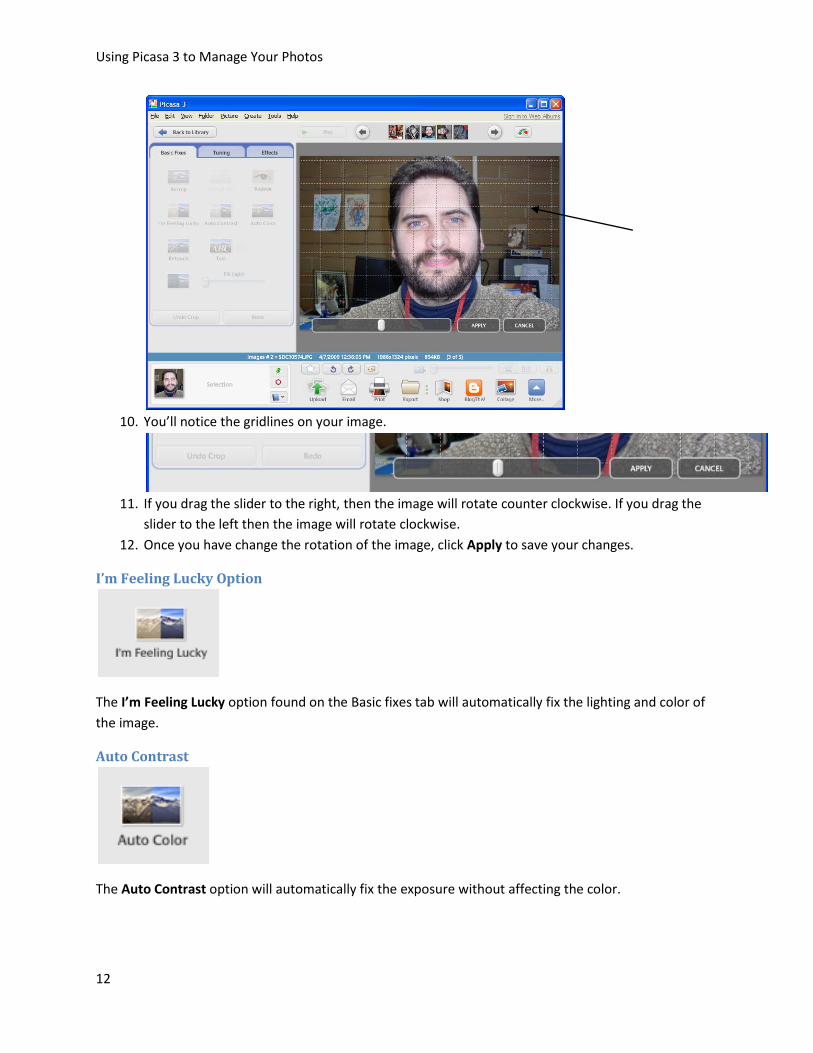
10. You’ll notice the gridlines on your image.
11. If you drag the slider to the right, then the image will rotate counter clockwise. If you drag the
slider to the left then the image will rotate clockwise.
12. Once you have change the rotation of the image, click Apply to save your changes.
I’m Feeling Lucky Option
The I’m Feeling Lucky option found on the Basic fixes tab will automatically fix the lighting and color of
the image.
Auto Contrast
The Auto Contrast option will automatically fix the exposure without affecting the color.
Using Picasa 3 to Manage Your Photos
13
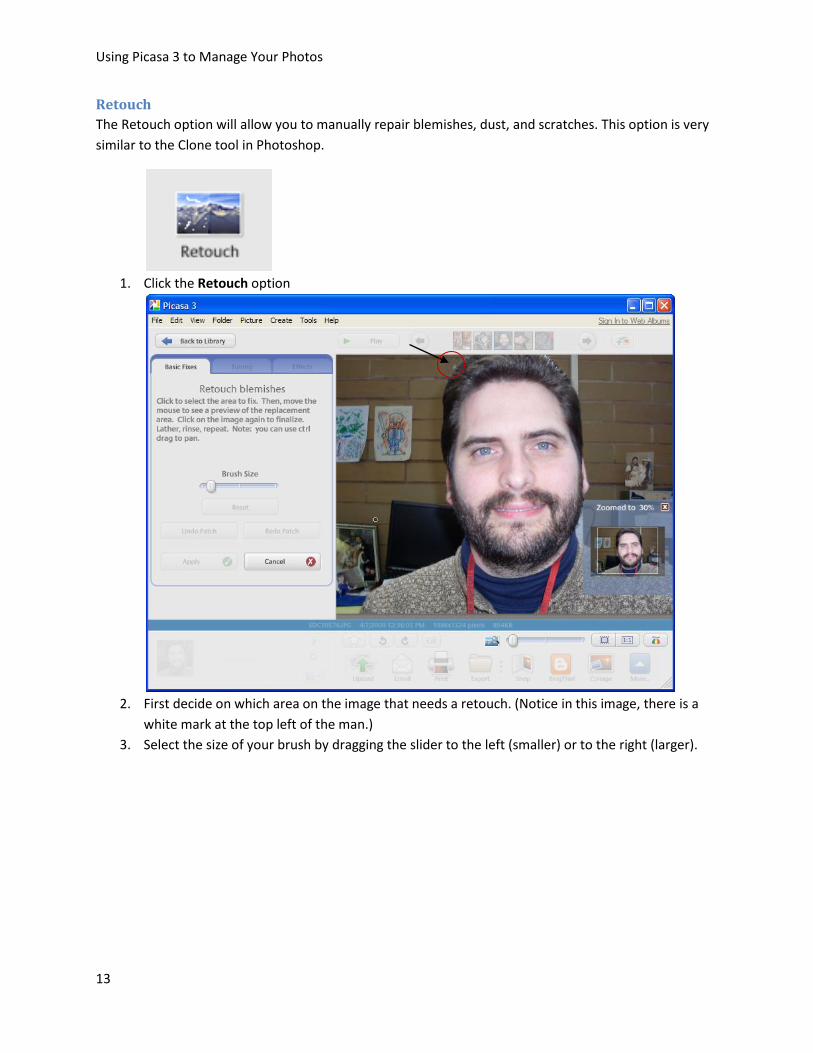
Retouch
The Retouch option will allow you to manually repair blemishes, dust, and scratches. This option is very
similar to the Clone tool in Photoshop.
1. Click the Retouch option
2. First decide on which area on the image that needs a retouch. (Notice in this image, there is a
white mark at the top left of the man.)
3. Select the size of your brush by dragging the slider to the left (smaller) or to the right (larger).
Using Picasa 3 to Manage Your Photos
14
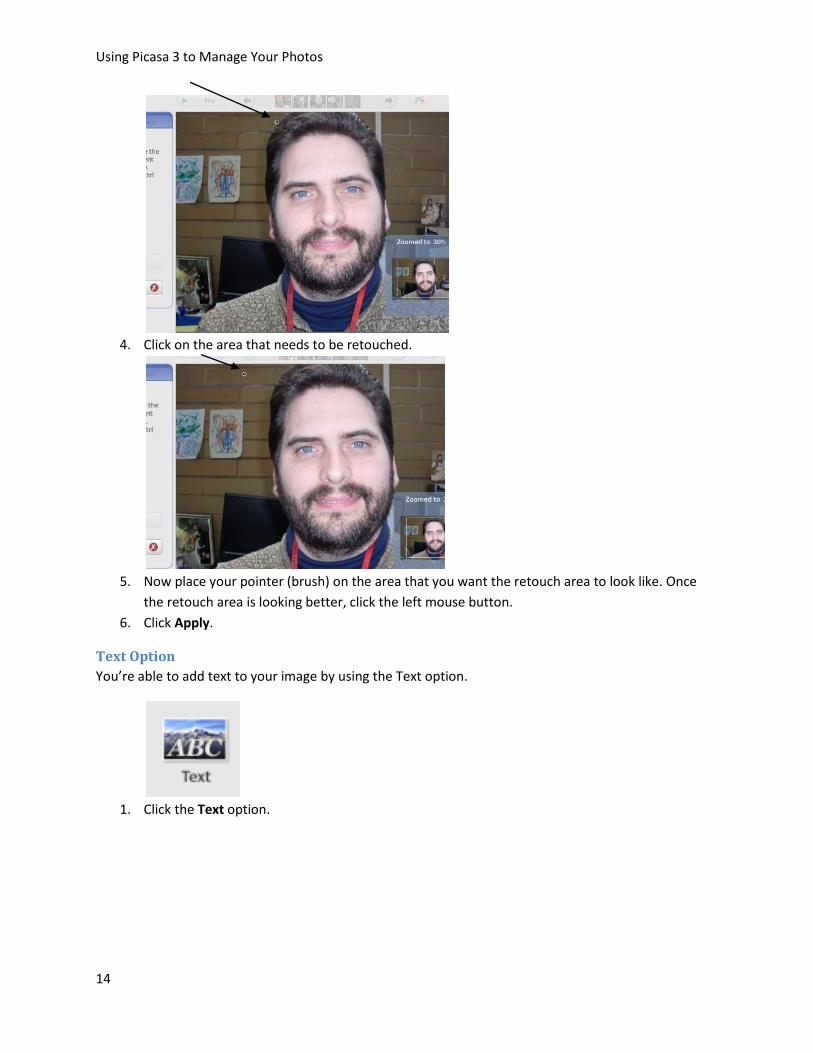
4. Click on the area that needs to be retouched.
5. Now place your pointer (brush) on the area that you want the retouch area to look like. Once
the retouch area is looking better, click the left mouse button.
6. Click Apply.
Text Option
You’re able to add text to your image by using the Text option.
1. Click the Text option.

Using Picasa 3 to Manage Your Photos
15
2. You’ll see the white text “Type anywhere to add text”.
3. You should see a gray border around your text.
Using Picasa 3 to Manage Your Photos
16
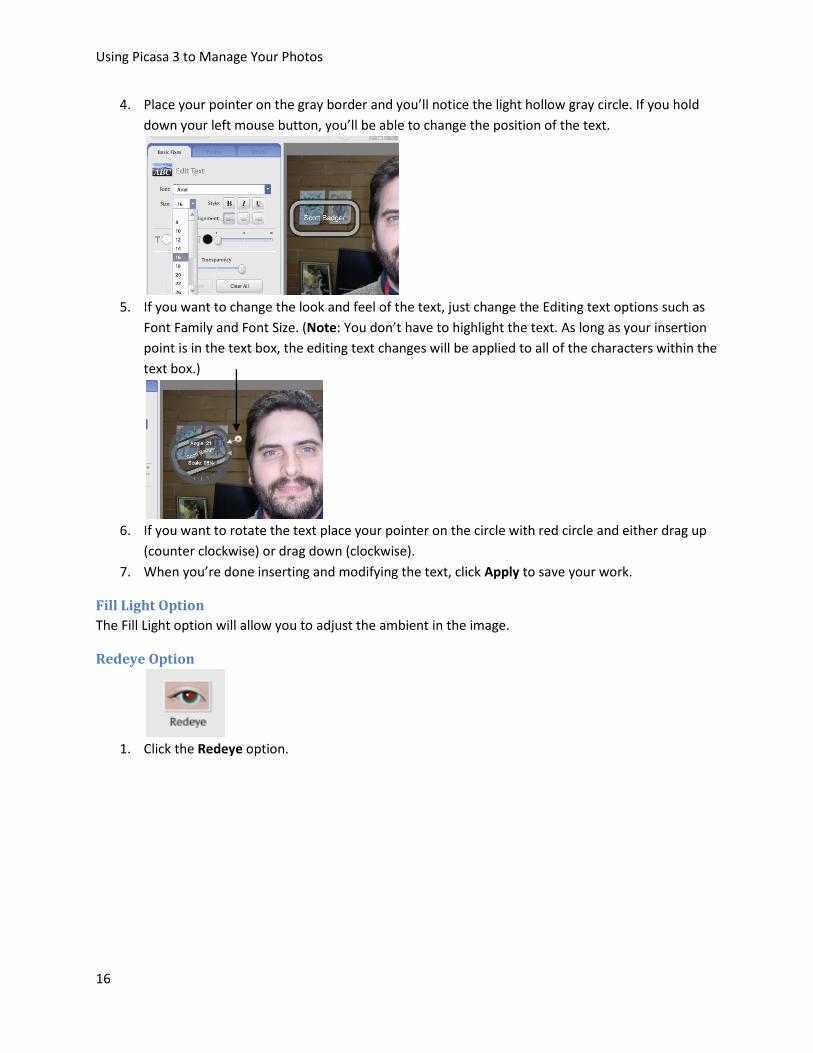
4. Place your pointer on the gray border and you’ll notice the light hollow gray circle. If you hold
down your left mouse button, you’ll be able to change the position of the text.
5. If you want to change the look and feel of the text, just change the Editing text options such as
Font Family and Font Size. (Note: You don’t have to highlight the text. As long as your insertion
point is in the text box, the editing text changes will be applied to all of the characters within the
text box.)
6. If you want to rotate the text place your pointer on the circle with red circle and either drag up
(counter clockwise) or drag down (clockwise).
7. When you’re done inserting and modifying the text, click Apply to save your work.
Fill Light Option
The Fill Light option will allow you to adjust the ambient in the image.
Redeye Option
1. Click the Redeye option.
Using Picasa 3 to Manage Your Photos
17
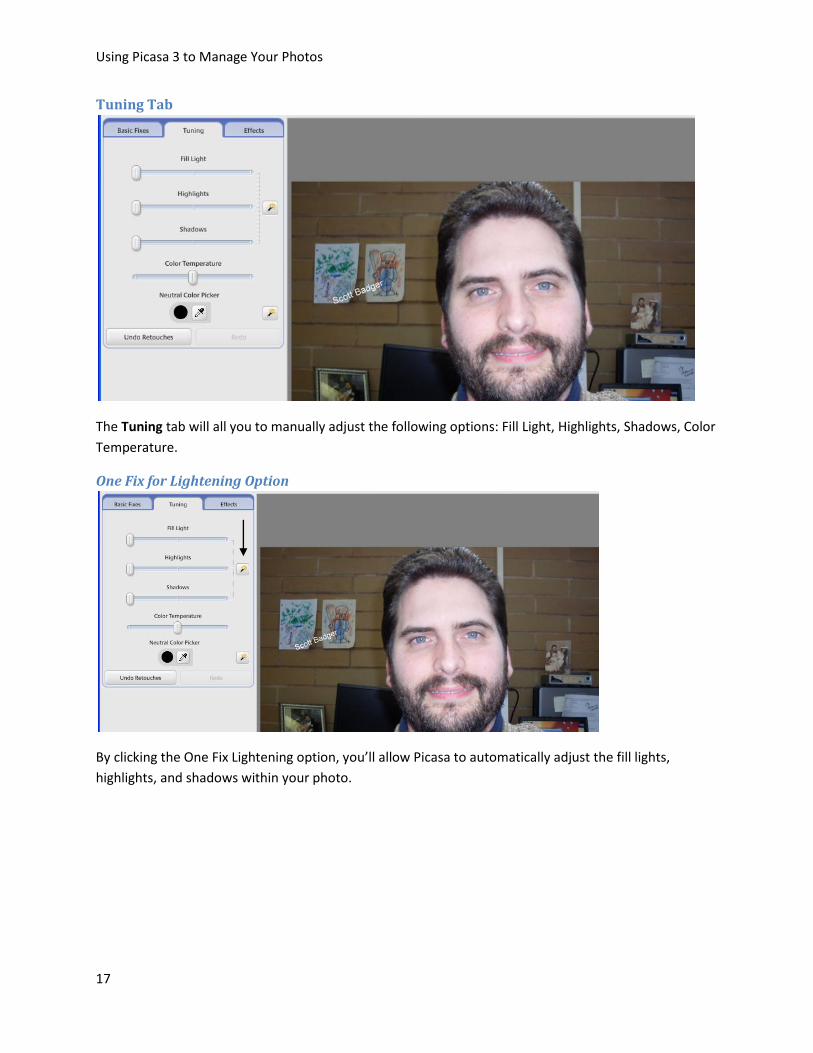
Tuning Tab
The Tuning tab will all you to manually adjust the following options: Fill Light, Highlights, Shadows, Color
Temperature.
One Fix for Lightening Option
By clicking the One Fix Lightening option, you’ll allow Picasa to automatically adjust the fill lights,
highlights, and shadows within your photo.
Using Picasa 3 to Manage Your Photos
18
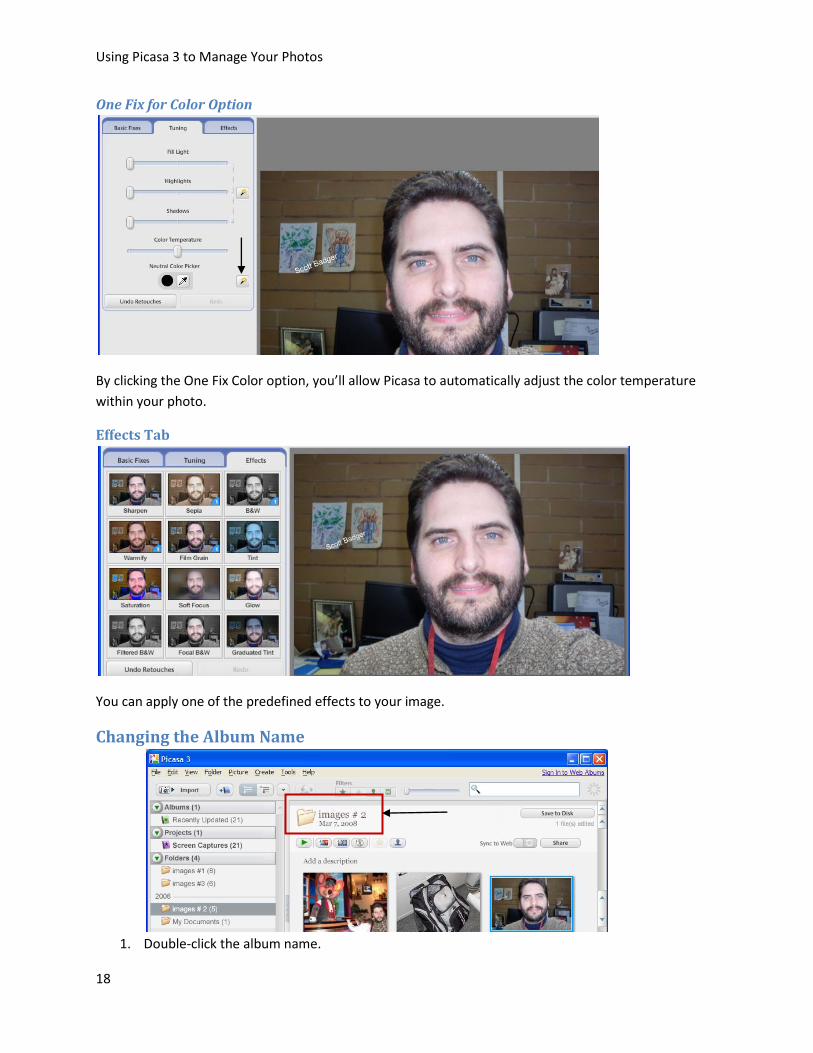
One Fix for Color Option
By clicking the One Fix Color option, you’ll allow Picasa to automatically adjust the color temperature
within your photo.
Effects Tab
You can apply one of the predefined effects to your image.
Changing the Album Name
1. Double-click the album name.

Using Picasa 3 to Manage Your Photos
19
2. Enter in a new name.
3. Click OK.
4. The album name has been changed.
Upload Your Pictures to Your Google Account
1. Click on the Sync to Web button.
Using Picasa 3 to Manage Your Photos
20
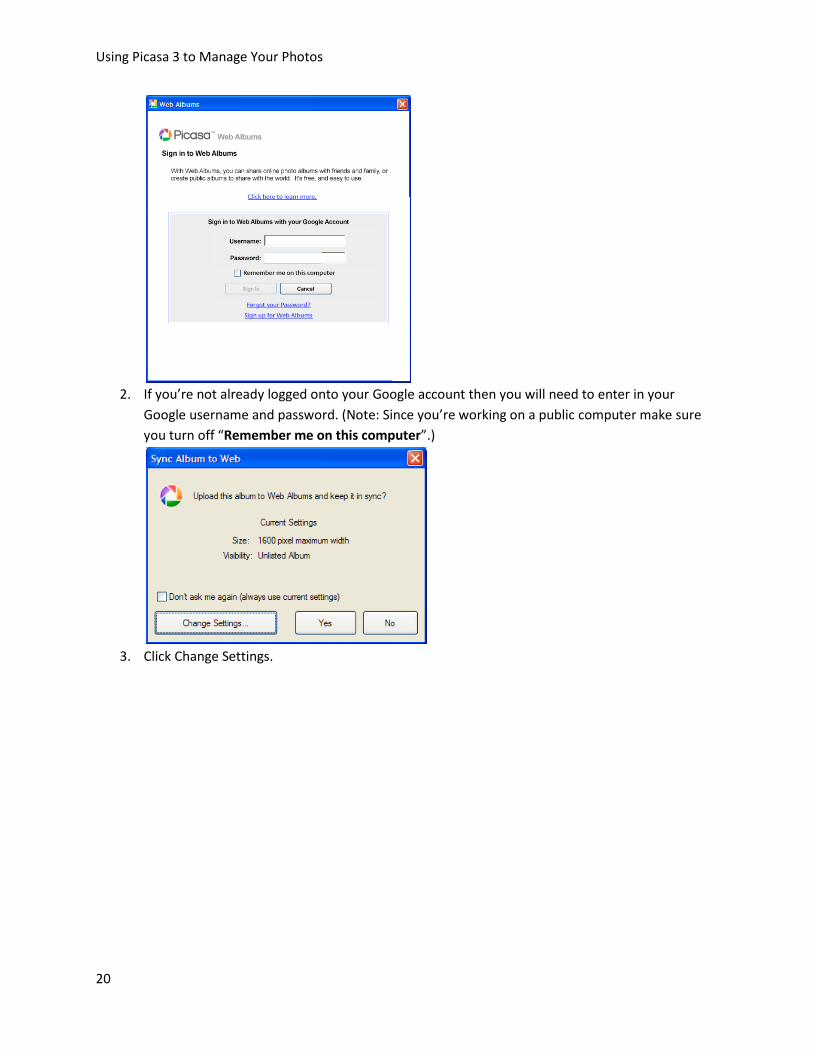
2. If you’re not already logged onto your Google account then you will need to enter in your
Google username and password. (Note: Since you’re working on a public computer make sure
you turn off “Remember me on this computer”.)
3. Click Change Settings.
Using Picasa 3 to Manage Your Photos
21
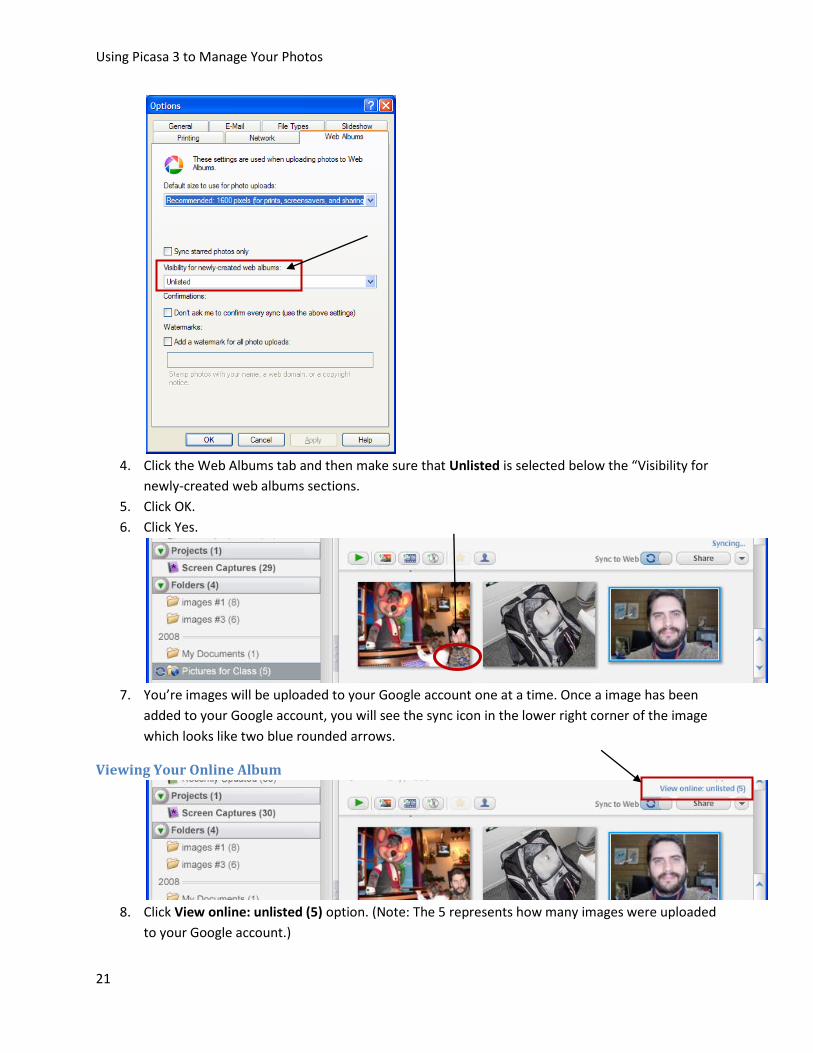
4. Click the Web Albums tab and then make sure that Unlisted is selected below the “Visibility for
newly-created web albums sections.
5. Click OK.
6. Click Yes.
7. You’re images will be uploaded to your Google account one at a time. Once a image has been
added to your Google account, you will see the sync icon in the lower right corner of the image
which looks like two blue rounded arrows.
Viewing Your Online Album
8. Click View online: unlisted (5) option. (Note: The 5 represents how many images were uploaded
to your Google account.)
Using Picasa 3 to Manage Your Photos
22
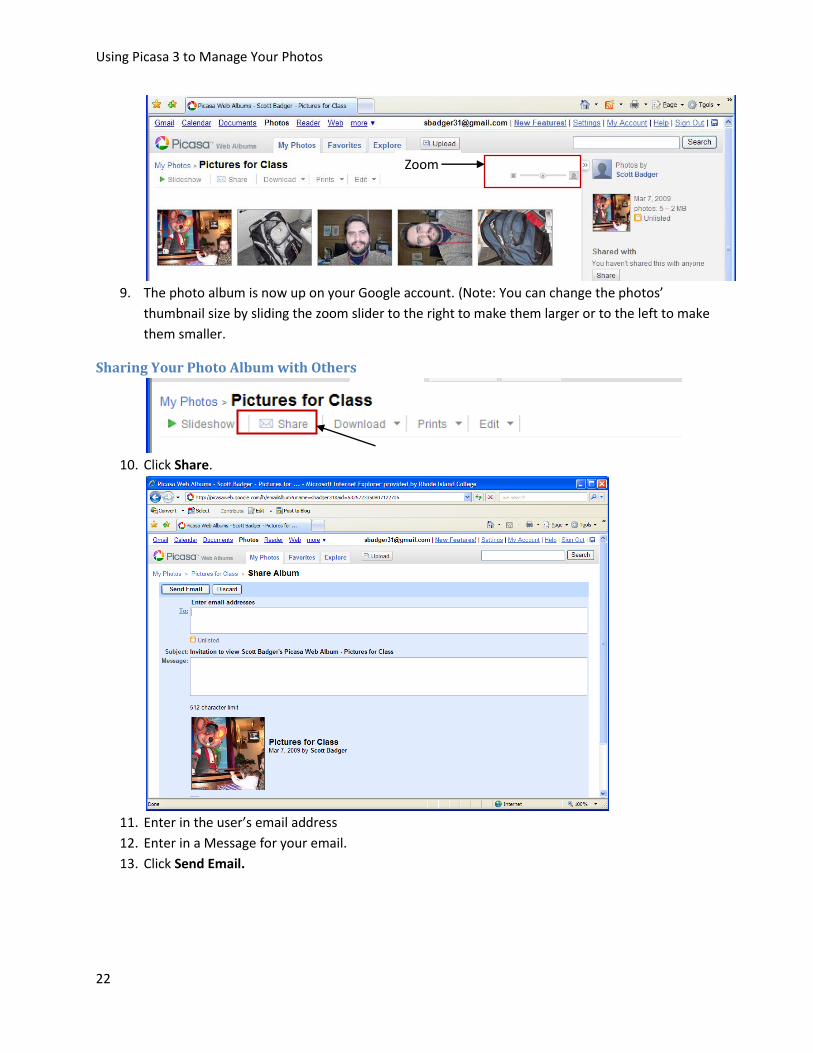
9. The photo album is now up on your Google account. (Note: You can change the photos’
thumbnail size by sliding the zoom slider to the right to make them larger or to the left to make
them smaller.
Sharing Your Photo Album with Others
10. Click Share.
11. Enter in the user’s email address
12. Enter in a Message for your email.
13. Click Send Email.
Zoom
Using Picasa 3 to Manage Your Photos
23
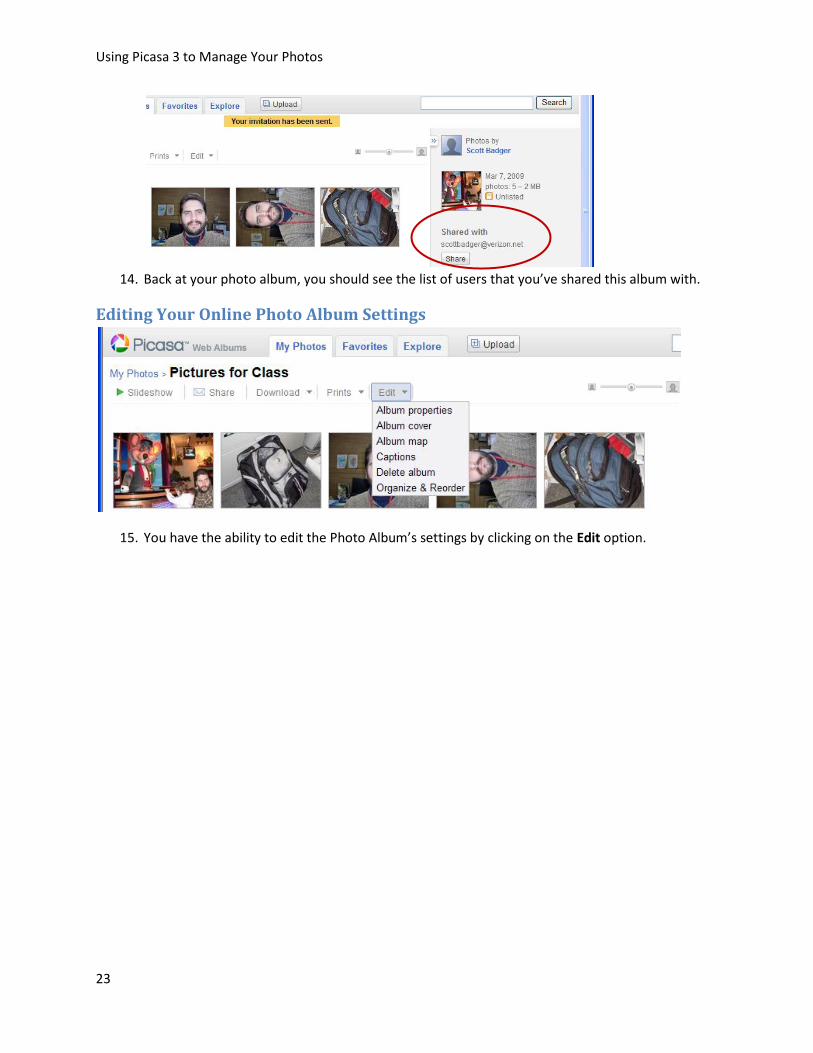
14. Back at your photo album, you should see the list of users that you’ve shared this album with.
Editing Your Online Photo Album Settings
15. You have the ability to edit the Photo Album’s settings by clicking on the Edit option.