Embed Size (px)
Citation preview
User's Manual
VL400 SeriesVideo Laryngoscope
Please read this manual thoroughly and follow the procedures. Keep this
manual properly for future reference. Information in this manual may change
at any time without prior notice. Please visit www.uescope.com for the most
updated User’s Manual and contact information.
Copyright © 2016 Zhejiang UE Medical Corp. All rights reserved. No reproduc-
tion in any form of this manual, in whole or in part, may be made without the
written authorization from Zhejiang UE Medical Corp.
UESCOPE is a registered trademark of UE Medical Devices, Inc.
Rev 1.1 (November 2016)
Distributed by:
UE Medical Devices, Inc.
831 Beacon Street, Suite 136
Newton, MA 02459, USA
www.uescope.com
Manufacturer:
Zhejiang UE Medical Corp.
8 Youyi Road, Baita EDZ
Xianju, Zhejiang 317300, China
EC Representative:
Lotus Global Co., Ltd.
1 Four Seasons Terrace
West Drayton, Middlesex
London, UB7 9GG, UK
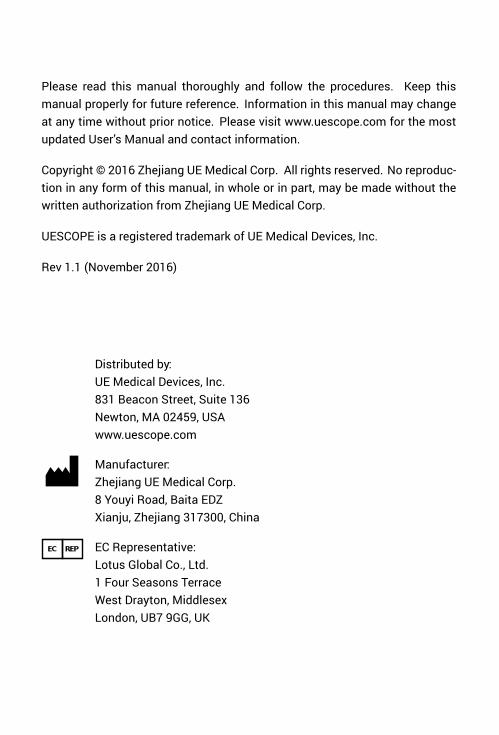
Table of Contents
1 Introduction . . . . . . . . . . . . . . . . . . . . . . . . . . . . . . . . . . . . . . . . . . . . . . . . . . 1
1.1 Description . . . . . . . . . . . . . . . . . . . . . . . . . . . . . . . . . . . . . . . . . . . . . 1
1.2 Components and Specifications . . . . . . . . . . . . . . . . . . . . . . . . . . 1
1.3 Warnings and Cautions . . . . . . . . . . . . . . . . . . . . . . . . . . . . . . . . . . 5
2 Operating Instructions . . . . . . . . . . . . . . . . . . . . . . . . . . . . . . . . . . . . . . . . . 6
2.1 Getting Started . . . . . . . . . . . . . . . . . . . . . . . . . . . . . . . . . . . . . . . . . 6
2.2 Intubation Procedure . . . . . . . . . . . . . . . . . . . . . . . . . . . . . . . . . . . . 8
2.3 Factors that Influence Successful Intubation . . . . . . . . . . . . . . . 9
3 Cleaning and Maintenance . . . . . . . . . . . . . . . . . . . . . . . . . . . . . . . . . . . 12
3.1 General Guideline . . . . . . . . . . . . . . . . . . . . . . . . . . . . . . . . . . . . . . 12
3.2 Cleaning Monitor . . . . . . . . . . . . . . . . . . . . . . . . . . . . . . . . . . . . . . 13
3.3 Cleaning Video Baton . . . . . . . . . . . . . . . . . . . . . . . . . . . . . . . . . . . 14
3.4 Cleaning Video Blade . . . . . . . . . . . . . . . . . . . . . . . . . . . . . . . . . . . 14
3.5 Cleaning Video Stylet . . . . . . . . . . . . . . . . . . . . . . . . . . . . . . . . . . . 14
4 Troubleshooting . . . . . . . . . . . . . . . . . . . . . . . . . . . . . . . . . . . . . . . . . . . . . 15
5 Warranty . . . . . . . . . . . . . . . . . . . . . . . . . . . . . . . . . . . . . . . . . . . . . . . . . . . 16
1
1 Introduction
1.1 Description
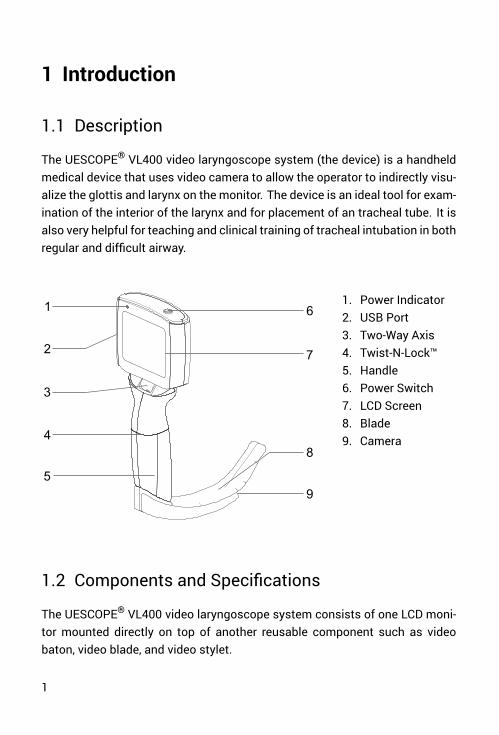
The UESCOPE® VL400 video laryngoscope system (the device) is a handheld
medical device that uses video camera to allow the operator to indirectly visu-
alize the glottis and larynx on the monitor. The device is an ideal tool for exam-
ination of the interior of the larynx and for placement of an tracheal tube. It is
also very helpful for teaching and clinical training of tracheal intubation in both
regular and difficult airway.
1
2
3
4
5
6
7
8
9
1. Power Indicator
2. USB Port
3. Two-Way Axis
4. Twist-N-Lock™
5. Handle
6. Power Switch
7. LCD Screen
8. Blade
9. Camera
1.2 Components and Specifications
The UESCOPE® VL400 video laryngoscope system consists of one LCD moni-
tor mounted directly on top of another reusable component such as video
baton, video blade, and video stylet.
2
Monitor
Display 2.5" LCD
Tilt and Rotation 65° forward, 65° backward, 90° left, 180° right
Recording (optional) 100,000 photos (JPEG), 4.5 hour video (AVI)
Video Output Yes
Power Consumption < 2 W
Weight 120 g
Battery Lithium-Ion rechargeable, 1000 mAh
Working Time ≥ 90 min
Charging Time ≤ 3 hour
Charge Cycles > 300 charge/discharge cycles
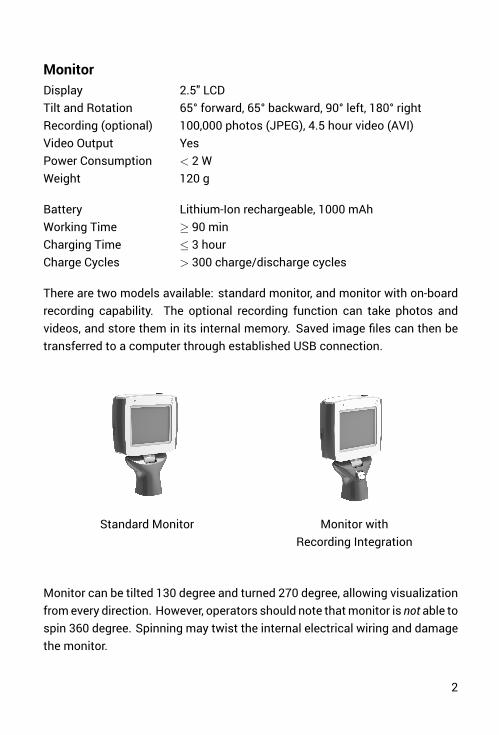
There are two models available: standard monitor, and monitor with on-board
recording capability. The optional recording function can take photos and
videos, and store them in its internal memory. Saved image files can then be
transferred to a computer through established USB connection.
Standard Monitor Monitor with
Recording Integration
Monitor can be tilted 130 degree and turned 270 degree, allowing visualization
fromevery direction. However, operators should note thatmonitor is not able to
spin 360 degree. Spinning may twist the internal electrical wiring and damage
the monitor.

3
Video Blade
Camera CMOS
Angle of View 60°
Light Source High intensity LED
Illuminance ≥ 150 LUX
Sizes Miller 0, Mac 1, Mac 2, Mac 3, Mac 4
Weight 60–100 g
Video blade’s design is based on conventional laryngoscope blade shape, with
a slight angulation at the end. Video blades are available in various sizes for
pediatric and adult patient usage. Video blades are reusable. They need to be
reprocessed between uses.
Video Blade Video Baton
(with disposable cover)
Video Stylet
Video Baton & Disposable Cover
Camera CMOS
Angle of View 60°
Light Source High intensity LED
Illuminance ≥ 150 LUX
Sizes Mac 2, Mac 3, Mac 4
Weight 60–100 g
4
Video baton needs to be loaded with single-use plastic cover (blade) that
protect them. There are different sizes of video batons, corresponding to differ-
ent sizes of single-use covers. Each disposable plastic cover has anti-fogging
technology, and has been sterilized using Ethylene Oxide (EO) and packaged in
individual peel pouch for single use only.
After loaded with disposable cover, video baton has the exactly same shape as
the corresponding video blade.
Video Stylet
Camera CMOS
Angle of View 80°
Light Source High intensity LED
Illuminance ≥ 200 LUX
Stylet Length 360 mm
Stylet OD 5.2 mm
Tracheal Tube Size 5.5–9.0 mm
Weight 80 g
Video stylet is a lighted stylet with digital camera at the tip. The camera located
at the tip will provide much wider view compared to conventional fiber optic
stylet. Video Stylet is either rigid or malleable. Its adjustable tube stop can
accommodate different sizes of tracheal tube. Like video blades, video stylet
is reusable and need to be reprocessed between uses.
Charger & Cable
Charger Input 110–240 VAC, 50/60 Hz
Charger Output 5 V 1000 mA
Charging Cable USB, Composite video output, micro-USB
The device shall only be charged using the provided charger. The device shall
not be used during the charging.
5
Environmental and Operating Conditions
Operating Temperature -5–50 °C (23–122 °F)
Storage/Transit Temp. -40–55 °C (-40–131 °F)
Humidity 10–90%
The device is designed formedical applications. Always respect the conditions
specified for storage and operating environments.
The device must be prevented from adverse external effects such as strong
electromagnetic radiation, excessive force, or high temperature. The device
shall not be used in places where there are fire hazards. The device shall not
be used in the presence of flammable anesthetic mixture.
1.3 Warnings and Cautions
Caution: U.S. Federal law restricts this device to sale by or on the order
of a physician.
Do not disassemble the device without manufacturer’s authorization.
To do so will impair patient safety and void the warranty.
6
2 Operating Instructions
2.1 Getting Started
Please note that the devices are supplied non-sterile. Refer to Chapter 3 to clean
the device and accessories before using on patient for the first time. Dispos-
able laryngoscope blades are supplied sterile and ready for single use only.
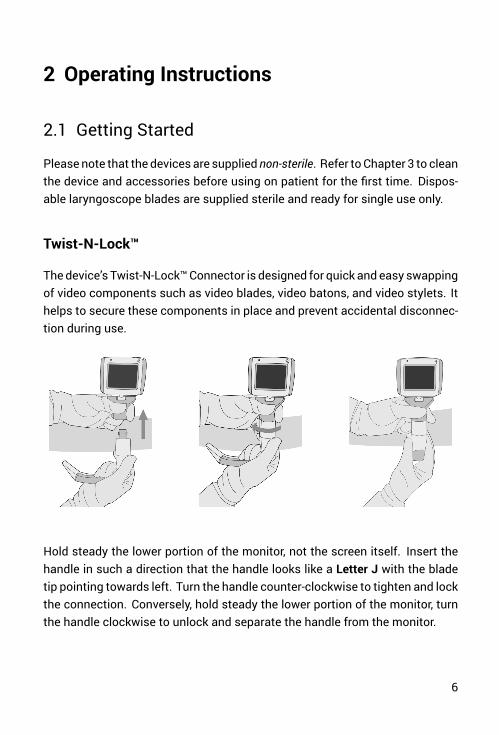
Twist-N-Lock™
Thedevice’s Twist-N-Lock™Connector is designed for quick and easy swapping
of video components such as video blades, video batons, and video stylets. It
helps to secure these components in place and prevent accidental disconnec-
tion during use.
Hold steady the lower portion of the monitor, not the screen itself. Insert the
handle in such a direction that the handle looks like a Letter J with the blade
tip pointing towards left. Turn the handle counter-clockwise to tighten and lock
the connection. Conversely, hold steady the lower portion of the monitor, turn
the handle clockwise to unlock and separate the handle from the monitor.
7
Charge the Battery
The device is powered by an internal rechargeable Lithium-ion battery. It is
highly recommended to fully charge the battery before first use, using the
provided charger and cable.
During charging, a flashing green power indicator indicates that charging is
in progress, while a steady green power indicator indicates that charging has
completed. It may take up to 3 hours to fully charge the battery when no charge
remains.
During the long-term standby, the battery shall be checked and
recharged if necessary once every 2–3 months.
Load Disposable Blade
Open the peel pouch and slide the disposable blade over the VL400 Video
Baton. The blade is securely loaded when it is firmly latched to the anchor
point with a click sound.
Power Up
Press and briefly hold the power switch for 2–4 seconds to turn on the device.
A bright LED light should appear from the front end of the video component,
where the camera locates. The company logo should appear on the screen for
a few seconds. Then the scene taken by a high definition camerawill be shown.
Observe the monitor screen to verify that a clear image is being displayed.
A steady green power indicator means the device is in normal working
state. A red power indicator means the battery is running low and
needs to be recharged immediately.
8
Record Images and Video
For monitors with recording integration, photos and videos of the operations
can be recorded and automatically saved in its internal memory. Files can then
be transferred to a computer through established USB connection.
Take a Snapshot Press and release the recording button. A snapshot
icon appears briefly at the upper of the screen, indi-
cating a still photo has been taken and saved.
Record a Video Press and hold the recording button until you see
a red dot appearing at the upper left corner of the
screen, indicating a video recording is in process.
Press and hold again to exit video recording.
2.2 Intubation Procedure
The procedures of the intubation using the UESCOPE® VL400 video laryngo-
scopeare basically the same as those of doing direct laryngoscopy.
1. When intubating difficult way, it is recommended to insert a well lubri-
cated stylet into the tracheal tube. The distal end of intubating stylet
is bent anteriorly to follow the specially designed 45° blade angle of UE
video laryngoscope.
2. Check to make sure the patient is in the optimal position for direct laryn-
goscopy.
3. Look directly into the patient’s mouth. Hold the device in the left hand
and introduce the blade into the patient’s mouth along the midline.
4. Look at the screen. While gliding downwards on the surface of the tongue
following the anatomical curvature of the oral cavity and pharynx, manip-
ulate the device to visualize the palate, uvula, and epiglottis sequentially
on the screen. Advance the blade tip to the vallecula and gently lift the
9
tip upwards to expose the vocal cords in the central upper section of the
monitor (i.e., Grade 2 view). If you see the vocal cords almost occupy the
whole screen (i.e., Grade 1 view), it’s better to withdraw the blade a little
backward.
5. Look directly into the patient’s mouth. Gently insert the precurved stylet-
ted tracheal tube into the oropharynx along with the right side of the
blade.
6. Look at the screen. You should visualize the tip of the tracheal tube in
the lower right corner of the screen. Angle or rotate the tracheal tube to
align its tip with the glottis. Withdraw the stylet slightly if necessary, and
advance the tracheal tube to pass the glottis. Do not allow the stylet to
enter the glottis.
7. After gently withdraw the stylet from tracheal tube, advance the tracheal
tube further into the trachea until the entire cuff disappears from the view.
8. After confirming correct placement of the tracheal tube into the trachea,
hold the tracheal tube in place andwithdraw the video laryngoscope from
the mouth. Inflate the cuff of the tracheal tube to appropriate cuff pres-
sure. Tightly secure the tracheal tube in place.
9. Press and briefly hold the power switch button for 2–4 seconds to turn
off the device.
10. Unload the disposable blade from the video baton and discard the blade.
Twist and unlock to separate the monitor from the handle. Clean and
decontaminate the monitor and handle according to the cleaning guide-
lines in chapter 3.
2.3 Factors that Influence Successful Intubation
Because the procedures of theUESCOPE® video laryngoscope are basically the
same as those of direct laryngoscopy, the operator experienced in the direct
10
laryngoscopy can use it successfully after reading this manual, without the
need for any special training. However, there are a few factors worth paying
attention to:
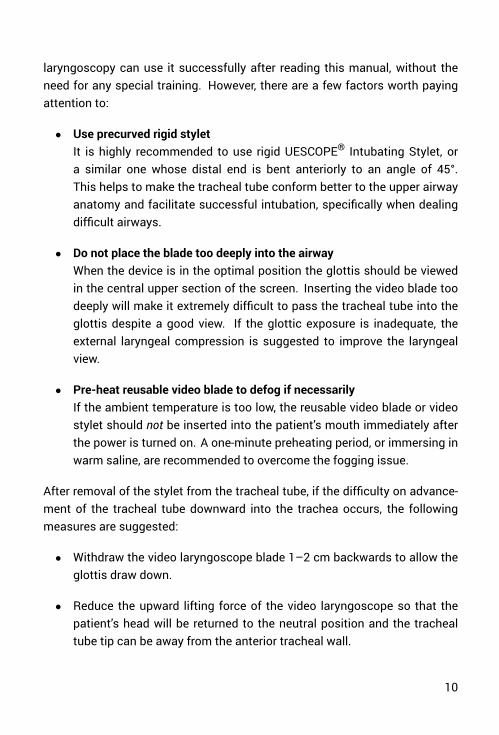
• Use precurved rigid stylet
It is highly recommended to use rigid UESCOPE® Intubating Stylet, or
a similar one whose distal end is bent anteriorly to an angle of 45°.
This helps to make the tracheal tube conform better to the upper airway
anatomy and facilitate successful intubation, specifically when dealing
difficult airways.
• Do not place the blade too deeply into the airway
When the device is in the optimal position the glottis should be viewed
in the central upper section of the screen. Inserting the video blade too
deeply will make it extremely difficult to pass the tracheal tube into the
glottis despite a good view. If the glottic exposure is inadequate, the
external laryngeal compression is suggested to improve the laryngeal
view.
• Pre-heat reusable video blade to defog if necessarily
If the ambient temperature is too low, the reusable video blade or video
stylet should not be inserted into the patient’s mouth immediately after
the power is turned on. A one-minute preheating period, or immersing in
warm saline, are recommended to overcome the fogging issue.
After removal of the stylet from the tracheal tube, if the difficulty on advance-
ment of the tracheal tube downward into the trachea occurs, the following
measures are suggested:
• Withdraw the video laryngoscope blade 1–2 cm backwards to allow the
glottis draw down.
• Reduce the upward lifting force of the video laryngoscope so that the
patient’s head will be returned to the neutral position and the tracheal
tube tip can be away from the anterior tracheal wall.
11
• Rotate the tracheal tube 90° clockwise and then further advance the tube
into the trachea.
• The patient’s head is lifted (flexed) slowly when the tracheal tube is
advanced, which makes long axis of tube to be more parallel to that of
trachea so as to advance the tracheal tube downward much easier.
12
3 Cleaning and Maintenance
3.1 General Guideline
The UESCOPE® VL400 video laryngoscope must be decontaminated prior to
first use and as soon as feasible after each use. Decontamination should be
carried out in accordance with local regulations and your facility’s policy.
Commonly used aldehyde disinfectants including 2% glutaraldehyde, and
0.55% ortho-pathalaldehyde (Cidex OPA), have been verified as compatible and
will cause no physical degradation to the device. Other types of disinfectant
like peracetic acid and sodiumhypochlorite are also effective butmay be corro-
sive to pin connectors and plastic handle.
UE Medical make no claims regarding the efficacy of the detergents, disinfec-
tants, and equipment. It remains the responsibility of the operator to ensure
that the reprocessing procedures performed following the chemical and equip-
ment manufacturer’s instructions and guidelines to achieve the desired result.
This normally requires validation and routine monitoring of the process.
Do not autoclave. Do not attempt disinfection/sterilization in a temper-
ature above 60 °C. Doing so will permanently damage the components
and will void the warranty.
Always follow the detergents, disinfectants, and instrument manufac-
turer’s written instructions.
Before cleaning, power off the monitor and detach from the handle. Ensure
video baton, video blade, and video stylet are properly fitted into the provided
end caps and secured to protect pin connectors. The eligible cleaningmethods
for components are summarized in Table 1.

13
Table 1 Eligible decontamination levels and methods for UESCOPE® VL400
video laryngoscope components and accessories. Recommended methods
are in shaded area with double checkmarks. However, the level of disinfection
or sterilization required may vary according to local regulations.
Component
&
Accessory
Low-Level
Disinfection
High-Level
DisinfectionSterilization
Disinfectant
Wipes1
Manual
Soaking2AERs3
STERRAD
Gas Plasma
Ethylene
Oxide
Monitor ✓✓ ✓
Video Baton ✓✓4 ✓ ✓ ✓ ✓
Video Blade ✓ ✓ ✓✓ ✓
Video Stylet ✓ ✓ ✓✓ ✓ ✓
Disposable Blade For single use only. Do Not Reprocess
1 Recommended disinfectantwipes include 70% Isopropyl alcohol, CaviWipes, and
Super Sani-Cloth wipe.
2 Completely submerged in 2% glutaraldehyde for 20 minutes, or Cidex OPA for 12
minutes at room temperature, per chemical manufacturer’s instructions.
3 Automated Endoscope Reprocessors implementing Cidex OPA and Rapicide
OPA/28 as disinfectants, e.g., Medivators DSD-201.
4 Low-level disinfection process may be considered where high level disinfection
and sterilization processes are not practical.
3.2 Cleaning Monitor
Wipe clean the monitor in between uses and as needed, using 70% Isopropyl
alcohol, CaviWipes, or Super Sani-Cloth wipe. If there is concern about the level
of disinfection or if it is exposed to contamination, themonitor can be sterilized
using Ethylene Oxide (EO) gas method (see Table 1).
Monitor is not waterproof and should not be submerged or exposed to
excessive amounts of fluids.
14
3.3 Cleaning Video Baton
To clean, remove the disposable blade from the baton and dispose of prop-
erly. Wipe clean the baton thoroughly to remove any soil from all exposed
surfaces. Then wipe down using 70% Isopropyl alcohol, CaviWipes, or Super
Sani-Cloth wips, per manufacturer’s instructions.
If there is concern about its level of contamination or if it is exposed to cont-
amination, video baton should be reprocessed by glutaraldehyde or Cidex
OPA method, STERRAD gas plasma sterilization, or EO gas method (see Table
1).
3.4 Cleaning Video Blade
To clean reusable video blade, use water and appropriate enzymatic detergent
to wash. Repeat until no visible soil remains. Then rinse and rough dry all
surfaces of the component. Manually soak the blade in 2% glutaraldehyde or
Cidex OPA solution per manufacturer’s instructions. Alternatively, reprocess
with automatic reprocessors using Cidex OPA or Rapicide OPA/28 disinfectant,
e.g., Medivators DSD-201 (See Table 1).
3.5 Cleaning Video Stylet
To clean reusable video stylet, use water and appropriate enzymatic detergent
to wash. Repeat until no visible soil remains. Then rinse and rough dry all
surfaces of the component. Manually soak video stylet in 2% glutaraldehyde
or Cidex OPA solution per manufacturer’s instructions. Alternatively, use Medi-
vators AER with Rapicide OPA/28 disinfectant, or use STERRAD gas plasma
processor (See Table 1).
15
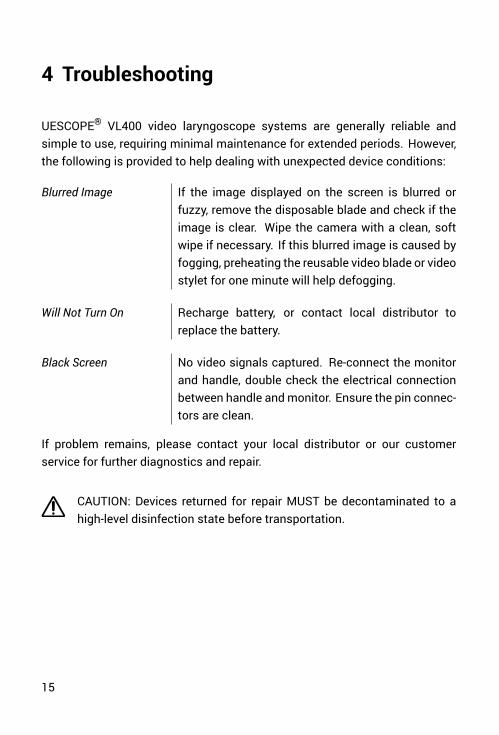
4 Troubleshooting
UESCOPE® VL400 video laryngoscope systems are generally reliable and
simple to use, requiring minimal maintenance for extended periods. However,
the following is provided to help dealing with unexpected device conditions:
Blurred Image If the image displayed on the screen is blurred or
fuzzy, remove the disposable blade and check if the
image is clear. Wipe the camera with a clean, soft
wipe if necessary. If this blurred image is caused by
fogging, preheating the reusable video blade or video
stylet for one minute will help defogging.
Will Not Turn On Recharge battery, or contact local distributor to
replace the battery.
Black Screen No video signals captured. Re-connect the monitor
and handle, double check the electrical connection
between handle andmonitor. Ensure the pin connec-
tors are clean.
If problem remains, please contact your local distributor or our customer
service for further diagnostics and repair.
CAUTION: Devices returned for repair MUST be decontaminated to a
high-level disinfection state before transportation.
16
5 Warranty
UE Medical warrants the original purchaser that the device will be free from
defects in material and workmanship. This warranty applies for one year from
the date of shipment from UE Medical Devices, Inc. This warranty does not
apply if the product has been damaged due to improper cleaning and handling,
neglect, misuse, accident, or unauthorized repair.

Zhejiang UE Medical Corporation
8 Youyi Road, Baita EDZ
Xianju, Zhejiang 317300, China
Tel: +86 576 87788798
Fax: +86 576 87721129