Embed Size (px)
Citation preview


2
User ManualTo
paz
Sim
plify
4
2. Simplify Size. . . . . . . . . . . . . . . . . . . . . . .193. Feature Boost. . . . . . . . . . . . . . . . . . . . .194. Details Strength. . . . . . . . . . . . . . . . . . .195. Details Boost. . . . . . . . . . . . . . . . . . . . . .196. Details Size. . . . . . . . . . . . . . . . . . . . . . . 197. Remove Small. . . . . . . . . . . . . . . . . . . . .198. Remove Weak. . . . . . . . . . . . . . . . . . . . .19
H. Adjust . . . . . . . . . . . . . . . . . . . . . . . . . . . . . . . . 201. Brightness. . . . . . . . . . . . . . . . . . . . . . . .202. Contrast. . . . . . . . . . . . . . . . . . . . . . . . . .203. Saturation. . . . . . . . . . . . . . . . . . . . . . . .204. Saturation Boost . . . . . . . . . . . . . . . . . 205. Dynamics. . . . . . . . . . . . . . . . . . . . . . . . .206. Structure. . . . . . . . . . . . . . . . . . . . . . . . .207. Structure Boost. . . . . . . . . . . . . . . . . . .20
I. Edges . . . . . . . . . . . . . . . . . . . . . . . . . . . . . . . . . 211. Inverse Color. . . . . . . . . . . . . . . . . . . . . .212. Edge Type. . . . . . . . . . . . . . . . . . . . . . . . 213. Edge Strength. . . . . . . . . . . . . . . . . . . . .214. Simplify Edge. . . . . . . . . . . . . . . . . . . . . 215. Reduce Weak. . . . . . . . . . . . . . . . . . . . . 21
6. Reduce Small. . . . . . . . . . . . . . . . . . . . . .217. Flatten Edge. . . . . . . . . . . . . . . . . . . . . . 21
J. Curve Tool . . . . . . . . . . . . . . . . . . . . . . . . . . . . .22 K. Local Adjustments. . . . . . . . . . . . . . . . . . . . . .23
L. Finishing Touches. . . . . . . . . . . . . . . . . . . . . . .241. Vignette . . . . . . . . . . . . . . . . . . . . . . . . . 242. Quad Tone . . . . . . . . . . . . . . . . . . . . . . . 25
M. Program Tools. . . . . . . . . . . . . . . . . . . . . . . . . 261. Undo/Redo. . . . . . . . . . . . . . . . . . . . . . .262. Effect Tools. . . . . . . . . . . . . . . . . . . . . . .26
V. Additional Resources
A. FAQ’s 27B. Connect 29
I. Installation
A. How to Install 3 B. Plugin Compatibility 3
C. Host-Specific Installation 31. Photoshop 32. Lightroom 43. PaintShop Pro 44. PhotoPlus 5
D. Uninstalling 5E. License Key 6
II. Introduction
A. About Simplify 4. . . . . . . . . . . . . . . . . . . . . . . . . . 7B. Main Features. . . . . . . . . . . . . . . . . . . . . . . . . . . . 8C. User Interface. . . . . . . . . . . . . . . . . . . . . . . . . . . . 9
III. Work Area
A. Effects & Collections . 10B. Adjustments .13
C. The Preview Window . . . . . . . . . . . . . . . . . . . . .14 D. The Navigator Panel. . . . . . . . . . . . . . . . . . . . . . 15
1. Navigate. . . . . . . . . . . . . . . . . . . . . . . . . .152. Loupe. . . . . . . . . . . . . . . . . . . . . . . . . . . .153. Histogram . . . . . . . . . . . . . . . . . . . . . . . .15
E. Collections and Presets. . . . . . . . . . . . . . . . . . . 161. Applying Presets . . . . . . . . . . . . . . . . . .162. BuzSim . . . . . . . . . . . . . . . . . . . . . . . . . . 163. Detail Removal and Enhancement. . .164. Line and Ink. . . . . . . . . . . . . . . . . . . . . . .165. My Collection . . . . . . . . . . . . . . . . . . . . .166. Painting. . . . . . . . . . . . . . . . . . . . . . . . . . 167. Simplify 3. . . . . . . . . . . . . . . . . . . . . . . . .168. Sketch. . . . . . . . . . . . . . . . . . . . . . . . . . . 16
F. Global Adjustments. . . . . . . . . . . . . . . . . . . . . . .18G. Simplify . . . . . . . . . . . . . . . . . . . . . . . . . . . . . . . . .19
1. Color Space. . . . . . . . . . . . . . . . . . . . . . .19
3
User ManualTo
paz
Sim
plify
4
Compatibility
Simplify 4 can be accessed as a plugin in:
• Photoshop CS4+• Photoshop Creative Cloud• Photoshop Elements 12+• Corel Paintshop Pro X 6+• Serif PhotoPlus X5+• Lightroom Creative Cloud• Lightroom 2+ as an external editor• photoFXlab
Accessing Simplify 4 in Ps, PsCC, and Pse
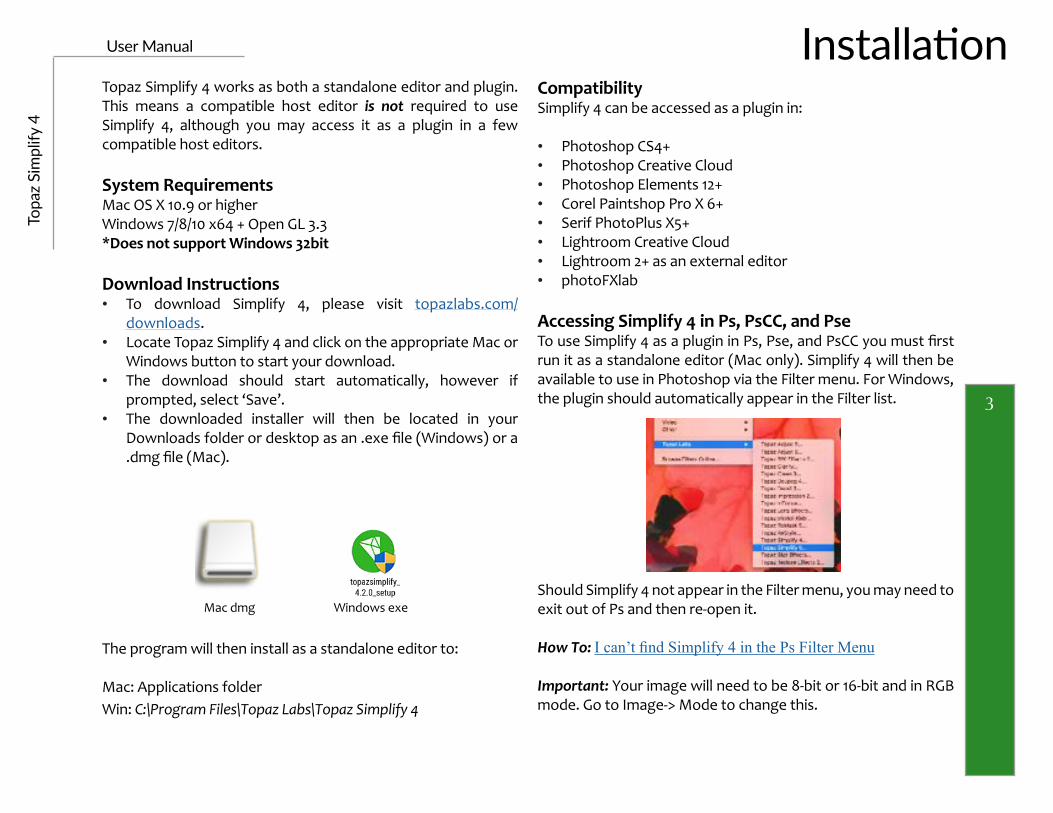
To use Simplify 4 as a plugin in Ps, Pse, and PsCC you must first run it as a standalone editor (Mac only). Simplify 4 will then be available to use in Photoshop via the Filter menu. For Windows, the plugin should automatically appear in the Filter list.
Should Simplify 4 not appear in the Filter menu, you may need to exit out of Ps and then re-open it.
How To: I can’t find Simplify 4 in the Ps Filter Menu
Important: Your image will need to be 8-bit or 16-bit and in RGB mode. Go to Image-> Mode to change this.
Topaz Simplify 4 works as both a standalone editor and plugin. This means a compatible host editor is not required to use Simplify 4, although you may access it as a plugin in a few compatible host editors.
System Requirements
Mac OS X 10.9 or higherWindows 7/8/10 x64 + Open GL 3.3*Does not support Windows 32bit
Download Instructions
• To download Simplify 4, please visit topazlabs.com/downloads.
• Locate Topaz Simplify 4 and click on the appropriate Mac or Windows button to start your download.
• The download should start automatically, however if prompted, select ‘Save’.
• The downloaded installer will then be located in your Downloads folder or desktop as an .exe file (Windows) or a .dmg file (Mac).
The program will then install as a standalone editor to:
Mac: Applications folder Win: C:\Program Files\Topaz Labs\Topaz Simplify 4
Installation
Mac dmg Windows exe

4
User ManualTo
paz
Sim
plify
4
Accessing Simplify 4 in Corel PaintShop Pro X
To configure Simplify 4 as a plugin in PaintShop Pro:
1. Go to File-> Preferences-> File Locations...2. Scroll to select ‘Plugins’ from the File types list and click ‘Add’
3. Navigate to C:\Program Files\Topaz Labs 4. Select the Topaz Simplify 4 folder and click OK.
Accessing Simplify 4 in Lightroom
Simplify 4 can be accessed as an external editor in Lightroom by going to Photo-> Edit In-> Topaz Simplify 4.
Important: To configurate use of Simplify 4, go to Lightroom-> Preferences-> External Editing.
Make sure that ‘TIFF’ is selected under File Format. In addition, select 16 bits/component for bit depth and the color space ProPhoto RGB for optimal editing.
How To: Accessing Simplify 4 in Lightroom
Installation

5
User ManualTo
paz
Sim
plify
4
5. Click OK again to return back to your main screen.6. Go to Effects-> Plugins-> Topaz Labs-> Topaz Simplify 4 and select it to start the program.
Accessing Simplify 4 in Serif PhotoPlus
To use Simplify 4 as a plugin in Serif Photo Plus:
1. Go to File-> Preferences2. Select Plug-ins from the list and then click Browse.
3. Navigate to: C:\Program Files\Topaz Labs
Installation4. Select the Topaz Labs folder and press OK. 5. Press OK again to return back to your main screen.6. Exit out of Serif and then re-open it.7. To access Simplify 4, open an image and go to Effects-> Plugin Filters-> Topaz Labs-> Topaz Simplify 4
To Uninstall Simplify 4:
Mac
1. Quit Photoshop (or other editing program).2. Navigate to the Applications folder: Macintosh HD -> Library -> Applications-> Topaz Simplify 4. 3. Locate the Topaz Simplify 4 folder and move it to the trash. You will need to enter your system password to OK this change.
Windows
1. Quit Photoshop (or other editing program).2. Click on the Start Menu and select Control Panel -> Programs -> Programs and Features (or Uninstall a Program). 3. Select Topaz Simplify 4 and click uninstall.
Edge and Detail Boost

6
User ManualTo
paz
Sim
plify
4
Entering Your License Key
Upon opening Simplify 4, you should be prompted to enter your 30 digit license key. You can also enter your license key from the top Help menu.
Simply copy and paste your 30 digit license key into the provided space to activate the program. Or, if running a trial, click ‘Continue Trial’.
Should you receive an activation failure, please make sure that you have copied (ctrl/cmd + C) and pasted (ctrl/cmd + V) the key. Also be sure that you did not copy any extra blank spaces.
Please know that there is no difference between the trial and purchased version of Simplify 4. Simplify 4 does not require a trial key, as it is timer based.
Additional license key assistance:
• My license key is not being accepted• Common License Key Questions
Installation
Custom Effect
Custom Effect

7
User ManualTo
paz
Sim
plify
4
About Simplify 4Turn Your Photos into Works of Arts
Topaz Simplify 4 opens up the traditional art medium by bringing digital photographers the tools needed to instantly transform any digital image into a work of art.
Simplify 4 can blur the distinction between photographic realism and art, allowing you to make your digital image into something that is truly unique to look at.
Topaz Simplify 4 allows you to easily apply the look of brush strokes and other art tools with ease. Using Simplify 4, you can enhance the essence of your original image giving you a dynamic and creative result.
Simplify 4 is also great for rescuing previously unusable images. By adding artistic enhancements to a damaged, underexposed, overexposed, dull, or boring image, you can instantly transform it into something that is creative, unique and-eye catching!
The Primary Functions of Topaz Simplify Include:
1. Remove details from your image based on size.2. Enhance or remove color in images.3. Generate or reduce lines, edges, and shading for changes in distinctness.4. Fine-tune images to match your artistic vision.5. Create a new and artistic interpretation of your digital images with ease and artistic precision.6. Rescue unusable images by adding a traditional art flare.
Introduction
Soft Features
Custom Effect
8
User ManualTo
paz
Sim
plify
4
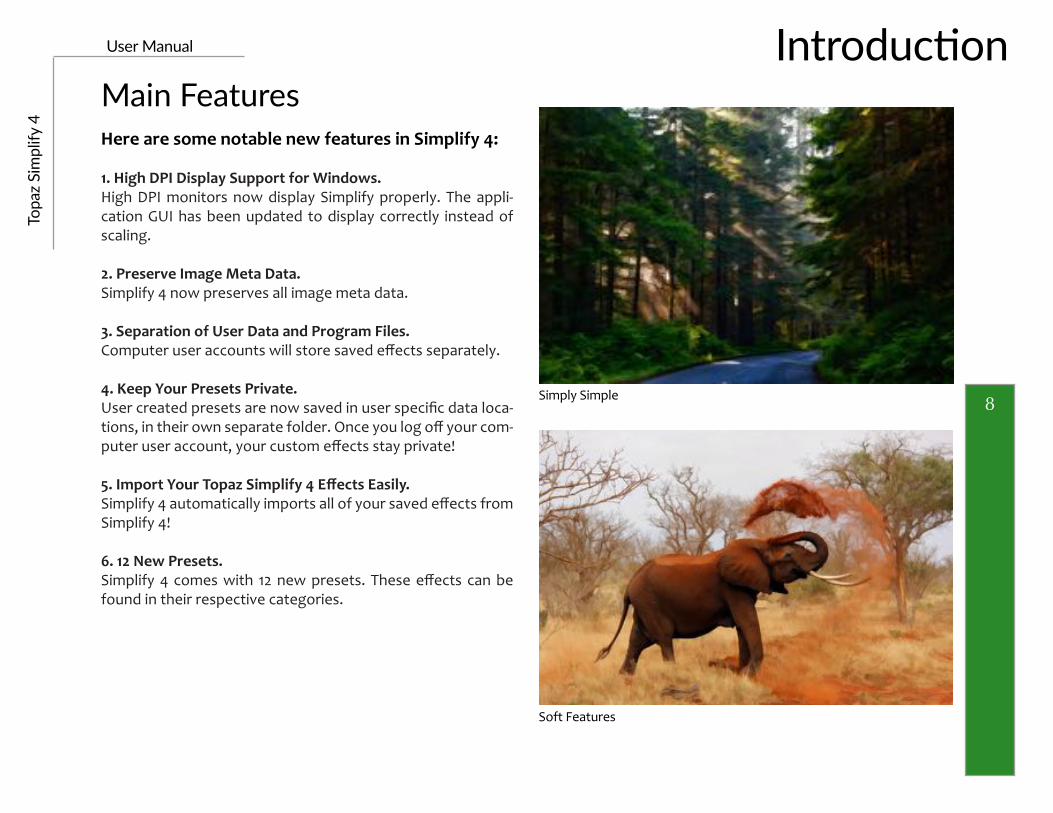
Main FeaturesHere are some notable new features in Simplify 4:
1. High DPI Display Support for Windows.
High DPI monitors now display Simplify properly. The appli-cation GUI has been updated to display correctly instead of scaling.
2. Preserve Image Meta Data.
Simplify 4 now preserves all image meta data.
3. Separation of User Data and Program Files.
Computer user accounts will store saved effects separately.
4. Keep Your Presets Private.
User created presets are now saved in user specific data loca-tions, in their own separate folder. Once you log off your com-puter user account, your custom effects stay private!
5. Import Your Topaz Simplify 4 Effects Easily.Simplify 4 automatically imports all of your saved effects from Simplify 4!
6. 12 New Presets.
Simplify 4 comes with 12 new presets. These effects can be found in their respective categories.
Introduction
Simply Simple
Soft Features

9
User ManualTo
paz
Sim
plify
4Work Area
User InterfaceThere are four main areas in Simplify 4: Collections, Presets, the Preview Window, and the Adjustments Panel.
Upon entering the program, you will see the main preview window with pre-made effects on the left and customization tools on the right. This is a good starting point for finding the look you want. Browse through several different collections and styles or create your own from scratch.

10
User ManualTo
paz
Sim
plify
4Work Area
Effects & Collections Detail Removal and Enhancement
There are 6 included collections in Topaz Simplify 4: BuzSim, Detail Removal and Enhancement, Line and Ink, My Collection, Painting, and Sketch. The pre-made effects are a great place to start for inspiration!
BuzSim
Edge and Detail Boost
Dust Removal IVSplit Toned I
BuzSim III

11
User ManualTo
paz
Sim
plify
4Work Area
Line and Ink Painting
Cartoon by D. Pacheco
Cartoon Natural II Impressions Natural
Watercolor II

12
User ManualTo
paz
Sim
plify
4Work Area
Sketch My Collection
Pastel
Pencil Hard on Black
Custom Setting
Custom Setting
13
User ManualTo
paz
Sim
plify
4
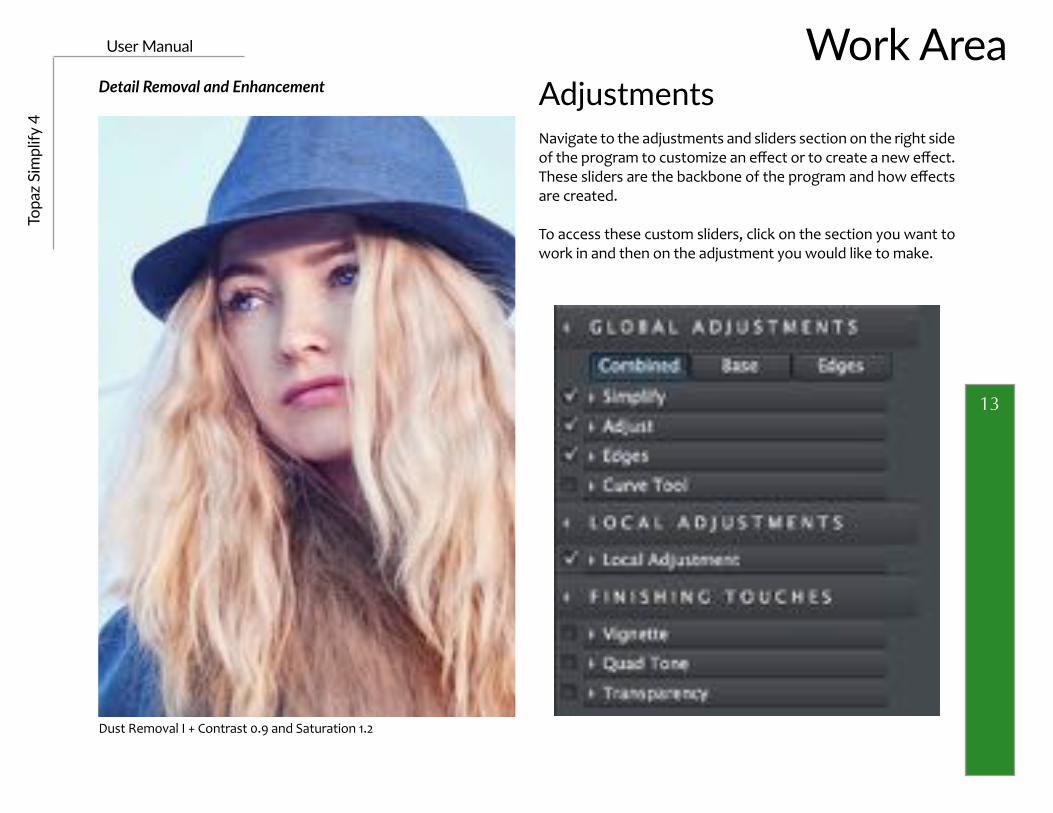
Adjustments Navigate to the adjustments and sliders section on the right side of the program to customize an effect or to create a new effect. These sliders are the backbone of the program and how effects are created.
To access these custom sliders, click on the section you want to work in and then on the adjustment you would like to make.
Work AreaDetail Removal and Enhancement
Dust Removal I + Contrast 0.9 and Saturation 1.2

14
User ManualTo
paz
Sim
plify
4Work Area
The Preview WindowThe Preview Window offers a variety of options to customize your workspace.
Collapse the Effects Panel Click the left facing arrow to hide the Effects Panel. Click it again to reveal the Effects Panel. This will hide the Collections and Pre-sets Sections of the program.
Preview OptionsFull Image Preview allows you to see the entire image. Simplify 4 also features a 2-screen split view option for easy before and after comparison, as well as a gridview to view multiple pre-sets. You may toggle back and forth between the two views by selecting the view you wish to use. The active viewing option will be highlighted.
Preview DescriptionThe Preview Description lets you know which image you are viewing, Processed or Original. You may toggle back and forth between the two views by selecting the view you wish to use. The active viewing option will be displayed . You may also use the space bar for a quick glance to compare the Processed or Original image. This option is only available for Full Image Pre-view.
Toggle ZoomZoom between fit view and the last used zoom.
ZoomA drop down menu with different viewing options. View to fit screen or zoom in up to 400%.
Workspace ColorChoose between 5 different workspace colors.
Collapsed Effects Panel and 2-Screen Split View Option
Preset Gridview Option
15
User ManualTo
paz
Sim
plify
4
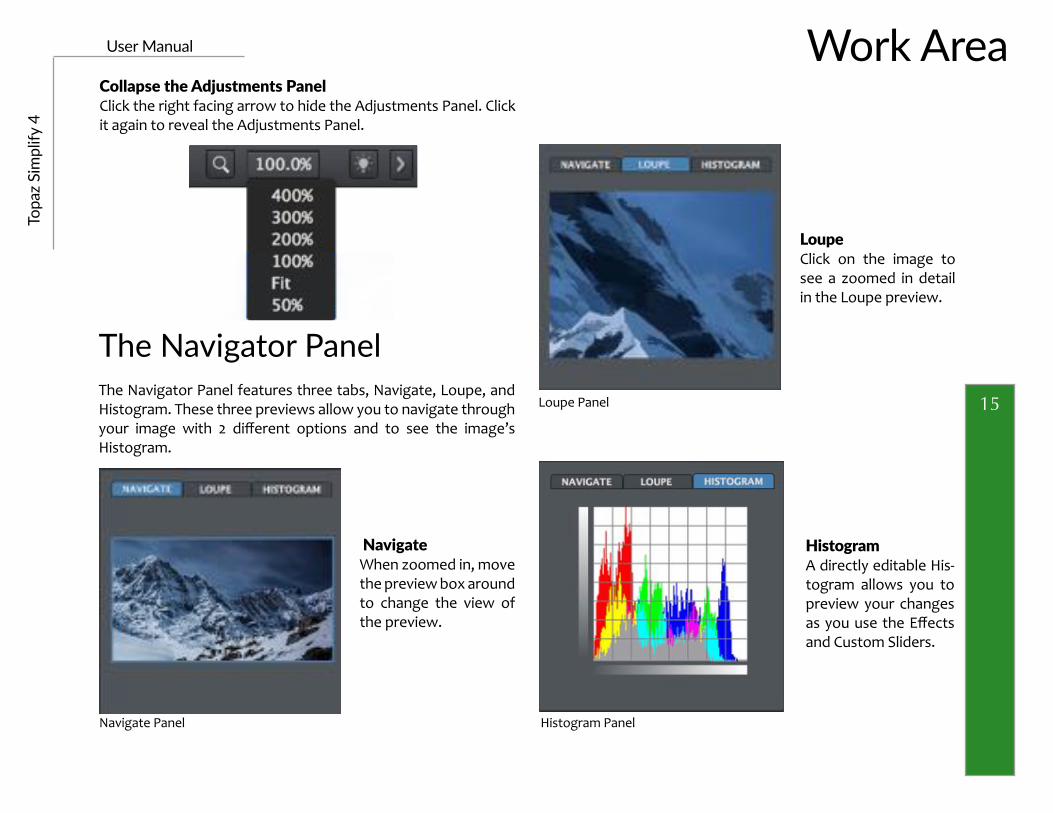
The Navigator PanelThe Navigator Panel features three tabs, Navigate, Loupe, and Histogram. These three previews allow you to navigate through your image with 2 different options and to see the image’s Histogram.
Work Area
Navigate Panel
Loupe Panel
Histogram Panel
Navigate When zoomed in, move the preview box around to change the view of the preview.
LoupeClick on the image to see a zoomed in detail in the Loupe preview.
HistogramA directly editable His-togram allows you to preview your changes as you use the Effects and Custom Sliders.
Collapse the Adjustments Panel Click the right facing arrow to hide the Adjustments Panel. Click it again to reveal the Adjustments Panel.

16
User ManualTo
paz
Sim
plify
4
Collections and PresetsPresets are a great way to speed up and simplify the whole process of using Topaz Simplify 4. Presets are set previews with previously defined settings that you can recall and reapply at any time. We’ve included some default presets for you and, although they won’t work for every single photograph, they serve as excellent starting points for customized tweaking.
Applying PresetsApplying a default preset is easy and intuitive. Simply clicking on a preset will change all the settings in Topaz Simplify 4 to match those in the selected preset. To get the exact results you want, you may still want to go through the tabs and tweak the parameters.
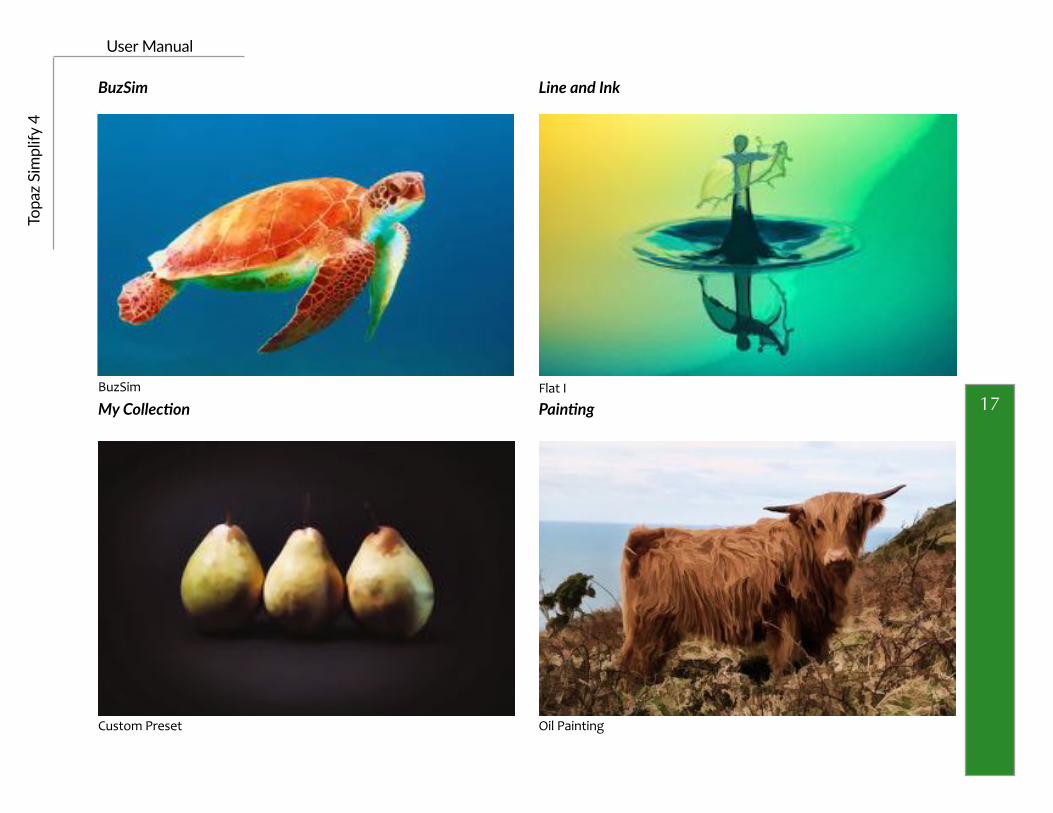
BuzSim Named after a popular plugin that served as inspiration, this col-lection features 16 presets from subtle to dramatic.
Detail Removal and EnhancementThese 12 subtle presets are great for minor corrections on skin or dust removal.
Line and InkThis collection features 28 both black and white and color pre-sets with heavy edge and detail lines. Great for creating cartoon and graphic looks.
My CollectionThis collection contains your own unique collection to ensure easy access to all your own presets.
PaintingThis category of 35 presets features many different styles of paintings from watercolor to impressionistic and everything in between.
Simplify 3 Preset ListA collection of 12 of all the favorite presets from Simplify 3. This category has a little of everything.
Sketch These 22 presets are a softer approach to the Link and Ink Col-lection. This collection contains more pencil like sketch effects in both color and black and white.
BuzSim III + Simplify Size 0.07 and Contrast 1.55
17
User ManualTo
paz
Sim
plify
4
BuzSim
BuzSim
Oil Painting
Painting
Line and Ink
Flat I
My Collection
Custom Preset

18
User ManualTo
paz
Sim
plify
4Work Area
Global Adjustments The adjustment tools in Topaz Simplify 4 allow you to manually create effects and/or tweak preset settings to customize a unique look for each of your images.
There are 4 adjustments within Simplify 4: Simplify, Adjust, Edges, and Curve Tool.
To add or change an adjustment, simply click on it. The adjustment window will expand to display adjustment sliders.
Simplify The Simplify tab controls what details in the image are removed and which ones are retained. Different combinations of the set-tings create many different possibilities.
Color SpaceColorspace allows you to change the space where the simplify-ing action takes place. The RGB colorspace tends to produce more dramatic color effects, while the YCbCr colorspace tends to shift color less.
Simplify SizeDefines the size of the details being simplified. Any detail with a size below this value will be removed, leaving behind only the larger features. The value of this parameter is relative to the en-tire image’s size.
Global Adjustments Collapsed BuzSim + Simplify Size 0.2 BuzSim + Simplify Size 0.8
BuzSim IV

19
User ManualTo
paz
Sim
plify
4
Details BoostControls the weaker details in the image. A setting higher than 1 accentuates weaker details, while a setting below 1 weakens minor image details.
Details SizeDetermines the size of image features to be considered “detail” which will be brought back with the Detail Strength slider. The value of this parameter is relative to the full image size.
Remove SmallRemoves smaller image details whose size is below this value.
Remove WeakRemoves weaker image details with a strength below this value.
Work Area
Global Adjustments Expanded
Feature BoostBoosts the main features in the image and exaggerates details. Use this in the RGB color space to introduce colorful artifacts into the image. For more natural image colors, switch the color-space to YCbCr.
Details StrengthSelectively brings back detail from the “simplified” image, and controls the strength of these details. This parameter works
BuzSim + Contrast 1.25, Saturation 1.70, Structure 1.51, and Structure Boost 1.25

20
User ManualTo
paz
Sim
plify
4Work Area
AdjustThe Adjust tab offers convenient color, tone and detail controls which allows you to alter the brightness, contrast, detail and saturation of the simplified image.
BrightnessControls the brightness of the image. A value greater than 0 increases the brightness and a value less than 0 decreases the brightness.
ContrastControls the contrast in the image giving you the ability to in-crease or decrease the appearance of the darks and lights in your image proportionally.
SaturationIncreases or decreases the color saturation (richness of color) in an image.
Saturation BoostAdjusts the amount of saturation in the weaker image colors without affecting the stronger image colors. Setting this value higher than 1.0 will make the color more vibrant, while a value of less than 1.0 makes the weaker color appear more washed out.
DynamicsEffects the contrast and tonal balance on a local level, versus global.
StructureThe amount of detail enhancement applied in the image. A value higher than 1.0 strengthens the details in the image while a val-ue less than 1.0 reduces the strength of details.
Structure BoostThe amount of detail enhancement applied to the smaller details in the image. A value higher than 1.0 strengthens the weaker de-tails in the image while a value less than 1.0 reduces the strength of smaller details. This parameter affects mostly weak details. Strong details should be adjusted using the Structure slider.
Adjustments Tab Expanded

21
User ManualTo
paz
Sim
plify
4
EdgesThe Edges tab brings out, modifies or alternatively creates edg-es in the photo. Use those lines alone or to combine them with the rest of the image. While the Simplify and Adjust tabs make up the main portion of the image, the Edges tab plays an impor-tant role in determining the size, shape and color of the edges in an image, which can affect the final result in many ways.
Inverse ColorEnabling this box will inverse the edge color. By default, edges are black or colored on a white background. You can use this feature to create white or colored edges on a black background.
Edge TypeSimplify offers 8 different types of edges that you can use to ac-centuate the effect of your image. This includes different combi-nations of color, size and style of edge lines.
Edge StrengthIncreases the strength of the displayed edges. This feature only detects edges that have not been excluded by the Simplify Edge parameter.
Simplify EdgeThis removes image features of a certain size. The higher this setting is, the less number of edges that will remain. This param-eter is analogous to the Simplify Size parameter in the Simplify tab.
Reduce Weak Reduces edges that are faint or weak in intensity. This feature is ideal when there are stray weak lines around the edges that you would like to remove.
Reduce Small Reduces edges that are small in size. This is also ideally used when there are small lines around important edge detail that you wish to remove.
Flatten EdgeFattens the image edges, making them thicker. This feature is useful when the original image edges are thin or too small.
Edges Tab Expanded
22
User ManualTo
paz
Sim
plify
4
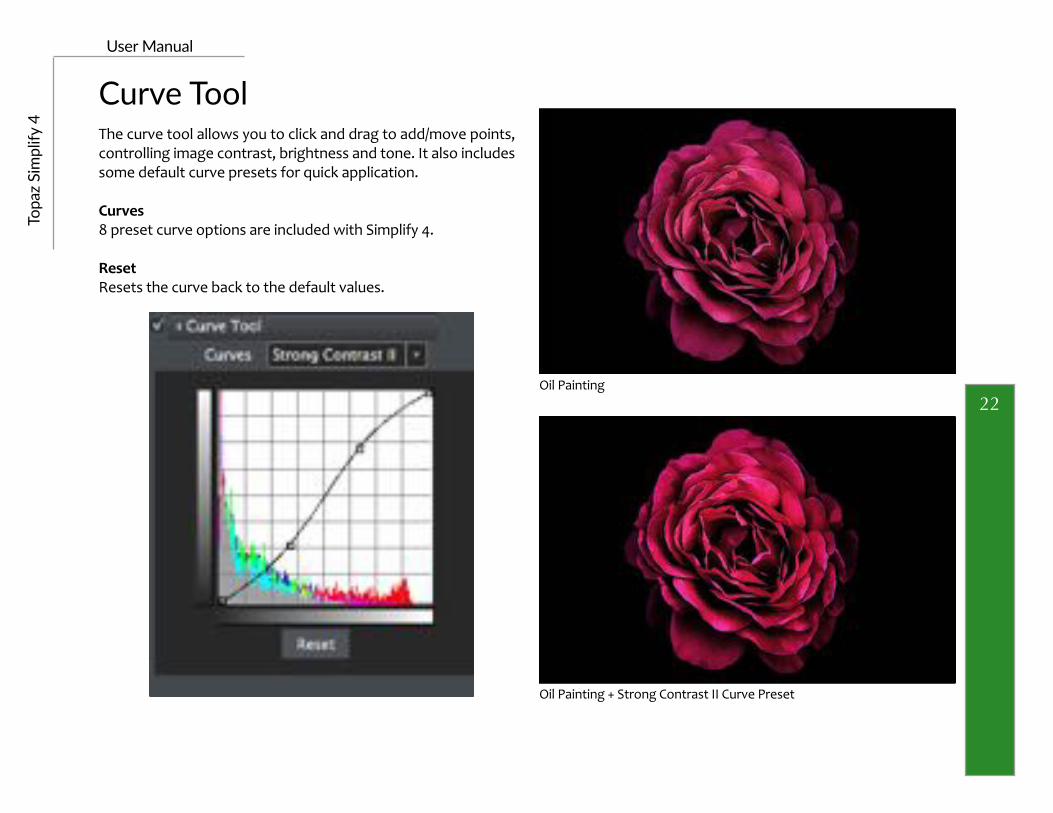
Curve ToolThe curve tool allows you to click and drag to add/move points, controlling image contrast, brightness and tone. It also includes some default curve presets for quick application.
Curves
8 preset curve options are included with Simplify 4.
Reset
Resets the curve back to the default values.
Oil Painting
Oil Painting + Strong Contrast II Curve Preset

23
User ManualTo
paz
Sim
plify
4Work Area
Adjustment Type Choose Dodge, Burn, Brush Out, or Smooth. Note that the slid-er options below the type will apply to whatever adjustment type you have selected.
DodgeUsed to lighten (dodge) specific areas of your image by in-creasing the exposure in those areas.
BurnUsed to darken (burn) specific areas of your image by limiting the exposure in those areas.
Brush Out
Allows you to easily taper down the strength of effects or remove them completely. The Opacity slider controls how opaque your adjustments become. The higher the value the more effect that will be removed.
SmoothSmooths out detail using the Smooth option - this is great for cleaning up areas of skin and sky.
Overall StrengthAdvanced blending control over applied adjustments. If dodg-ing or burning is too weak or strong, the strength slider allows for further control. Note that the below adjustments will apply to whatever type you are in.
Brush SizeControls the size of the brush.
Local Adjustments This tab allows you to selectively apply image adjustments using an intuitive brush. Adjustments include burning, dodging smoothing and erasing/brushing out applied adjustments.
Local Adjustments Tab Expanded

24
User ManualTo
paz
Sim
plify
4Work Area
Finishing TouchesThis tab includes useful finishing touches that you can apply to your image. It includes vignettes, toning, and transparency.
VignetteThis effect allows you to add a basic vignette to your image.
Center (button)Click to set the center point for your vignette.
Image CrispEdge + Vignette Strength 0.60 and Size -0.20
Vignette StrengthControls how heavily the vignette is applied to your image. A higher value will produce a darker vignette, whereas a smaller value will produce a lighter, more opaque vignette
Vignette SizeControls the size of the applied vignette. A higher value will expand the width of the vignette towards the edges of your image. A smaller value will contract the vignette inward to the center of your image.
Vignette TransitionDetermines the hardness of the transition between the blurred (out-of-focus) background and the focused foreground. The higher the value the softer the transition will be.
Vignette Curvature Controls the blend between the vignette and the original im-age. The larger values will produce a longer softer transition and the lower values will produce a shorter transition.
Vignette Tab Expanded

25
User ManualTo
paz
Sim
plify
4Work Area
Quad ToneColor Region 1Click on the corresponding color swatch and a color picker will pop-up for a color to be selected. Once the color is selected, use the Region 1 slider to select where on the tonal scale that color is to be applied.
Color Region 2Click on the corresponding color swatch and a color picker will pop-up for a color to be selected. Once the color is selected, use the Region 2 slider to select where on the tonal scale that color is to be applied.
Color Region 3Click on the corresponding color swatch and a color picker will pop-up for a color to be selected. Once the color is selected, use the Region 3 slider to select where on the tonal scale that color is to be applied.
Color Region 4Click on the corresponding color swatch and a color picker will pop-up for a color to be selected. Once the color is selected, use the Region 4 slider to select where on the tonal scale that color is to be applied.
Tonal Strength Determines the strength of the tones applied to the image.
Spot Removal II + Quad Toning
Quad Tone Tab Expanded
26
User ManualTo
paz
Sim
plify
4
Undo/RedoUndoUndo any workflow step you have done by clicking the undo button at the bottom of the adjustments panel.
RedoRedo any workflow step you have done by clicking the redo button at the bottom of the adjustments panel.
Effect ToolsApplySimplify features a new Apply button which allows you to stack multiple effects/presets during the same workflow.
ResetResets all active adjustment sliders.
Close the Program There are 2 easy to use buttons at the lower right corner. You can cancel your work or save your image easily.
ExitSelecting Exit will close the program without changes. If you are using Simplify 4 as a plugin, you will be returned to the host editor.
Save AsClicking OK will save your image or return you to your host edi-tor program.
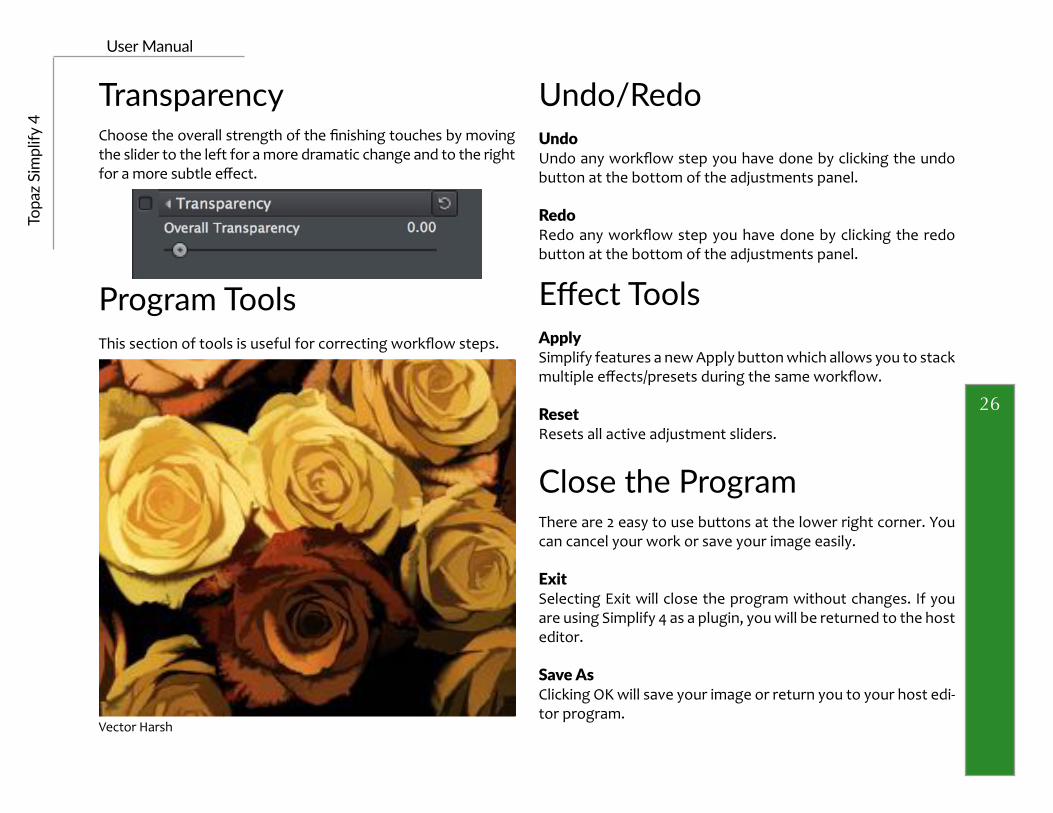
TransparencyChoose the overall strength of the finishing touches by moving the slider to the left for a more dramatic change and to the right for a more subtle effect.
Program ToolsThis section of tools is useful for correcting workflow steps.
Vector Harsh
27
User ManualTo
paz
Sim
plify
4
“Does my Topaz Collection come with Simplify 4?”
If you purchased a Topaz Complete Collection 14+, then yes, you own Simplify. Product upgrades with Topaz are complimentary. To update your copy of Simplify, go to topazlabs.com/downloads and download an upgrade for either Mac or Windows.
“I need a Simplify 4 trial key?”
Topaz Simplify 4 does not require a trial key. The 30 day activation will be automatic upon downloading the software.
“If I use the 30-day trial version will I need to uninstall the trial
version before I upgrade to a full version?”
No, there is no difference between the purchased software and the trial software.
“Can I use the purchased software on both Mac and PC?”
Yes, you may use the purchased software on two operating systems at a time. Your license key will work on both versions. The correct software can be downloaded from our downloads page at topazlabs.com/downloads.
“Does Simplify 4 work with Aperture or iPhoto?”
No. After the update to Yosemite, the Topaz plugins ceased to work with Aperture and iPhoto.
“Does Simplify 4 work with Fusion Express?”
No, Topaz Simplify 4 does not work with Fusion Express.
“Do you have any Simplify 4 tutorials?”
You can find Simplify 4 tutorials on our blog at blog.topazlabs.com and on YouTube at youtube.com/topazlabs.
FAQ’s
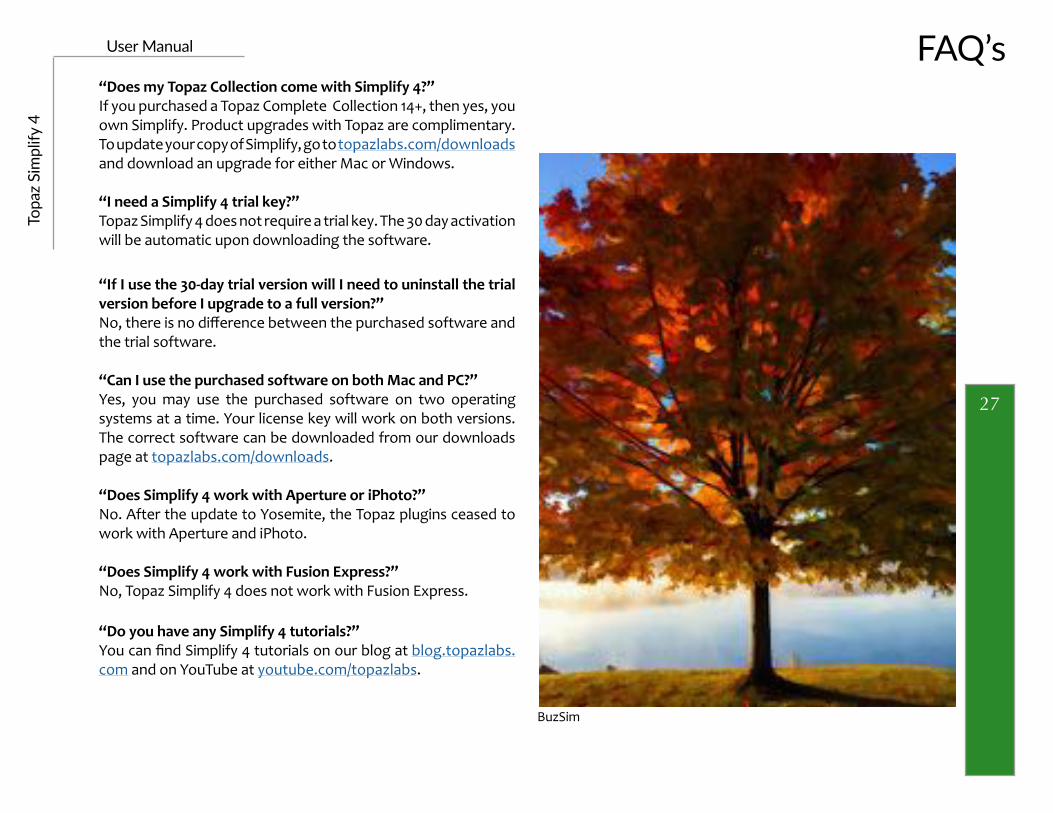
BuzSim
28
User ManualTo
paz
Sim
plify
4
“I can’t find Simplify 4 in the Photoshop Filter menu”To access Simplify 4 in the Filter menu, you will first need to run Simplify 4 as a standalone editor (Mac only). After that, restart Photoshop and Simplify 4 should appear in your Filter menu. Should that fail to work, please do the following to resolve the issue:
Method 1:
Automatic Run installer and restart Photoshop.
Method 2:
PS Utility download from PSCC , Photoshop, or PSE setup page.
Method 3:
Manual Setup
Mac:
1. Go to Applications folder and right click on the Simplify 4 icon.2. Click on ‘Show Package Contents’-> Contents-> Resources3. Copy the Topaz_Simplify 4 plugin to your PSCC 2017, Photoshop, or PSE plugins folder.4. Restart PSCC 2017, Photoshop, or PSE and Simplify 4 should show up in the Filter menu.
Windows:
1. Go to C:\Program Files\Topaz Labs\Topaz Simplify 4\PS_Plugins_x64.2. Copy the tladjustps_x64.8bf file and paste it to the PS Plugins folder.
“I have a question not listed here.”
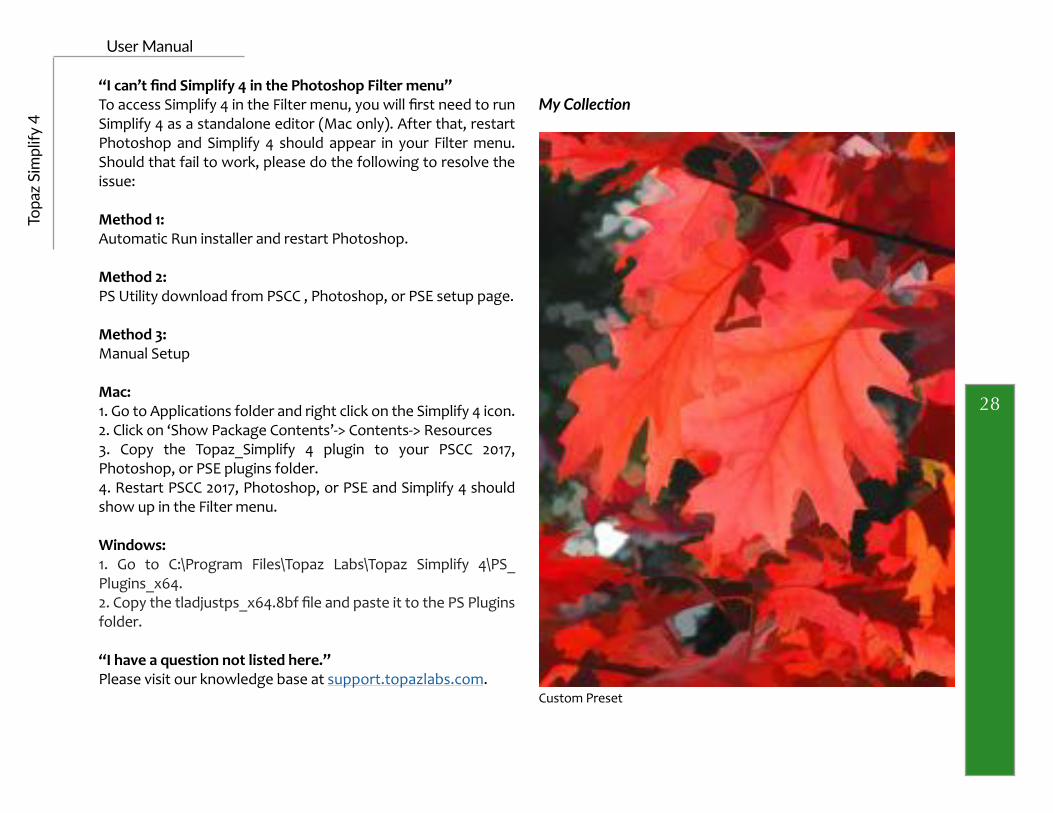
Please visit our knowledge base at support.topazlabs.com. Custom Preset
My Collection

29
User ManualTo
paz
Sim
plify
4Connect
ConnectFollow us on Twitter for notifications of recent news and easily get in touch with us whenever you feel like it!
Find us on our Facebook Page and network with other Topaz users!
Participate in the user based Discussion Forum. Get help and feedback from other users and join in the discussions, share images, and participate in contests!
Subscribe to our YouTube Channel to keep up with any newly released product video tutorials!
Check out our Blog for tutorials, tips, and updates from Topaz Labs!
And don’t forget to check out our other social media outlets including: InstagramPinterest LinkedInGoogle+

30
User ManualTo
paz
Sim
plify
4
Topaz Labs LLC, a privately owned company headquartered in Dallas, Texas, focuses on developing advanced image enhancement technology. With today’s widespread use of digital still cameras, the need for high-quality digital images has greatly increased. Topaz Labs’ mission is to bring practical state-of-the-art image enhancement technology to both professionals and consumers.
Contact Information Topaz Labs, LLC 14285 Midway RoadSuite 125Addison, TX 75001
Technical SupportVisit: topazlabs.com/supportEmail: [email protected]
Copyright © 2016 Topaz Labs, LLC. All rights reserved. www.topazlabs.com

31
User ManualTo
paz
Sim
plify
4
Be sure to check out the complete line-up of Topaz products. Photo Enhancement Plug-ins
Go to topazlabs.com/downloads to get your 30-day free trial!
Ultimate control over image exposure, detail, and color gives you the power to make your photos pop.
Develop unique and compelling pho-tography with the most technologically advanced software available.
Create powerful photos & flawless image definition. Intelligently and dynamically enhance image contrast.
Specializes in creating crisp and stylized images. Also features extensive smoothing capabilities.
Advanced JPEG artifact reduction filters eliminate JPEG compression artifacts while preserving im-age detail like never before.
Advanced high-ISO noise reduction tech-nology that eliminates noise while effort-lessly maximizing and retaining image detail.
Output & creative sharpening with three levels of intricate and specific detail enhancement.
The superior capture-sharpening solution that actually recovers lost detail and refines with micro-contrast detail enhancement.
Your virtual camera bag of effects simu-lated from real lenses and filters. Effects in-clude creamy bokeh, old school filters and more!
Remove unwanted backgrounds from your digital images quickly and easily with ReMask.
Expand your creativity alter your image’s look by applying one of over a thousand color filters.
Transform your regular photo into a beautiful work of art, such as an oil painting, watercolor, line & ink drawing and more!
Create beautifully rendered and natural lighting effects in seconds!
Our standalone editor that is a one stop workshop for access-ing all of your Topaz plugins. Can also work as an external editor (replacing Fusion).
Illuminate yourphotos withelectrifying light.
From high-impact grunge and contrast to soft and subtle lighting e ects, inspira-tion is only a click away.