Embed Size (px)
Citation preview
TOPAZ DETAIL V2QUICK START GUIDE
Detail 2
For more Detail 2 tutorials and resources please visit: http://www.topazlabs.com/tutorials/detail
Introduction
Topaz Detail brings out the best in images by enhancing the natural elements in the image without over sharpening or creating halos. The three-level detail control gives you precision and advanced control over your detail enhancements for optimal image quality every time.
If you are new to the Topaz Detail program you will notice that it is a great micro-detail enhancement tool with the ability to sharpen, convert images to black and white and give your image that perfect final touch.
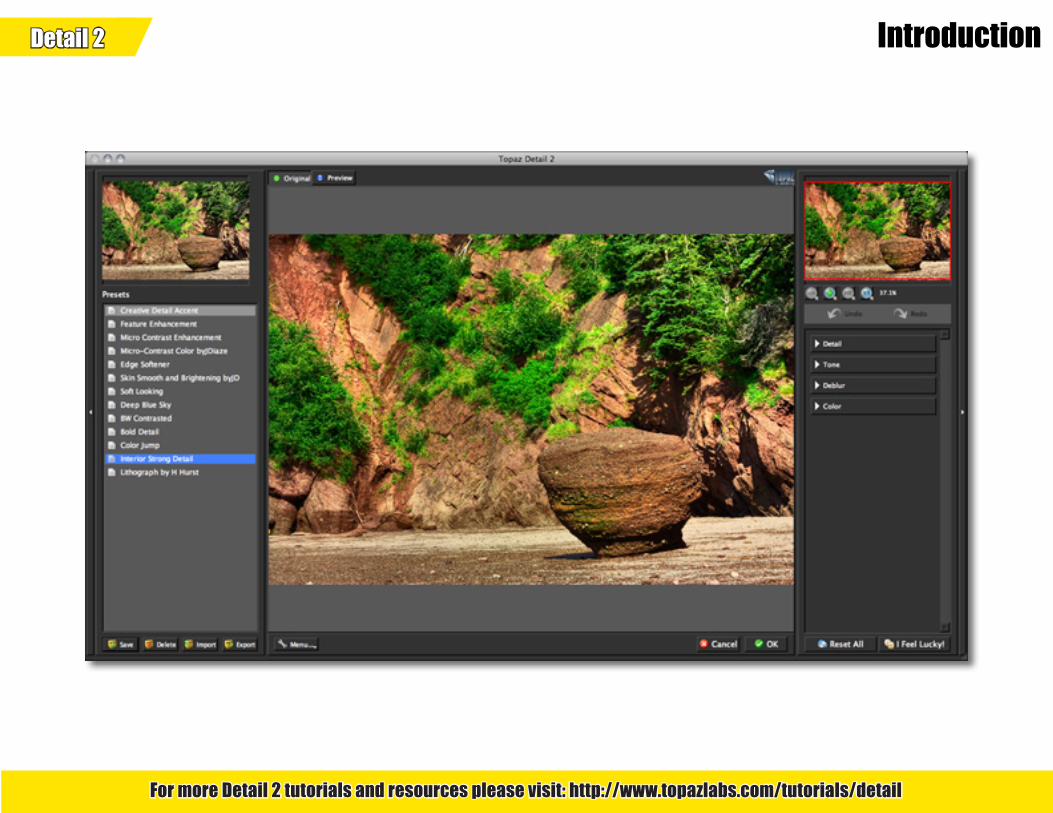
Topaz Detail 2 features the same advanced detail enhancement technology from version 1, but the user interface and workflow have been completely revamped. Topaz Detail 2 features a new user interface, a new presets layout, Undo / Redo controls and faster processing speeds.
Here are some other fun and very useful features introduced in Detail V2:
1. An adjustable user interface. Expand and collapse the preset panel and the tool panel for an adjustable workspace.
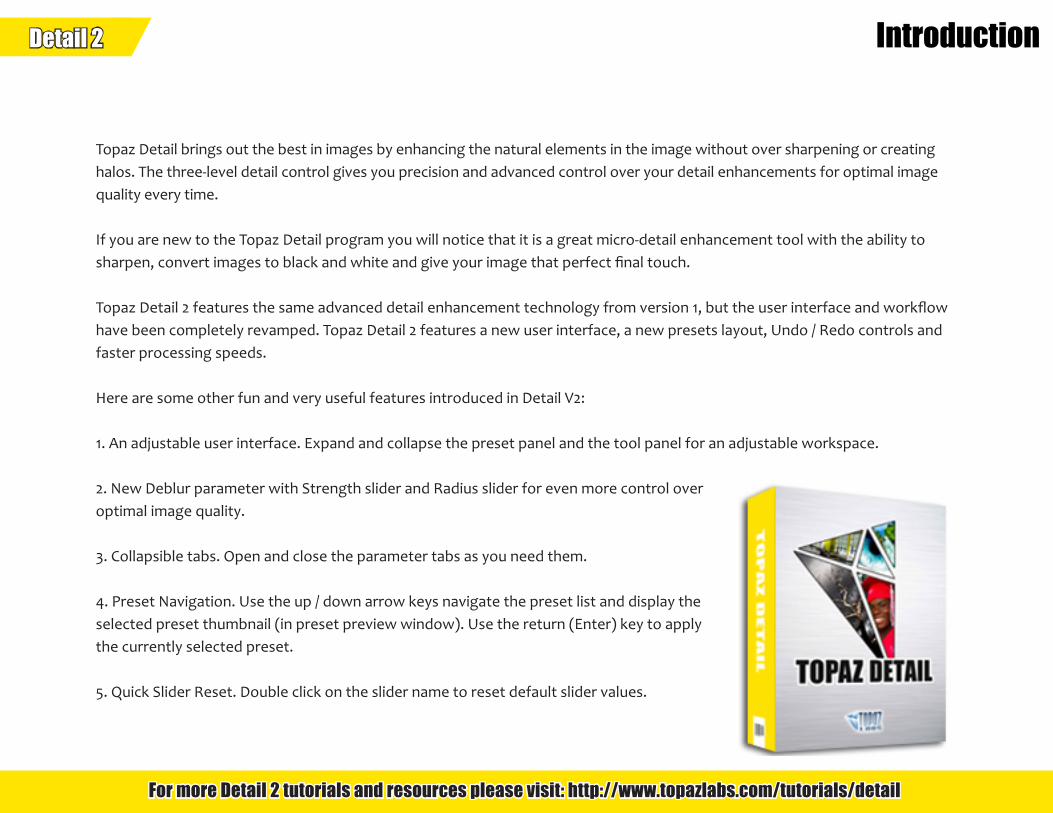
2. New Deblur parameter with Strength slider and Radius slider for even more control over optimal image quality.
3. Collapsible tabs. Open and close the parameter tabs as you need them.
4. Preset Navigation. Use the up / down arrow keys navigate the preset list and display the selected preset thumbnail (in preset preview window). Use the return (Enter) key to apply the currently selected preset.
5. Quick Slider Reset. Double click on the slider name to reset default slider values.
Detail 2
For more Detail 2 tutorials and resources please visit: http://www.topazlabs.com/tutorials/detail
Introduction
Detail 2
For more Detail 2 tutorials and resources please visit: http://www.topazlabs.com/tutorials/detail
Tools
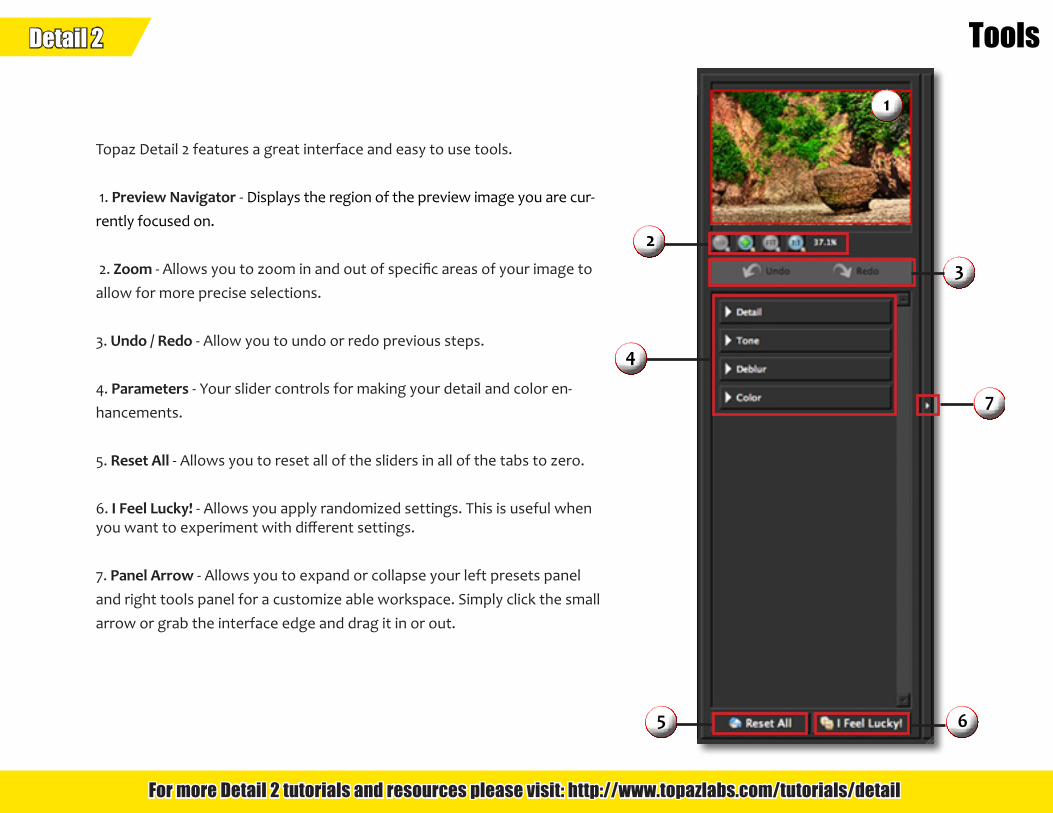
Topaz Detail 2 features a great interface and easy to use tools.
1. Preview Navigator - Displays the region of the preview image you are cur-rently focused on.
2. Zoom - Allows you to zoom in and out of specific areas of your image to allow for more precise selections.
3. Undo / Redo - Allow you to undo or redo previous steps.
4. Parameters - Your slider controls for making your detail and color en-hancements.
5. Reset All - Allows you to reset all of the sliders in all of the tabs to zero.
6. I Feel Lucky! - Allows you apply randomized settings. This is useful when you want to experiment with different settings.
7. Panel Arrow - Allows you to expand or collapse your left presets panel and right tools panel for a customize able workspace. Simply click the small arrow or grab the interface edge and drag it in or out.
3
1
2
5 6
7
4
Detail 2
For more Detail 2 tutorials and resources please visit: http://www.topazlabs.com/tutorials/detail
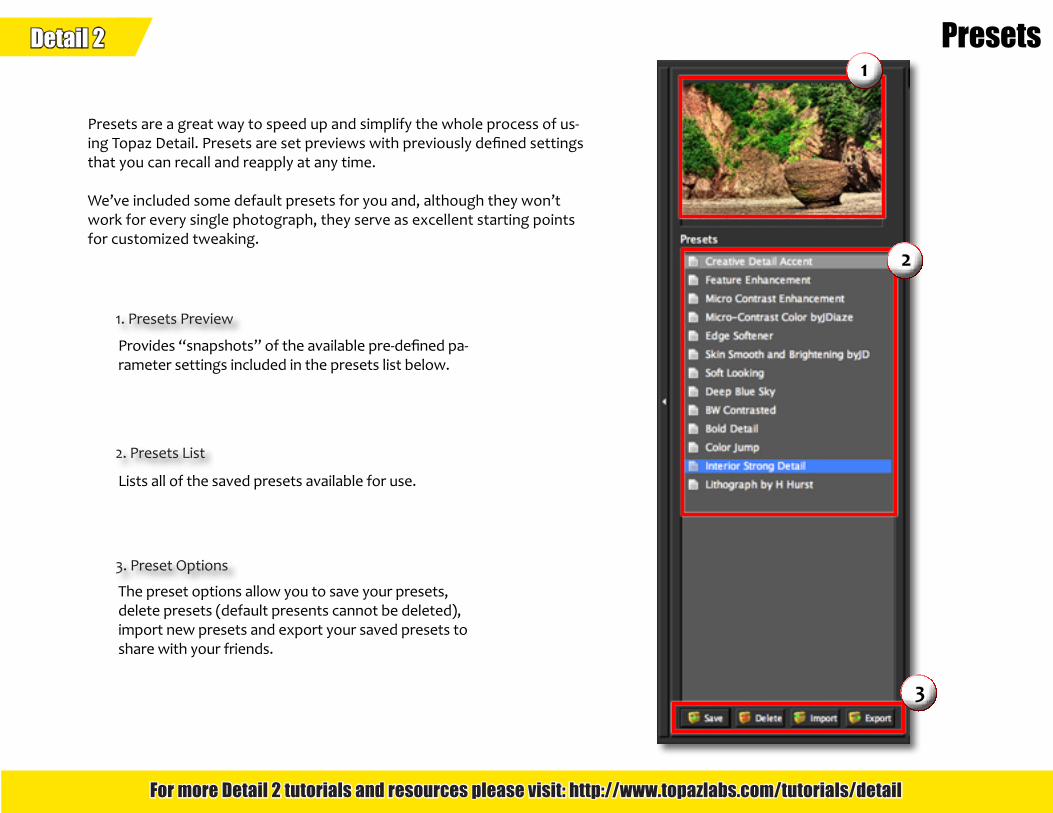
Presets
1. Presets Preview
Provides “snapshots” of the available pre-defined pa-rameter settings included in the presets list below.
2
2. Presets List
Lists all of the saved presets available for use.
1
3. Preset Options
The preset options allow you to save your presets, delete presets (default presents cannot be deleted), import new presets and export your saved presets to share with your friends.
3
Presets are a great way to speed up and simplify the whole process of us-ing Topaz Detail. Presets are set previews with previously defined settings that you can recall and reapply at any time.
We’ve included some default presets for you and, although they won’t work for every single photograph, they serve as excellent starting points for customized tweaking.
Detail 2
For more Detail 2 tutorials and resources please visit: http://www.topazlabs.com/tutorials/detail
Workflow
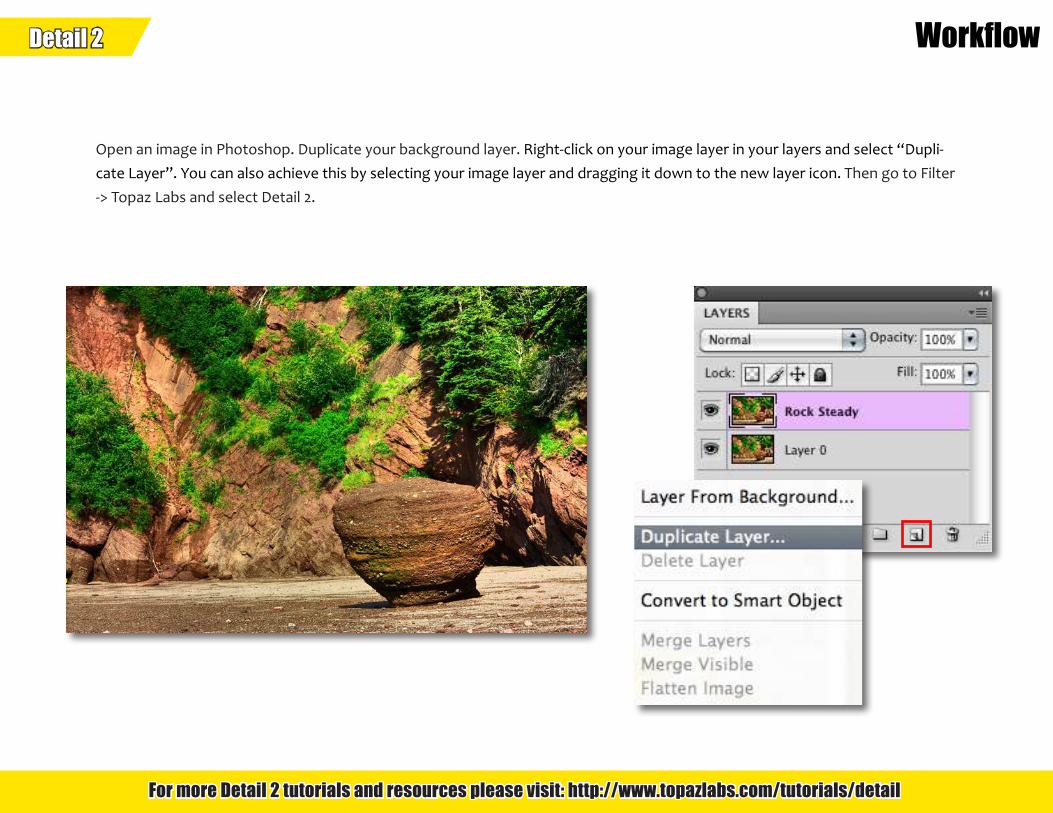
Open an image in Photoshop. Duplicate your background layer. Right-click on your image layer in your layers and select “Dupli-cate Layer”. You can also achieve this by selecting your image layer and dragging it down to the new layer icon. Then go to Filter -> Topaz Labs and select Detail 2.
Detail 2
For more Detail 2 tutorials and resources please visit: http://www.topazlabs.com/tutorials/detail
Workflow
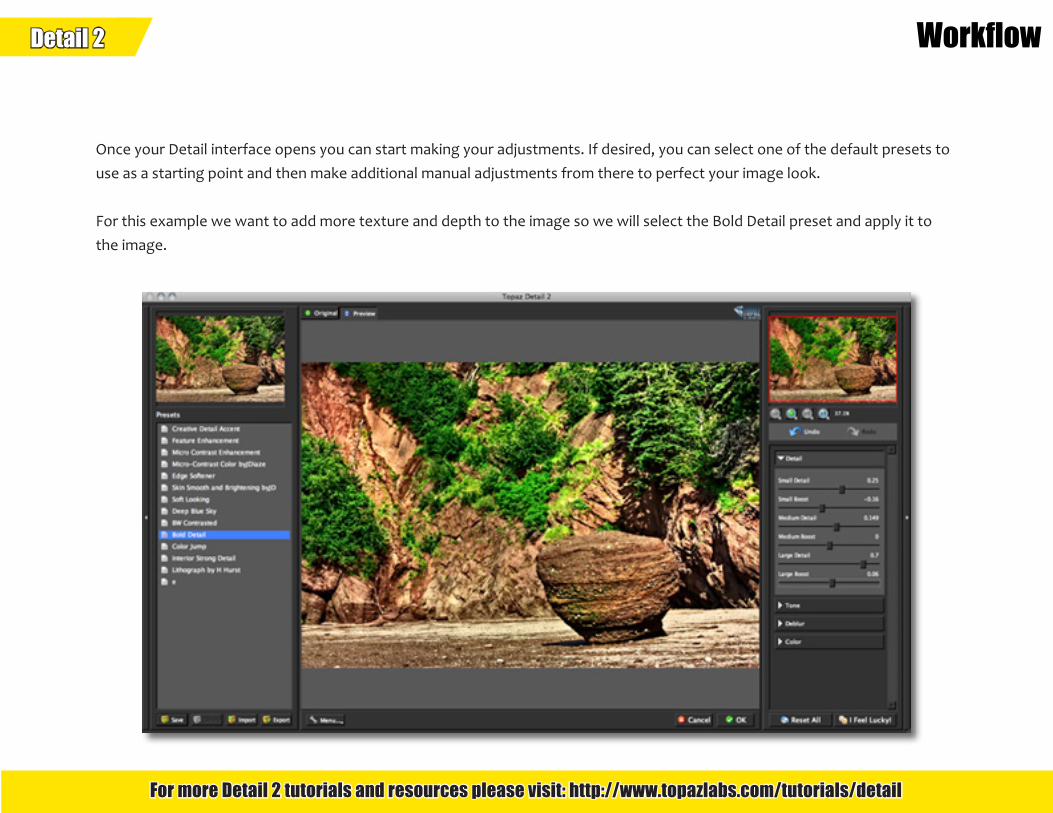
Once your Detail interface opens you can start making your adjustments. If desired, you can select one of the default presets to use as a starting point and then make additional manual adjustments from there to perfect your image look.
For this example we want to add more texture and depth to the image so we will select the Bold Detail preset and apply it to the image.
Detail 2
For more Detail 2 tutorials and resources please visit: http://www.topazlabs.com/tutorials/detail
Workflow
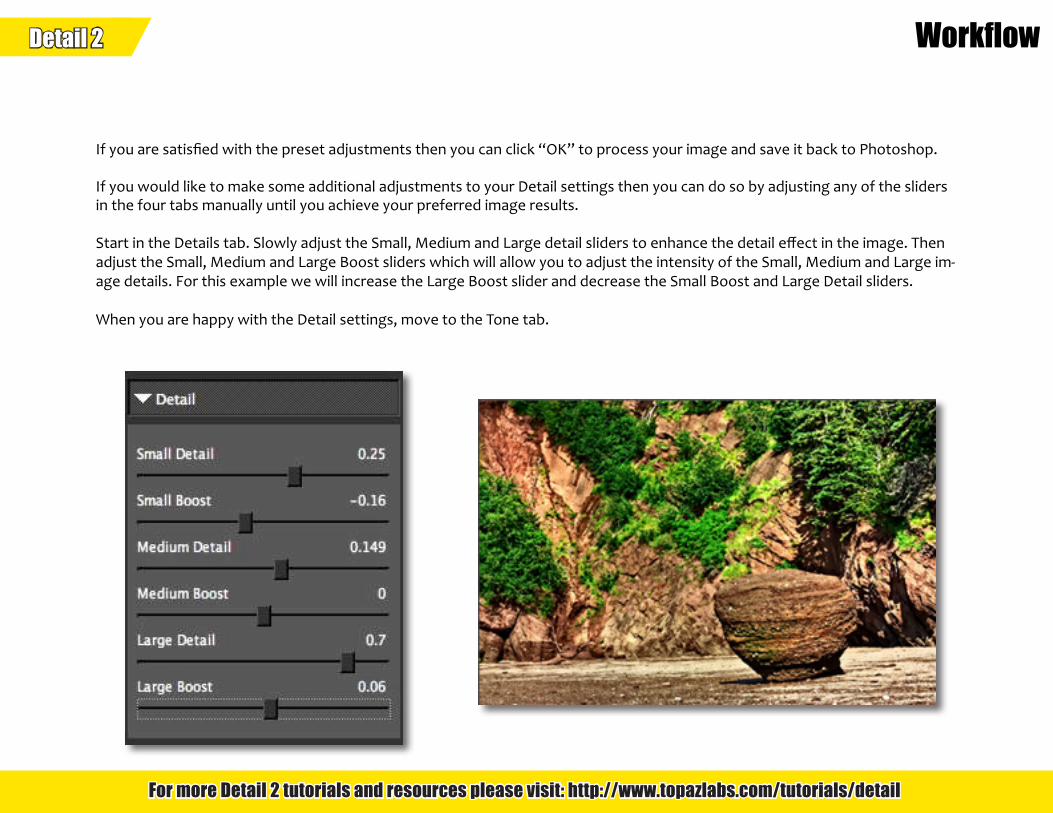
If you are satisfied with the preset adjustments then you can click “OK” to process your image and save it back to Photoshop.
If you would like to make some additional adjustments to your Detail settings then you can do so by adjusting any of the sliders in the four tabs manually until you achieve your preferred image results.
Start in the Details tab. Slowly adjust the Small, Medium and Large detail sliders to enhance the detail effect in the image. Then adjust the Small, Medium and Large Boost sliders which will allow you to adjust the intensity of the Small, Medium and Large im-age details. For this example we will increase the Large Boost slider and decrease the Small Boost and Large Detail sliders.
When you are happy with the Detail settings, move to the Tone tab.
Detail 2
For more Detail 2 tutorials and resources please visit: http://www.topazlabs.com/tutorials/detail
Workflow
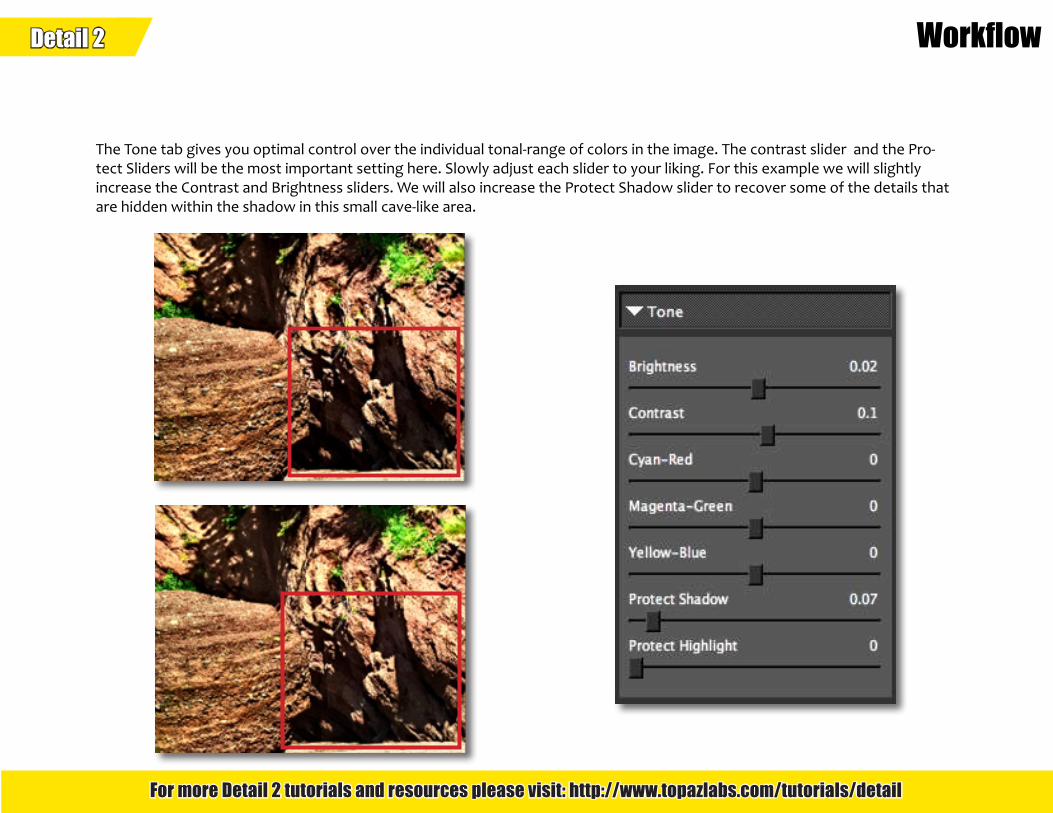
The Tone tab gives you optimal control over the individual tonal-range of colors in the image. The contrast slider and the Pro-tect Sliders will be the most important setting here. Slowly adjust each slider to your liking. For this example we will slightly increase the Contrast and Brightness sliders. We will also increase the Protect Shadow slider to recover some of the details that are hidden within the shadow in this small cave-like area.
Detail 2
For more Detail 2 tutorials and resources please visit: http://www.topazlabs.com/tutorials/detail
Workflow
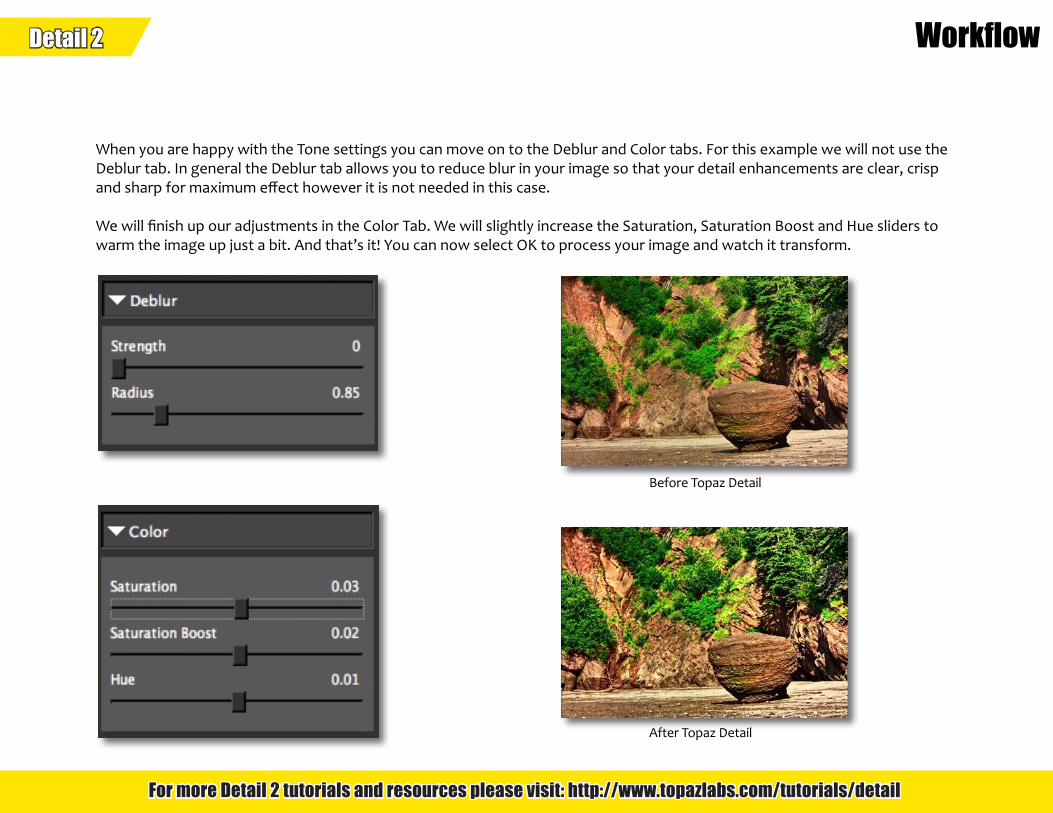
When you are happy with the Tone settings you can move on to the Deblur and Color tabs. For this example we will not use the Deblur tab. In general the Deblur tab allows you to reduce blur in your image so that your detail enhancements are clear, crisp and sharp for maximum effect however it is not needed in this case.
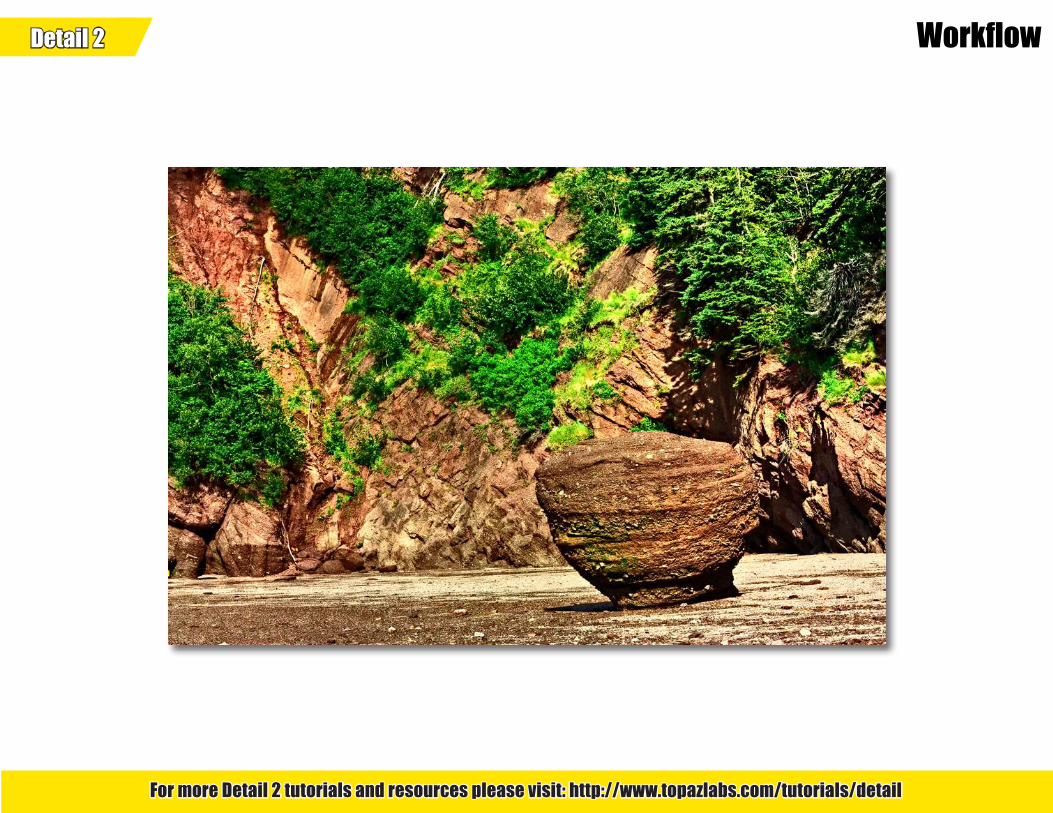
We will finish up our adjustments in the Color Tab. We will slightly increase the Saturation, Saturation Boost and Hue sliders to warm the image up just a bit. And that’s it! You can now select OK to process your image and watch it transform.
Before Topaz Detail
After Topaz Detail
Detail 2
For more Detail 2 tutorials and resources please visit: http://www.topazlabs.com/tutorials/detail
Workflow
Detail 2
For more Detail 2 tutorials and resources please visit: http://www.topazlabs.com/tutorials/detail
Quick Start Use
This Topaz Detail 2 Quick Start Guide is for users who are familiar with the detail enhancement process and who
want to jump straight into using Topaz Detail 2.
For a more in-depth and comprehensive break down of using Topaz Detail 2 please view the Topaz Detail User
Guide.
The User Guide was automatically installed on your computer when you installed Topaz Detail 2.
Here is how to access it:
MAC: HD -> Library -> Application Support -> Topaz Labs -> Detail 2 -> Docs
WINDOWS: Computer -> C:/ -> Program Files -> Topaz Labs -> Topaz Detail 2 -> Docs
You can also download it or watch video tutorials online at: http://www.topazlabs.com/tutorials/detail

Detail 2
For more Detail 2 tutorials and resources please visit: http://www.topazlabs.com/tutorials/detail
Shortcut Keys
Topaz Detail uses some shortcut keys to speed up your workflow. Many of these keys are similar to those in Photoshop. The following keys work at all times.
ADDITIONAL SHORTCUTS
View Original Image Spacebar Spacebar Reset All CMD-ALT-R CTRL-ALT-RZoom to Fit CMD-0 CTRL-0Zoom to 100% CMD-ALT-0 CTRL-ALT-0Zoom In + or CMD - + + or CTRL - +Zoom Out - or CMD - - - or CTRL - -Undo CMD -Z Ctrl - Z Redo CMD - Shift - Z Ctrl - Shift - Z
Action MAC Shortcut PC Shortcut
D Expands / Collapses Detail Tab T Expands / Collapses Tone TabB Expands / Collapses DeBlur TabC Expands / Collapses Color TabLeft or Right Arrow Key Scrolls through presetsReturn (enter) key Applies selected preset[ key Reduces selected slider value by 0.1] key Increases selected slider value by 0.1Home Key Set the slider value to minimumEnd Key Set the slider value to maximumDouble-click slider name Resets the slider value to 0
Action Shortcut
Detail 2
For more Detail 2 tutorials and resources please visit: http://www.topazlabs.com/tutorials/detail
Connect with Topaz
Follow us on Twitter for notifications of recent news and easily get in touch with us
whenever you feel like it!
Find us on our Facebook page and network with other Topaz users!
Participate in the entirely user-led Topaz Flickr group for a helpful and highly active community for Topaz Photoshop plug-ins!
Subscribe to our YouTube channel to keep up with any newly released product video
tutorials!
Check out our new Forum and our blog for tutorials, tips and updates from Topaz Labs!
This document was archived February 2014 forphotomacrography documentation purposes at thehttp://extreme-macro.co.uk extreme macro website.All rights reserved by the document authors.