Embed Size (px)
Citation preview
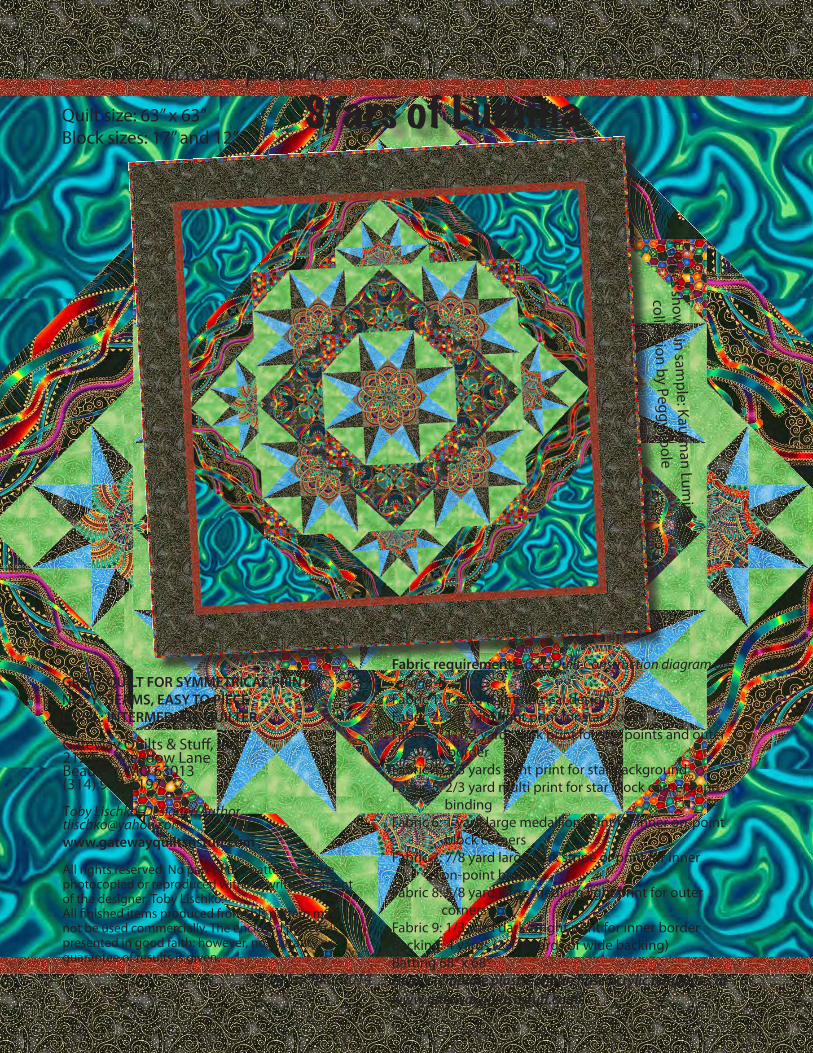
Stars of LuminaQuilt size: 63” x 63”Block sizes: 17” and 12”
Fabric requirements: (See Quilt Construction diagram on page 4)Fabric 1: 1 yard (Symmetrical design)Fabric 2: 3/8 yard light print for star pointsFabric 3: 1-1/2 yards dark print for star points and outer borderFabric 4: 2/3 yards light print for star backgroundFabric 5: 2/3 yard multi print for star block corners and bindingFabric 6: 1 yard large medallion print for inner on-point block cornersFabric 7: 7/8 yard large dark stripe or print for inner on-point borderFabric 8: 5/8 yard large medium light print for outer corners Fabric 9: 1/3 yard dark/bright print for inner borderBacking: 4 yards (2-1/4 yards of wide backing)Batting 68” x 68”Heavy template plastic or purchase acrylic templates at www.gatewayquiltsnstuff.com.
Toby Lischko presents
All rights reserved. No part of this pattern may be photocopied or reproduced without written consent of the designer, Toby Lischko. All finished items produced from this pattern may not be used commercially. The enclosed pattern is presented in good faith: however, no warranty or guarantee of results is given.
Gateway Quilts & Stuff, Inc.212 Fox Meadow LaneBeaufort, MO 63013(314) 913-1197
Toby Lischko, Designer/[email protected]
©Toby Lischko, 2014
TL-27
GREAT QUILT FOR SYMMETRICAL PRINTS!NO “Y” SEAMS, EASY TO PIECELEVEL: INTERMEDIATE QUILTER
Fabrics shown in sam
ple: Kaufman Lum
ina
collection by Peggy Toole

Stars of LuminaDesigned by Toby Lischko
Please read all instructions before beginning
Toby’s Piecing Tips
• Make a test block first to make sure that the pieces fit together and the block fin-ishes at the size required. (Use scraps.)
• Pay attention to pressing directions to make sections fit together better.
• Make templates, tracing all of the lines on the template plastic.
• FUSSY-CUTTING INSTRUCTIONS for the center star (kite). Put pieces of rolled up tape on the back of the template around the edges. Place the template’s center line along the center of one of the fabric de-signs (see illustration). Cut out around the template with a small rotary cutter. Leave the original fabric patch attached to the back of the template. Move the template with the patch to the center of the next similar design across the width of the fab-ric (selvage to selvage). Place the template on the fabric until it disappears in the de-sign (all of the edges of the original patch will match the fabric underneath). Cut out next patch. Continue in this manner until all repeats are cut out. Repeat this process with another area of the fabric design.
CUTTING INSTRUCTIONS (Based on 42” WOF-Width of Fabric) Arrows on templates indi-cate straight-of-grain.
From Fabric 1: *Using the 17” A template (kite), cut out one set of eight repeats and four sets of five repeats. See instructions above for fussy-cutting. (Don’t worry about straight-of-grain on the kite templates.)
Cut repeats going across width first, then move to next repeat going up the length of the fabric.
*With the 12” A template, cut out four sets of five repeats each.
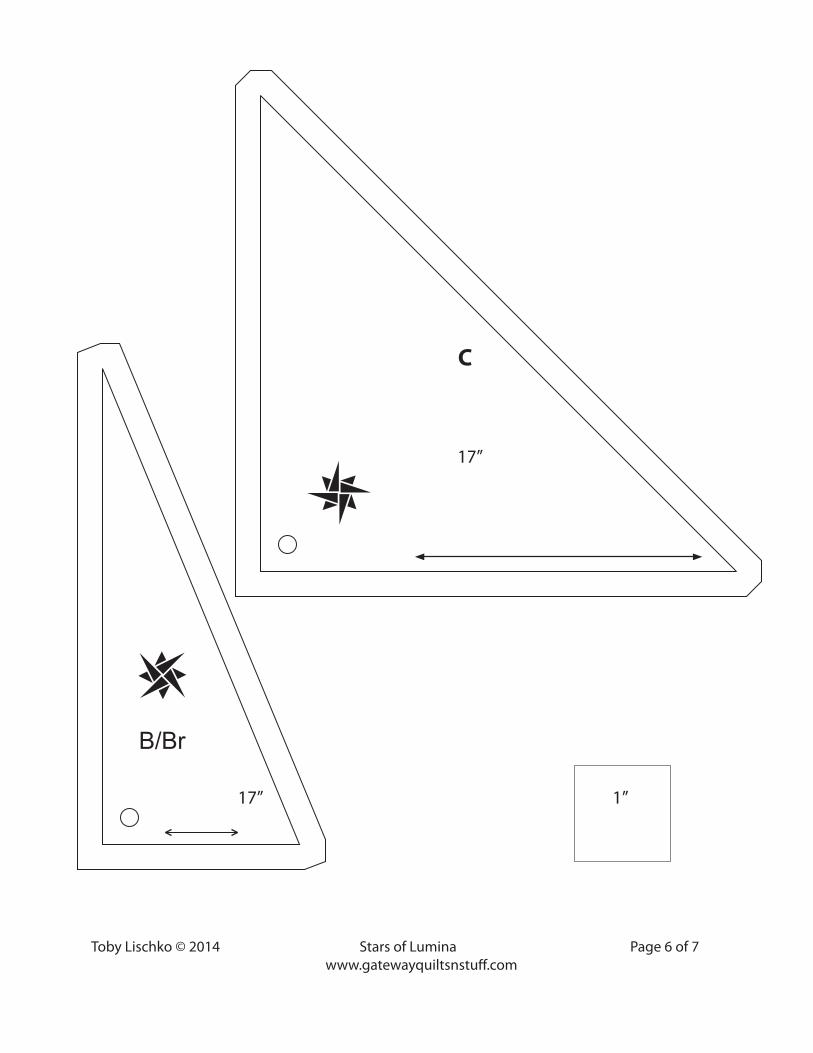
From Fabrics 2 and 3: (Strips are purposely cut slightly wider.)*Cut one 5-1/2” x 42” WOF strip from each. Fold one Fabric 2 strip wrong sides together, selvage to selvage. Line up the bot-tom of the 17” B/Br template along the trimmed edge and cut twenty-four across the strip, rotat-ing template for the most patches per strip set. This creates left and right sections. Repeat with the one Fabric 3 strip.*Cut one 4-1/8” x 42” WOF strip from each. Fold the Fabric 2 strip (selvage to selvage) wrong sides together. Line up the bottom of the 12” B/Br template along the trimmed edge and cut sixteen, rotating template for the most patches per strip. Repeat with the Fabric 3 strips.*Cut seven Fabric 3 5-1/2” x 42” WOF strips for Border 2.
From Fabric 4:*Cut two 5-1/2” x 42” WOF strips. Line up the bottom of the 17” C template along the trimmed edge and cut twenty-eight, rotating template for the most patches per strip.
Toby Lischko © 2014 Stars of Lumina Page 1 of 7 www.gatewayquiltsnstuff.com
Quilt size: Approx. 63” x 63” Block sizes: 17” x 17” and 12” x 12”
From Fabric 4 cont’:
* Cut two 4-1/8” x 42” WOF strips. Line up the bottom of the 12” C template along the trimmed edge and cut sixteen, rotating tem-plate for the most patches per strip. Line up the edge of the 12” D template along the fabric trimmed edge and cut four.
From Fabric 5:*Cut one 5-1/2” x 42” WOF strips. Line up the bottom of the 17” C template along the trimmed edge and cut eight, rotating tem-plate for the most patches per strip.*Cut seven 2-1/4” x 42” WOF strips for binding.
From Fabric 6: (if using large medallion)*Align the intersection of the 6-1/2” mark on a square ruler to the center of the medallion and cut a 13” square. Repeat with another alike medallion. Cut the squares in half diagonally once to create four Half-square triangles (HST).* If using a plain fabric, cut two 13” squares and sub-cut each in half diagonally into four HST.
From Fabric 7: *Cut four 6-1/2” x 42” WOF strips. Cut into eight 19-1/4” rectangles. Place two rectangles wrong sides together and cut off corners at 45º angles as illustrated. There will be a rightand left section.
From Fabric 8: * Cut two 18” x 18” squares. Sub-cut each diagonally into four HST.
From Fabric 9: *Cut six 1-1/2” x 42” WOF strips for border 1.
17” BLOCK CONSTRUCTION
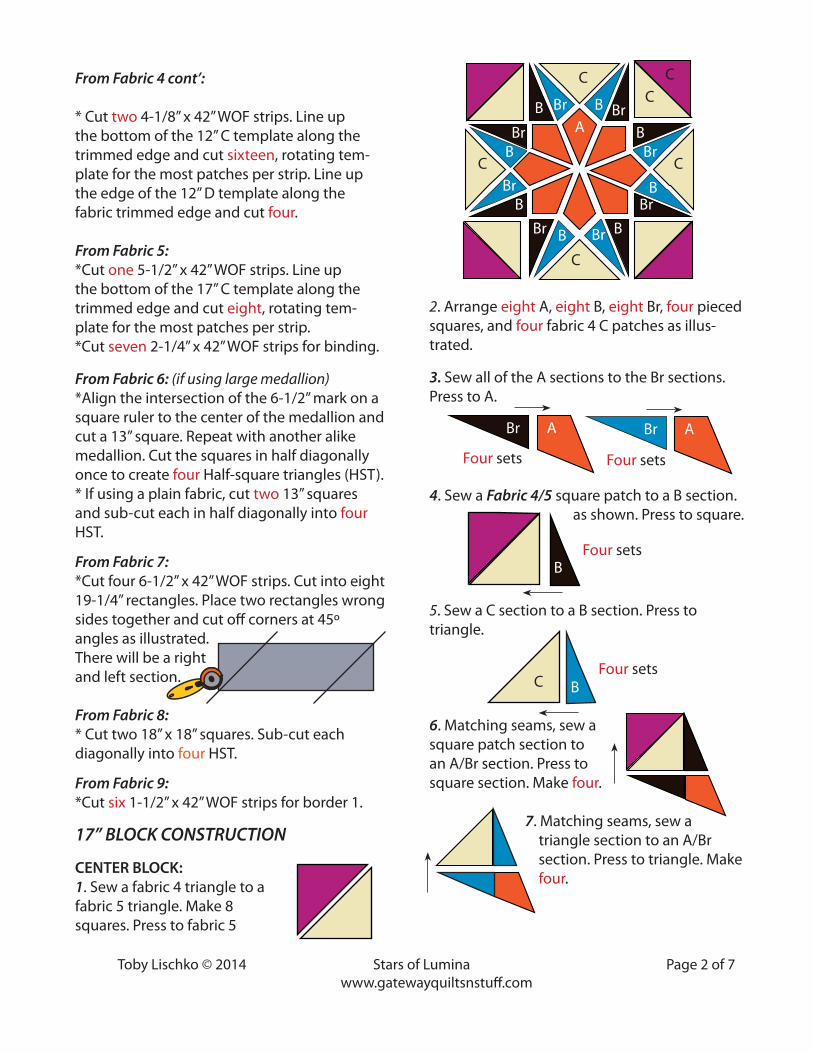
CENTER BLOCK:1. Sew a fabric 4 triangle to a fabric 5 triangle. Make 8 squares. Press to fabric 5
2. Arrange eight A, eight B, eight Br, four pieced squares, and four fabric 4 C patches as illus-trated.
3. Sew all of the A sections to the Br sections. Press to A.
4. Sew a Fabric 4/5 square patch to a B section. as shown. Press to square.
5. Sew a C section to a B section. Press to triangle.
6. Matching seams, sew a square patch section to an A/Br section. Press to square section. Make four.
7. Matching seams, sew a triangle section to an A/Br section. Press to triangle. Make four.
Toby Lischko © 2014 Stars of Lumina Page 2 of 7 www.gatewayquiltsnstuff.com
CC
C
B
B
BB
B
B Br
Br
BrBr
Br
Br
Br A Br A
Four sets Four sets
Four setsBC
BFour sets
A
C
C
C
BB Br Br
Toby Lischko © 2014 Stars of Lumina Page 3 of 7 www.gatewayquiltsnstuff.com
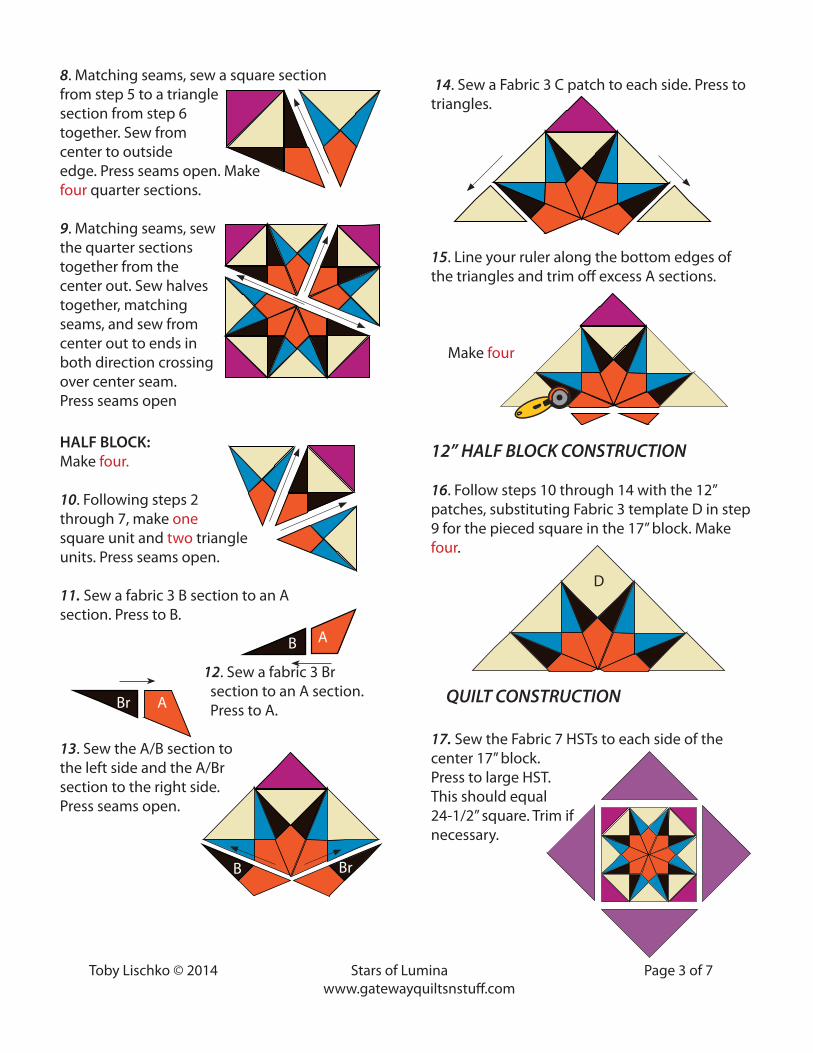
8. Matching seams, sew a square section from step 5 to a triangle section from step 6 together. Sew fromcenter to outside edge. Press seams open. Make four quarter sections.
9. Matching seams, sew the quarter sections together from the center out. Sew halves together, matchingseams, and sew from center out to ends in both direction crossing over center seam. Press seams open
HALF BLOCK: Make four.
10. Following steps 2 through 7, make one square unit and two triangle units. Press seams open.
11. Sew a fabric 3 B section to an A section. Press to B.
12. Sew a fabric 3 Br section to an A section. Press to A.
13. Sew the A/B section to the left side and the A/Brsection to the right side.Press seams open.
Br A
AB
14. Sew a Fabric 3 C patch to each side. Press to triangles.
15. Line your ruler along the bottom edges of the triangles and trim off excess A sections.
Make four
12” HALF BLOCK CONSTRUCTION
16. Follow steps 10 through 14 with the 12” patches, substituting Fabric 3 template D in step 9 for the pieced square in the 17” block. Make four.
17. Sew the Fabric 7 HSTs to each side of the center 17” block.Press to large HST.This should equal24-1/2” square. Trim if necessary.
BrB
QUILT CONSTRUCTION
D
QUILT CONSTRUCTION CONT’
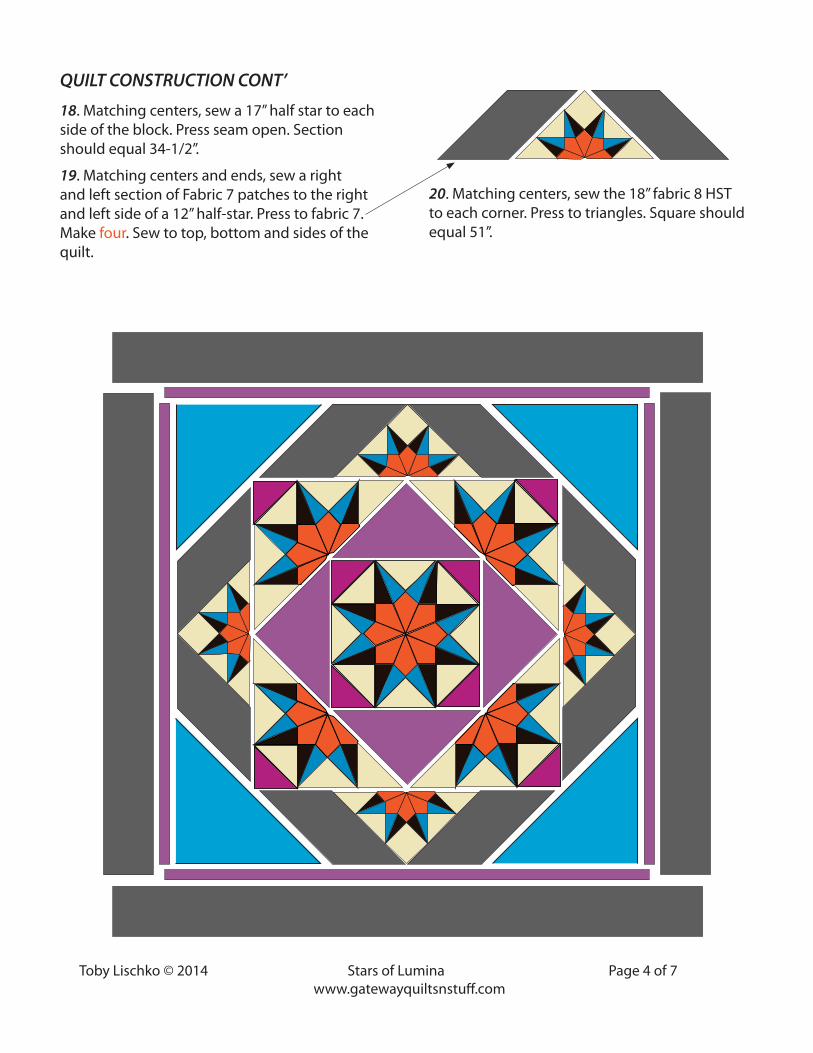
19. Matching centers and ends, sew a right and left section of Fabric 7 patches to the right and left side of a 12” half-star. Press to fabric 7. Make four. Sew to top, bottom and sides of the quilt.
18. Matching centers, sew a 17” half star to each side of the block. Press seam open. Section should equal 34-1/2”.
20. Matching centers, sew the 18” fabric 8 HST to each corner. Press to triangles. Square should equal 51”.
Toby Lischko © 2014 Stars of Lumina Page 4 of 7 www.gatewayquiltsnstuff.com
SOSL2x
SOSL2x
SOSL2x
B/Br
SOSL2x
Toby Lischko © 2014 Stars of Lumina Page 5 of 7 www.gatewayquiltsnstuff.com
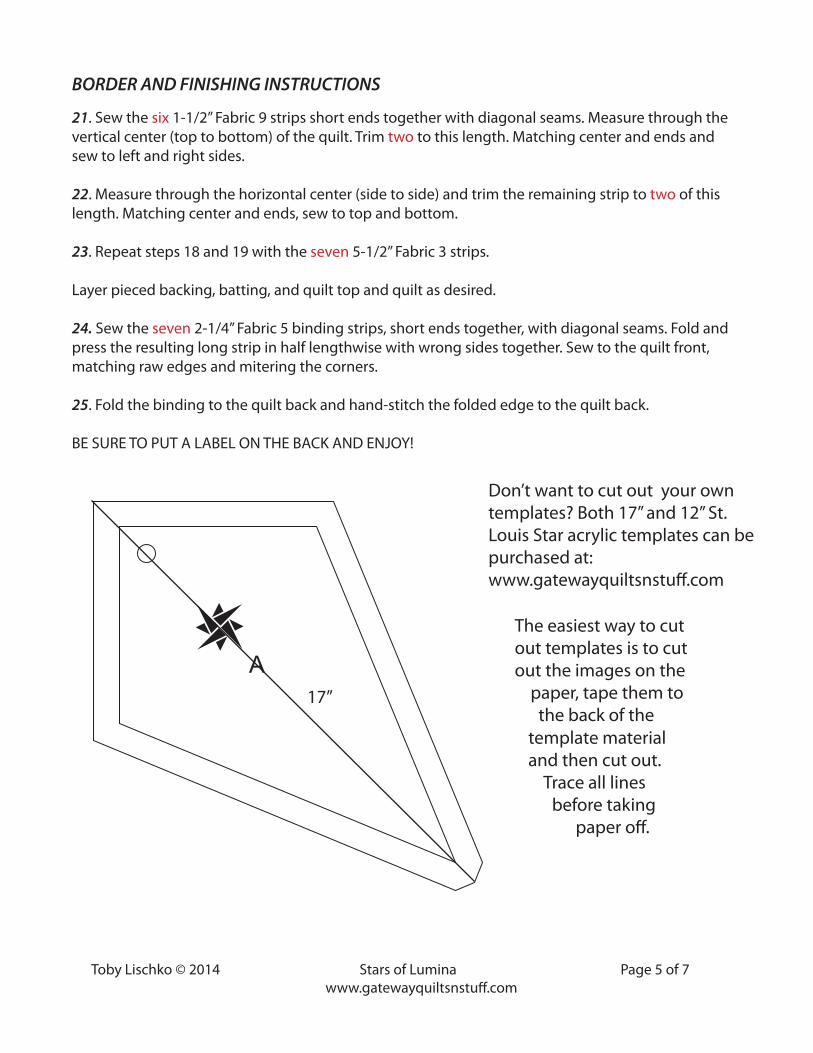
Don’t want to cut out your own templates? Both 17” and 12” St. Louis Star acrylic templates can be purchased at: www.gatewayquiltsnstuff.com
BORDER AND FINISHING INSTRUCTIONS
21. Sew the six 1-1/2” Fabric 9 strips short ends together with diagonal seams. Measure through the vertical center (top to bottom) of the quilt. Trim two to this length. Matching center and ends and sew to left and right sides.
22. Measure through the horizontal center (side to side) and trim the remaining strip to two of this length. Matching center and ends, sew to top and bottom.
23. Repeat steps 18 and 19 with the seven 5-1/2” Fabric 3 strips.
Layer pieced backing, batting, and quilt top and quilt as desired.
24. Sew the seven 2-1/4” Fabric 5 binding strips, short ends together, with diagonal seams. Fold and press the resulting long strip in half lengthwise with wrong sides together. Sew to the quilt front, matching raw edges and mitering the corners.
25. Fold the binding to the quilt back and hand-stitch the folded edge to the quilt back.
BE SURE TO PUT A LABEL ON THE BACK AND ENJOY!
17”
The easiest way to cut out templates is to cut out the images on the paper, tape them to the back of the
template material and then cut out. Trace all lines before taking paper off.
17” 1”
Toby Lischko © 2014 Stars of Lumina Page 6 of 7 www.gatewayquiltsnstuff.com
SOSL2x
SOSL2x
SOSL2x
B/Br
SOSL2x SOSL2x
17”
C
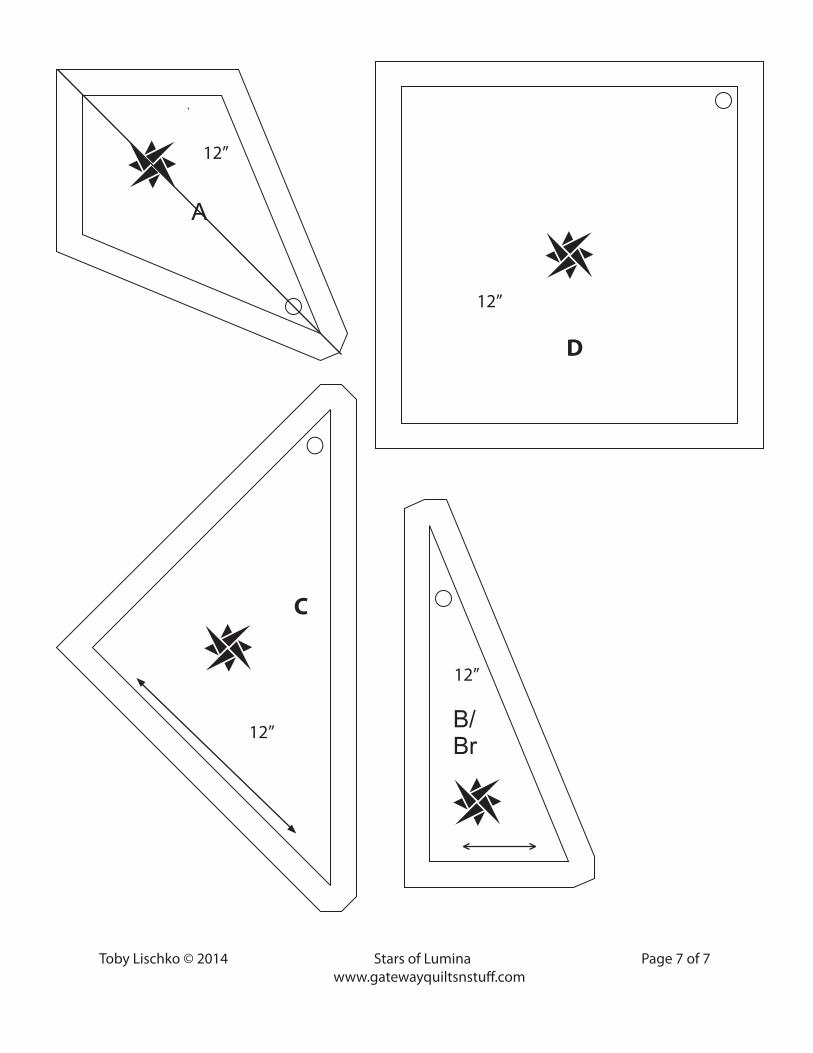
Toby Lischko © 2014 Stars of Lumina Page 7 of 7 www.gatewayquiltsnstuff.com
12”
12”
12”
12”
SLS 12”
SLS 1
2”
C
SLS 12”
D
C