Embed Size (px)
Citation preview
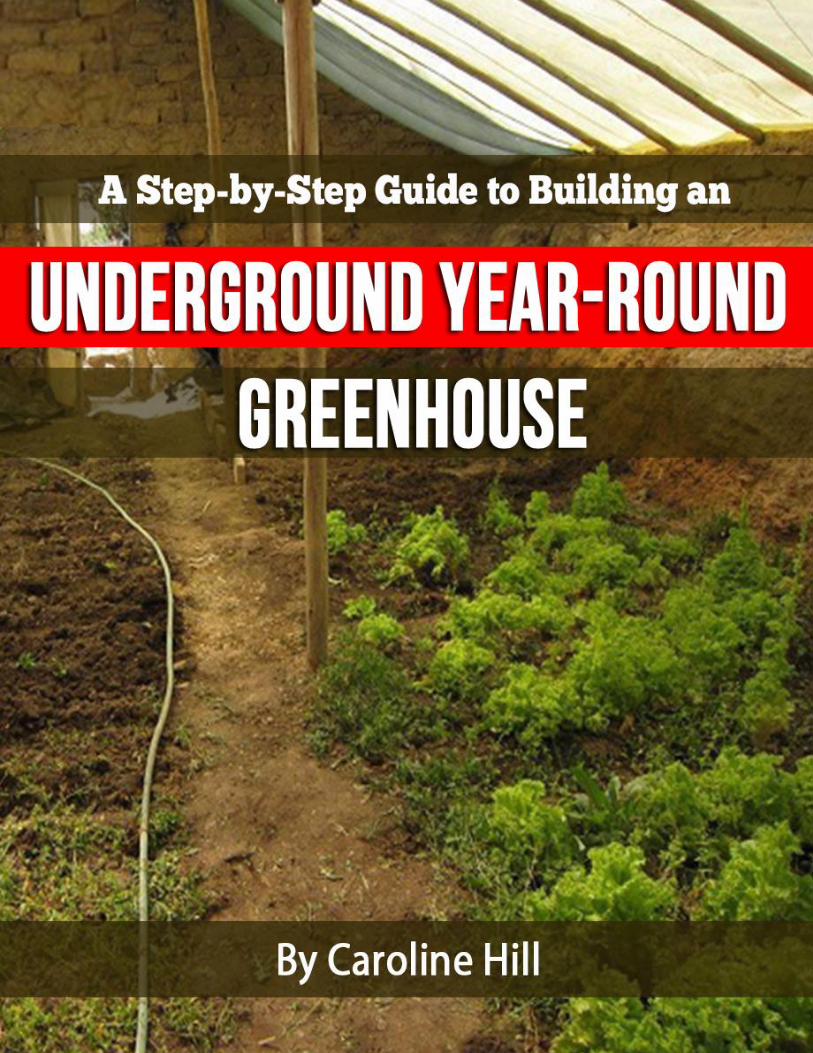
The Underground Year-Round Greenhouse
1
The Underground Year-Round Greenhouse
2
Contents A Step-by-Step Guide to Building an Underground Year-
Round Greenhouse ........................................................... 3
Chapter 1 ....................................................................... 3
Introduction: ................................................................... 3
Chapter 2 ....................................................................... 4
Mechanism of Greenhouse and Underground
Greenhouse ................................................................... 4
Chapter 3 ....................................................................... 9
Site Selection for an Underground Greenhouse ............ 9
Chapter 4 ..................................................................... 24
Walipini Construction ................................................... 24
Chapter 5 ..................................................................... 30
Completion and Use .................................................... 30
The Underground Year-Round Greenhouse
3
A Step-by-Step Guide to Building an
Underground Year-Round
Greenhouse
Chapter 1
Introduction: Nowadays people are becoming interested in growing
their own food to guarantee fresh, safe, and healthy food.
Most people enjoy garden-fresh food, but the problem is
created in areas where winter is too cold so that crops
can’t be grown. But people are not willing to sit down and
suck their thumbs. They are researching, and they have
already created the method to solve the problem. The best
solution to the problem is to use a greenhouse.
A greenhouse is a house that is constructed with glass or
special PVC that is used to grow crops in the winter where
crops can’t be grown in too much cold. At the present
The Underground Year-Round Greenhouse
4
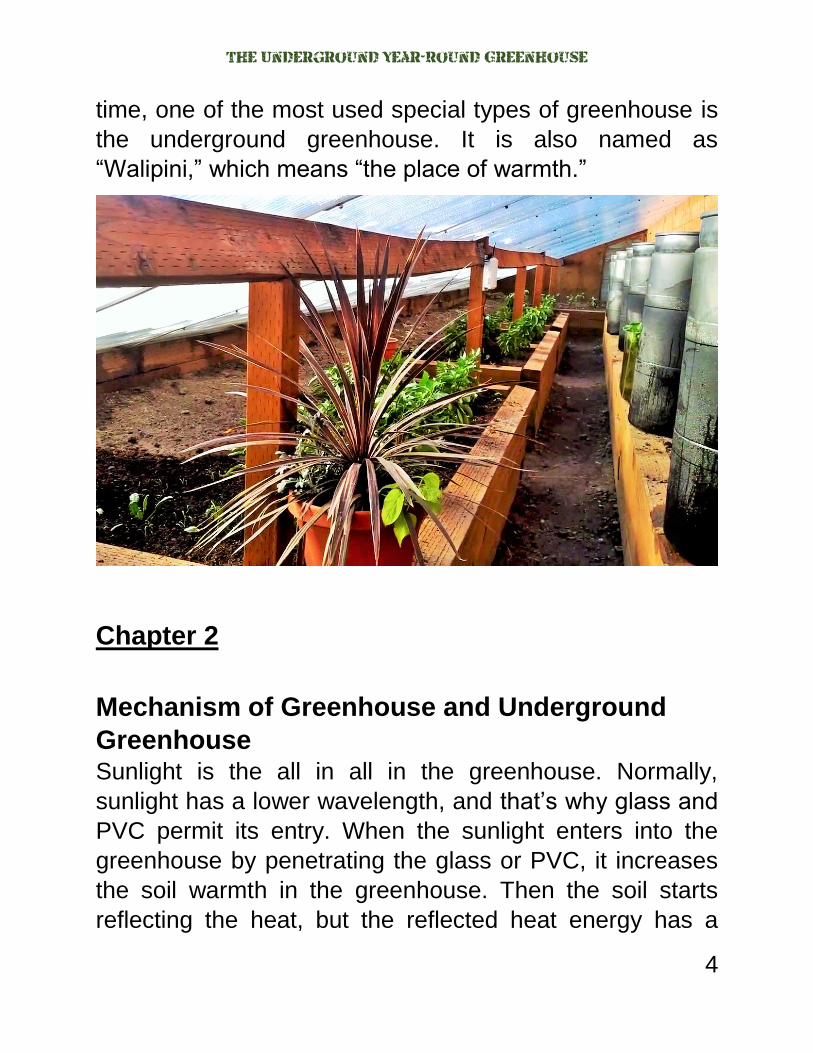
time, one of the most used special types of greenhouse is
the underground greenhouse. It is also named as
“Walipini,” which means “the place of warmth.”
Chapter 2
Mechanism of Greenhouse and Underground
Greenhouse Sunlight is the all in all in the greenhouse. Normally,
sunlight has a lower wavelength, and that’s why glass and
PVC permit its entry. When the sunlight enters into the
greenhouse by penetrating the glass or PVC, it increases
the soil warmth in the greenhouse. Then the soil starts
reflecting the heat, but the reflected heat energy has a
The Underground Year-Round Greenhouse
5
higher wavelength. The glass or PVC doesn’t permit the
higher wavelength to penetrate. So the heat energy can’t
go outside and makes the environment warm in the
greenhouse.
Underground greenhouse:
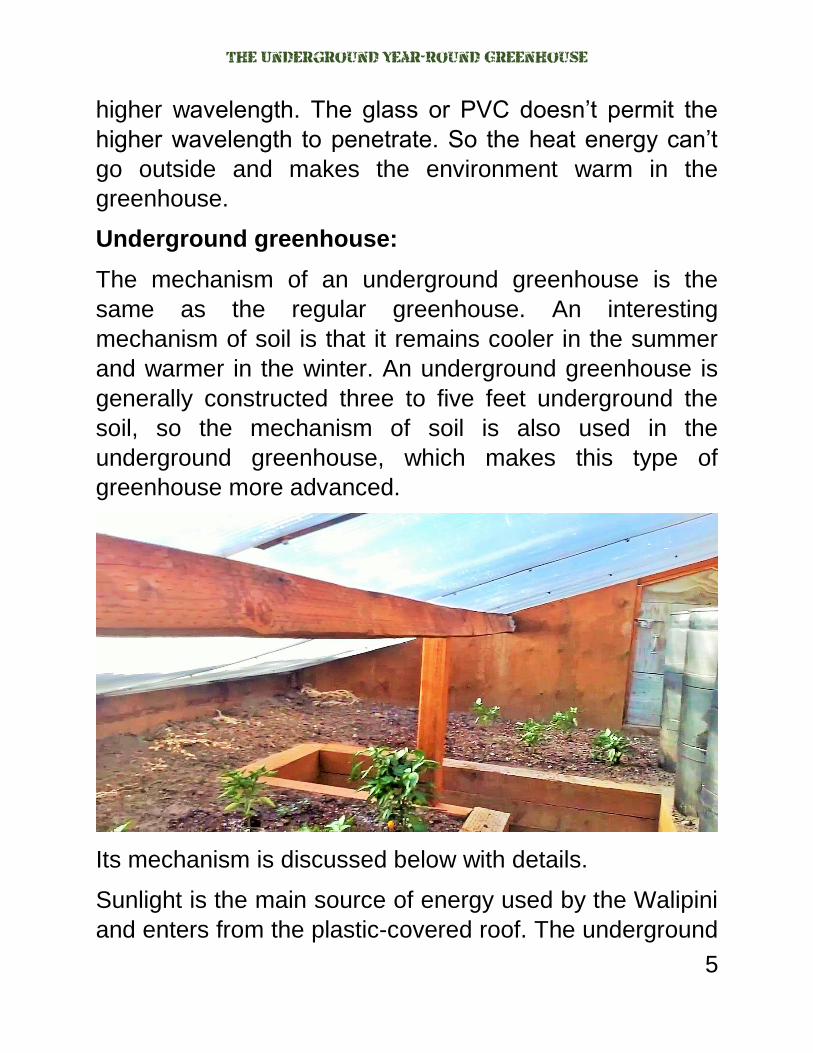
The mechanism of an underground greenhouse is the
same as the regular greenhouse. An interesting
mechanism of soil is that it remains cooler in the summer
and warmer in the winter. An underground greenhouse is
generally constructed three to five feet underground the
soil, so the mechanism of soil is also used in the
underground greenhouse, which makes this type of
greenhouse more advanced.
Its mechanism is discussed below with details.
Sunlight is the main source of energy used by the Walipini
and enters from the plastic-covered roof. The underground
The Underground Year-Round Greenhouse
6
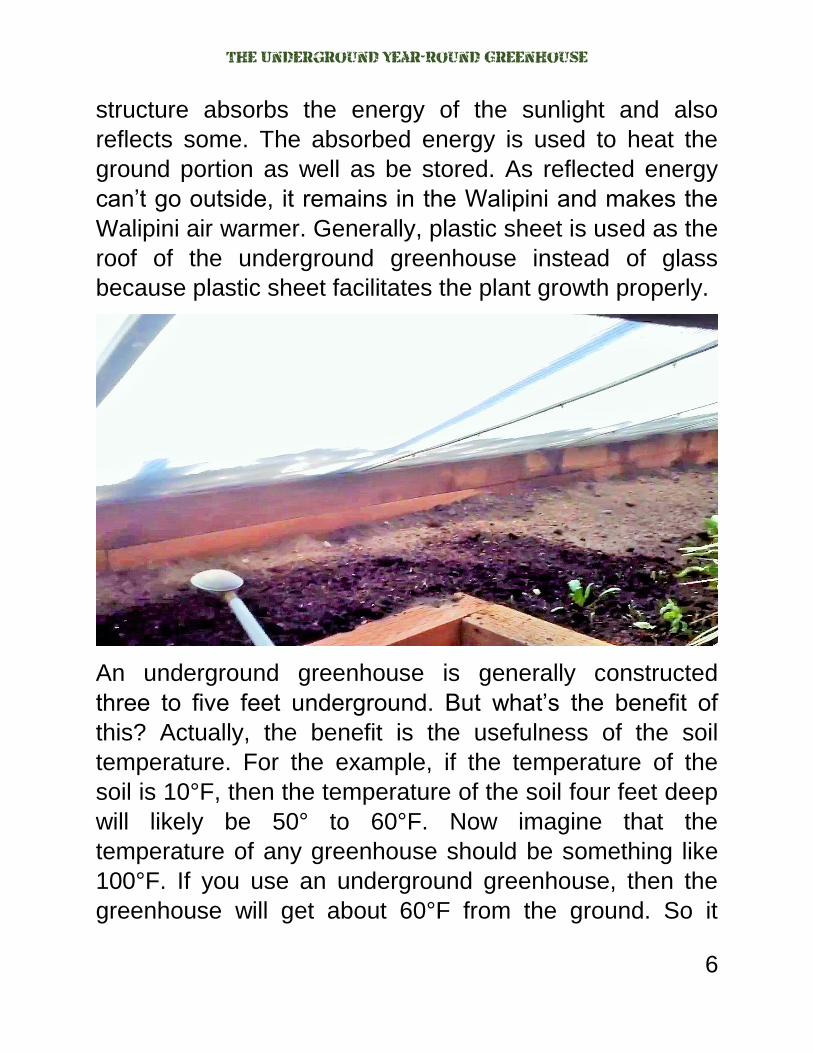
structure absorbs the energy of the sunlight and also
reflects some. The absorbed energy is used to heat the
ground portion as well as be stored. As reflected energy
can’t go outside, it remains in the Walipini and makes the
Walipini air warmer. Generally, plastic sheet is used as the
roof of the underground greenhouse instead of glass
because plastic sheet facilitates the plant growth properly.
An underground greenhouse is generally constructed
three to five feet underground. But what’s the benefit of
this? Actually, the benefit is the usefulness of the soil
temperature. For the example, if the temperature of the
soil is 10°F, then the temperature of the soil four feet deep
will likely be 50° to 60°F. Now imagine that the
temperature of any greenhouse should be something like
100°F. If you use an underground greenhouse, then the
greenhouse will get about 60°F from the ground. So it
The Underground Year-Round Greenhouse
7
needs an outside temperature of only 40°F to provide
100°F of heat that will be produced by sunlight and other
sources, while the normal greenhouse needs to produce
the total 100°F from the sunlight and other small sources.
The roof of the underground greenhouse is made of a
dual-layer sheet. The place between these two sheets is
full of dead air which ensures insulation. This is
approximately 3” to 4” thick to facilitate insulation.
Moreover, the use of soil in constructing the wall of the
underground greenhouse should be increased because
the soil acts as an insulator in this case. It’s normal that
the temperature falls at an alarming rate at night. That’s
why the sheet or glazing should be covered with insulation
board, which is filled with foam, straw, grass, etc. This will
help to insulate it.
You may have heard about the flywheel effect. If you
haven’t, then let me clarify. Earth such as stone, water,
soil, etc., absorbs heat when it comes into contact with
solar energy or sunlight. This is called the flywheel effect.
The greater the mass, the greater the absorbing tendency.
Mass is not the all in all in this effect. The color also plays
an important role while absorbing heat energy. For an
example, a deep color such as gray, ash, or black absorbs
more heat, while a light color such as white or pink
absorbs less heat as they reflect the energy at a higher
rate.
The Underground Year-Round Greenhouse
8
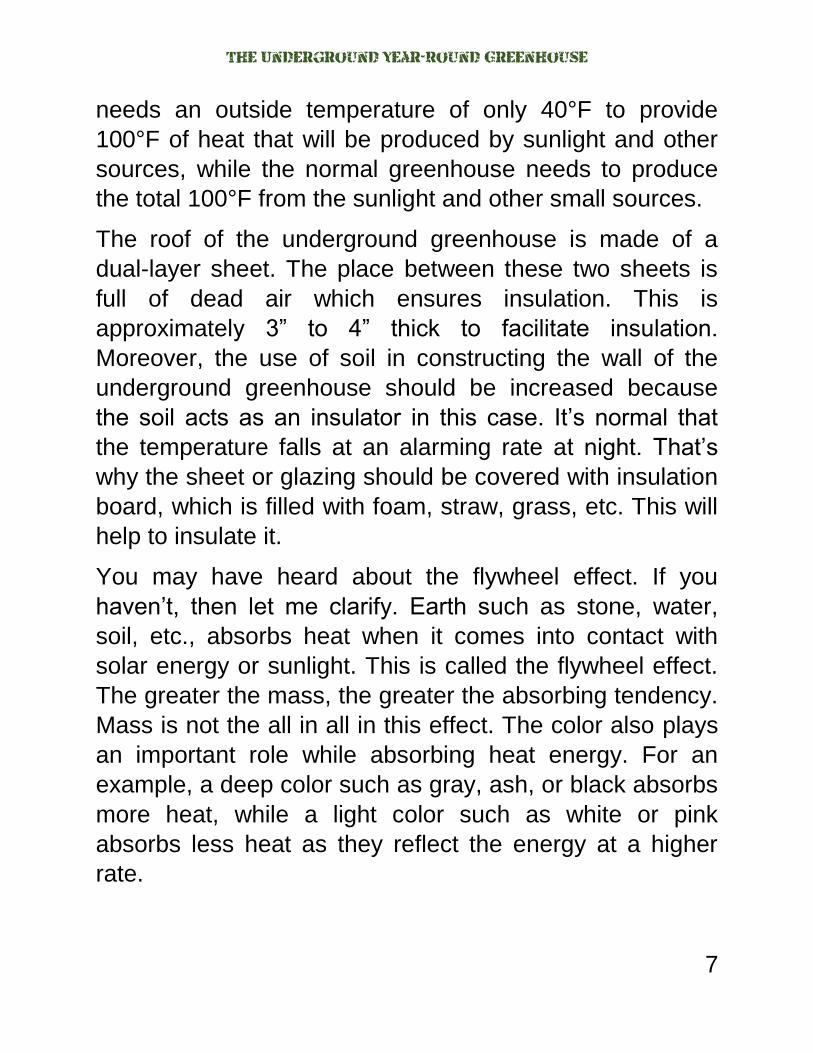
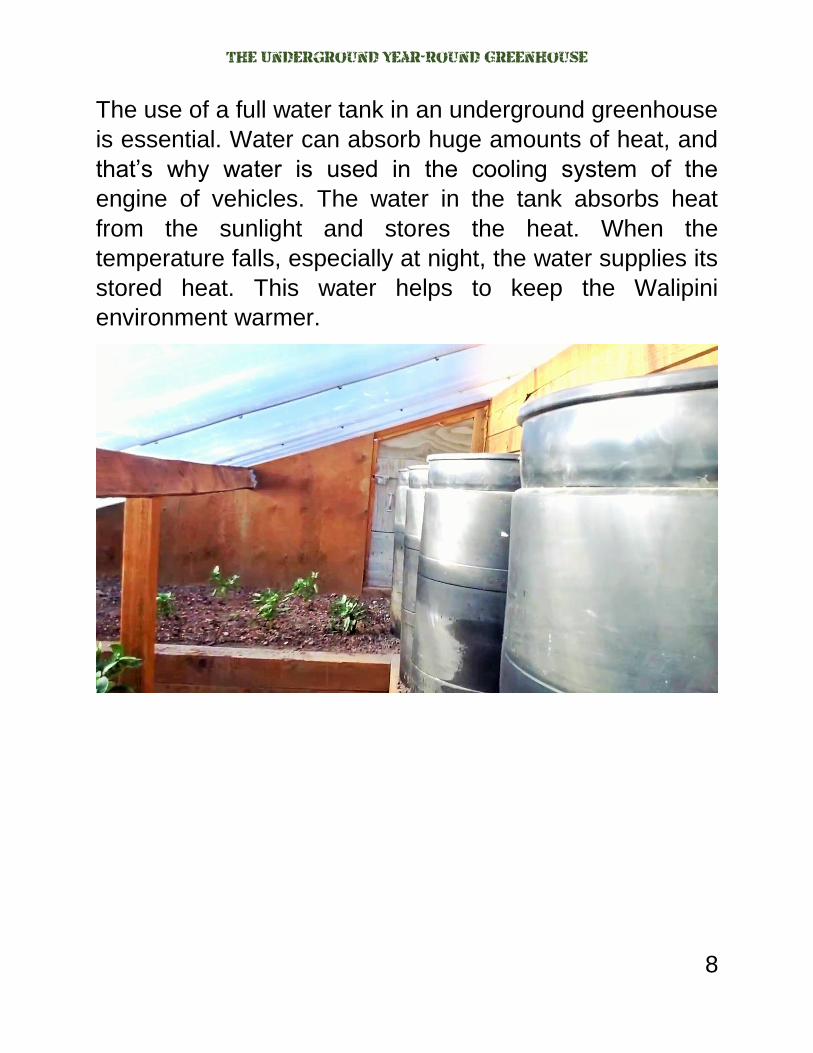
The use of a full water tank in an underground greenhouse
is essential. Water can absorb huge amounts of heat, and
that’s why water is used in the cooling system of the
engine of vehicles. The water in the tank absorbs heat
from the sunlight and stores the heat. When the
temperature falls, especially at night, the water supplies its
stored heat. This water helps to keep the Walipini
environment warmer.
The Underground Year-Round Greenhouse
9
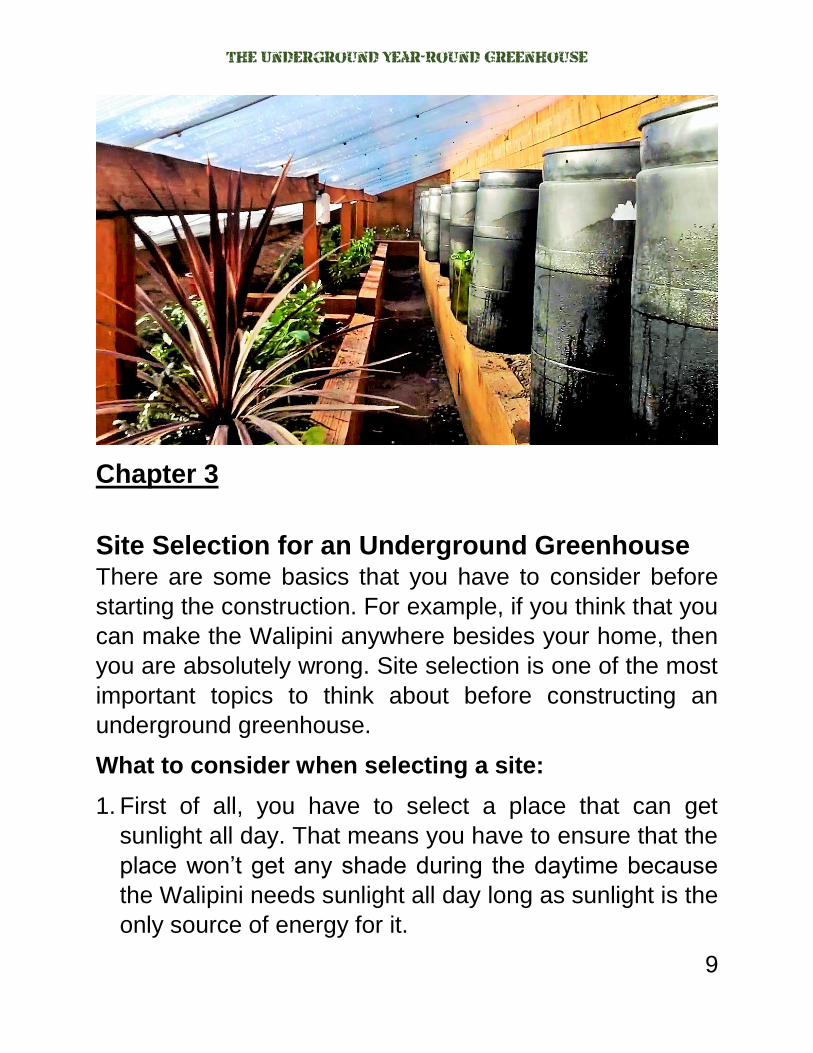
Chapter 3
Site Selection for an Underground Greenhouse There are some basics that you have to consider before
starting the construction. For example, if you think that you
can make the Walipini anywhere besides your home, then
you are absolutely wrong. Site selection is one of the most
important topics to think about before constructing an
underground greenhouse.
What to consider when selecting a site:
1. First of all, you have to select a place that can get
sunlight all day. That means you have to ensure that the
place won’t get any shade during the daytime because
the Walipini needs sunlight all day long as sunlight is the
only source of energy for it.

The Underground Year-Round Greenhouse
10
2. Water penetration demands great consideration at the
time of site selection. Sometimes it can be seen that
water penetration occurs through the wall or the floor of
the Walipini, but it’s undoubtedly destructive as it
hampers plant growth. It mainly depends on the soil
type surrounding the Walipini. If the soil has a lower
permeability, it is good to construct the Walipini in there,
but if the soil has a higher permeability rate, then you
should use plastic sheeting. Clay soil is the best for
underground greenhouse construction, so you should
test the soil before constructing the Walipini. Moreover,
you have to be careful about the drainage system. So
you have to dig a good drainage ditch around the
Walipini.
3. Compare the area with the water level. The area should
be placed five feet above the water level to facilitate the
drainage system.
Placement of the underground greenhouse:
The placement of the Walipini should be in such way that
it can ensure maximum sunlight penetration in the winter
season and minimum sunlight penetration in the summer.
In the summer, the environment normally remains warmer.
So the Walipini doesn’t need extra warmth in the summer.
That’s why the Walipini needs minimum sunlight during
the summer. Because plants need a reasonable
temperature for better growth, the Walipini needs
maximum sunlight penetration in the winter.
The Underground Year-Round Greenhouse
11
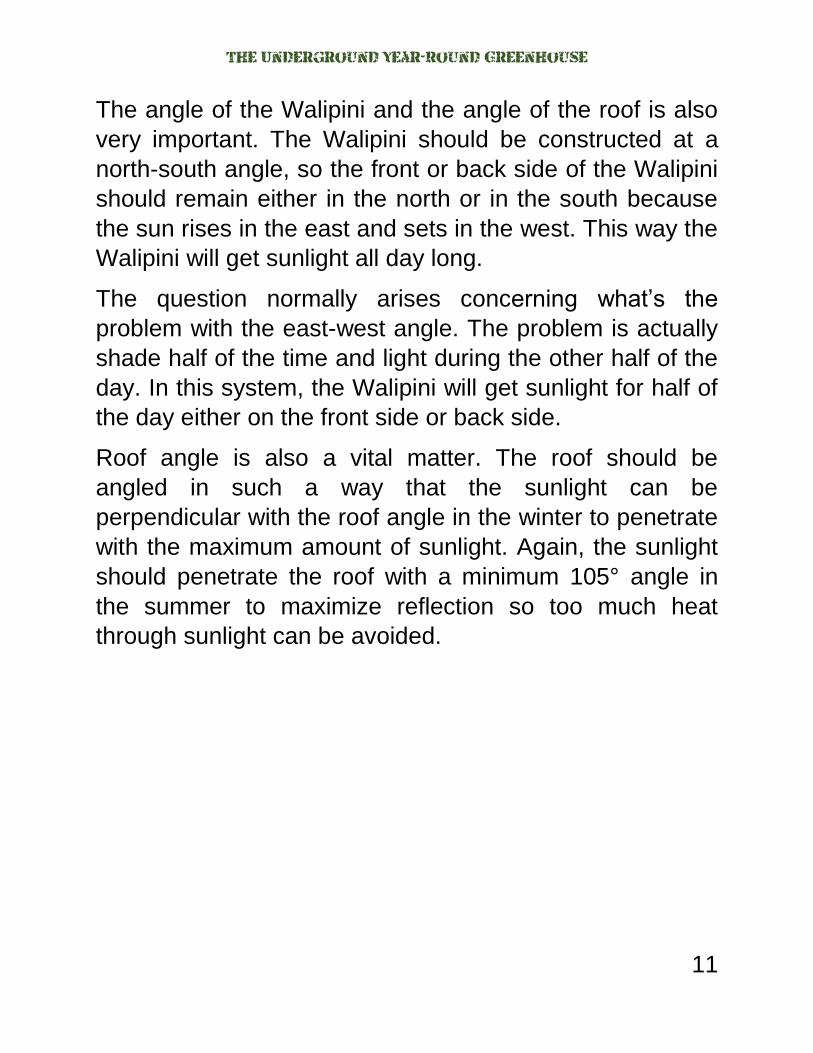
The angle of the Walipini and the angle of the roof is also
very important. The Walipini should be constructed at a
north-south angle, so the front or back side of the Walipini
should remain either in the north or in the south because
the sun rises in the east and sets in the west. This way the
Walipini will get sunlight all day long.
The question normally arises concerning what’s the
problem with the east-west angle. The problem is actually
shade half of the time and light during the other half of the
day. In this system, the Walipini will get sunlight for half of
the day either on the front side or back side.
Roof angle is also a vital matter. The roof should be
angled in such a way that the sunlight can be
perpendicular with the roof angle in the winter to penetrate
with the maximum amount of sunlight. Again, the sunlight
should penetrate the roof with a minimum 105° angle in
the summer to maximize reflection so too much heat
through sunlight can be avoided.
The Underground Year-Round Greenhouse
12
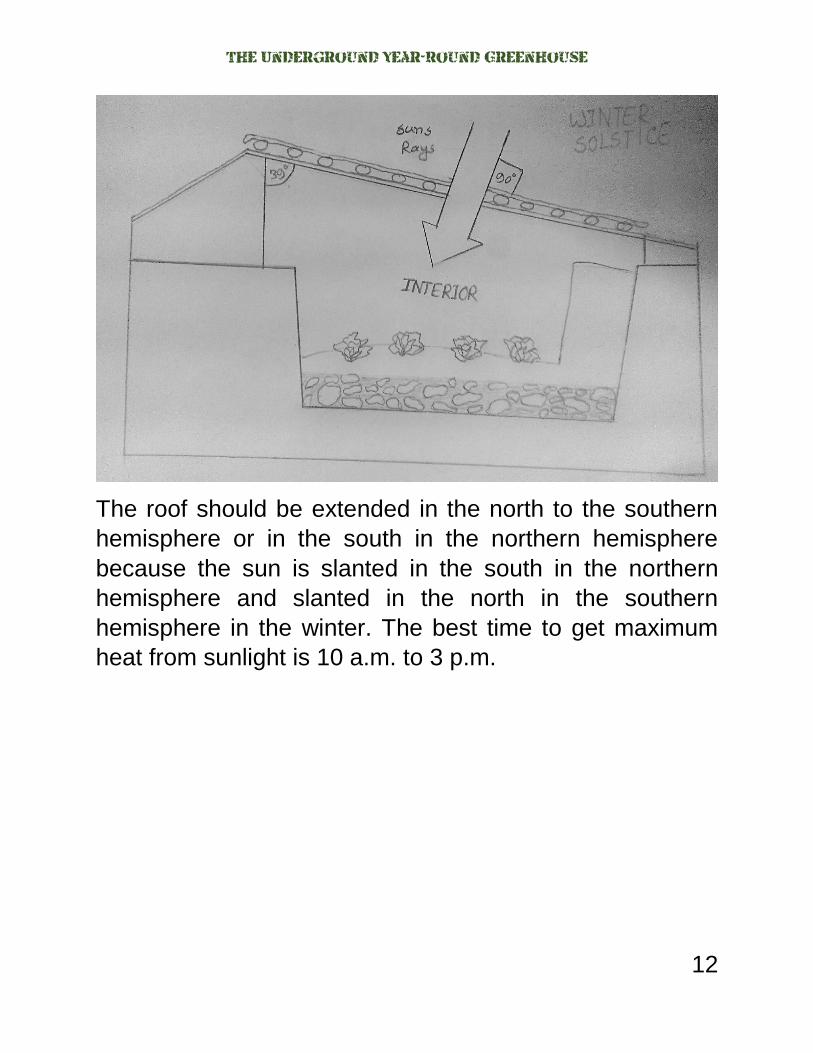
The roof should be extended in the north to the southern
hemisphere or in the south in the northern hemisphere
because the sun is slanted in the south in the northern
hemisphere and slanted in the north in the southern
hemisphere in the winter. The best time to get maximum
heat from sunlight is 10 a.m. to 3 p.m.
The Underground Year-Round Greenhouse
13
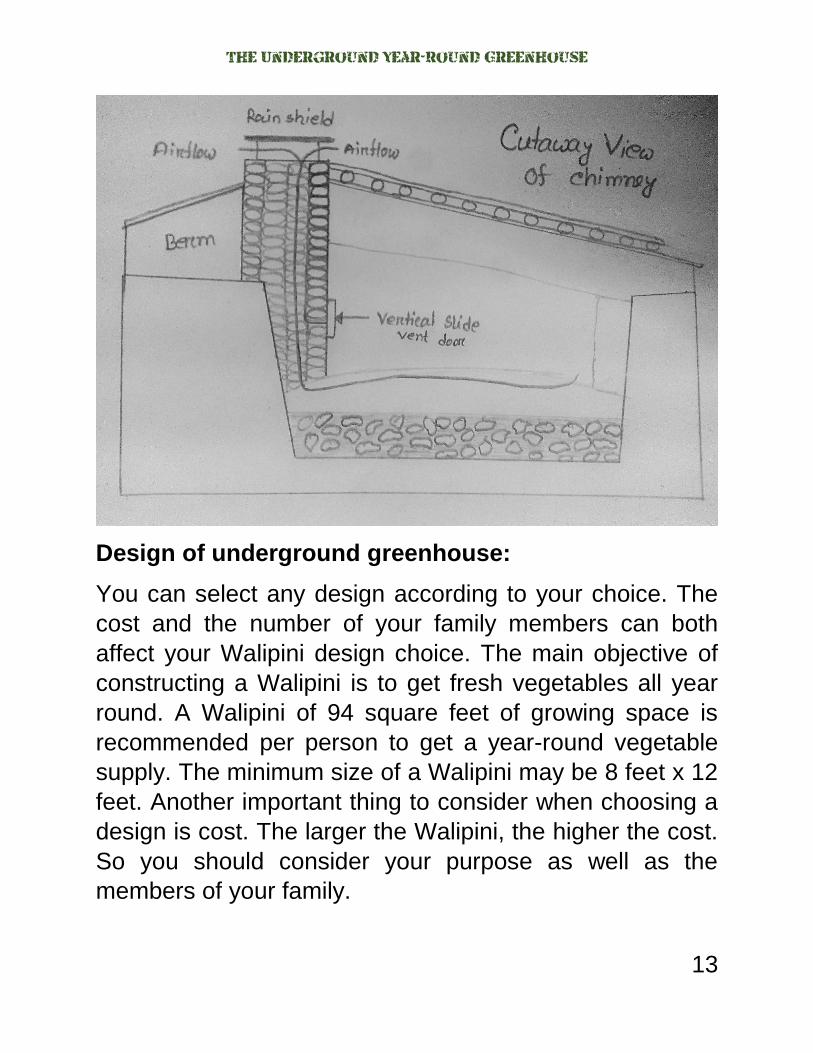
Design of underground greenhouse:
You can select any design according to your choice. The
cost and the number of your family members can both
affect your Walipini design choice. The main objective of
constructing a Walipini is to get fresh vegetables all year
round. A Walipini of 94 square feet of growing space is
recommended per person to get a year-round vegetable
supply. The minimum size of a Walipini may be 8 feet x 12
feet. Another important thing to consider when choosing a
design is cost. The larger the Walipini, the higher the cost.
So you should consider your purpose as well as the
members of your family.
The Underground Year-Round Greenhouse
14
As an example, a Walipini of 10 ft. X 45 ft. is enough to
supply year-round vegetables for four family members.
About 16% of this space will be accommodated by the
construction of the wall, inner road, etc. So 16% of 450 sq.
ft. = 72 sq. ft. The remaining space for growing is 450 sq.
ft. – 72 sq. ft. = 378 sq. ft. Divide it by four (for a family of
four).
Now, 378 sq. ft./4 is equal to 94.5 sq. ft. The minimum
requirement of the growing space for a single person is 94
sq. ft.
Direct calculation:
45 ft. X 10 ft. = 450 sq. ft.
450 sq. ft. X 16% = 72 sq. ft.
450 sq. ft. – 72 sq. ft. = 378 sq. ft.
378 sq. ft./4 = 94.5 sq. ft.
Another calculation for Walipini size suitable for six family
members is given here. A Walipini of 12 ft. X 56 ft. is
suitable for a proper supply of the required vegetables for
six family members. As the construction site
accommodates about 16% of its space, 16% of 672 sq. ft.
will be 107.52 sq. ft. = 108 sq. ft. So the inner free space
for cultivation is left as 672 – 108 sq. ft. = 564 sq. ft. Now
divide the free growing space with the number of family
members. As the family members equals six, the
calculation will be 564/6 equals 94 sq. ft.
The Underground Year-Round Greenhouse
15
Direct calculation:
56 ft. X 12 ft. = 672 sq. ft.
672 sq. ft. X 16% = 107.52 sq. ft. = 108 sq. ft.
672 sq. Ft. – 108 sq. ft. = 564 sq. ft.
564 sq. ft./6 = 94 sq. ft.
I’ll explain another calculation to make this concept
completely clear. A calculation of a Walipini suitable for
eight family members is explained here, where 13 ft. x 69
ft. is a very good size for cultivating year-round vegetables
for eight family members. About 16% of the space will be
accommodated by constructional purpose. So 16% of 897
sq. ft. will be 143.52 sq. ft. = 144 sq. ft. The free space will
be 897 sq. ft. – 144 sq. ft. equals 753 sq. Ft. Now divide it
by the number of family members. Here the family
members is eight, so the equation will be 753/8 = 94.125
sq. ft. = 94 ft.
Direct calculation:
69 ft. x 13 ft. = 897 sq. ft.
897 sq. ft. X 16% = 143.52 sq. ft. = 144 sq. ft.
897 sq. ft. – 144 sq. ft. = 753 sq. ft.
753 sq. ft./8 = 94.125 sq. ft. = 94 sq. ft.
The Underground Year-Round Greenhouse
16
You have to also be aware of the construction cost of a
Walipini. The Walipini should be chosen and designed so
that the cost becomes minimal. Here are some ways to
minimize the costs.
1. Firstly, labor costs can be huge, but you can minimize
the labor costs by doing it yourself. You can also ask
your family members, neighbors, and close friends to
help. If you can’t get help from them, then you can hire a
single laborer to work with you or assist you.
2. You will have a large amount of soil after digging. You
can use that soil as a planting medium in the
underground greenhouse as the soil is also valuable
and you shouldn’t waste it.
3. The rest of the dug up soil can be used in the earthen
wall construction.
4. On the top, you should use plastic sheeting instead of a
corrugated fiberglass panel or glass because the plastic
sheet is relatively cheap and the penetration of the
sunlight is more accurate.
5. The foundation and the footing are traditionally created
with concrete, but it’s not really necessary. You could
skip this to minimize the cost.
6. While digging, you will get some stones. You can use
them in the base construction as well as drainage
construction work.
The Underground Year-Round Greenhouse
17
7. You can utilize some used materials where possible.
Suppose you have a used door in your store room. You
can use that in this construction. You can also use
larger oil drums, pots, a water tank, and even internal
wooden parts.
Drainage:
At the beginning, the destructive effect of water coming
into the Walipini was discussed. Undoubtedly, a proper
drainage system can prevent the entry of water. Not only
the outer water but also the inner high moisture condition
is harmful to the plants. Only a proper drainage system
can solve this problem. Normally two types of drainage
systems are used in the Walipini. The presence of both of
the two systems is mandatory. Let’s have a look.
1. Inner drainage:
The well-constructed interior drainage system is very
important for a standard Walipini. Moisture is really
necessary for the plants, but high moisture is harmful as it
causes diseases. Fungal and bacterial attacks increase as
well. About 1.5 ft. to 2 ft. from the Walipini ground is where
you dig for interior drainage. This space is filled with
stones, gravel, and about eight to ten inches of soil. The
largest stone or gravel is placed at the bottom, and then
smaller stones are placed on top of it. The eight to ten
inches of soil is placed on top. All of the materials are
placed loosely. It is built in such a way that the user can
open the cover of the system when necessary.
The Underground Year-Round Greenhouse
18
2. Outer drainage:
Water is the life for both plants and animals. But water is
not always a friend; it can also be a foe depending on the
situation. Outer water is a foe for the plants of an
underground greenhouse. To prevent the entry of the
outer water, an exterior drainage system must be
constructed surrounding the Walipini. It should be
constructed two to three feet away from the Walipini wall
on all sides. If it is constructed accurately, the outer water
won’t be able to come in contact with the Walipini wall.
Another problem is the inclined water of the roof. When it
falls on the ground near the Walipini wall, it may come in
contact with the wall. That’s why the ground of the Walipini
construction should be a little high in comparison to the
surrounding ground so that the dropped water can be
inclined to the drainage ditch and move away (although
the rain water of the roof is removed by another system).
Ventilation:
Ventilation is used in buildings to promote good health.
Similarly, to ensure healthy plants, an underground
greenhouse needs a ventilation system. It aids in
maintaining the inner temperature as well as humidity.
How much ventilation is needed depends on the
environment. If the temperature of the surrounding
environment is relatively high, then it needs high venting to
avoid overheating. Sometimes the air becomes humid,
and high venting is also necessary at that time. Again,
The Underground Year-Round Greenhouse
19
when the temperature becomes too low, ventilation should
be minimal at that time. There are several ventilation
systems that are used in the underground greenhouse.
Which system is best for your Walipini will be determined
by the environment of your Walipini.
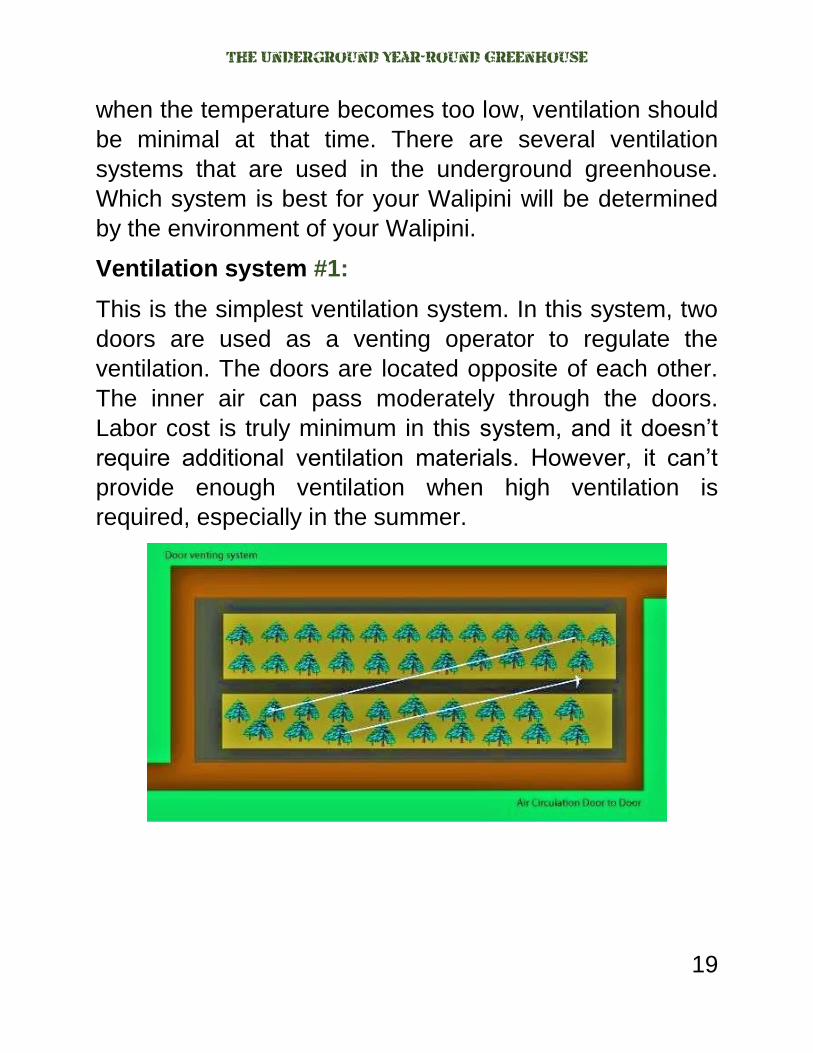
Ventilation system #1:
This is the simplest ventilation system. In this system, two
doors are used as a venting operator to regulate the
ventilation. The doors are located opposite of each other.
The inner air can pass moderately through the doors.
Labor cost is truly minimum in this system, and it doesn’t
require additional ventilation materials. However, it can’t
provide enough ventilation when high ventilation is
required, especially in the summer.
The Underground Year-Round Greenhouse
20
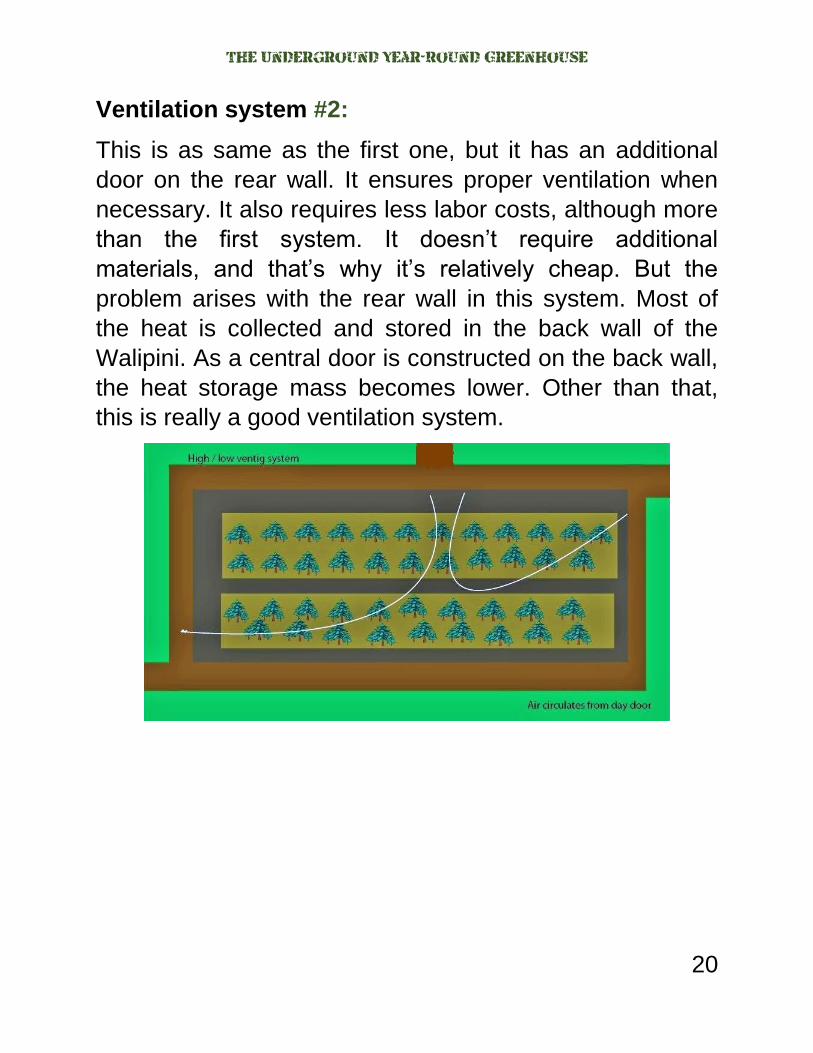
Ventilation system #2:
This is as same as the first one, but it has an additional
door on the rear wall. It ensures proper ventilation when
necessary. It also requires less labor costs, although more
than the first system. It doesn’t require additional
materials, and that’s why it’s relatively cheap. But the
problem arises with the rear wall in this system. Most of
the heat is collected and stored in the back wall of the
Walipini. As a central door is constructed on the back wall,
the heat storage mass becomes lower. Other than that,
this is really a good ventilation system.
The Underground Year-Round Greenhouse
21
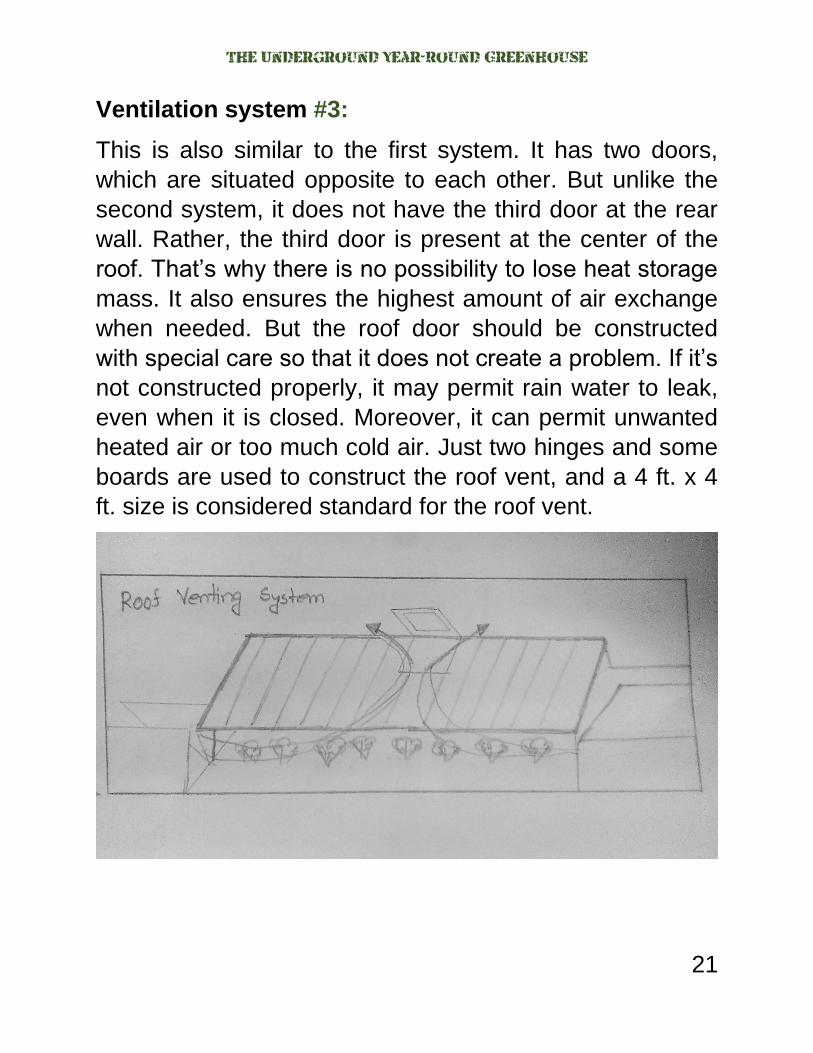
Ventilation system #3:
This is also similar to the first system. It has two doors,
which are situated opposite to each other. But unlike the
second system, it does not have the third door at the rear
wall. Rather, the third door is present at the center of the
roof. That’s why there is no possibility to lose heat storage
mass. It also ensures the highest amount of air exchange
when needed. But the roof door should be constructed
with special care so that it does not create a problem. If it’s
not constructed properly, it may permit rain water to leak,
even when it is closed. Moreover, it can permit unwanted
heated air or too much cold air. Just two hinges and some
boards are used to construct the roof vent, and a 4 ft. x 4
ft. size is considered standard for the roof vent.
The Underground Year-Round Greenhouse
22
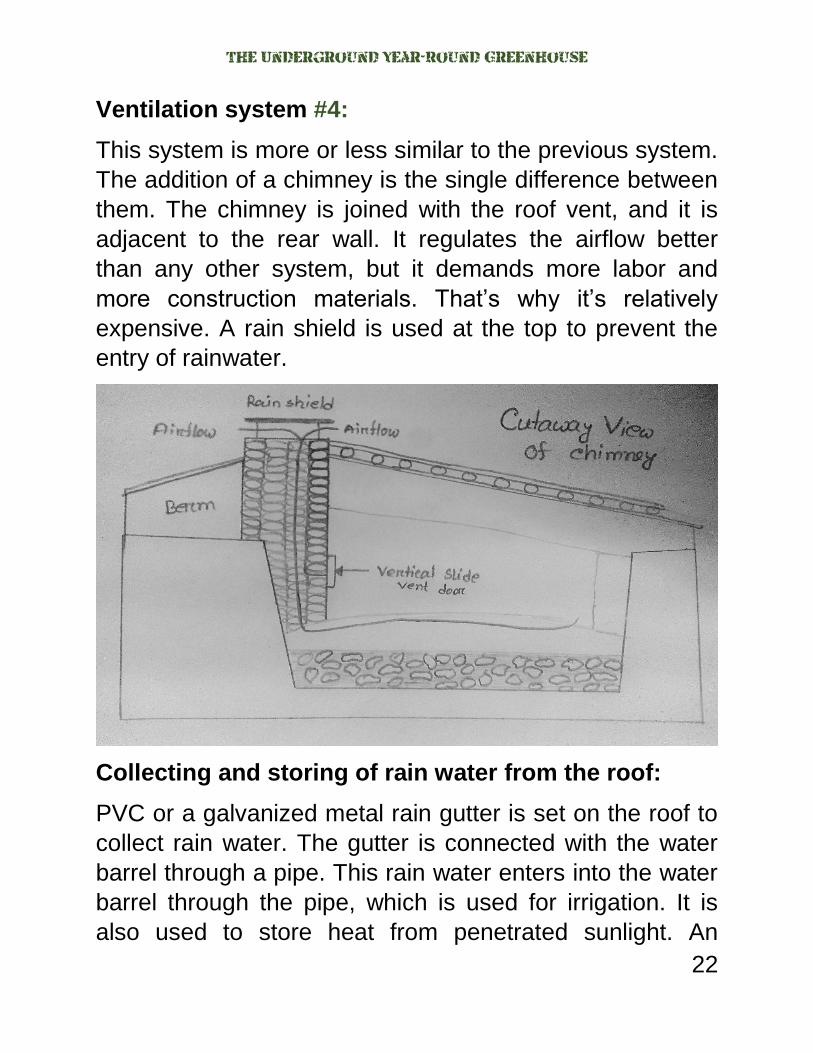
Ventilation system #4:
This system is more or less similar to the previous system.
The addition of a chimney is the single difference between
them. The chimney is joined with the roof vent, and it is
adjacent to the rear wall. It regulates the airflow better
than any other system, but it demands more labor and
more construction materials. That’s why it’s relatively
expensive. A rain shield is used at the top to prevent the
entry of rainwater.
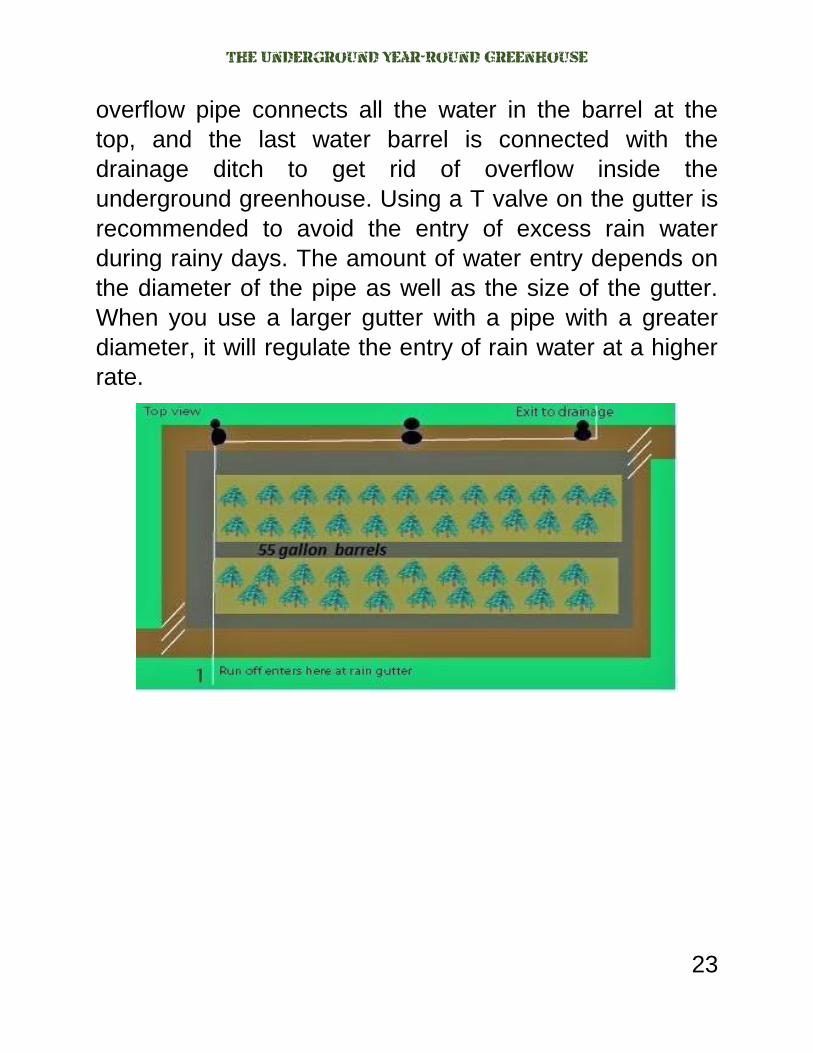
Collecting and storing of rain water from the roof:
PVC or a galvanized metal rain gutter is set on the roof to
collect rain water. The gutter is connected with the water
barrel through a pipe. This rain water enters into the water
barrel through the pipe, which is used for irrigation. It is
also used to store heat from penetrated sunlight. An
The Underground Year-Round Greenhouse
23
overflow pipe connects all the water in the barrel at the
top, and the last water barrel is connected with the
drainage ditch to get rid of overflow inside the
underground greenhouse. Using a T valve on the gutter is
recommended to avoid the entry of excess rain water
during rainy days. The amount of water entry depends on
the diameter of the pipe as well as the size of the gutter.
When you use a larger gutter with a pipe with a greater
diameter, it will regulate the entry of rain water at a higher
rate.

The Underground Year-Round Greenhouse
24
Chapter 4
Walipini Construction Required materials:
1. Hinged door (wooden door is recommended)
2. Door lintel
3. Door frames
4. Roof frame or roof lintel
5. PVC pipe
6. Agro-film
7. Soil (clay soil, mixture of silt and clay soil)
8. Large to medium gravel and stones
9. Plastic sheeting for drainage
10. T valve and gutter to use on the roof
11. Drain gutter
12. Overflow pipe
13. Wood stripis
14. Plastic sheet to use on the roof
15. Adobe mud (mixture of clay, sand, and straw)
16. Digging materials, etc.
Digging and ground construction:
First of all, you have to determine the design of your
Walipini. Measure the width and length in the selected
area, and start digging from each of the measured poles.
Don’t waste the dug up soil because there are other uses
for the soil. This soil will have to be used as the cultivable
land of the Walipini.
The Underground Year-Round Greenhouse
25
The ground of a Walipini is normally made of soil. You can
also use rough tiles or bricks, but that will just increase
your costs. So a dirt floor is the best and is the most
commonly used all over the world.
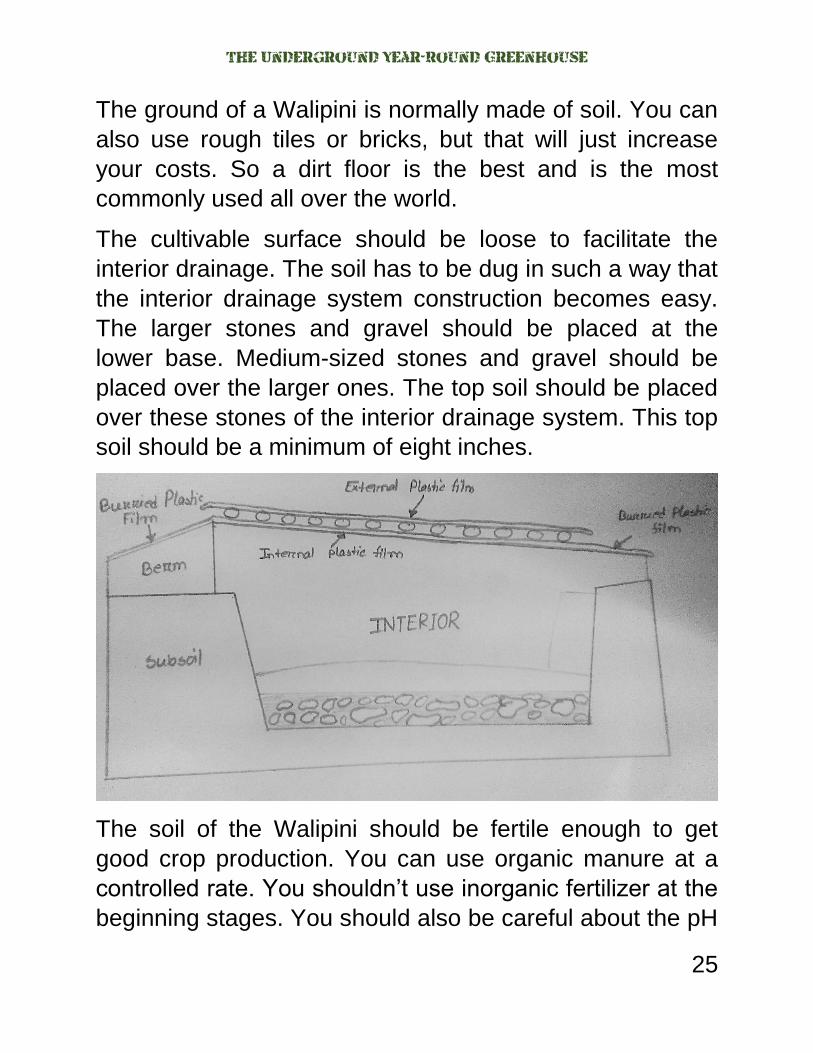
The cultivable surface should be loose to facilitate the
interior drainage. The soil has to be dug in such a way that
the interior drainage system construction becomes easy.
The larger stones and gravel should be placed at the
lower base. Medium-sized stones and gravel should be
placed over the larger ones. The top soil should be placed
over these stones of the interior drainage system. This top
soil should be a minimum of eight inches.
The soil of the Walipini should be fertile enough to get
good crop production. You can use organic manure at a
controlled rate. You shouldn’t use inorganic fertilizer at the
beginning stages. You should also be careful about the pH
The Underground Year-Round Greenhouse
26
of the Walipini soil. The best pH range or optimum pH
range for crop cultivation is 6.5 to 7.5, where 7 is the best.
Wall:
The importance of the wall of a Walipini can’t be described
in words. It makes the difference between a greenhouse
and an underground greenhouse. The wall has to be laid
out from the edge of the digging. You can use adobe mud
for plastering the wall. You can use bricks at the middle of
the mud layer. The bricks must be first-class bricks. The
mass of the brick can also store the heat energy. You
have to consider these factors when choosing your bricks:
1. Try to make a crack with your nail in the brick surface. If
it cracks, avoid it.
2. Strike the brick with another brick or hammer. If it
sounds clearly and doesn’t break, then it’s undoubtedly
a good brick.
3. Take two bricks, and make a T-shaped structure. Then
select such a moderately hard surface. Drop the T-
shaped bricks from about six feet up. If the bricks break
down, then they should be avoided.
You need good mud for the Walipini wall. The soil should
be clay soil, and the mud should have a 10% moisture
content. Next, the adobe mud (a mixture of clay, sand, and
straw) should be ready. The adobe mud is normally used
as a very thick layer of the brick skeleton for the Walipini
wall, which makes the Walipini wall more heatproof. The
The Underground Year-Round Greenhouse
27
four walls also have to be constructed in such a way that
the roof can be constructed over it at a 39° to 41° angle.
Roof of the Walipini:
Recheck and make sure that the angle of the roof is
approximately 39º to 40º so it will be perpendicular to the
sun’s rays on the winter solstice. Next place the twenty 4”
x 16’ long poles on 4’ centers spanning the roof beginning
at one end of the growing area which will place the 18th
pole at the other end of the growing area. Poles 19 and 20
are placed at the ends 4’ from poles 1 and 18 so that there
is minimum 1’ overhang over the two doors on the ends of
the building.
Little overhang on the front and back walls is needed, if
plastic sheeting is used to protect the immediate area from
erosion and water penetration. Before pinning the poles
into the tops of the back and front walls, place a sheet of
plastic running the full length of the interior of the building,
including the overhangs, at both the top and bottom so
that this interior glazing will be staked down with the end
of each pole. Drill a hole in each pole and stake it into the
rammed earth with rebar, a wooden stake or dowel. Fill
the wall in between each pole with adobe mud the width of
the wall following the angle of the poles. This will seal the
area between each of the poles to prevent outside air from
coming in and inside heated air venting to the outside.
Now cover the entire exterior of the roof with the plastic
sheeting overlapping each joint at least 6” to minimize air
The Underground Year-Round Greenhouse
28
leakage and securing each overlap with wood stripping
and nails at one of the poles. Nail stripping the full length
of each pole to secure the plastic and to prevent wind
damage. Place a single course of adobes all the way
around the perimeter of the roof with the exception of the
bottom side where the water runs off into the gutter
system. This will secure the boarder of the plastic to the
walls. On the lower wall the plastic must run down to the
gutter system unobstructed so the water freely follows this
course. Now go inside the Walipini and finish lining the
underside of the poles/roof with the plastic securing it with
nailed stripping as well. Make sure to seal the overlaps to
prevent heated air and moisture in the growing area from
entering the dead 4” insulation air space. Now check all
areas where the poles and plastic join the roof for open
spaces that will leak air and fill them with adobe mud from
the inside and the outside. Next return to the outside and
install the rain gutter at the lower end of the roof so that it
will catch all of the run off from the glazing. Make sure that
the gutter is lower at the end where the distributions of the
water will take place. At the gutter exit install a T-pipe so
that water can be directed to the nearest surface drain
ditch and/or inside to the barrel water
storage/heating/overflow system.
Run a pipe from the T valve inside above the door and
over to the first barrel in the corner. Then run additional
pipe for overflow from the first to the last barrel and then
an exit pipe from the last barrel through the back wall of
The Underground Year-Round Greenhouse
29
the Walipini over to the nearest surface drainage ditch.
The roofing system is now completed.
Door:
The door of an underground greenhouse is very important.
The door should be installed in such a way that the air
can’t be exchanged between the inside and the outside
environment of the Walipini. Because of this, a metal door
should be avoided since one of the most important
characteristics of the metal is its conductivity and a metal
door can conduct and exchange heat. So a wooden door
is recommended for Walipini construction. You should
consider the following things when choosing the wood:
1. The timber should be uniformly shaped and mature.
Mature timber is generally grey or black in color.
2. The timber should sound clear when striking with a
hammer. The clear sound shows the high density of the
wood.
3. The crown of the timber should be sound and vigorous.
It must not be cracked.
The wooden door should be well burnished, and a water-
protecting polish should cover the whole door so that the
door can’t come in contact with water, which would be
harmful to the wood and reduce its lifetime. Because of
the water and high moisture, this precaution should be
maintained.
The Underground Year-Round Greenhouse
30
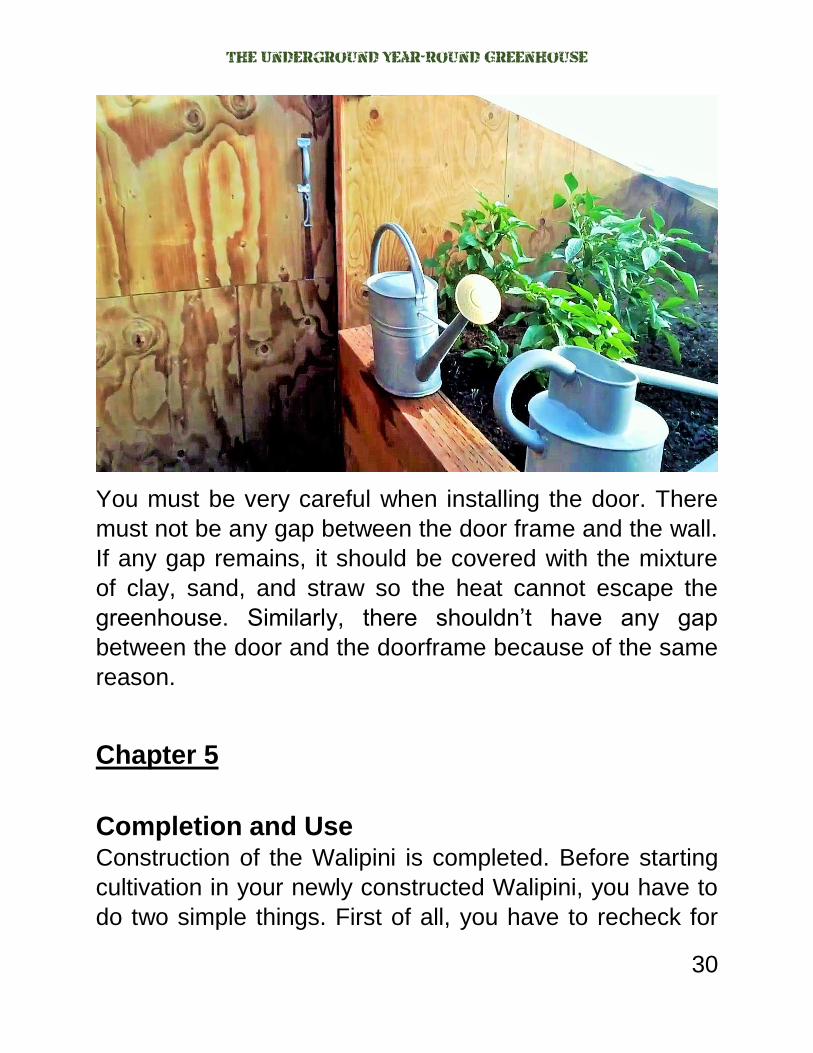
You must be very careful when installing the door. There
must not be any gap between the door frame and the wall.
If any gap remains, it should be covered with the mixture
of clay, sand, and straw so the heat cannot escape the
greenhouse. Similarly, there shouldn’t have any gap
between the door and the doorframe because of the same
reason.
Chapter 5
Completion and Use Construction of the Walipini is completed. Before starting
cultivation in your newly constructed Walipini, you have to
do two simple things. First of all, you have to recheck for
The Underground Year-Round Greenhouse
31
any leakage. If any leakage is found, use the adobe mud
again as instructed. When you are sure that the Walipini is
free from all leaks, you should test its temperature. If the
temperature can reach about 60°F in the winter, the
Walipini is ready for use.
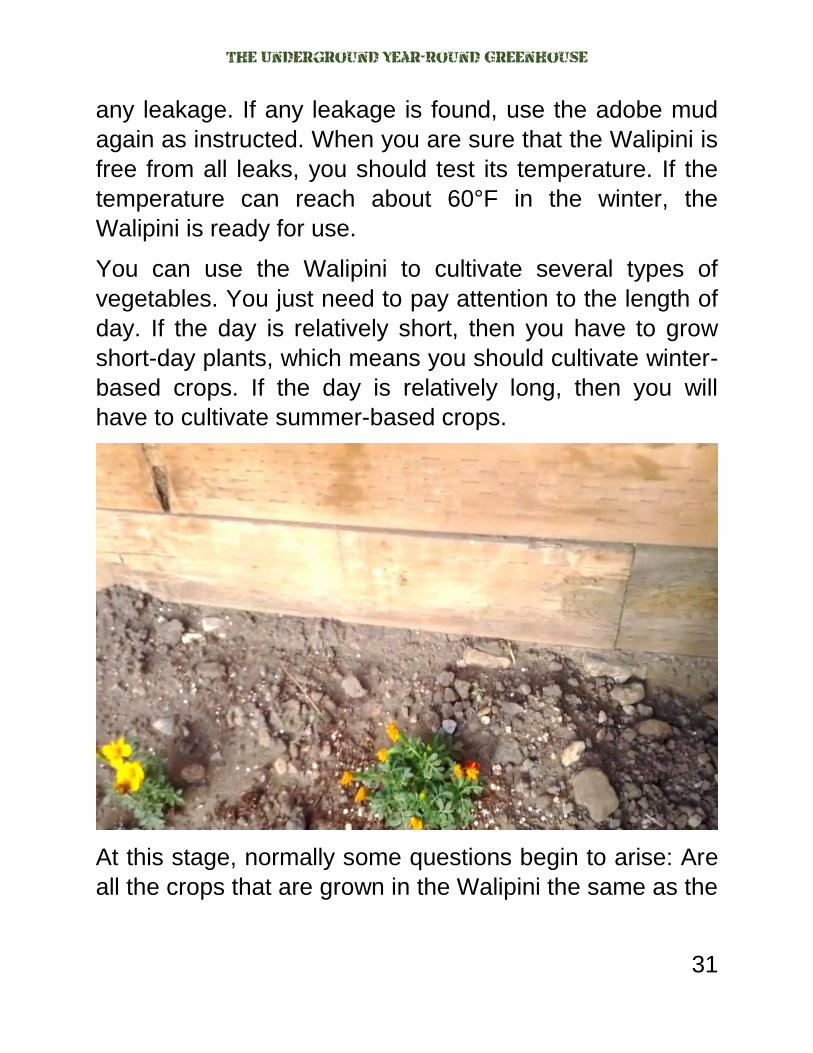
You can use the Walipini to cultivate several types of
vegetables. You just need to pay attention to the length of
day. If the day is relatively short, then you have to grow
short-day plants, which means you should cultivate winter-
based crops. If the day is relatively long, then you will
have to cultivate summer-based crops.
At this stage, normally some questions begin to arise: Are
all the crops that are grown in the Walipini the same as the

The Underground Year-Round Greenhouse
32
normal field-cultivated crops? Is there any difference in the
taste? Any difference in the size and quality?
The answer is “yes” to all the question. There is a
difference between the Walipini-grown crops and field-
grown crops. The Walipini-grown crops are three times
better than the field-grown crops. Here’s why:
1. Diseases and pests are rare in the Walipini, and that’s
why your crops remain free from pesticides.
2. Attacks by insects are minimal in the Walipini, and that’s
why you don’t need to apply insecticides. Your crops
remain free from harmful chemicals.
3. Weeds seldom grow in the Walipini.
4. You can use hybrid varieties and give individual care to
each of the crops.

The Underground Year-Round Greenhouse
33