Embed Size (px)
Citation preview
The Most
COMPLETE101+ STEPWordPress Checklist Ever
Some might say that it’s easy getting a WordPress website up and
running. And truth be told, it is. But when you’re actually creating a
new WordPress website from scratch, for a client, well, things tend
to get a bit more complicated.
This is the last WordPress website creation checklist you’ll ever
need.
Today, we’re going to give you the Ultimate WordPress checklist. All
of the things you need to do get a website fully up and running and
ready for launch.
This WordPress checklist is divided into multiple sections, providing
a complete list of tasks you need to do for each and every step
when planning, building and launching a new WordPress website.
Introduction
Contents
WordPress Hosting & Infrastructure Checklist . . . . . . . . . . . . . . . . . . 4
WordPress Installation Checklist . . . . . . . . . . . . . . . . . . . . . . . . . . . . . 9
WordPress Security Checklist . . . . . . . . . . . . . . . . . . . . . . . . . . . . . . . 15
WordPress Theme Checklist . . . . . . . . . . . . . . . . . . . . . . . . . . . . . . . . 19
WordPress Configuration Checklist . . . . . . . . . . . . . . . . . . . . . . . . . . 21
WordPress Search Engine Optimization Checklist . . . . . . . . . . . . . . 25
Social Media Integration WordPress Checklist . . . . . . . . . . . . . . . . . 29
Mailing List Integration Checklist . . . . . . . . . . . . . . . . . . . . . . . . . . . . 31
Analytics, Monitoring and Uptime Integration. . . . . . . . . . . . . . . . . . 32
WordPress Performance Checklist . . . . . . . . . . . . . . . . . . . . . . . . . . . 33
WordPress Testing Checklist . . . . . . . . . . . . . . . . . . . . . . . . . . . . . . . . 35
Website Functionality Checklist . . . . . . . . . . . . . . . . . . . . . . . . . . . . . 37
Post Launch Checklist . . . . . . . . . . . . . . . . . . . . . . . . . . . . . . . . . . . . . 38
Have You Completed the WordPress Task Checklist? . . . . . . . . . . . 40
Let’s get started!
The Most Complete 101+ Step WordPress Checklist EverPage 4
WordPress Hosting & Infrastructure Checklist
There are plenty of guides out there on how to install WordPress, but
here’s a quick summary of the essentials:
Choose a hosting company for your site. This is something you’ve
probably already done before and is a topic that is debated about
without end. Everybody has an opinion on the hosts they love and
hate. So I’m not going to delve into that here.
Ensure your hosting meets the minimum (safe) requirements for
WordPress. While meeting the minimum hosting requirements
is typically not an issue with most hosting services, quite a few
sites are still using old, obsolete and unsafe versions of Apache,
PHP, MySQL and other software. Make sure your hosting service
is running on PHP7 and MySQL v5.6 or greater. Always refer to the
latest WordPress minimum requirements and stay away from any
hosts who push you towards other versions.
Buy or get access to your hosting details. Once you’ve decided and
made sure the service is great, buy a hosting plan, or make sure your
client has bought this and given you details to access to the cPanel
or backend of the host.
1
The Most Complete 101+ Step WordPress Checklist Ever Page 5
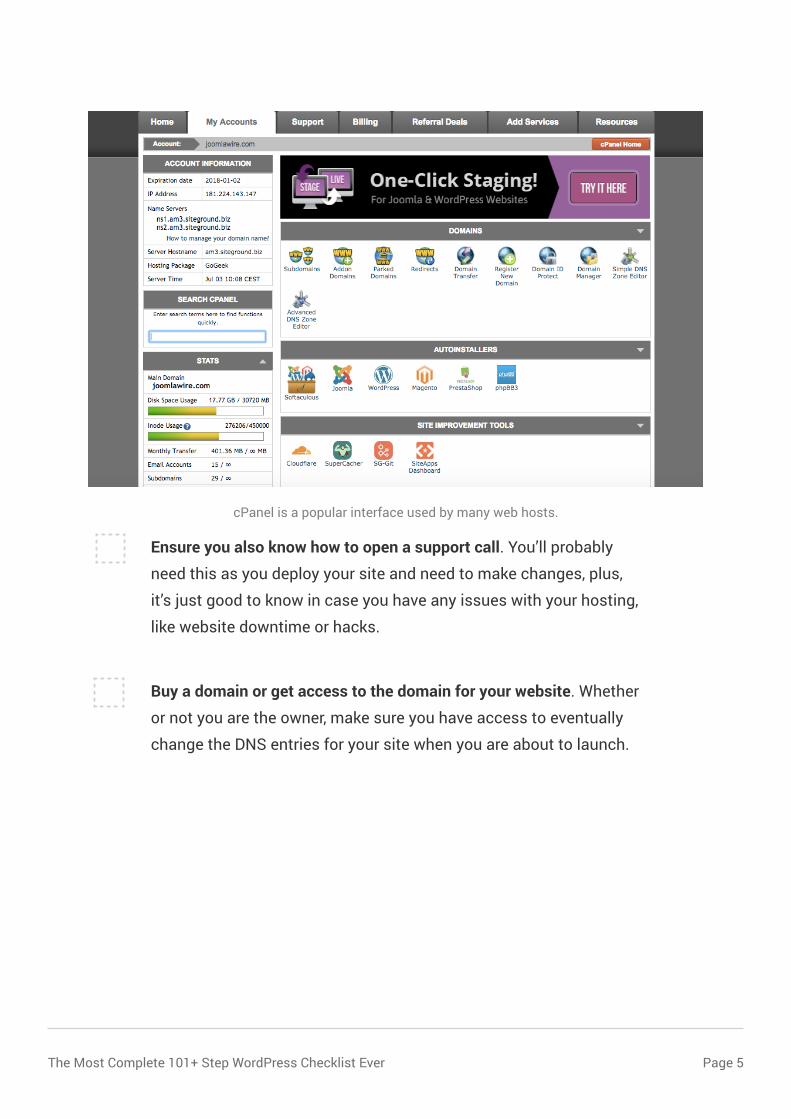
Ensure you also know how to open a support call. You’ll probably
need this as you deploy your site and need to make changes, plus,
it’s just good to know in case you have any issues with your hosting,
like website downtime or hacks.
Buy a domain or get access to the domain for your website. Whether
or not you are the owner, make sure you have access to eventually
change the DNS entries for your site when you are about to launch.
cPanel is a popular interface used by many web hosts.
The Most Complete 101+ Step WordPress Checklist EverPage 6
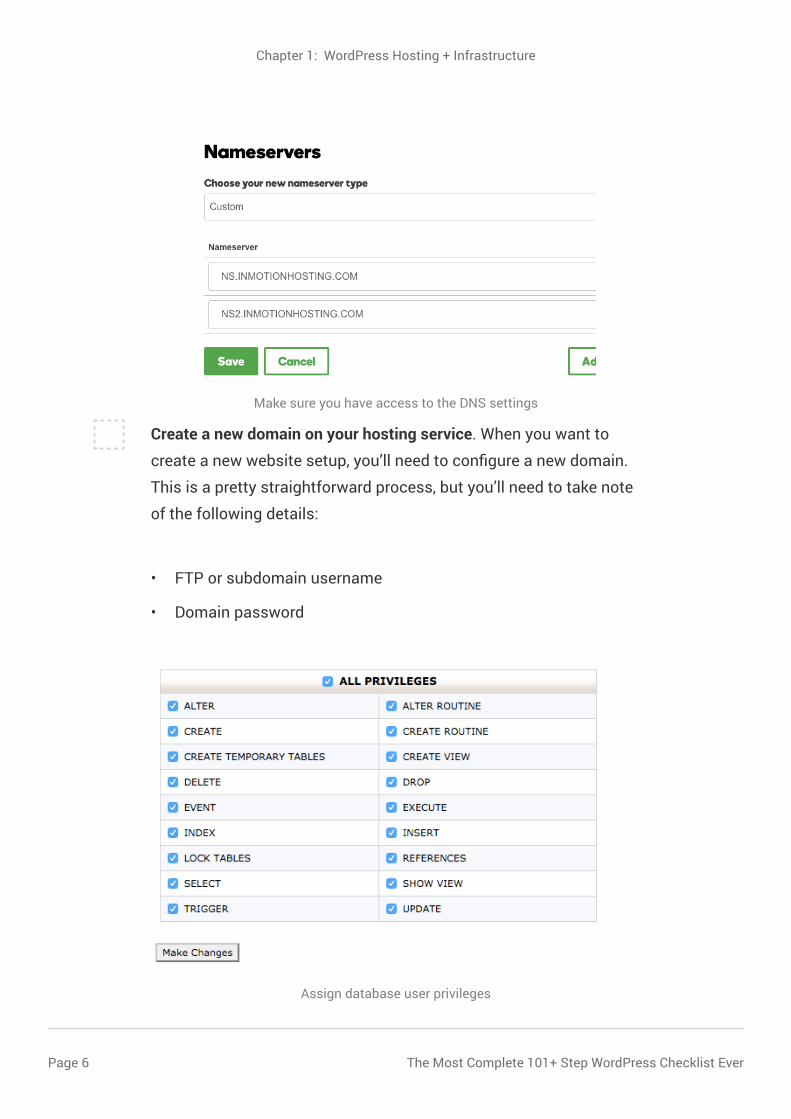
Create a new domain on your hosting service. When you want to
create a new website setup, you’ll need to configure a new domain.
This is a pretty straightforward process, but you’ll need to take note
of the following details:
• FTP or subdomain username
• Domain password
Chapter 1: WordPress Hosting + Infrastructure
Make sure you have access to the DNS settings
Assign database user privileges
The Most Complete 101+ Step WordPress Checklist Ever Page 7
Create a new database for your website. While reusing databases
is possible, it’s not recommended. A security breach on one site
means the breach can move across your sites, impacting anything
else hosted on the same database. Also, create a new database
user. Using the same logic as above, you should have a new
database user for each different hosted site. Make sure you are
not re-using passwords. Grant the database user access to the
database – you’ll need to attach the database user you just created
to the database by granting SQL privileges from the username to the
password.
Always use strong passwords. I like using password generators to
make it as difficult as possible to brute-force attack. If you don’t like
that, use long, complex, passphrases (e.g. th1sisaprettyH@aaRD-
passtogue55!)
Once you’ve done all of the above, make sure you have the following
details:
• Database name
• Database user
• Database password
• Database server address
Setup email addresses as necessary. While using generic emails
is fine, it’s much more professional to use branded emails. Create
generic emails as necessary (hello@, info@, support@, …) and email
addresses for team members (dave@, …). For each email address
you create, keep track of the username and password. Remote
Chapter 1: WordPress Hosting + Infrastructure
The Most Complete 101+ Step WordPress Checklist EverPage 8
access details should be kept handy so you can provide them to the
client as part of the project handover.
Store all of the above information in a secure place. All of the
information above is quite sensitive so if it lands in the wrong hands
you’re setting yourself up for disaster. Store the information in a
safe place. Password services such as LastPass are highly rec-
ommended for this information. Plain text documents on shared
drives are a very bad idea.
Change the DNS settings of your domain to point to name servers
of hosting service (Optional). At this point, in order to install on the
final address of the website, you can point the DNS settings of the
domain to the nameservers of the hosting service. This will mean
that anybody who hits the domain will actually see the new site. I
prefer doing it this way, such that the WordPress installation will not
require changes to the URL / address.
Chapter 1: WordPress Hosting + Infrastructure
The Most Complete 101+ Step WordPress Checklist Ever Page 9
WordPress Installation Checklist
Download the latest installation of WordPress from WordPress.org.
It’s always recommended you install the latest version rather than
an earlier version of WordPress.
Alternatively, install WordPress using Managed WordPress Hosting.
If you’re actually not much into doing things yourself and you’d
like to let the pros handle your WordPress installation, setting up
managed WordPress hosting is a good alternative. With managed
hosting, you typically only have to administer the content of your
site while installation, setup, databases, security, backups, updates,
performance and uptime monitoring are all handled by your host.
Check out our detailed guide to WordPress managed hosting.
Upload the archive file to your domain root folder. Don’t uncompress
the files on your local drive. Uploading the files individually takes a
ridiculous amount of time, compared to uploading just the archive
file. Uncompress the WordPress installation to the root folder. Make
sure you’re actually uncompressing to the root (domain.com), rather
than a subdirectory (domain.com/wordpress) unless you have a
good reason to do so.
Chapter 2: WordPress Installation
2
The Most Complete 101+ Step WordPress Checklist EverPage 10
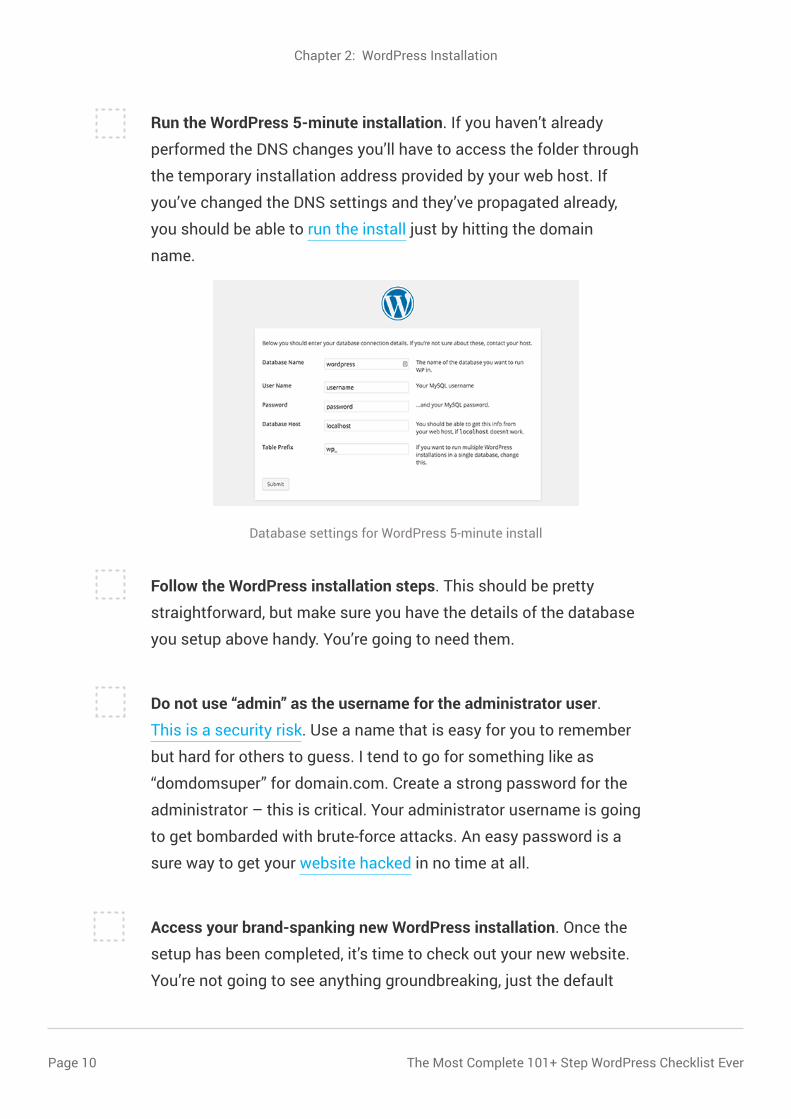
Run the WordPress 5-minute installation. If you haven’t already
performed the DNS changes you’ll have to access the folder through
the temporary installation address provided by your web host. If
you’ve changed the DNS settings and they’ve propagated already,
you should be able to run the install just by hitting the domain
name.
Follow the WordPress installation steps. This should be pretty
straightforward, but make sure you have the details of the database
you setup above handy. You’re going to need them.
Do not use “admin” as the username for the administrator user.
This is a security risk. Use a name that is easy for you to remember
but hard for others to guess. I tend to go for something like as
“domdomsuper” for domain.com. Create a strong password for the
administrator – this is critical. Your administrator username is going
to get bombarded with brute-force attacks. An easy password is a
sure way to get your website hacked in no time at all.
Access your brand-spanking new WordPress installation. Once the
setup has been completed, it’s time to check out your new website.
You’re not going to see anything groundbreaking, just the default
Chapter 2: WordPress Installation
Database settings for WordPress 5-minute install
The Most Complete 101+ Step WordPress Checklist Ever Page 11
Chapter 2: WordPress Installation
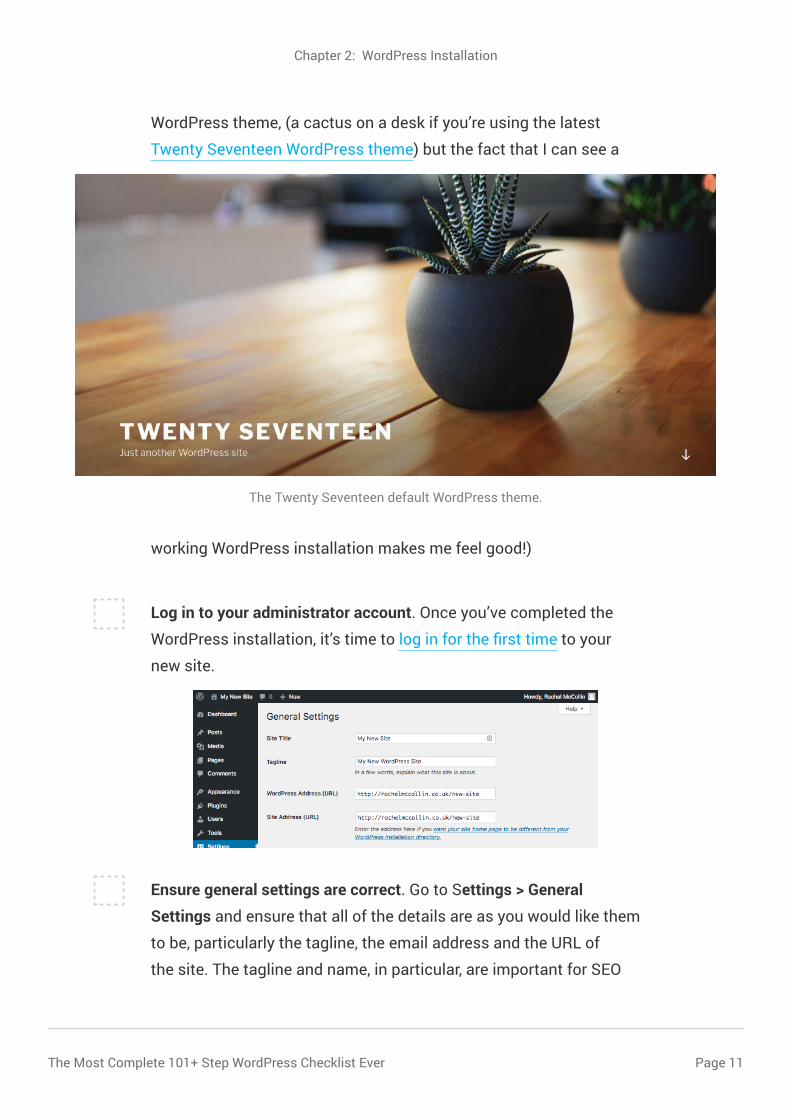
WordPress theme, (a cactus on a desk if you’re using the latest
Twenty Seventeen WordPress theme) but the fact that I can see a
working WordPress installation makes me feel good!)
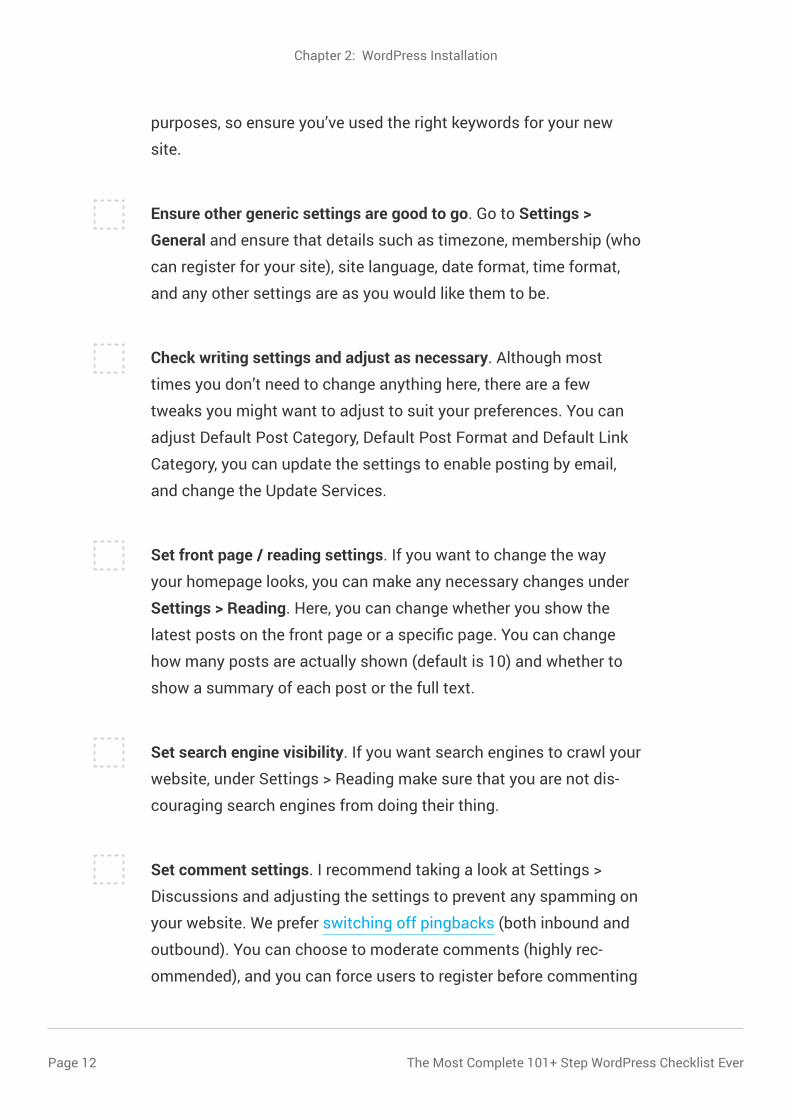
Log in to your administrator account. Once you’ve completed the
WordPress installation, it’s time to log in for the first time to your
new site.
Ensure general settings are correct. Go to Settings > General
Settings and ensure that all of the details are as you would like them
to be, particularly the tagline, the email address and the URL of
the site. The tagline and name, in particular, are important for SEO
The Twenty Seventeen default WordPress theme.
The Most Complete 101+ Step WordPress Checklist EverPage 12
purposes, so ensure you’ve used the right keywords for your new
site.
Ensure other generic settings are good to go. Go to Settings >
General and ensure that details such as timezone, membership (who
can register for your site), site language, date format, time format,
and any other settings are as you would like them to be.
Check writing settings and adjust as necessary. Although most
times you don’t need to change anything here, there are a few
tweaks you might want to adjust to suit your preferences. You can
adjust Default Post Category, Default Post Format and Default Link
Category, you can update the settings to enable posting by email,
and change the Update Services.
Set front page / reading settings. If you want to change the way
your homepage looks, you can make any necessary changes under
Settings > Reading. Here, you can change whether you show the
latest posts on the front page or a specific page. You can change
how many posts are actually shown (default is 10) and whether to
show a summary of each post or the full text.
Set search engine visibility. If you want search engines to crawl your
website, under Settings > Reading make sure that you are not dis-
couraging search engines from doing their thing.
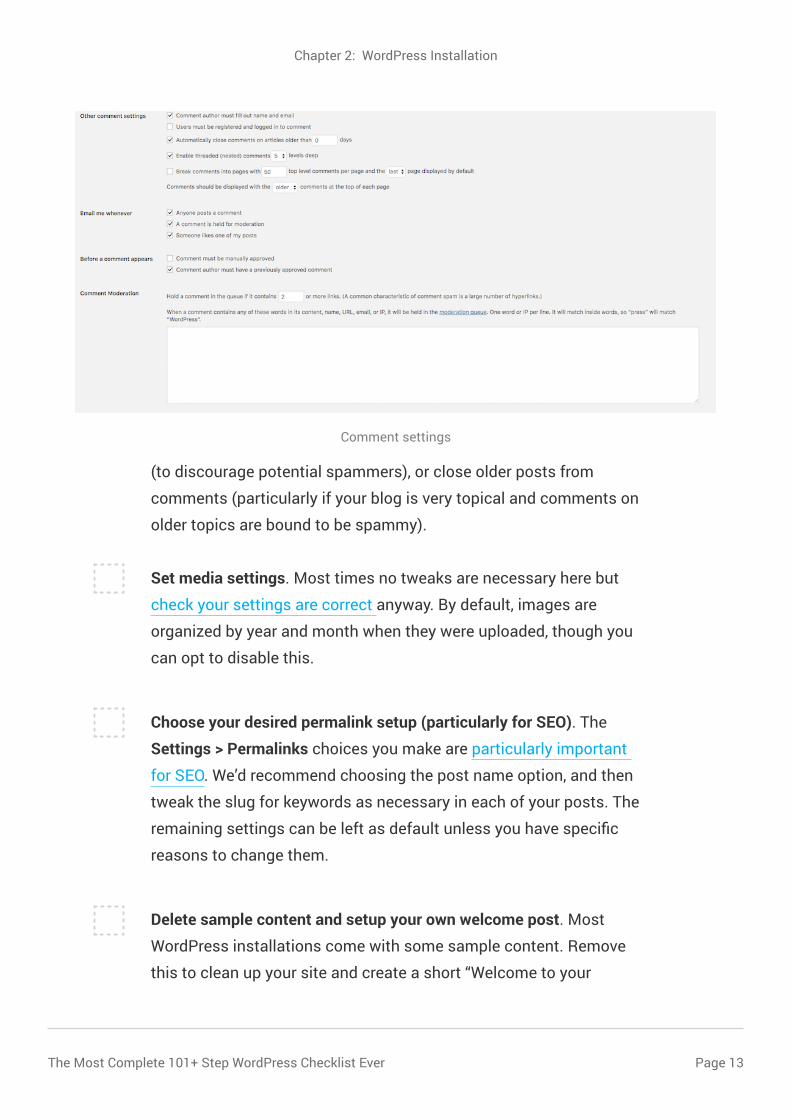
Set comment settings. I recommend taking a look at Settings >
Discussions and adjusting the settings to prevent any spamming on
your website. We prefer switching off pingbacks (both inbound and
outbound). You can choose to moderate comments (highly rec-
ommended), and you can force users to register before commenting
Chapter 2: WordPress Installation
The Most Complete 101+ Step WordPress Checklist Ever Page 13
Chapter 2: WordPress Installation
(to discourage potential spammers), or close older posts from
comments (particularly if your blog is very topical and comments on
older topics are bound to be spammy).
Set media settings. Most times no tweaks are necessary here but
check your settings are correct anyway. By default, images are
organized by year and month when they were uploaded, though you
can opt to disable this.
Choose your desired permalink setup (particularly for SEO). The
Settings > Permalinks choices you make are particularly important
for SEO. We’d recommend choosing the post name option, and then
tweak the slug for keywords as necessary in each of your posts. The
remaining settings can be left as default unless you have specific
reasons to change them.
Delete sample content and setup your own welcome post. Most
WordPress installations come with some sample content. Remove
this to clean up your site and create a short “Welcome to your
Comment settings
The Most Complete 101+ Step WordPress Checklist EverPage 14
website post,” or something similar which your users will see if they
come across your site. It’s ideal to mention that your site is still
under construction. (P.S. Do avoid the 90s under construction GIFs!)
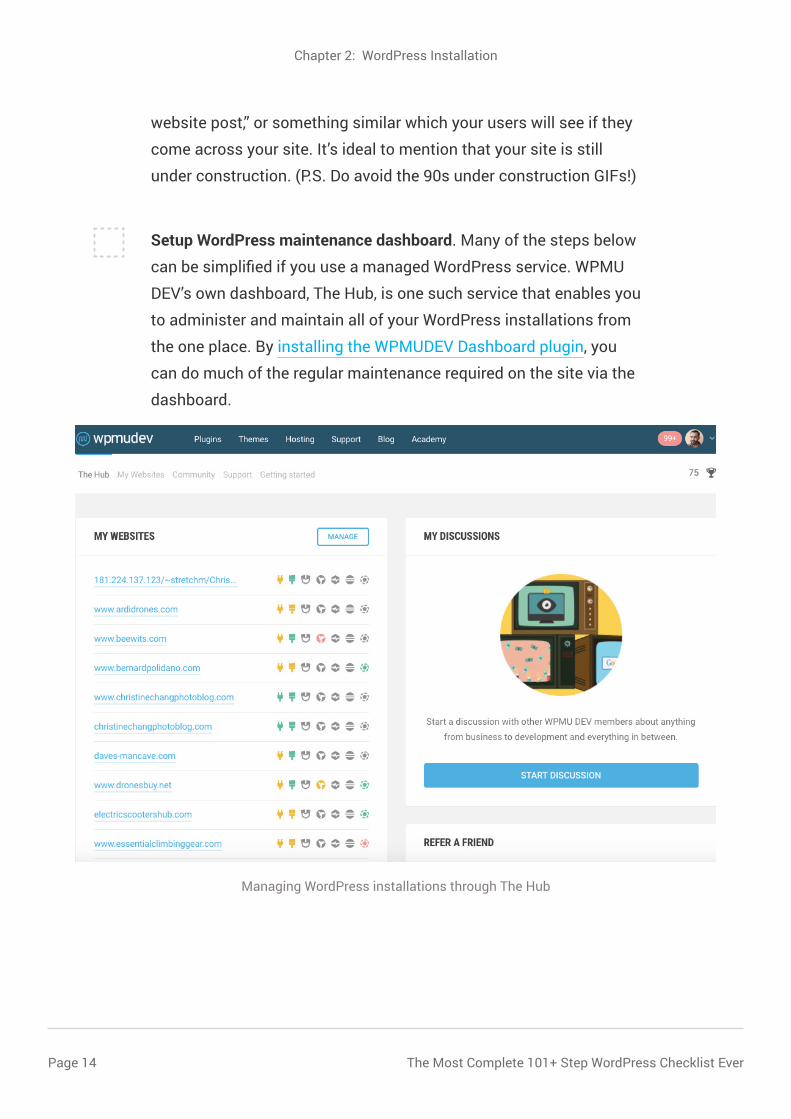
Setup WordPress maintenance dashboard. Many of the steps below
can be simplified if you use a managed WordPress service. WPMU
DEV’s own dashboard, The Hub, is one such service that enables you
to administer and maintain all of your WordPress installations from
the one place. By installing the WPMUDEV Dashboard plugin, you
can do much of the regular maintenance required on the site via the
dashboard.
Chapter 2: WordPress Installation
Managing WordPress installations through The Hub
The Most Complete 101+ Step WordPress Checklist Ever Page 15
Chapter 3: WordPress Security
WordPress Security Checklist
WordPress security requires a full-blown exercise, and in fact,
we’ve already written a 30+ item checklist for full-blown WordPress
security, which we highly recommend you visit and bookmark. In
this WordPress checklist, we’ll have a look at a few of the basic
things you must do for WordPress security.
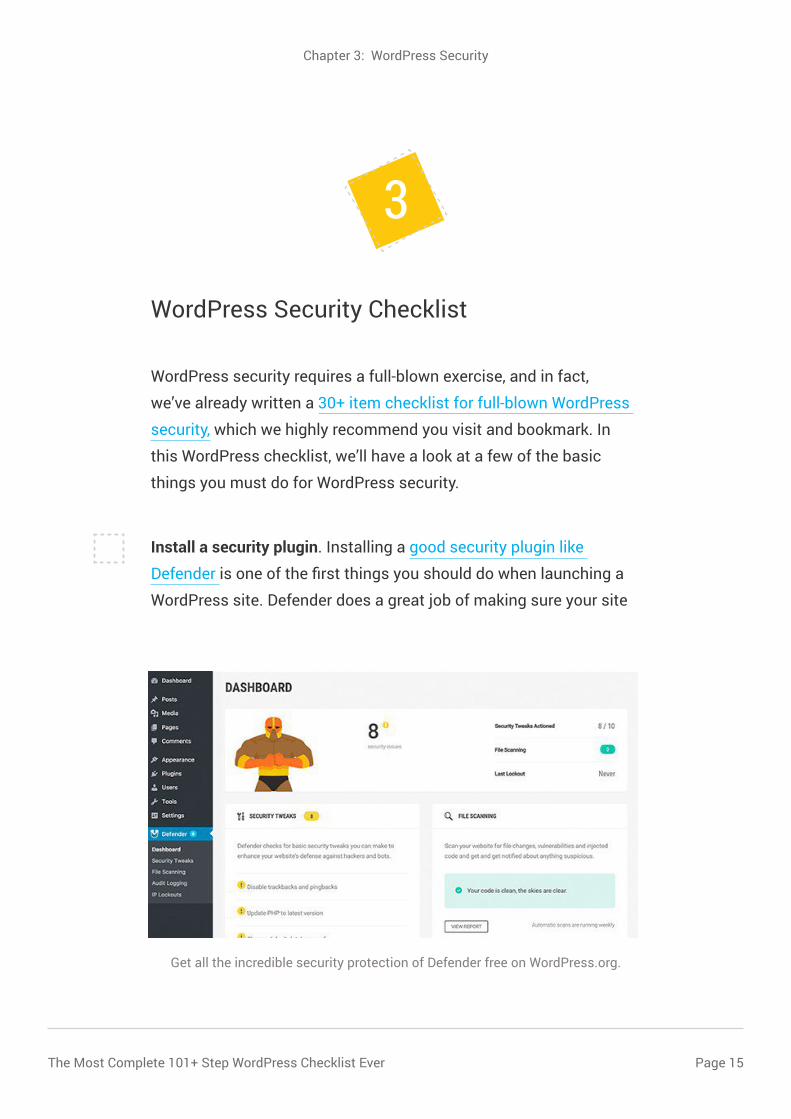
Install a security plugin. Installing a good security plugin like
Defender is one of the first things you should do when launching a
WordPress site. Defender does a great job of making sure your site
3
Get all the incredible security protection of Defender free on WordPress.org.

The Most Complete 101+ Step WordPress Checklist EverPage 16
Chapter 3: WordPress Security
is less vulnerable by performing a series of security hardening steps
on your site.
Quite a few of the steps below are already covered by Defender.
Make sure WordPress auto updates are enabled. When security
issues are discovered, the WordPress Security Team typically
releases an update that fixes any vulnerabilities. You should,
therefore, check that your wp-config.php file does not contain the
following constant, which disables auto updates:
1 define( ‘AUTOMATIC_UPDATER_DISABLED’, true );
Update Authentication Keys for your WordPress installation. These
keys should be changed every so often, but definitely should be
changed after your initial installation. Generate a new set of keys
here: https://api.wordpress.org/secret-key/1.1/, and then update the
settings in your wp-config.php file.
Secure the wp.config file from unauthorized access. It’s a good idea
to add the following to your .htaccess file to deny any unauthorized
access to the file:
1 <files wp-config.php>
2 order allow,deny
3 deny from all
4 function
Remove the WordPress version. Although this is security by
obscurity and it’s by no means a strong way to bolster security on
The Most Complete 101+ Step WordPress Checklist Ever Page 17
Chapter 3: WordPress Security
your site, it just makes it that tad harder for somebody to target any
vulnerabilities in a specific WordPress version. Add the following
code into your functions.php file:
1 function remove_version() {
2 return ‘’;
3 }
4 add_filter(‘the_generator’, ‘remove_version’);
Limit login attempts to the backend. Weak passwords are always
a bad idea. That’s why we’ve recommended you create a secure
password a few lines up. However, limiting brute forcing attempts
to the backend is definitely a good idea. After all, you don’t want
hackers hammering away at your backend. Install Defender to limit
logins.
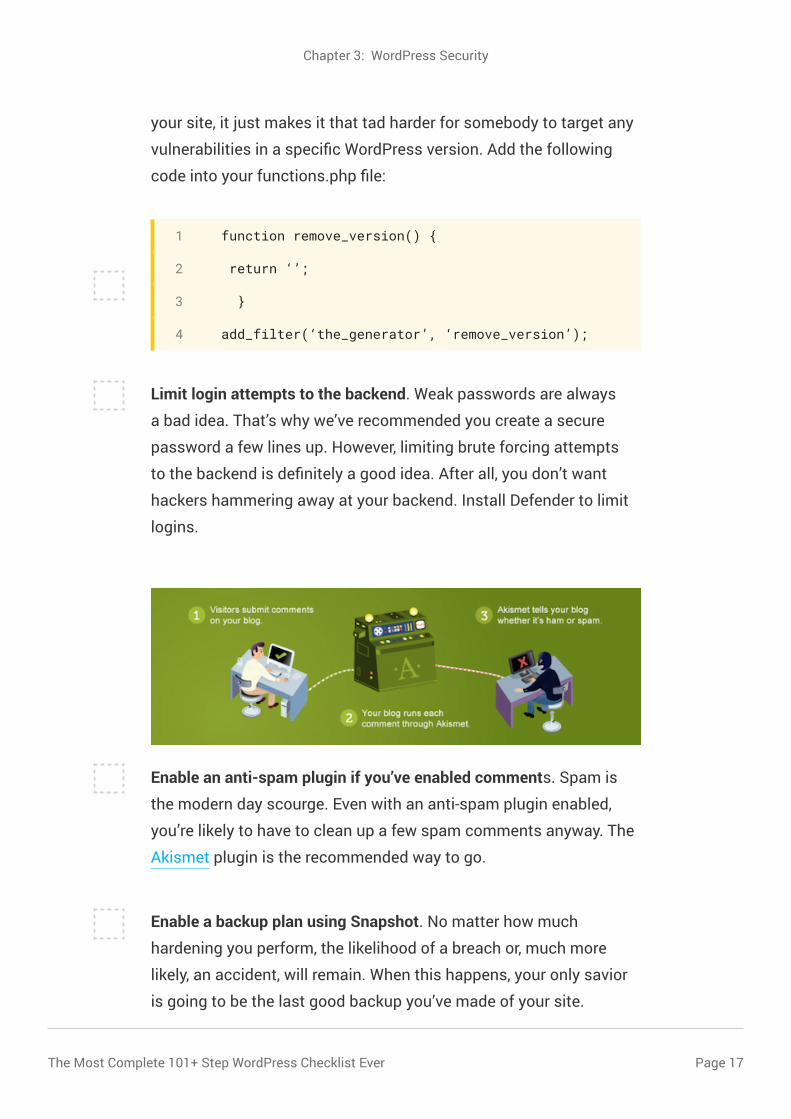
Enable an anti-spam plugin if you’ve enabled comments. Spam is
the modern day scourge. Even with an anti-spam plugin enabled,
you’re likely to have to clean up a few spam comments anyway. The
Akismet plugin is the recommended way to go.
Enable a backup plan using Snapshot. No matter how much
hardening you perform, the likelihood of a breach or, much more
likely, an accident, will remain. When this happens, your only savior
is going to be the last good backup you’ve made of your site.

The Most Complete 101+ Step WordPress Checklist EverPage 18
Chapter 3: WordPress Security
Snapshot, which integrates very nicely with Defender, allows you to
make backups and, more importantly, you can back up to the cloud.
Remember, if you’re keeping your backups on your own server, you
might still find yourself in serious trouble if your backup files go
missing.
Never download themes or plugins from pirate sites. And never ever
download plugins from non-reputable sources or hacking forums /
pirate software sites. They will be riddled with malware and will have
backdoors with which your site can be hijacked at will. Trust me, it’s
not worth the risk.
The Most Complete 101+ Step WordPress Checklist Ever Page 19
Chapter 4: WordPress Theme
WordPress Theme Checklist
Choose an appropriate theme for your website. Finding the right
theme for your website is a big decision you’ll have to make. You
need to find something that fits the brand, the functionality you
require for your site, your plans for the future, your budget, your
theme supplier, whether your client is happy with the choice… If
you want to be able to create and customize your own themes, you
might want to check out our very own Upfront.
Make sure your theme is mobile-friendly. One of the essential
criteria for choosing a theme for your site is going to be its mobile-
friendliness. Most of the traffic to your site will probably be coming
from mobile for a vast majority of sites. Your theme should not just
be mobile-friendly – ideally, it should be mobile-first.
Check how your theme handles responsiveness. Besides
mobile-first, your theme should be responsive, i.e. respond nicely
to the various sized devices that will be accessing it (extra small
– mobile, small – tablet/phablet, medium – desktops and laptops,
large – large screens). Your theme will morph depending on
screen access, with certain sections or functions hidden or shown
according to the size of device accessing the site. You should
ensure that you are happy with the responsiveness of the theme and
4
The Most Complete 101+ Step WordPress Checklist EverPage 20
ensure that the relevant sections are given due importance on the
various screen sizes.
Create a child theme site. As part of the development of your
website, you’re likely going to want to tweak some CSS and make
other customizations to your theme as necessary. Rather than edit
your site’s CSS directly, it’s recommended you create a child theme
first.
Update your theme with your brand’s logo. One of the most basic
configurations you’ll have to do to the theme is updating the theme
with your brand’s logo.
Chapter 4: WordPress Theme
The Most Complete 101+ Step WordPress Checklist Ever Page 21
Chapter 5: WordPress Configuration
WordPress Configuration Checklist
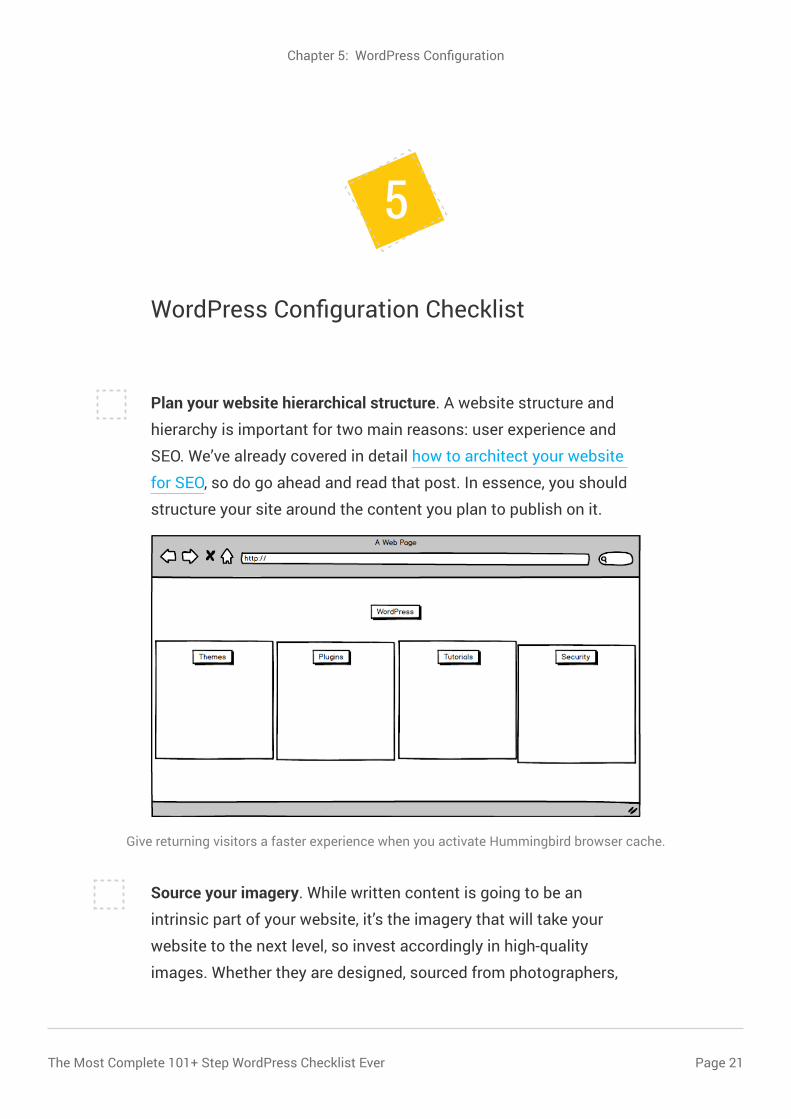
Plan your website hierarchical structure. A website structure and
hierarchy is important for two main reasons: user experience and
SEO. We’ve already covered in detail how to architect your website
for SEO, so do go ahead and read that post. In essence, you should
structure your site around the content you plan to publish on it.
Source your imagery. While written content is going to be an
intrinsic part of your website, it’s the imagery that will take your
website to the next level, so invest accordingly in high-quality
images. Whether they are designed, sourced from photographers,
5
Give returning visitors a faster experience when you activate Hummingbird browser cache.
The Most Complete 101+ Step WordPress Checklist EverPage 22
Chapter 5: WordPress Configuration
bought from stock photography sites or downloaded from free stock
image sites, images are crucial.
Source your content writers. The difference between a website that
sells and one that doesn’t, comes down to your sales copy. If you’re
not a professional copywriter, invest in one. These writers know
what wording to use, how to embed it in your site in such a way to
drastically improve your conversion ratio. Don’t skimp here.
Add a contact page. One of the main reasons for the existence of
most websites is that they provide an additional point of contact
between organizations and their client base or users. Your contact
page should be readily accessible and besides an actual contact
form, it should provide information to helps site visitors get in touch,
including phone numbers, physical location and any other forms of
communication available, such as social media.
Customize the messages of the contact form. The difference
between an amateur and a professional looking website is in the
small details. Customizing messages that contact form displays
after sending (and other auto messages) gives your website that
little edge over most run-of-the-mill websites.
Redirect to a “thank you” or information pages after submission.
When a user has made the effort of following your calls-to-action
and has tried getting in touch, the least you can do is set their
expectations. Follow up a form submission with a redirect to a
“thank you” page that helps directs their next action or what they
can now expect from you. Of course, make sure you meet any expec-
tations you set.

The Most Complete 101+ Step WordPress Checklist Ever Page 23
Chapter 5: WordPress Configuration
Add other important ancillary pages. There are a number of pages
that should be part of each and every website you create. Although
these pages are not particularly exciting, their importance shouldn’t
be underestimated.
• About Us. This is a detailed overview of the organization behind
the website. There should be sufficient details here such that
somebody who is doing business with the website for the first
time can confidently understand who the organization is and
what the company is all about.
• Privacy policy. A legal requirement in some countries, this page
explains to the user what kind of information about the user
is collected by the website and what will be done with that
information to allay any privacy concerns.
• Terms and conditions. Another legally required page, it helps
limit your liability, sets the copyright of your site, sets governing
laws for the site and references the privacy policy that the
website applies.
Add your sales copy pages, services or product pages. You’ve
organized most of your site up to this point, so it’s time to start
making some money! Your sales copy pages need to be well-thought
out, so sales copy is a skill you’ll need to acquire. If you don’t have
the necessary writing skills, hire somebody who does. It might be
expensive, but it’ll be well-worth it. Specific sales landing pages
can either be part of the theme of your site or else you can opt for a
specific landing page plugin or service.
The Most Complete 101+ Step WordPress Checklist EverPage 24
Chapter 5: WordPress Configuration
Create menus and menu items as necessary. Creating a menu for
your site should be part of a long-term strategy for both the UX of
your site and its SEO architecture. Once you know what your site
structure will look like, only then should you start designing and
defining menu items as necessary.
Create a custom 404 page. Turn a frustrating user experience into
a positive one by helping the user find the information they were
looking for, or providing a contact method so they can get in touch
with you.
Configure any WordPress widgets. You’ll need to configure any
widgets you use for features like archives, recent comments and
recent blogs. There might also be widgets that come with your
theme or any plugins you’ve installed.
Install any preferred and necessary plugins. Once you’re done with
the basics, you’re going to have to install a few good plugins to
achieve the desired functionality of your site. Choosing plugins
should not be taken lightly because they can make or break your
site. Always go for trusted and reputable companies and be sure to
read reviews.
The Most Complete 101+ Step WordPress Checklist Ever Page 25
Chapter 6: WordPress Search Engine Optimization Checklist
WordPress Search Engine Optimization
Checklist
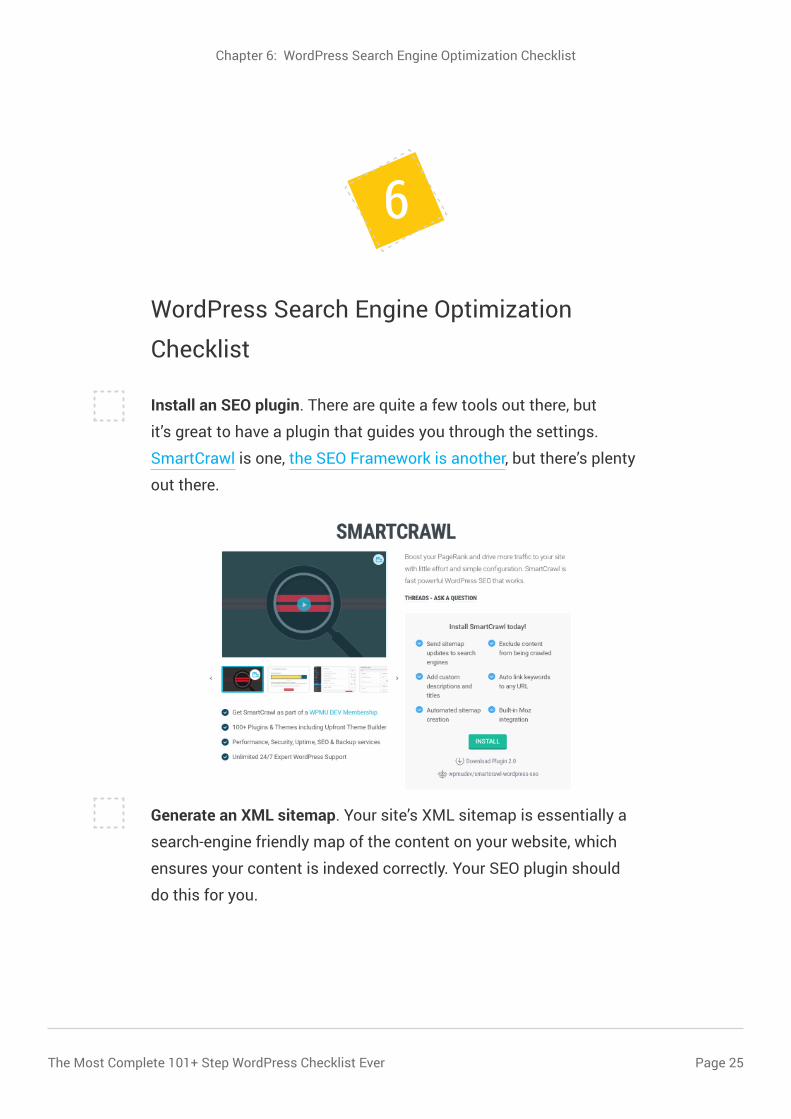
Install an SEO plugin. There are quite a few tools out there, but
it’s great to have a plugin that guides you through the settings.
SmartCrawl is one, the SEO Framework is another, but there’s plenty
out there.
Generate an XML sitemap. Your site’s XML sitemap is essentially a
search-engine friendly map of the content on your website, which
ensures your content is indexed correctly. Your SEO plugin should
do this for you.
6
The Most Complete 101+ Step WordPress Checklist EverPage 26
Log in to Google Search Console and verify your website. In order to
submit your XML sitemap to Google, you’ll need to sign up or log in
to Google Search Console to verify your website.
Log in to Bing WebMaster tools and verify your website. Although
Bing does not generate as much traffic as Google, it’s still got
potential to send good traffic your way with the right content
marketing.
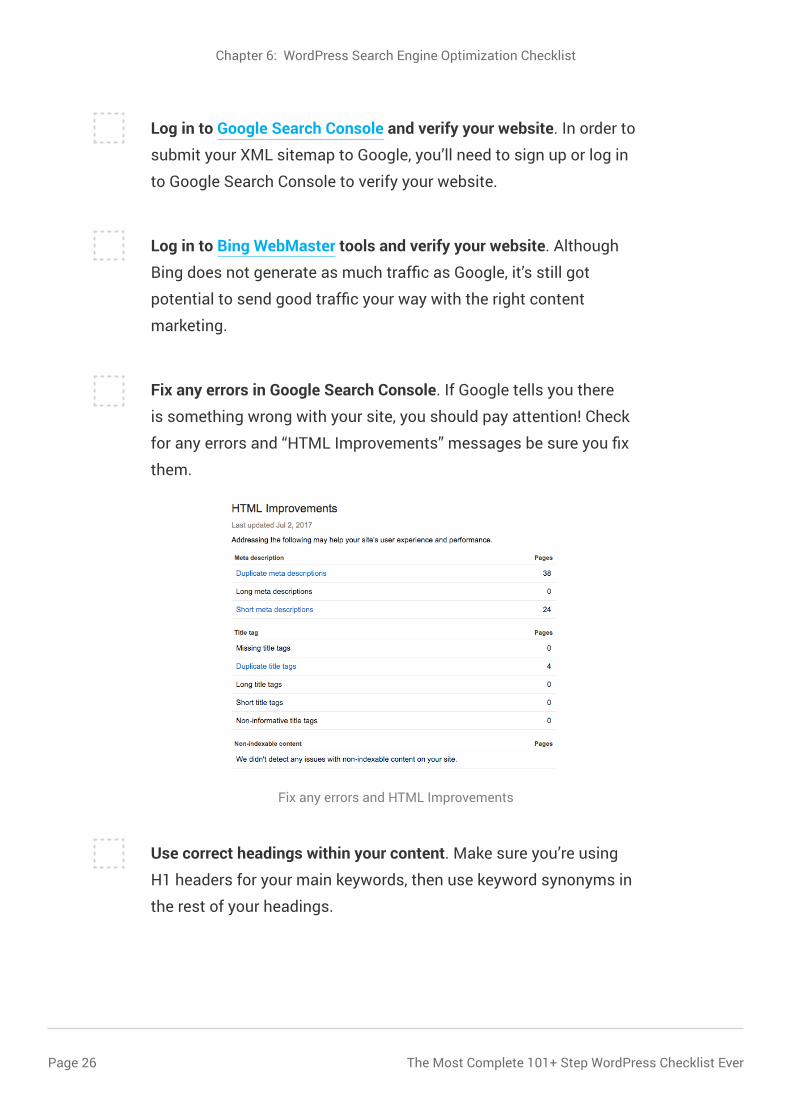
Fix any errors in Google Search Console. If Google tells you there
is something wrong with your site, you should pay attention! Check
for any errors and “HTML Improvements” messages be sure you fix
them.
Use correct headings within your content. Make sure you’re using
H1 headers for your main keywords, then use keyword synonyms in
the rest of your headings.
Chapter 6: WordPress Search Engine Optimization Checklist
Fix any errors and HTML Improvements
The Most Complete 101+ Step WordPress Checklist Ever Page 27
Use two-fold headlines to improve the number of keywords you are
targeting. If you have a primary and secondary keyphrase you want
to target, two-fold headlines (a secondary headline following the
primary title/headline) allow you to target both nicely.
All pages and posts should have unique titles with 70 characters or
less. Besides the actual length of the post, you should spend a lot of
time creating compelling and emotional headlines for your content.
This will help boost your traffic significantly both for organic and
social media traffic.
All pages and posts should have unique meta descriptions with 156
characters or less. Well-written meta description can help boost
your organic traffic. Create compelling meta descriptions that entice
people to click through to your articles.
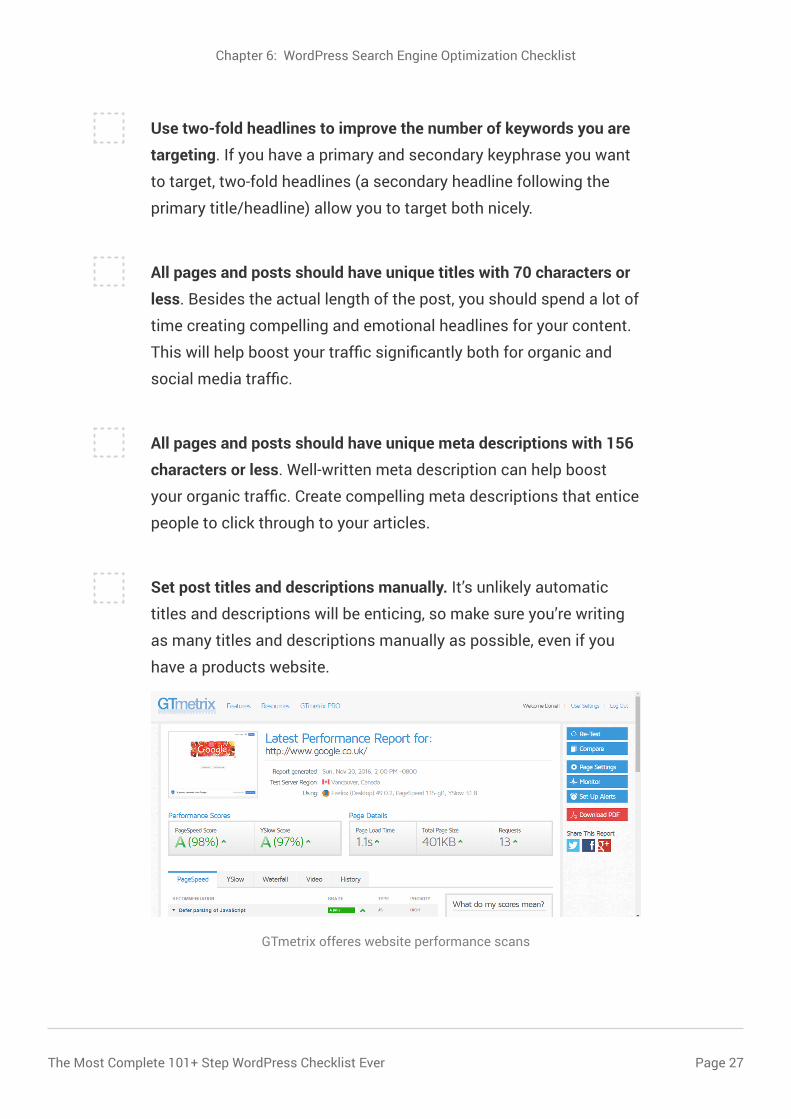
Set post titles and descriptions manually. It’s unlikely automatic
titles and descriptions will be enticing, so make sure you’re writing
as many titles and descriptions manually as possible, even if you
have a products website.
Chapter 6: WordPress Search Engine Optimization Checklist
GTmetrix offeres website performance scans

The Most Complete 101+ Step WordPress Checklist EverPage 28
Make sure your WordPress site is fast. You’ve probably seen this so
many times it’s coming out of your ears. However, it’s true – your
site needs to load quickly so your users don’t get frustrated and
leave. A happy visitor is a loyal visitor. Check out our Ultimate Mega
Guide to Speeding Up WordPress.
Chapter 6: WordPress Search Engine Optimization Checklist
The Most Complete 101+ Step WordPress Checklist Ever Page 29
Chapter 7: WordPress Social Media Integration
Social Media Integration WordPress Checklist
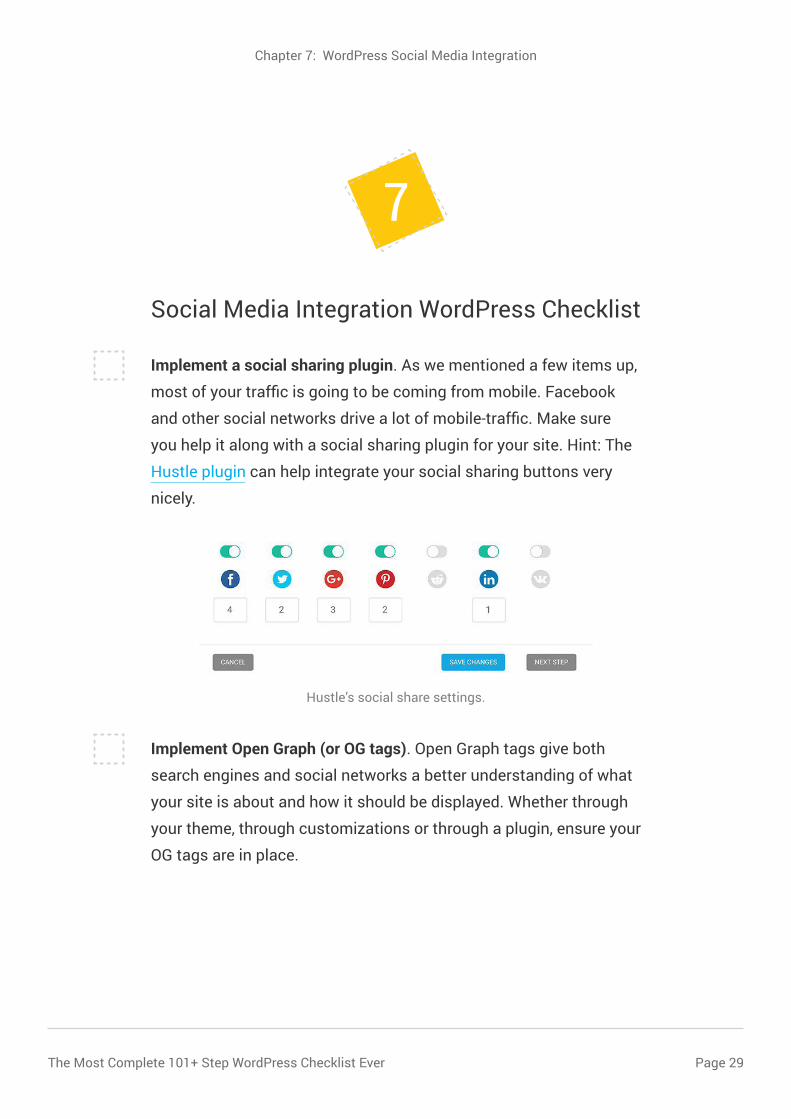
Implement a social sharing plugin. As we mentioned a few items up,
most of your traffic is going to be coming from mobile. Facebook
and other social networks drive a lot of mobile-traffic. Make sure
you help it along with a social sharing plugin for your site. Hint: The
Hustle plugin can help integrate your social sharing buttons very
nicely.
Implement Open Graph (or OG tags). Open Graph tags give both
search engines and social networks a better understanding of what
your site is about and how it should be displayed. Whether through
your theme, through customizations or through a plugin, ensure your
OG tags are in place.
7
Hustle’s social share settings.
The Most Complete 101+ Step WordPress Checklist EverPage 30
Chapter 7: WordPress Social Media Integration
Implement Twitter Cards. Just like Facebook OG tags, Twitter OG
tags help Twitter figure out how best to display posts shared from
your website, so make sure Twitter OG tags are in place.
Push posts automatically to Twitter (optional). If you’d like to push
posts to Twitter automatically, you can set up a plugin like as WP to
Twitter to do this. We’ve also got an Ultimate Guide to Integrating
Twitter into WordPress for plenty more detail.
Customize your Facebook page to match the branding of your
website. For consistency’s sake, your Facebook page and your
website’s branding should match, so make sure you update your
Facebook page cover image as necessary.
Push posts automatically to Facebook (optional). If you’re looking
to push your content to Facebook, you can use services like Buffer,
HootSuite, and IFTTT.

The Most Complete 101+ Step WordPress Checklist Ever Page 31
Chapter 8: WordPress Mailing List Integration
Mailing List Integration Checklist
Implement a newsletter subscription form. The e-Newsletter mailing
list plugins is a perfect fit if you’re looking to engage with your
audience via email such as newsletters or email broadcasts.
Prepare your site for picking up emails. Besides “Subscriber to
our newsletter” type widgets, you should implement multiple
mechanisms to pick up as many emails as possible from your
website traffic. Email is still the number one way to convert website
traffic into paying customers.
Use Hustle to create multiple lead magnets. Continuing from the
previous point, use Hustle to create a number of lead magnets
(hooks on your site that ask for an email address in exchange for
something of value to the visitor) to boost your email subscriber
list. Done right, you can convert between 1% to 20% of your website
traffic to email.
8
Create stunning opt-ins, pop-ups and slide-ins with Hustle.
The Most Complete 101+ Step WordPress Checklist EverPage 32
Chapter 9: Analytics, Monitoring, and Uptime
Analytics, Monitoring and Uptime Integration
Add Google or any other analytics service to your theme. If you’re a
traffic geek like me, you’ll probably spend a lot of time poring over
each little detail in your analytics, but in order to do that, you’ll need
to integrate Google Analytics with WordPress.
Install an uptime monitor. The Hub includes a built-in uptime
monitor that sends you an instant email alert if your site goes down.
Monitor your visitors to remove any UX stumbling blocks. If you’re
serious about conversion, you need to ensure there are no obstacles
preventing your visitors from buying your product or service. Mon-
itoring tools like Hotjar can help you see what your visitors are doing
in real-time.
9
The Most Complete 101+ Step WordPress Checklist Ever Page 33
Chapter 10: WordPress Performance
WordPress Performance Checklist
Ensure your page load time is 3 seconds or less. The ideal loading
time of any page of your website should be 3 seconds or less. Set
this as your benchmark and do anything you can to achieve that
loading speed.
Clean up any unused themes, plugins or anything else which you
will not be using. Themes that are installed but deactivated can
present a performance hit and are a security concern. In fact, you
should keep your site as lean as possible for performance purposes.
Remove any plugins that are non-essential.
Install a WordPress a caching plugin. A caching plugin is essential
to making your website load fast. Hitting the database with tens of
queries each time a visitor lands on your site will drag your website’s
loading speed down. Using a caching plugin will ensure your site is
served faster and your loading speed is seriously improved.
Install Hummingbird to further optimize loading speed.
Hummingbird is another tool that can make your website load
faster. It does quite a lot of things under the hood to make your site
leaner. A caching plugin + Hummingbird is typically a killer combo
for most sites. Using Hummingbird, you can check how quickly your
10
The Most Complete 101+ Step WordPress Checklist EverPage 34
Chapter 10: WordPress Performance
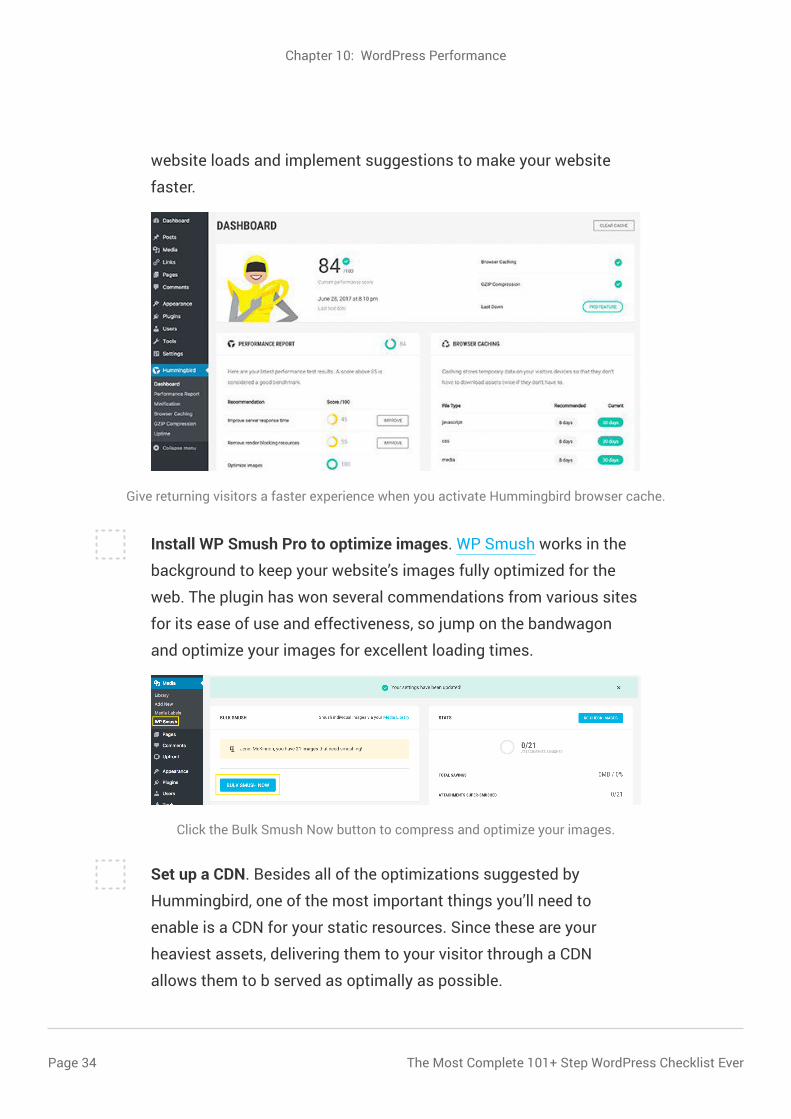
website loads and implement suggestions to make your website
faster.
Install WP Smush Pro to optimize images. WP Smush works in the
background to keep your website’s images fully optimized for the
web. The plugin has won several commendations from various sites
for its ease of use and effectiveness, so jump on the bandwagon
and optimize your images for excellent loading times.
Set up a CDN. Besides all of the optimizations suggested by
Hummingbird, one of the most important things you’ll need to
enable is a CDN for your static resources. Since these are your
heaviest assets, delivering them to your visitor through a CDN
allows them to b served as optimally as possible.
Give returning visitors a faster experience when you activate Hummingbird browser cache.
Click the Bulk Smush Now button to compress and optimize your images.

The Most Complete 101+ Step WordPress Checklist Ever Page 35
Chapter 11: Testing Checklist
WordPress Testing Checklist
Run a few pages of your site through the W3C Validators. Although
a perfectly valid website is not necessary, it’s a good idea to remove
any obvious and glaring errors.
Check whether you left any broken links by mistake. Broken links
can lead to a bad user experience and negative SEO signals, so
strive to remove them completely from your site.
Your website should look great on all browsers. Most especially,
your website should look great on the major browsers: Chrome,
FireFox, Safari, and Edge. Browsershots is an excellent tool that can
generate a quick snapshot of your website on multiple versions of
the major browsers.
Check whether your website has any accessibility problems and
fix them. You’ll want to ensure that your site is as accessible to all
audiences as possible.
Make sure you have removed any dummy text. Search for any lorem
ipsum text or other copy used for testing and delete it.
11
The Most Complete 101+ Step WordPress Checklist EverPage 36
Chapter 11: Testing Checklist
Proofread the content of your site for any spelling and grammar
errors. Spelling and grammar errors show a lack of professionalism.
Pass your website’s copy through multiple proofs. If you’re not a
native speaker of the language you’re writing in, make sure you hire
native speakers to proof your content..
Make sure your contact details are correct. Particularly if you want
to rank for local searches, make sure your physical location details
are correct, together with names and phone numbers.
Check that images are formatted correctly and have been optimized
for speed. We’ve already recommended that you use Smush to
optimize your images for the speed, but you’ll need to manually test
whether your images are formatted and placed correctly.
Check that audio and video items are correct. Just like with images,
check that any audio and video items play correctly and are not
linking to draft or old copies.
Check that any assets such as PDFs are correctly linked. If you’re
hosting resources, assets or are offering downloads through lead
magnets, test to ensure that all assets are correctly linked and are
being sent on cue.
Any images, files, fonts, themes and other content should be
properly licensed. Spare yourself the embarrassment of being
publicly called out for using unlicensed resources. Make sure any
third party resources you are using on your site are fully licensed for
your use.
The Most Complete 101+ Step WordPress Checklist Ever Page 37
Chapter 12: WordPress Functionality Testing
Website Functionality Checklist
Verify that all forms are working and submitting data correctly.
Manually test your forms and make sure that the contact
information is being sent to the correct email addresses or
databases.
Test that forms are displaying correct messages. Customizing any
automatic messages displayed after sending forms can give you
that little edge over other websites, but if you choose not to do this,
at least make sure that any contact forms are displaying correct
messages after submission.
Check that any form or email auto replies are working correctly. If
your contact forms will be sending any auto replies, confirm that the
correct messages are going out at the right contact point.
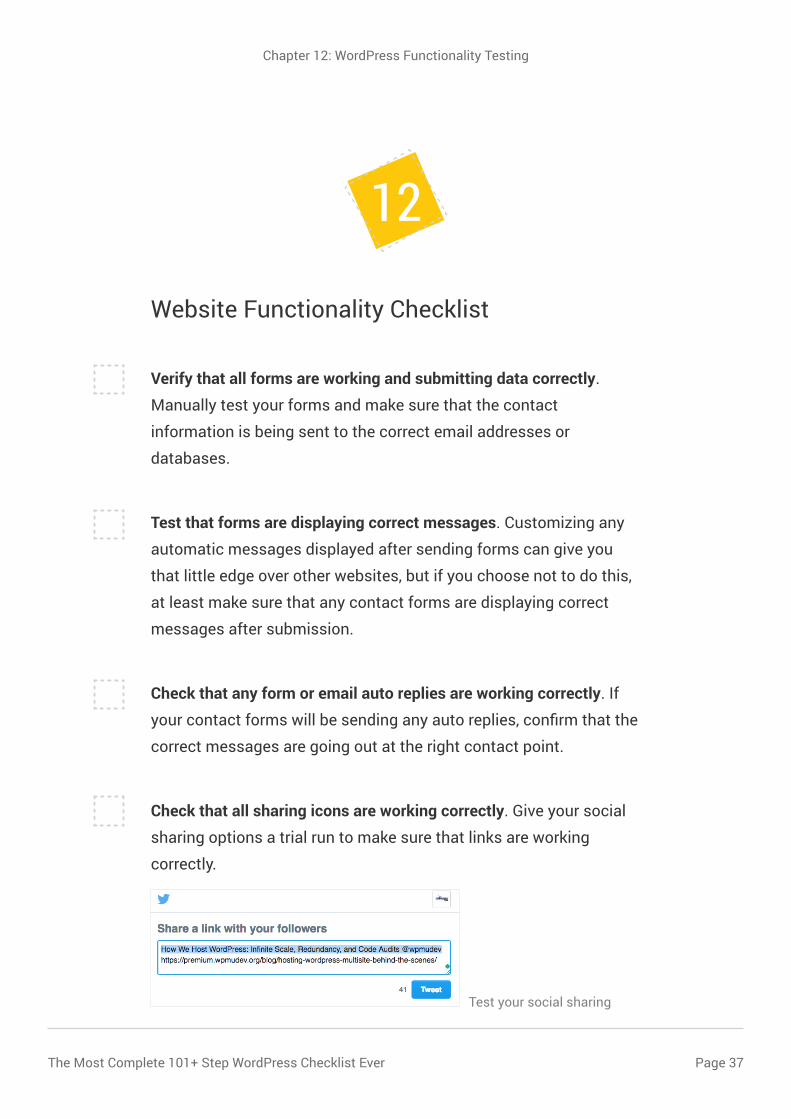
Check that all sharing icons are working correctly. Give your social
sharing options a trial run to make sure that links are working
correctly.
12
Test your social sharing
The Most Complete 101+ Step WordPress Checklist EverPage 38
Chapter 13: Post-launch
Post Launch Checklist
Create a website handover document. There’s going to be a lot of
detail you’ll need to hand over to the client (if you have one) when
you’re done, including database names and users, passwords, and
other essential information. Put everything together in a document,
ready to be handed over to the client.
Invoice the client. Hey, that’s the point of all this work, isn’t it?
Add the website to your design portfolio. Because hey, after you’ve
done such a great job on this site you want to get some merit out of
it!
Set up a retainer with the client for maintenance updates. Revenue
from the website shouldn’t stop once the site has launched. You
should find ways of charging (at least a small fee) for ongoing main-
tenance of the site. Don’t forget to add the site to The Hub, which
will make the maintenance of the site that much easier.
Make a backup of the development site. Don’t rely on the client to
create and keep backups. Make sure you’ve taken a full backup of
the launched (working) version of the site just in case something
goes catastrophically wrong and you need to restore a backup.
13
The Most Complete 101+ Step WordPress Checklist Ever Page 39
Chapter 13: Post-launch
Make sure you save any backups offsite rather than on the same
server as the live website.
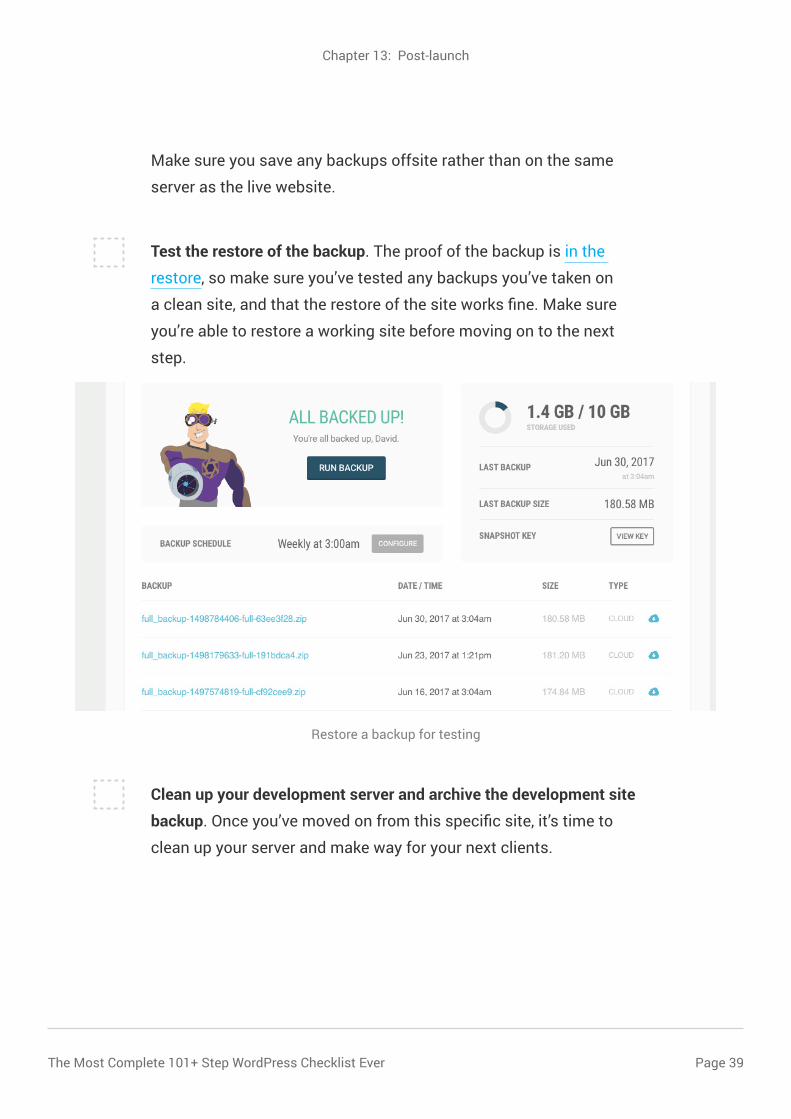
Test the restore of the backup. The proof of the backup is in the
restore, so make sure you’ve tested any backups you’ve taken on
a clean site, and that the restore of the site works fine. Make sure
you’re able to restore a working site before moving on to the next
step.
Clean up your development server and archive the development site
backup. Once you’ve moved on from this specific site, it’s time to
clean up your server and make way for your next clients.
Restore a backup for testing
The Most Complete 101+ Step WordPress Checklist EverPage 40
Have you completed your WordPress Tast Checklist
Have You Completed All the Items in the
WordPress Task Checklist?
As you can see, developing and launching a website takes much
more work than you’re probably even aware of, so we made this
WordPress checklist to ensure that you don’t miss any of the
essential steps.
This checklist covers the basics, so you’ll need to add your own
steps along the way to take into account any custom features you
add to your site.
We hope you find this checklist useful for your next WordPress
project!
?