Embed Size (px)
Citation preview
The beginning of creating my contents.
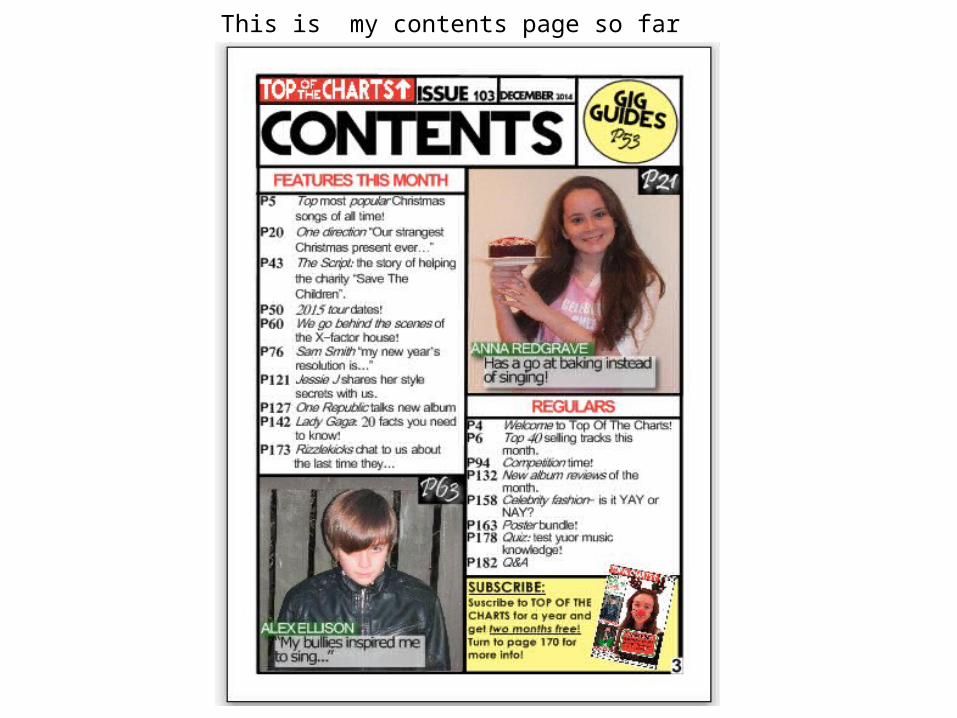
This is my contents page so far
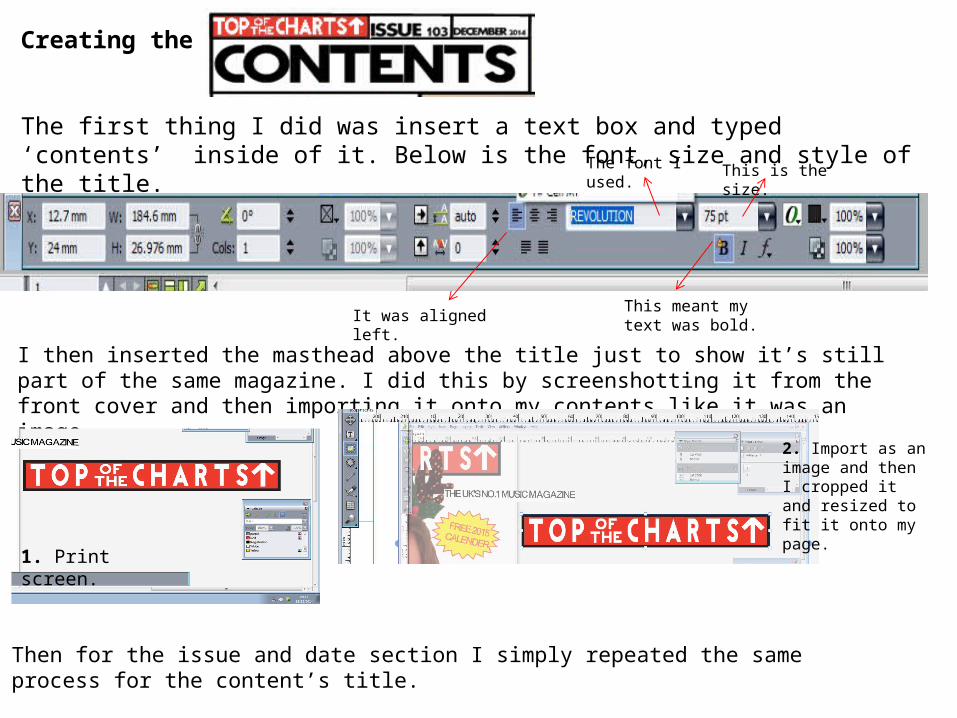
Creating the title
The first thing I did was insert a text box and typed ‘contents’ inside of it. Below is the font, size and style of the title. The font I used.
This meant my text was bold.
It was aligned left.
This is the size.
I then inserted the masthead above the title just to show it’s still part of the same magazine. I did this by screenshotting it from the front cover and then importing it onto my contents like it was an image.
1. Print screen.
2. Import as an image and then I cropped it and resized to fit it onto my page.
Then for the issue and date section I simply repeated the same process for the content’s title.

Inserting the images.I then inserted the images by using this button like I did when importing images for the front cover. This let me draw a box and then I right clicked inside of it to import my images. I then just resized them to what I wanted them to be.
1. Right click and press import.
2. Resize and crop.
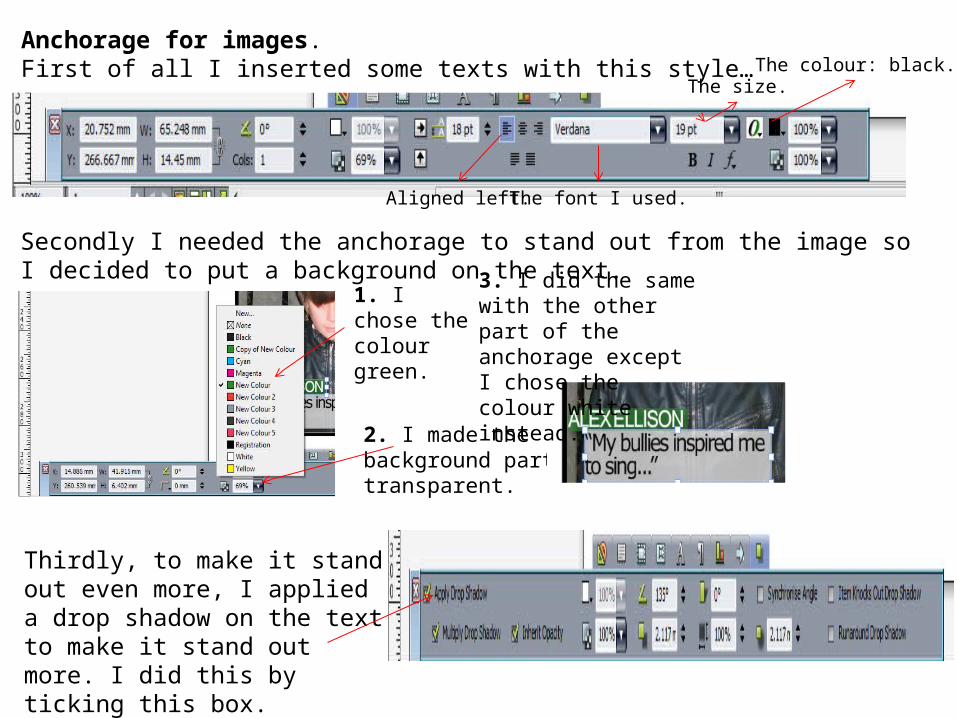
Anchorage for images.First of all I inserted some texts with this style…
The font I used.Aligned left.
The size.The colour: black.
Secondly I needed the anchorage to stand out from the image so I decided to put a background on the text.
2. I made the background partly transparent.
1. I chose the colour green.
3. I did the same with the other part of the anchorage except I chose the colour white instead.
Thirdly, to make it stand out even more, I applied a drop shadow on the text to make it stand out more. I did this by ticking this box.

Creating the subscribe box.Firstly, I just inserted the textAnd then changed the Background to yellow to make it stand out. I then screenshot my front cover and imported the screenshot like it was an image. I completed this by using the same tools from previous features on my contents page.
Creating the puff.
1. I inserted the circle by clicking on this button
here.
2. I then inserted some text and rotated the puff by clicking on the corners of the circle and text box which let me turn to the angle I wanted it to be at.
3. I then chose the colour here.
And then made the colour lighter by decreasing the transparency.
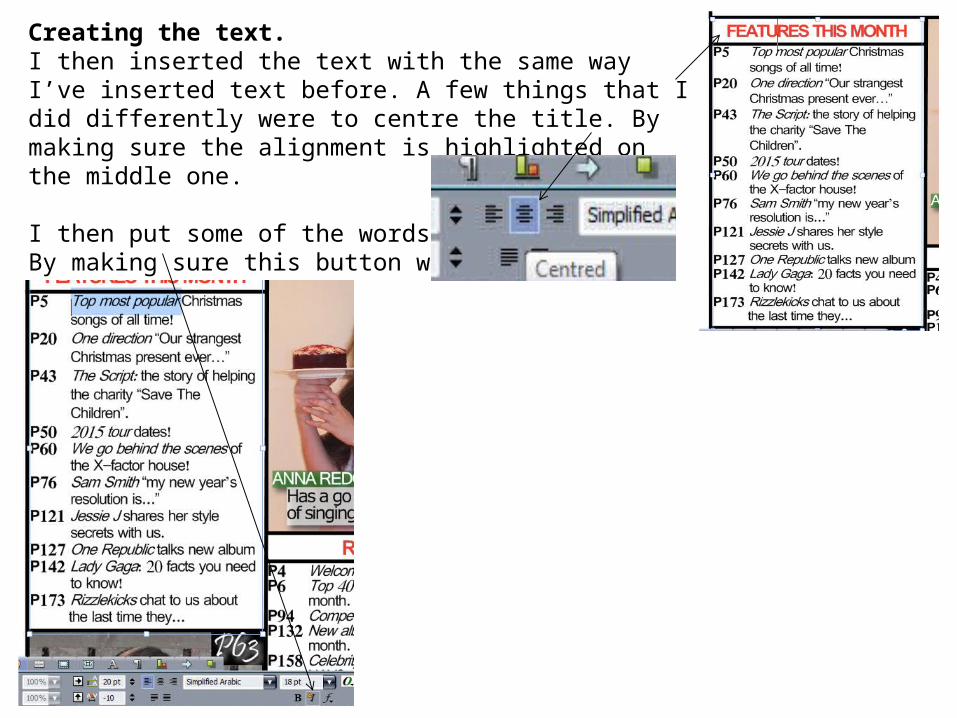
Creating the text.I then inserted the text with the same way I’ve inserted text before. A few things that I did differently were to centre the title. By making sure the alignment is highlighted on the middle one.
I then put some of the words in italics.By making sure this button wasHighlighted.
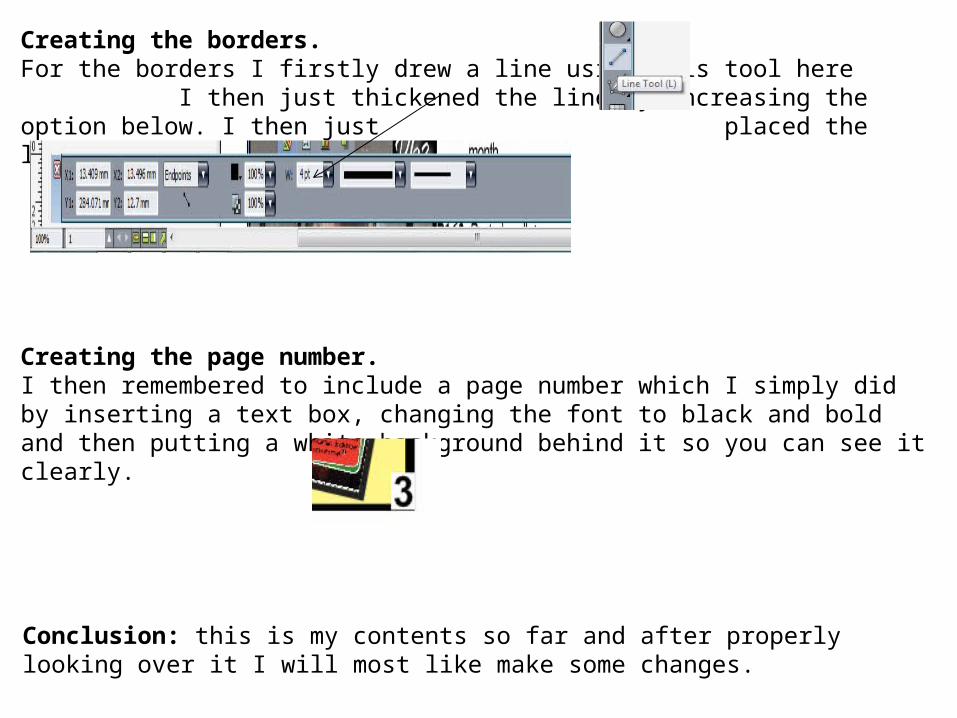
Creating the borders.For the borders I firstly drew a line using this tool here I then just thickened the line by increasing the option below. I then just placed the line where I wanted a border.
Creating the page number.I then remembered to include a page number which I simply did by inserting a text box, changing the font to black and bold and then putting a white background behind it so you can see it clearly.
Conclusion: this is my contents so far and after properly looking over it I will most like make some changes.