Embed Size (px)
Citation preview

2
TechSmith Relay Installation Guide
_____________________________________________________________________________
__________________________________________________________________________________________________________
www.techsmith.com - ii -
All rights reserved
This manual, as well as the software described in it, is furnished under license andmay be used or copied onlyin accordance with the terms of such license. The content of this manual is furnished for informational useonly, is subject to change without notice and should not be construed as a commitment by TechSmith Cor-poration. TechSmith Corporation assumes no responsibility or liability for any errors or inaccuracies that mayappear in this manual.
Trademarks
All-in-One Capture, Camtasia, Camtasia Relay, Camtasia Studio, Coach's Eye, DubIt, EnSharpen, Enter-priseWide, Expressshow, Jing, Morae, Rich Recording Technology (RRT), Screencast.com, ScreenChomp,Show TheWorld, SmartFocus, Snagit, TechSmith, TechSmith Fuse, TSCC and UserVue are eitherregisteredmarks or marks of TechSmith Corporation in the U.S. and/or other countries. This list is not a com-prehensive list of all TechSmith Corporationmarks. The absence of a name/mark or logo in this notice doesnot constitute a waiver of any intellectual property rights that TechSmith Corporation has established in any ofits product, feature or service names/marks or logos. All other marks are the property of their respective own-ers.
TechSmith Relay Installation Guide
_____________________________________________________________________________
__________________________________________________________________________________________________________
www.techsmith.com - iii -
Table of ContentsInstallation Introduction 1
SetupOptions 1
Getting the Server Ready for Installation 2
Server Planning 2
Server Hardware 2
Important Server Considerations 3
Server Operating System 4
AdministratorWebsite Access 4
Supported Versions for Plug-Ins 4
Prerequisites for Installation 5
Security Considerations for Installation 7
Required Ports 7
Conditional Ports 7
Local SQL Server 7
Remote SQL Server Ports 8
Use Dynamic Ports / List SQL Server as an Exception 8
Firewall Rules Resources 9
Passwords 9
General Server Security Resources 10
Installation 11
Install the TechSmith Relay Server 11
Add a Server to the Team 12
The Team Exported Settings File 12
Server Configuration 15
Email Server Configuration 15
Configuration Steps 15
Related Documentation and Support 16
TechSmith Relay Website and Recorder Help 17
Related Documentation 18
TechSmith Tutorials 19
TechSmith Relay Installation Guide
_____________________________________________________________________________
__________________________________________________________________________________________________________
www.techsmith.com - iv -
Contact TechSmith Tech Support 20
3rd Party Legal Notices 21
TechSmith Relay Installation Guide
_____________________________________________________________________________
__________________________________________________________________________________________________________

www.techsmith.com - 1 -
Installation IntroductionThis document will help you to install the TechSmith Relay server software. When you run the installationapplication, the installer walks you through the installation steps on your server. This document is meant toprovide supporting information to help you get through the installer and provide support with any installationtasks that are not covered in the installer.
While you are prompted to install most of the prerequisites during installation, depending on your actualserver, the process to install these items may vary. This document contains links to resources that will assistyou with various server configurations.
Topics Included in This DocumentGetting the Server Ready for Installation
Server Planning
Prerequisites for Installation
Security Considerations for Installation
Installation
Server Configuration
Presenter Computer Planning
Related Documentation
Setup OptionsThe installer program will install the TechSmith Relay server software, which includes the website interfaceand the TechSmith Relay database. TechSmith Relay offers the following installation options:
Express setup
Use this option to set up the TechSmith Relay server, website, and database on this server. Expresssetup creates and uses a local SQL Server instance named “Relay.”
Advanced setup
Use this option to:
Connect to a remote SQL Server instance to install the TechSmith Relay database.
If TechSmith Relay is installed on a different server than SQL Server, the security policies onboth servers must match. If the security policy differs between the two servers, youmayencounter problems with installation.
Add an additional server to an existing TechSmith Relay server team.
Havemore control over the setup process.
TechSmith Relay Installation Guide
_____________________________________________________________________________
__________________________________________________________________________________________________________
www.techsmith.com - 2 -
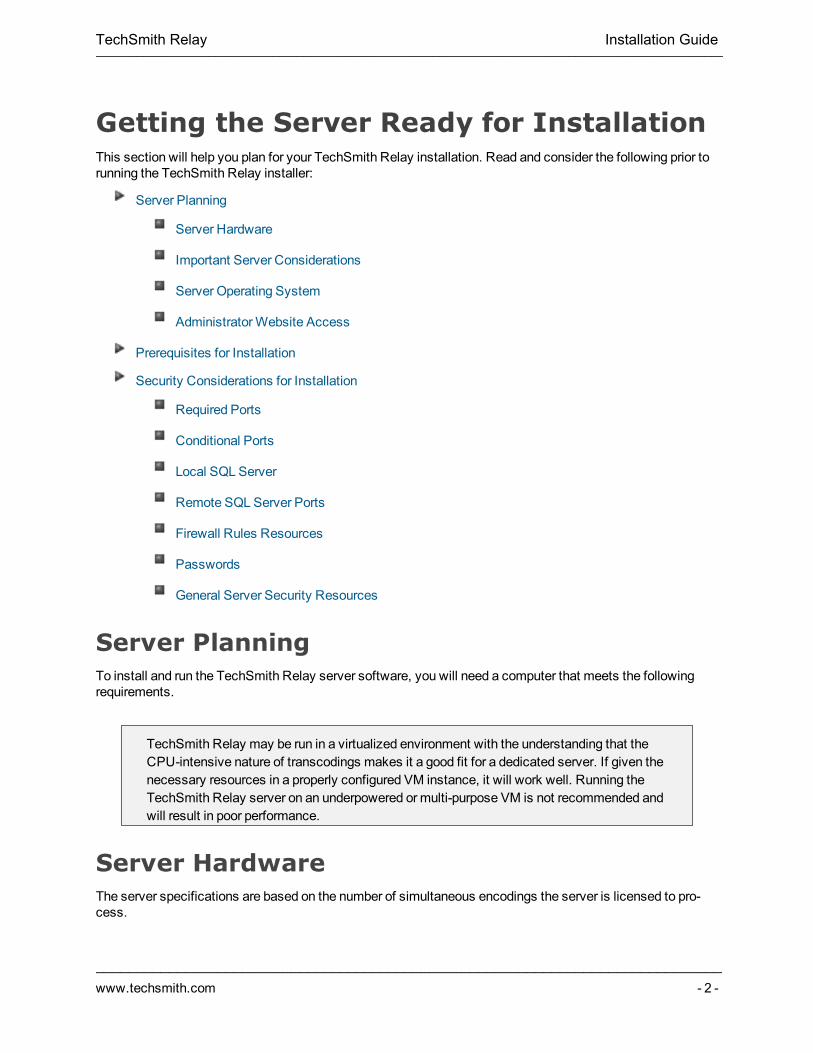
Getting the Server Ready for InstallationThis section will help you plan for your TechSmith Relay installation. Read and consider the following prior torunning the TechSmith Relay installer:
Server Planning
Server Hardware
Important Server Considerations
Server Operating System
AdministratorWebsite Access
Prerequisites for Installation
Security Considerations for Installation
Required Ports
Conditional Ports
Local SQL Server
Remote SQL Server Ports
Firewall Rules Resources
Passwords
General Server Security Resources
Server PlanningTo install and run the TechSmith Relay server software, you will need a computer that meets the followingrequirements.
TechSmith Relay may be run in a virtualized environment with the understanding that theCPU-intensive nature of transcodings makes it a good fit for a dedicated server. If given thenecessary resources in a properly configured VM instance, it will work well. Running theTechSmith Relay server on an underpowered or multi-purpose VM is not recommended andwill result in poor performance.
Server HardwareThe server specifications are based on the number of simultaneous encodings the server is licensed to pro-cess.
TechSmith Relay Installation Guide
_____________________________________________________________________________
__________________________________________________________________________________________________________
www.techsmith.com - 3 -
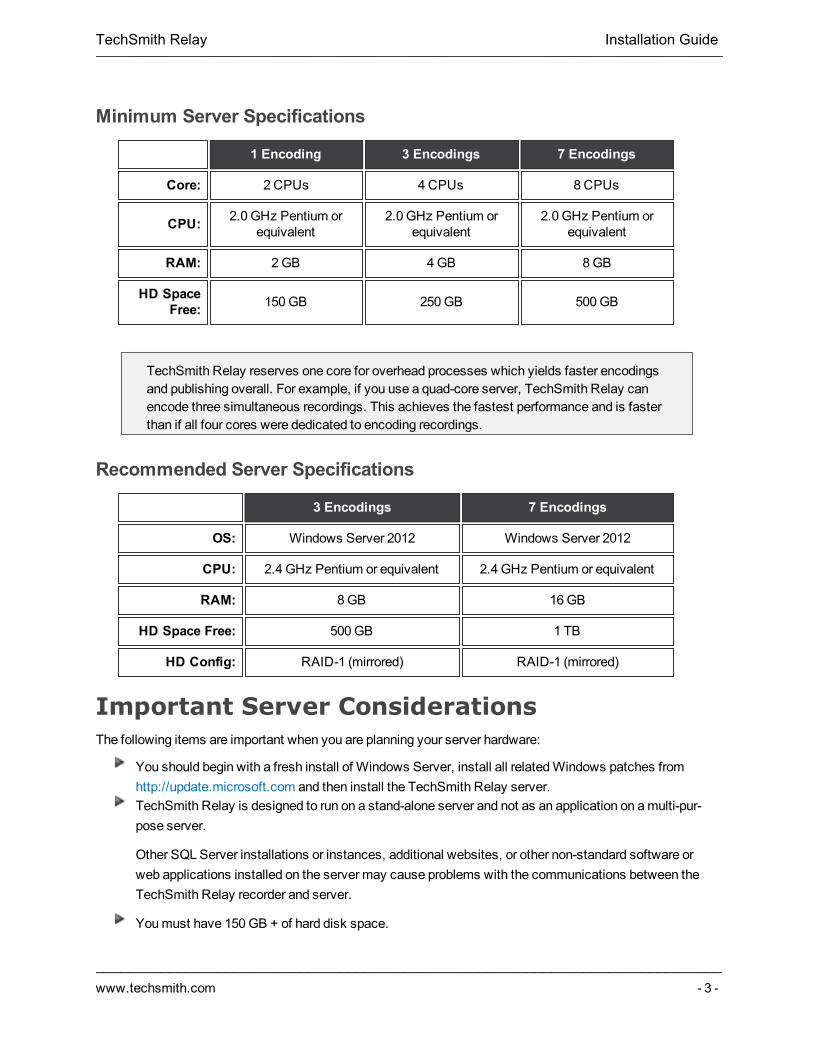
Minimum Server Specifications
1 Encoding 3 Encodings 7 Encodings
Core: 2 CPUs 4CPUs 8CPUs
CPU: 2.0 GHz Pentium orequivalent
2.0 GHz Pentium orequivalent
2.0 GHz Pentium orequivalent
RAM: 2GB 4GB 8GB
HD SpaceFree: 150GB 250GB 500GB
TechSmith Relay reserves one core for overhead processes which yields faster encodingsand publishing overall. For example, if you use a quad-core server, TechSmith Relay canencode three simultaneous recordings. This achieves the fastest performance and is fasterthan if all four cores were dedicated to encoding recordings.
Recommended Server Specifications
3 Encodings 7 Encodings
OS: Windows Server 2012 Windows Server 2012
CPU: 2.4 GHz Pentium or equivalent 2.4 GHz Pentium or equivalent
RAM: 8GB 16GB
HD Space Free: 500GB 1 TB
HD Config: RAID-1 (mirrored) RAID-1 (mirrored)
Important Server ConsiderationsThe following items are important when you are planning your server hardware:
You should begin with a fresh install of Windows Server, install all relatedWindows patches fromhttp://update.microsoft.com and then install the TechSmith Relay server.TechSmith Relay is designed to run on a stand-alone server and not as an application on amulti-pur-pose server.
Other SQL Server installations or instances, additional websites, or other non-standard software orweb applications installed on the server may cause problems with the communications between theTechSmith Relay recorder and server.
Youmust have 150GB + of hard disk space.
TechSmith Relay Installation Guide
_____________________________________________________________________________
__________________________________________________________________________________________________________
www.techsmith.com - 4 -
As a rough guideline, a one hour recording requires between 1-2 GB of space.
Unprocessed recordings consume disk space until they are published. After the final presentation ispublished, the original recording is deleted.
Presentations waiting for user interaction, such as presentations in the Held for Captioning or NeedsAttention states, continue to consume space on the server until the presenter or an administratorreleases the presentation and it is published.
More processing cores meanmore simultaneous encoding potential, and therefore, faster encodingand publishing; this potential is also dependent on the number of simultaneous encodings your serveris licensed to process.
Server Operating SystemThe following server operating systems are supported:
TechSmith Relay requires an English version of the server operating system.
SupportedWindows Server 2008 R2 (Full install, WOW64 required)
Windows Server 2012 R2
Windows Server 2012
Administrator Website AccessTo access the TechSmith Relay website and interact with the TechSmith Relay server, administrators needone of the following web browsers:
Internet Explorer 7 or higher
Firefox 3.x or higher
Safari 3.x or higher
The current version of Chrome
Supported Versions for Plug-InsTechSmith Relay uses plug-ins to integrate with various publish destinations and notification servers. The fol-lowing versions are currently supported:
Notification servers:Blackboard Learn™ 9.1
Moodle 1.9
TechSmith Relay Installation Guide
_____________________________________________________________________________
__________________________________________________________________________________________________________
www.techsmith.com - 5 -
Moodle 2.0
Publish destinations:Mediasite 5.5
Drupal 6.1
Microsoft® Windows® SharePoint™ 2010
Prerequisites for InstallationTo save time during installation, install the following prerequisites prior to running the TechSmith Relayinstaller. Server prerequisites include the following:
IIS
SSLCertificate
QuickTime
Desktop Experience Feature
If you do not set up these items before starting the TechSmith Relay installer, you are notifiedthat they are not installed.
Resources for PrerequisitesUse the following links if you need assistance on installing a prerequisite:
IIS
For Server 2008 or Server 2008 R2 (IIS 7.0 or 7.5): http://learn.iis.net/page.aspx/29/installing-iis-7-on-windows-server-2008-or-windows-server-2008-r2/For Server 2012 or Server 2012 R2 (IIS 8.0) http://iis.net/learn/get-started/whats-new-in-iis-8/installing-iis-8-on-windows-server-2012TheOfficial Microsoft IIS Site: http://www.iis.net/
SSL Certificate
The TechSmith Relay installer attempts to communicate with IIS over HTTPS to verify the cer-tificate is properly installed. HTTPS bindings need to be set for the website you select in theinstaller. If HTTPS bindings are not set to use your SSL certificate, the installer does not allowyou to install TechSmith Relay to that website.
http://learn.iis.net/page.aspx/144/how-to-setup-ssl-on-iis-7 (IIS 7.0 and above)
TechSmith Relay Installation Guide
_____________________________________________________________________________
__________________________________________________________________________________________________________
www.techsmith.com - 6 -
QuickTime
You need to install QuickTime 7.7.3 (the latest at the time of this publication) or greater to process present-ations recorded onMacintosh-based computers. TechSmith Relay does not provide the QuickTime codec.
If QuickTime version 7.7.3 (or later) is not detected, the installer prompts you to download and install Quick-Time. We recommend that you do not allow automatic updating of QuickTime on the TechSmith Relay server.
You can downloadQuickTime at http://www.apple.com/quicktime/download/.
Desktop Experience Feature
For information fromMicrosoft on the Desktop experience feature, which gives Windows Server many of theapplications and features that are available in theWindows operating system, see http://-technet.microsoft.com/en-us/library/cc772567.aspx.
ForWindows Server 2012 and 2012 R2, turn on the Desktop Experience from the Add Roles and FeaturesWizard > Features > User Interface and Infrastructures > Desktop Experience.
TechSmith Relay Installation Guide
_____________________________________________________________________________
__________________________________________________________________________________________________________
www.techsmith.com - 7 -
Security Considerations for InstallationWhen installing TechSmith Relay, if security considerations are configured incorrectly, they could causeissues during installation.
It is very important to consider the security of the environment hosting TechSmith Relay. You want to makesure that the TechSmith Relay server is as secure as possible against attacks. The following information isprovided only to help avoid issues during installation.
More in-depth information on securing your TechSmith Relay server is available in the TechSmith RelayServer Security Administrator Guide. For information on where to locate this document, see Related Docu-mentation and Support.
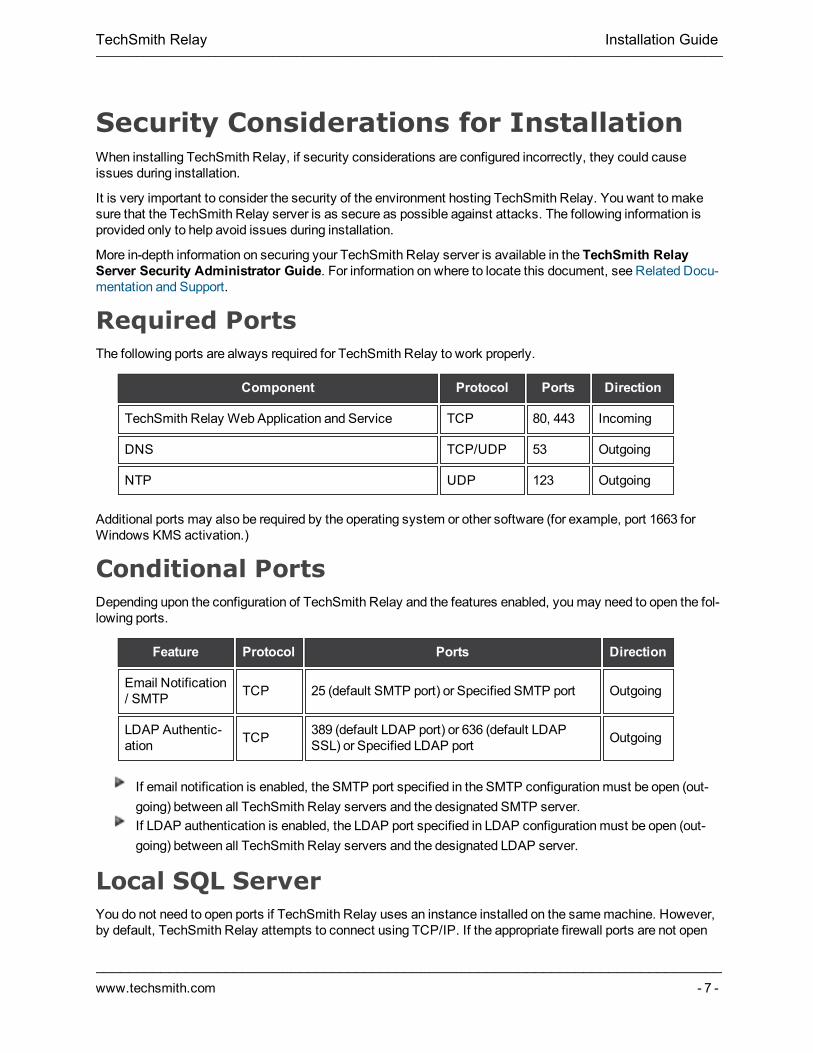
Required PortsThe following ports are always required for TechSmith Relay to work properly.
Component Protocol Ports Direction
TechSmith Relay Web Application and Service TCP 80, 443 Incoming
DNS TCP/UDP 53 Outgoing
NTP UDP 123 Outgoing
Additional ports may also be required by the operating system or other software (for example, port 1663 forWindows KMS activation.)
Conditional PortsDepending upon the configuration of TechSmith Relay and the features enabled, youmay need to open the fol-lowing ports.
Feature Protocol Ports Direction
Email Notification/ SMTP TCP 25 (default SMTP port) or Specified SMTP port Outgoing
LDAP Authentic-ation TCP 389 (default LDAP port) or 636 (default LDAP
SSL) or Specified LDAP port Outgoing
If email notification is enabled, the SMTP port specified in the SMTP configurationmust be open (out-going) between all TechSmith Relay servers and the designated SMTP server.If LDAP authentication is enabled, the LDAP port specified in LDAP configurationmust be open (out-going) between all TechSmith Relay servers and the designated LDAP server.
Local SQL ServerYou do not need to open ports if TechSmith Relay uses an instance installed on the samemachine. However,by default, TechSmith Relay attempts to connect using TCP/IP. If the appropriate firewall ports are not open
TechSmith Relay Installation Guide
_____________________________________________________________________________
__________________________________________________________________________________________________________
www.techsmith.com - 8 -
(see Remote SQL Server Ports then this connection fails).
To enable TechSmith Relay with restrictive firewall rules, change the TechSmith Relay server’s configurationfiles:
data.config (located in theManager directory of TechSmith Relay’s installation directory, typicallyC:\Program Files\TechSmith\Relay Server\Manager\)web.config (located in theWeb directory of TechSmith Relay’s installation directory, typicallyC:\Program Files\TechSmith\Relay Server\Web\)
For each of these files, do the following:
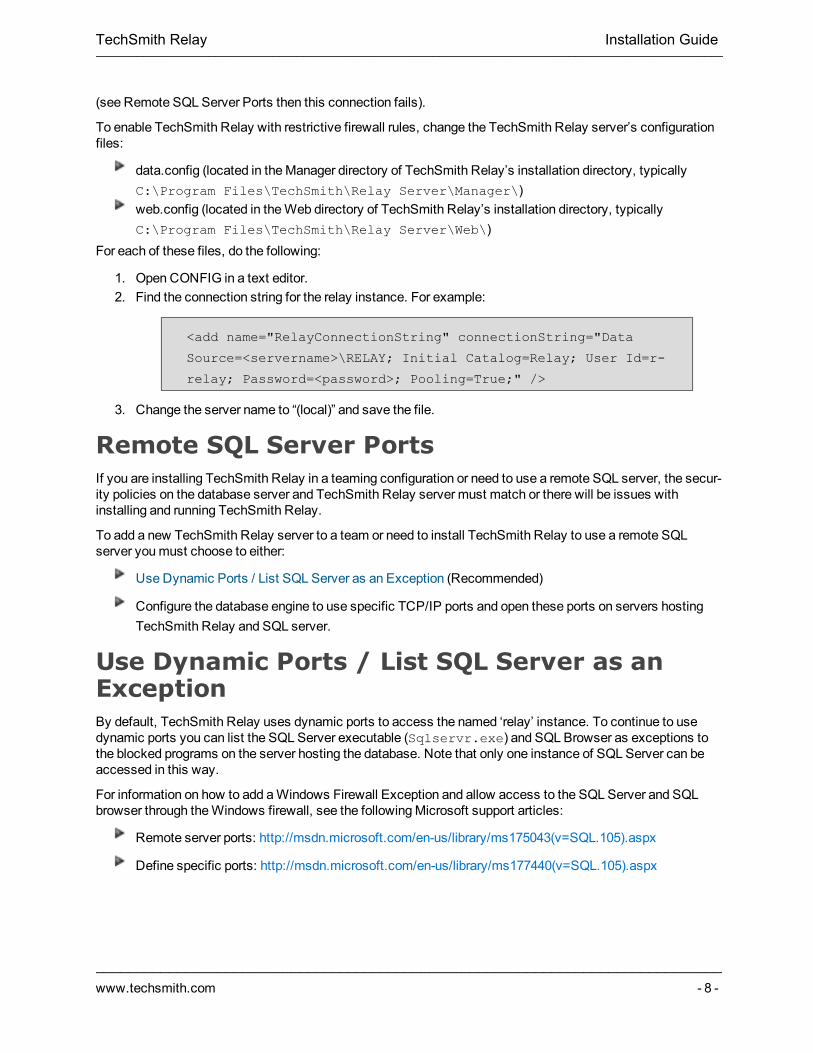
1. Open CONFIG in a text editor.2. Find the connection string for the relay instance. For example:
<add name="RelayConnectionString" connectionString="Data
Source=<servername>\RELAY; Initial Catalog=Relay; User Id=r-
relay; Password=<password>; Pooling=True;" />
3. Change the server name to “(local)” and save the file.
Remote SQL Server PortsIf you are installing TechSmith Relay in a teaming configuration or need to use a remote SQL server, the secur-ity policies on the database server and TechSmith Relay server must match or there will be issues withinstalling and running TechSmith Relay.
To add a new TechSmith Relay server to a team or need to install TechSmith Relay to use a remote SQLserver youmust choose to either:
Use Dynamic Ports / List SQL Server as an Exception (Recommended)
Configure the database engine to use specific TCP/IP ports and open these ports on servers hostingTechSmith Relay and SQL server.
Use Dynamic Ports / List SQL Server as anExceptionBy default, TechSmith Relay uses dynamic ports to access the named ‘relay’ instance. To continue to usedynamic ports you can list the SQL Server executable (Sqlservr.exe) and SQL Browser as exceptions tothe blocked programs on the server hosting the database. Note that only one instance of SQL Server can beaccessed in this way.
For information on how to add aWindows Firewall Exception and allow access to the SQL Server and SQLbrowser through theWindows firewall, see the followingMicrosoft support articles:
Remote server ports: http://msdn.microsoft.com/en-us/library/ms175043(v=SQL.105).aspx
Define specific ports: http://msdn.microsoft.com/en-us/library/ms177440(v=SQL.105).aspx
TechSmith Relay Installation Guide
_____________________________________________________________________________
__________________________________________________________________________________________________________
www.techsmith.com - 9 -
Firewall Rules ResourcesService overview and network port requirements for theWindows Server system
http://support.microsoft.com/kb/832017
Windows Firewall Center
http://technet.microsoft.com/en-us/network/bb545423.aspx
PasswordsMany of the components involved in hosting TechSmith Relay (includingWindows Server accounts, SQLServer users, and TechSmith Relay accounts) rely on passwords for distinguishing authorized users fromeveryone else.
TechSmith Relay Administrator Account PasswordThis password is used for the “relayadmin” account (master user in the database) as well as the Relayinstance in the SQL database.
Remember this password! If you forget it and do not have other user accounts with admin-istrator access to TechSmith Relay, youmay have to uninstall and then reinstall TechSmithRelay. Delete the database when prompted by the server installer. You will lose all informationincluding user accounts and profiles. If you are in this situation, please contact http://sup-port.techsmith.com.
General Password Complexity GuidelinesAll passwords, including those used in the installer, need tomeet your organizations password complexityrules. Attackers commonly attempt to guess passwords to gain access to these systems as an authorizeduser. Furthermore these attacks are typically executed using automated scripts that try thousands of pass-words, including common passwords, dictionary words, and random combinations of characters. One of thebest defenses against password guessing attacks is the use of strong, or hard-to-guess, passwords. Strongpasswords should:
Be eight characters in length or more.
Combine letters, numbers, and symbols.
Not include words from the dictionary.
Be different than your username or account name.
Be different than passwords used for other systems.
For more suggestions and information on strong passwords, please see the article "Strong Passwords andPassword Security" at http://www.microsoft.com/protect/yourself/password/create.mspx.
TechSmith Relay Installation Guide
_____________________________________________________________________________
__________________________________________________________________________________________________________
www.techsmith.com - 10 -
General Server Security ResourcesWindows Server 2008
http://technet.microsoft.com/en-us/library/dd349801.aspx
Windows Server 2008 Security Guidehttp://technet.microsoft.com/en-us/library/cc264463.aspx
http://www.microsoft.com/downloads/details.aspx?familyid=FB8B981F-227C-4AF6-A44B-B115696A80AC&displaylang=en
Windows Server 2008 Security ComplianceManagement Toolkit
http://technet.microsoft.com/en-us/library/cc514539.aspx
TechSmith Relay Installation Guide
_____________________________________________________________________________
__________________________________________________________________________________________________________
www.techsmith.com - 11 -
InstallationOnce all the prerequisite software is installed and set up on the server, you can install TechSmith Relay.
After you complete installation, youmay want to review the current known issues forTechSmith Relay. You can find the list of known issues in the TechSmith Support Center. Atthe time of publication, there are no known issues for TechSmith Relay.
See Also:
Install the TechSmith Relay Server
Add a Server to the Team
Server Configuration
Presenter Computer Planning
Install the TechSmith Relay ServerTo install the server (or the first server in a team), use the following process. To add an additional server to ateam, see Add a Server to the Team.
1. Download the correct installer for your server:For 32-bit servers, use the TechSmith Relay 32-bit installer (CamtasiaRelayServer.exe)
For 64-bit server, use the TechSmith Relay 64-bit installer (CamtasiaRelayServer_x64.exe)
2. Copy the TechSmith Relay installer file to your server.3. Run the TechSmith Relay server installer.4. Follow the instructions in the installation wizard.
The installer scans for prerequisite components and indicates which components you need to install.See Prerequisites for Installation for links to information about each item.
For more information about adding the server to an existing team of TechSmith Relay servers,see Add a Server to the Team.
5. When installation is complete, the TechSmith Relay website opens in a web browser. Log in as anadministrator and complete Server Configuration.
6. If you are going to install and team additional servers to the one you just installed, create The TeamExported Settings File.
If you have any issues during installation, you can Contact TechSmith Tech Support for assist-ance.
TechSmith Relay Installation Guide
_____________________________________________________________________________
__________________________________________________________________________________________________________
www.techsmith.com - 12 -
Add a Server to the Team
When adding a server to the team, security policies on all teamed servers (and the server run-ning SQL Server, if applicable) must match. If the security policy differs between the servers,youmay encounter problems with installation.
In TechSmith Relay, you can team servers together to add power and flexibility to TechSmith Relay. Teamingservers means that they all accept presentations based on load and other variables. Once teamed, you workwith the teamed servers as if they are one server. They all run from a single database, so all information isavailable on each of the teamed servers.
On any of the servers, go toSystem > Servers to view all teamed servers’ status and jobcounts.
After you install the first TechSmith Relay server and database, to add another server to the team use the fol-lowing process:
1. If you are using a network firewall and have not yet done so, open TCP port 1433 and UDP port 1434 toconnect to the database. If using a host-based firewall such as Windows firewall then add exceptionsfor the SQL Server and SQL Browser executables. For more information, see Remote SQL ServerPorts.
2. Double-click the TechSmith Relay server installer.3. When you get to the Select Setup Type page of the wizard, select Advanced setup and click Next.4. On the Select Advanced Installation Type page, select Add this server to an existing TechSmith
Relay team and click Next.5. Install prerequisites and click Next.6. On the SQL Server Connection page, enter or browse to the SQL instance name in use for TechSmith
Relay. Enter the “Relay” user password and click Next.7. On the TechSmith Relay Team Exported Setting File page, browse to the TechSmith Relay Team
Exported Settings file and click Next. See The Team Exported Settings File for information on how tocreate this file.
8. Complete the wizard and click Install.9. When installation is complete, the website opens in a web browser. Log in as an administrator and com-
plete Server Configuration.
The Team Exported Settings FileWhen adding a new TechSmith Relay server to a team, the installer prompts for a TechSmith Relay TeamExported Settings file.
The TechSmith Relay Team Exported Settings file is an XML file containing the private encryption key usedby the existing teammembers. This XML file can be created using the TechSmith Relay Configuration Pro-tection Tool.
To create and use the TechSmith Relay Team Exported Settings file:
TechSmith Relay Installation Guide
_____________________________________________________________________________
__________________________________________________________________________________________________________
www.techsmith.com - 13 -
1. Access an existing teammember that has the correct encryption key installed.
The configuration protection tool (ConfigurationProtectionTool.exe) is located in theMan-ager directory of the TechSmith Relay installation directory (C:\ProgramFiles\TechSmith\Relay Server\Manager by default.)
2. Launch the configuration protection tool by double-clickingConfigurationProtectionTool.exe.
The configuration protection tool (CPT) attempts to find TechSmith Relay’s CONFIG files in the spe-cified installation directory (initially based on where the tool was launched from.)
The status window shows an error message if CPT is unable to find the .CONFIG files. If this hap-pens, the installation directory must be corrected before any other action can be taken.
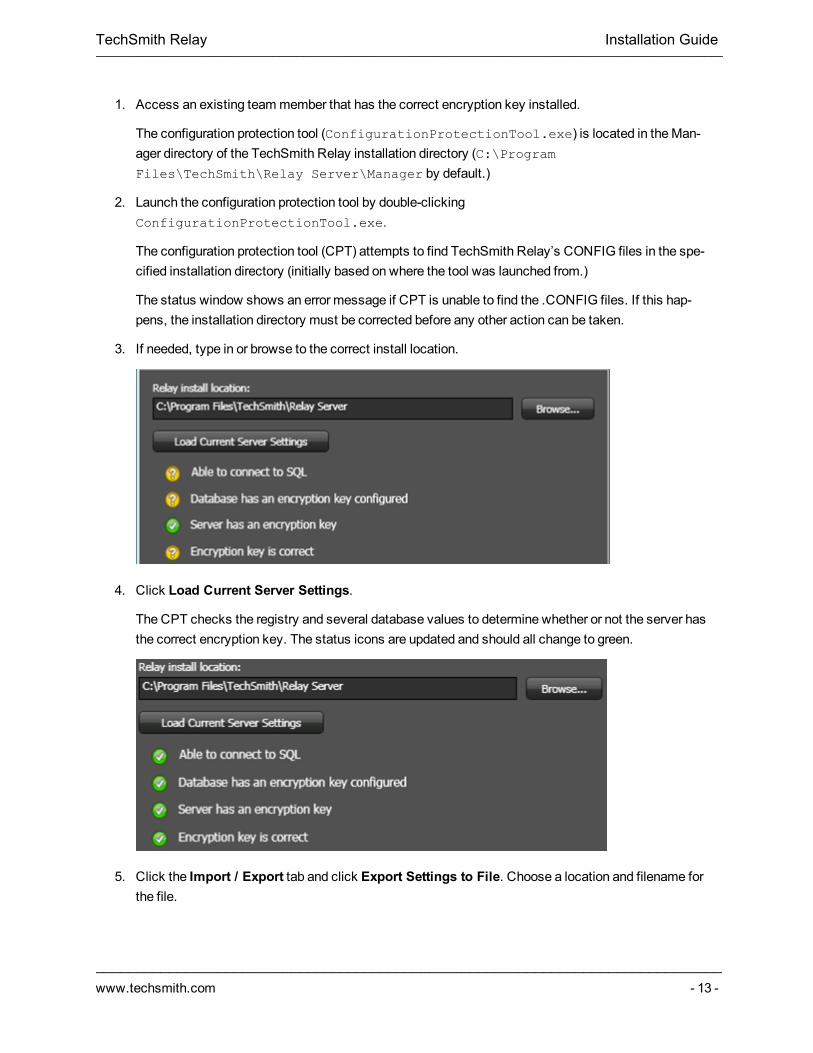
3. If needed, type in or browse to the correct install location.
4. Click Load Current Server Settings.
The CPT checks the registry and several database values to determine whether or not the server hasthe correct encryption key. The status icons are updated and should all change to green.
5. Click the Import / Export tab and click Export Settings to File. Choose a location and filename forthe file.
TechSmith Relay Installation Guide
_____________________________________________________________________________
__________________________________________________________________________________________________________
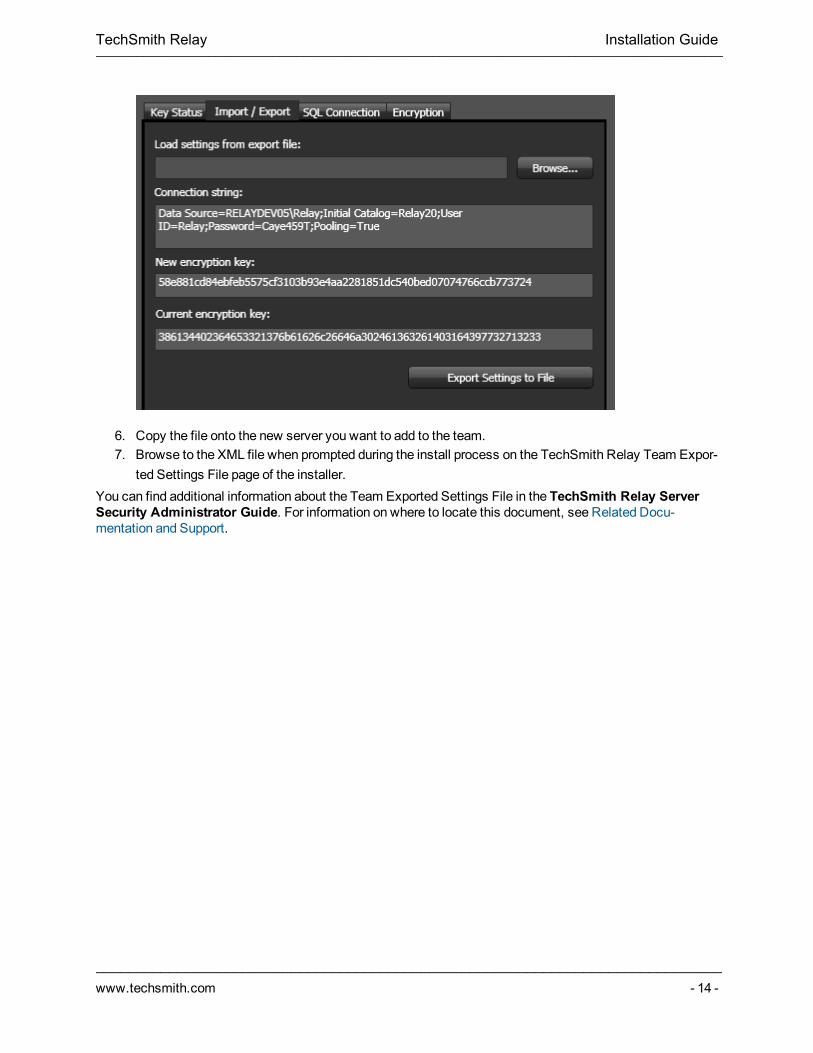
www.techsmith.com - 14 -
6. Copy the file onto the new server you want to add to the team.7. Browse to the XML file when prompted during the install process on the TechSmith Relay Team Expor-
ted Settings File page of the installer.You can find additional information about the Team Exported Settings File in the TechSmith Relay ServerSecurity Administrator Guide. For information on where to locate this document, see Related Docu-mentation and Support.
TechSmith Relay Installation Guide
_____________________________________________________________________________
__________________________________________________________________________________________________________
www.techsmith.com - 15 -
Server ConfigurationWhen the install completes, log in to the TechSmith Relay website with the “relayadmin” account. You nowneed to configure the server.
Email Server ConfigurationWhen you first log in, you are directed to a page to configure the email server. TechSmith Relay can send twotypes of email notifications:
Notifications for published presentations
These notifications are sent to presenters, administrators, and/or viewers when presentations are pub-lished. These need to be set up and then included in the profile used to process the presentation.
Notifications from the TechSmith Relay system
These administrativemessages are sent from the system and notify TechSmith Relay presenters ofserver and presentation problems, such as: presentations needing attention, password changes, etc.
The email server configuration includes:
The SMTP email server address.
The SMTP email server port.
The email address that appears in the Reply To field of email notifications.
The email address of the TechSmith Relay administrator. This email address receives notificationsfrom the server when action is needed from an administrator.
Skip Email Server ConfigurationIf you do not know the email server address during initial configuration, uncheck the Enable Email Noti-fications option to skip this step.
To enter the email server information later, go to: Profiles > Notification Server Configuration > Email Servertab. This allows notifications for published presentations to be sent.
To turn on system notifications, go to System > System Options > Email Notifications, check the Enableemail notifications option, and click Save.
Configuration StepsNext, you see the Important Configuration Steps:
1. Define publish destinations2. Set up notifications3. Create profiles
You can findmore information about all of these steps in the help on the TechSmith Relay website and clickthe Configuration of TechSmith Relay link on the System page.
TechSmith Relay Installation Guide
_____________________________________________________________________________
__________________________________________________________________________________________________________
www.techsmith.com - 16 -
Related Documentation and SupportWehope you have found this Installation Guide helpful, but it is only one of many resources available to youas a user of TechSmith Relay. The following are some additional resources for TechSmith Relay.
FeedbackIf you would like to offer feedback on or suggestions of topics to cover in this or any other TechSmith Relaydocumentation, please send an email to [email protected].
TechSmith Relay Installation Guide
_____________________________________________________________________________
__________________________________________________________________________________________________________
www.techsmith.com - 17 -
TechSmith Relay Website and RecorderHelpFor day-to-day administration of TechSmith Relay, please see the TechSmith Relay Website Help. This helpis available after logging into the TechSmith Relay website as an administrator. Just click a Help link, avail-able on each web page, to open the TechSmith Relay Administrator Help.
For help with TechSmith Relay Recorder, please install and open TechSmith Relay Recorder or open the port-able recorder to access help for the recorder.
TechSmith Relay Installation Guide
_____________________________________________________________________________
__________________________________________________________________________________________________________
www.techsmith.com - 18 -
Related DocumentationThe following PDF documents are available for download from the TechSmith Relay documentation page onthe TechSmith.com website:
TechSmith Relay Upgrade Guide
Learn how to upgrade TechSmith Relay.
TechSmith Relay Administrator Website Help
Walk through the configuration of TechSmith Relay and find administration information to help youkeep TechSmith Relay running smoothly
TechSmith Relay Server Security Administrator Guide
Learn about ways to help secure your TechSmith Relay server.
TechSmith Relay Release Notes
See a summary of the new features and updates. Learn about how those features affect current users.
TechSmith Relay Technical Reference Guide
An in-depth examination of TechSmith Relay, including the overall architecture, planning information,sizing and performance considerations, security principles, tips on integrating TechSmith Relay withother products, and general best practices.
TechSmith Relay Installation Guide
_____________________________________________________________________________
__________________________________________________________________________________________________________
www.techsmith.com - 19 -
TechSmith TutorialsThe TechSmith tutorials contain a wealth of free resources for each one of TechSmith’s products, includingTechSmith Relay. We encourage you to visit the site, choose the section that most interests you and thenwatch a video or read an article.
The TechSmith Relay tutorials page is available at:
http://www.techsmith.com/tutorial-camtasia-relay-current.html
TechSmith Relay Installation Guide
_____________________________________________________________________________
__________________________________________________________________________________________________________
www.techsmith.com - 20 -
Contact TechSmith Tech SupportIn the event you have an installation issue that cannot be answered with the TechSmith Relay Help and doc-umentation, please follow the steps below to receive assistance from TechSmith Technical Support.
Submit a QuestionProblems with installation? Send a question to Technical Support.
1. On the Support Center page (http://support.techsmith.com), click Ask a Question.2. Log in or register.3. Fill in the requested information, making sure to include as much information regarding the nature of the
problem as possible.4. Select Other under Problem Type.5. In the Attach Documents field, click Browse and locate the %TEMP%\Relay_Setup.6. Attach all .log files located in the folder to your question.
Call Technical SupportThe TechSmith Relay Tech Support team is ready and waiting for your questions. Should you have problemsthat you cannot solve using the resources provided, please give us a call and wewill be happy to assist.
The following information is available on the TechSmith website by clicking Company >Contact Us. Always refer to that location for latest, most accurate information.
Phone:+1.517.381.2300 (ext. 784)
Toll Free in the U.S. & Canada: 800.517.3001 (ext. 784)
Tech Support Website: http://support.techsmith.com
TechSmith Relay Installation Guide
_____________________________________________________________________________
__________________________________________________________________________________________________________
www.techsmith.com - 21 -
3rd Party Legal NoticesMP3 Codec
Supply of this product does not convey a license nor imply any right to distribute content created with thisproduct in revenue-generating broadcast systems (terrestrial, satellite, cable and/or distribution channels),streaming applications (via internet, intranets and/or other networks), other content distribution systems (pay-audio or audio-on-demand applications and the like) or physical media (compact discs, digital versatile discs,semiconductor chips, hard drives, memory cards and the like). An independent license for such use isrequired. For details, please visit http://mp3licensing.com
Apache License
Copyright 2008 TechSmith Incorporated, All Rights Reserved Licensed under the Apache License, Version2.0 (the "License"); youmay not use this file except in compliance with the License. Youmay obtain a copy ofthe License at
http://www.apache.org/licenses/LICENSE-2.0
Unless required by applicable law or agreed to in writing, software distributed under the License is distributedon an "AS IS" BASIS, WITHOUTWARRANTIES OR CONDITIONS OF ANY KIND, either express orimplied. See the License for the specific language governing permissions and limitations under the License.
RealNetworks
RealNetworks® technology is provided under license from RealNetworks, Inc., copyright © 1995-2003RealNetworks, Inc. and/or its suppliers. P.O. Box 91123, Seattle, Washington 98111-9223, U.S.A. PatentsPending. All rights reserved. RealNetworks is a registered trademark of RealNetworks, Inc.
TechSmith Relay Installation Guide
_____________________________________________________________________________
__________________________________________________________________________________________________________