Embed Size (px)
Citation preview
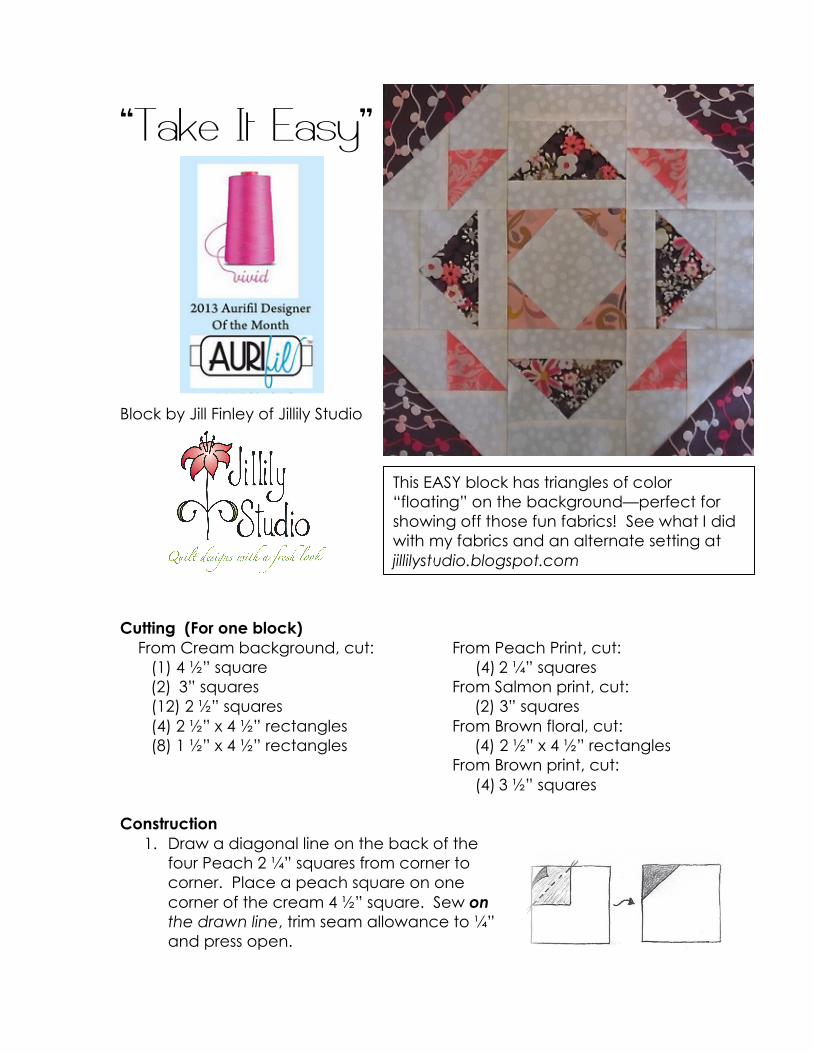
“Take It Easy” Block by Jill Finley of Jillily Studio Cutting (For one block)
From Cream background, cut: (1) 4 ½” square
(2) 3” squares (12) 2 ½” squares (4) 2 ½” x 4 ½” rectangles (8) 1 ½” x 4 ½” rectangles
From Peach Print, cut: (4) 2 ¼” squares
From Salmon print, cut: (2) 3” squares From Brown floral, cut: (4) 2 ½” x 4 ½” rectangles From Brown print, cut:
(4) 3 ½” squares
Construction 1. Draw a diagonal line on the back of the
four Peach 2 ¼” squares from corner to corner. Place a peach square on one corner of the cream 4 ½” square. Sew on the drawn line, trim seam allowance to ¼” and press open.
This EASY block has triangles of color “floating” on the background—perfect for showing off those fun fabrics! See what I did with my fabrics and an alternate setting at jillilystudio.blogspot.com
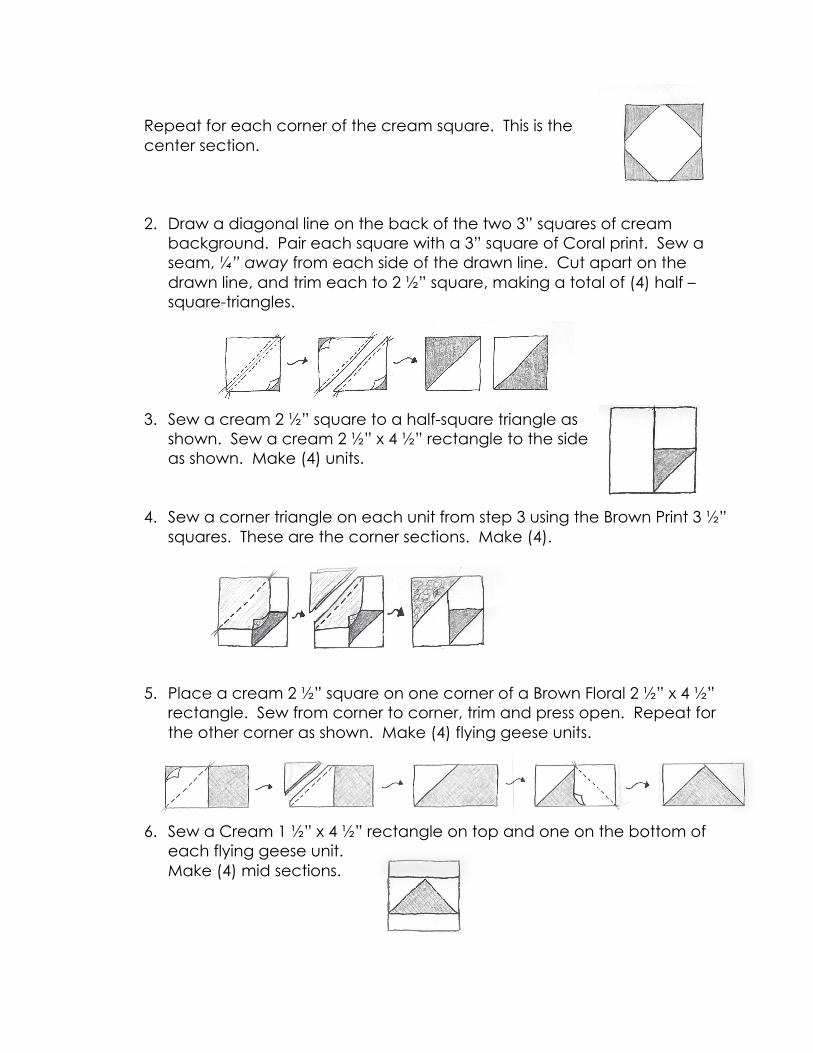
Repeat for each corner of the cream square. This is the center section.
2. Draw a diagonal line on the back of the two 3” squares of cream
background. Pair each square with a 3” square of Coral print. Sew a seam, ¼” away from each side of the drawn line. Cut apart on the drawn line, and trim each to 2 ½” square, making a total of (4) half –square-triangles.
3. Sew a cream 2 ½” square to a half-square triangle as
shown. Sew a cream 2 ½” x 4 ½” rectangle to the side as shown. Make (4) units.
4. Sew a corner triangle on each unit from step 3 using the Brown Print 3 ½” squares. These are the corner sections. Make (4).
5. Place a cream 2 ½” square on one corner of a Brown Floral 2 ½” x 4 ½” rectangle. Sew from corner to corner, trim and press open. Repeat for the other corner as shown. Make (4) flying geese units.
6. Sew a Cream 1 ½” x 4 ½” rectangle on top and one on the bottom of each flying geese unit. Make (4) mid sections.
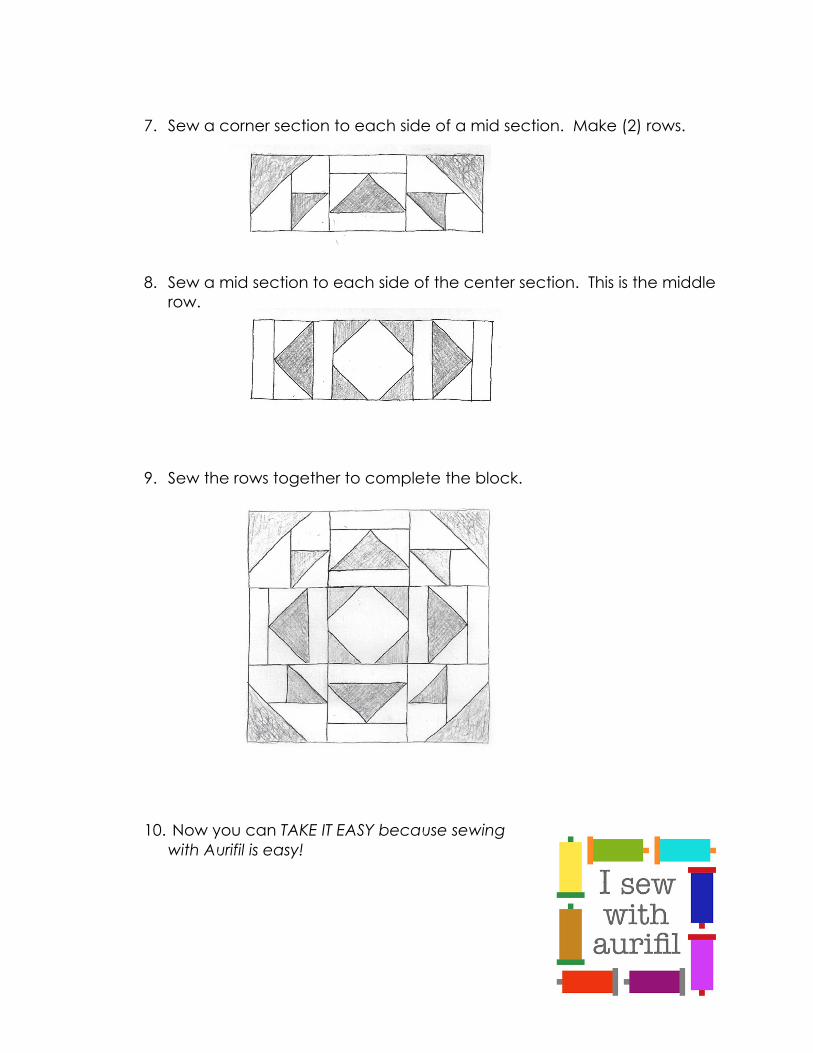
7. Sew a corner section to each side of a mid section. Make (2) rows.
8. Sew a mid section to each side of the center section. This is the middle row.
9. Sew the rows together to complete the block.
10. Now you can TAKE IT EASY because sewing
with Aurifil is easy!