Embed Size (px)
Citation preview
SPYTEC AETOS 400CLOCK CAM USER GUIDE
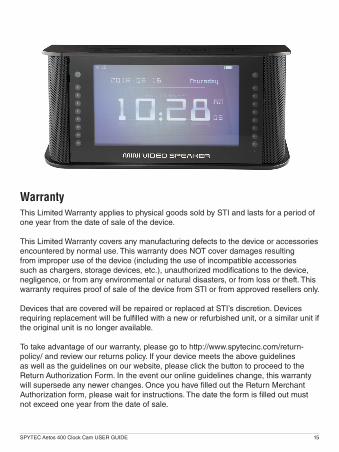
Thank you for choosing the SpyTec Aetos 400 Clock Cam. The miniature boombox with clock, radio and 4.3-inch color video display hides a high-def camera and microphone for clandestine video recording. The camera even works in the dark using a night vision infrared light. You can play captured video files on the 400's own display or transfer them from the microSD card (not included) to your computer. Video recording can be triggered automatically by motion. The Clock Cam can be deployed on a tabletop or carried with you. You can use it for portable entertainment by copying videos, music and photos from your computer and playing them through the 400's screen and robust speakers or by plugging in your own headphones. The unit is powered by a pair of rechargeable, removable batteries or an AC adapter, which are both included.
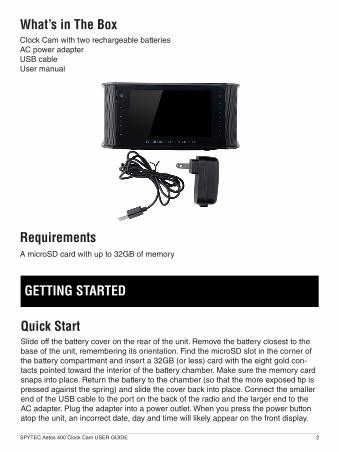
What’s in The BoxClock Cam with two rechargeable batteriesAC power adapterUSB cableUser manual
RequirementsA microSD card with up to 32GB of memory
GETTING STARTED
Quick StartSlide off the battery cover on the rear of the unit. Remove the battery closest to the base of the unit, remembering its orientation. Find the microSD slot in the corner of the battery compartment and insert a 32GB (or less) card with the eight gold con-tacts pointed toward the interior of the battery chamber. Make sure the memory card snaps into place. Return the battery to the chamber (so that the more exposed tip is pressed against the spring) and slide the cover back into place. Connect the smaller end of the USB cable to the port on the back of the radio and the larger end to the AC adapter. Plug the adapter into a power outlet. When you press the power button atop the unit, an incorrect date, day and time will likely appear on the front display.
SPYTEC Aetos 400 Clock Cam USER GUIDE 2
SPYTEC Aetos 400 Clock Cam USER GUIDE 3
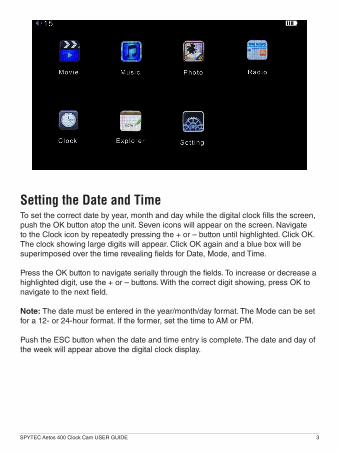
Setting the Date and TimeTo set the correct date by year, month and day while the digital clock fills the screen, push the OK button atop the unit. Seven icons will appear on the screen. Navigate to the Clock icon by repeatedly pressing the + or – button until highlighted. Click OK. The clock showing large digits will appear. Click OK again and a blue box will be superimposed over the time revealing fields for Date, Mode, and Time.
Press the OK button to navigate serially through the fields. To increase or decrease a highlighted digit, use the + or – buttons. With the correct digit showing, press OK to navigate to the next field.
Note: The date must be entered in the year/month/day format. The Mode can be set for a 12- or 24-hour format. If the former, set the time to AM or PM.
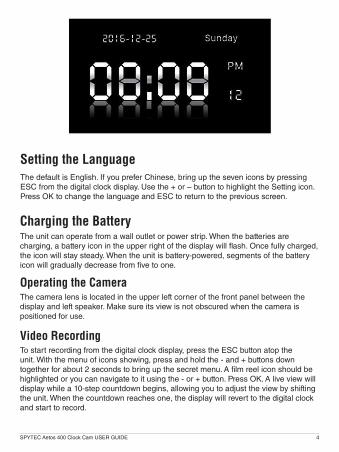
Push the ESC button when the date and time entry is complete. The date and day of the week will appear above the digital clock display.
SPYTEC Aetos 400 Clock Cam USER GUIDE 4
The default is English. If you prefer Chinese, bring up the seven icons by pressing ESC from the digital clock display. Use the + or – button to highlight the Setting icon. Press OK to change the language and ESC to return to the previous screen.
Setting the Language
Charging the BatteryThe unit can operate from a wall outlet or power strip. When the batteries are charging, a battery icon in the upper right of the display will flash. Once fully charged, the icon will stay steady. When the unit is battery-powered, segments of the battery icon will gradually decrease from five to one.
Operating the CameraThe camera lens is located in the upper left corner of the front panel between the display and left speaker. Make sure its view is not obscured when the camera is positioned for use.
Video RecordingTo start recording from the digital clock display, press the ESC button atop the unit. With the menu of icons showing, press and hold the - and + buttons down together for about 2 seconds to bring up the secret menu. A film reel icon should be highlighted or you can navigate to it using the - or + button. Press OK. A live view will display while a 10-step countdown begins, allowing you to adjust the view by shifting the unit. When the countdown reaches one, the display will revert to the digital clock and start to record.
SPYTEC Aetos 400 Clock Cam USER GUIDE 5
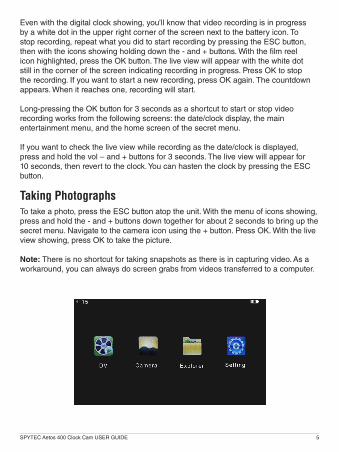
Even with the digital clock showing, you’ll know that video recording is in progress by a white dot in the upper right corner of the screen next to the battery icon. To stop recording, repeat what you did to start recording by pressing the ESC button, then with the icons showing holding down the - and + buttons. With the film reel icon highlighted, press the OK button. The live view will appear with the white dot still in the corner of the screen indicating recording in progress. Press OK to stop the recording. If you want to start a new recording, press OK again. The countdown appears. When it reaches one, recording will start.
Long-pressing the OK button for 3 seconds as a shortcut to start or stop video recording works from the following screens: the date/clock display, the main entertainment menu, and the home screen of the secret menu.
If you want to check the live view while recording as the date/clock is displayed, press and hold the vol – and + buttons for 3 seconds. The live view will appear for 10 seconds, then revert to the clock. You can hasten the clock by pressing the ESC button.
Taking PhotographsTo take a photo, press the ESC button atop the unit. With the menu of icons showing, press and hold the - and + buttons down together for about 2 seconds to bring up the secret menu. Navigate to the camera icon using the + button. Press OK. With the live view showing, press OK to take the picture.
Note: There is no shortcut for taking snapshots as there is in capturing video. As a workaround, you can always do screen grabs from videos transferred to a computer.
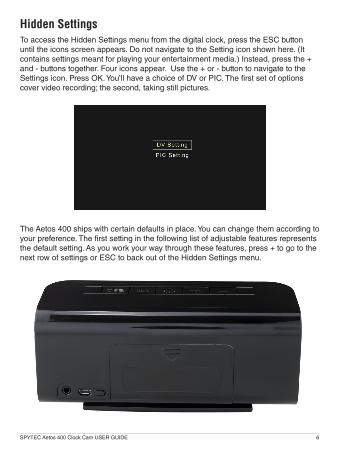
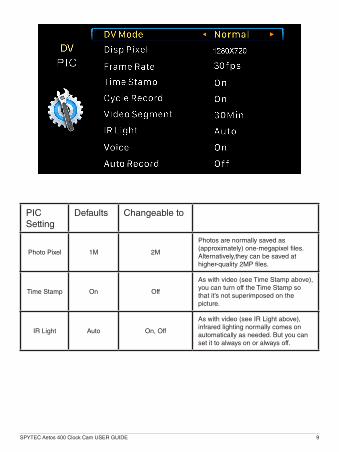
Hidden SettingsTo access the Hidden Settings menu from the digital clock, press the ESC button until the icons screen appears. Do not navigate to the Setting icon shown here. (It contains settings meant for playing your entertainment media.) Instead, press the + and - buttons together. Four icons appear. Use the + or - button to navigate to the Settings icon. Press OK. You’ll have a choice of DV or PIC. The first set of options cover video recording; the second, taking still pictures.
SPYTEC Aetos 400 Clock Cam USER GUIDE 6
The Aetos 400 ships with certain defaults in place. You can change them according to your preference. The first setting in the following list of adjustable features represents the default setting. As you work your way through these features, press + to go to the next row of settings or ESC to back out of the Hidden Settings menu.
SPYTEC Aetos 400 Clock Cam USER GUIDE 7
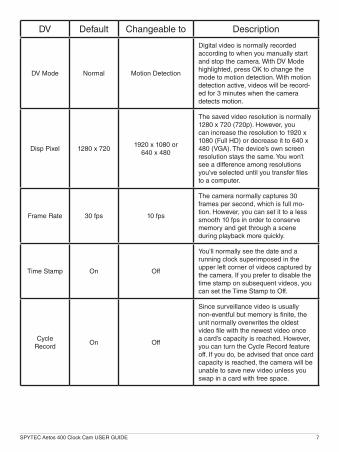
DV Default Changeable to Description
DV Mode Normal Motion Detection
Digital video is normally recorded according to when you manually start and stop the camera. With DV Mode highlighted, press OK to change the mode to motion detection. With motion detection active, videos will be record-ed for 3 minutes when the camera detects motion.
Disp Pixel 1280 x 7201920 x 1080 or
640 x 480
The saved video resolution is normally 1280 x 720 (720p). However, you can increase the resolution to 1920 x 1080 (Full HD) or decrease it to 640 x 480 (VGA). The device’s own screen resolution stays the same. You won’t see a difference among resolutions you’ve selected until you transfer files to a computer.
Frame Rate 30 fps 10 fps
The camera normally captures 30 frames per second, which is full mo-tion. However, you can set it to a less smooth 10 fps in order to conserve memory and get through a scene during playback more quickly.
Time Stamp On Off
You’ll normally see the date and a running clock superimposed in the upper left corner of videos captured by the camera. If you prefer to disable the time stamp on subsequent videos, you can set the Time Stamp to Off.
Cycle Record
On Off
Since surveillance video is usually non-eventful but memory is finite, the unit normally overwrites the oldest video file with the newest video once a card’s capacity is reached. However, you can turn the Cycle Record feature off. If you do, be advised that once card capacity is reached, the camera will be unable to save new video unless you swap in a card with free space.
SPYTEC Aetos 400 Clock Cam USER GUIDE 8
Video Segment
30 min. 60-, 5-, 10-min.
Video is normally saved into a sepa-rate file every 30 minutes. The camera then starts a new but contiguous file. You can change the file time to 5-, 10- or 60 minutes. Press the OK button repeatedly to change the number. When satisfied, press ESC to back out of the menu or + to proceed to the next row.
IR Light Auto On, Off
Thanks to the Aetos 400's built-in infra-red light, subjects can be captured on video even in the dark. This is referred to as night vision. The camera’s default is to automatically use IR light as need-ed in the absence of adequate ambient lighting. However, you can switch the setting so that the IR light is always on or always off. (Keeping if off may save battery power but guarantees a dark or impossible-to-see video under poorly-lit conditions.)
Voice On Off
The camera normally records audio along with the video. For legal or aesthetic reasons, you may prefer the video to be silent. If so, set the unit’s built-in microphone to Off.
Auto Record Off On
When you're playing movies (entertain-ment or surveillance footage), video recording stops. With Auto Record on, the camera will automatically record when you finish playing content and press ESC.
SPYTEC Aetos 400 Clock Cam USER GUIDE 9
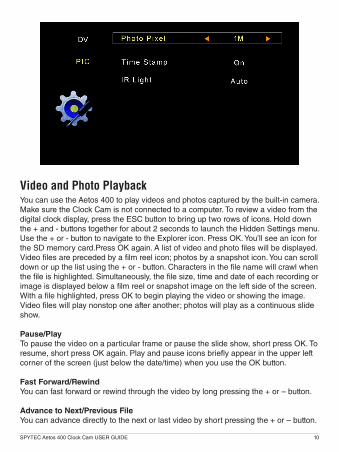
PIC Setting
Defaults Changeable to
Photo Pixel 1M 2M
Photos are normally saved as (approximately) one-megapixel files. Alternatively,they can be saved at higher-quality 2MP files.
Time Stamp On Off
As with video (see Time Stamp above), you can turn off the Time Stamp so that it’s not superimposed on the picture.
IR Light Auto On, Off
As with video (see IR Light above), infrared lighting normally comes on automatically as needed. But you can set it to always on or always off.
SPYTEC Aetos 400 Clock Cam USER GUIDE 10
Video and Photo PlaybackYou can use the Aetos 400 to play videos and photos captured by the built-in camera. Make sure the Clock Cam is not connected to a computer. To review a video from the digital clock display, press the ESC button to bring up two rows of icons. Hold down the + and - buttons together for about 2 seconds to launch the Hidden Settings menu. Use the + or - button to navigate to the Explorer icon. Press OK. You’ll see an icon for the SD memory card.Press OK again. A list of video and photo files will be displayed. Video files are preceded by a film reel icon; photos by a snapshot icon. You can scroll down or up the list using the + or - button. Characters in the file name will crawl when the file is highlighted. Simultaneously, the file size, time and date of each recording or image is displayed below a film reel or snapshot image on the left side of the screen. With a file highlighted, press OK to begin playing the video or showing the image. Video files will play nonstop one after another; photos will play as a continuous slide show.
Pause/PlayTo pause the video on a particular frame or pause the slide show, short press OK. To resume, short press OK again. Play and pause icons briefly appear in the upper left corner of the screen (just below the date/time) when you use the OK button.
Fast Forward/RewindYou can fast forward or rewind through the video by long pressing the + or – button.
Advance to Next/Previous FileYou can advance directly to the next or last video by short pressing the + or – button.
Change the VolumeTo adjust the volume of the video as it’s playing, long press the OK button. When the volume slider appears on the screen, use the + or - button to raise or lower the volume. The slider will disappear from the screen two seconds later.
Return to File ListPress ESC while playing a video to get back to the SD card. Press OK to see the list of files. Short press a highlighted file to play it.
Delete a FileWith a file highlighted in the directory, long press OK to bring up this dialog box: “Are you sure to delete?” With YES highlighted, press OK to delete. If you want to keep the file, use the + or – button to navigate to NO so that it’s highlighted. Then press OK.
Attaching to a ComputerConnect the Aetos 400 to your computer using the included USB cable. Then press the power button atop the unit. You’ll see animated dots on the Clock Cam’s screen along with text indicating that a USB device is connecting. After a few seconds, the device should show up as a removable drive on your computer screen. Use your computer’s file directory to explore files created by the Aetos 400’s camera and saved to its memory card. You can use your computer to play files directly from the unit, copy videos and photos to your computer and delete unneeded files on the card. To play files on your computer from the Aetos 400, open them with such programs as Windows Media Player or VLC Media Player.
EntertainmentAside from its surveillance features, the unit’s color screen and stereo speakers can be used to show movies or videos, play music and display photos stored on the microSD card that you’ve transferred from a computer. It also has an FM tuner and embedded antenna for receiving local radio stations out of the air.
To access your media from the digital clock, press the ESC button. The top row of icons enables you to choose Movie, Music, Photo or Radio. To see a list of compatible video, music and photo file formats, see Specifications on pg. 14.
SPYTEC Aetos 400 Clock Cam USER GUIDE 11
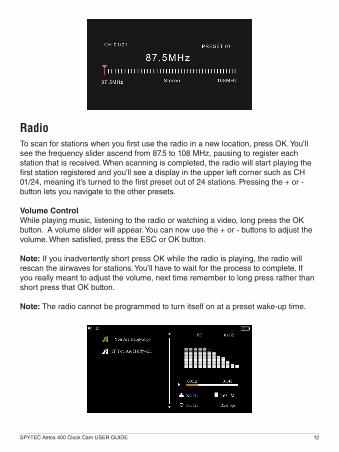
RadioTo scan for stations when you first use the radio in a new location, press OK. You’ll see the frequency slider ascend from 87.5 to 108 MHz, pausing to register each station that is received. When scanning is completed, the radio will start playing the first station registered and you’ll see a display in the upper left corner such as CH 01/24, meaning it’s turned to the first preset out of 24 stations. Pressing the + or - button lets you navigate to the other presets.
Volume ControlWhile playing music, listening to the radio or watching a video, long press the OK button. A volume slider will appear. You can now use the + or - buttons to adjust the volume. When satisfied, press the ESC or OK button.
Note: If you inadvertently short press OK while the radio is playing, the radio will rescan the airwaves for stations. You’ll have to wait for the process to complete. If you really meant to adjust the volume, next time remember to long press rather than short press that OK button.
Note: The radio cannot be programmed to turn itself on at a preset wake-up time.
SPYTEC Aetos 400 Clock Cam USER GUIDE 12
MusicIf you plan to use the Aetos 400 as a personal music player, copy your songs into a dedicated music folder on the microSD card. (The card can either be removed from the Clock Cam, placed in an adapter and inserted in an SD slot or kept in the Clock Cam connected to a computer with the included USB cable.) To see a list of playable formats, see Specifications on pg. 14.
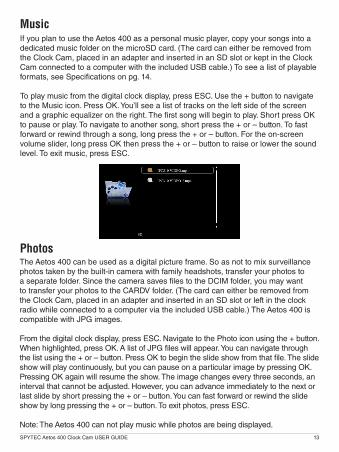
To play music from the digital clock display, press ESC. Use the + button to navigate to the Music icon. Press OK. You’ll see a list of tracks on the left side of the screen and a graphic equalizer on the right. The first song will begin to play. Short press OK to pause or play. To navigate to another song, short press the + or – button. To fast forward or rewind through a song, long press the + or – button. For the on-screen volume slider, long press OK then press the + or – button to raise or lower the sound level. To exit music, press ESC.
SPYTEC Aetos 400 Clock Cam USER GUIDE 13
PhotosThe Aetos 400 can be used as a digital picture frame. So as not to mix surveillance photos taken by the built-in camera with family headshots, transfer your photos to a separate folder. Since the camera saves files to the DCIM folder, you may want to transfer your photos to the CARDV folder. (The card can either be removed from the Clock Cam, placed in an adapter and inserted in an SD slot or left in the clock radio while connected to a computer via the included USB cable.) The Aetos 400 is compatible with JPG images.
From the digital clock display, press ESC. Navigate to the Photo icon using the + button. When highlighted, press OK. A list of JPG files will appear. You can navigate through the list using the + or – button. Press OK to begin the slide show from that file. The slide show will play continuously, but you can pause on a particular image by pressing OK. Pressing OK again will resume the show. The image changes every three seconds, an interval that cannot be adjusted. However, you can advance immediately to the next or last slide by short pressing the + or – button. You can fast forward or rewind the slide show by long pressing the + or – button. To exit photos, press ESC.
Note: The Aetos 400 can not play music while photos are being displayed.
SPYTEC Aetos 400 Clock Cam USER GUIDE 14
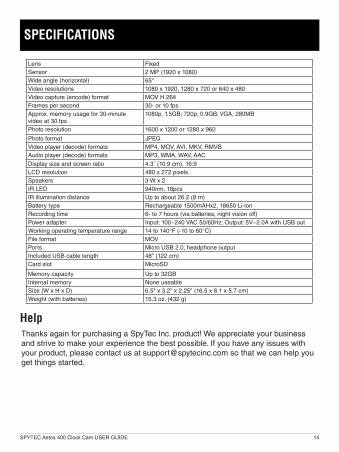
Lens FixedSensor 2 MP (1920 x 1080)Wide angle (horizontal) 65°Video resolutions 1080 x 1920, 1280 x 720 or 640 x 480Video capture (encode) format MOV H.264Frames per second 30- or 10 fpsApprox. memory usage for 30-minute video at 30 fps
1080p, 1.5GB; 720p, 0.9GB; VGA, 280MB
Photo resolution 1600 x 1200 or 1280 x 960
Photo format JPEGVideo player (decode) formats MP4, MOV, AVI, MKV, RMVBAudio player (decode) formats MP3, WMA, WAV, AACDisplay size and screen ratio 4.3˝ (10.9 cm), 16:9LCD resolution 480 x 272 pixelsSpeakers 3 W x 2IR LED 940nm, 18pcsIR illumination distance Up to about 26.2 (8 m)Battery type Rechargeable 1500mAHx2, 18650 Li-ionRecording time 6- to 7 hours (via batteries, night vision off)Power adapter Input: 100−240 VAC 50/60Hz; Output: 5V−2.0A with USB outWorking operating temperature range 14 to 140°F (-10 to 60°C)File format MOVPorts Micro USB 2.0, headphone outputIncluded USB cable length 48" (122 cm)Card slot MicroSD
Memory capacity Up to 32GBInternal memory None useableSize (W x H x D) 6.5" x 3.2" x 2.25" (16.5 x 8.1 x 5.7 cm)Weight (with batteries) 15.3 oz. (432 g)
SPECIFICATIONS
HelpThanks again for purchasing a SpyTec Inc. product! We appreciate your business and strive to make your experience the best possible. If you have any issues with your product, please contact us at [email protected] so that we can help you get things started.
SPYTEC Aetos 400 Clock Cam USER GUIDE 15
WarrantyThis Limited Warranty applies to physical goods sold by STI and lasts for a period of one year from the date of sale of the device.
This Limited Warranty covers any manufacturing defects to the device or accessories encountered by normal use. This warranty does NOT cover damages resulting from improper use of the device (including the use of incompatible accessories such as chargers, storage devices, etc.), unauthorized modifications to the device, negligence, or from any environmental or natural disasters, or from loss or theft. This warranty requires proof of sale of the device from STI or from approved resellers only.
Devices that are covered will be repaired or replaced at STI’s discretion. Devices requiring replacement will be fulfilled with a new or refurbished unit, or a similar unit if the original unit is no longer available.
To take advantage of our warranty, please go to http://www.spytecinc.com/return-policy/ and review our returns policy. If your device meets the above guidelines as well as the guidelines on our website, please click the button to proceed to the Return Authorization Form. In the event our online guidelines change, this warranty will supersede any newer changes. Once you have filled out the Return Merchant Authorization form, please wait for instructions. The date the form is filled out must not exceed one year from the date of sale.


![[XLS]obcindia.co.inobcindia.co.in/obcnew/upload/obc/Unpaid Dividend 2013-14... · Web view400 400 400 400 400 400 400 400 400 400 400 400 400 400 400 400 400 400 400 400 400 400 400](https://img.pdfslide.us/doc/110x75/5aa6f94e7f8b9a54748b6a16/xls-dividend-2013-14web-view400-400-400-400-400-400-400-400-400-400-400-400.jpg)