Embed Size (px)
Citation preview
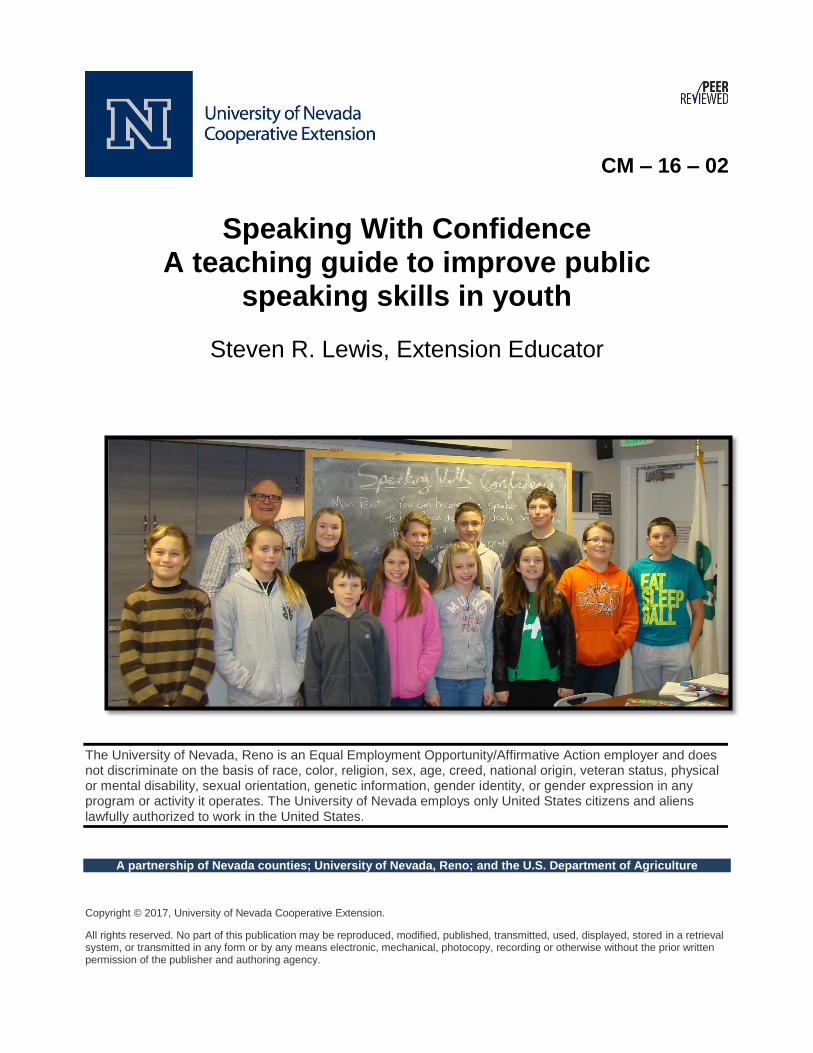
CM – 16 – 02
Speaking With Confidence
A teaching guide to improve public speaking skills in youth
Steven R. Lewis, Extension Educator
The University of Nevada, Reno is an Equal Employment Opportunity/Affirmative Action employer and does not discriminate on the basis of race, color, religion, sex, age, creed, national origin, veteran status, physical or mental disability, sexual orientation, genetic information, gender identity, or gender expression in any program or activity it operates. The University of Nevada employs only United States citizens and aliens lawfully authorized to work in the United States.
A partnership of Nevada counties; University of Nevada, Reno; and the U.S. Department of Agriculture
Copyright © 2017, University of Nevada Cooperative Extension.
All rights reserved. No part of this publication may be reproduced, modified, published, transmitted, used, displayed, stored in a retrieval system, or transmitted in any form or by any means electronic, mechanical, photocopy, recording or otherwise without the prior written permission of the publisher and authoring agency.
Speaking With Confidence
HOW TO USE THIS TEACHING GUIDE
This curriculum guide can be used with various age groups. It seems to work best for the 11 to14-year-olds. Younger youth may find some of the exercises too challenging. Older youth tend to enjoy the curriculum when used with others of similar age.
In most of the sessions the learner practices public speaking by teaching others. The session topic is used as the speech topic so the learner becomes the teacher. The learner benefits by practicing public speaking as well as internalizing the subject matter. The curriculum consists of 12 one-hour sessions. Each session is designed to address a different aspect of public speaking. It is recommended that you teach Sessions 1-3 first. There is no required sequence for the remaining topics. The teacher or leader may choose to teach all 12 sessions in the order in which they appear in the guide or concentrate more heavily on a few particular sessions, depending on the needs and interests of the students. The final session is the five-minute speech. The teacher should review Session 12 early in the sequence of classes and be prepared to discuss and distribute Session 12 Worksheet A at some point prior to the final session.
Ideally, students can participate and experience a fair amount of speaking practice when the class is limited to 12 students. To create an adequate audience and generate good feedback and conversation, the class size should include at least six students. The Session Outline gives a snapshot of the entire session.
The Objective states what the students will accomplish, and the Materials section suggests items the teacher will need to help teach that session.
Each session should begin and end with the Main Point. The main point should also be repeated numerous times throughout the session to reinforce its significance.
The Opening question and warm-up exercise is designed to start the session, get students interacting with one another, and get them thinking about the session topic.
Worksheets are teaching tools to help students remember key points. They can be found on the last page of each session. Each student should receive a worksheet copy. The teacher goes over the information as the students fill in the answers in the blank spaces. Answers are underlined and in italics in the guide. It might be helpful for the teacher to fill in the blanks with the correct answers prior to each session to avoid searching for the correct answers in the curriculum text.
The Journal page provides a means for students to rewrite their goal(s), record what they did, reflect on the session, and determine how their learning can be applied; do, reflect, apply, as in the Experiential Learning Model. The journal and other materials are located in the back of this guide as “Tools.”
Speaking With Confidence
GENERAL INFORMATION
Learner Objectives
Practice public speaking each session Write and review personal public speaking goals (vision) each session Gain confidence in public speaking skills
Learner Guidelines (ground rules)
Stand when speaking
Be positive about themselves and others Listen while others are speaking – practice being an attentive audience Smile a lot
Items Covered Each Session (one hour)
Opening (first three minutes) Pledge of Allegiance 4-H Pledge Review main point of previous session Review main point of current session
Session subject (54 minutes) Closing – review main point
Work on Journal (last three minutes)
4-H Pledge
I pledge my head to clearer thinking, my heart to greater loyalty, my hands to larger service and my health to better living, for my club, my community, my country and my world.
Speaking With Confidence
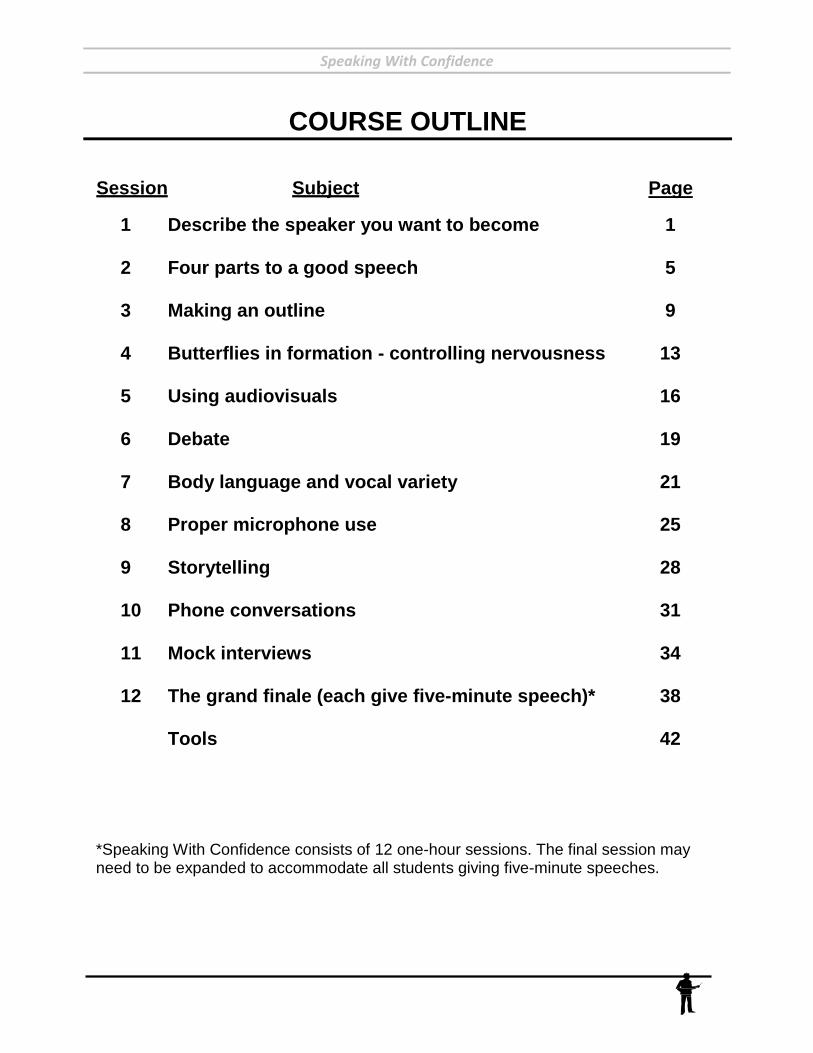
COURSE OUTLINE
Session Subject Page
1 Describe the speaker you want to become 1
2 Four parts to a good speech 5 3 Making an outline 9
4 Butterflies in formation - controlling nervousness 13
5 Using audiovisuals 16
6 Debate 19 7 Body language and vocal variety 21
8 Proper microphone use 25 9 Storytelling 28
10 Phone conversations 31
11 Mock interviews 34
12 The grand finale (each give five-minute speech)* 38 Tools 42
*Speaking With Confidence consists of 12 one-hour sessions. The final session may need to be expanded to accommodate all students giving five-minute speeches.
Speaking With Confidence
1
SESSION 1
Describe the speaker you want to become
Session Outline State the main point Describe what speaking with confidence means to you (warm-up exercise) Review course outline Review learner objectives and guidelines (worksheet) Illustrate the speaker you will be Explain your picture to the group Restate the main point Work on journal
Objective: For students to articulate their vision for the speaker they hope to become.
Materials: Worksheet copies, flip chart paper, colored markers, pencils, discarded magazines (with good pictures), tape, scissors
State the Main Point You can become the speaker you want to be if you describe it clearly, visualize that image in your mind, and practice.
Opening question and warm-up exercise
Each student is asked to think about what speaking with confidence means. Each is then asked to stand; give their whole name, the school they attend, and grade; and describe what speaking with confidence means to them. If there are exceptionally shy youth in the class, you might break the class into small groups for this exercise.
Review course outline
Briefly go through the topics that will be covered in the course (course outline). You might also inform the students of the dates for each topic and any gaps in the schedule. Ask for questions.
Review learner objectives and guidelines (Worksheet)
Make copies of Session 1 Worksheet A (Page 3) and hand out to the students. Explain that all students will follow the guidelines. You may want to enlarge these guidelines and post them each session. As you go through the guidelines, have the students fill in the blanks on the worksheet. Read the first one…Stand when speaking. Ask the students, Why do you think that ground rule is important? Read the next…Be positive about yourself and others. Again ask, Why is that important?
Speaking With Confidence
2
SESSION 1
Listen while others are speaking. Smile a lot. Next, review the learner objectives and mention that every student will accomplish these objectives: to practice public speaking each session, to write and review personal public speaking goals each session, and to gain confidence in public speaking skills. Finally ask, Are there any questions about these objectives and guidelines?
Illustrate the speaker you want to become
Provide newsprint (flip chart paper), colored markers, discarded magazines, tape and scissors for each student to illustrate and/or creatively represent the speaker she/he will be by the end of the course. This could be a collage of someone they admire as a speaker, a place they see themselves speaking, a reaction they would like to get from an audience, etc. They are not allowed to use any words. This exercise is intended to help the student visualize their goal. After the images have been created, have the students describe their images using words on Session 1 Worksheet B (Page 4). This description will serve as their GOAL.
Explain your picture to the group
One student at a time will stand before the class with his/her picture and have the class try to interpret the meaning. After a short time, the student will explain what was portrayed in the picture by reading the description on Worksheet B. Students are encouraged to hang their pictures in their rooms or somewhere they will see them daily, so they will think about them often.
The Do, Reflect, Apply Experiential Learning Model (Tool A) may be found in the back of this guide. If followed, the model should enhance the learning experience of the students in all the sessions. It is quite simple. Follow the three steps: do, reflect, apply. Do the exercise of creating the collages and describing the speaker they want to become. Reflect by asking all what the results were of this exercise and what they saw and heard. If the class needs some help with this question, the instructor might offer, “I hear many students say they want to be a confident speaker or they want to be entertaining.” Finally, Apply the experience by asking how this collage-making exercise can be used in other situations. If students are stumped, suggest, “This exercise can be used to visualize your future career or how you hope to do in school.”
Restate the Main Point Remember…you can become the speaker you want to be if you describe it clearly, visualize that image in your mind, and practice. Work on journal
The journal is intended to extend the impact of the Experiential Learning Model. At the end of each session, the students are allowed three minutes to answer four questions. The journal page may be found in the back of this guide (Tool B).
Speaking With Confidence
3
SESSION 1 WORKSHEET A
Speaking With Confidence
Guidelines when speaking.
Be about yourself and others.
while others are speaking.
a lot.
Objectives
To public speaking each session.
To and review personal
public speaking each session.
To gain in public speaking skills.
Main Point You can become the speaker you want to be if you describe it clearly, visualize that image in your mind, and practice.
Speaking With Confidence
4
SESSION 1 WORKSHEET B
Describe Your Vision (picture) of the Speaker You Want to Become
(Examples – The speaker I want to become is easy to listen to, easy to understand, confident and not nervous; makes good eye contact; speaks up and can be heard by all; is well organized; uses body language and vocal variety; uses audio-visuals; is funny; is inspiring; is entertaining…). This is your GOAL.
Main Point You can become the speaker you want to be if you describe it clearly, visualize that image in your mind, and practice.
Speaking With Confidence
5
SESSION 2
Four parts to a good speech
Session Outline State the main point In your opinion, what makes a good speech? (warm-up exercise) Ways to practice speaking with confidence Preparing a speech (worksheet) Video tape each student speaking on four parts to a good speech (short speech) Review speeches and discuss what each student did right Restate the main point Work on journal
Objective: For students to describe the four essential parts of a good speech; a title, introduction, body, and conclusion.
Materials: Worksheet copies, chalkboard or flip chart, colored markers, pencils, video camera, tripod, lectern (optional)
Review the last session – Ask, What did we cover last session?, and restate the last session’s main point. You can become the speaker you want to be if you describe it clearly, visualize that image in your mind, and practice.
State the Main Point A good speech includes a title, introduction, body, and conclusion, and usually requires a lot of practice. Opening question and warm-up exercise Tell the students they are good speech judges. Suggest that they think of a speech
they thought was particularly good and ask, Where did you hear that speech, what was the speech about, and what made it great? On a chalkboard or flip chart, record these good speech characteristics. Some ideas include: easy to understand, fun to listen to, interactive, etc.
Ways to practice speaking with confidence Since practicing is so important in gaining confidence, ask the students to think of
ways to practice. Use Tool C in the back of this guide to help you lead a brainstorming session. You can use the following list of ways to practice if needed.
Ways to practice in front of the mirror in front of your family or friends in your head before you go to sleep while riding in the car

Speaking With Confidence
6
SESSION 2 in the room or place you are actually going to make the speech in the shower at the dinner table when you get up or before you go to bed while doing chores Preparing a speech (Worksheet) Copy the worksheet handout for each student. Remember, as in Session 1, the
blanks on the worksheet correspond to the underlined words that follow in this guide. Organize the body first. Establish the main points of the speech. Make sure these
points are clear and believable. Consider the amount of time you have to relay your message, because the body constitutes approximately 95 percent of a speech. The body is the meat of the speech.
Next, organize the introduction. Orient the audience to what you are going to tell
them. Get the audience’s attention and interest. Develop some credibility by assuring them you are knowledgeable of the topic. Provide some background information that is relevant to the topic and give the audience reason to pay attention.
Organize the conclusion to wrap up and summarize what you just told them. Restate
the main points or purpose. Tie up any loose ends and bring the audience back to the beginning by reiterating the main message.
Give the speech a title. A title should be creative and instructive to the audience.
Finally and most importantly, practice, practice, practice. Each time you give a
speech, it gets better and you gain more confidence. There are many ways to practice a speech that are fun. Think of it as fun!
Videotape each student speaking on what makes a good speech Give students five minutes to prepare a short speech based on the information they
were just given about what makes a good speech. Tell them they can use the information from the opening question, list of brainstormed ways to practice and the worksheet. Videotape each student giving his or her speech on, “Four parts to a good speech.” Videotaping is optional. However, it will be a good reference point to measure development in speaking skills. You might ask for volunteers to run the camera or just leave the camera running.
Speaking With Confidence
7
SESSION 2
Review speeches and discuss what each student did right After each speech, have the class give positive feedback. Focus on what each
student did that was consistent with what makes a good speech. You might refer back to the list created earlier by the students. This is information students can add to their journals.
Restate the Main Point A good speech includes a title, introduction, body, and conclusion, and usually requires a lot of practice. Work on journal Make copies of the Journal (Tool B) and suggest the students be serious about filling
it out. Ask the students to discuss their journal answers. The three journal questions are consistent with the Experiential Learning Model – what did we do, what did you see and hear, and how can you use what you learned today in other ways in your life? Getting in the habit of processing do, reflect and apply will help students glean more from the Speaking With Confidence experience.
Reminder Ask the students to think of a topic for their five-minute speech. The five-minute
speech won’t be given until the final session, but working on it a little at a time will ease the burden. Their topic can be anything they choose. Encourage them to select a topic that is of interest to them, such as a hobby or 4-H project.
Speaking With Confidence
8
SESSION 2 WORKSHEET
Preparing a Speech
Organize the first. These are the main points or purpose of the speech.
Next, organize the . This will get the audience’s attention and prepare them for what they are about to hear.
Organize the to wrap up and summarize what you just told them. Restate the main points or purpose.
Give the speech a . A title should be creative and instructive to the audience.
Finally and most importantly, , , . Each
time you give a speech, it gets better and you gain more confidence.
There are many ways to practice a speech that are . Think of it as fun!
Main Point A good speech includes a title, introduction, body, and conclusion, and usually requires a lot of practice.
Speaking With Confidence
9
SESSION 3
Making an outline
Session Outline State the main point What is wrong with reading a speech? (warm-up exercise) How to build and use a speech outline (worksheet) The speech outline advantage (short speech) Restate the main point Work on journal
Objective: For students to understand how to build and use a speech outline, and to avoid reading a speech.
Materials: Copy worksheets, chalkboard or flip chart
Review the main point of the last session presented. State the Main Point – For best results and audience appreciation, an outline works much better than reading or memorizing your speech. Opening question and warm-up exercise Ask students to think of a speech that was read word for word and then ask, In your
opinion, what was wrong with that speech? Write their responses on the flip chart. If the responses don’t include the following, you could share these traits: didn’t hold the audience’s attention, boring, little eye contract, not dynamic, stumbled over words and don’t remember the main points.
How to build and use a speech outline (Worksheet A) A speech outline helps you organize your speech and gives you queues to remember
what to say. An outline is a map using key words so you can communicate ideas, not memorized lines.
Use 3 inch by 5 inch cards or an outline template. Start by listing the main points in the body. Use just enough words to jar your memory
of the main topics you want to convey. Remember, you are communicating ideas, not memorized lines.
Next, think about how to get the audience’s attention in the introduction. This can be a
question, a statistic, the main points you will be talking about, or anything that gets the audience curious about what you are about to say.
Next, write some words, not in sentence structure, to close out your speech in the
conclusion.
Speaking With Confidence
10
SESSION 3 When you give your speech, always start with a title. Don’t bolt the title out. Pause to
get the audience’s attention and state the title slowly and clearly. Think of something catchy.
Trust yourself to speak from your outline. This form of speech is more natural and
better received than a speech that is read. Student presentation Hand out the speech outline (Worksheet B) and give students about five minutes to
prepare a short presentation on “The Speech Outline Advantage.” Their task is to teach the class how to use a speech outline.
Restate the Main Point – For best results and audience appreciation, an outline works
much better than reading or memorizing your speech.
Work on journal Reminder The students should have thought about the topic of their five-minute speech and
begun to outline the body and main points.
Speaking With Confidence
11
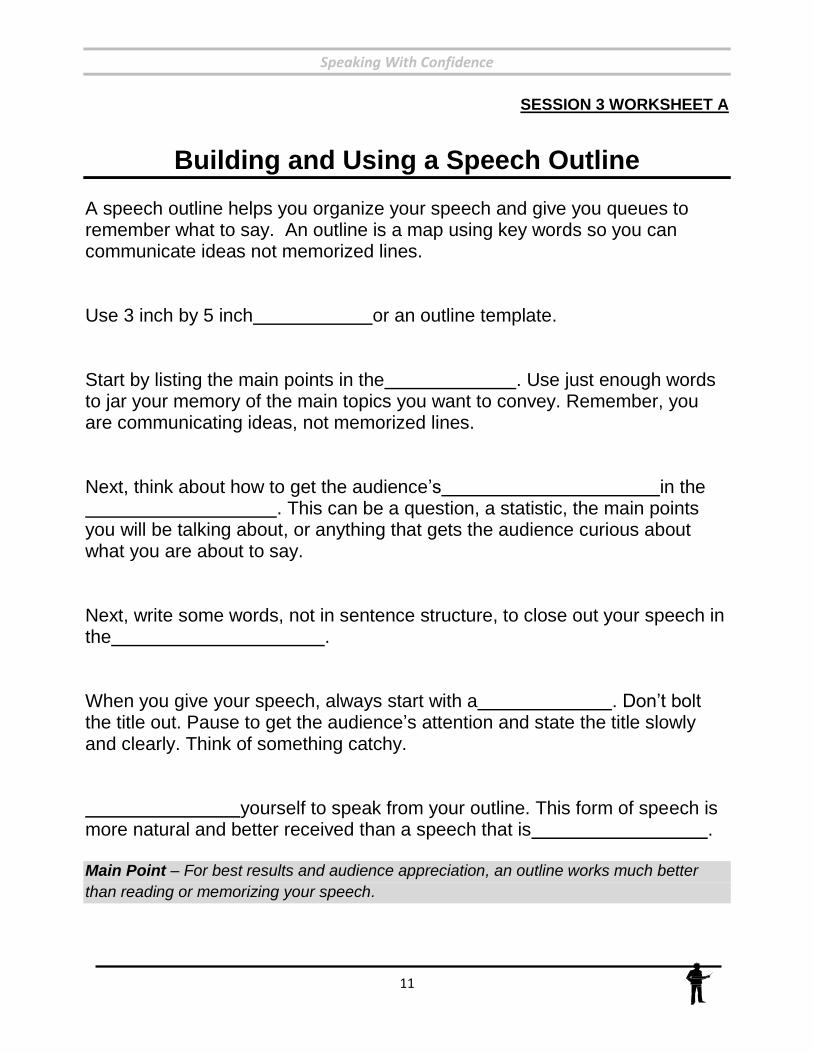
SESSION 3 WORKSHEET A
Building and Using a Speech Outline
A speech outline helps you organize your speech and give you queues to remember what to say. An outline is a map using key words so you can communicate ideas not memorized lines. Use 3 inch by 5 inch or an outline template. Start by listing the main points in the . Use just enough words to jar your memory of the main topics you want to convey. Remember, you are communicating ideas, not memorized lines. Next, think about how to get the audience’s in the . This can be a question, a statistic, the main points you will be talking about, or anything that gets the audience curious about what you are about to say. Next, write some words, not in sentence structure, to close out your speech in the . When you give your speech, always start with a . Don’t bolt the title out. Pause to get the audience’s attention and state the title slowly and clearly. Think of something catchy. yourself to speak from your outline. This form of speech is more natural and better received than a speech that is . Main Point – For best results and audience appreciation, an outline works much better
than reading or memorizing your speech.
Speaking With Confidence
12
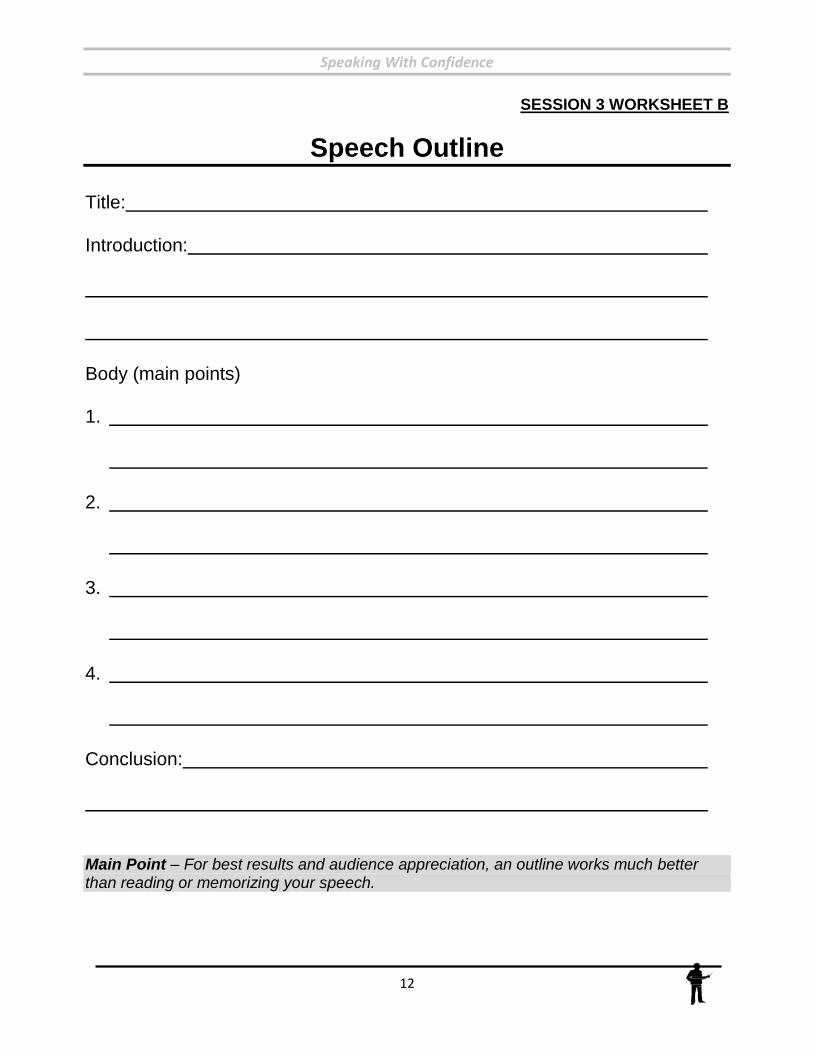
SESSION 3 WORKSHEET B
Speech Outline
Title: Introduction:
Body (main points)
1.
2.
3.
4.
Conclusion:
Main Point – For best results and audience appreciation, an outline works much better than reading or memorizing your speech.
Speaking With Confidence
13
SESSION 4
Butterflies in formation – controlling nervousness
Session Outline State the main point What causes nervousness and how do people show it? (warm-up exercise) Tips to deal with nervousness (worksheet) How do you intend to manage your nervousness (short speech) Restate the main point Work on journal Objective: For students to become aware of why people get nervous while public speaking and identify ways to control their own nervousness. Materials: Worksheet copies, chalkboard or flip chart
Review the main point of the last session presented.
State the Main Point You can control your nervousness and make that energy improve your speech. Opening questions and warm-up exercise
Learning about nervousness is learning about yourself. Usually when we do something new, we get nervous. Ask the students to brainstorm, Why would someone be afraid of public speaking? Examples are: lack of confidence, not being prepared, etc…These may be recorded on the chalkboard or flip chart. Next ask, How do we show nervousness? Examples are: blushing, stuttering, sweating, umms, ands, etc…You could do some role playing or charades for kids to demonstrate nervousness. Record these responses on a flip chart.
Tips to deal with nervousness (Worksheet)
Remember, nervousness is normal and can enhance a speaker’s ability. The key is not to eliminate the butterflies, but get them to fly in formation. Follow these tips to control your nervousness and make that energy improve your speech. Select a topic that you are interested in or want to learn more about. Prepare your speech well in advance. Practice several times each day.
Take on a positive attitude and look forward to the presentation.
Speaking With Confidence
14
SESSION 4
Imagine yourself as a great speech giver.
Visualize the audience and their positive reaction to your speech. Try these exercises right before giving your speech:
• Calm yourself by taking several slow deep breaths. • Make and hold your fists tight for five seconds, then relax. Repeat this several
times. • Practice positive self-talk. “You are the best!” “Your speech is a winner!” Smile to
yourself. • Think of yourself in the most relaxing place you know. • Pretend you are talking to only one person. • Visualize the audience wearing something funny.
Personal report of communication apprehension
Explain that this exercise (Tool D) is a fun way to measure how you feel about speaking to others. It establishes a measurement that may be used to determine improvement over time in controlling one’s nervousness. All scores are good; they simply indicate one’s current level of uneasiness while public speaking. This exercise should be done again at the end of this course to determine the change in one’s nervousness level. The reading level of this instrument might be too advanced for some students, so suggest they work with their parents at home to complete the exercise.
How do you intend to manage your nervousness?
Ask the students to use the Speech Outline Worksheet to prepare a short speech explaining what causes nervousness in people when public speaking, how they show it, and what techniques they are going to use to manage their own nervousness. Remind students to use the four parts to a good speech: title, introduction, body and conclusion.
Restate the Main Point You can control your nervousness and make that energy improve your speech.
Work on journal
Give the students a new journal sheet to complete. Help them by walking through the questions. What did we do today? What did you hear and see? How can you use what you learned today in other ways?
Reminder
Mention that the students should have selected a topic by now, for their five-minute speech to be given at the final session.
Speaking With Confidence
15
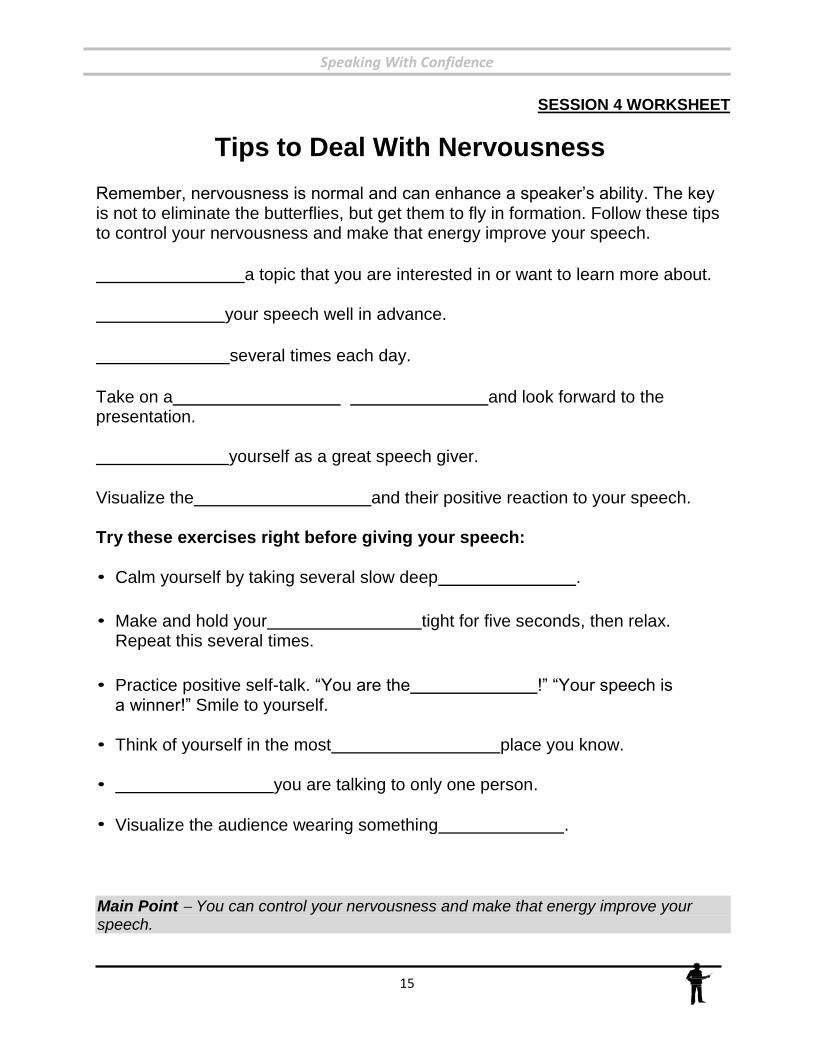
SESSION 4 WORKSHEET
Tips to Deal With Nervousness
Remember, nervousness is normal and can enhance a speaker’s ability. The key is not to eliminate the butterflies, but get them to fly in formation. Follow these tips to control your nervousness and make that energy improve your speech.
a topic that you are interested in or want to learn more about.
your speech well in advance.
several times each day.
Take on a and look forward to the presentation.
yourself as a great speech giver.
Visualize the and their positive reaction to your speech. Try these exercises right before giving your speech: • Calm yourself by taking several slow deep .
• Make and hold your tight for five seconds, then relax. Repeat this several times.
• Practice positive self-talk. “You are the !” “Your speech is a winner!” Smile to yourself.
• Think of yourself in the most place you know.
• you are talking to only one person. • Visualize the audience wearing something .
Main Point You can control your nervousness and make that energy improve your speech.
Speaking With Confidence
16
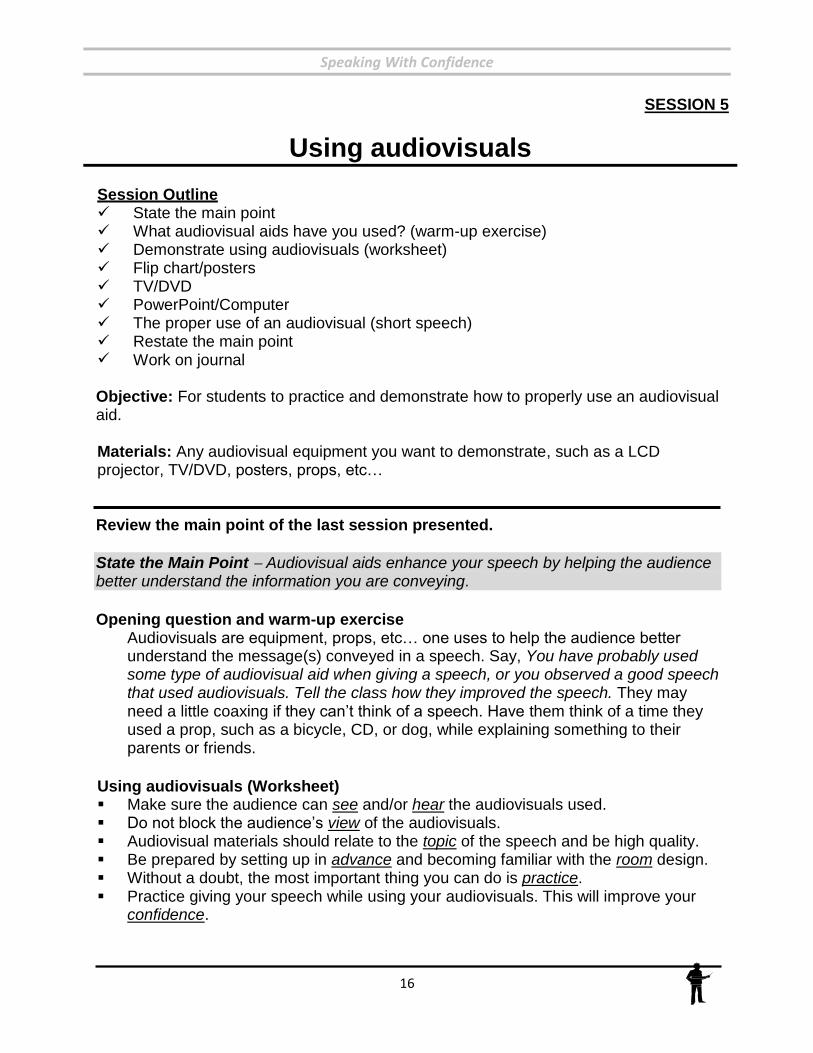
SESSION 5
Using audiovisuals
Session Outline State the main point What audiovisual aids have you used? (warm-up exercise) Demonstrate using audiovisuals (worksheet) Flip chart/posters TV/DVD PowerPoint/Computer The proper use of an audiovisual (short speech) Restate the main point Work on journal
Objective: For students to practice and demonstrate how to properly use an audiovisual aid.
Materials: Any audiovisual equipment you want to demonstrate, such as a LCD projector, TV/DVD, posters, props, etc… Review the main point of the last session presented.
State the Main Point Audiovisual aids enhance your speech by helping the audience better understand the information you are conveying.
Opening question and warm-up exercise
Audiovisuals are equipment, props, etc… one uses to help the audience better understand the message(s) conveyed in a speech. Say, You have probably used some type of audiovisual aid when giving a speech, or you observed a good speech that used audiovisuals. Tell the class how they improved the speech. They may need a little coaxing if they can’t think of a speech. Have them think of a time they used a prop, such as a bicycle, CD, or dog, while explaining something to their parents or friends.
Using audiovisuals (Worksheet) Make sure the audience can see and/or hear the audiovisuals used. Do not block the audience’s view of the audiovisuals. Audiovisual materials should relate to the topic of the speech and be high quality. Be prepared by setting up in advance and becoming familiar with the room design. Without a doubt, the most important thing you can do is practice. Practice giving your speech while using your audiovisuals. This will improve your
confidence.
Speaking With Confidence
17
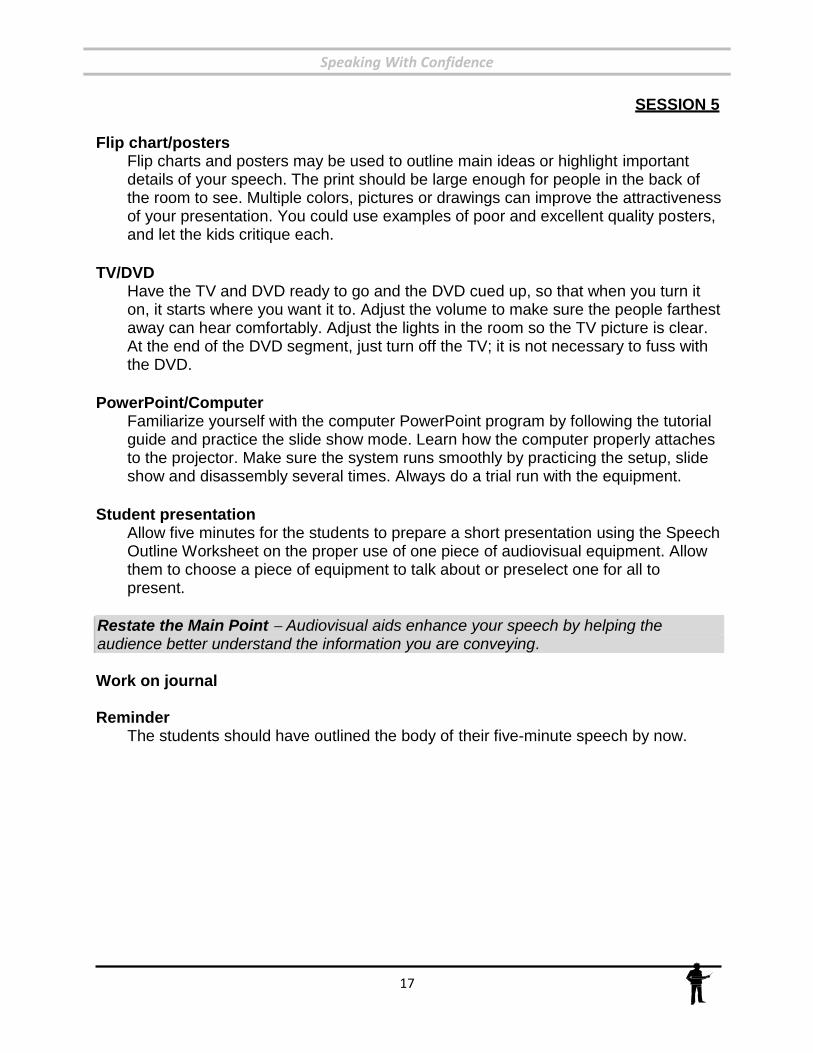
SESSION 5
Flip chart/posters
Flip charts and posters may be used to outline main ideas or highlight important details of your speech. The print should be large enough for people in the back of the room to see. Multiple colors, pictures or drawings can improve the attractiveness of your presentation. You could use examples of poor and excellent quality posters, and let the kids critique each.
TV/DVD
Have the TV and DVD ready to go and the DVD cued up, so that when you turn it on, it starts where you want it to. Adjust the volume to make sure the people farthest away can hear comfortably. Adjust the lights in the room so the TV picture is clear. At the end of the DVD segment, just turn off the TV; it is not necessary to fuss with the DVD.
PowerPoint/Computer
Familiarize yourself with the computer PowerPoint program by following the tutorial guide and practice the slide show mode. Learn how the computer properly attaches to the projector. Make sure the system runs smoothly by practicing the setup, slide show and disassembly several times. Always do a trial run with the equipment.
Student presentation
Allow five minutes for the students to prepare a short presentation using the Speech Outline Worksheet on the proper use of one piece of audiovisual equipment. Allow them to choose a piece of equipment to talk about or preselect one for all to present.
Restate the Main Point Audiovisual aids enhance your speech by helping the audience better understand the information you are conveying.
Work on journal
Reminder
The students should have outlined the body of their five-minute speech by now.
Speaking With Confidence
18
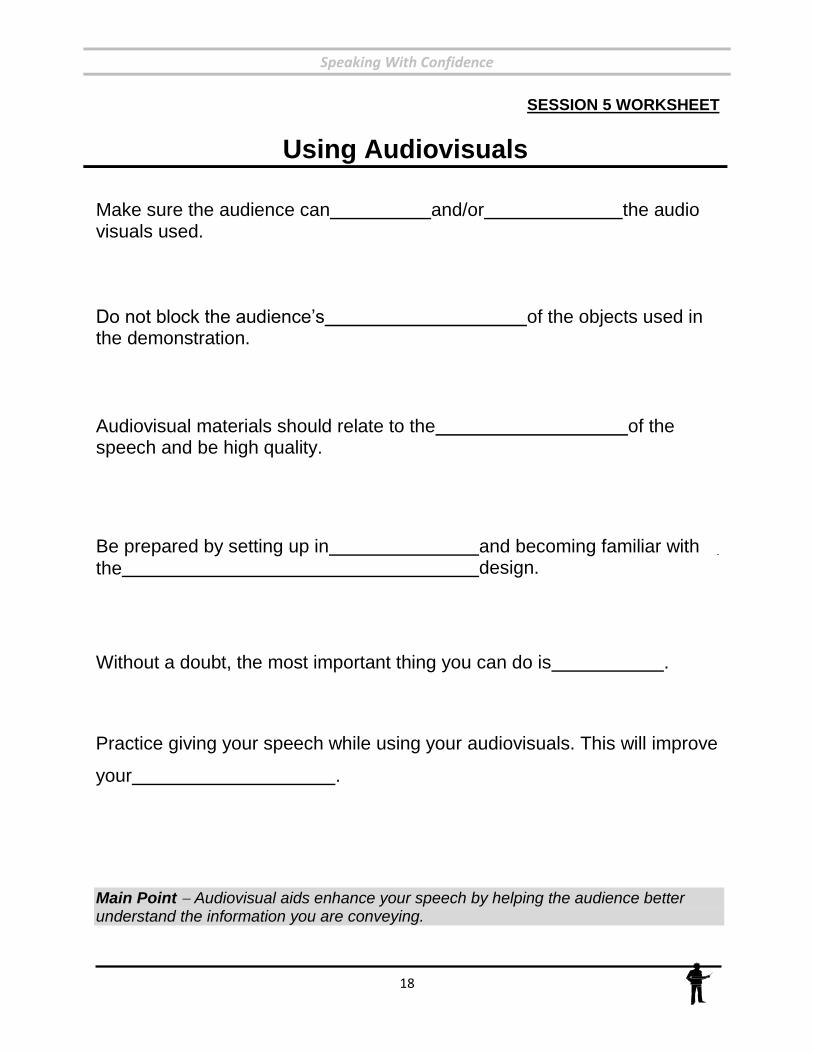
SESSION 5 WORKSHEET
Using Audiovisuals
Make sure the audience can and/or the audio visuals used.
Do not block the audience’s of the objects used in the demonstration.
Audiovisual materials should relate to the of the speech and be high quality.
Be prepared by setting up in and becoming familiar with
the design.
Without a doubt, the most important thing you can do is .
Practice giving your speech while using your audiovisuals. This will improve
your .
Main Point Audiovisual aids enhance your speech by helping the audience better understand the information you are conveying.
Speaking With Confidence
19
SESSION 6
Debate
Session Outline State the main point Describe a debate you had recently (warm-up exercise) Brainstorm topics to debate Prioritize topics Debate the topics Restate the main point Work on journal Objective: To have students verbalize the pro and con sides of an issue they enjoy talking about.
Materials: Chalkboard or flip chart, markers Review the main point of the last session presented
State the Main Point People speak more confidently about matters in which they have strong feelings.
Opening question and warm-up exercise
Say, Please describe a difference of opinion discussion you had recently. What was the topic and what side did you take? Let the students know that this type of discussion may be referred to as a debate, a discussion in which arguments are made on both sides of an issue.
Brainstorm topics to debate
Write a list of interesting or controversial topics on the flip chart. The following are examples of subjects that have generated good interactive debate. School uniforms Dropping the voting age to 10 Chewing gum at school Parents in the classroom Year-round schooling for K-12 Dropping the driving age to 14 Community service requirement for high school graduation Hunting
Ask the students to think of other topics that they would like to discuss and write those topics on the board as well.
Speaking With Confidence
20
SESSION 6
Prioritize issues
After everyone has had a chance to contribute topic ideas, number the list. Ask the students to pick the two topics they are most interested in discussing. Go down the list and tally each topic. The topics with the highest tally are the topics they will debate first. Then just work your way down the list.
Debate the topics
Give the students a couple of minutes to collect their thoughts about the first topic. Ask them to think about a few pro and con perspectives. Ask for a volunteer to start the debate by standing and giving a pro or con reasoning. Next, a student will stand and counter that position. Part of being a good speaker is to listen to the opposite view without being rude or derogatory to the person. The objective is to get the students to start talking about a subject that moves them. As they begin to speak from the heart, they speak with more confidence and less self-consciousness and nervousness. It’s fun! Next go to the next topic and continue until you run out of time.
Restate the Main Point People speak more confidently about matters in which they have strong feelings.
Work on journal
Reminder
Let the students know that they should be working on the introduction and conclusion portions of their speech.
Speaking With Confidence
21
SESSION 7
Body language and vocal variety
Session Outline State the main point Reading with inflexion (warm-up exercise) The impact of a message (worksheet) Read book passages Express emotion through eyes and voice Body language of active listeners How body language and voice impact our message (short speech) Restate the main point Work on journal
Objective: To experience how body language and voice tones convey the message much more than words themselves.
Materials: Flip chart, markers, an easy-to-read book
Review the main point of the last session presented.
State the Main Point The way a speech is given has greater impact than the words spoken.
Warm-up exercise
Write the following statements on the flip chart and ask each student to read them with a voice inflexion on the capitalized word: WHERE are you going? Where ARE you going? Where are YOU going? Where are you GOING? Discuss how the meaning changes as the inflexion changes. For instance, WHERE gives emphasis to desired location, ARE refers to the fact it is happening, YOU targets the individual, and GOING brings attention to movement.
Body language and vocal variety (Worksheet) Research has shown that nonverbal communication plays a considerable role in how we humans relate with one another. A breakdown in approximate percentages shows the impact of words, voice tones and body language in the messages we convey.
7 percent words 38 percent voice tones, and 55 -percent body language
Speaking With Confidence
22
SESSION 7
These numbers help us understand the main point: The way a speech is given has greater impact than the words spoken.
Facial expressions convey emotions and feelings. A way of carrying or positioning the body is called posture, and it is a large part of body language.
There are several aspects of voice that can affect the message you are giving.
Volume is the loudness of sound and can be used to reach the audience or to stress a point.
Pitch is the lowness or highness of a sound that can convey emotions.
Rate is how fast or slow one talks and can be used to convey confidence, impatience or many other feelings. Pauses can be used to get the audience’s attention.
Read book passages
Select a book that is suitable for a fifth-to six-grade reading level. Ask the first volunteer to read a couple sentences with no emotion or feeling, and then ask the volunteer to read the same passage again, only this time with feeling. The next volunteer will do the same thing, but with the next couple of sentences. Discuss how the voice makes a difference in the meaning. Relate that to public speaking and speaking with confidence.
Express emotion through the eyes and the voice
Pair up and have one student express these emotions with just their eyes: Surprise Anger Love Confusion Boredom Others Now rotate and allow the other student to express these same emotions with their eyes, while the partner tries to determine the emotion that is being expressed.
Now try this same exercise by using your voice rather than your eyes to convey these emotions.
Speaking With Confidence
23
SESSION 7
The instructor might ask students what they observed from this exercise. It is difficult to communicate with just eyes or voice. When we communicate, we tend to use body language and vocal variety.
Body language of active listeners
Speech listeners have an important role to play. Body language of the audience can be used to encourage the speaker. Ask students to demonstrate body language that might discourage a speaker as well as body language that has a positive effect on a speaker and conveys active listening.
How does body language and voice impact our message?
Hand out the Speech Outline Worksheet and allow time for students to prepare a brief talk about how body language and voice affects the way we communicate. Have the students present their talks.
Restate the Main Point The way a speech is given has greater impact than the words spoken.
Work on journal
Reminder
Remind students to continue working on their five-minute speech. Practice will markedly improve their confidence.
Speaking With Confidence
24
SESSION 7 WORKSHEET
Body Language and Vocal Variety
The impact of a message is:
percent words
percent voice tones, and
percent body language
These numbers help us understand the main point: The way a speech is given is more important than what is said.
Facial expression conveys emotions and . A way of carrying or positioning the body is called and it is a large part of body language.
There are several aspects of voice that can affect the message you are giving.
is the loudness of sound and can be used to reach the audience or to stress a point.
is the lowness or highness of a sound that can convey emotions.
is how fast or slow one talks and can be used to convey confidence, impatience or many other feelings. can be used to get the audience’s attention.
Main Point The way a speech is given has greater impact than the words spoken.
Speaking With Confidence
25
SESSION 8
Proper microphone use
Session Outline State the main point Describe someone you’ve seen using a microphone (warm-up exercise) Proper microphone use (worksheet) Demonstrate various types of microphones Proper microphone use (short speech) Restate the main point Work on journal
Objective: For students to become familiar with and practice proper microphone use. Materials: Worksheet copies, several types of microphones
Review the main point of the last session presented.
State the Main Point Proper microphone use will enable the audience to better receive your message. Opening question and warm-up exercise
Ask students to think of a speech where a microphone was being used and to describe where the speech was given, the speech topic, the type of microphone and how the microphone improved the speech.
Proper microphone use (Worksheet)
Don’t ask if people can hear you without the microphone. Use it; the microphone is your friend! There are several types of microphones, including stationary, wired, handheld (wireless), lapel and headset. Hold or position the microphone up to your mouth but not touching your lips. Speak directly into the microphone rather than off to the side. Regulate the volume by adjusting the microphone’s distance to your mouth. Listen to the volume, make sure all people can hear you, and avoid being too loud or causing feedback. Be aware that when you turn your head, the microphone must go with you.
Speaking With Confidence
26
SESSION 8
When possible, walk around with the microphone, change your location and use body language. When finished speaking, leave the microphone or hand it to someone, but don’t attempt to turn it off. Remember, a good speech begins with the audience being able to hear it.
Demonstrate various types of microphones
Get a number of types of microphones to use for demonstration, if possible. If all microphone types are not available, the teacher may need to describe them. Microphone types include the stationary wired (on a cord or attached to a lectern), handheld (wireless), the lapel and the headset. It is best for the microphones to be operable to demonstrate the challenges with volume, feedback, etc. Specific challenges with stationary microphones include they restrict “speaker movement,” and sometimes the arm supporting the microphone is too short or not tall enough. Challenges with the wired mic are dictated by the length of the cord. The handheld wireless mic requires the speaker to use one hand to hold the mic and to concentrate on keeping it in the optimum position in front of his/her mouth. Sometimes the lapel mic doesn’t pick up the speaker’s voice, but the lapel and headset are probably the most ideal types to allow for freedom of the speaker’s body language.
Proper microphone use (short speech)
Hand out a Speech Outline Worksheet and allow a few minutes for students to prepare a short speech on the proper microphone use. Suggest they use the microphones in their speeches. Ask the class for feedback after each short speech on what aspects were well done.
Restate the Main Point Proper microphone use will enable the audience to better receive your message.
Work on journal
Reminder
Students should be practicing their five-minute speeches.
Speaking With Confidence
27
SESSION 8 WORKSHEET
Proper Microphone Use
Don’t ask if people can hear you without the microphone. Use it; the microphone is your !
There are several of microphones, including stationary, wired, handheld (wireless), lapel and headset.
Hold or position the microphone up to your mouth but not touching your .
Speak into the microphone rather than off to the side.
Regulate the volume by adjusting the microphone’s to your mouth. Listen to the volume, make sure all people can hear you, and avoid being too loud or causing feedback.
Be aware that when you turn your ,the microphone must go with you.
When possible, around with the microphone, change your location and use body language.
When finished speaking, leave the microphone or hand it to someone, but don’t attempt to turn it .
Remember, a good speech begins with the audience being able to it. Main Point Proper microphone use will enable the audience to better receive your message.
Speaking With Confidence
28
SESSION 9
Storytelling
Session Outline State the main point Tell a short story (warm-up exercise) Describe a picture exercise Storytelling in public speaking (worksheet) Using a story in your speech (short speech) Restate the main point Work on journal
Objective: For students to recognize how storytelling can enhance speeches by adding a personal touch and making them more entertaining.
Materials: Worksheet copies, creative pictures mounted on card stock
Review the main point of the last session presented.
State the Main Point Stories can greatly improve your speech and are easy to remember.
Opening question and warm-up exercise Ask the students to think of a short story they can share with the class. This can be a story about the best vacation they’ve had, a story about a sibling or a pet, a story about a lesson they learned, anything. After all stories are shared ask how they felt while telling the stories. Students might mention that it was easy to talk about their story, it was easy to remember, and the words seemed to just flow out.
Describe a picture Hand out pre-made pictures (one to each student). These are pictures that can be
found in magazines such as National Geographic. Large pictures, 8.5 inches by 11 inches are best. Inform the students, without showing the pictures to their neighbor, think about how they would describe this picture. One by one, students will describe their pictures in the greatest detail possible and then show their pictures to the class. The class will give feedback on how well the picture descriptions matched the pictures. Following the exercise, explain that storytelling is similar to “painting” a picture to the audience. The better a story is told, the better the audience feels or envisions the same experience the speaker is conveying.
Storytelling in public speaking (Worksheet)
Use stories that relate to your speech topic.
Speaking With Confidence
29
SESSION 9
Think of the audience experience, age, and occupation, as well as the nature of the occasion, to select appropriate stories. Space stories throughout your speech to provide a change of pace. When you tell about your successes and challenges, others will find this entertaining, as they can see themselves having the same experiences. Use facts from your own life, or you can improvise and make the story a little more exciting. Keep your stories short and to the point. Eliminate irrelevant details. Set the stage for the story by including the location where your story takes place. Mention people, places and things with which the audience is familiar. Use descriptive verbs and adjectives. Practice your story so you are sure to include the most important details and the punch line in the right place.
Using a story in your speech
Hand out the Speech Outline Worksheet and ask students to prepare a short talk on how stories can improve your speech. Critique the speeches by asking other students what aspects were well done.
Restate the Main Point Stories can greatly improve your speech and are easy to remember. Work on journal
Reminder
Students should be practicing their five-minute speeches.

Speaking With Confidence
30
SESSION 9 WORKSHEET
Storytelling in Public Speaking
Use stories that to your speech topic.
Think of the experience, age and occupation, as well as the nature of the occasion, to select appropriate stories.
Space stories throughout your speech to provide a change of .
When you tell about your successes and challenges, others will find this , as they can see themselves having the same experiences.
Use from your own life, or you can improvise and make the story a little more exciting. Keep your stories and to the point. Eliminate irrelevant details. Set the stage for the story by including the where your story takes place. Mention people, places and things with which the audience is . Use descriptive and ,
your story so you are sure to include the most important details and the punch line in the right place.
Main point Stories can greatly improve your speech and are easy to remember.
Speaking With Confidence
31
SESSION 10
Phone conversations
Session Outline State the main point Describe two phone conversations (warm-up exercise) Phone etiquette and attitude (worksheet) Phone conversation exercises Leave a message Restate the main point Work on journal
Objectives: For students to practice public speaking skills while using the phone.
Materials: Two phones to use as props, they need not be operable
Review the main point of the last session presented.
State the Main Point Telephone conversations can provide an opportunity to improve your public speaking skills. Opening question and warm-up exercise
Ask the students to describe two phone conversations they’ve had, one poor quality and one good quality. Have them explain what they thought was poor and what they thought was good about these phone calls. As the students describe these phone call characteristics, the teacher can jot them down on the flip chart under the headings of poor and good.
Phone etiquette and attitude (Worksheet)
Whatever is on your mind is projected over the phone. Your attitude can be projected through the phone line. Answer the phone with a smile on your face and confidence in your voice. Pay attention and don’t be in a hurry when talking on the phone. Concentrate on speaking clearly and with a good attitude. Always practice being polite while on the phone. When leaving a voice message, make sure to be brief, speak up, and speak slowly. Telephone conversations can provide excellent experience for becoming a confident speaker.
Phone conversation exercises
Get two phones to use for these exercises. The local phone company will usually lend you some for the day if you explain what you are using them for. You may also use cell phones or toy phones.
Speaking With Confidence
32
SESSION 10 A. Pick two volunteers. One is going to sell the other a dozen eggs. The
volunteers can make up the imaginary relationship as they go, or they can set some parameters before beginning, such as: they have never met each other before, the seller is a 4-H member, and the buyer is a mother that lives across town. Then switch roles. They will be role-playing in front of the class.
B. Pick two volunteers. One is going to ask the other if she could spend the night. Then switch roles.
C. Pick two volunteers. One is going to give the other directions to get to their house. Have the students listen carefully for content completeness and accuracy.
D. Create another phone conversation topic.
Leave a message
Ask students to prepare a short voice message they will leave for someone. When it’s their turn to leave a message make sure they include their name, the date and the time of the call, a message, and a phone number.
Restate the Main Point Telephone conversations can provide an opportunity to improve your public speaking skills.
Work on journal
Reminder
Remind the students to practice their five-minute speech.
Speaking With Confidence
33
SESSION 10 WORKSHEET
Phone Etiquette and Attitude
Whatever is on your is projected over the phone.
Your can be projected through the phone line.
Answer the phone with a on your face and confidence
in your voice.
Pay attention and don’t be in a hurry when talking on the phone.
Concentrate on speaking and with a good attitude.
Always practice being while on the phone.
When leaving a voice message, make sure to be brief, speak up, and
speak .
Telephone conversations can provide an excellent experience for becoming a confident speaker.
Main Point Telephone conversations can provide an opportunity to improve your public speaking skills.
Speaking With Confidence
34
SESSION 11
Mock interviews
Session Outline State the main point How to prepare for an interview (warm-up exercise) Tips for a good interview (worksheet) Interview exercise Restate the main point Work on journal Objective: To practice applying public speaking skills in an interview. Materials: Mock interview arrangement with table and two chairs, job titles written on pieces of paper for students to draw out of a hat, flip chart, markers
Review the main point of the last session presented.
State the Main Point Successful interviews usually result from good public speaking skills and practice.
Opening question and warm-up exercise Ask the students to brainstorm how they would prepare for a job interview. Make a list of all the preparation actions mentioned on a flip chart.
Tips for a good interview Eye contact - Maintain it throughout the interview but don’t stare. Body language - Be poised and calm, and sit or stand straight. Voice - Maintain an even, pleasant tone.
Three things considered by the employer
Attitude – 80 percent Appearance – 10 percent Skill – 10 percent
Things to Remember
Shake hands with the employer as you meet him/her. Wait to be seated until the employer indicates when appropriate. Listen carefully to the employer and think about the questions asked before you answer. Explain what the employer can expect to gain by having you as an employee and what you expect to gain from the job. Be able to talk positively about yourself for one minute. Don’t talk about your personal problems. Be conscious of your body language as well as the employer’s body language.
Speaking With Confidence
35
SESSION 11
Closing Interview Ask one or two questions about the job, the company or the work environment. Shake hands with the employer and thank him/her for the time.
Interview Exercise
Distribute 3-by-5 cards with different job titles to each student. Ask if any student would like a different job title or if they would like to write their own. The interviewee (student) comes into the employer’s make-believe office to interview for a job. They greet, introduce themselves and have a seat. The interviewer (teacher) asks some or all of the following questions. The interviewer can also ask other questions or ask the interviewee to expand upon short answers.
1. Tell me about yourself. 2. Why do you want to be a ? 3. Do you know what the job requires? 4. Describe the experience you’ve had that qualifies you for this position. 5. Tell me about your last job. 6. Why did you leave? 7. What are some of the problems you’ve had to deal with in your last job? And, how
did you deal with them? 8. Why should we hire you? 9. Tell be about a situation when you had to make a decision that was unpopular.
How did you handle it? 10. Describe the most elaborate report you have ever had to write. 11. Do you have any questions? *Different jobs you might want to use include, but are not limited to, the following: Professional Football Coach Mechanic Legal Secretary Sewer Cleaner FBI Special Agent NASA Astronaut It is fun to select a different job for each interviewee. At the end of the session, ask the students, Why do you think it is important to display confidence during an interview?
Optional exercise
If you feel students are too young to understand the context of a job interview, you might consider asking them to describe something you’d like to do for living. You could ask some of the following questions. 1. Tell me a little about yourself. 2. Why do you think you’d like to do __________ for a living?

Speaking With Confidence
36
SESSION 11
3. Do you know anyone that does this professionally today? If so, please tell me about them.
4. What experiences/schooling would help you prepare for a career in this field? 5. Why do you think you’d be good in this business?
Restate the Main Point Successful interviews usually result from good public speaking skills and practice.
Work on journal Reminder
Remind the students they should be practicing their five-minute speeches over and over again.
Speaking With Confidence
37
SESSION 11 WORKSHEET
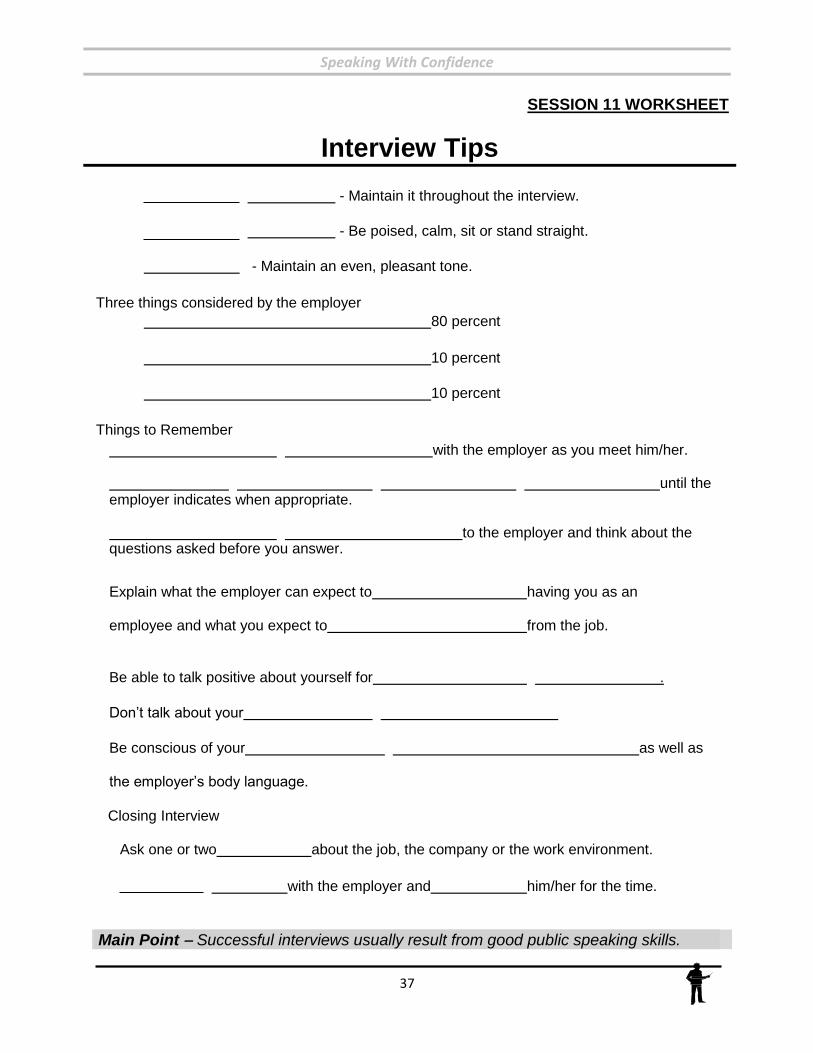
Interview Tips
- Maintain it throughout the interview.
- Be poised, calm, sit or stand straight.
- Maintain an even, pleasant tone.
Three things considered by the employer
80 percent
10 percent
10 percent
Things to Remember
with the employer as you meet him/her. until the
employer indicates when appropriate. to the employer and think about the
questions asked before you answer. Explain what the employer can expect to having you as an
employee and what you expect to from the job.
Be able to talk positive about yourself for .
Don’t talk about your
Be conscious of your as well as
the employer’s body language.
Closing Interview
Ask one or two about the job, the company or the work environment.
with the employer and him/her for the time.
Main Point Successful interviews usually result from good public speaking skills.
Speaking With Confidence
38
SESSION 12
The grand finale
Session Outline State the main point Pick a number to determine speakers’ order Videotape each student giving five-minute speech Class evaluation of how each speaker has improved Course evaluation Schedule times to conduct individual evaluations with each student (who wants to)
Objective: For students to practice using the public speaking skills learned and apply them to a five-minute prepared speech.
Materials: Video camera, pieces of paper to draw order of speakers, certificates
Note: One to two weeks prior to the final session, give the students Session 12 Worksheet A to use as a guide or checklist to help them be well prepared for their five-minute speech. Review the main point of the last session presented.
State the Main Point You become the speaker you want to be when you describe it, work toward that image, and practice. Randomly select speaker order Cut up as many pieces of paper as there are speakers. Number these paper pieces
1 through x (total number of speakers). Have each speaker draw a number out of the hat. This will determine their speaking order.
Video record each speaker From a tripod or stationary position, video record each speaker. This will give the
teacher a measurement from which to counsel student growth in public speaking.
Class evaluation of how each speaker has improved After each speech, have the class give positive feedback. Focus on how each
student has improved since the beginning of the course. Give plenty of applause!
Course evaluation Ask the students to complete the course evaluation using Session 12 Worksheet B.
This will provide the teacher/leader with student perceptions on how they improved. This form may also be used as the project record for their record books and signed by the teacher/leader. The teacher can make a copy of each for their record.
Speaking With Confidence
39
SESSION 12
Schedule times to conduct individual evaluations with each student (who wants to)
For those students who want to get additional feedback and a little more in-depth attention to their progress in becoming a confident speaker, set a time and date to meet. You might want to arrange for the scheduling sometime following the final session. At this meeting, you may want to show the video clips of the beginning and end speeches. Ask the students to bring their journal pages to this meeting to share with the teacher.
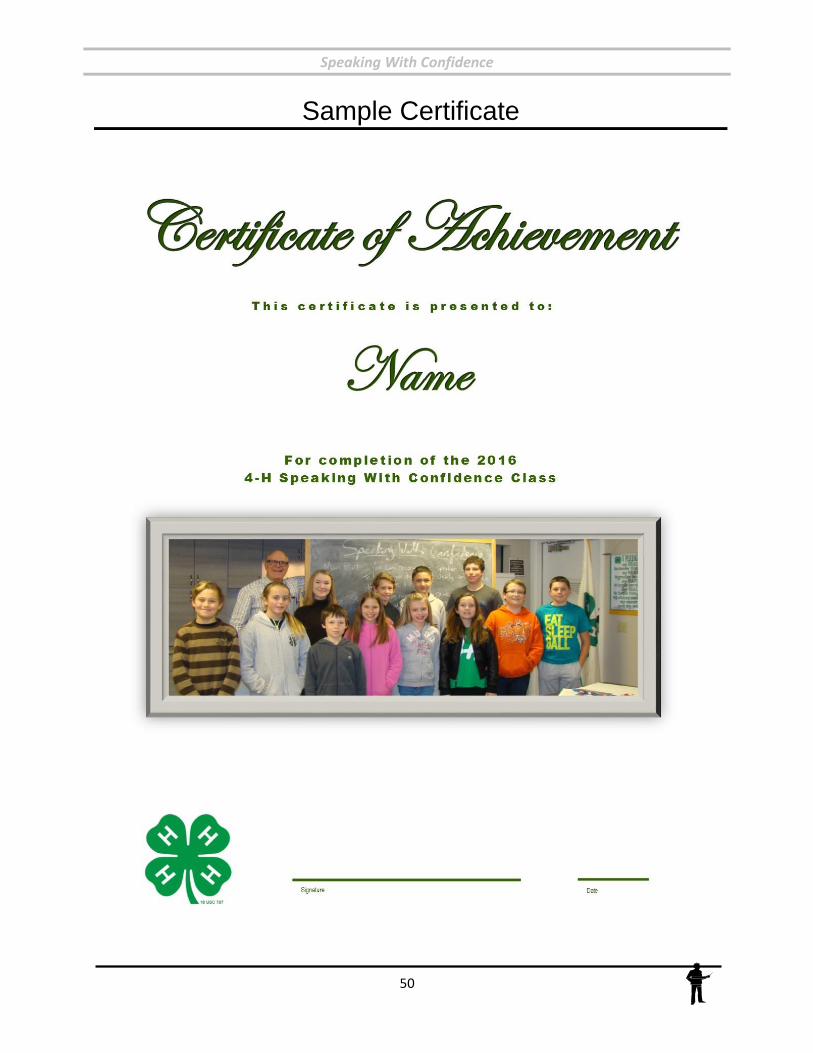
Restate the Main Point You become the speaker you want to be when you describe it, work toward that image, and practice. Certificates of achievement
Consider using the certificate template on Page 50. Fill in the student’s name and insert a picture of the class if desired. The certificate may be inserted in the 4-H member’s record book/portfolio, symbolizes accomplishment and is a nice gesture of recognition.
Speaking With Confidence
40
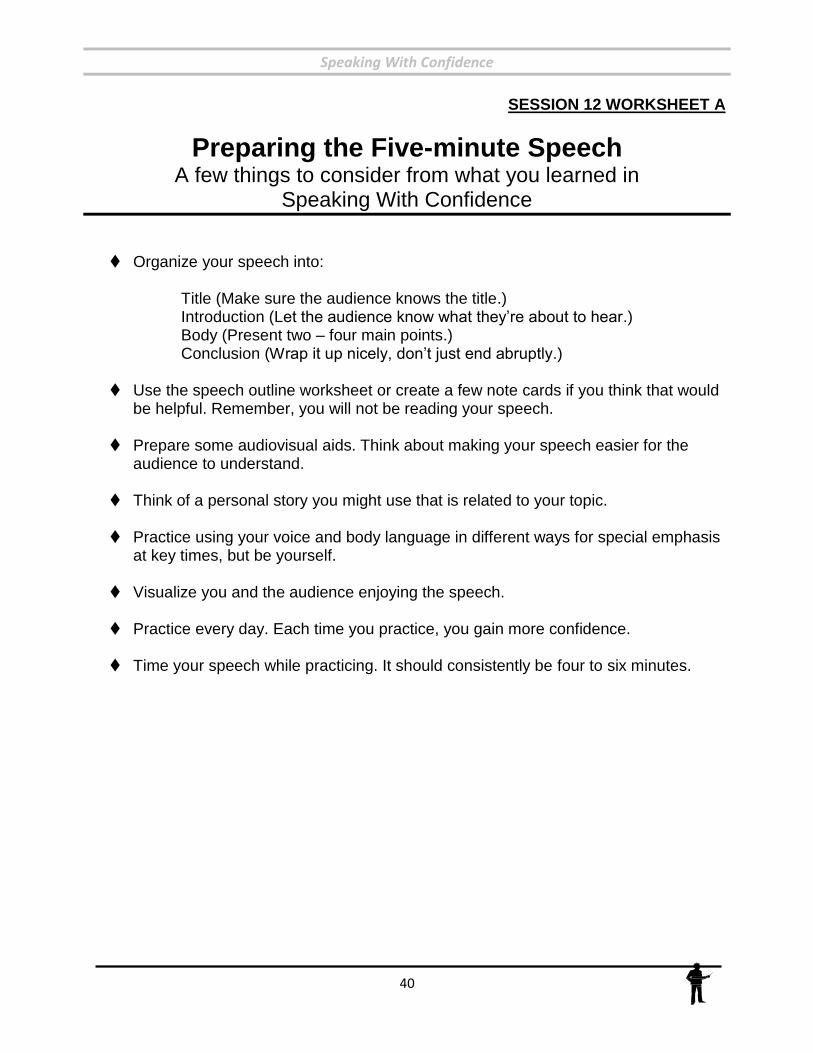
SESSION 12 WORKSHEET A
Preparing the Five-minute Speech A few things to consider from what you learned in
Speaking With Confidence
Organize your speech into:
Title (Make sure the audience knows the title.) Introduction (Let the audience know what they’re about to hear.) Body (Present two – four main points.) Conclusion (Wrap it up nicely, don’t just end abruptly.)
Use the speech outline worksheet or create a few note cards if you think that would
be helpful. Remember, you will not be reading your speech.
Prepare some audiovisual aids. Think about making your speech easier for the audience to understand.
Think of a personal story you might use that is related to your topic.
Practice using your voice and body language in different ways for special emphasis
at key times, but be yourself.
Visualize you and the audience enjoying the speech.
Practice every day. Each time you practice, you gain more confidence.
Time your speech while practicing. It should consistently be four to six minutes.
Speaking With Confidence
41
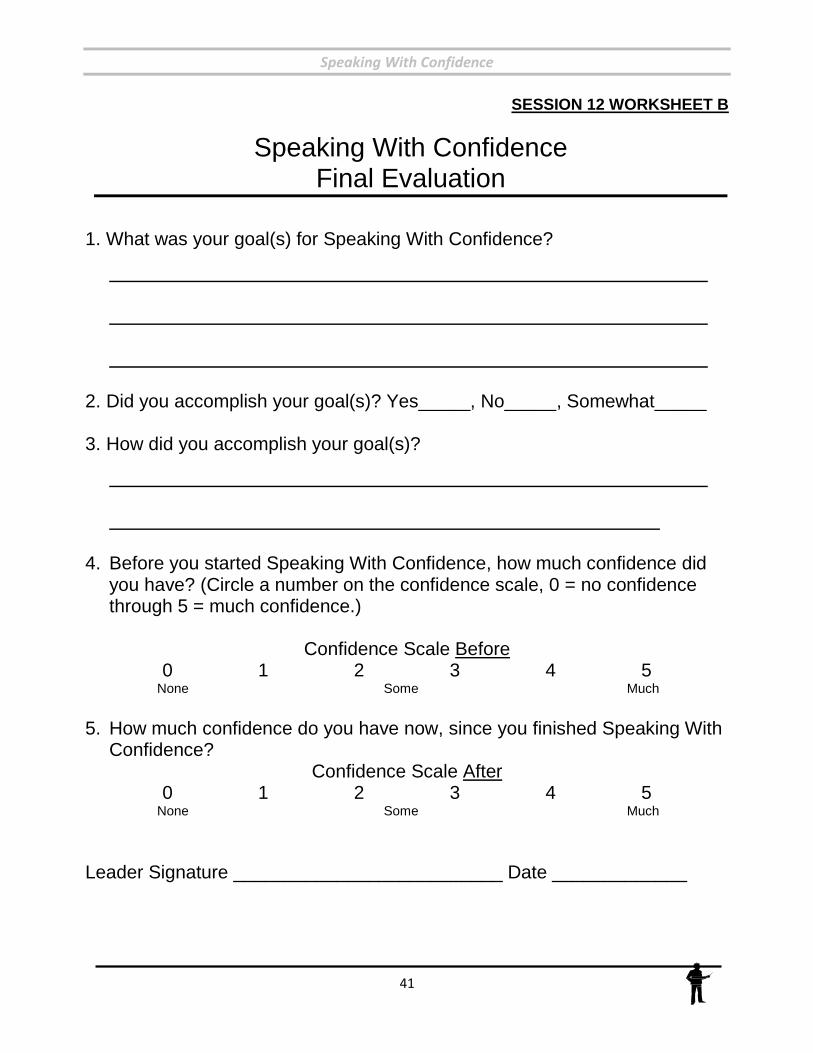
SESSION 12 WORKSHEET B
Speaking With Confidence Final Evaluation
1. What was your goal(s) for Speaking With Confidence?
2. Did you accomplish your goal(s)? Yes_____, No_____, Somewhat_____ 3. How did you accomplish your goal(s)?
4. Before you started Speaking With Confidence, how much confidence did you have? (Circle a number on the confidence scale, 0 = no confidence through 5 = much confidence.)
Confidence Scale Before
0 1 2 3 4 5 None Some Much
5. How much confidence do you have now, since you finished Speaking With
Confidence? Confidence Scale After
0 1 2 3 4 5 None Some Much
Leader Signature __________________________ Date _____________
Speaking With Confidence
42
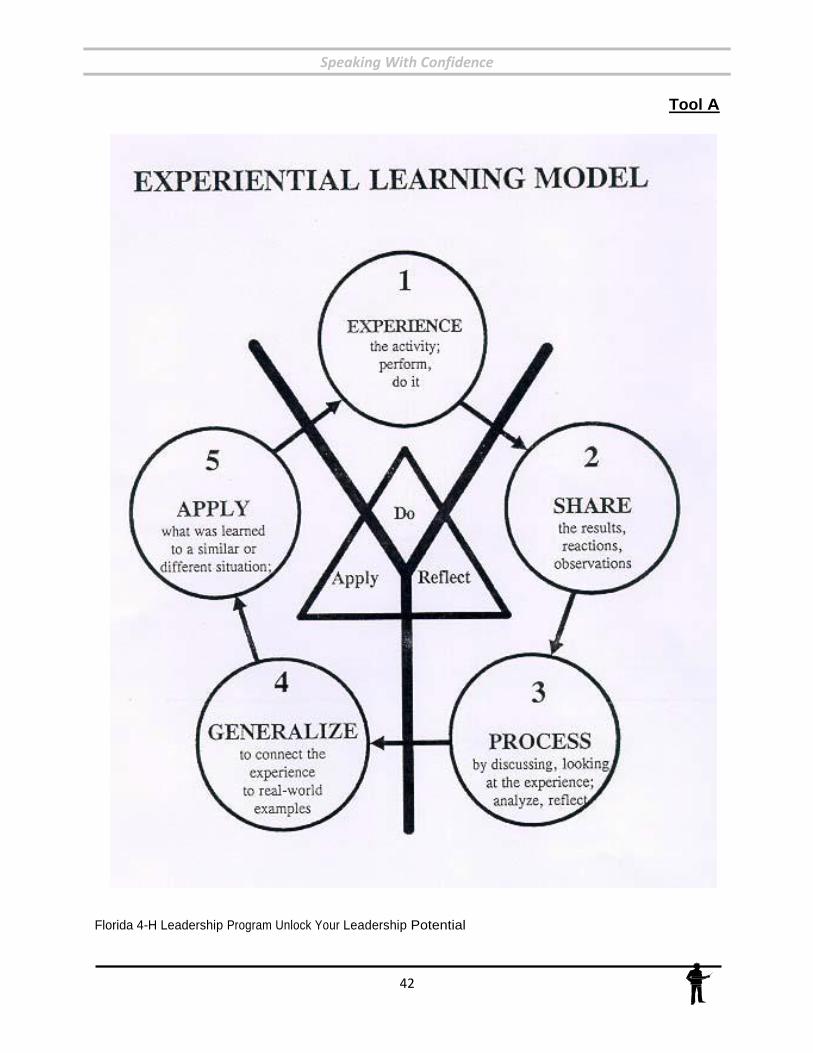
Tool A
Florida 4-H Leadership Program Unlock Your Leadership Potential
Speaking With Confidence
43
Tool A
The 4-H Program has a long history of providing for a cooperative teaching-learning process between adults and youth. The activities in each project lesson strive to involve young people in experiences that require them to interact, analyze, question, reflect and transfer what they have learned to personal application. The activity comes first, and the learning comes from the discovery of new knowledge and skills as a result of the experience. This is the 4-H learn-by-doing process. However, to end with the experience without building upon it through REFLECTING and APPLYING does not help the young person understand the significance of what he/she saw, heard or did. It is the transfer of this significance from one experience to another that helps young people apply their learning in future situations.
Do Each lesson topic identifies the activity or series of activities to DO
involving youth in a common EXPERIENCE.
REFLECT At the conclusion of the activity(ies), allow time for the youth to REFLECT
(share and process) what they learned from the experience. Each lesson guide outlines some key questions to assist you in this process.
APPLY Help youth to APPLY their new knowledge and skill to real life situations.
You can do this by helping them to identify key principles that are important for future decisions or personal action. Again, each lesson has outlined a few questions to direct this process.
STEPS This model illustrates the cooperative teaching-learning process that is the goal of 4-H curricula. A further description of the steps in the process may be helpful as you become an active participant in UNLOCK YOUR LEADERSHIP POTENTIAL! Experience – Begin with concrete experience. This can be an individual activity or a group experience, but it involves “doing something.” The learning experience will most likely take place when the experience is unfamiliar or a first-time activity for the learner; pushes the learner beyond any previous performance levels; is uncomfortable; and includes the risk of failure.
Share – Next, get the participant(s) to talk about the experience. Share reactions and observations. Let the group talk freely. Acknowledge ideas; listing them visually is helpful. Allow time for volunteers to share responses. Encourage group members to answer questions posed by others. Avoid having the leader answer questions.
Speaking With Confidence
44
Tool A
Process – Discuss how themes, problems and issues are brought out by the exercise. Speak to specific problems and issues that the group discovers from the exercise or recalls from personal experiences. Look for recurring themes and write them on the newsprint. Have small groups discuss and report back, have a panel discussion, or generate ideas individually on 3-by-5 cards.
Generalize – Find general trends or common truths in the experience. Draw out and identify the principles that are important, those that apply to real life, not just the activity. This focuses on the key messages. List key terms that capture the lessons. Identify situations where the principles apply.
Apply – Concentrate on how the new learning can be applied to everyday situations. Discuss how issues raised by this activity can be useful in the future. Describe how more effective behaviors can grow out of what is learned. Write personal goals for behavior changes, take turns solving problem situations in groups of two or three, or roleplay situations that show how new behavior is learned. Each individual should feel a sense of ownership for what is learned.
Speaking With Confidence
45
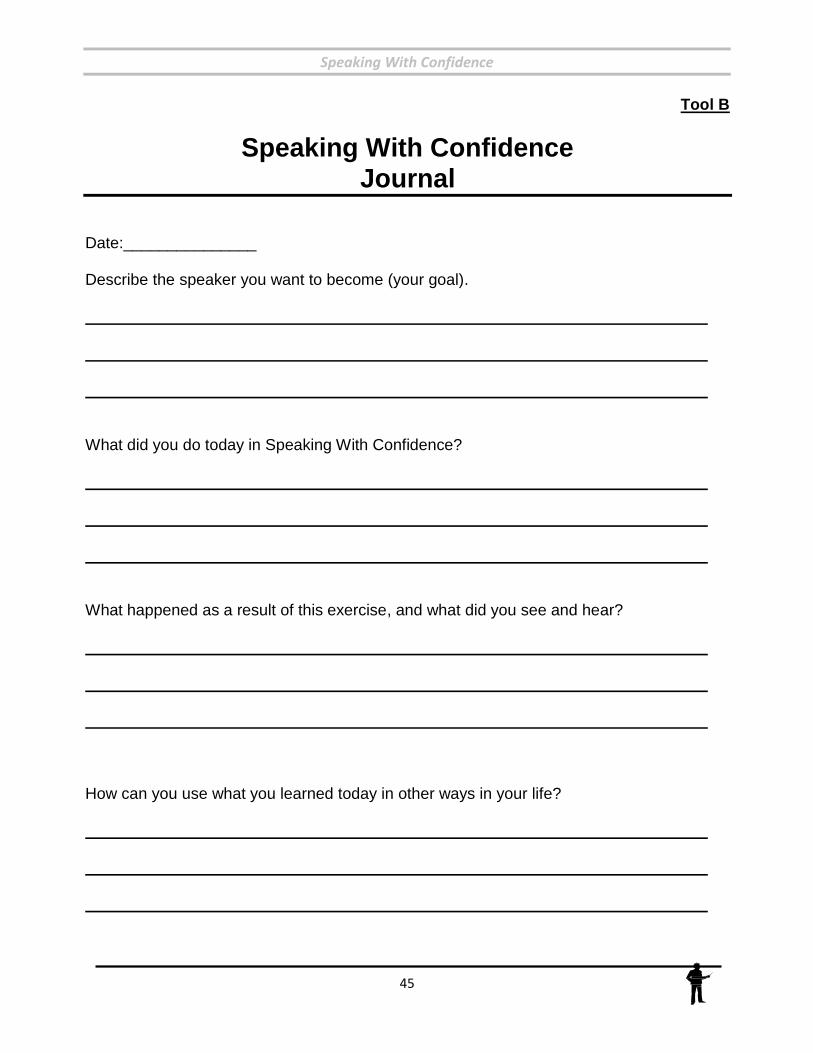
Tool B
Speaking With Confidence Journal
Date:_______________ Describe the speaker you want to become (your goal). What did you do today in Speaking With Confidence? What happened as a result of this exercise, and what did you see and hear? How can you use what you learned today in other ways in your life?
Speaking With Confidence
46
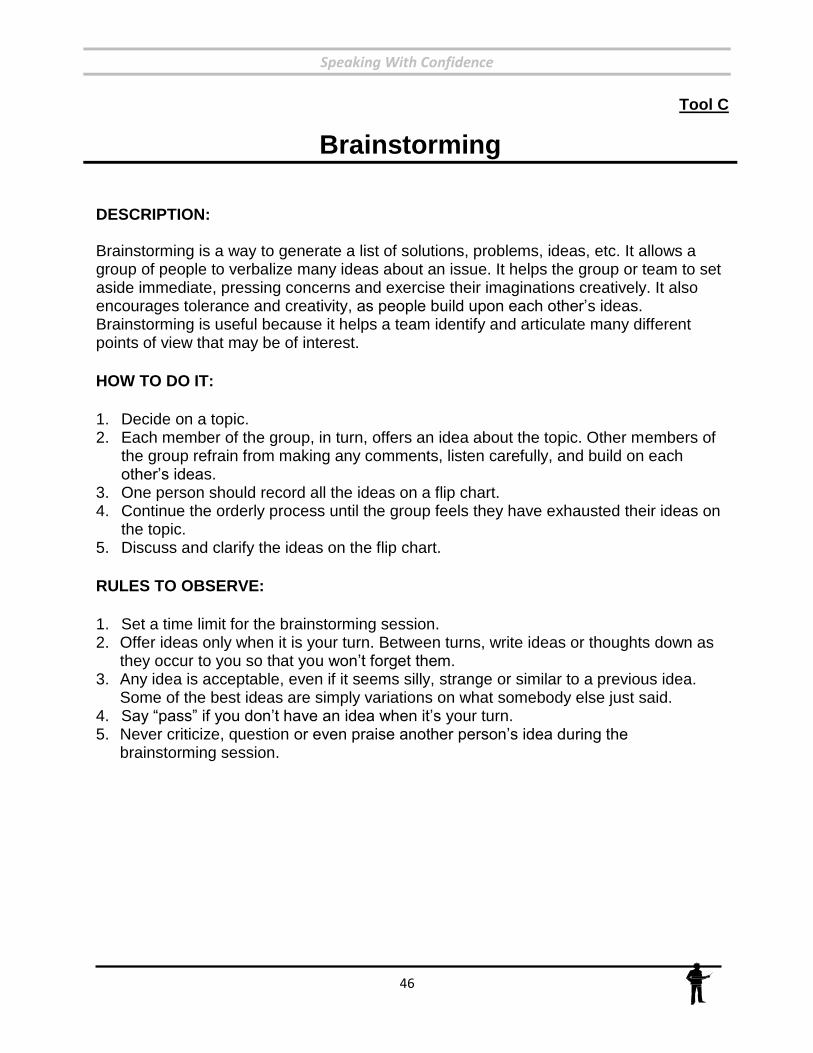
Tool C
Brainstorming
DESCRIPTION:
Brainstorming is a way to generate a list of solutions, problems, ideas, etc. It allows a group of people to verbalize many ideas about an issue. It helps the group or team to set aside immediate, pressing concerns and exercise their imaginations creatively. It also encourages tolerance and creativity, as people build upon each other’s ideas. Brainstorming is useful because it helps a team identify and articulate many different points of view that may be of interest.
HOW TO DO IT:
1. Decide on a topic. 2. Each member of the group, in turn, offers an idea about the topic. Other members of
the group refrain from making any comments, listen carefully, and build on each other’s ideas.
3. One person should record all the ideas on a flip chart. 4. Continue the orderly process until the group feels they have exhausted their ideas on
the topic. 5. Discuss and clarify the ideas on the flip chart.
RULES TO OBSERVE:
1. Set a time limit for the brainstorming session. 2. Offer ideas only when it is your turn. Between turns, write ideas or thoughts down as
they occur to you so that you won’t forget them. 3. Any idea is acceptable, even if it seems silly, strange or similar to a previous idea.
Some of the best ideas are simply variations on what somebody else just said. 4. Say “pass” if you don’t have an idea when it’s your turn. 5. Never criticize, question or even praise another person’s idea during the
brainstorming session.
Speaking With Confidence
47
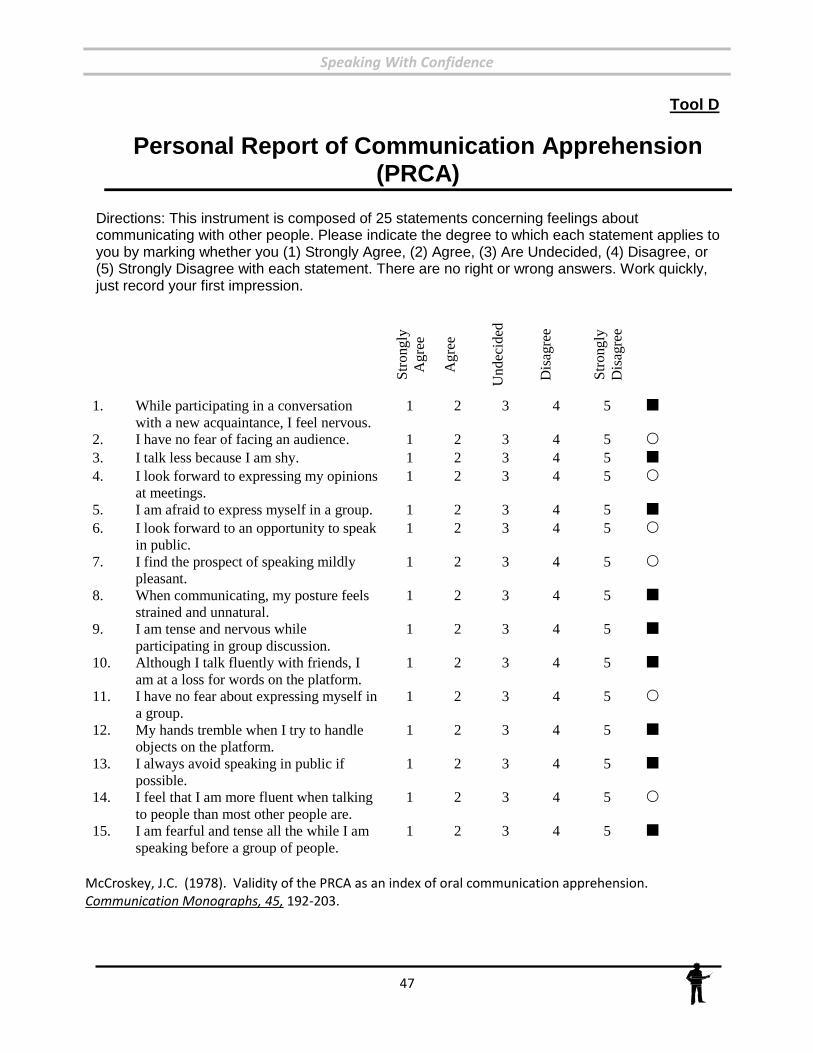
Tool D
Personal Report of Communication Apprehension (PRCA)
Directions: This instrument is composed of 25 statements concerning feelings about communicating with other people. Please indicate the degree to which each statement applies to you by marking whether you (1) Strongly Agree, (2) Agree, (3) Are Undecided, (4) Disagree, or (5) Strongly Disagree with each statement. There are no right or wrong answers. Work quickly, just record your first impression.
Str
ong
ly
Ag
ree
Ag
ree
Und
ecid
ed
Dis
agre
e
Str
ong
ly
Dis
agre
e
1. While participating in a conversation
with a new acquaintance, I feel nervous.
1 2 3 4 5
2. I have no fear of facing an audience. 1 2 3 4 5 3. I talk less because I am shy. 1 2 3 4 5 4. I look forward to expressing my opinions
at meetings.
1 2 3 4 5
5. I am afraid to express myself in a group. 1 2 3 4 5 6. I look forward to an opportunity to speak
in public.
1 2 3 4 5
7. I find the prospect of speaking mildly
pleasant.
1 2 3 4 5
8. When communicating, my posture feels
strained and unnatural.
1 2 3 4 5
9. I am tense and nervous while
participating in group discussion.
1 2 3 4 5
10. Although I talk fluently with friends, I
am at a loss for words on the platform.
1 2 3 4 5
11. I have no fear about expressing myself in
a group.
1 2 3 4 5
12. My hands tremble when I try to handle
objects on the platform.
1 2 3 4 5
13. I always avoid speaking in public if
possible.
1 2 3 4 5
14. I feel that I am more fluent when talking
to people than most other people are.
1 2 3 4 5
15. I am fearful and tense all the while I am
speaking before a group of people.
1 2 3 4 5
McCroskey, J.C. (1978). Validity of the PRCA as an index of oral communication apprehension. Communication Monographs, 45, 192-203.
Speaking With Confidence
48
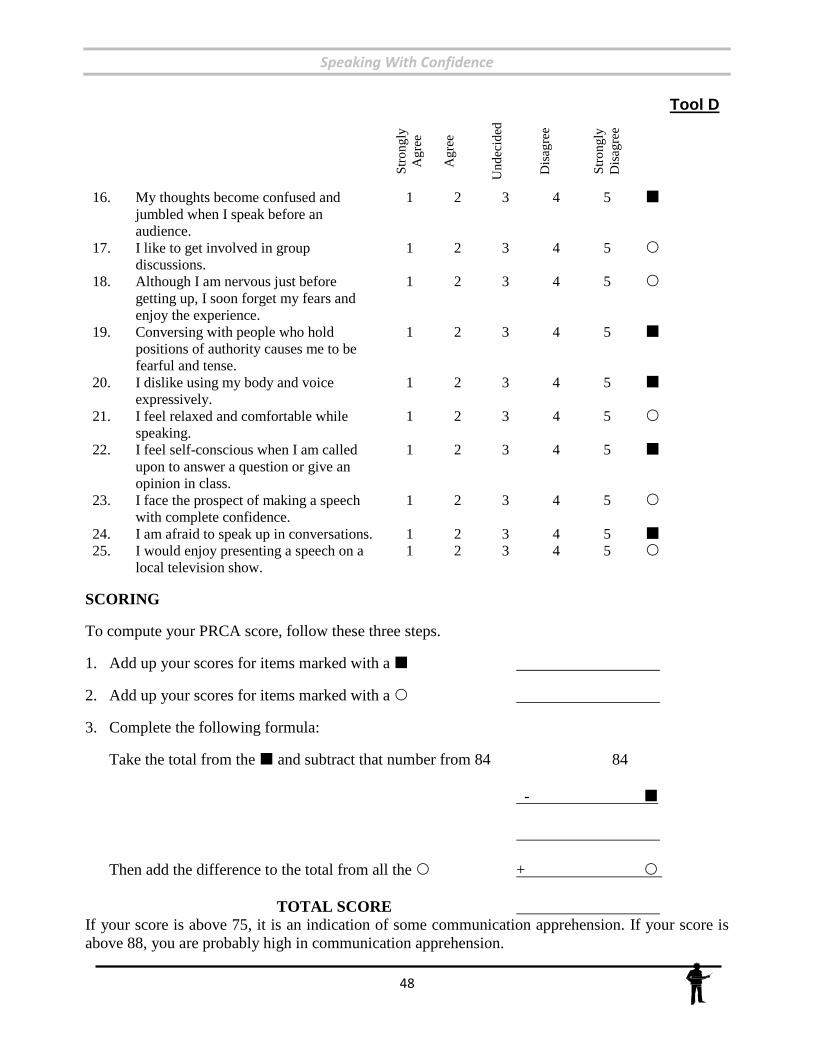
Tool D
Str
on
gly
Ag
ree
Ag
ree
Un
dec
ided
Dis
agre
e
Str
on
gly
Dis
agre
e
16. My thoughts become confused and
jumbled when I speak before an
audience.
1 2 3 4 5
17. I like to get involved in group
discussions.
1 2 3 4 5
18. Although I am nervous just before
getting up, I soon forget my fears and
enjoy the experience.
1 2 3 4 5
19. Conversing with people who hold
positions of authority causes me to be
fearful and tense.
1 2 3 4 5
20. I dislike using my body and voice
expressively.
1 2 3 4 5
21. I feel relaxed and comfortable while
speaking.
1 2 3 4 5
22. I feel self-conscious when I am called
upon to answer a question or give an
opinion in class.
1 2 3 4 5
23. I face the prospect of making a speech
with complete confidence.
1 2 3 4 5
24. I am afraid to speak up in conversations. 1 2 3 4 5 25. I would enjoy presenting a speech on a
local television show.
1 2 3 4 5
SCORING
To compute your PRCA score, follow these three steps.
1. Add up your scores for items marked with a
2. Add up your scores for items marked with a
3. Complete the following formula:
Take the total from the and subtract that number from 84 84
-
Then add the difference to the total from all the +
TOTAL SCORE If your score is above 75, it is an indication of some communication apprehension. If your score is
above 88, you are probably high in communication apprehension.
Speaking With Confidence
49
References
A leader’s guide to 4-H club demonstrations. (1972). University of California, Agricultural Extension Service. 4-H-G88 Rev.
Carnegie, D. 2008. Speak more effectively Part one: Public speaking a quick and easy way, Dale Carnegie & Associates, Inc., https://www.dalecarnegie.com/assets/1/7/SpeakingEffectively.pdf Elton, M.A. (1991). Characteristics of a good speech: tips for effective public speaking. University of Nevada, Reno, Speech Communication (unpublished).
Family Community Leadership. (1985). Influence policy through better presentations. FCL 511.
Florida 4-H Leadership Program. (1997). Unlock your leadership potential. Leader’s Guide. SPLDL20.
Interview guidelines. 2014. Portland Community College, http://spot.pcc.edu/comptech/eqintervguide.htm McCroskey, J.C. (1978). Validity of the PRCA as an index of oral communication apprehension. Communication Monographs, 45, 192-203.
Otfinoski, Steven. (1996). Speaking Up, Speaking Out: A Kids’ Guide to Making Speeches, Oral Reports and Conversation. Millbrook Press
Thompson, J. 2011. Is nonverbal communication a numbers game? Psychology Today, Sept 30, https://www.psychologytoday.com/blog/beyond-words/201109/is-nonverbal-communication-numbers-game Toastmasters International Youth Leadership Program. (1986). Coordinator’s Guide and Participants Handbook.
Toastmasters International. (1990). Effective speech evaluation. Toastmasters International. (1987). Gestures: Your body speaks. Toastmasters International. (1987). Your speaking voice.
Speaking With Confidence
50
Sample Certificate