Embed Size (px)
Citation preview
51 45 050 Removing and installing instrument panelupper section trim (from 07/04)
Necessary preliminary tasks:
• Remove A-pillar trim
• Remove glovebox
• Remove decorative trims for instrument panel
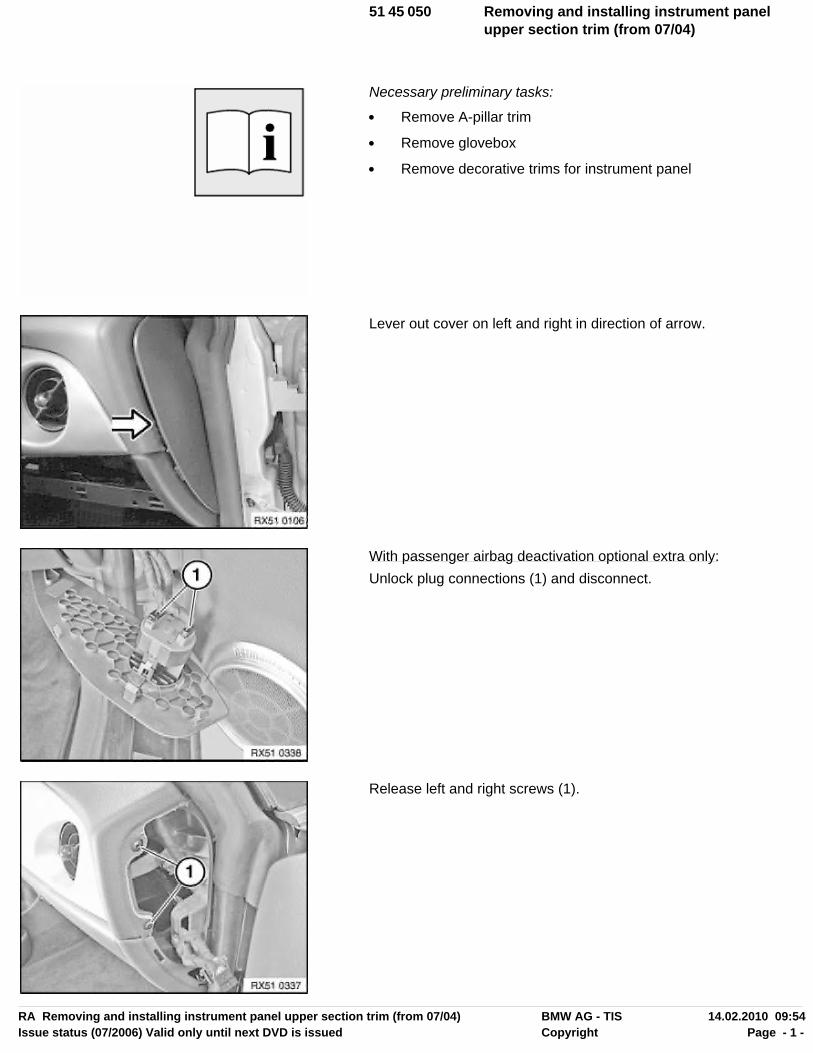
Lever out cover on left and right in direction of arrow.
With passenger airbag deactivation optional extra only:Unlock plug connections (1) and disconnect.
Release left and right screws (1).
RA Removing and installing instrument panel upper section trim (from 07/04) BMW AG - TIS 14.02.2010 09:54Issue status (07/2006) Valid only until next DVD is issued Copyright Page - 1 -
Release screws (1).
Release screws (1).
Lever out cover caps (1) in ventilation grille and release screwsunderneath.
Release screws (1) in ventilation grille.
RA Removing and installing instrument panel upper section trim (from 07/04) BMW AG - TIS 14.02.2010 09:54Issue status (07/2006) Valid only until next DVD is issued Copyright Page - 2 -
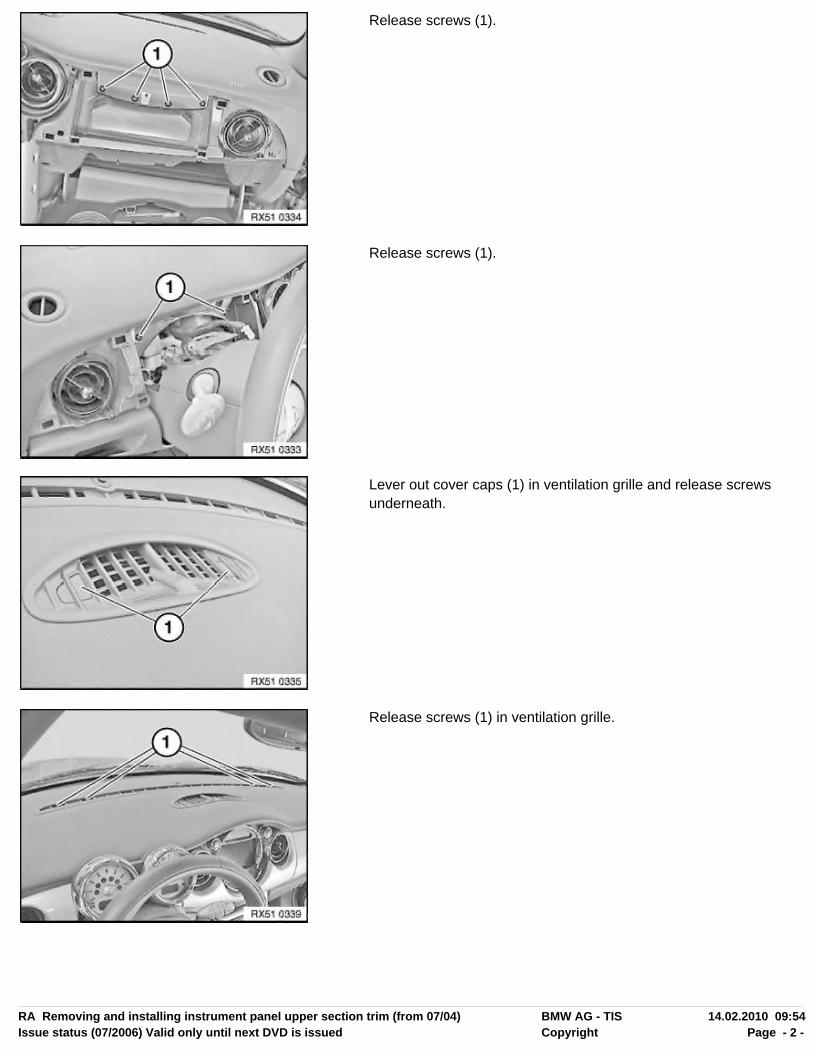
With automatic air conditioning optional extra only:
Note:Tape off work area around solar sensor (1) (risk of damage).
Remove solar sensor (1).Firmly pull solar sensor (1) upwards to release binding (adhesivetape inside instrument panel).Feed plug connection (2) out of instrument panel and disconnect.
Installation:Wrap adhesive tape round plug connection to prevent rattlingnoises.
Protect trim with adhesive tape (1) against damage.
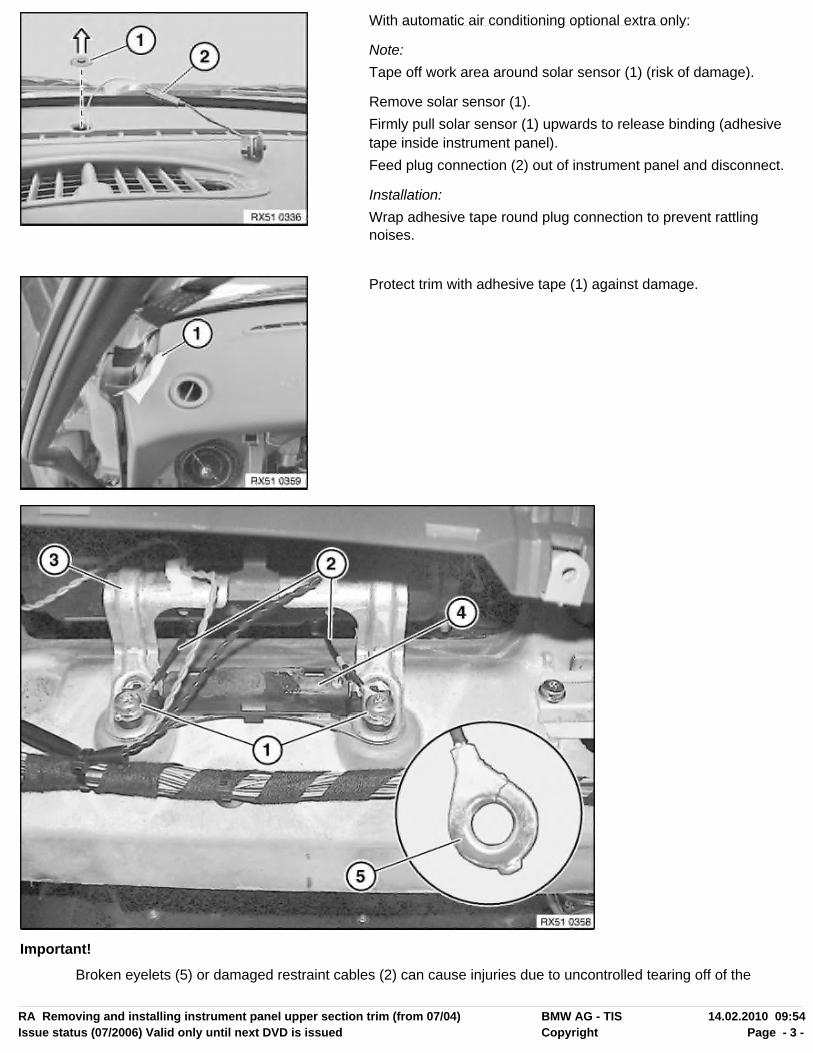
Important!
Broken eyelets (5) or damaged restraint cables (2) can cause injuries due to uncontrolled tearing off of the
RA Removing and installing instrument panel upper section trim (from 07/04) BMW AG - TIS 14.02.2010 09:54Issue status (07/2006) Valid only until next DVD is issued Copyright Page - 3 -
airbag cover when the airbag is triggered.
Instrument panel upper section trim must be replaced if eyelets (5) are damaged or restraint cables (2) aredamaged.
In order to prevent damage to eyelets (5), make sure spacer (4) is fitted; retrofit if necessary.
Release screws (1).
Tightening torque 72 12 7AZ .
Remove instrument panel upper section towards top and feed out restraint cables (2) between airbag module andinstrument panel lower section.
Installation:
Restraint cables (2) must be located between bracket (3).
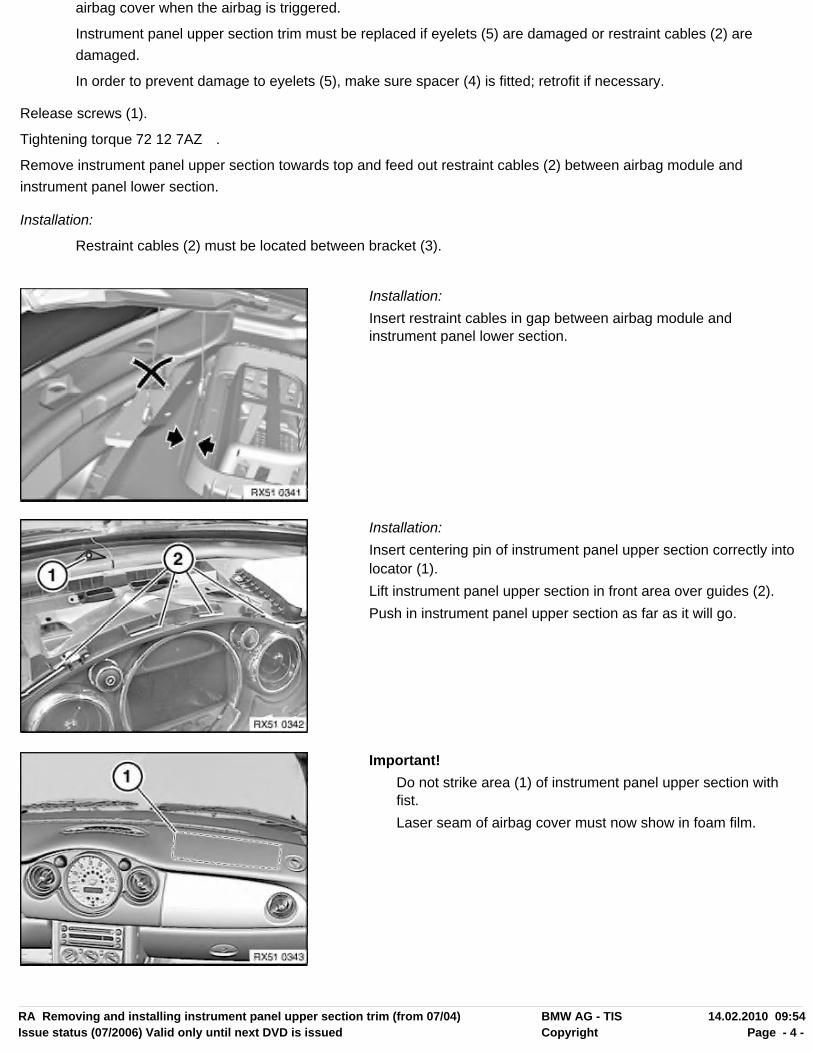
Installation:Insert restraint cables in gap between airbag module andinstrument panel lower section.
Installation:Insert centering pin of instrument panel upper section correctly intolocator (1).Lift instrument panel upper section in front area over guides (2). Push in instrument panel upper section as far as it will go.
Important!Do not strike area (1) of instrument panel upper section withfist.Laser seam of airbag cover must now show in foam film.
RA Removing and installing instrument panel upper section trim (from 07/04) BMW AG - TIS 14.02.2010 09:54Issue status (07/2006) Valid only until next DVD is issued Copyright Page - 4 -
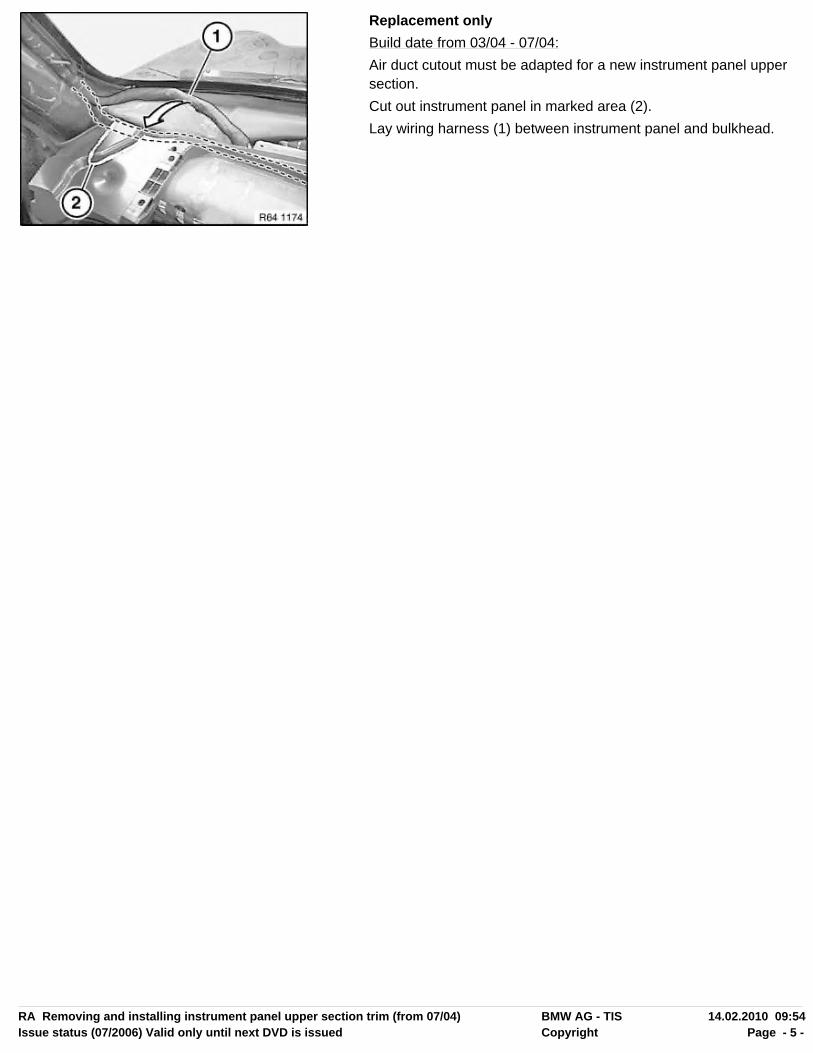
Replacement onlyBuild date from 03/04 - 07/04:Air duct cutout must be adapted for a new instrument panel uppersection.Cut out instrument panel in marked area (2).Lay wiring harness (1) between instrument panel and bulkhead.
RA Removing and installing instrument panel upper section trim (from 07/04) BMW AG - TIS 14.02.2010 09:54Issue status (07/2006) Valid only until next DVD is issued Copyright Page - 5 -
51 43 201 Removing and installing/replacing panel forroof pillar at front (A-pillar), left or right
Warning!Vehicles with head airbags:Read and comply with safety regulations for working onvehicles with airbag systems.Refer to Safety regulations for working on vehicles with airbagsystems.
Important!Do not use sharp-edged tools to remove panel (head airbagmay be damaged).
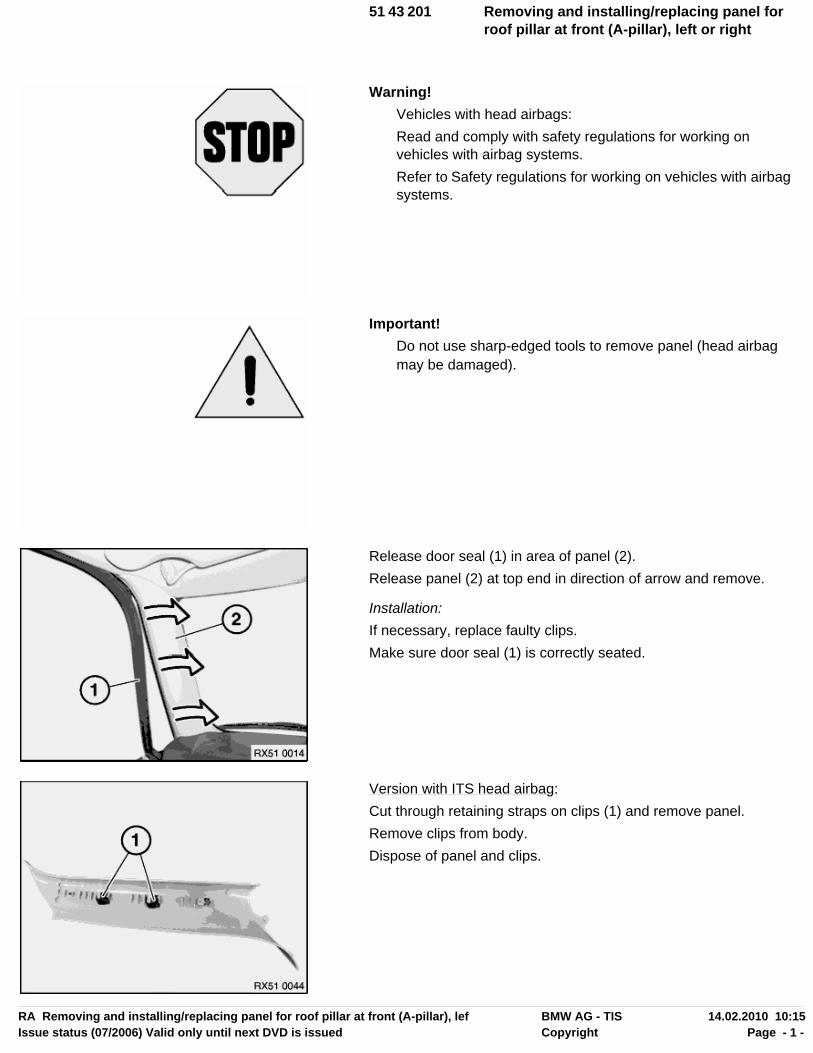
Release door seal (1) in area of panel (2).Release panel (2) at top end in direction of arrow and remove.
Installation:If necessary, replace faulty clips.Make sure door seal (1) is correctly seated.
Version with ITS head airbag:Cut through retaining straps on clips (1) and remove panel.Remove clips from body.Dispose of panel and clips.
RA Removing and installing/replacing panel for roof pillar at front (A-pillar), lef BMW AG - TIS 14.02.2010 10:15Issue status (07/2006) Valid only until next DVD is issued Copyright Page - 1 -
51 45 066 Removing and installing decorative trim forinstrument panel (driver's side)
Up to 07/04:
Note:Unclip the decorative trim opposite in stages.
Unclip decorative trim in direction of arrow and remove.
Installation:If necessary, replace faulty clips (1) on decorative trim.
From 07/04:
Necessary preliminary tasks:
• Remove instrument from steering column
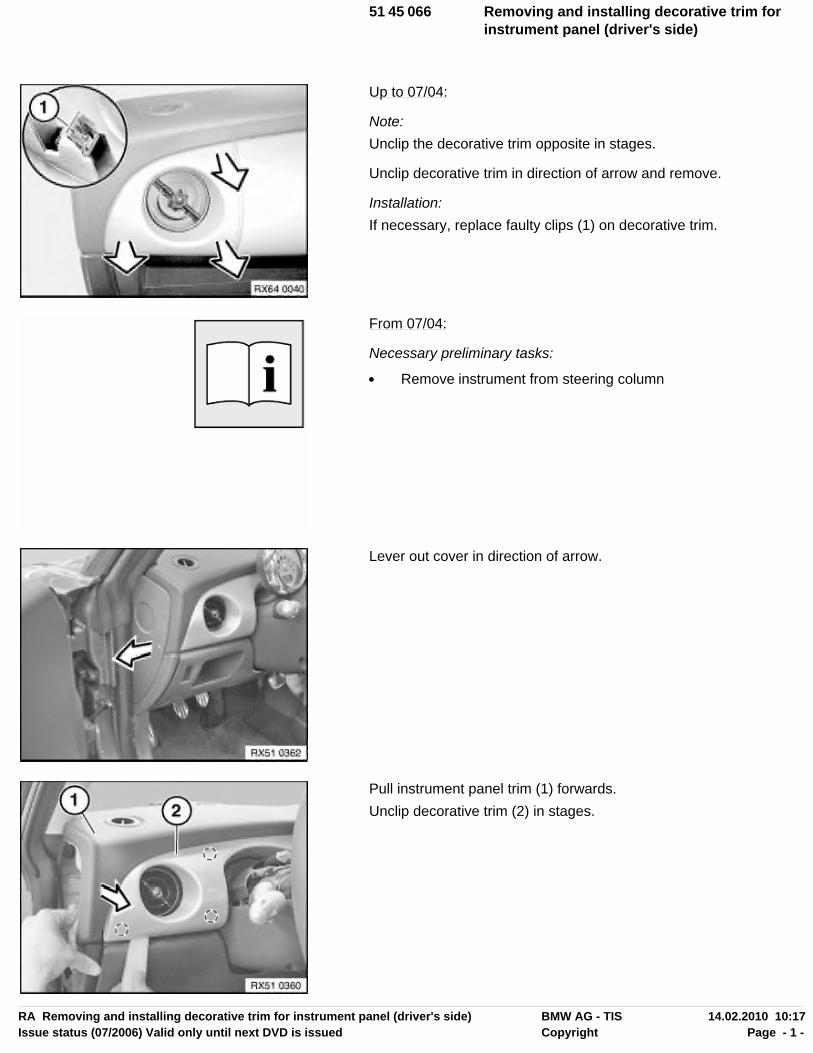
Lever out cover in direction of arrow.
Pull instrument panel trim (1) forwards.Unclip decorative trim (2) in stages.
RA Removing and installing decorative trim for instrument panel (driver's side) BMW AG - TIS 14.02.2010 10:17Issue status (07/2006) Valid only until next DVD is issued Copyright Page - 1 -
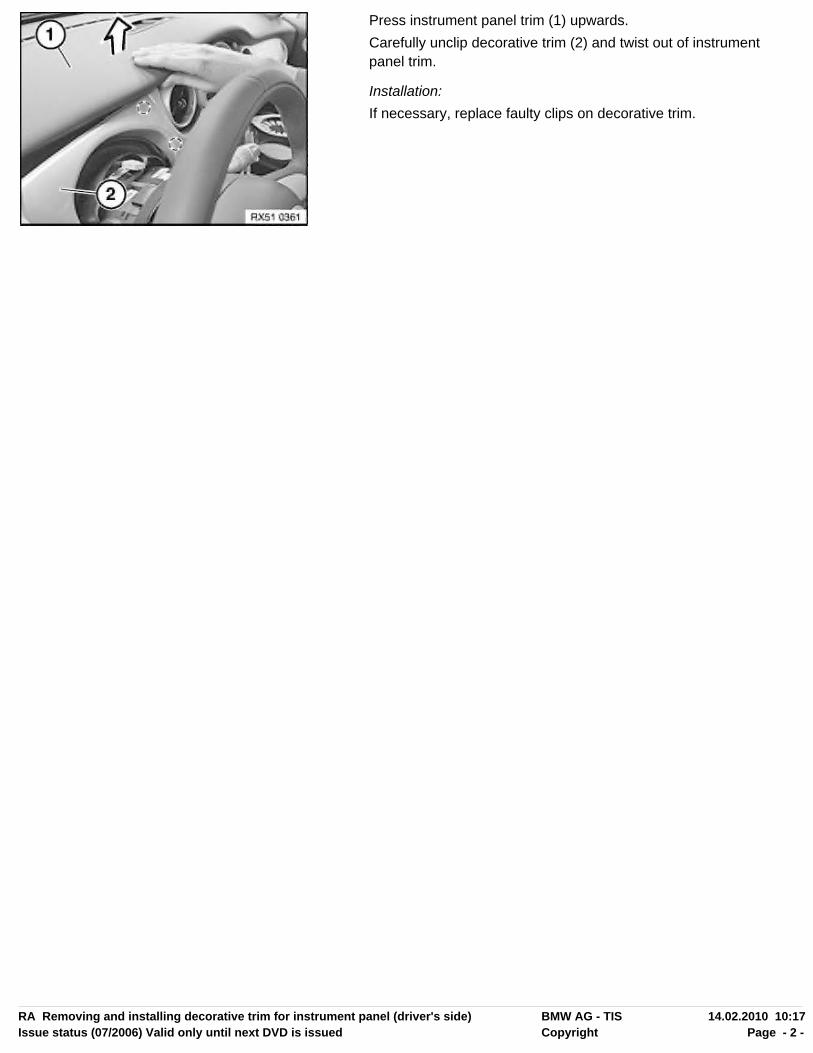
Press instrument panel trim (1) upwards.Carefully unclip decorative trim (2) and twist out of instrumentpanel trim.
Installation:If necessary, replace faulty clips on decorative trim.
RA Removing and installing decorative trim for instrument panel (driver's side) BMW AG - TIS 14.02.2010 10:17Issue status (07/2006) Valid only until next DVD is issued Copyright Page - 2 -
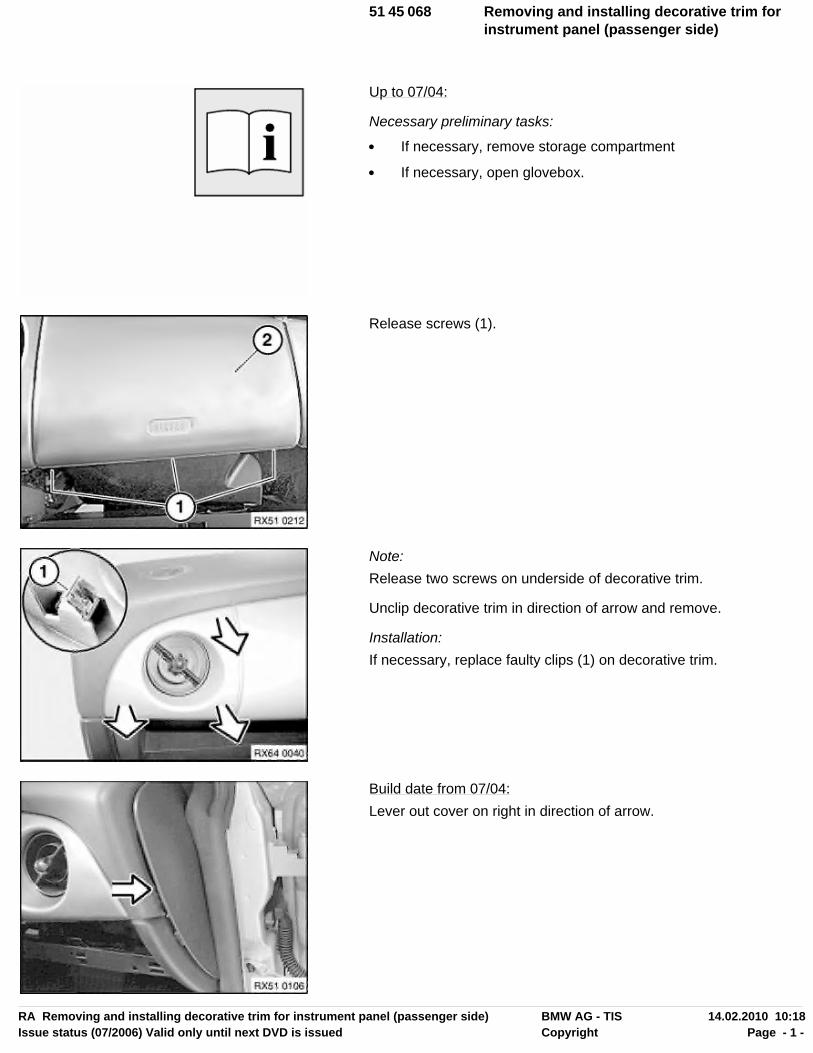
51 45 068 Removing and installing decorative trim forinstrument panel (passenger side)
Up to 07/04:
Necessary preliminary tasks:
• If necessary, remove storage compartment
• If necessary, open glovebox.
Release screws (1).
Note:Release two screws on underside of decorative trim.
Unclip decorative trim in direction of arrow and remove.
Installation:If necessary, replace faulty clips (1) on decorative trim.
Build date from 07/04:Lever out cover on right in direction of arrow.
RA Removing and installing decorative trim for instrument panel (passenger side) BMW AG - TIS 14.02.2010 10:18Issue status (07/2006) Valid only until next DVD is issued Copyright Page - 1 -
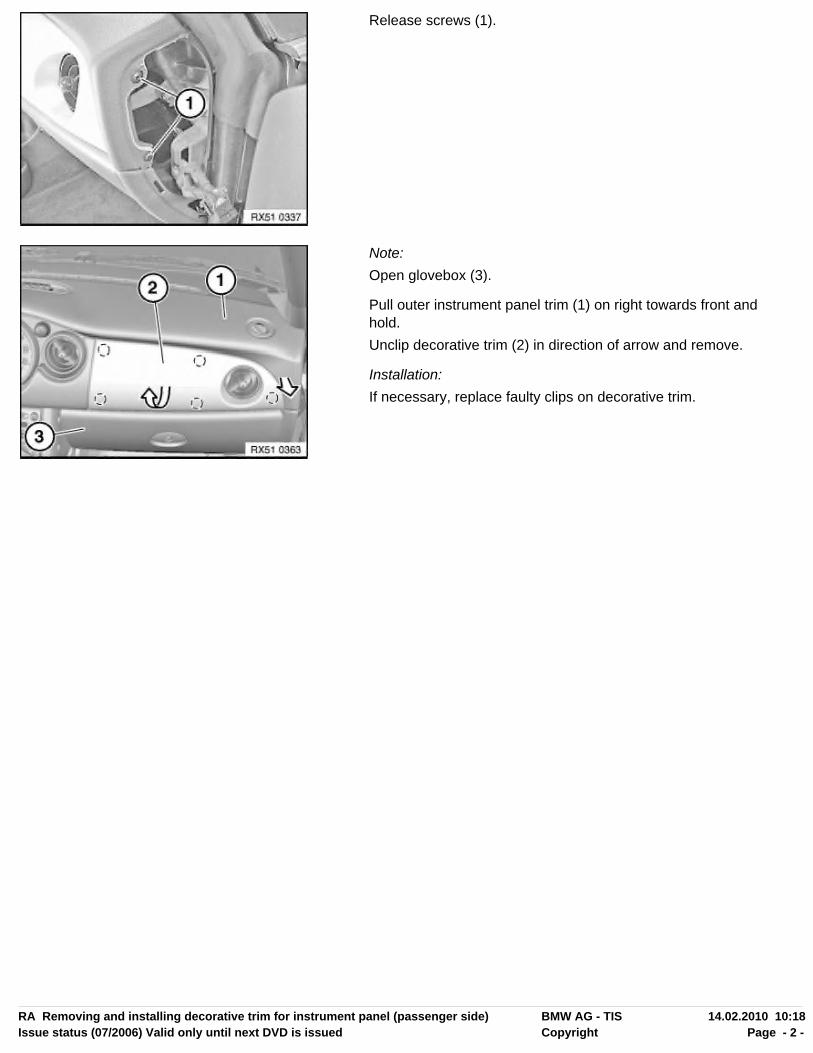
Release screws (1).
Note:Open glovebox (3).
Pull outer instrument panel trim (1) on right towards front andhold.Unclip decorative trim (2) in direction of arrow and remove.
Installation:If necessary, replace faulty clips on decorative trim.
RA Removing and installing decorative trim for instrument panel (passenger side) BMW AG - TIS 14.02.2010 10:18Issue status (07/2006) Valid only until next DVD is issued Copyright Page - 2 -
51 16 360 Removing and installing right glovebox
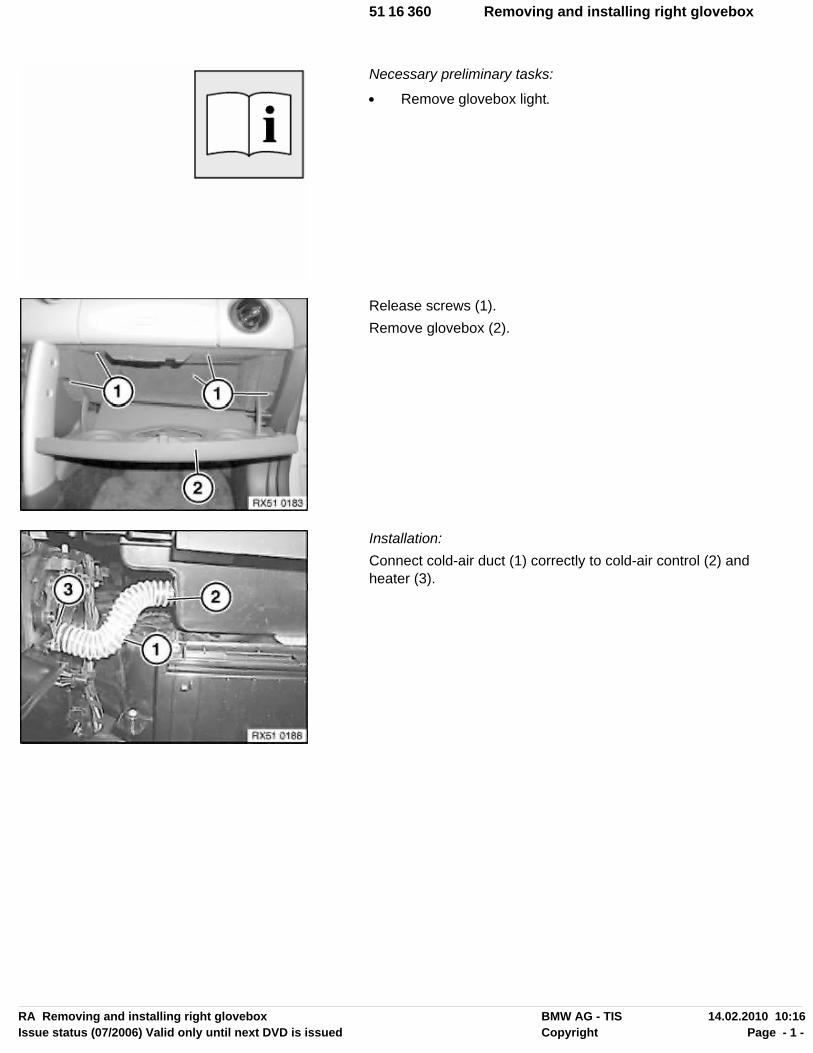
Necessary preliminary tasks:
• Remove glovebox light.
Release screws (1).Remove glovebox (2).
Installation:Connect cold-air duct (1) correctly to cold-air control (2) andheater (3).
RA Removing and installing right glovebox BMW AG - TIS 14.02.2010 10:16Issue status (07/2006) Valid only until next DVD is issued Copyright Page - 1 -