Embed Size (px)
Citation preview
1
Software Engineering Final ProjectProfessor Doom
Fernando VillarrealJasjot “Sunny” Sumal
Jason ChiMark StevensMoises Ayala

2
Table of ContentsIntroduction...................................................................................................................................... 3
Game Concept (Mark)................................................................................................................ 3Objected Oriented Design (Jason)............................................................................................. 4Agile (Jason)............................................................................................................................... 4
Menu.......................................................................................................................................5Components.....................................................................................................................................6
Sprites (Fernando)...................................................................................................................... 6Assembling the sprite.............................................................................................................6Bones for spriter..................................................................................................................... 7Keyframes editor in Spriter.....................................................................................................7
Graphics (Moises).......................................................................................................................7Hero Mechanics and Jumping (Mark).......................................................................................10Interaction with Platforms (Mark).............................................................................................. 11Spikes (Sunny)..........................................................................................................................12Memory Test (Jason).................................................................................................................13Unit Testing (Sunny)..................................................................................................................13Elevators (Sunny)......................................................................................................................14
"Traps" - failed 1st attempt...................................................................................................14Next iteration: Elevators....................................................................................................... 16
Audio (Fernando)...................................................................................................................... 18Level Editor (Mark)....................................................................................................................19Saving and Loading Rooms (Mark).......................................................................................... 20
Conclusion..................................................................................................................................... 20Group Dynamics (Mark)............................................................................................................20What we learned (Mark)............................................................................................................21

3
Introduction
Game Concept
Our game can best be described as a precision platformer. As the name indicates, precision platformers usually involve a user controlled character that can jump over and on platforms. This main character - or hero of the game - may also be given an assortment of weapons and items. Either way the main challenge of these games revolves around jumping between various platforms while trying not to die. Our game fits this mold perfectly. To be more specific, our gamehas been influenced heavily by one particular game called I Wanna Be The Guy.
We decided to use a stationary camera that displays an entire room. When the hero leaves the boundary of one of the rooms he is then transported to the adjacent room. In this way our game is essentially made up of a bunch of interconnected rooms in a grid like pattern.
Our rooms are filled with platforms and elevators that can be walked on. To make the game challenging and give it more purpose we added a few obstacles that can kill our hero. These include spikes and two types of enemies. We have also armed our hero with a gun that he can use to kill enemies. Spikes, however, remain unkillable. We have also implemented save points throughout the rooms that act as spawning points for the hero when he dies. This ends up beingquite important since our hero does not have a health bar. Yes, he dies in one hit. This makes the game challenging yet also fairly rewarding because each new save point is like a “high five” for completing a difficult jump. The ultimate goal of the game is to make your way to the final room where we intended to have a boss, but sadly we ran out of time and felt it was more important to fine tune our other game elements rather than throw in a sloppy looking boss. Our
4
game controls and collisions are very tight and responsive, lending itself to an enjoyable playingexperience.
Objected Oriented Design
The base framework of the game was designed with two concepts in mind. The first concept was that the game needed to be Object Oriented to allow the source code to be separated. Thisseparation allows multiple users to work on the same code base without conflicting with each other as much. This is important to have in a group project with many people and one of the main advantages of a an Objected Oriented design. In comparison, if the files is not broken up then many users can be working on the same file and that will create conflicts within the code. Another advantage of Objected Oriented design is that it organizes related code within a class. These are the advantages that Objected Oriented code is important to a group project; however,it is not the only reason that Objected Oriented programming was an important consideration forthe project.
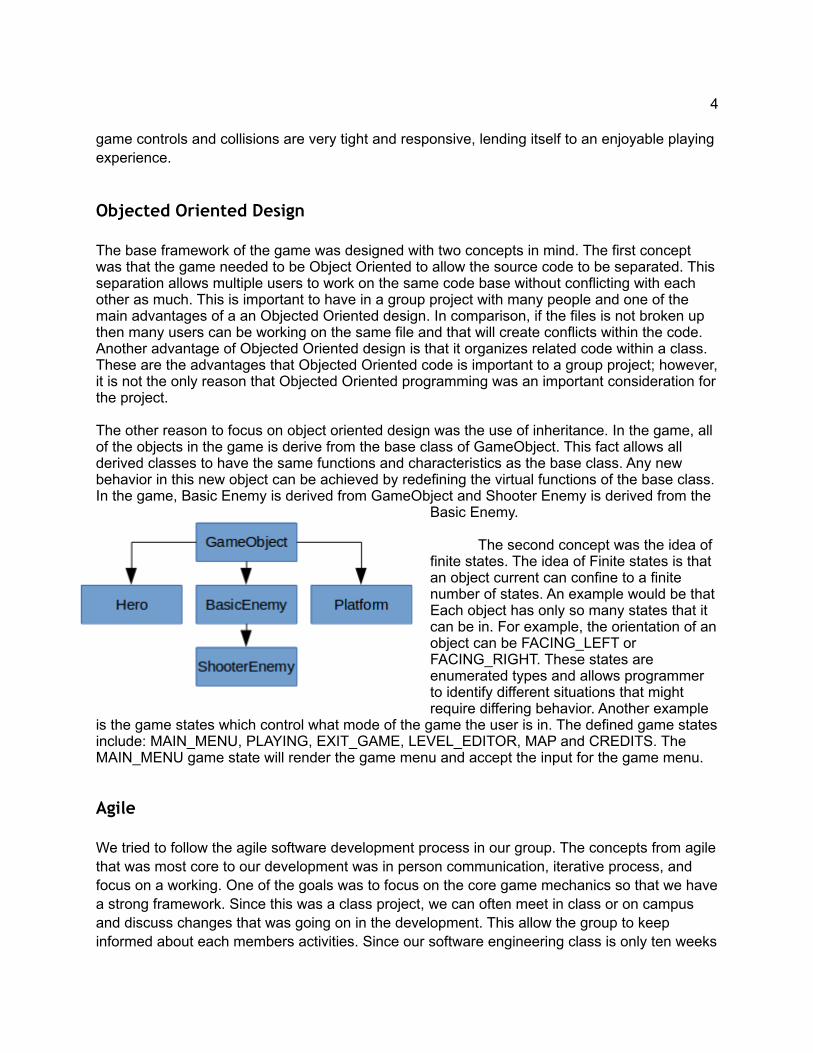
The other reason to focus on object oriented design was the use of inheritance. In the game, all of the objects in the game is derive from the base class of GameObject. This fact allows all derived classes to have the same functions and characteristics as the base class. Any new behavior in this new object can be achieved by redefining the virtual functions of the base class.In the game, Basic Enemy is derived from GameObject and Shooter Enemy is derived from the
Basic Enemy.
The second concept was the idea of finite states. The idea of Finite states is that an object current can confine to a finite number of states. An example would be thatEach object has only so many states that it can be in. For example, the orientation of anobject can be FACING_LEFT or FACING_RIGHT. These states are enumerated types and allows programmer to identify different situations that might require differing behavior. Another example
is the game states which control what mode of the game the user is in. The defined game statesinclude: MAIN_MENU, PLAYING, EXIT_GAME, LEVEL_EDITOR, MAP and CREDITS. The MAIN_MENU game state will render the game menu and accept the input for the game menu.
Agile
We tried to follow the agile software development process in our group. The concepts from agilethat was most core to our development was in person communication, iterative process, and focus on a working. One of the goals was to focus on the core game mechanics so that we havea strong framework. Since this was a class project, we can often meet in class or on campus and discuss changes that was going on in the development. This allow the group to keep informed about each members activities. Since our software engineering class is only ten weeks
5
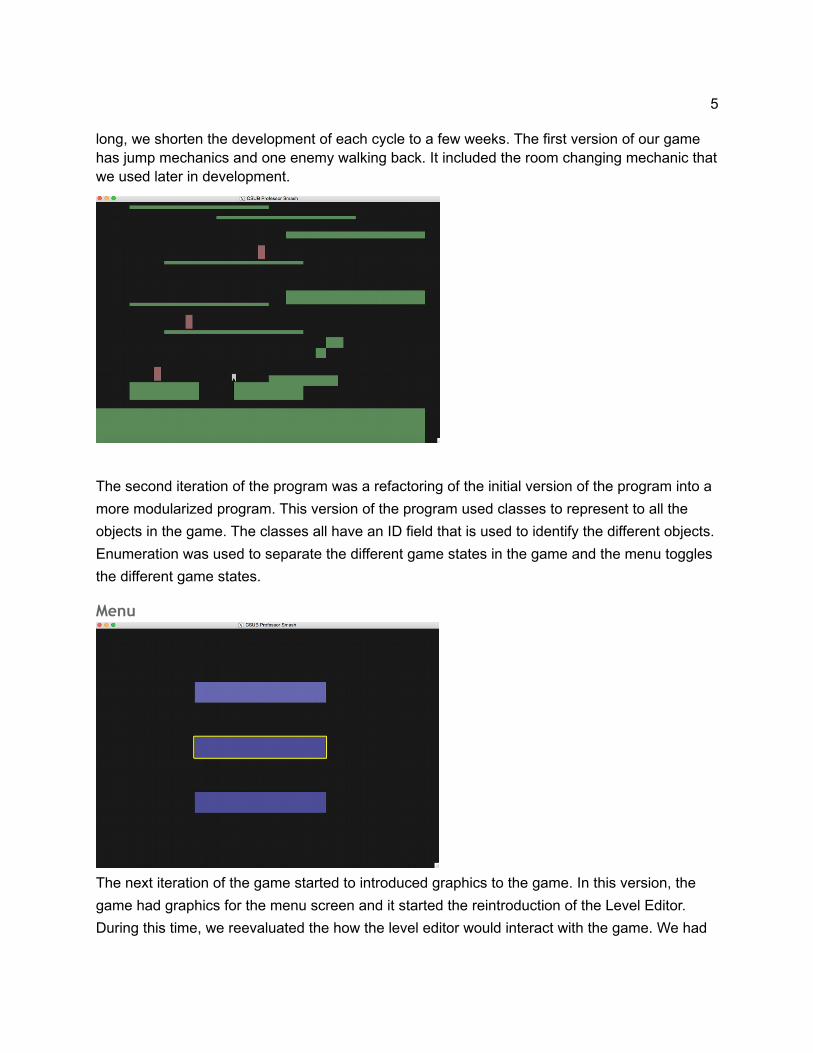
long, we shorten the development of each cycle to a few weeks. The first version of our game has jump mechanics and one enemy walking back. It included the room changing mechanic thatwe used later in development.
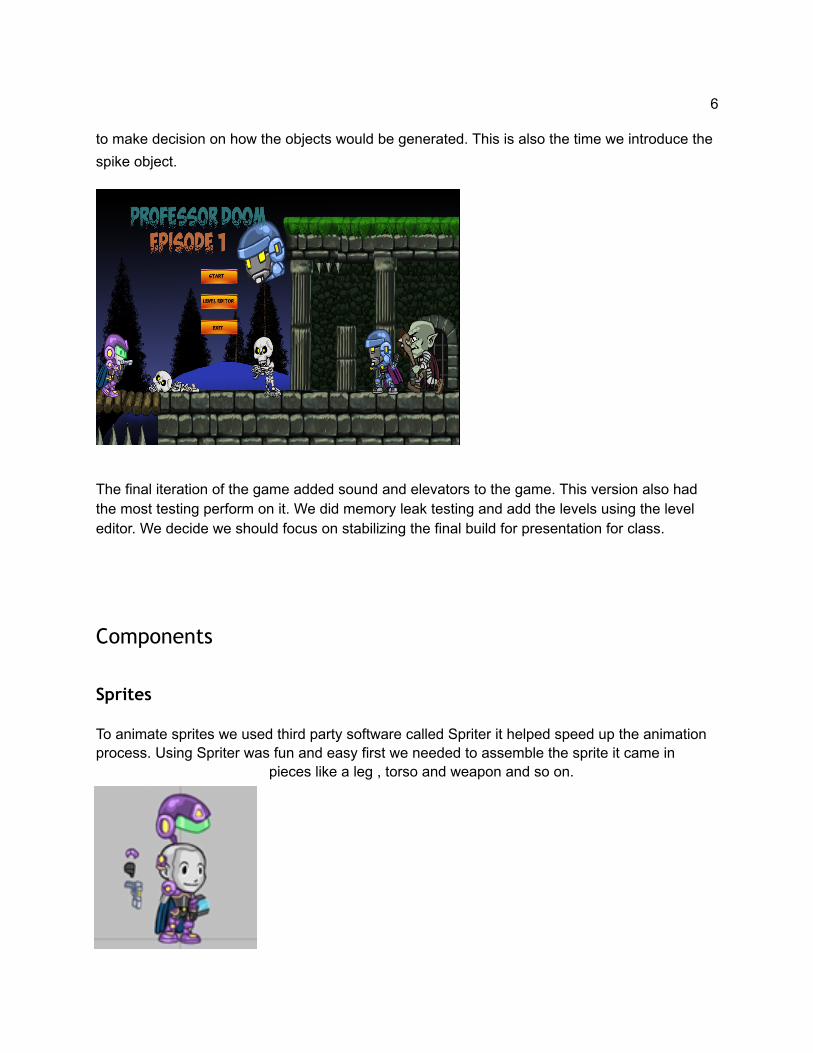
The second iteration of the program was a refactoring of the initial version of the program into a
more modularized program. This version of the program used classes to represent to all the
objects in the game. The classes all have an ID field that is used to identify the different objects.
Enumeration was used to separate the different game states in the game and the menu toggles
the different game states.
Menu
The next iteration of the game started to introduced graphics to the game. In this version, the
game had graphics for the menu screen and it started the reintroduction of the Level Editor.
During this time, we reevaluated the how the level editor would interact with the game. We had
6
to make decision on how the objects would be generated. This is also the time we introduce the
spike object.
The final iteration of the game added sound and elevators to the game. This version also had the most testing perform on it. We did memory leak testing and add the levels using the level editor. We decide we should focus on stabilizing the final build for presentation for class.
Components
Sprites
To animate sprites we used third party software called Spriter it helped speed up the animation process. Using Spriter was fun and easy first we needed to assemble the sprite it came in
pieces like a leg , torso and weapon and so on.

7
Assembling the sprite
In Spriter we assemble the pieces that we want to use, after we assemble the sprite then we assign bones to each or grouped parts this is what gives the sprite animation. The fun part is making the animations.
Bones for spriter After constructing the bones we are able to create keyframes within Spriter giving us the ability of animation the keyframes are on a timeline that corresponds to every movement that is manually made. After setting all the keyframes we are able to hit play and watch the animation come to life.
Keyframes editor in Spriter
Also a cool feature of Spriter is that we are able to print out PNG format spritesheets of every keyframe that was used in our animation it can go horizontal printout or a vertical printout we always used horizontal printouts to make it easier for graphics.
8
Graphics
Implementing the graphics was not an easy task for us, because most of our group members didn’t have a strong background of OpenGL. Therefore, we had to learn as we proceeded with the project. Our goals were to import many ppm images into our game. On some images like our background image, we wanted to import the whole image and on other images like our sprite images we wanted to import only a certain frame at a time. The first step we took when importing the graphics, was to import the images into OpenGL textures. Since we were working with ppm format images we were able to use the source code that Gordon provided us with in his frameworks. We grabbed the ppm.h and the ppm.c file. However, most of our graphic images were in png format, which meant that we had to convert toppm. To accomplish this we used GIMP to do the transition. When converting to ppm, we were provided with two options, which were: raw or ASCII. We had to make sure to select raw because Gordon’s framework is intended for raw ppm file types. Once we had the images imported into OpenGL textures we moved on to rendering the background image first, because we wanted to render everything else on top of the background.In order, to avoid code reusability we wrote our own function that would take in a texture and would render the whole image onto the screen.
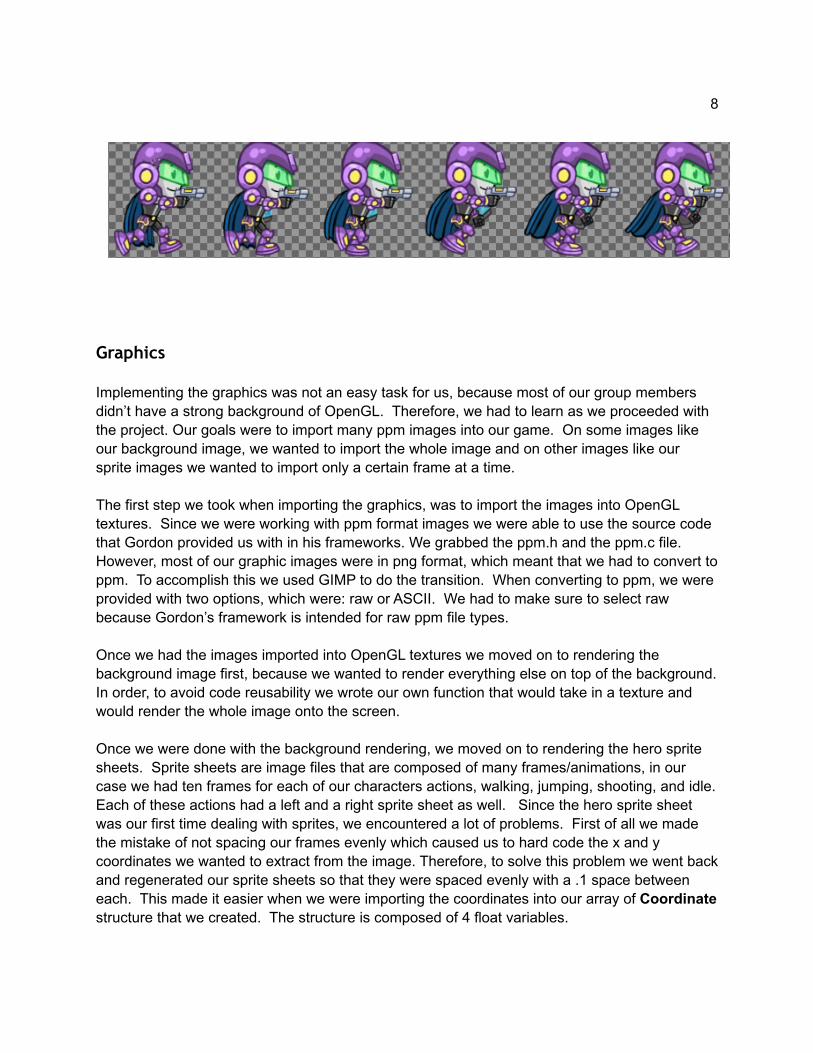
Once we were done with the background rendering, we moved on to rendering the hero sprite sheets. Sprite sheets are image files that are composed of many frames/animations, in our case we had ten frames for each of our characters actions, walking, jumping, shooting, and idle.Each of these actions had a left and a right sprite sheet as well. Since the hero sprite sheet was our first time dealing with sprites, we encountered a lot of problems. First of all we made the mistake of not spacing our frames evenly which caused us to hard code the x and y coordinates we wanted to extract from the image. Therefore, to solve this problem we went backand regenerated our sprite sheets so that they were spaced evenly with a .1 space between each. This made it easier when we were importing the coordinates into our array of Coordinate structure that we created. The structure is composed of 4 float variables.

9
After splitting up our image into the desired frames, we came across another problem. For some reason we were not able to make the background of the frame transparent. We would always get a black background in back of our frame. We spent a good week and a half on this and tried many methods in order to make the background transparent. We became frustrated because we weren’t getting any results. We were already thinking of finding source code that would import png files, because with png we were able to save our images with a transparent background which would make things much easier. However, after talking to Gordon he pointedus toward the bigfoot program he had provided us with back in week 2 of the quarter. We discovered the ConvertToRGBA function. This function converts our RGB image into an RGBA where A is the ALPHA value. After we had our image in RGBA we were able to use the GL_ALPHA() that OpenGL has. This function discards fragments depending on the outcome of a comparison between an incoming fragment's alpha value and a constant reference value. However, the comparison will only occur if the alpha test is enabled.
Once we had the transparency implemented on our hero, we realized there was a white border around our hero’s image. This white border was caused because our original background was white and we simply colored it black. We decided to get around this problem by simply using a tablet and a pen to carefully color the set of pixels around the hero’s image that were white.
After successfully importing our sprite sheets, we moved on to creating an algorithm that would render them at the right time and event. Our algorithm depends on two things. First it depends on the event that is currently happening, for example, if the right key is being pressed, then we want to render the sprite where the hero is walking right. We also had to include a timer that would switch frames every 80000 microseconds, otherwise our frames would render really fast and not within rhythm of the hero object.
Implementing the the enemy characters very similar to the hero implementation. Actually, for the enemies we had less sprite sheets to implement, which made the task less tedious. The same logic that was used for the hero was implemented into the enemy sprite sheets. We also implemented the same logic that is used to toggle through the platforms, in order to toggle through our two types of enemy by pressing the “g” key. Again, we simply use an enemy_id thatis incremented every time the key is pressed and modded by 2 in order to parse through both types of enemies.
After rendering our background, hero and enemy textures we worked on rendering platforms, and our elevators. The elevators are composed of two platforms, which meant that if we had our platforms working then our elevators would work as well. Our platform images are composed by 64 X 64. By this stage of the development, we had discovered that OpenGL prefers even sizes for the textures, otherwise we would encounter a segmentation fault. Therefore, we were forced to go back and resize our previous images.
As we proceeded with the implementation of the platforms, we came up with the idea of importing multiple image types for the platforms like a rock texture, coal texture, dirt texture, anda couple other types. We decided this would make our game graphics more dynamic and catch
10
the user’s attention. Importing many types of platform textures in an array made it easier, when it came to accessing them in the code. We added a tex_id that would be associated with the corresponding texture in the array.
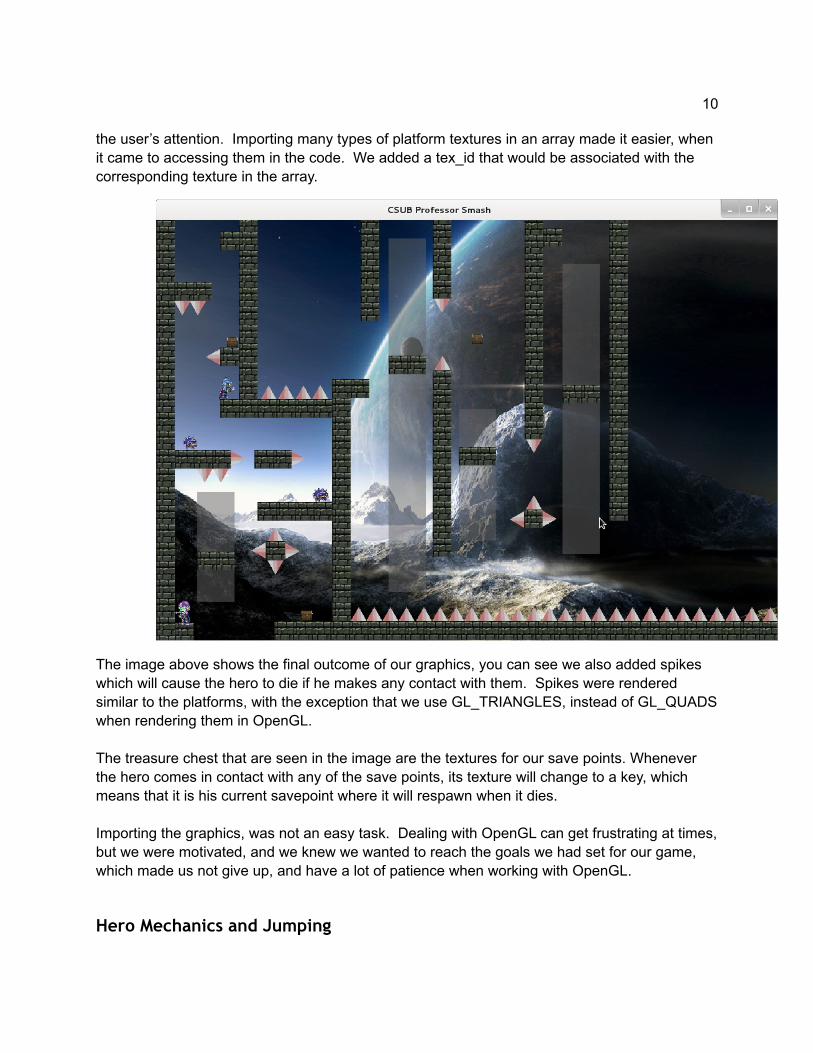
The image above shows the final outcome of our graphics, you can see we also added spikes which will cause the hero to die if he makes any contact with them. Spikes were rendered similar to the platforms, with the exception that we use GL_TRIANGLES, instead of GL_QUADSwhen rendering them in OpenGL.
The treasure chest that are seen in the image are the textures for our save points. Whenever the hero comes in contact with any of the save points, its texture will change to a key, which means that it is his current savepoint where it will respawn when it dies.
Importing the graphics, was not an easy task. Dealing with OpenGL can get frustrating at times,but we were motivated, and we knew we wanted to reach the goals we had set for our game, which made us not give up, and have a lot of patience when working with OpenGL.
Hero Mechanics and Jumping
11
In order to give variety to the types of tricks that we can put in our rooms, we have given our hero a double jump. The implementation of this mechanic was simplistic in design but a little tricky to implement. Essentially there is a jump counter that increases each time he jumps. This counter is reset to zero upon landing on a platform and set to one when he falls off a platform orelevator. If the counter is 2 or greater he cannot jump.
One issue that we faced, however, occurred when a user held down the jump button without releasing it. This caused our hero to jump twice in rapid succession and made it very hard to space your jumps apart from each other. The solution to this may seems a bit hacky but it worked beautifully and was quite easy to implement. What we did was use an integer variable toact as a sort of timer. When the user releases the jump key this variable is reset and when it reaches zero the hero is able to jump. This way if the key is held and thus rapidly toggling between being pressed and released this variable never reaches zero until the key is released for at least 5 iterations of our game loop. Now when the jump key is held down the character jumps to his full height.
We also wanted the player to be able to control the height of their jumping even further by allowing a range of jumps that are smaller than a full jump. Basically if you press and release the jump key very quickly the hero barely jumps off of the ground. This allows for even more precise jumps and tricks in the game. We handle this by checking the velocity of the hero when the previously mentioned variable reaches below a certain threshold. If the velocity is high it means he is early on in his jump and therefore his velocity can be set to 1 in order to slow him down and give the feel of a smaller jump.
Interaction with Platforms
Before talking about interactions with platforms it is worth mentioning a few things of note with respect to positioning of the hero in our game. Our hero’s vertical position is updated each frame based on his velocity. His velocity is increased by gravity until a certain terminal velocity isreached. Pressing left and right keys merely moves his horizontal position 3 pixels in the appropriate direction.
Each frame of the game we are checking multiple collision between the hero and our various game objects. What happens when the hero collides with a platform? How can we give the illusion that he is standing on a platform? Well, if a collision occurs we need to categorize whereexactly the player is right before he collides with the platform in question. If he is to the right or left of the platform before colliding we do not change his vertical velocity, instead only moving his position horizontally so that he is re-positioned right next to the platform.
If the player collides with a platform from below or above we need to handle things quite differently. First we can tell which direction the player came from by looking at his current position in relation to the platform, as well as previous position, which we are updating every time he moves. It is also important to note that our platforms are at least 15 pixels wide and high
12
from their centers, and the terminal velocity of our hero is -7. This means that if he collides from the top, his center position is guaranteed to be above the enter position of the platform, and viceversa if he collides from the bottom because his maximum upwards velocity is at most 5.5 pixelsper second unless he is on a moving elevator in which case it could be faster. Just to be safe welike to check his previous position to maintain accuracy and robustness.
So, if our hero hits from the bottom we then reset his downwards velocity to 0, move is position to be right below the platform collided with, and do not touch his horizontal velocity or position. We do the exact same thing when he collides with the top of one.
Spikes
Spikes were the first obstacle to be included in the game. Two different requirements were discussed primarily. The first was to implement spikes as textured rectangle, where the a textureof several tall spikes would fill in a square shape. This would allow collisions to be kept simple, since we would only have to worry about colliding rectangles. The other method was to implement spikes as triangles, where each spike is a separate triangle. Although this would require reimplementing collisions, it had the primary benefit of allowing more platforming challenge by being able to force the player to jump at different angles to progress through the level. Eventually it was decided to design the spikes as triangles, since we wanted to focus on the game's platforming challenge.
As the game existed before the implementation of spikes, only rectangle-rectangle collisions were detectable. The collision function only checked if the right, left, upper, and lower bounds of one object crossed the same bounds of another. However, rectangle-triangle collisions needed a more precise method of detecting collision, since there are only 3 sides, and the triangle's orientation changes where the sides are. We needed a method of detecting collision between triangles and rectangles that did not rely on orientation, meaning we could not use boundaries of shapes relative to their orientation on the screen. For this, two implementations were considered. The first was the optimal (most correct) method: detect if any of the line segments from one shape are crossing the line segments of another. The mathematics this method used, however, were more involved than desired, so another method was used.
When rectangle and triangle first collide, the corner of one shape will either move within the other shape, or land on top of a line segment. Detecting this is simpler than above, since now only single points need to be checked for collision. Determining if a simple shape is within a rectangle is just a matter of checking the rectangle's boundaries, and the three half-space formula can be used to check if a point is within a triangle. Although this method does not work for every collision scenario, our game does not need to consider these cases.
Starting off, setting up collisions between different shape types was a beast of its own. Not only did the collision function had to be modified for different shapes, but the basic game object classhad to be restructured to allow for different shapes, and the shape class had to be extended to
13
support triangles. This in turn affected every piece of code involving physics, since it now had to support different shapes, and forced rendering to be altered to support different the different game object types also being implemented. However, once the factoring was done, implementing the actual collision function was straight-forward, since it had been very clearly defined during its design phase. Debugging it was another story.
Memory Test
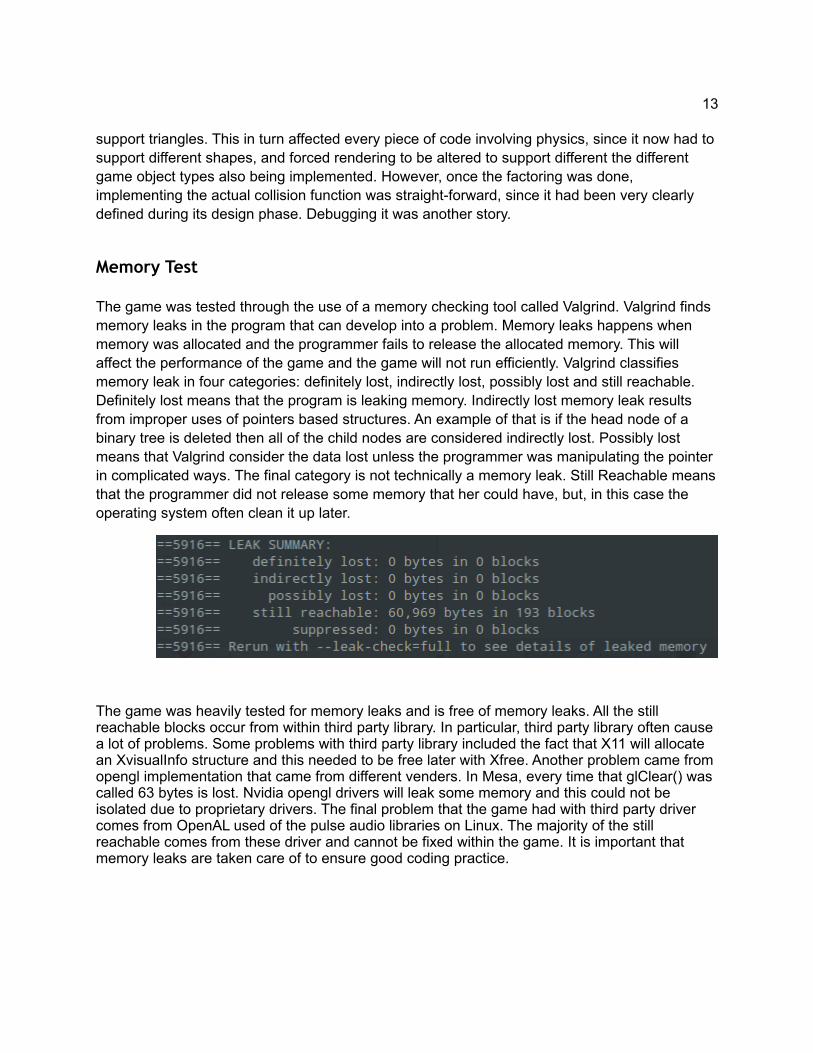
The game was tested through the use of a memory checking tool called Valgrind. Valgrind finds memory leaks in the program that can develop into a problem. Memory leaks happens when memory was allocated and the programmer fails to release the allocated memory. This will affect the performance of the game and the game will not run efficiently. Valgrind classifies memory leak in four categories: definitely lost, indirectly lost, possibly lost and still reachable. Definitely lost means that the program is leaking memory. Indirectly lost memory leak results from improper uses of pointers based structures. An example of that is if the head node of a binary tree is deleted then all of the child nodes are considered indirectly lost. Possibly lost means that Valgrind consider the data lost unless the programmer was manipulating the pointer in complicated ways. The final category is not technically a memory leak. Still Reachable meansthat the programmer did not release some memory that her could have, but, in this case the operating system often clean it up later.
The game was heavily tested for memory leaks and is free of memory leaks. All the still reachable blocks occur from within third party library. In particular, third party library often cause a lot of problems. Some problems with third party library included the fact that X11 will allocate an XvisualInfo structure and this needed to be free later with Xfree. Another problem came from opengl implementation that came from different venders. In Mesa, every time that glClear() was called 63 bytes is lost. Nvidia opengl drivers will leak some memory and this could not be isolated due to proprietary drivers. The final problem that the game had with third party driver comes from OpenAL used of the pulse audio libraries on Linux. The majority of the still reachable comes from these driver and cannot be fixed within the game. It is important that memory leaks are taken care of to ensure good coding practice.
14
Unit Testing
A methodical form of testing became necessary when debugging triangle-rectangle collisions. The final function for testing triangle-rectangle collisions was giving erroneous results in some situations. This functions relied on other collision functions, as well as many functions used for 2d-vector manipulation, to produce a result. Due to this complexity, each function needed to be tested individually, since any one of them could have been causing crashes. Implementing unit testing for all functions in question was the most structured way to test all of them.
Unit testing was implemented with the following functions: i. run a single test of a function, write results, and return result ii. run several cases of the single test run function, track all results, return T is all tests passed, F otherwise, also print result iii. run different functions for running test cases related to a specific area (collisions, 2d-vec, etc.), return T/F based on whether or not all functions passed, print result iv. main: run all functions managing unit-tests for different areas, and print overall results
This testing method helped resolve the source of errors, function by function, allowing us to clearly see exactly what function was failing, and for which cases. Functions that other functionswere dependent upon were tested first, which were the vector functions. These functions were not zeroing out some z-coordinates which lead to errors later on in computations. Once these issues were fixed, the collision functions were then tested. The primary functions to test in this area were those related to rectangle-triangle (rect-tri) collision, since the rectangle-rectangle (rect-rect) collision function was already known to work correctly. The rect-tri function tested collision between the two shapes by checking if any corner from one shape was within the othershape. It did this by making heavy use of two helper functions: one to test if a point was within a rectangle, and another to test is a point was within a triangle (using the three half-space test). These helper functions were therefore first, and both were found to work correctly, so the error was therefore narrowed down to the rect-tri collision function. Since this function was known it be failing, the code was first checked for the source of the error before a unit test was attempted. Some searching revealed an error while checking the bounding rectangle of the triangle against the rectangle being tested (a greater than/less than flip), causing only the right half of the triangle to return true for collision. Correcting this mistake fixed the collision errors between triangles and rectangles. The game was working as it should be at this point, so unit testing was stopped here in order to focus on the next requirement that needed to be implemented.
Elevators
Once the level editor and sprite-sheet graphics had been implemented into the game, we wanted to include more features into the game to increase the challenge. One of those features to be included was moving platforms.

15
"Traps" - failed 1st attemptA trap was to be a set of platforms and/or spikes that move to another location on contact; the trap would either move once on contact, or move back and forth between start/end locations on contact. This would allow for the construction of movable platforms the player could use for transportation, as well as actual traps, such as platforms that fall away to reveal spikes, spikes that pop up out from platforms, or hidden routes that could be revealed on contact.
Given those requirements, the trap had to be designed so that it was encapsulated in its own class. This allowed it to be treated as a single game object entity later on. It also allowed for the ability to store several traps that could be handled at once (if needed) for any given room. This would also help separate the platforms and spikes that would be stored in the trap, from the non-movable ones stored for the room. Since functionality to handle platforms/spikes was already available in the level editor, render function, and file read/write (used to store/read data for each room), the optimal way to implement traps was to modularize these functions to handle each game object entity type within helper functions. This would allow easier implementation of traps by being able to reuse many pieces of code. The only truly new logic that would need to be added would be starting/ending traps in the level editor and file i/o, and moving the entities within the trap on contact.
The trap class was implemented with a platforms and spikes vector, as a well as an onCollision and movement function to handle activation of the trap, moving to the destination after contact, and, for two-way traps, moving back and forth between start and end locations until contact stopped. The current editor was refactored so that adding, removing, and resizing entities was done using helper functions specialized for each entity type. Once the refactored code was tested and verified to be working correctly, code for handling trap platforms and spikes was added to the necessary helper functions. Code for starting and ending trap construction, including setting a target location, was also added at this point. The render function was refactored next to modularize each entity's render into a separate helper function. Once this code was verified through testing, a trap render helper function was added, which utilized the platform and spike rendering functions created during the refactor. Two separate render functions were also created for rendering semi-transparent, black-colored spikes and platforms. This was used in the level editor when the trap's target location was being set, allowing the userto see where each spike and platform would end up after the traps movement was complete.
Although the rendering worked fine, there were several problems with other areas of the trap's implementation. Firstly, the traps would not move once on contact with the hero. Instead they would disappear from the screen on contact with the hero, and would then no longer collide withthe hero, indicating they had warped to some random location off-screen. Further, when entering trap construction mode, deleting any platform or spike would result in a segmentation fault, but deleting the trap after it had been finalized (all desired platforms and spikes placed, a target location set, and whether the trap was one-way or two-way set), would not cause the error. Debugging attempts with 'gdb' revealed the crash was occurring because the program
16
was attempting to access out of bounds memory while checking for collisions in the non-trap spikes or platforms (depending on which had been deleted). This indicated once a GameObject pointer holding the allocated platform/spike had been pushed onto the corresponding vector in the trap, a separate GameObject pointer that pointed to the same platform/spike in memory wasbeing pushed onto the room's corresponding vector for static platforms/spikes. There were many points in the code this error could have been occurring, but the code had become too convoluted to trace through and pinpoint the exact cause. What was especially confusing was that the problem did not persist after the trap had been finalized.
At this point, there were just over three weeks left in the project. The complexity of the problemsbeing faced meant the trap class would likely have to be restarted completely, and even then there was no guarantee it would work. After a group discussion, it was decided the trap idea should be scrapped in favor of a simpler elevator the would only move up and down within a modifiable range. The elevator would be its own entity, not a platform, so that it would not conflict with existing vectors in the Room class. However, the refactoring done to the code before including trap modification was kept. Modularization of code in 'render' and 'check_game_input' (which is where the level editor base code resides) made both functions substantially easier to deal with while modifying and adding features.
Perhaps the most important thing taken away from this failure, however, was not something thatcould be defined in terms of code, but instead in what was learned. Firstly, a feature should not be implemented until the design is very clearly defined. This in turn allows all, or most, requirements to be defined before the actual implementation, instead of having to guess them during while implementing the feature. This provides a strict vision of the feature, allowing it to quickly be implemented, since it is known what the feature should be, and perhaps more importantly, what it should not be. If it is not defined exactly what the feature should be, the feature can be a wide, unmaintainable, and potentially unassociated range of things. Attempting to implement a feature with this lack of understanding will likely only muddle things more, rather than clear them up. The reason for this can be summed up in the saying "where you ends up usually depends on where you start". Even if an idea is cleared up as it is implemented, the vagueness at the beginning will likely still throw the implementation down a point of no return right out of the gate. In this case, a convoluted class was created that could not clearly be maintained, as a result the class could only be interfaced with using odd special cases that weredifficult to remember and manage.
On a related note, one should not not make a classes/functions/modules/features that attempt to do too much. It is better to divide functionality into smaller entities that do a very specialized task, and then use those modules to implement more complex functionality after being sure theywork. This provide two major benefits. The first is the complex entity becomes much easier to maintain an implement. The second is that even if the complex entity fails to be implemented in the end, it is likely the smaller specialized modules will be (or can be made) functional, and can therefore still be implemented to provide simpler features even though the complex desired feature could not be included.
17
Next iteration: ElevatorsThe purpose of this class was to implement what would essentially be a moving platform of a fixed size. The elevator should be placeable and moveable around like a platform, and should move up and down between a range that can be modified within the level editor.
The Elevator class will be derived from the GameObject class. It will store two y-coordinate values that correspond to its upper and lower bounds. When spawned, it will start from its lower bound and move upward at a constant velocity until it hits its upper bound. The constructor will create an elevator that is one tile high and two tiles across. Its upward velocity, upper bound, lower bound, and x-coordinate will be set according to parameters passed through the constructor. A movement function will handle moving the elevator's center position according to it's velocity. Once the elevator passes either of its bounds, its velocity will be negated to force it back in the opposite direction.
Helper functions for setting and retrieving upper and lower bounds, as well as speed, were created to encapsulate interface for the class within the class definition. This helped prevent critical code for the class from being spread out throughout the level editor and main.cpp, instead helping keeping most functionality related to the class in one place. Interfacing the classwith the level editor was mostly a matter of selecting a button for spawning elevators, then calling the correct helper function within the class for modifying the functionality that already existed with the editor.
A separate render function was created for elevators, which rendered the basic shape in a solid color. This was later obsoleted in favor of the platform render function, which already contained the necessary functionality to rendering elevators. A function was also made for rendering the elevator's range by representing it as a semi-transparent rectangle the width of the elevator, starting at the elevator's lower bound and stretching to its upper bound. This function stayed in use through the level editor (activated only when the range needs to be modified).
Since implementation managed to stick very close to the design, which was defined much more clearly than the attempt to create traps, the class worked mostly as expected with very few bugs. There were still some issues however. At first, the hero was designed to react to the class the same way it did to platforms on collision. This lead to jerking movement from the hero as theelevator was falling, since contact with platforms is designed to zero out the vertical velocity if the hero is colliding from the top or bottom. The quick fix was to set the hero's vertical velocity equal to that of the elevator's on contact. However this lead to further problems.
After several failed attempts at fixing the situation, it turns out, the correct fix for these problems was actually the simplest. Instead of checking for top-only collision with the elevator, the hero's velocity simply needed to be set back to the elevator's downward velocity. This solution did not work earlier because the velocity vector had been repurposed to store the base velocity before the speed multiplier was applied. This was mostly the cause of not being able to synchronize the hero with the elevator. Once the true velocity was calculated, synchronize the hero velocity worked perfectly. The primary lesson learned from all this was to keep design as simple and

18
intuitive as possible. Meaning do not repurpose variables arbitrarily, keep variables that are always needed up-to-date, and do not arbitrarily add extra containers to over-abstract functionality.
Audio
We used OpenAL as our audio API. OpenAL is a cross platform audio library. It accepts uncompressed audio data such as WAV files, which is what we used. Coding in OpenAL is similar to OpenGL. First we started off by initializing OpenAL. Our first trial didn’t exactly go so well because every time a button was pressed to initiate a sound there was a latency between the time the button was pressed and when the actual sound was heard. To fix this problem we created sources and buffers prior to the sound function call. After we fixed that problem there was still a half second latency in the game. After much frustration we found the problem. It turned out to be an issue with the virtual machine that we were using to run the game on. When we tested on a native machine, however, the sound was crisp, without delay. Here is a diagram on how the objects and their relationships to the device object that we are using.
In OpenAL you need a device and a context that is attached to the device. If you don't create a device and name it you can use a default device and we used OpenAL default device. We useda loop and a two dimensional array to fill sources and buffers. The buffers are filled with the audio data and the sources we used are called and played by function call.
We had some problems that involved a sound looping infinitely during gameplay. This was an easy fix by only calling the sound on the first frame that a collision occurs with the object. More problems arose that had to do with some memory leaks due to WAV files and other resources
19
not being closed correctly. We also forgot to unload the WAV file after using it, this also was a simple fix.
Another troubling issue revolved around warnings from the compiler about deprecated code. In order to fix this problem we would have needed to change the function that loaded the WAV file. However, Jason found a way to suppress the warnings by using a ‘pragma’ directive for the gcc compiler, to ignore the warnings. This worked out just fine since there were no problems at runtime. Another problem with audio was the save points when a the player interacted with the save point the sound kept ringing until the player stopped interacting with the object, which wasnot part of game design, to fix that we created another variable to update the value to true everytime we break out of the loop.
OpenAL is also multiplatform compatible so one of our team members uses a Mac and to loading a WAV file on the accepts more less parameters than the Linux version on so with that issue we needed to uses a ifdef macro that compiled the code nested in the macro for Mac else run Linux version.
Level Editor
We realized early on that it would be much easier to design fun and technically challenging rooms by using an in-game level editor instead of painfully editing text files that hold the coordinates of our game objects. After playing around with OpenGL and X11 events we realized that this was entirely possible and quite straight forward. Without getting into too much detail wewill try to explain the general methodology that we used to accomplish this feature.
Because we already have functions set in place to detect collision between our game objects it only seemed natural to use them to detect collisions between the mouse cursor and a game object on the screen. We have one universal keybind that is used to grab any object on the screen and move it. When this button is pressed we create a game object whose position coordinates are that of the mouse cursor. We then check collision with this newly created mouseobject against all of the objects that exists for the current room, i.e. everything on the screen. If a collision occurs we return from the function and set two variables. The first one is a boolean set to true to indicate what type of object is now movable, and the second is an integer number representing the index of the movable object in the vector structure that holds pointers to that object type within the current room. When the object is placed back on the screen we set the previously mentioned boolean value to false. Now, in our main game loop we check to see if anyobject types are currently movable. If so we call a function that updates the currently movable object to the position of the mouse. Our movable object is now actually move across the screen which allows it to interact with our hero.
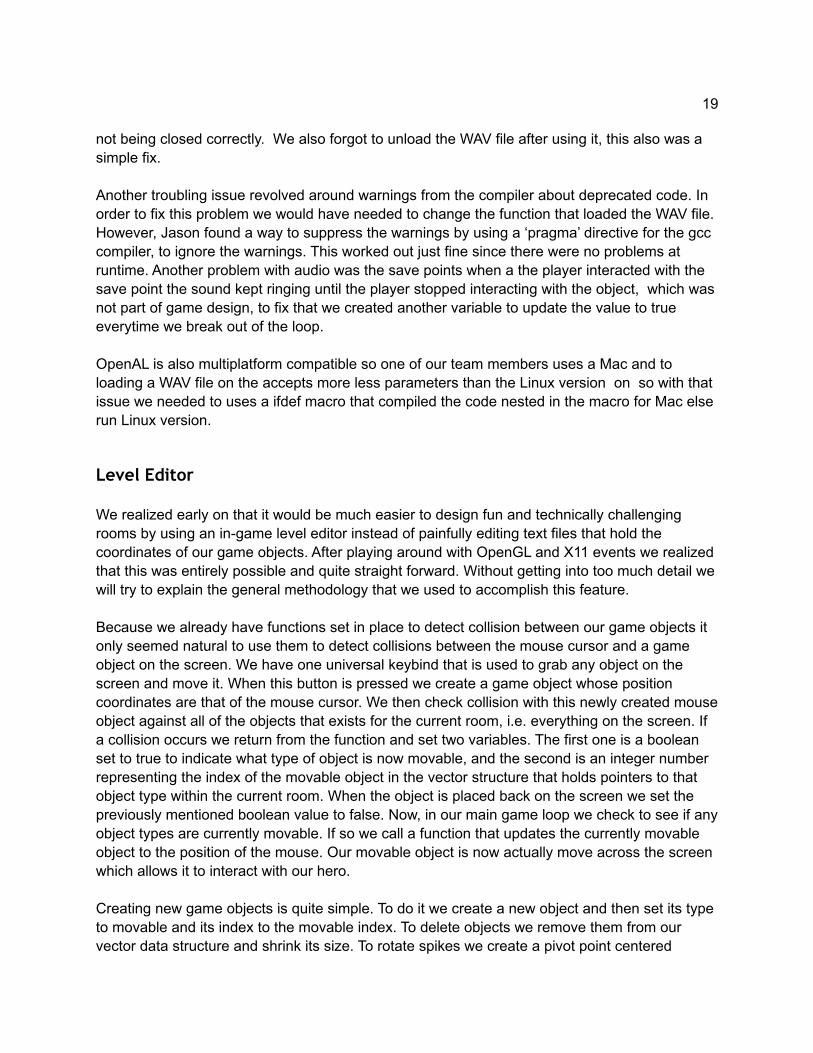
Creating new game objects is quite simple. To do it we create a new object and then set its type to movable and its index to the movable index. To delete objects we remove them from our vector data structure and shrink its size. To rotate spikes we create a pivot point centered
20
on the bottom left corner of the spike. As it rotates we just change the coordinates of the other corners to reflect the rotation.
Resizing platforms was computationally tricky but not very complicated logically. We have a fixed texture square which means that our platforms should always be multiples of that square. When the user starts resizing a platform it only increases in size according to the next closest multiple. This is accomplished using basic integer division.
Elevators proved slightly more difficult because you also have to take into account their speed and vertical upper bound position. As a result we had to use two buttons, one to increase their speed and one to adjust their height. We also set up a shadow behind the elevator while resizing to act as a visual cue for its position.
Saving and Loading Rooms
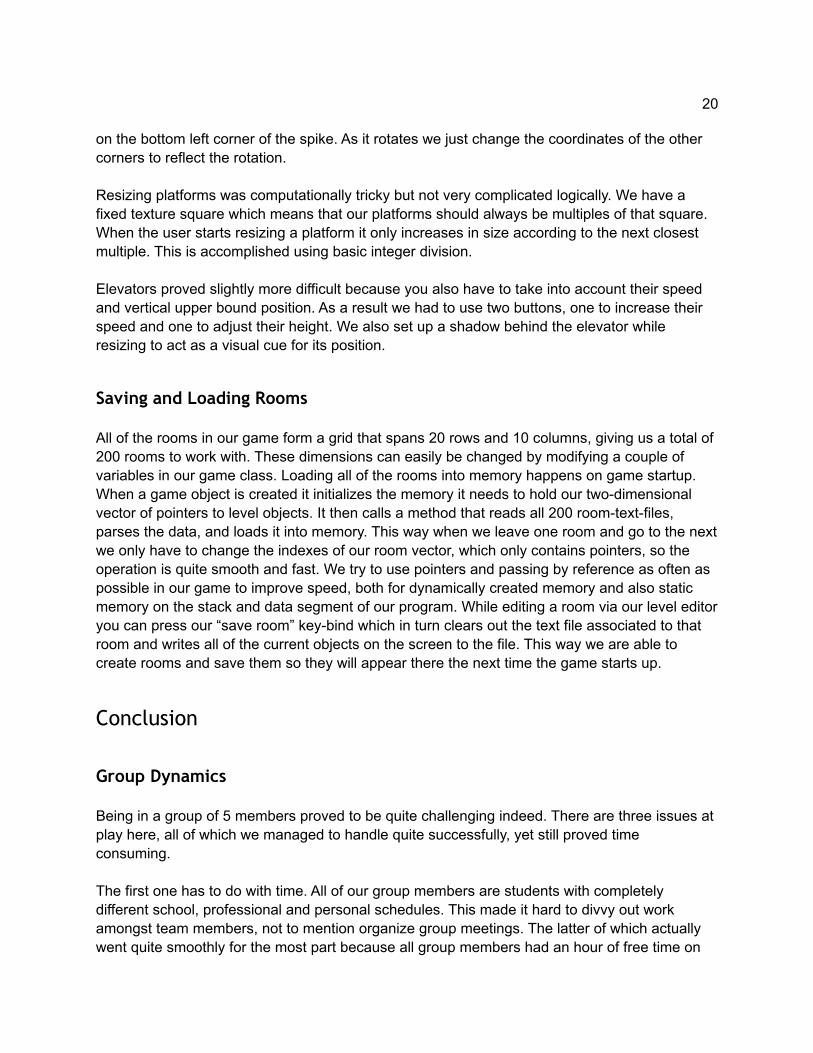
All of the rooms in our game form a grid that spans 20 rows and 10 columns, giving us a total of 200 rooms to work with. These dimensions can easily be changed by modifying a couple of variables in our game class. Loading all of the rooms into memory happens on game startup. When a game object is created it initializes the memory it needs to hold our two-dimensional vector of pointers to level objects. It then calls a method that reads all 200 room-text-files, parses the data, and loads it into memory. This way when we leave one room and go to the nextwe only have to change the indexes of our room vector, which only contains pointers, so the operation is quite smooth and fast. We try to use pointers and passing by reference as often as possible in our game to improve speed, both for dynamically created memory and also static memory on the stack and data segment of our program. While editing a room via our level editoryou can press our “save room” key-bind which in turn clears out the text file associated to that room and writes all of the current objects on the screen to the file. This way we are able to create rooms and save them so they will appear there the next time the game starts up.
Conclusion
Group Dynamics
Being in a group of 5 members proved to be quite challenging indeed. There are three issues at play here, all of which we managed to handle quite successfully, yet still proved time consuming.
The first one has to do with time. All of our group members are students with completely different school, professional and personal schedules. This made it hard to divvy out work amongst team members, not to mention organize group meetings. The latter of which actually went quite smoothly for the most part because all group members had an hour of free time on
21
Mondays and Wednesdays during the afternoon. Nevertheless it is still something to consider when talking about group dynamics.
Second there was the merging of game concepts, ideas, and coding methodologies / conventions. For the most part the game concepts and ideas went over smoothly but there werea few clashes in coding styles and methodologies. This makes sense because everybody approaches problems in different ways, but at the end of the day we were all happy as long as the code worked and was fairly easy to read.
Lastly, the most frustrating part of working in a group of this size was merging our code. The main issue here is that we were all working on the same files and while we did use GitHub as our version control software of choice, it was not a smooth process. What ended happening wasa lot of manual merging of code. All of our group members had their own branches in git and wewould play around with things there, then when we were ready to incorporate our changes into the game we would let the other group members know, pull from the latest version in the masterbranch, manually merge our changes into this branch, and finally push our completed changes back up to GitHub. In hindsight there might have been better ways of doing things but i think thiswould always be an issue when you have a large number of people working on a somewhat small project, especially when communication is not as easy as leaning back in your chair and discussing things with your office mate. Instead involving text messages, emails, phone calls, and of course weekly or even daily meetings.
What we learned
All of our group members have grown quite a bit in terms of our software engineering prowess. What this means is that we are hopefully more employable now. We have further improved uponquite a few intangible skills that most student don’t acquire until entering into the workforce. These include communication, prioritization, organization, and professionalism skills. We have also learned what it means to compromise and empathize with fellow group member. No, we are not yet experts in the field of software development but this project has been another step inthe right direction.