Embed Size (px)
Citation preview
1
Power Point images when directly copied and pasted on Word (Power Point usually have
image resolution of 96 dpi). Turning it to pdf may cause problems like pixelated and faintly
colored figures.
Power point 直接複製貼上到 word (ppt預設,解析度 96 dpi),轉成 pdf 會有問題,出現
奇怪色塊、圖片暈開
2
Powerpoint slides must be saved (as a new file, not as an existing image) as a 300 dpi .tif file
(there is a need to change some code, so google “300 dpi tif powerpoint). Then paste it on Adobe
Illustrator (AI), change the resolution to 600 dpi, and select the “Type Optimized” option on the
“Image Size” toolbar. Save the image again and paste it onto Word. Conversion to pdf will have
no problems.
Power point 輸出 (另存新檔,非另存圖片) 300 dpi tif 檔 (需改編碼,自行 google “ppt 圖
片輸出品質),貼到 Adobe illustrator (AI) 轉成 600 dpi 與反鋸齒處理,再輸出。用插入圖
片放進 word。轉成 pdf 品質沒問題。
3
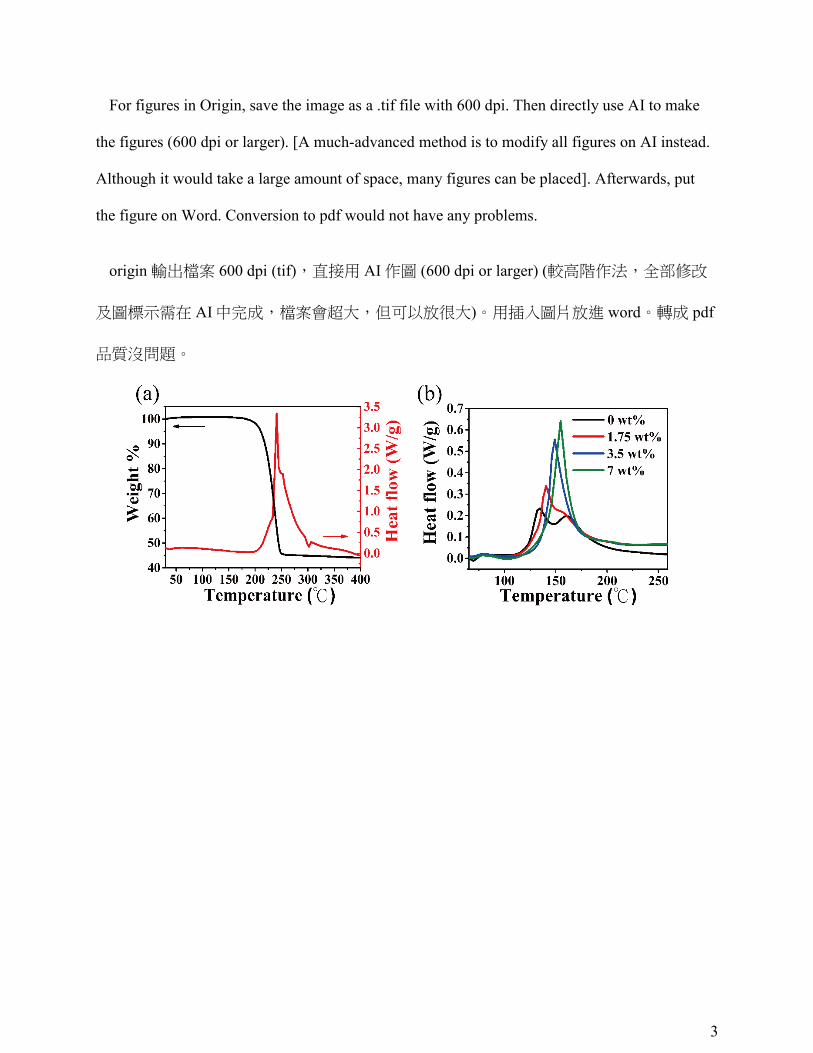
For figures in Origin, save the image as a .tif file with 600 dpi. Then directly use AI to make
the figures (600 dpi or larger). [A much-advanced method is to modify all figures on AI instead.
Although it would take a large amount of space, many figures can be placed]. Afterwards, put
the figure on Word. Conversion to pdf would not have any problems.
origin 輸出檔案 600 dpi (tif),直接用 AI 作圖 (600 dpi or larger) (較高階作法,全部修改
及圖標示需在 AI中完成,檔案會超大,但可以放很大)。用插入圖片放進 word。轉成 pdf
品質沒問題。
4
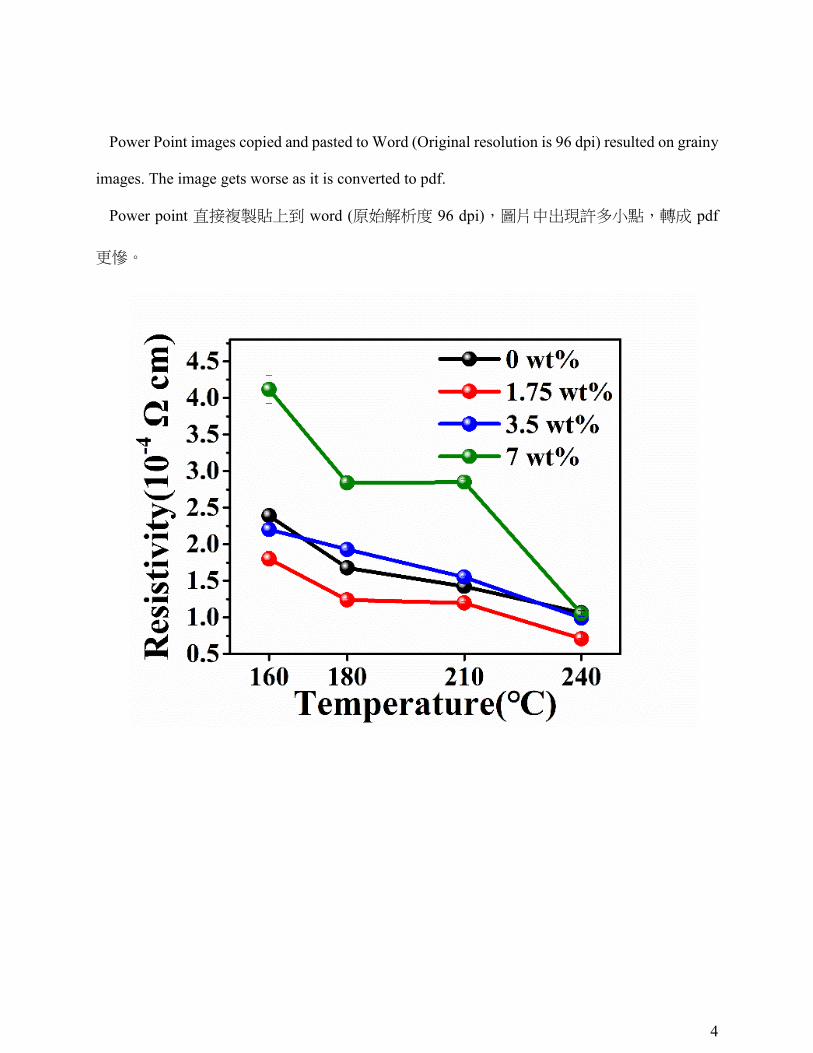
Power Point images copied and pasted to Word (Original resolution is 96 dpi) resulted on grainy
images. The image gets worse as it is converted to pdf.
Power point 直接複製貼上到 word (原始解析度 96 dpi),圖片中出現許多小點,轉成 pdf
更慘。
5
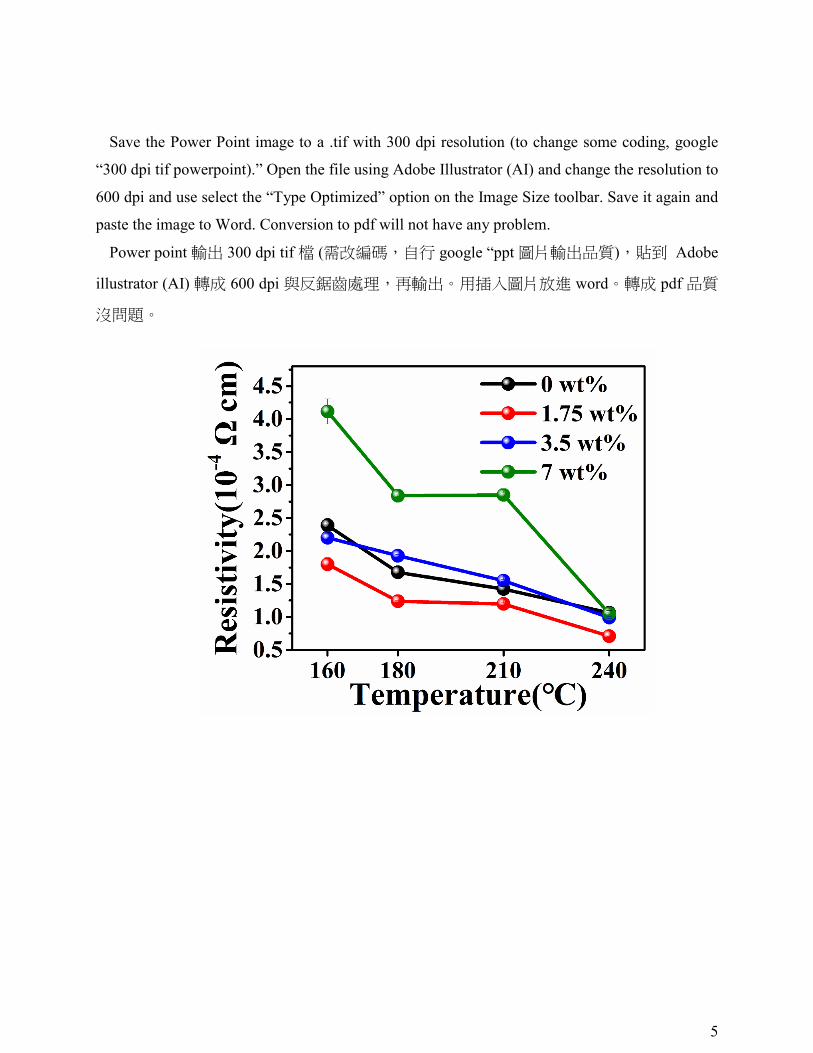
Save the Power Point image to a .tif with 300 dpi resolution (to change some coding, google
“300 dpi tif powerpoint).” Open the file using Adobe Illustrator (AI) and change the resolution to
600 dpi and use select the “Type Optimized” option on the Image Size toolbar. Save it again and
paste the image to Word. Conversion to pdf will not have any problem.
Power point 輸出 300 dpi tif 檔 (需改編碼,自行 google “ppt 圖片輸出品質),貼到 Adobe
illustrator (AI) 轉成 600 dpi 與反鋸齒處理,再輸出。用插入圖片放進 word。轉成 pdf 品質
沒問題。
6
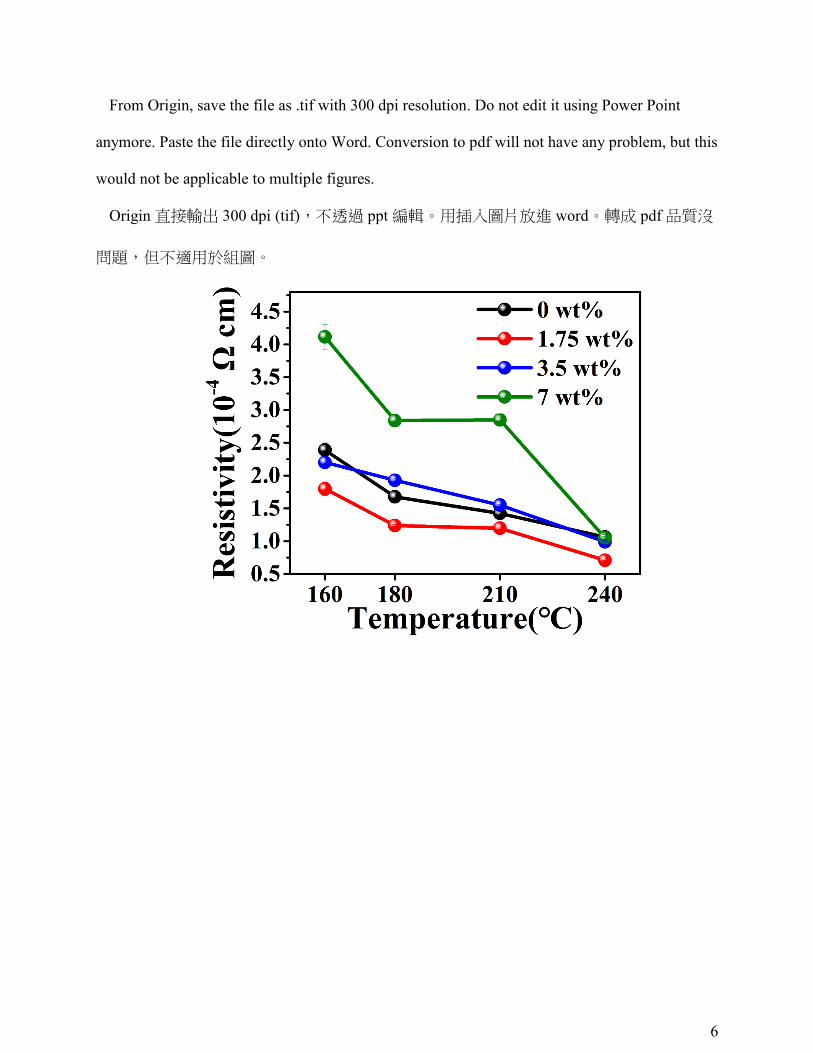
From Origin, save the file as .tif with 300 dpi resolution. Do not edit it using Power Point
anymore. Paste the file directly onto Word. Conversion to pdf will not have any problem, but this
would not be applicable to multiple figures.
Origin 直接輸出 300 dpi (tif),不透過 ppt 編輯。用插入圖片放進 word。轉成 pdf 品質沒
問題,但不適用於組圖。
7
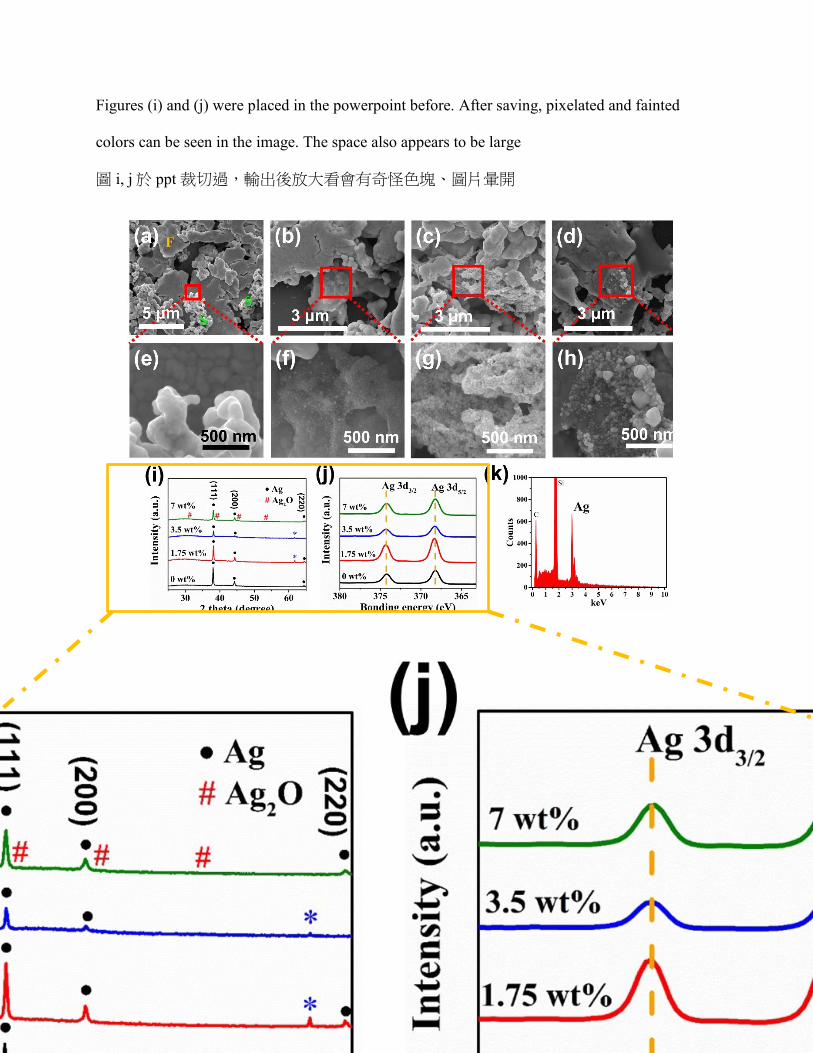
Figures (i) and (j) were placed in the powerpoint before. After saving, pixelated and fainted
colors can be seen in the image. The space also appears to be large
圖 i, j於 ppt 裁切過,輸出後放大看會有奇怪色塊、圖片暈開
8
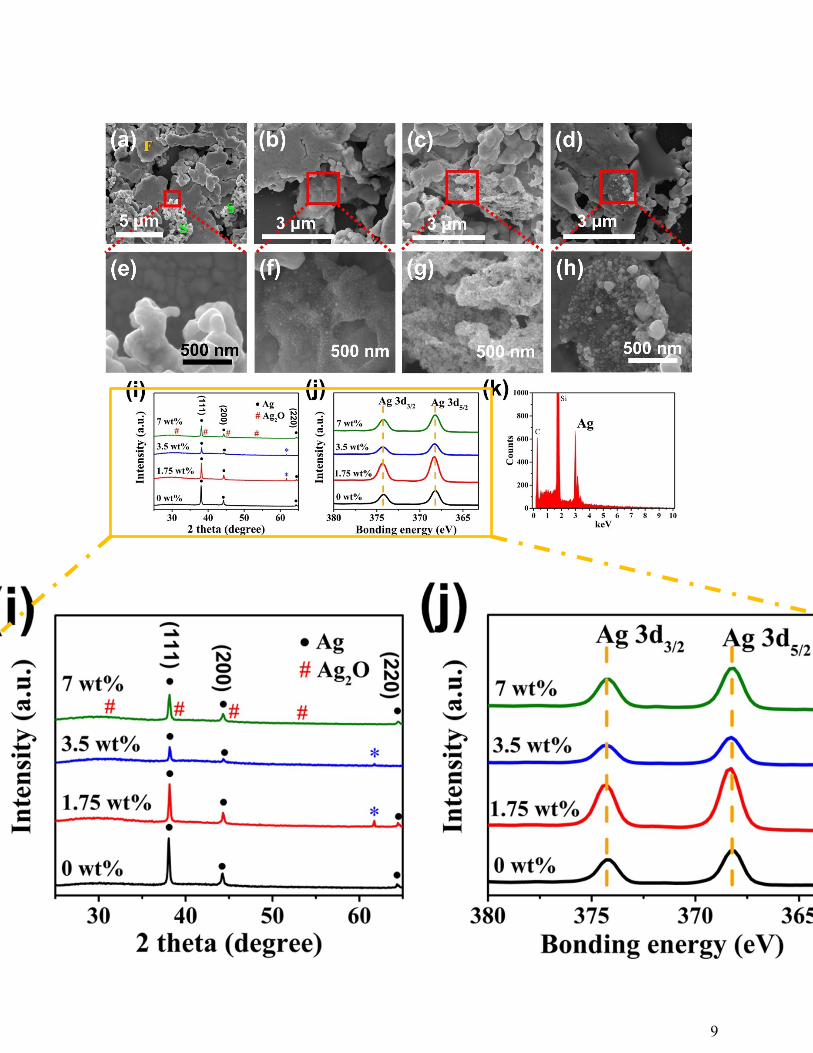
Figures (i) and (j) were cut from MS Paint and eliminated some extra spaces. It was pasted again
to Power Point for typesetting. Saving the image will not have any problem.
圖 i, j於小畫家中裁掉多餘部分,再放入 ppt中排版,輸出後沒問題。
Note: Under white background, cropping using Power Point can make some decolorized white
spots appear in the figure. If cropping is needed, using MS Paint or any other image processing
software is a better option. Afterwards, add it back to the Power Point for typesetting. In
addition, directly pasting the image to Word and converting to pdf would result in the same
problem. So, you need to improve the image resolution first before you add it to Word.
Note: 白底圖,於 ppt中編輯過 (裁切),都會直接出現奇怪斑點與底色,如需裁切,可先於
先於小畫家,或是其他修圖軟體中裁切好,再放入 ppt 排版。此外,於 word 中裁切過,
轉 pdf亦有此現象,也需先裁切至適合大小,再放入 word。
9