Embed Size (px)
Citation preview

OU Campus Step-by-StepThis guide is going to show you one example of taking a MS Word file and converting it to the web.
From this...
We will be using the MS Word version of OU Campus Quick Start Guide
To this...
OU Campus Step-by-Step 1

We will be using the CCC program pages as an example of how we want the converted document to appear.
Create a new page
In a folder in OU campus, click on New | New Two Column Page
OU Campus Step-by-Step 2

1. Give the page a title. This needs to be relatively short as it appears at the top of the page.
2. Give a description. This appears in the search engine result descriptions of the page
3. Add the page to the navigation menu, unless it should be hidden from the secondary navigation on the right-hand side of the page.
OU Campus Step-by-Step 3

4. Give the file a name using lowercase letters, underscores and dashes (no spaces or special characters please).
This is how the new page looks. Resize your browser to make sure the title (1) doesn't overwrite the breadcrumbs (2) at lower browser sizes. You can make changes under page properties area.
OU Campus Step-by-Step 4

Highlight and copy the part of the MS Word Document that we want to appear in the Top Content section of the page.
Click on the Top Content button to edit that section.
Click on the Paste as Text button on the editor's menu. You always want to use paste as text when copying and pasting content from an outside source. If you don't you will have hidden codes from MS Word and HTML pages that will cause major problems.
CTRL-X to paste the contents.
CTRL-S (or click on the Save icon) to save.
Edit the Main Content area
OU Campus Step-by-Step 5

Click on the Main Content button
Highlight and change the text of the heading. Hit the Enter key to move the cursor below the line.
OU Campus Step-by-Step 6
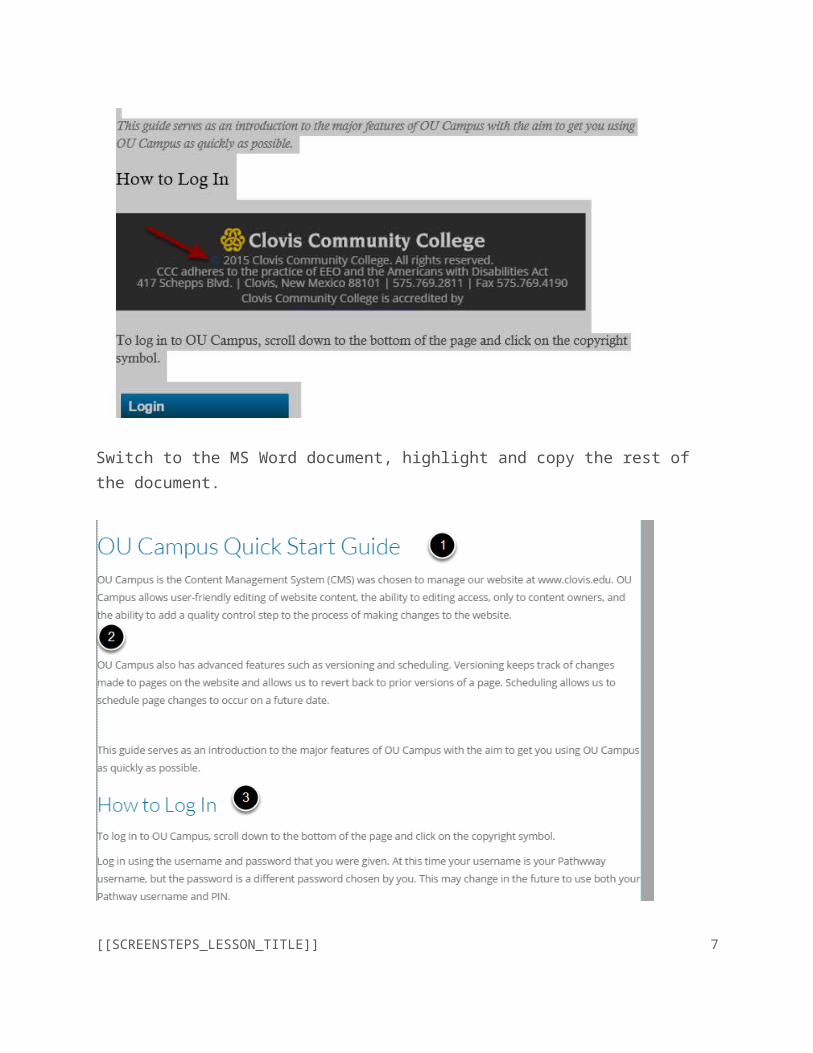
Switch to the MS Word document, highlight and copy the rest of the document.
Paste the contents into the main section.
1. This is the top level heading. We'll have to change it's style to an H3 because H2 and H1 are reserved for use above this section.
2. You'll have to adjust for lines that don't wrap correctly, have more than one line break, etc. The WYSIWYG editor in OU Campus is much like editing in MS Word.
3. This heading gets the next level style: H4 in this case.
Note: We'll add all the images in the end.
OU Campus Step-by-Step 7
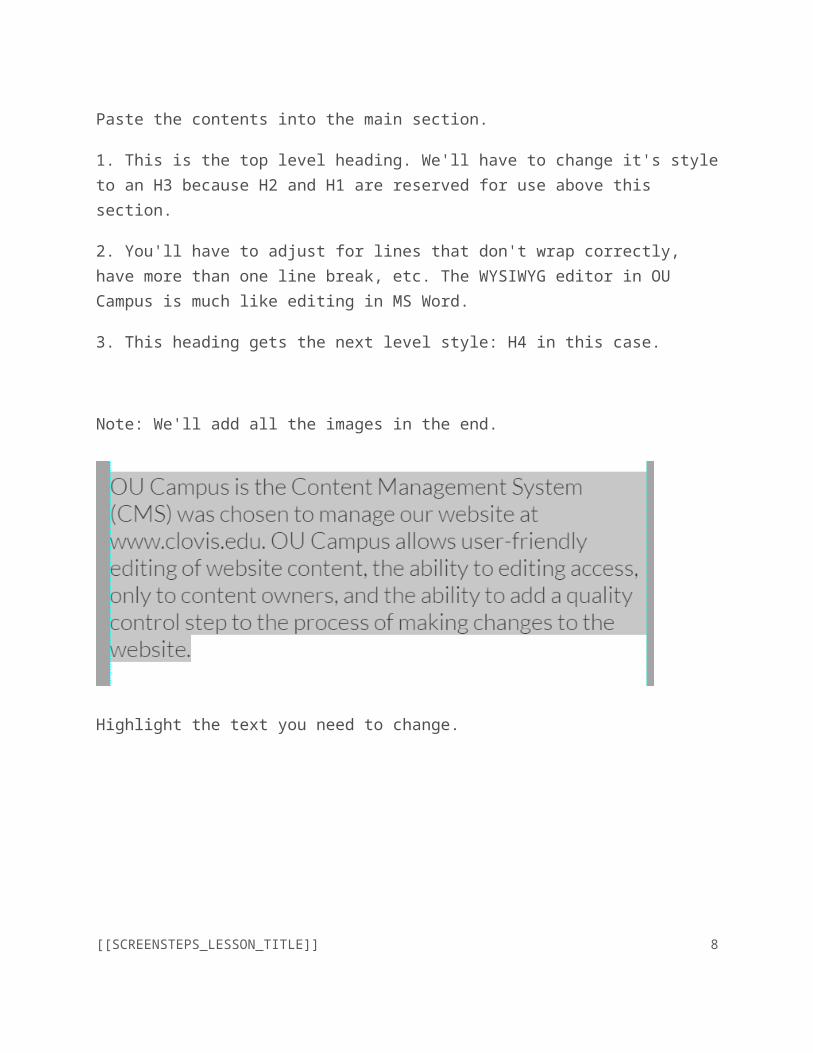
Highlight the text you need to change.
Choose the correct type from the pull-down menu: Paragraph in this case.
OU Campus Step-by-Step 8

Do the same for the headings
Save the main section when done. It should be looking more readable now.
Change the look of the Top Content section text
OU Campus Step-by-Step 9

Click on the Top Content button.
Click on the source code part button on the toolbar.
The source code view shows us the special codes.
Change the paragraph class on the "p" tag from the MS Word class of "LessonDescription" to the OU Campus class of "blockquote-big." This part is advanced and requires basic HTML knowledge, so you might need some help with it.
OU Campus Step-by-Step 10

Save the section and you'll see a preview of the changes.
Switch to Folder View
Click on the Pages breadcrumb to show the folder view.
1. _nav.inc contains the HTML code for the right-side navigation area for all pages in this folder. Editing this is advanced and requires basic HTML knowledge, so you might need some help with it.
2. The _props.pcf stores properties information. Please get help if you need to edit this.
3. The docs folder is where you store attachments like PDF files. You can create more sub-folders beneath the docs folder for organization.
4. The images folder is where you store images used in the web pages. You can create more sub-folders beneath the docs folder for organization.
5. File names ending with the .pcf extension are web pages. In the CMS, these wail have a .pcf extension. When published to our website, they will have a .aspx extension. The index page is the home page for the folder. You
OU Campus Step-by-Step 11

can have many web pages in a folder and create more sub-folders for organization.
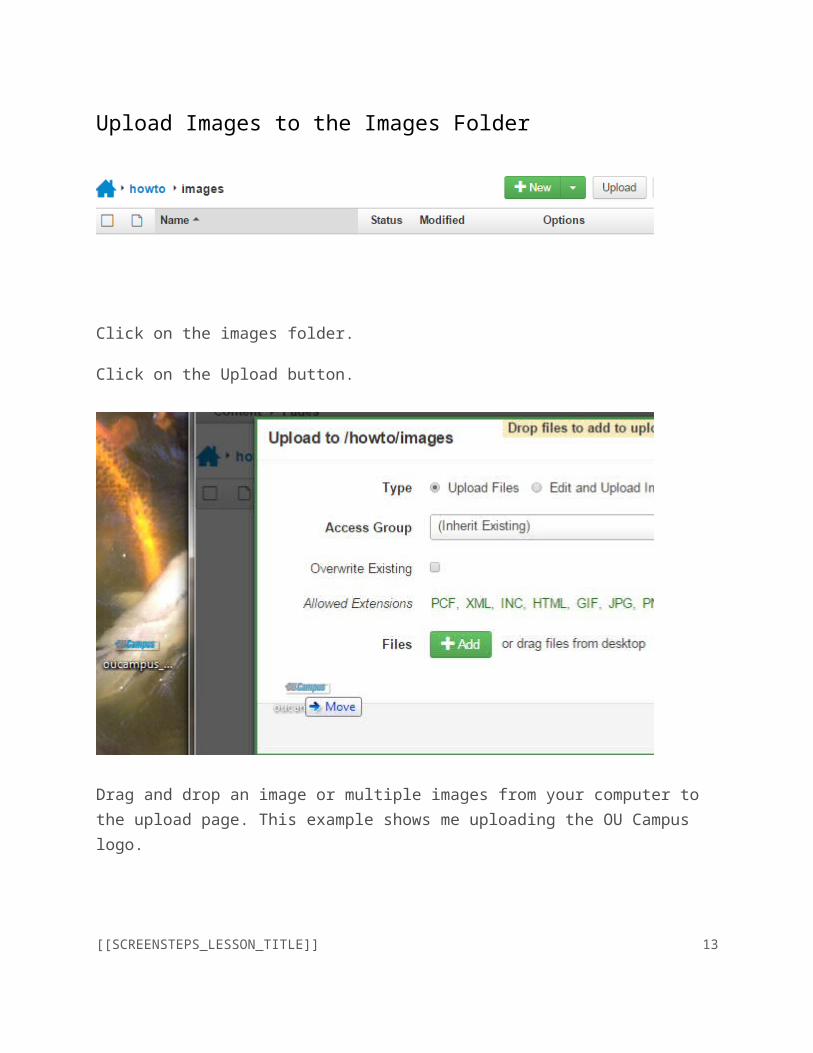
Upload Images to the Images Folder
Click on the images folder.
Click on the Upload button.
Drag and drop an image or multiple images from your computer to the upload page. This example shows me uploading the OU Campus logo.
OU Campus Step-by-Step 12
You will see the files listed.
Click on the Start Upload button.
You'll see the images listed in the folder.
OU Campus Step-by-Step 13

You can use the image tools built into OU Campus to resize the image to the exact size you are going to use. Please ask me for more information about how and why to resize images.
OU Campus Step-by-Step 14

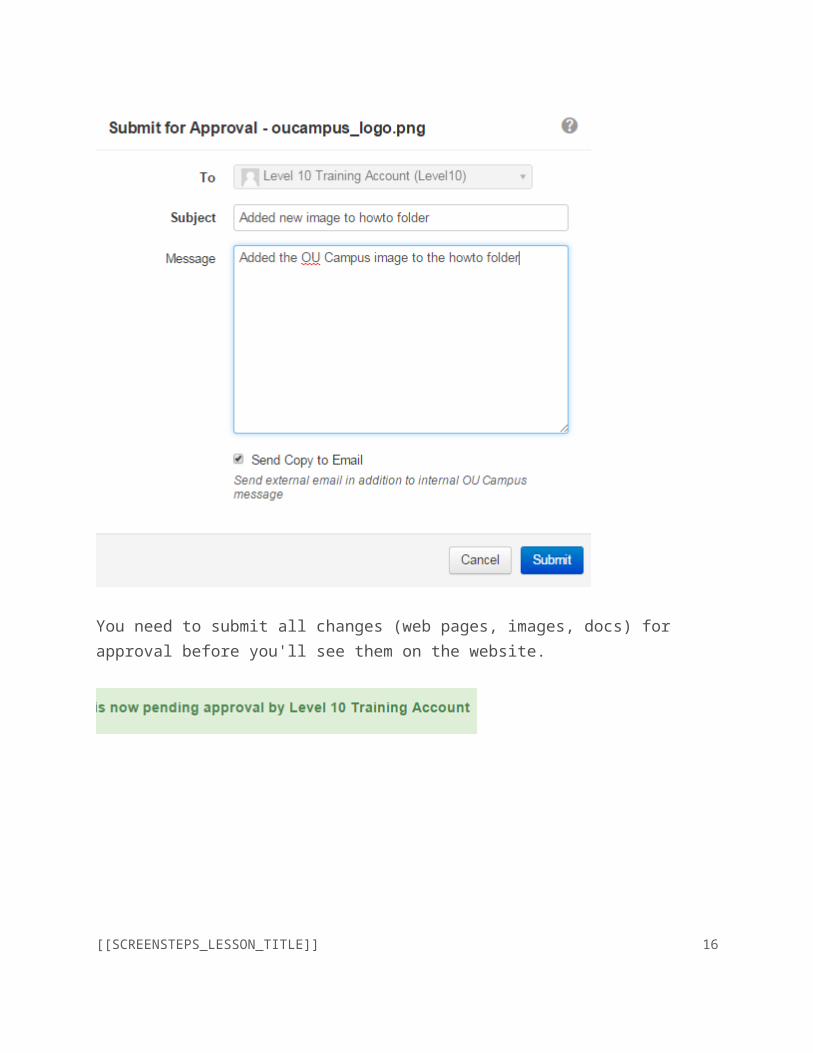
You need to submit all changes (web pages, images, docs) for approval before you'll see them on the website.
OU Campus Step-by-Step 15
You'll receive a message when an admin approves your changes and published the content.
OU Campus Step-by-Step 16

Add the Logo to the Top Content Section
Edit the Top Content section.
1. Click in the content at the beginning of the line where you want to insert the image.
2. Click on the Insert/Edit image button on the toolbar.
OU Campus Step-by-Step 17

Click on the browse button to select the image.
OU Campus Step-by-Step 18

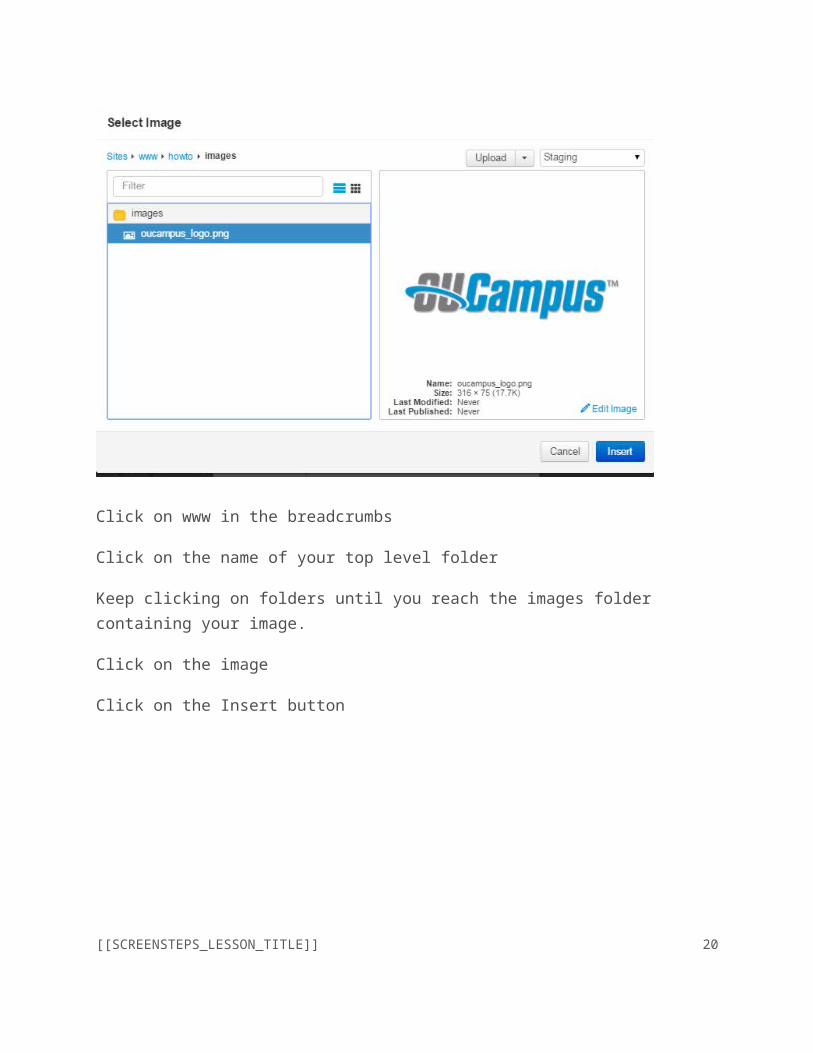
Click on www in the breadcrumbs
Click on the name of your top level folder
Keep clicking on folders until you reach the images folder containing your image.
Click on the image
Click on the Insert button
OU Campus Step-by-Step 19
The Source field will fill in a special code that represents that image file. This will refer to the file even if it is changed, moved, or renamed.
Fill in the Description and Tool tip fields for user accessibility
Do not change the Dimensions size. Consider resizing the image instead.
Change the Class to Responsive Image
Click on the OK button.
OU Campus Step-by-Step 20

The image will not show up in Preview mode until it is published.
Image Appearance Settings
OU Campus Step-by-Step 21

Click on Insert/Edit Image settings on the toolbar to change the image appearance settings.
OU Campus Step-by-Step 22

Click on the Appearance tab.
You can change the appearance alignment and spaces around the image.
A preview shows to the right.
Note: please do not get creative and make the image look different than other images on the site.
This shows subtle changes to the text wrapping when we align the image to the left and add some horizontal padding.
Edit the Right-Hand Side Navigation
OU Campus Step-by-Step 23

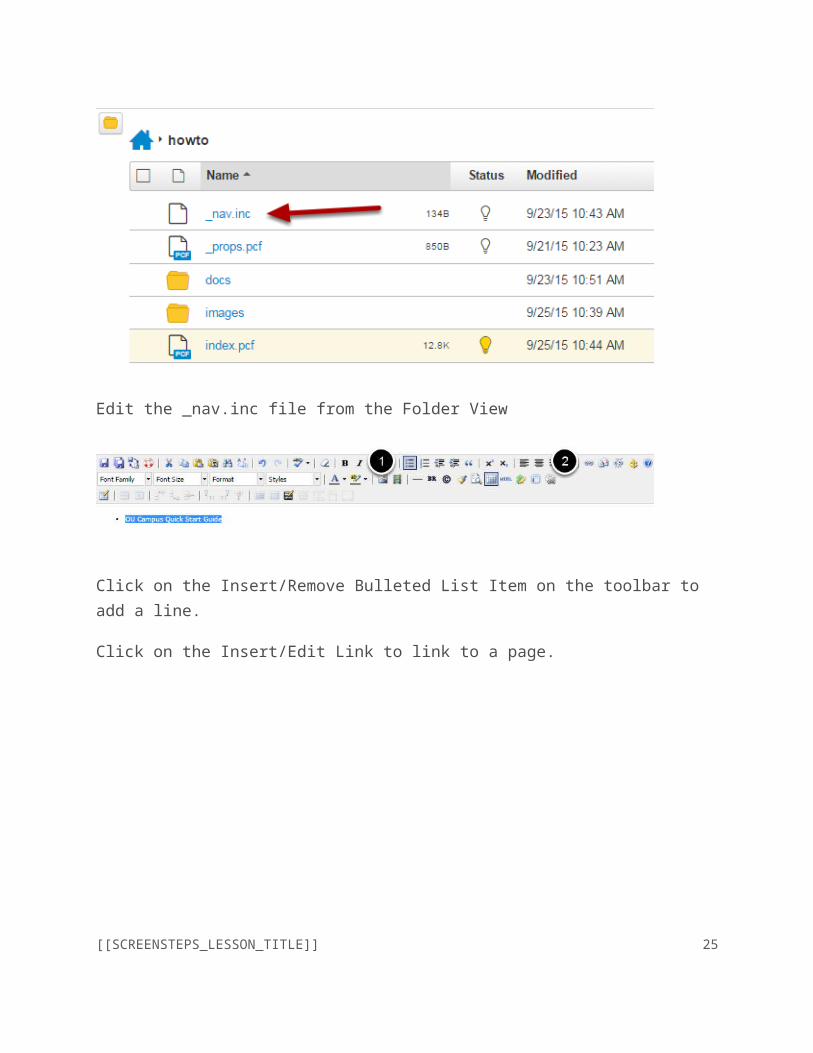
Edit the _nav.inc file from the Folder View
Click on the Insert/Remove Bulleted List Item on the toolbar to add a line.
Click on the Insert/Edit Link to link to a page.
OU Campus Step-by-Step 24
1. Use the breadcrumbs to navigate to the folder containing the destination page.
2. Click on the page.
3. A preview of the page appears.
4. Click on the Insert button to insert a link to the page.
OU Campus Step-by-Step 25

Fill out the Target and Title areas and clink on Insert.
Editing the Right Content to add Contact Info
OU Campus Step-by-Step 26

Click on the Right Content button.
Highlight all content of the section using CTRL-A. Hit the Delete key twice to clear all content.
Choose Insert Asset from the toolbar menu
OU Campus Step-by-Step 27

Search for the contact info asset for your folder.
Click on the Insert button
Note: For new folders, you might have to copy and change an existing one.
A placeholder appears for the Info asset.
OU Campus Step-by-Step 28

Save and you will see the contact info in preview
Adding an Accordion
OU Campus Step-by-Step 29

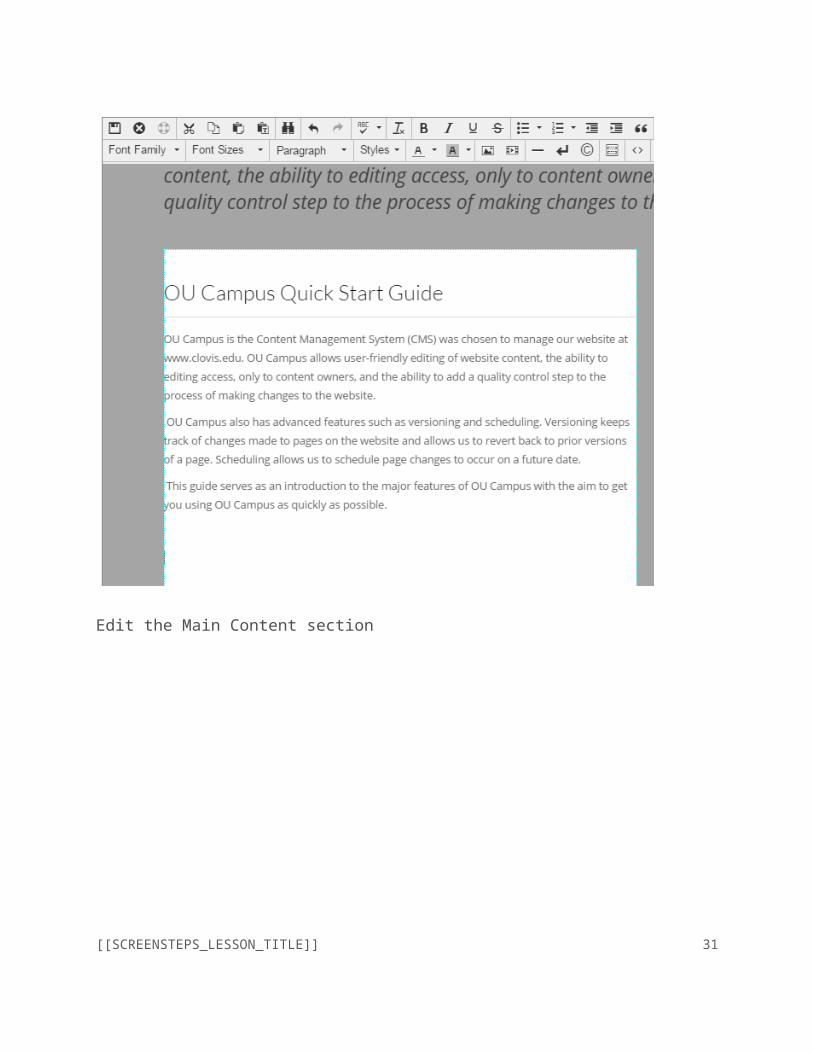
Edit the Main Content section
OU Campus Step-by-Step 30
Click on the Snippet icon on the toolbar
Click on the type of accordion you want to insert
Click on the Insert button
OU Campus Step-by-Step 31
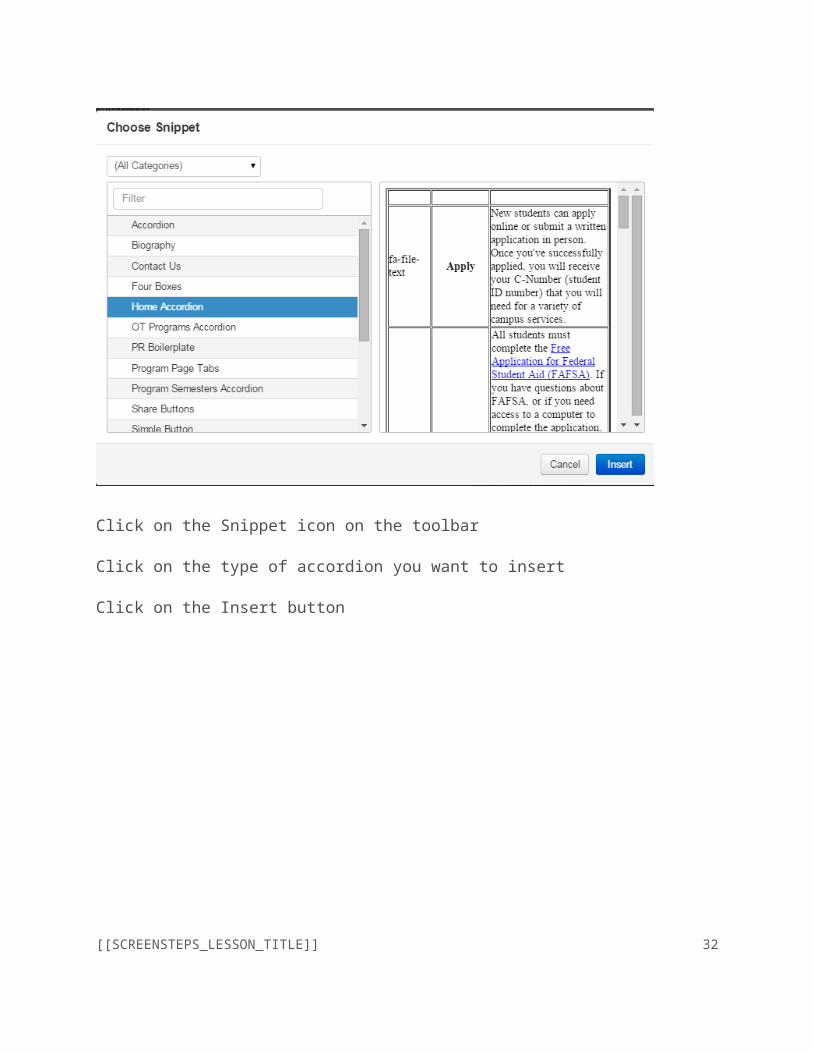
You'll see a table.
1. The first column contains the name of the icon used in the accordion
2. The second column contains the title that is still visible when the accordion is closed
3. The third content contains the content visible only when the accordion is open
OU Campus Step-by-Step 32

Accordion in preview mode.
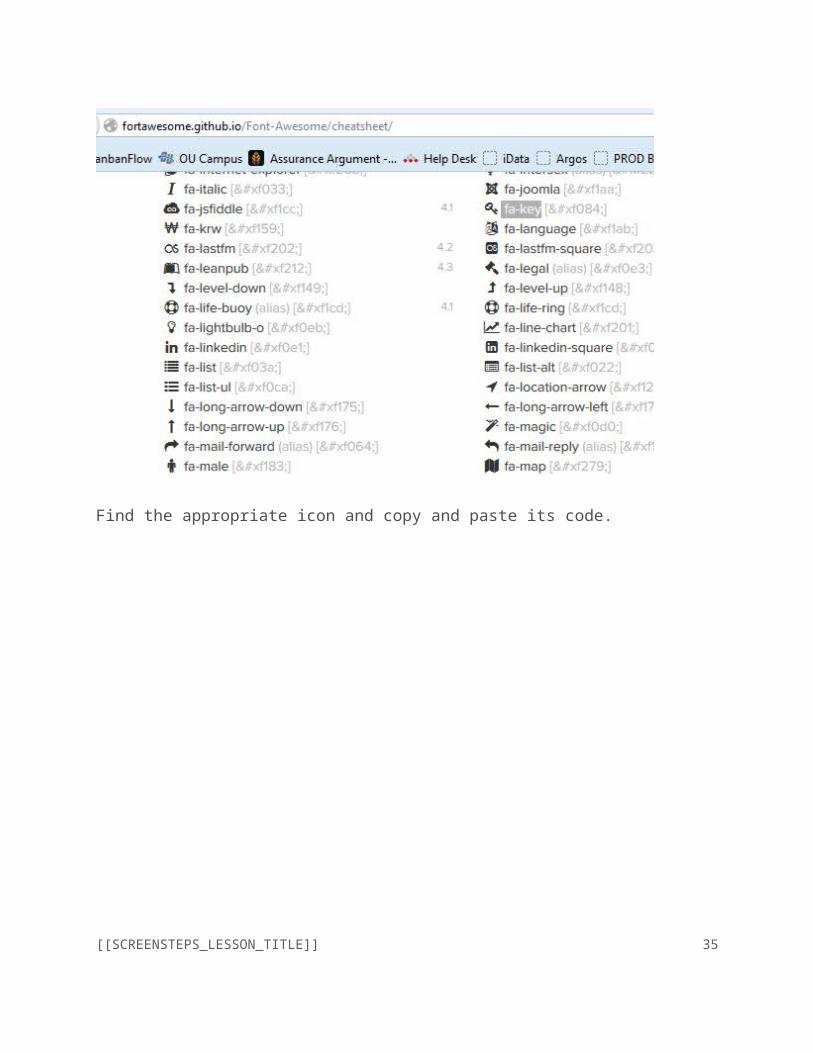
The codes for the icons are available on the Font Awesome Glyph Cheatsheet on the Add-Ons menu.
OU Campus Step-by-Step 33

Find the appropriate icon and copy and paste its code.
OU Campus Step-by-Step 34
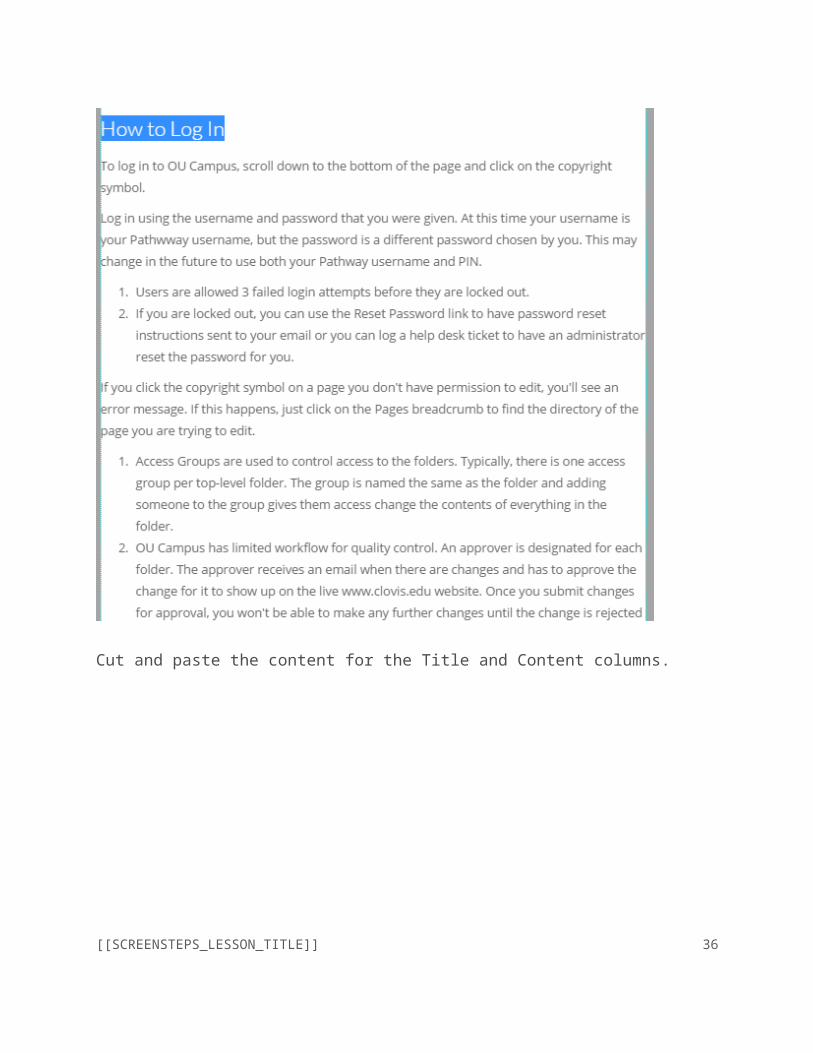
Cut and paste the content for the Title and Content columns.
OU Campus Step-by-Step 35
OU Campus Step-by-Step 36

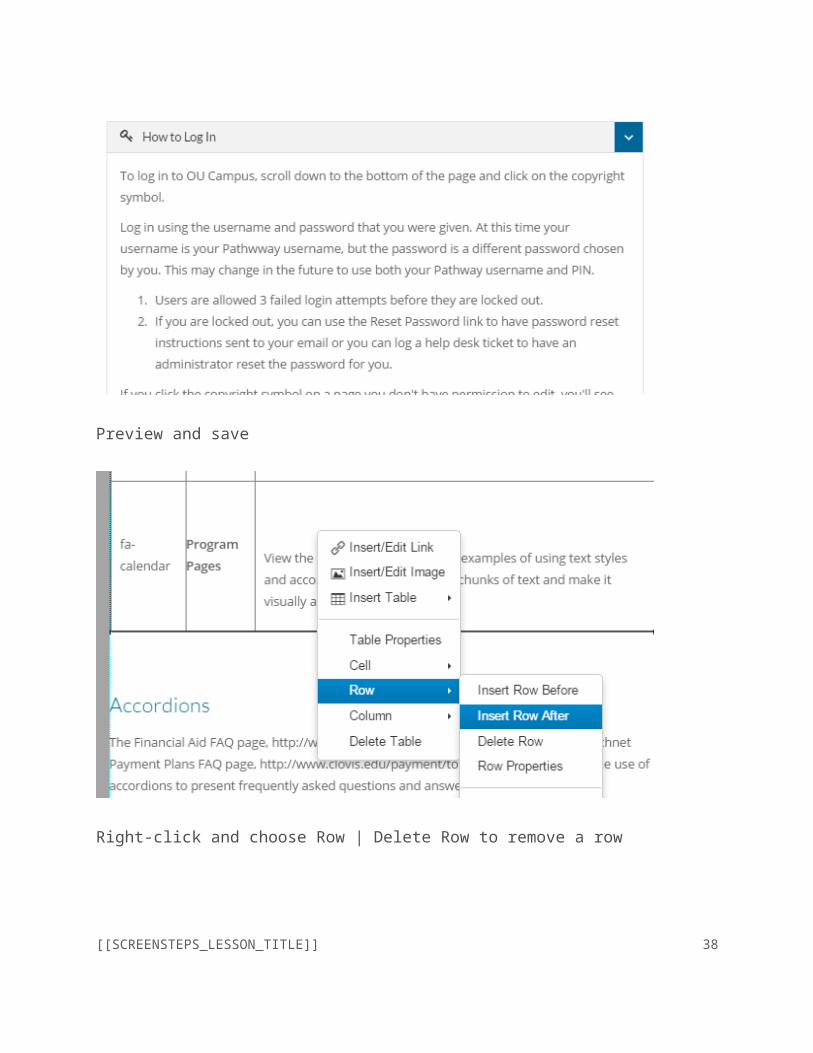
Preview and save
Right-click and choose Row | Delete Row to remove a row
Right-click and choose Row | Insert Row Before or After to add a row.
OU Campus Step-by-Step 37
Preview and save when done.
Adding images
OU Campus Step-by-Step 38

You can create new folders to organize images.
Click on the Upload button, select the images, drag and drop them on the window, and click on the Start Upload button.
OU Campus Step-by-Step 39

Insert the images as we did before with the logo.
OU Campus Step-by-Step 40

Make sure the images have the Responsive Image class and resize when the window width is decreased.
OU Campus Step-by-Step 41