Embed Size (px)
Citation preview

OPEN LIGHTSDIY INSTRUCTIONSFOR BUILDING ONEWHEELCHAIR LIGHTING
FOREWORD
How can the everyday life of wheelchair users be supported and enriched? MADE FOR MY WHEELCHAIR is a project in which we work as a team including wheelchair users, engineers and designers. Over the past year, we have been developing open source wheelchair add-ons through user research, ideation, design, prototyping and testing.
A big challenge in the everyday life of wheelchair users is lighting - it’s difficult to see and be seen in traffic in the dark. Although it is at least as important for wheelchair users as for cyclers, you hardly find wheelchair lights on the market. We developed OPEN LIGHTS for wheelchairs that can be built with most common DIY tech-nologies. The components can be ordered online and produced with 3D printers and laser cutters - from 15 Euro each piece. You can pick your favourite colours and shapes and even program the lighting modes yourself!
MADE FOR MY WHEELCHAIR is a project by Makea Industries GmbH, Fab Lab Berlin and be able e.V..This project is funded by the Federal Ministry of Education and Research, Photonics Research Program Germany, contract number 13N14244. It is the winner of the “Light Cares” contest. The competition “Light Cares - Photonics Technologies for People with Disabilities” was launched in January 2016 by the Federal Ministry of Research. The associated project partners are Otto Bock Mobility Solutions GmbH and Sozialhelden e.V.
DISCLAIMERMakea Industries GmbH, Fab Lab Berlin, be able e.V. and the team working on the project, its collaborators, and partners take no responsibility for any use of the information pub-lished in this document and will not be liable for any damages, losses or causes of action of any nature arising from any use of any of the process and information in this document.The DIY instructions, text and photos are licensed under Creative Commons CC-BY.https://creativecommons.org/licenses/by/3.0/
OVERVIEW
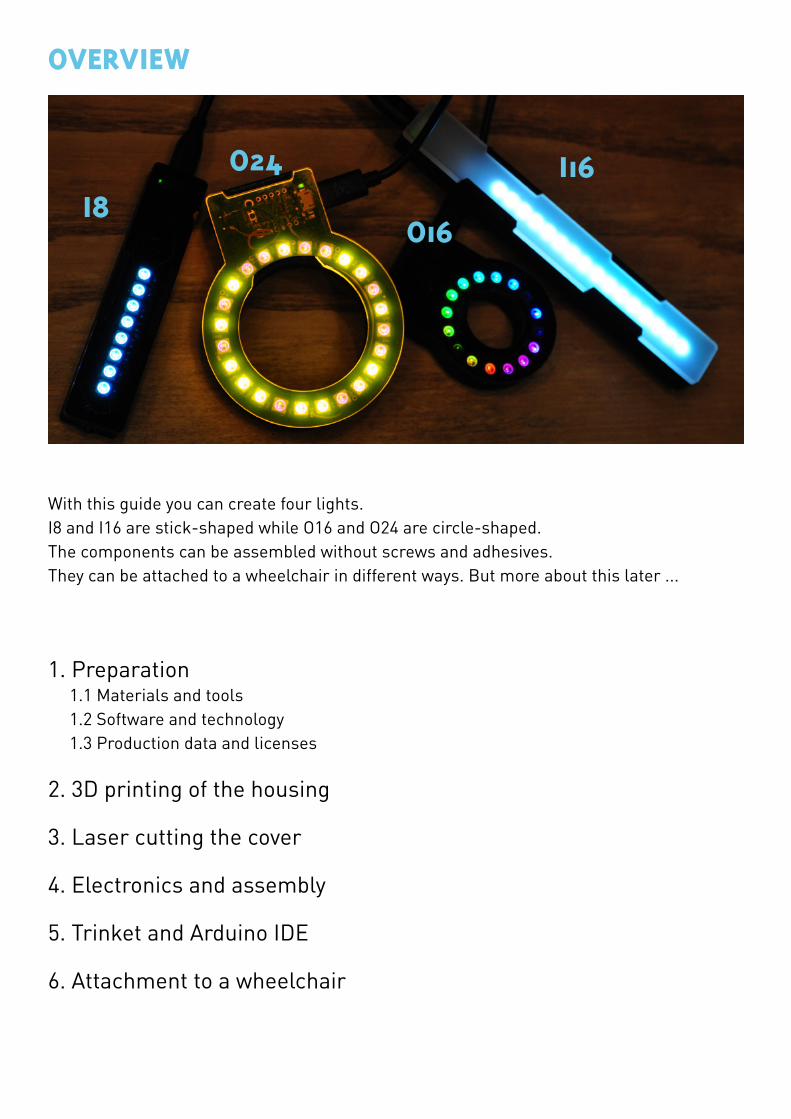
With this guide you can create four lights.I8 and I16 are stick-shaped while O16 and O24 are circle-shaped.The components can be assembled without screws and adhesives. They can be attached to a wheelchair in different ways. But more about this later ...
1. Preparation 1.1 Materials and tools 1.2 Software and technology 1.3 Production data and licenses 2. 3D printing of the housing
3. Laser cutting the cover
4. Electronics and assembly
5. Trinket and Arduino IDE
6. Attachment to a wheelchair
I8I16O24
O16
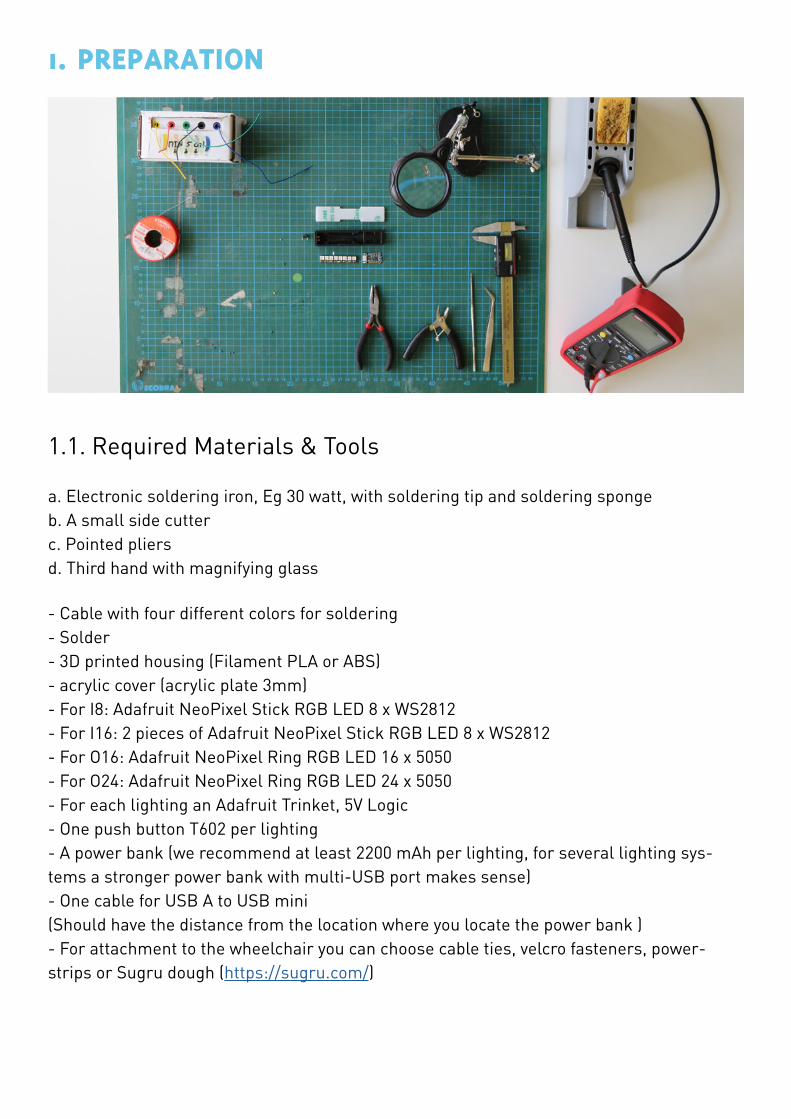
1.1. Required Materials & Tools
a. Electronic soldering iron, Eg 30 watt, with soldering tip and soldering spongeb. A small side cutterc. Pointed pliersd. Third hand with magnifying glass
- Cable with four different colors for soldering- Solder- 3D printed housing (Filament PLA or ABS)- acrylic cover (acrylic plate 3mm)- For I8: Adafruit NeoPixel Stick RGB LED 8 x WS2812- For I16: 2 pieces of Adafruit NeoPixel Stick RGB LED 8 x WS2812- For O16: Adafruit NeoPixel Ring RGB LED 16 x 5050- For O24: Adafruit NeoPixel Ring RGB LED 24 x 5050- For each lighting an Adafruit Trinket, 5V Logic- One push button T602 per lighting- A power bank (we recommend at least 2200 mAh per lighting, for several lighting sys-tems a stronger power bank with multi-USB port makes sense)- One cable for USB A to USB mini(Should have the distance from the location where you locate the power bank )- For attachment to the wheelchair you can choose cable ties, velcro fasteners, power-strips or Sugru dough (https://sugru.com/)
1. PREPARATION
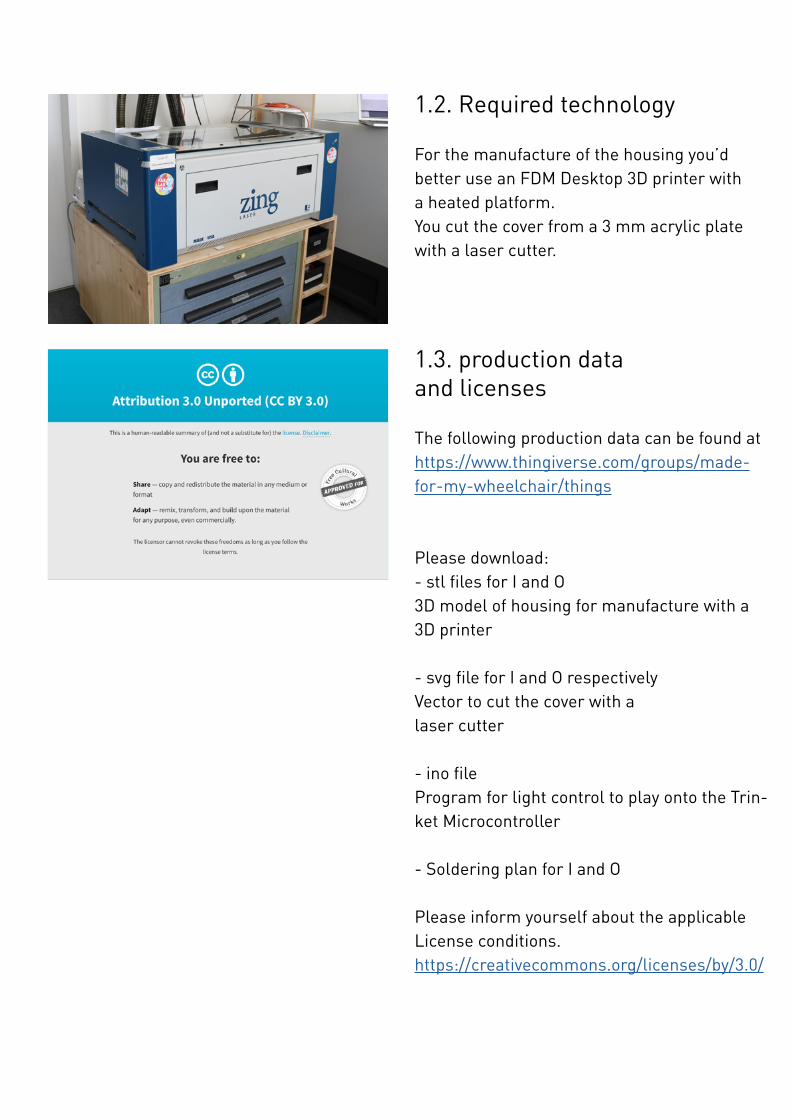
1.2. Required technology
For the manufacture of the housing you’d better use an FDM Desktop 3D printer with a heated platform.You cut the cover from a 3 mm acrylic plate with a laser cutter.
1.3. production dataand licenses
The following production data can be found athttps://www.thingiverse.com/groups/made-for-my-wheelchair/things
Please download:- stl files for I and O3D model of housing for manufacture with a 3D printer
- svg file for I and O respectivelyVector to cut the cover with alaser cutter
- ino fileProgram for light control to play onto the Trin-ket Microcontroller
- Soldering plan for I and O
Please inform yourself about the applicableLicense conditions.https://creativecommons.org/licenses/by/3.0/
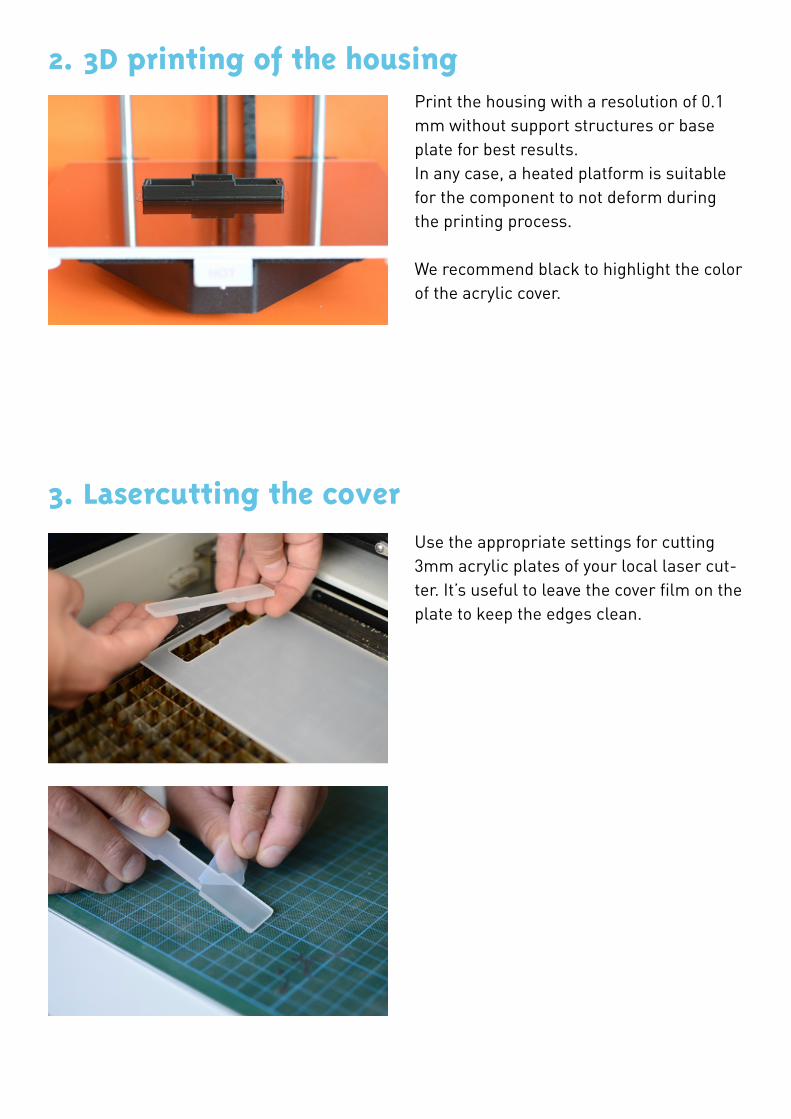
Print the housing with a resolution of 0.1 mm without support structures or base plate for best results.In any case, a heated platform is suitable for the component to not deform during the printing process.
We recommend black to highlight the color of the acrylic cover.
Use the appropriate settings for cutting 3mm acrylic plates of your local laser cut-ter. It’s useful to leave the cover film on the plate to keep the edges clean.
2. 3D printing of the housing
3. Lasercutting the cover
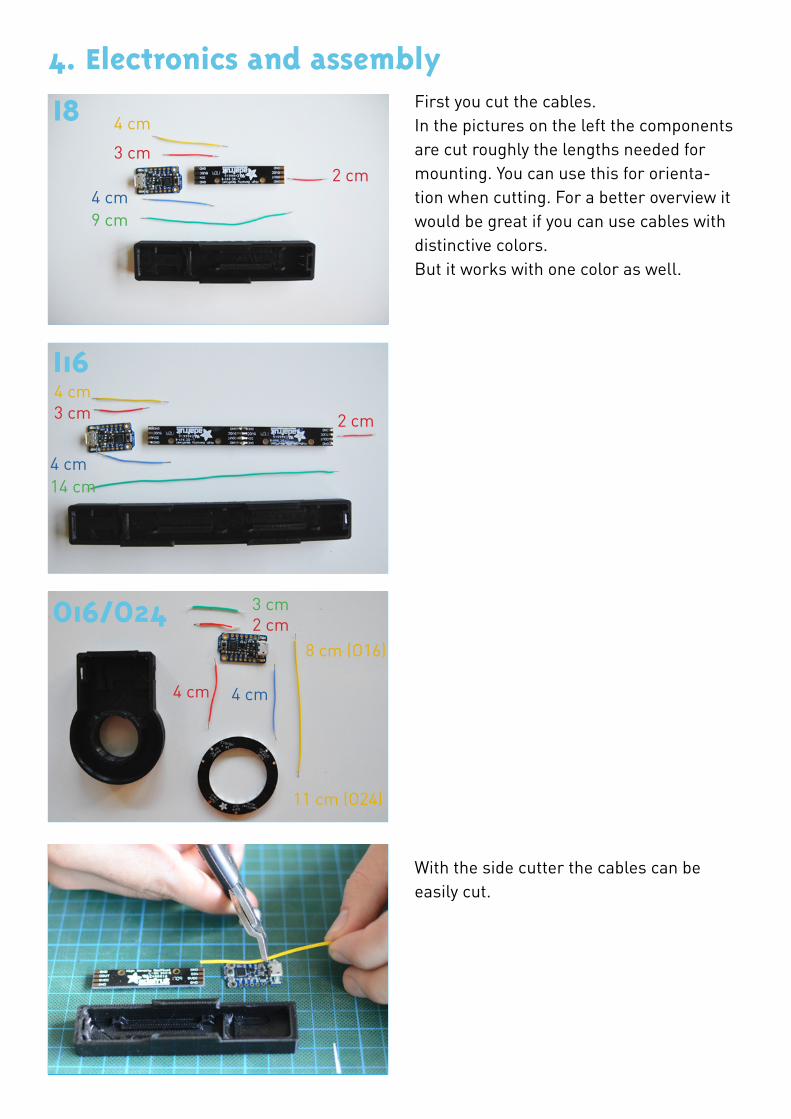
First you cut the cables.In the pictures on the left the components are cut roughly the lengths needed for mounting. You can use this for orienta-tion when cutting. For a better overview it would be great if you can use cables with distinctive colors.But it works with one color as well.
With the side cutter the cables can be easily cut.
4. Electronics and assembly
I8
I16
O16/O24
4 cm
4 cm
3 cm
3 cm
2 cm
2 cm
2 cm
9 cm
14 cm
4 cm
4 cm
4 cm 4 cm
8 cm (O16)
11 cm (O24)
3 cm
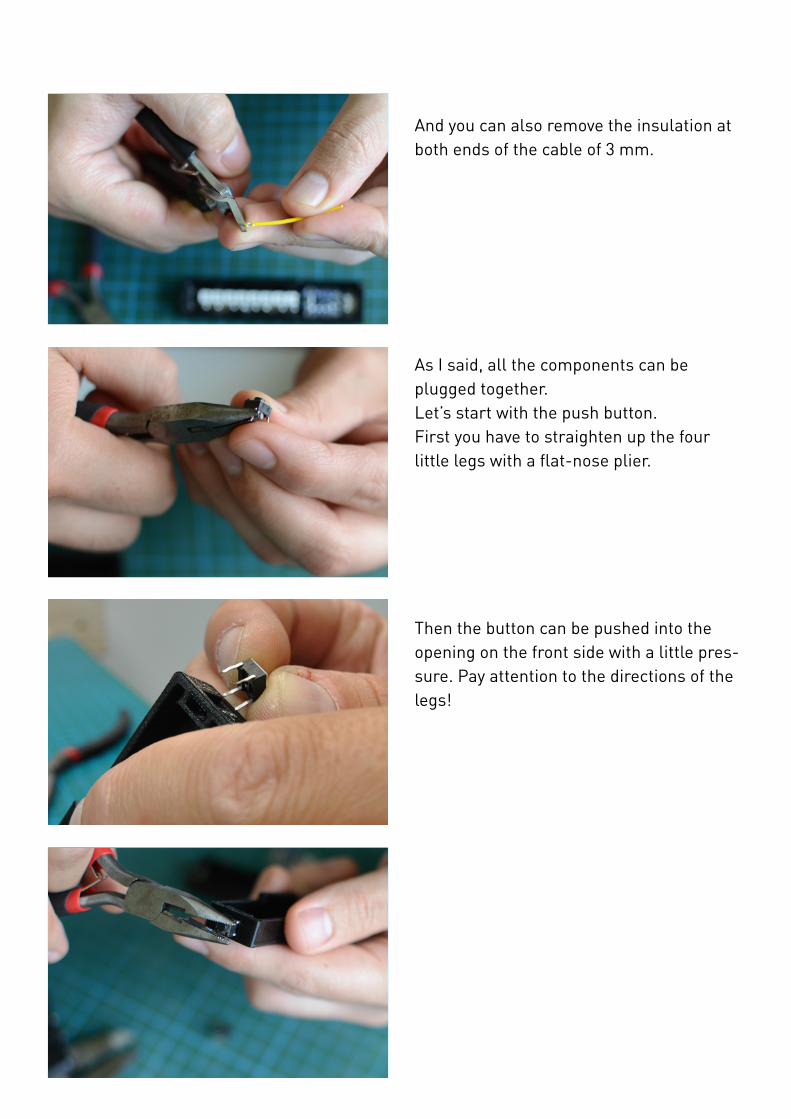
And you can also remove the insulation at both ends of the cable of 3 mm.
As I said, all the components can be plugged together.Let’s start with the push button.First you have to straighten up the four little legs with a flat-nose plier.
Then the button can be pushed into the opening on the front side with a little pres-sure. Pay attention to the directions of the legs!

You have to bend the four legs outwards. Fits!ATTENTION: only the two upper legs will be solered later!
Before we can insert the Neopixel Stick or the Neopixel Ring and the Trinket, the components must be soldered together.If soldering is a whole new territory for you, then take a look at this video and practice a bit.https://www.youtube.com/watch?v=UpVx-4wGukRc
For I16, you have to first solder together the two pieces of Neopixel Sticks.
When soldering, you have to stick exactly to the soldering plan on the following page. Note that this only indicates the soldering positions of the cables. Do not stick to the cable lengths and position of the compo-nents as sketched. Instead refer to the marked cable lengths and adapt the posi-tion of the components to your individual situation.
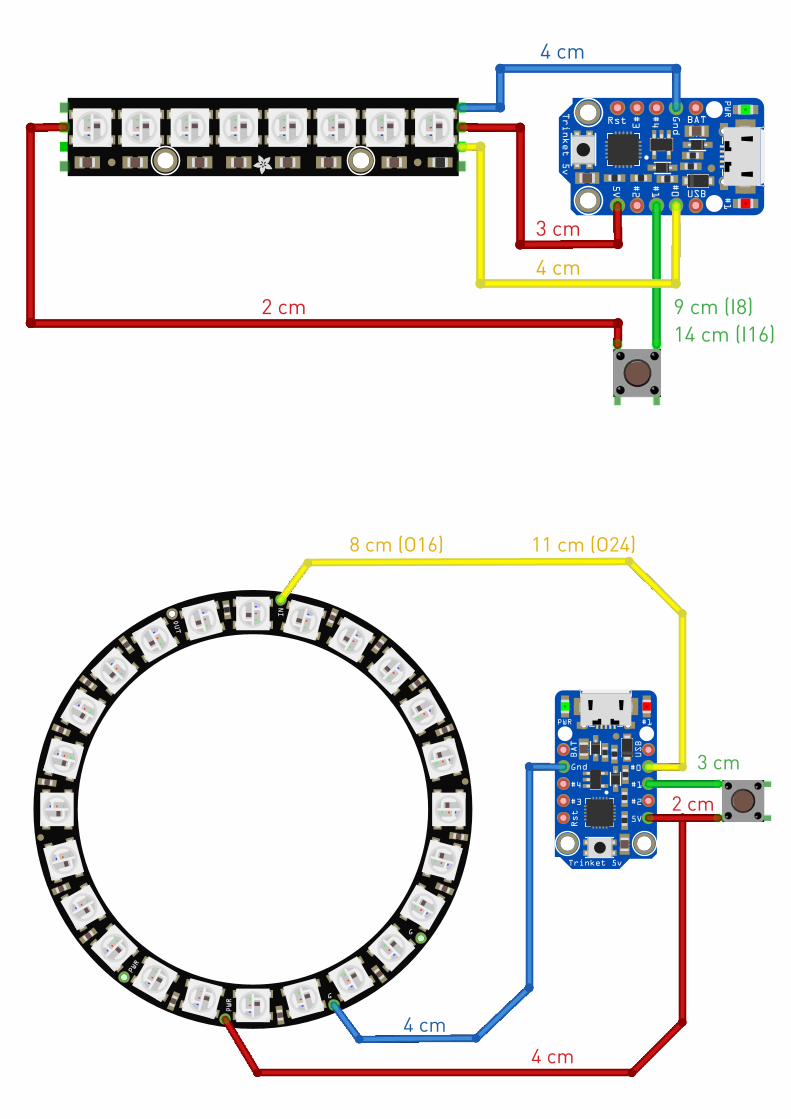
4 cm
3 cm
2 cm 9 cm (I8)14 cm (I16)
4 cm
4 cm4 cm
2 cm
3 cm
8 cm (O16) 11 cm (O24)
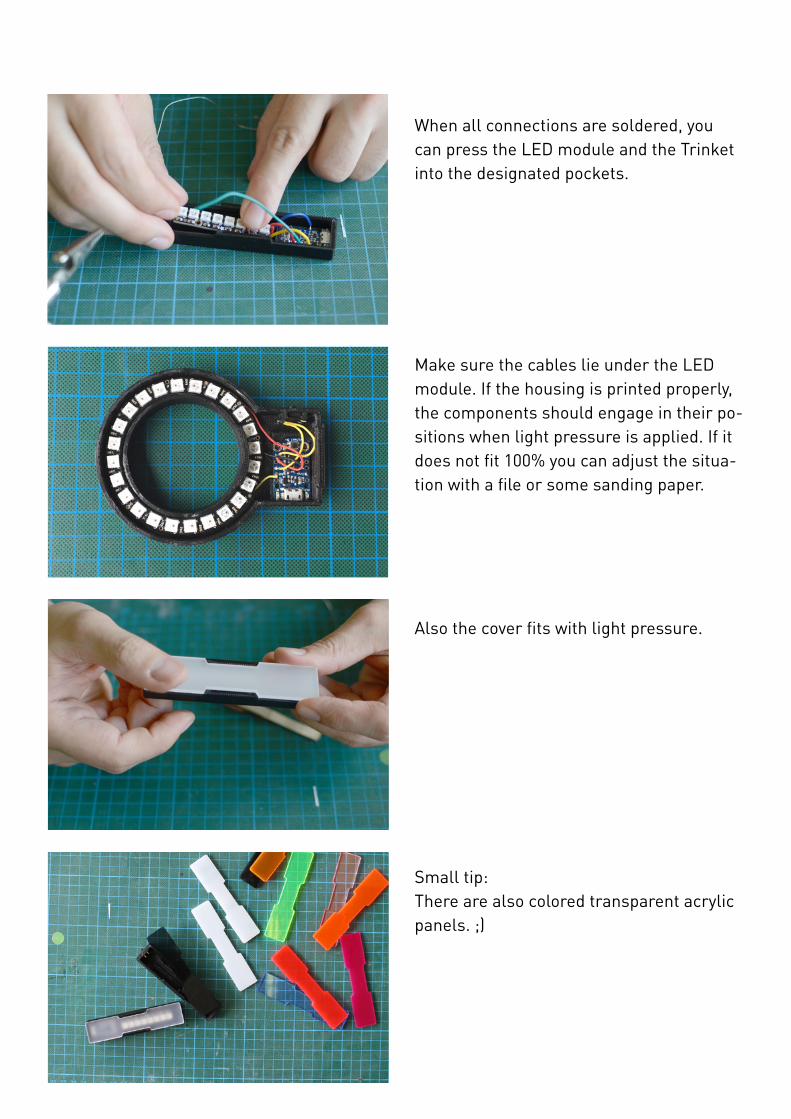
When all connections are soldered, you can press the LED module and the Trinket into the designated pockets.
Make sure the cables lie under the LED module. If the housing is printed properly, the components should engage in their po-sitions when light pressure is applied. If it does not fit 100% you can adjust the situa-tion with a file or some sanding paper.
Also the cover fits with light pressure.
Small tip:There are also colored transparent acrylic panels. ;)
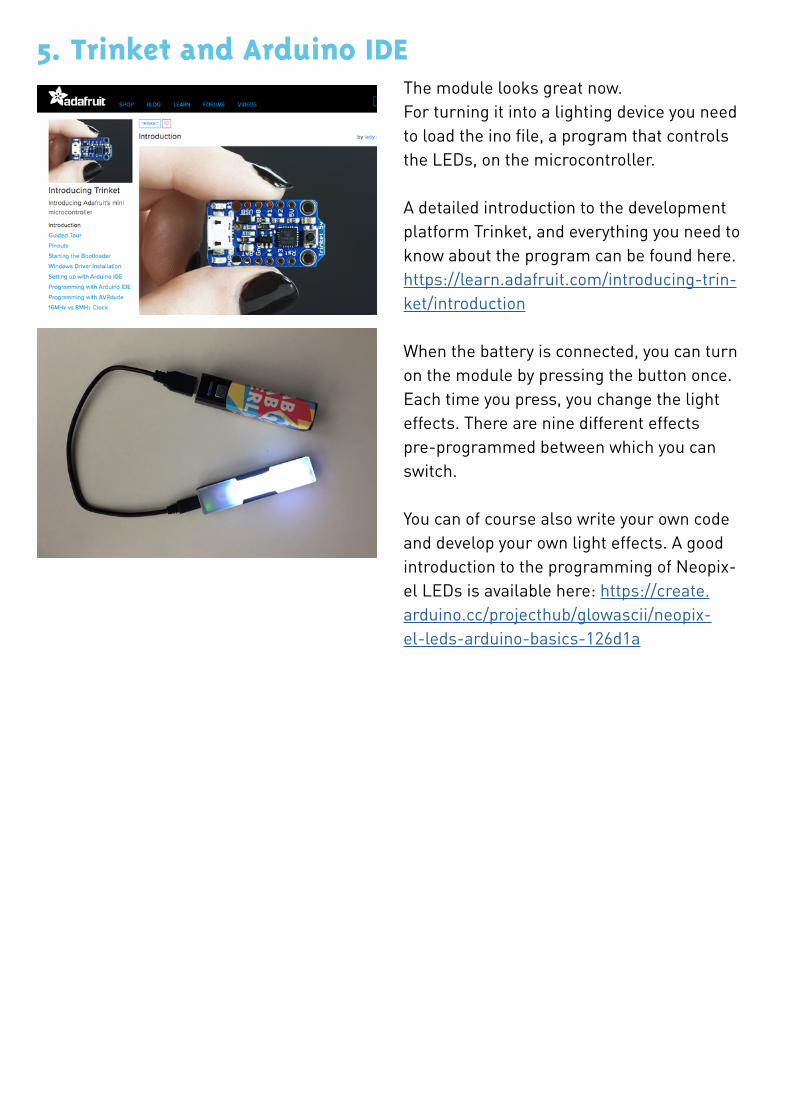
5. Trinket and Arduino IDEThe module looks great now.For turning it into a lighting device you need to load the ino file, a program that controls the LEDs, on the microcontroller.
A detailed introduction to the development platform Trinket, and everything you need to know about the program can be found here. https://learn.adafruit.com/introducing-trin-ket/introduction
When the battery is connected, you can turn on the module by pressing the button once.Each time you press, you change the light effects. There are nine different effects pre-programmed between which you can switch.
You can of course also write your own code and develop your own light effects. A good introduction to the programming of Neopix-el LEDs is available here: https://create.arduino.cc/projecthub/glowascii/neopix-el-leds-arduino-basics-126d1a
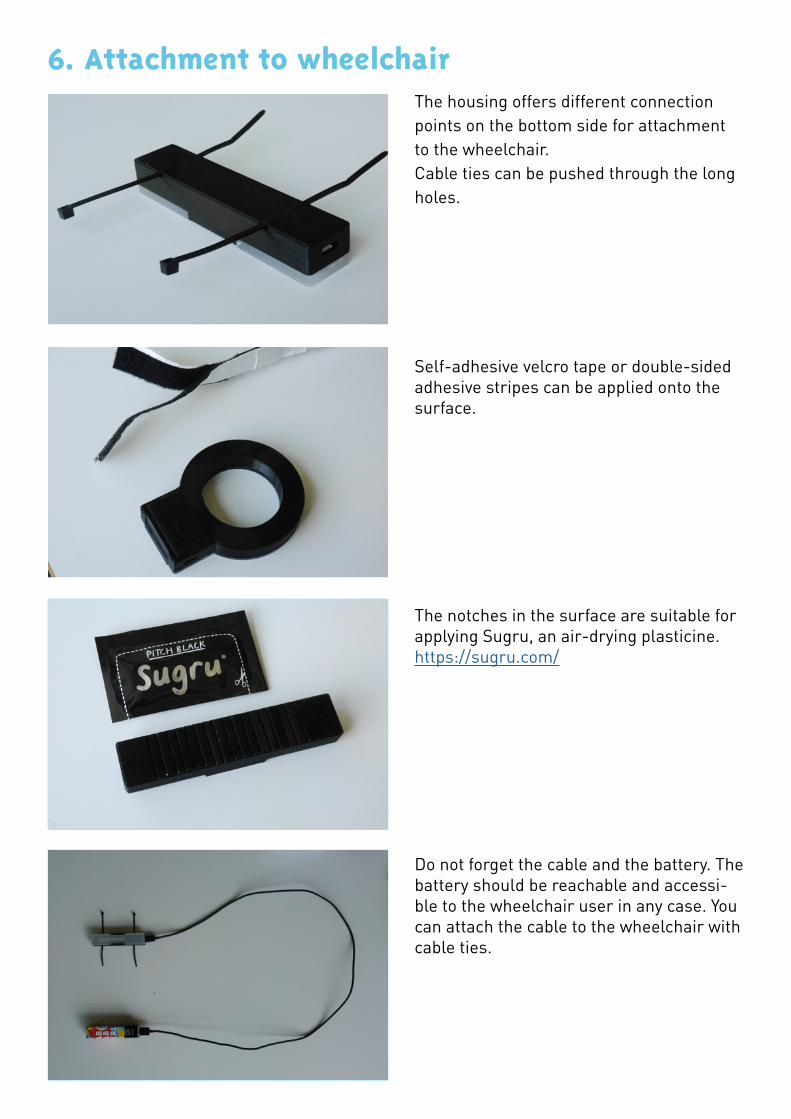
6. Attachment to wheelchairThe housing offers different connection points on the bottom side for attachment to the wheelchair.Cable ties can be pushed through the long holes.
Self-adhesive velcro tape or double-sided adhesive stripes can be applied onto the surface.
The notches in the surface are suitable for applying Sugru, an air-drying plasticine.https://sugru.com/
Do not forget the cable and the battery. The battery should be reachable and accessi-ble to the wheelchair user in any case. You can attach the cable to the wheelchair with cable ties.
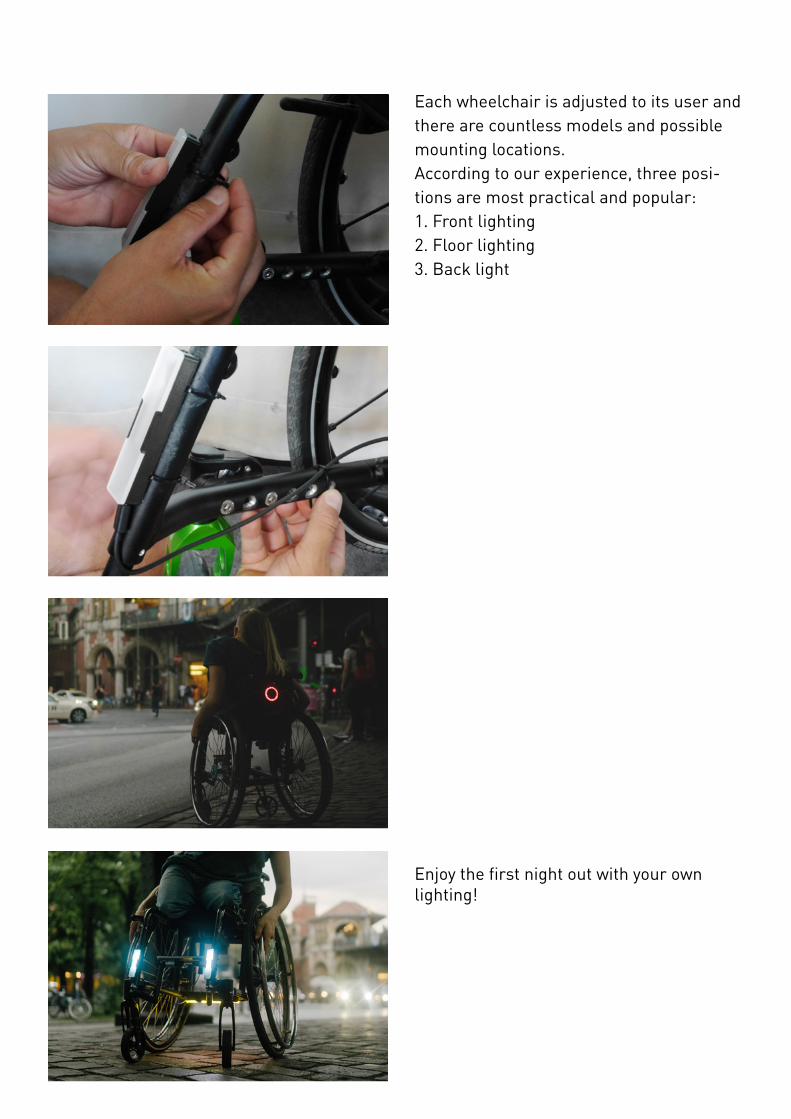
Each wheelchair is adjusted to its user and there are countless models and possible mounting locations.According to our experience, three posi-tions are most practical and popular:1. Front lighting2. Floor lighting3. Back light
Enjoy the first night out with your own lighting!