Embed Size (px)
Citation preview
- Please attach the antenna to the IB-MP401Air.
- Connect the mirco USB cable to the power adapter and plug it in the electricity outlet.
- Link your HiFi Stereo System and the IB-MP401Air using an AUX or optical cable.
- Ready for the next steps!
One-time integration into your own network environment!
IB-MP401Air - Audio Streaming Receiver
Connecting the IB-MP401Air
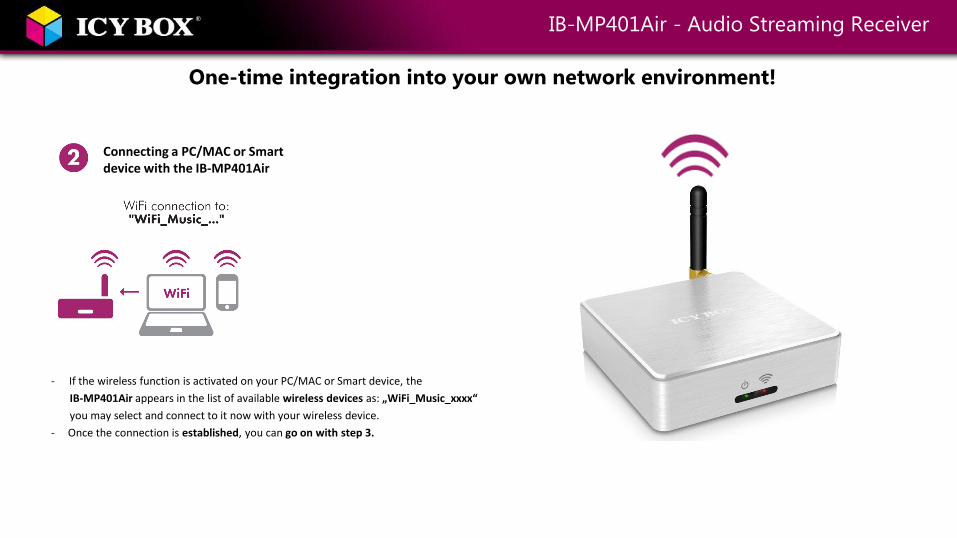
- If the wireless function is activated on your PC/MAC or Smart device, the
IB-MP401Air appears in the list of available wireless devices as: „WiFi_Music_xxxx“
you may select and connect to it now with your wireless device.
- Once the connection is established, you can go on with step 3.
One-time integration into your own network environment!
IB-MP401Air - Audio Streaming Receiver
Connecting a PC/MAC or Smart device with the IB-MP401Air
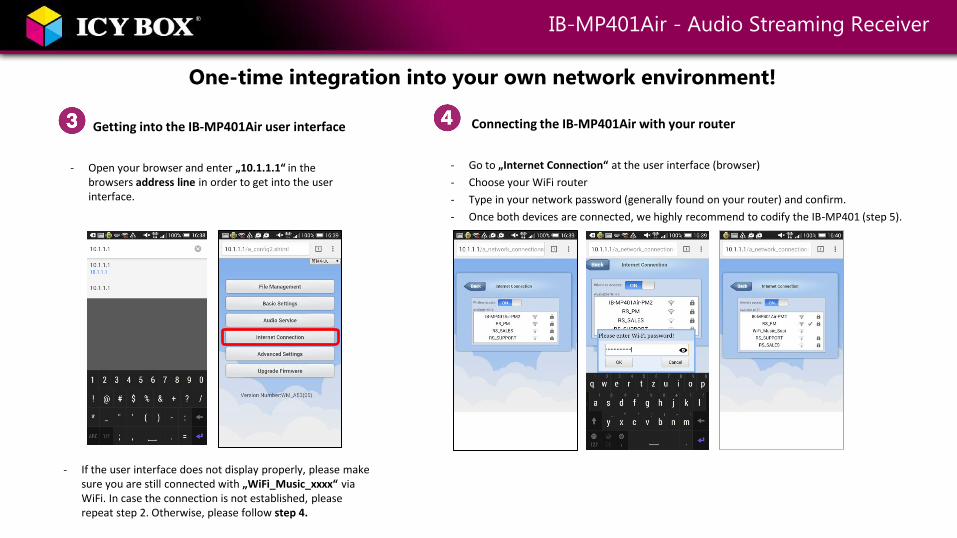
- Open your browser and enter „10.1.1.1“ in the browsers address line in order to get into the user interface.
One-time integration into your own network environment!
IB-MP401Air - Audio Streaming Receiver
Getting into the IB-MP401Air user interface
- If the user interface does not display properly, please make sure you are still connected with „WiFi_Music_xxxx“ via WiFi. In case the connection is not established, please repeat step 2. Otherwise, please follow step 4.
Connecting the IB-MP401Air with your router
- Go to „Internet Connection“ at the user interface (browser)
- Choose your WiFi router
- Type in your network password (generally found on your router) and confirm.
- Once both devices are connected, we highly recommend to codify the IB-MP401 (step 5).

- Choose „Basic Settings“ at the user interface
- Type in a name of your choice, for example: „My IB-MP401“
- Choose a wireless access protection standard (i.e. WPA/WPA2) and type in a password of your choice.
- Confirm the password.
- Click on „Done“ to complete the setup.
- Reconnect with the new name and password for checking the setup.
- Connect your smart phone, tablet or computer to your home network.
- Ready to play music!
One-time integration into your own network environment!
IB-MP401Air - Audio Streaming Receiver
Codify the IB-MP401Air 5

- Requirement:
- IB-MP401Air and mobile device/Computer has to be in the same network!
Mobil devices with Apple® iOS and Computer with Apple® MAC OS®
- 1. No App’s required.
- 2. Use the AirPlay® function of your Apple product for set up the IB-MP401Air as the play back device.
- 3. Start i.e. iTunes® and play your favorite music.
Remark for Apple Smart devices
> iOS7
- Please refer to the previous connection steps, connect IB-MP401Air correctly, sliding your finger up from the bottom of the display. Type AirPlay and choose “IB-MP401Air” (default „WiFi Music_xxxx ”) as audio output device, all supported music of the iOS device can be outputted from IB-MP401Air.
< iOS6
- Please refer to the previous connection steps, connect IB-MP401Air correctly, press “Home” button twice quickly to activate the taskbar, slip to the left, you can see “AirPlay”, type and choose “IB-MP401Air” (default „WiFi Music_xxxx”) as audio output device, all supported music of the iOS device can be outputted from IB-MP401Air.
Music Playback!
IB-MP401Air - Audio Streaming Receiver
Apple® Devices

- Requirement:
- IB-MP401Air and mobile device/Computer have to be in the same network!
Mobil devices with Android
- Use free music APP’s with UPnP support from Google Play store.
Examples as follows: - Air Buddy, All Cast, BubbleUPnP, ShareOn, UPnPlay, iMediaShare, N7 Player, Air Music, Air Smart Player etc.
Using “ShareOn“ works as follows:
- Open the APP - Choose IB-MP401Air as playback device
- Choose music source
Music Playback!
IB-MP401Air - Audio Streaming Receiver
Android® Devices
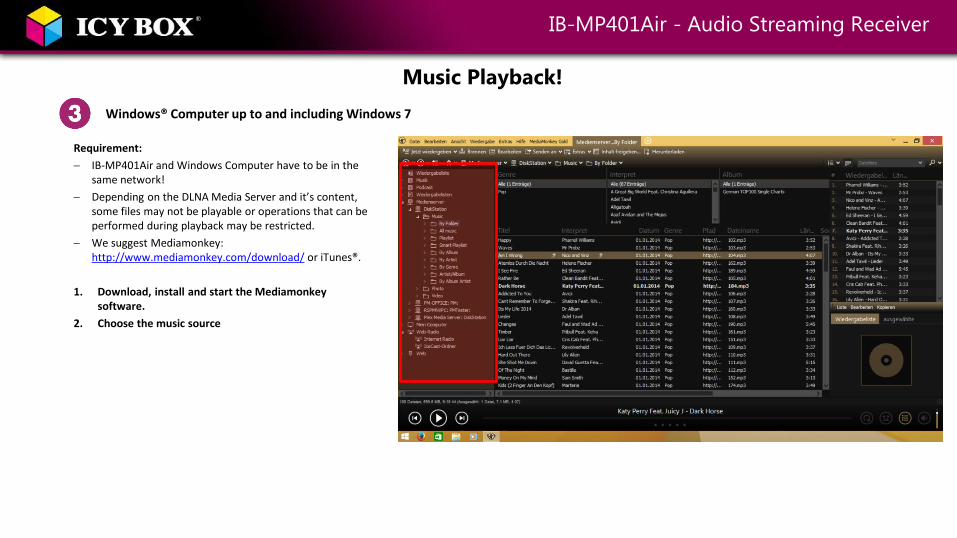
Requirement:
IB-MP401Air and Windows Computer have to be in the same network!
Depending on the DLNA Media Server and it’s content, some files may not be playable or operations that can be performed during playback may be restricted.
We suggest Mediamonkey: http://www.mediamonkey.com/download/ or iTunes®.
1. Download, install and start the Mediamonkey software.
2. Choose the music source
Music Playback!
IB-MP401Air - Audio Streaming Receiver
Windows® Computer up to and including Windows 7
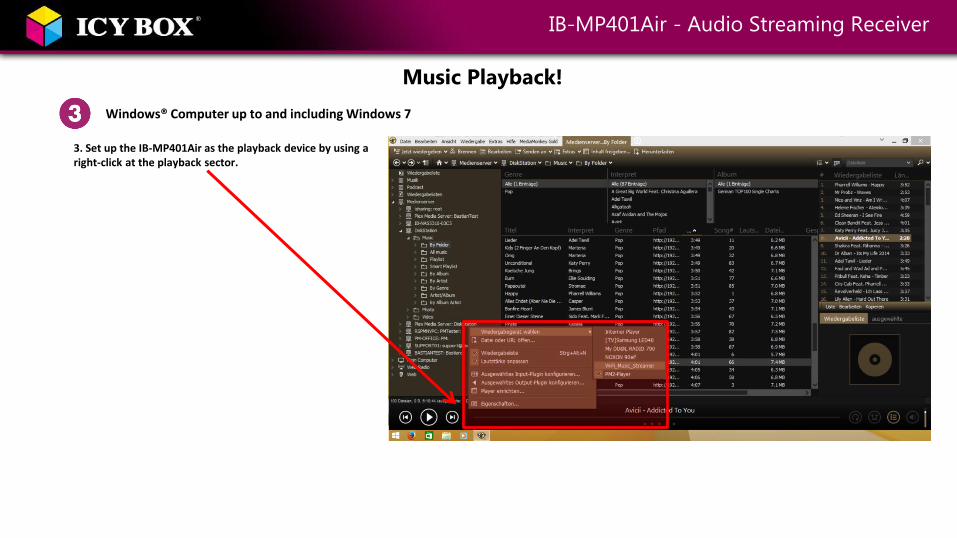
3. Set up the IB-MP401Air as the playback device by using a right-click at the playback sector.
Music Playback!
IB-MP401Air - Audio Streaming Receiver
Windows® Computer up to and including Windows 7
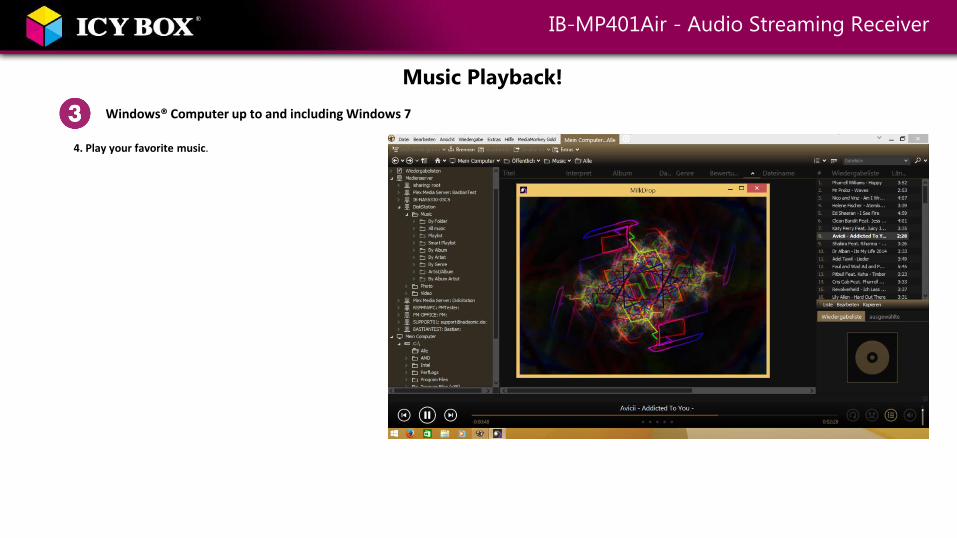
4. Play your favorite music.
Music Playback!
IB-MP401Air - Audio Streaming Receiver
Windows® Computer up to and including Windows 7

Requirement:
- IB-MP401Air and Windows Computer have to be in the same network!
- Depending on the DLNA Media Server and it’s content, some files may not be playable or operations that can be performed during playback may be restricted.
We suggest XBOX Music APP, Mediamonkey: http://www.mediamonkey.com/download/ or iTunes.
Using XBOX Music APP
1. Open the integrated XBOX Music APP.
Music Playback!
IB-MP401Air - Audio Streaming Receiver
Windows® Computer from Windows 8 or later 2. Choose the music source
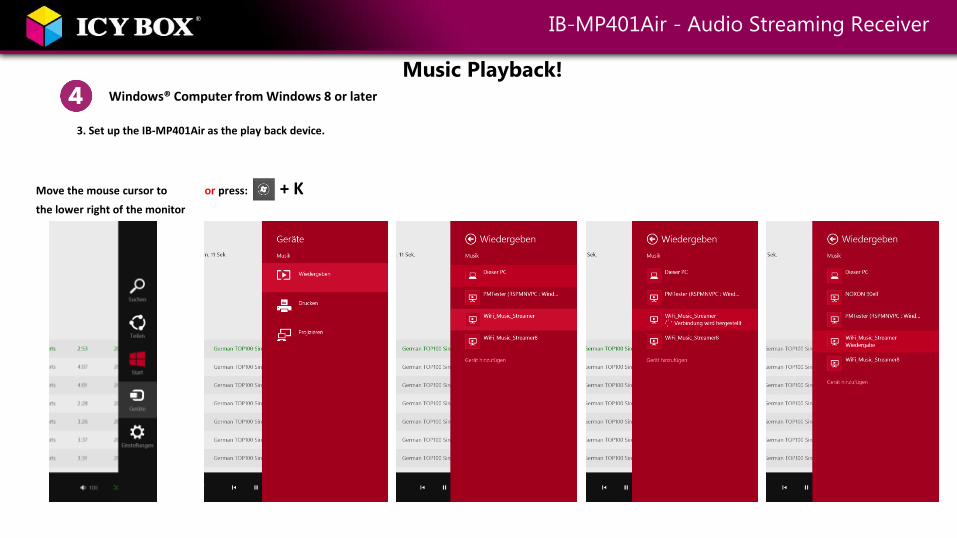
3. Set up the IB-MP401Air as the play back device.
Music Playback!
IB-MP401Air - Audio Streaming Receiver
Windows® Computer from Windows 8 or later
Move the mouse cursor to or press: + K the lower right of the monitor
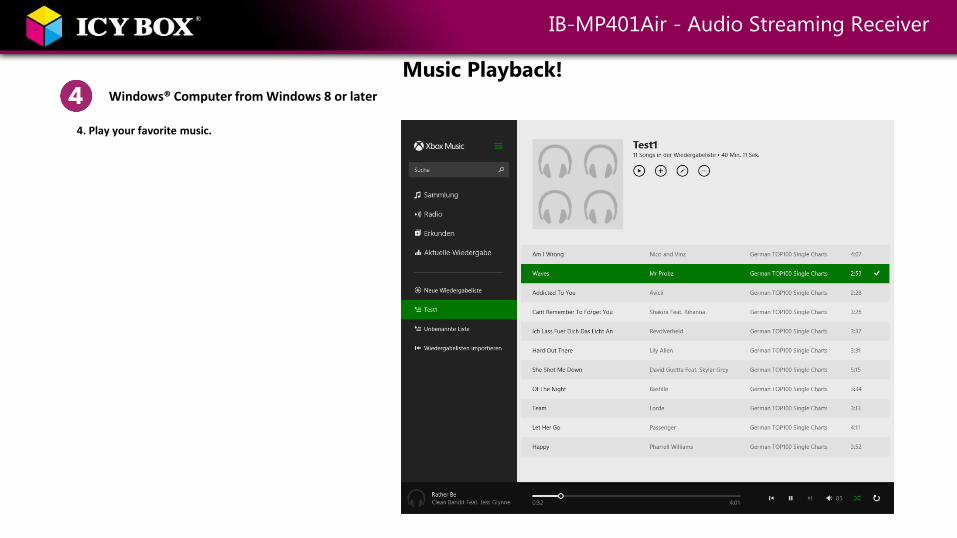
4. Play your favorite music.
Music Playback!
IB-MP401Air - Audio Streaming Receiver
Windows® Computer from Windows 8 or later