Embed Size (px)
Citation preview

OOLLSS..SSwwiittcchh OOnn--BBooaarrddiinngg vv11..11 AAnnddyy OOrrrroocckk AAuugguusstt 3300,, 22000077
OLS.Switch On-Boarding v1.1
Table of Contents
1 Preparation .......................................................................................................................................... 3 1.1 Specifications ..............................................................................................................................................3
1.1.1 Obtain and review all ‘official’ specifications from the provider ........................................................................3 1.1.2 Schedule specification ‘walkthrough’..................................................................................................................3
1.2 Telecommunications ..................................................................................................................................3 1.2.1 Initiate discussion on telecommunications infrastructure ....................................................................................3 1.2.2 Initiate discussion on PGP Encryption of files.....................................................................................................3 1.2.3 Determine the connection model .........................................................................................................................4 1.2.4 Determine the channel manager you will use ......................................................................................................4
2 Configuring Online Aspects................................................................................................................ 5 2.1 Files .............................................................................................................................................................5
2.1.1 Add new sub-directory structure..........................................................................................................................5 2.1.2 Configure ISO Packager ......................................................................................................................................5 2.1.3 Define External-to-Internal Result Code mapping...............................................................................................6 2.1.4 Define Channel ....................................................................................................................................................7 2.1.5 Define MUX ........................................................................................................................................................9 2.1.6 Define Unhandled Queue.....................................................................................................................................9 2.1.7 Define System Monitor entries for channels........................................................................................................9 2.1.8 Define Store and Forward (if required)..............................................................................................................10 2.1.9 Define Fixed-Value Template............................................................................................................................11 2.1.10 Define Logon Manager (if required)..................................................................................................................11 2.1.11 Add BIN Range and Card Type values (if required)..........................................................................................11 2.1.12 Add new participants to TransactionManager ...................................................................................................13 2.1.13 Add any new ‘inc’ files referenced in TransactionManager ..............................................................................15
2.2 Programs...................................................................................................................................................15 2.2.1 Write custom channel manager (if required)......................................................................................................15 2.2.2 Write custom logon manager (if required).........................................................................................................16 2.2.3 Write “Query Host” program.............................................................................................................................17 2.2.4 Write endpoint-dependent “ISO Request” extension.........................................................................................17
3 Configuring Batch Aspects ............................................................................................................... 19 3.1 Files ...........................................................................................................................................................19
3.1.1 Define applicable records using the FSDMsg facility........................................................................................19 3.2 Programs...................................................................................................................................................21
3.2.1 Add program ‘handler’ for any extract and internal reports required ................................................................21 3.2.2 Write the new batch programs ...........................................................................................................................22
4 Testing It ............................................................................................................................................ 25 4.1 Build and Start It .....................................................................................................................................25
4.1.1 Define variable values in a properties file..........................................................................................................25 4.1.2 Compile and build a release ...............................................................................................................................25 4.1.3 Install the new release in test and start the service.............................................................................................26
4.2 Run It ........................................................................................................................................................26 4.2.1 Run an online transaction...................................................................................................................................26 4.2.2 Run an extract ....................................................................................................................................................26
August 30, 2007 Page 2
OLS.Switch On-Boarding v1.1
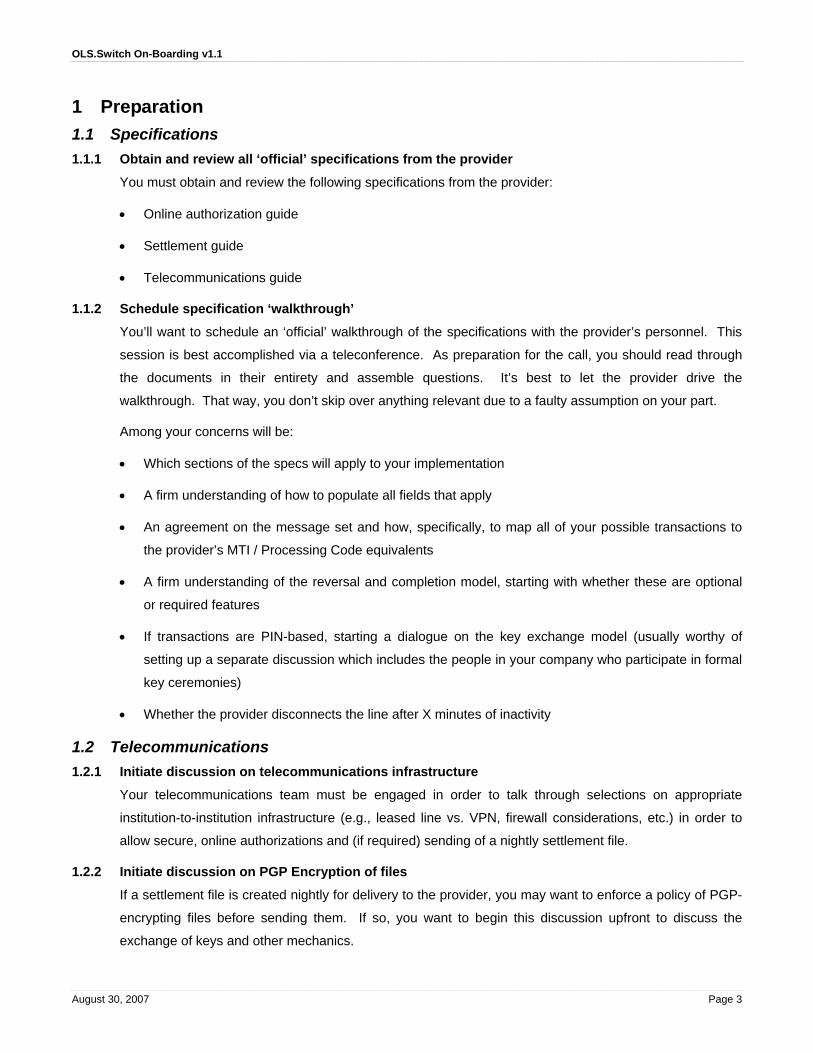
1 Preparation 1.1 Specifications 1.1.1 Obtain and review all ‘official’ specifications from the provider
You must obtain and review the following specifications from the provider:
• Online authorization guide
• Settlement guide
• Telecommunications guide
1.1.2 Schedule specification ‘walkthrough’
You’ll want to schedule an ‘official’ walkthrough of the specifications with the provider’s personnel. This
session is best accomplished via a teleconference. As preparation for the call, you should read through
the documents in their entirety and assemble questions. It’s best to let the provider drive the
walkthrough. That way, you don’t skip over anything relevant due to a faulty assumption on your part.
Among your concerns will be:
• Which sections of the specs will apply to your implementation
• A firm understanding of how to populate all fields that apply
• An agreement on the message set and how, specifically, to map all of your possible transactions to
the provider’s MTI / Processing Code equivalents
• A firm understanding of the reversal and completion model, starting with whether these are optional
or required features
• If transactions are PIN-based, starting a dialogue on the key exchange model (usually worthy of
setting up a separate discussion which includes the people in your company who participate in formal
key ceremonies)
• Whether the provider disconnects the line after X minutes of inactivity
1.2 Telecommunications 1.2.1 Initiate discussion on telecommunications infrastructure
Your telecommunications team must be engaged in order to talk through selections on appropriate
institution-to-institution infrastructure (e.g., leased line vs. VPN, firewall considerations, etc.) in order to
allow secure, online authorizations and (if required) sending of a nightly settlement file.
1.2.2 Initiate discussion on PGP Encryption of files
If a settlement file is created nightly for delivery to the provider, you may want to enforce a policy of PGP-
encrypting files before sending them. If so, you want to begin this discussion upfront to discuss the
exchange of keys and other mechanics.
August 30, 2007 Page 3
OLS.Switch On-Boarding v1.1
1.2.3 Determine the connection model
Some providers will have you connect to a single data center; others will ask you to make simultaneous
connections to two data centers and distribute authorization traffic between the two destinations. Make a
definitive determination as which of the two models is in play here. Get the host and port information for
all test and production destinations. You’ll need these to configure your channel connections.
Additionally, if your OLS.Switch implementation consists of more than one application node, make sure
you establish this fact very clearly with the provider. For example, if you have two application nodes, let it
be known that “we will want to establish two connections to each of your destinations addresses.” To
accommodate this approach, the provider will need to do one of the following things: ensure each
host:port can accept multiple connections (in networking parlance, the destination address must be
configured with ‘multiple listeners’); or the provider must specify unique destination addresses for each of
your application nodes.
1.2.4 Determine the channel manager you will use
It is of critical importance to know the details of the provider’s TCP/IP implementation. This information
will determine which channel manager you will use. Without the right channel manager in place, nothing
will work.
For example, AMEX has this to say about their TCP/IP implementation:
Messages are sent as variable-length byte streams (65,533 bytes, maximum). Request messages must be preceded by a two byte, unsigned integer, field length indicator, in binary, “network short/big-endian” format (i.e. most significant byte, followed by least significant byte). The field length indicator value must reflect the combined length of the two-byte indicator and the request message data field. Response messages (returned by the server) will contain a similarly formatted field length indicator that reflects the combined length of the two-byte indicator and the response message data field.
The text in the middle is bolded by AMEX because they understand its importance. The ‘combined
length’ approach is fairly non-standard. They’re making the reader aware of that anomaly. So, they’ve
nicely called it out. A custom channel manager is required to implement this interface. [Refer to Section
2.2.1 for AMEX channel implementation specifics.]
We can contrast the AMEX approach to something more standard, like SVS’ approach. This is from the
SVS telecommunication specification:
Messages are passed unencoded by way of TCP. Each message is prefixed by a two-byte message header.
● byte 1 – High order byte of message length
● byte 2 – Low order byte of message length
In all messages, the message length value placed in bytes 1 and 2 does not include the length of the header.
That’s the more typical approach, which is covered by an standard jPOS channel called ‘NAC Channel.’
August 30, 2007 Page 4
OLS.Switch On-Boarding v1.1
2 Configuring Online Aspects 2.1 Files 2.1.1 Add new sub-directory structure
It’s assumed that you’ve already got a ‘modules’ directory (‘dir’) in place. Using the AMEX example, you
need to create a sub-dir structure underneath modules that looks like this:
2.1.2 Configure ISO Packager
Configuring the ISO Packager is the essential, core task. The packager incorporates such ISO8583
implementation decisions as: the format of numerical values (display or BCD?); the character set used for
alphanumerical values (ASCII or EBCDIC?); the length of each data field; whether the LLVAR or LLLVAR
construct is in play for a particular field; whether numerical values should be padded to the full field
length; and other important implementation policies that have been made by the provider and
incorporated into their specifications.
You must read and know the provider’s specs as a precursor to this exercise. You should also read my
in-depth discussion of the packager ‘alignment’ exercise, which you can find here:
http://www.andyorrock.com/paymentsystems/2006/09/implementing_th.html
You should also familiarize yourself with Chapter 7 (“Implementing Custom Packagers”) and Appendix C
(“ISOField Packagers”) of the “jPOS Programmers’ Guide.”
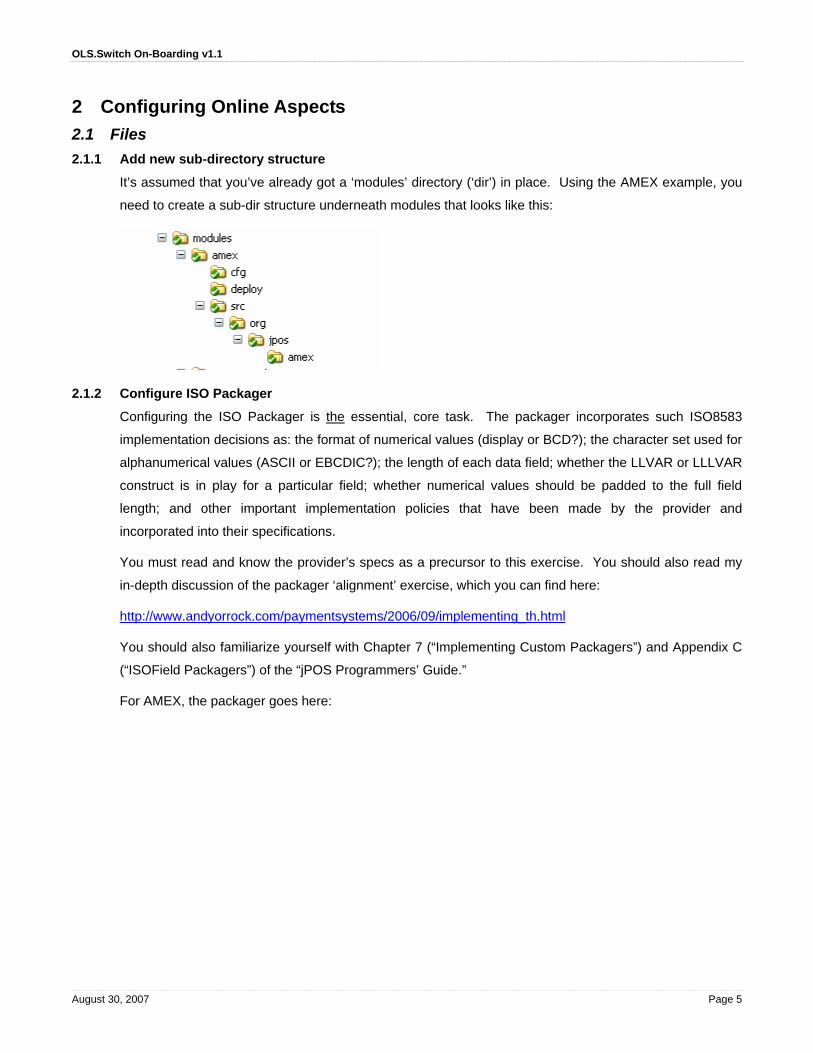
For AMEX, the packager goes here:
August 30, 2007 Page 5

OLS.Switch On-Boarding v1.1
2.1.3 Define External-to-Internal Result Code mapping
This task assumes that you’ve already got a working internal result code scheme in place. As a prelude
to this section, you should read my two-part online series on the importance of establishing a result code
infrastructure:
• Part 1: http://www.andyorrock.com/paymentsystems/2006/08/result_codes.html
• Part 2: http://www.andyorrock.com/paymentsystems/2007/07/result-codes-pa.html
The goal for this step is to map each possible result code received from the provider (the external code)
into one of the defined internal result codes (‘IRCs’). If required, you can define and add new, additional
IRCs (not part of this discussion). These codes go into a file called ‘Constants.p’ – see placement here:
For a typical AMEX installation, the file contains the following contents:
August 30, 2007 Page 6
OLS.Switch On-Boarding v1.1
AMEX.ISO.000 = 0000 # Referral AMEX.ISO.001 = 0001 # Partial approval – if not supported, map to decline AMEX.ISO.002 = 3000 # VIP approval - treat as standard approval AMEX.ISO.003 = 0000 AMEX.ISO.100 = 3000 AMEX.ISO.101 = 3100 # Referral AMEX.ISO.107 = 0001 AMEX.ISO.109 = 2400 AMEX.ISO.110 = 2006 AMEX.ISO.111 = 2100 AMEX.ISO.115 = 2005 AMEX.ISO.122 = 3108 AMEX.ISO.125 = 3000 AMEX.ISO.181 = 2000 AMEX.ISO.183 = 2003 AMEX.ISO.187 = 3108 AMEX.ISO.188 = 3108 AMEX.ISO.189 = 2400 AMEX.ISO.200 = 3000
Notes:
• The AMEX interface uses the ISO8583 1993 specification, where Field 39 (where you ‘find’ the
external value) is three positions (most providers use the 1987 specification, where Field 39 is two
positions).
• In the build process (defined in Section 4 of this document), all Constants.p files are ‘rolled up’ into a
single file. So the prefix (i.e., ‘AMEX’ here) must be unique per file (a separate Constants.p file is
defined for each interface) to prevent collisions.
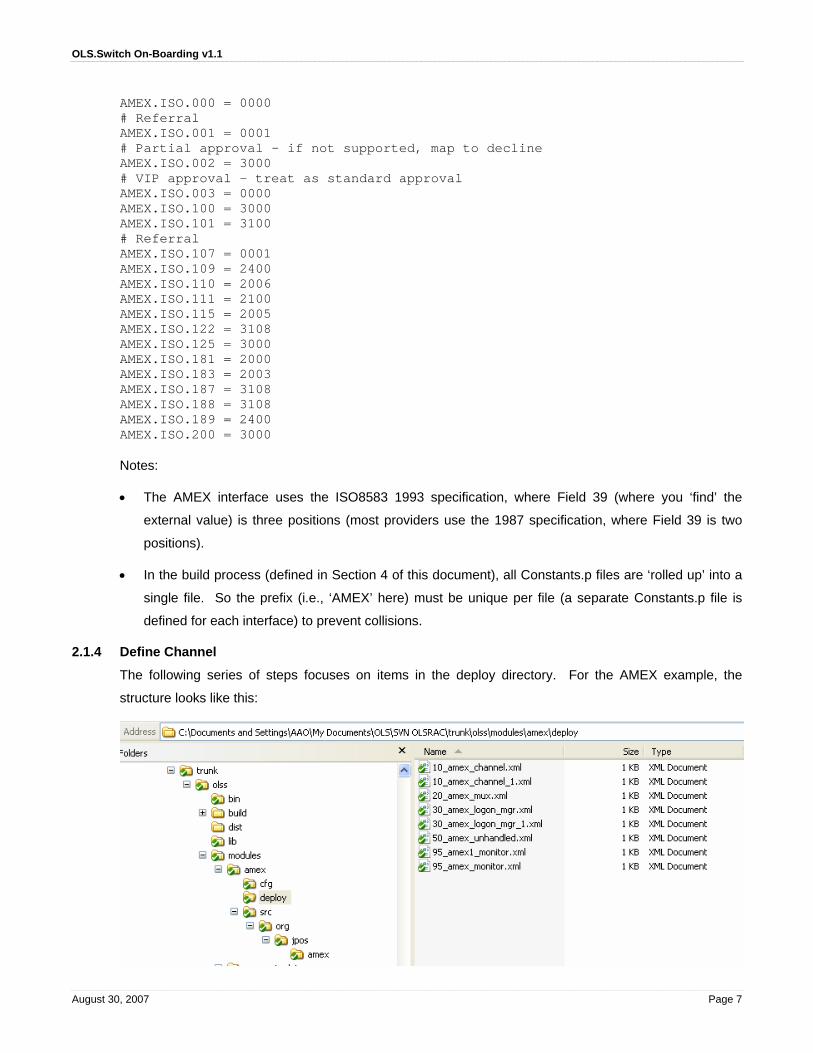
2.1.4 Define Channel
The following series of steps focuses on items in the deploy directory. For the AMEX example, the
structure looks like this:
August 30, 2007 Page 7

OLS.Switch On-Boarding v1.1
For this exercise, we assume a two-channel implementation.
NOTES ON XML:
• For all examples that follow, we skip the required initial <?xml version="1.0" ?> line. The
reader is assumed to know that this is a requirement in the XML definitions.
• Property variables (items bounded by ‘@’) are discussed in Section 4.1.1.
• Key linking values (i.e., values that matter to other XML files) are presented in bold blue text.
• Lines highlighted in red text are debug ‘helpers’ added to facilitate testing and certification. Adding
these two lines provides the developer/implementer with hex traces of the ‘raw’ message exchange.
This facility allows you to confirm that you’re building your requests and parsing the responses
properly. We don’t recommend keeping these lines around once the interface is moved into
production, as the data logged may run afoul (depending on card type) of PCI CISP standards..
We define the first channel in 10_channel_amex.xml like so:
<channel-adaptor name='amex' class="org.jpos.q2.iso.ChannelAdaptor" logger="Q2"> <channel class="org.jpos.amex.AMEXChannel" logger="Q2" realm="amex-channel" packager="org.jpos.iso.packager.GenericPackager"> <property name="packager-logger" value="Q2" /> <property name="packager-realm" value="amex-debug" /> <property name="packager-config" value="cfg/amex.xml" /> <property name="host" value="@amex0.host@" /> <property name="port" value="@amex0.port@" /> </channel> <in>amex-send</in> <out>amex-receive</out> <reconnect-delay>10000</reconnect-delay> </channel-adaptor>
We define the second channel in 10_channel_amex_1.xml like so:
<channel-adaptor name='amex1' class="org.jpos.q2.iso.ChannelAdaptor" logger="Q2"> <channel class="org.jpos.amex.AMEXChannel" logger="Q2" realm="amex-channel" packager="org.jpos.iso.packager.GenericPackager"> <property name="packager-logger" value="Q2" /> <property name="packager-realm" value="amex-debug" /> <property name="packager-config" value="cfg/amex.xml" /> <property name="host" value="@amex1.host@" /> <property name="port" value="@amex1.port@" /> </channel> <in>amex-send</in> <out>amex-receive</out> <reconnect-delay>10000</reconnect-delay> </channel-adaptor>
August 30, 2007 Page 8

OLS.Switch On-Boarding v1.1
2.1.5 Define MUX
Next, we define the multiplexer, a.k.a. the ‘MUX’, which manages the two channels, e.g., divides traffic
between multiple channels when all are up, or re-routes traffic accordingly when one or the other
channels is down. The MUX is also in charge of matching responses with requests.
Only one MUX definition is required per provider. For AMEX, we define 20_amex_mux.xml like so:
<mux class="org.jpos.q2.iso.QMUX" logger="Q2" name="amex-mux"> <in>amex-receive</in> <out>amex-send</out> <ready>amex.ready amex1.ready</ready> <unhandled>amex-unhandled</unhandled> </mux>
In the AMEX interface we use ISO Fields 41 (TID) and 11 (STAN) to match the ISO response with an
originating request. Since this is QMUX’s default, we don’t have to specify a ‘key’ parameter. If 41 and
11 aren’t sufficient to do matching, then a custom matching key must be defined. Here, for example,
we’ve added Field 37 (RRN) as an additional matching criterion:
<key>41, 11, 37</key>
2.1.6 Define Unhandled Queue
For most interfaces, you want to define an ‘unhandled queue.’ This is the system component that
handles late or unmatched responses. For AMEX, we define 50_amex_unhandled.xml like so:
<amex-delayed class='org.jpos.ee.LogUnhandled' logger='Q2'> <property name='unhandled-queue' value='amex-unhandled' /> </amex-delayed>
2.1.7 Define System Monitor entries for channels
For each defined channel, you define a System Monitor entry. These entries provide visibility into the
state and statistics of each channel by placing an entry into the application’s ‘status’ table.
To define an entry for the channel defined above in 10_channel_amex.xml, we define
95_amex_monitor.xml like so:
<channel-monitor name='amex0-monitor' class='org.jpos.ee.status.Monitor' logger='Q2'> <monitor id="@amex0-monitor@" delay='10000' period='15000'> <class>org.jpos.ee.ChannelMonitor</class> <property name='channel' value='amex' /> </monitor> </channel-monitor>
To define an entry for the channel defined above in 10_channel_amex_1.xml, we define
95_amex1_monitor.xml like so:
<channel-monitor name='amex1-monitor' class='org.jpos.ee.status.Monitor' logger='Q2'> <monitor id="@amex1-monitor@" delay='10000' period='15000'>
August 30, 2007 Page 9
OLS.Switch On-Boarding v1.1
<class>org.jpos.ee.ChannelMonitor</class> <property name='channel' value='amex1' /> </monitor> </channel-monitor>
2.1.8 Define Store and Forward (if required)
A store and forward (‘SAF’) element is only required if the provider requires that you supply host timeout
reversals. Typically, these are required only in conjunction with interfaces to providers that service cards
with real financial balances, not credit lines. So, for example, a Debit/EBT interface needs a SAF
component, as does a Stored Value interface. By contrast, the AMEX interface (when implemented for
credit cards only) doesn’t require a SAF component. They don’t want nor do they support real-time host
reversals. For a credit interface, reversals ‘wash out’ in the Extract process (i.e., reversed records aren’t
extracted).
For the sake of example, let’s assume we wanted to install a SAF component for AMEX. First, you
should read my three-part series on Store and Forward:
• Part 1: http://www.andyorrock.com/paymentsystems/2006/08/store_and_forwa.html
• Part 2: http://www.andyorrock.com/paymentsystems/2007/01/store_and_forwa.html
• Part 3: http://www.andyorrock.com/paymentsystems/2007/08/store-and-forwa.html
The SAF component for AMEX would be implemented in 30_amex_saf.xml like so:
<saf name='amex-saf' logger='Q2' realm='saf' class='org.jpos.saf.SAF'> <property name='space' value='jdbm:saf-amex' /> <property name='mux' value='amex-mux' /> <property name='flag-retransmissions' value='no'> if MTI is in list, messages would be retransmitted as xxx1 </property> <property name='initial-delay' value='60000' /> <property name='inter-message-delay' value='1000' /> <property name='wait-for-response' value='60000' /> <property name='max-retransmissions' value='1000' /> <property name='expire-after' value='86400'> in seconds </property> <property name='valid-response-codes' value='*' /> <property name='retry-response-codes' value='ZZ' /> </saf>
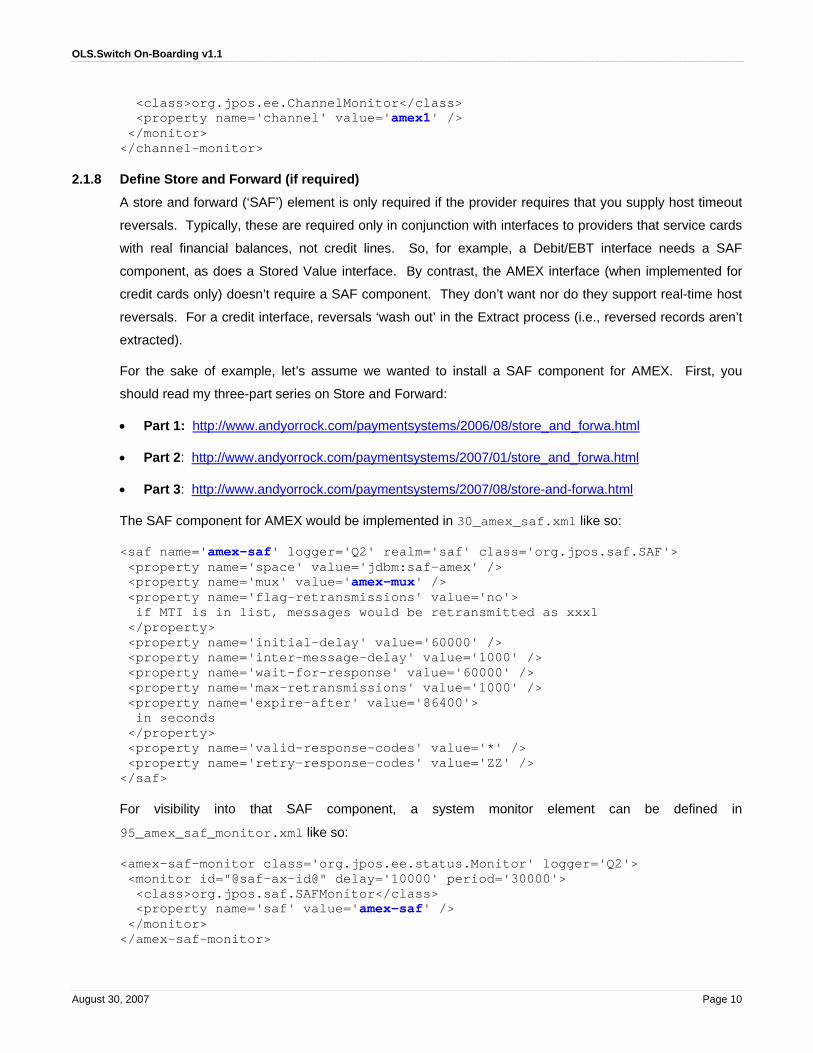
For visibility into that SAF component, a system monitor element can be defined in
95_amex_saf_monitor.xml like so:
<amex-saf-monitor class='org.jpos.ee.status.Monitor' logger='Q2'> <monitor id="@saf-ax-id@" delay='10000' period='30000'> <class>org.jpos.saf.SAFMonitor</class> <property name='saf' value='amex-saf' /> </monitor> </amex-saf-monitor>
August 30, 2007 Page 10

OLS.Switch On-Boarding v1.1
2.1.9 Define Fixed-Value Template
If there are any fixed values in the outbound ISO8583 request, you can remove the need to add code to
your program (see Section 2.2.4) by relegating the setting of these fields to the Fixed-Value Template
associated with this interface. [NOTE: This file is placed into the cfg sub-dir.] In the AMEX example,
there are five fields that are constant for all requests. So, you can define amex-template.xml like so:
<isomsg> <field id="19" value="840" /> <field id="24" value="182" /> <field id="25" value="1900" /> <field id="26" value="5912" /> <field id="32" value="05682" /> </isomsg>
NOTE: Fixed values are specific to country, industry and acquirer.
2.1.10 Define Logon Manager (if required)
Your implementation requires a logon manager if the provider requires logon, echo, or other “network
control” messages like key exchanges. These are typically implemented as ISO 08xx or 18xx Message
Type Indicators (‘MTIs’). Logon managers operate at the channel level. So, for our two-channel AMEX
example, you’ll require two distinct logon managers.
To define a logon manager for the channel defined above in 10_channel_amex.xml, we define
30_amex_logon_mgr.xml like so:
<amex-logon-mgr class="org.jpos.amex.LogonManager" logger="Q2"> <property name="persistent-space" value="@amex.logon.space@" /> <property name="mux" value="amex-mux" /> <property name="channel-ready" value="amex.ready" /> <property name="timeout" value="900000" /> <property name="echo-interval" value="600000" /> <property name="logon-interval" value="43200000" /> </amex-logon-mgr>
To define a logon manager for the channel defined above in 10_channel_amex_1.xml, we define
30_amex_logon_mgr_1.xml like so:
<amex1-logon-mgr class="org.jpos.amex.LogonManager" logger="Q2"> <property name="persistent-space" value="@amex.logon.space@" /> <property name="mux" value="amex-mux > " / <property name="channel-ready" value="amex1.ready" /> <property name="timeout" value="900000" /> <property name="echo-interval" value="600000" /> <property name="logon-interval" value="43200000" /> </amex1-logon-mgr>
2.1.11 Add BIN Range and Card Type values (if required)
Broadly, there are two transaction scenarios to consider:
August 30, 2007 Page 11
OLS.Switch On-Boarding v1.1
• There are those transactions where all is known by examining the transaction type information
provided by the origination point. For example, if the origination point tells us that a particular
transaction is a Debit or EBT purchase, you have what you need. An acquirer will have one
Debit/EBT gateway and can route all Debit and EBT purchases there regardless of card brand or
Bank Identification Number (‘BIN’) range.
• There are those transactions where knowing the transaction type provided by the origination point
doesn’t provide enough information to route the transaction. In these instances, you have to examine
the Primary Account Number (‘PAN’) to determine the card brand (within card type) and determine
the routing path, i.e., to which provider are you going to send the ISO authorization request.
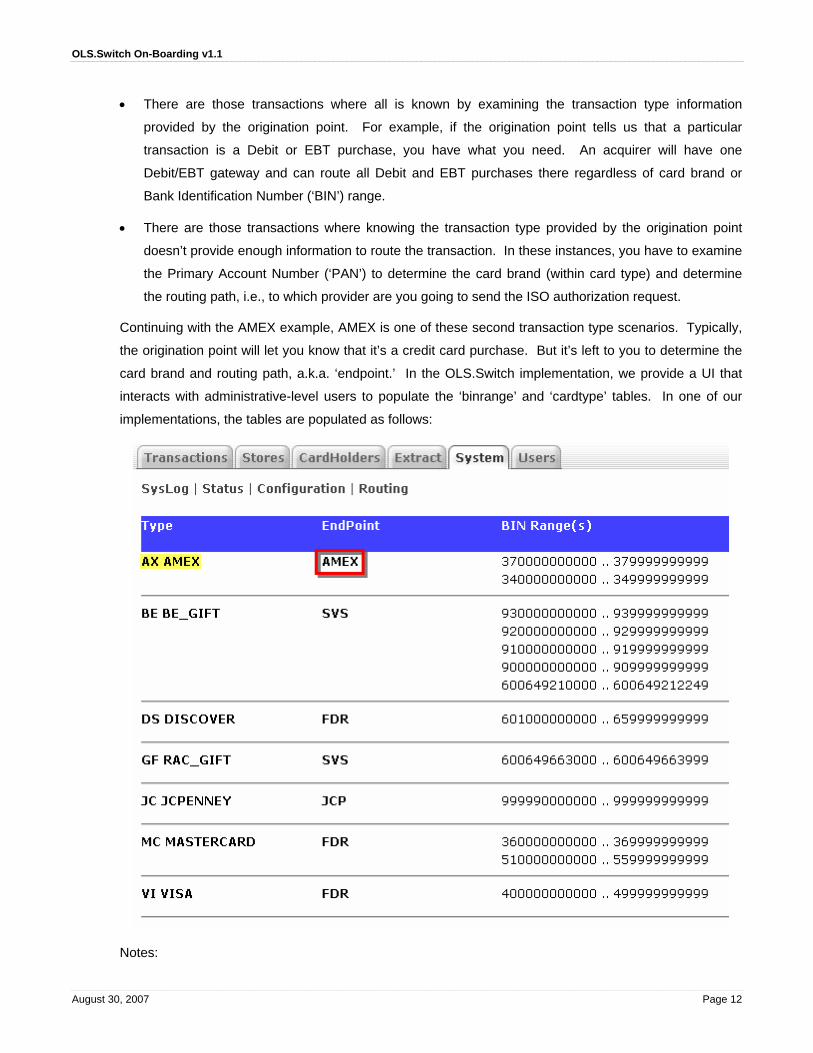
Continuing with the AMEX example, AMEX is one of these second transaction type scenarios. Typically,
the origination point will let you know that it’s a credit card purchase. But it’s left to you to determine the
card brand and routing path, a.k.a. ‘endpoint.’ In the OLS.Switch implementation, we provide a UI that
interacts with administrative-level users to populate the ‘binrange’ and ‘cardtype’ tables. In one of our
implementations, the tables are populated as follows:
Notes:
August 30, 2007 Page 12

OLS.Switch On-Boarding v1.1
• You can see that for Credit Cards, you have to specify BIN ranges in order to determine if the Credit
Card purchase is to be authorized by AMEX, First Data (‘FDR’) or JC Penney (‘JCP’). [The two SVS
items are some similar BIN range determination done for stored value cards.]
• For AMEX, the two defined BIN range entries represent the card number ranges “owned” by
American Express. Credit Card purchase transactions conducted with PANs falling within these BIN
ranges must be routed to AMEX for authorization.
• In the highlighted (yellow) area, ‘AX’ is the Card Brand. It is placed into the cardBrand column (on the
tranlog) in the OLS.Switch application. The highlighted ‘AMEX’ after the space is for additional info
only.
• The ‘AMEX’ designation framed in red is the targeted endpoint (i.e., the provider or gateway where
this OLS.Switch implementation is going to route the transaction) for transactions within this BIN
range.
2.1.12 Add new participants to TransactionManager
As a prelude to this section, you should read my TransactionManager piece online:
http://www.andyorrock.com/paymentsystems/2007/02/the_jpos_transa.html
In this section, we continue with the AMEX example. We assume that there’s an existing
TransactionManager in place to handle Credit Card Purchases and that you want to extend it to support
Credit Card transactions done with AMEX cards.
We’ll focus here in this document on implementing the Credit Card Purchase and Credit Card
Merchandise Return. The main transaction manager already has definitions for those that map out a
high-level transaction participant sequence:
<property name="J.54" value="CreateCredit Decrypt CreditSale" /> <property name="J.06" value="CreateCredit Decrypt CreditReturn" />
The ‘CreditSale’ group of participants looks like this (note new line added for AMEX):
<group name="CreditSale"> <participant class="org.jpos.ev.PopulateCreditTranLog" logger="Q2" realm="populate-credit-tranlog"> <property name="itc" value="05300" /> <property name="cardType" value="CR" /> <property name="checkpoint" value="populate-credit-tranlog" /> </participant> &validate_terminal; <participant class="org.jpos.ev.FindDuplicate"> <property name="itc" value="05300" /> <property name="dupe-check-window" value="2700" /> <property name="checkpoint" value="find-duplicate" /> </participant>
August 30, 2007 Page 13

OLS.Switch On-Boarding v1.1
<participant class="org.jpos.ev.SelectEndPoint"> <property name="FDR" value="QueryFDR LogAndReply" /> <property name="AMEX" value="QueryAMEX LogAndReply" /> <property name="JCP" value="QueryJCPPurch LogAndReply" /> <property name="DUPLICATE" value="DuplicateCreditResponse LogAndReply" /> <property name="MANAGER_OVERRIDE" value="DummyCreditResponse LogAndReply" /> <property name="UNKNOWN" value="DeclinedCreditResponse LogAndReply" /> </participant> </group>
Subsequently in the TransactionManager, we define a QueryAMEX group. Note how you map here to
the outgoing MTI and Processing Code (‘pcode’) and also reference the fixed-value template (set up in
Section 2.1.9):
<group name="QueryAMEX"> <participant class="org.jpos.ev.CreateAMEXRequest" logger="Q2" realm="create-amex-request"> <property name="mti" value="1100" /> <property name="pcode" value="004000" /> <property name="space" value="jdbm:amex-stan" /> <property name="template" value="cfg/amex-template.xml" /> <property name="checkpoint" value="create-amex-request" /> </participant> &query_amex_host; &credit_response; </group>
That’s a piece that brings together quite a number of the concepts.
AMEX doesn’t want Merchandise Returns sent to them real-time. We simply want to log those with an
Internal Result code of ‘0000’ for subsequent inclusion in the settlement file. This is how you do it (note
new line added for AMEX – here, the transaction is not sent to the AMEX Host):
<group name="CreditReturn"> <participant class="org.jpos.ev.PopulateCreditTranLog" logger="Q2" realm="populate-credit-tranlog"> <property name="itc" value="03000" /> <property name="cardType" value="CR" /> <property name="checkpoint" value="populate-credit-tranlog" /> </participant> &validate_terminal; <participant class="org.jpos.ev.FindDuplicate"> <property name="itc" value="03000" /> <property name="dupe-check-window" value="2700" /> <property name="checkpoint" value="find-duplicate" /> </participant> <participant class="org.jpos.ev.SelectEndPoint"> <property name="FDR" value="CreditReturnResponse LogAndReply" /> <property name="AMEX" value="CreditReturnResponse LogAndReply" /> <property name="JCP" value="QueryJCPRtn LogAndReply" />
August 30, 2007 Page 14

OLS.Switch On-Boarding v1.1
<property name="DUPLICATE" value="DuplicateCreditReturnResponse LogAndReply" /> <property name="MANAGER_OVERRIDE" value="DummyCreditResponse LogAndReply" /> <property name="UNKNOWN" value="DeclinedCreditResponse LogAndReply" /> </participant> </group> <group name="CreditReturnResponse"> <participant class="org.jpos.ev.SetRC" logger="Q2" realm="credit-return-set-rc"> <property name="rc" value="0000" /> </participant> &credit_response; </group>
NOTE: You’ll want to give special consideration towards how you’ll handle terminal-based reversals and
voids. For more information on that subject refer to my online piece:
http://www.andyorrock.com/paymentsystems/2007/01/entirely_tmi_on.html
2.1.13 Add any new ‘inc’ files referenced in TransactionManager
In the TransactionManager, try to make use of include files (‘inc’ files) whenever you have transaction
participants that you need to reference multiple times. In the example above, you added a new ‘inc’ file
called query_amex_host was added. To implement, you need to add a reference at the top of the
TransactionManager like so:
<!ENTITY query_amex_host SYSTEM "query_amex_host.inc">
Then, define a new file called query_amex_host.inc, which sits in the deploy dir and looks like this:
<participant class="org.jpos.amex.QueryAMEXHost" logger="Q2" realm="query-remote-amex-host"> <property name="mux" value="amex-mux" /> <property name="timeout" value="25000" /> <property name="threshold" value="12000" /> <property name="checkpoint" value="query-amex-host" /> <property name="reverse-on-timeout" value="false" /> </participant>
For more information on timeouts and thresholds, refer to my online piece:
http://www.andyorrock.com/paymentsystems/2007/07/just-trust-me-o.html
2.2 Programs 2.2.1 Write custom channel manager (if required)
Refer to the discussion in Section 1.2.4 of this document regarding channel managers. As discussed
there, the AMEX channel manager (continuing along with the AMEX example) is custom because of its
“include the length of the length” requirement.
For the records, that custom channel manager is written as follows (this is the entire program):
August 30, 2007 Page 15

OLS.Switch On-Boarding v1.1
package org.jpos.amex; import java.io.IOException; import java.net.ServerSocket; import org.jpos.iso.BaseChannel; import org.jpos.iso.ISOChannel; import org.jpos.iso.ISOException; import org.jpos.iso.ISOMsg; import org.jpos.iso.ISOPackager; import org.jpos.iso.ISOUtil; public class AMEXChannel extends BaseChannel { /** * Public constructor */ public AMEXChannel () { super(); } protected void len += 2;
sendMessageLength(int len) throws IOException {
serverOut.write (len >> 8); serverOut.write (len); } protected int getMessageLength() throws IOException, ISOException { byte[] b = new byte[2]; serverIn.readFully(b,0,2); return (int) ((((((int)b[0])&0xFF) << 8) | (((int)b[1])&0xFF)) - 2); } }
The channel manager is referenced in the channel XML definition(s). Refer to Section 2.1.4.
2.2.2 Write custom logon manager (if required)
Continuing with the AMEX example, AMEX has an 1804 ‘Echo’ Network message that can be
implemented via a Logon Manager. [See supporting Logon Manager XML in Section 2.1.10.]
Here’s the core part of that program (not showing the entire program here):
private void doEcho () throws ISOException { ISOMsg resp = mux.request (createMsg (), timeout); if (resp != null) { sp.out (ECHO, new Object(), echoInterval); } } private ISOMsg createMsg () throws ISOException { long traceNumber = SpaceUtil.nextLong (psp, TRACE) % 1000000; ISOMsg m = new ISOMsg ("1804"); m.set (3, "000000"); m.set (11, ISOUtil.zeropad (Long.toString (traceNumber), 6)); m.set (12, ISODate.getDateTime (new Date())); m.set (24, "831"); // “Are You There?” (per AMEX specs) m.set (25, "8700"); // Client-specific magic number return m; }
August 30, 2007 Page 16
OLS.Switch On-Boarding v1.1
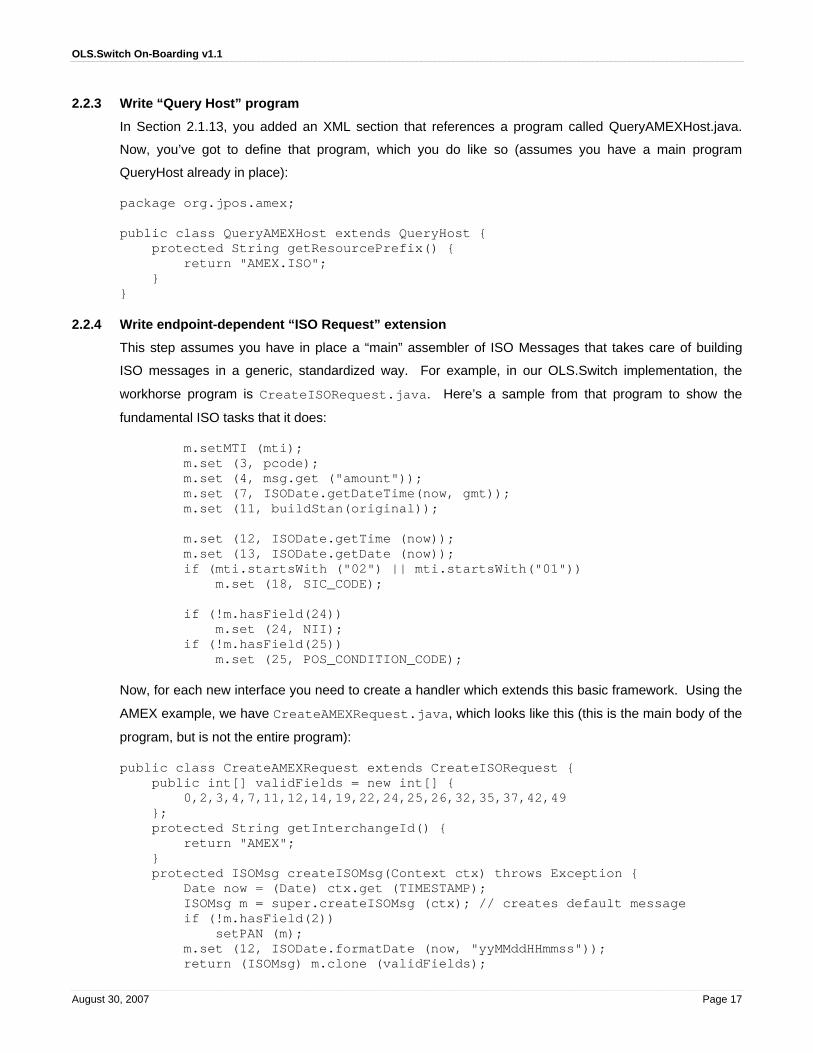
2.2.3 Write “Query Host” program
In Section 2.1.13, you added an XML section that references a program called QueryAMEXHost.java.
Now, you’ve got to define that program, which you do like so (assumes you have a main program
QueryHost already in place):
package org.jpos.amex; public class QueryAMEXHost extends QueryHost { protected String getResourcePrefix() { return "AMEX.ISO"; } }
2.2.4 Write endpoint-dependent “ISO Request” extension
This step assumes you have in place a “main” assembler of ISO Messages that takes care of building
ISO messages in a generic, standardized way. For example, in our OLS.Switch implementation, the
workhorse program is CreateISORequest.java. Here’s a sample from that program to show the
fundamental ISO tasks that it does:
m.setMTI (mti); m.set (3, pcode); m.set (4, msg.get ("amount")); m.set (7, ISODate.getDateTime(now, gmt)); m.set (11, buildStan(original)); m.set (12, ISODate.getTime (now)); m.set (13, ISODate.getDate (now)); if (mti.startsWith ("02") || mti.startsWith("01")) m.set (18, SIC_CODE); if (!m.hasField(24)) m.set (24, NII); if (!m.hasField(25)) m.set (25, POS_CONDITION_CODE);
Now, for each new interface you need to create a handler which extends this basic framework. Using the
AMEX example, we have CreateAMEXRequest.java, which looks like this (this is the main body of the
program, but is not the entire program):
public class CreateAMEXRequest extends CreateISORequest { public int[] validFields = new int[] { 0,2,3,4,7,11,12,14,19,22,24,25,26,32,35,37,42,49 }; protected String getInterchangeId() { return "AMEX"; } protected ISOMsg createISOMsg(Context ctx) throws Exception { Date now = (Date) ctx.get (TIMESTAMP); ISOMsg m = super.createISOMsg (ctx); // creates default message if (!m.hasField(2)) setPAN (m); m.set (12, ISODate.formatDate (now, "yyMMddHHmmss")); return (ISOMsg) m.clone (validFields);
August 30, 2007 Page 17
OLS.Switch On-Boarding v1.1
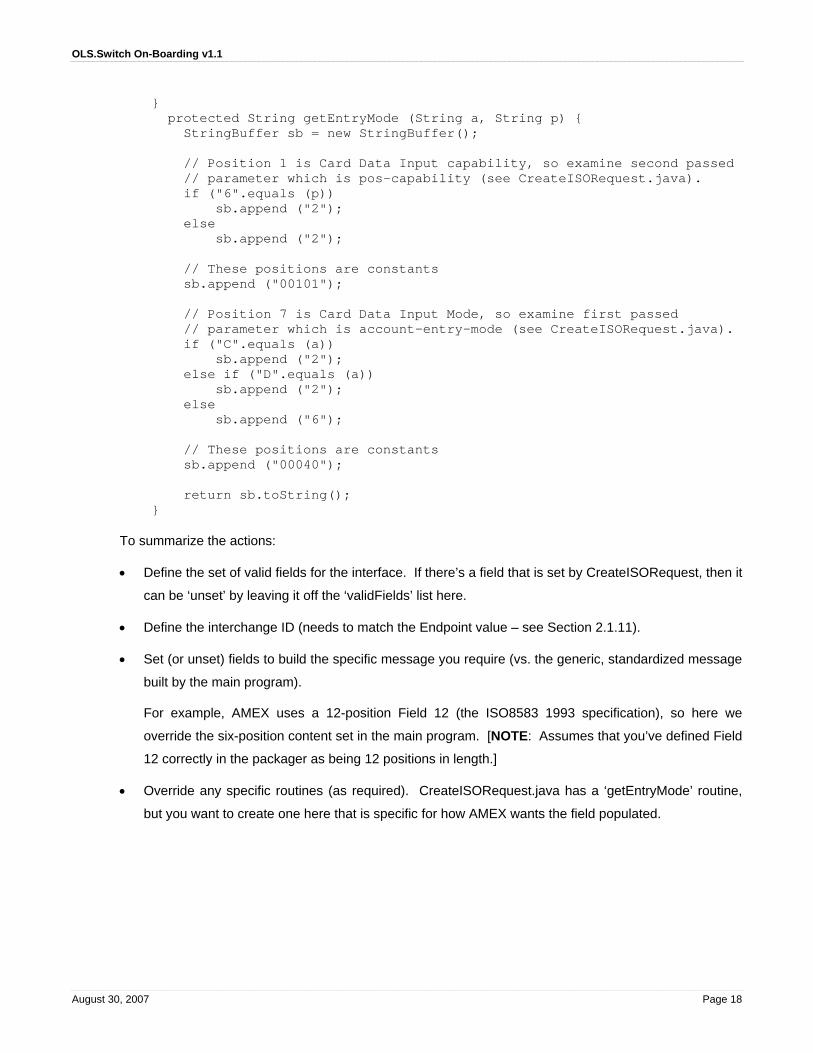
} protected String getEntryMode (String a, String p) { StringBuffer sb = new StringBuffer(); // Position 1 is Card Data Input capability, so examine second passed // parameter which is pos-capability (see CreateISORequest.java). if ("6".equals (p)) sb.append ("2"); else sb.append ("2"); // These positions are constants sb.append ("00101"); // Position 7 is Card Data Input Mode, so examine first passed // parameter which is account-entry-mode (see CreateISORequest.java). if ("C".equals (a)) sb.append ("2"); else if ("D".equals (a)) sb.append ("2"); else sb.append ("6"); // These positions are constants sb.append ("00040"); return sb.toString(); }
To summarize the actions:
• Define the set of valid fields for the interface. If there’s a field that is set by CreateISORequest, then it
can be ‘unset’ by leaving it off the ‘validFields’ list here.
• Define the interchange ID (needs to match the Endpoint value – see Section 2.1.11).
• Set (or unset) fields to build the specific message you require (vs. the generic, standardized message
built by the main program).
For example, AMEX uses a 12-position Field 12 (the ISO8583 1993 specification), so here we
override the six-position content set in the main program. [NOTE: Assumes that you’ve defined Field
12 correctly in the packager as being 12 positions in length.]
• Override any specific routines (as required). CreateISORequest.java has a ‘getEntryMode’ routine,
but you want to create one here that is specific for how AMEX wants the field populated.
August 30, 2007 Page 18

OLS.Switch On-Boarding v1.1
3 Configuring Batch Aspects As a prelude to this section, you should read – in its entirety – my ‘Real Systems Do Extracts’ series online:
• Part 1: http://www.andyorrock.com/paymentsystems/2006/07/real_systems_do.html
• Part 2: http://www.andyorrock.com/paymentsystems/2006/08/real_systems_do.html
• Part 3: http://www.andyorrock.com/paymentsystems/2006/09/real_systems_do.html
• Part 4: http://www.andyorrock.com/paymentsystems/2007/03/real_systems_do.html
3.1 Files 3.1.1 Define applicable records using the FSDMsg facility
Continuing here with the AMEX example, in the case of the referenced implementation, four record types
apply (as per the AMEX spec):
• Transaction File Header (‘TFH’) – one per file
• Transaction Advice Basic (‘TAB’) – one per extractable transaction
• Transaction Batch Trailer (‘TBT’) – one per store (AMEX extract records are arranged and tallied by
store, meaning you need to query the records in store number order and generate a trailer record on
each ‘store break’)
• Transaction File Summary (‘TFS’) – one per file
For each output set, you form a ‘base’ which consists of any set of fields at the beginning of the records
that is (a) repeatable in all record types in the set and (b) contains a field (or fields) which can act as a
key. That’s achievable for the AMEX output record set because record-id and record-number are the
initial fields in all records, and record-id (TFH, TAB, etc.) is the key. The base looks like this (where type
‘A’ is Alphanumeric, type ‘N’ is Numeric, and ‘K’ – not used here – is ‘Constant’):
<schema> <field id='record-id' type='A' length='3' key='true' /> <field id='record-number' type='N' length='8' /> </schema> Now you form the variable portions of the applicable records, which look like this in FSD:
<schema id='TFH'> <!-- Transaction File Header record --> <field id='submitter-id' type='K' length='11'>098497 </field> <field id='filler' type='K' length='21' > </field> <field id='submitter-ref-num' type='A' length='9' /> <field id='submitter-seq-num' type='K' length='9' >000000000</field> <field id='file-creation-date' type='N' length='8' /> <field id='file-creation-time' type='N' length='6' /> <field id='variable-length-ind' type='K' length='8' >05020000</field> </schema> <schema id='TAB'> <!-- Transaction Advice (Basic) record --> <field id='transaction-identifier' type='N' length='15'/> <field id='format-code' type='K' length='2' >02</field>
August 30, 2007 Page 19

OLS.Switch On-Boarding v1.1
<field id='media-code' type='K' length='2' >01</field> <field id='submission-method' type='K' length='2' >03</field> <field id='filler-1' type='K' length='10'> </field> <field id='approval-code' type='A' length='6' /> <field id='primary-account-number' type='A' length='19'/> <field id='expiration-date' type='N' length='4' /> <field id='transaction-date' type='N' length='8' /> <field id='transaction-time' type='N' length='6' /> <field id='filler-2' type='K' length='3' >000</field> <field id='transaction-amount' type='N' length='12'/> <field id='processing-code' type='N' length='6' /> <field id='currency-code' type='K' length='3' >840</field> <field id='extended-payment-data' type='K' length='2' >01</field> <field id='merchant-id' type='A' length='15'/> <field id='merchant-location' type='A' length='15'/> <field id='merchant-contact' type='A' length='40'/> <field id='terminal-id' type='A' length='8' /> <field id='pos-data-code' type='A' length='12'/> <field id='filler-3' type='K' length='3' >000</field> <field id='filler-4' type='K' length='12'>000000000000</field> <field id='filler-5' type='K' length='3' > </field> <field id='invoice-ref-number' type='A' length='30'/> <field id='filler-6' type='K' length='15'> </field> </schema> <schema id='TBT'> <!-- Transaction Batch Trailer record --> <field id='merchant-id' type='A' length='15'/> <field id='filler-1' type='K' length='15'> </field> <field id='tbt-id-number' type='N' length='15'/> <field id='tbt-creation-date' type='N' length='8' /> <field id='number-of-tabs' type='N' length='8' /> <field id='filler-2' type='K' length='3' >000</field> <field id='tbt-amount' type='N' length='20'/> <field id='tbt-amount-sign' type='A' length='1' /> <field id='tbt-currency-code' type='K' length='3' >840</field> <field id='filler-3' type='K' length='3' >000</field> <field id='filler-4' type='K' length='20'>00000000000000000000</field> <field id='filler-5' type='K' length='3' > </field> </schema> <schema id='TFS'> <!-- Transaction File Summary --> <field id='number-of-debits' type='N' length='8' /> <field id='filler-1' type='K' length='3' >000</field> <field id='hash-tot-debit-amt' type='N' length='20'/> <field id='number-of-credits' type='N' length='8' /> <field id='filler-2' type='K' length='3' >000</field> <field id='hash-tot-credit-amt' type='N' length='20'/> <field id='filler-3' type='K' length='3' >000</field> <field id='hash-tot-amt' type='N' length='20'/> </schema> File names here are important. FSD will look for the word ‘base’ and for the key when determining file
names during program execution. Therefore, the files are named:
• amex-extract-base.xml
• amex-extract-TFH.xml
• amex-extract-TAB.xml
• amex-extract-TBT.xml
• amex-extract-TFS.xml
August 30, 2007 Page 20

OLS.Switch On-Boarding v1.1
3.2 Programs 3.2.1 Add program ‘handler’ for any extract and internal reports required
We continue with the AMEX example. In conjunction with on-boarding the AMEX interface, you need to
define two new batch outputs: an ‘extract’ file (so you can inform AMEX of all the approved, non-reversed
financial transactions); and an internal ‘report’ (so that your internal accounting group can be kept
apprised of the same information).
The ‘extract’ file has an external audience. The FSD records defined above describe the record- and
field-level make-up of the file.
The ‘report’ file has an internal audience. Assuming the report leverages the look and feel of an existing
report file, no new FSD records are required.
For the AMEX example, we’re going to add new program handlers to handle these external and internal
file needs. That’s because we’re creating a file of AMEX-only transactions and delivering that information
to American Express. Likewise, internal accounting wants a separate file consisting only of AMEX
transactions.
In Extract.java, the new handlers are added as follows (see bolded text):
ExtractHandler[] handler = new ExtractHandler[] { new FDRExtractHandler(), new AMEXExtractHandler(), new DSCVRExtractHandler(), new GDOTExtractHandler(), new INCOMMExtractHandler(), new SVSExtractHandler(), new VZNExtractHandler(), new JCPExtractHandler(), new RACExtractDBHandler(false), // debug off new RACExtractEBHandler(false), // debug off new RACExtractAXHandler(false), // debug off new RACExtractDSMCVIHandler(false), // debug off new RACExtractJCHandler(false), // debug off new RACExtractGFHandler(false), // debug off new RACExtractCPINHandler(false), // debug off new RACExtractSVHandler(false), // debug off new RACExtractPCHandler(false), // debug off new DWExtractHandler(false), // debug off new NAVExtractHandler(false) // debug off }; Some comments:
• The AMEXExtractHandler is the external extract
• The ‘RAC’ items are the internal reports for accounting
• The internal reports have a debugging facility which can be turned to ‘true’ while testing during the
development process.
• The last item in the handler list – NAVExtractHandler here – should not be followed by a comma.
August 30, 2007 Page 21
OLS.Switch On-Boarding v1.1
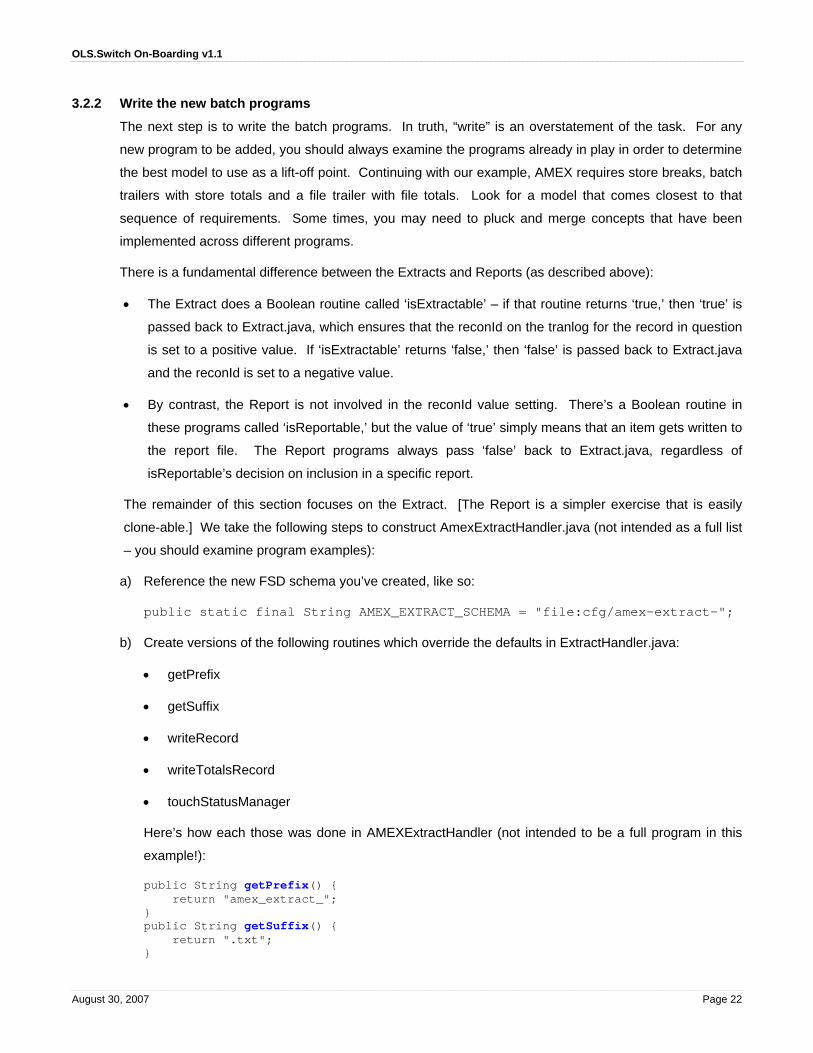
3.2.2 Write the new batch programs
The next step is to write the batch programs. In truth, “write” is an overstatement of the task. For any
new program to be added, you should always examine the programs already in play in order to determine
the best model to use as a lift-off point. Continuing with our example, AMEX requires store breaks, batch
trailers with store totals and a file trailer with file totals. Look for a model that comes closest to that
sequence of requirements. Some times, you may need to pluck and merge concepts that have been
implemented across different programs.
There is a fundamental difference between the Extracts and Reports (as described above):
• The Extract does a Boolean routine called ‘isExtractable’ – if that routine returns ‘true,’ then ‘true’ is
passed back to Extract.java, which ensures that the reconId on the tranlog for the record in question
is set to a positive value. If ‘isExtractable’ returns ‘false,’ then ‘false’ is passed back to Extract.java
and the reconId is set to a negative value.
• By contrast, the Report is not involved in the reconId value setting. There’s a Boolean routine in
these programs called ‘isReportable,’ but the value of ‘true’ simply means that an item gets written to
the report file. The Report programs always pass ‘false’ back to Extract.java, regardless of
isReportable’s decision on inclusion in a specific report.
The remainder of this section focuses on the Extract. [The Report is a simpler exercise that is easily
clone-able.] We take the following steps to construct AmexExtractHandler.java (not intended as a full list
– you should examine program examples):
a) Reference the new FSD schema you’ve created, like so:
public static final String AMEX_EXTRACT_SCHEMA = "file:cfg/amex-extract-";
b) Create versions of the following routines which override the defaults in ExtractHandler.java:
• getPrefix
• getSuffix
• writeRecord
• writeTotalsRecord
• touchStatusManager
Here’s how each those was done in AMEXExtractHandler (not intended to be a full program in this
example!):
public String getPrefix() { return "amex_extract_"; } public String getSuffix() { return ".txt"; }
August 30, 2007 Page 22

OLS.Switch On-Boarding v1.1
public boolean writeRecord (TranLog tl) throws Exception { if (!isExtractable(tl)) { return false; } CreditTranLog dtl = (CreditTranLog) tl; // Write header only once if ("".equals (currentStore)) { writeHeaderRecord (tl, seqno++); currentStore = tl.getStoreNumber(); } // Unlike FDR model, in AMEX model store rec is batch trailer, // not header. So this routine writes trailer for *previous* batch // if (!tl.getStoreNumber().equals (currentStore)) { writeStoreRecord (lastTranLog, seqno++); currentStore = tl.getStoreNumber(); tabnum = 0; storeTotals.reset(); } byte[] secData = tl.getSecureData(); if (secData == null) return false; Map m = ssm.customDecryptMap (getBDK(), secData); writeTransactionRecord (dtl, seqno++, m); tabnum = tabnum + 1; totals.add (dtl.getAmount(), isDebit (dtl)); // Add to store totals as well - same concept // (create matching routine called 'storeTotals') storeTotals.add (dtl.getAmount(), isDebit (dtl)); this.lastTranLog = tl; return true; } public void writeTotalsRecord () throws JDOMException, MalformedURLException, HibernateException, ISOException, IOException { if (lastTranLog != null) writeStoreRecord (lastTranLog, seqno++); // flush latched store Date now = new Date(); FSDMsg m = new FSDMsg (AMEX_EXTRACT_SCHEMA); m.set ("record-id", "TFS"); m.set ("record-number", Integer.toString(seqno)); // In ExtractHandler, need to start counting total Debits // (number in addition to amount) m.set ("number-of-debits", Integer.toString(totals.getDebitsCount())); m.set ("hash-tot-debit-amt", getAmountAsString(totals.getDebits())); // In ExtractHandler, need to start counting total Credits // (number in addition to amount) m.set ("number-of-credits", Integer.toString(totals.getCreditsCount())); m.set ("hash-tot-credit-amt", getAmountAsString(totals.getCredits())); // Total Amount in trailer is NOT netted (is Debits + Credits) m.set ("hash-tot-amt", getAmountAsString(totals.getDebits().add(totals.getCredits()))); ps.println (m.pack()); } public void touchStatusManager () throws Exception { statusManager.touch ("axextract AMEX Extract", Status.OK, fname);
August 30, 2007 Page 23
OLS.Switch On-Boarding v1.1
}
c) Next, add the ‘isExtractable’ routine – this is the core part of the program as it determines whether a
particular row in the tranlog is going to trigger output by this handler. isExtractable for AMEX looks
like this:
public boolean isExtractable (TranLog tl) { return tl instanceof CreditTranLog && "AX".equals (tl.getCardBrand()) && tl.getStoreNumber() != null && tl.getSecureData() != null && tl.getRevInd() == null && ("05300".equals (tl.getInternalTranCode()) || "03000".equals (tl.getInternalTranCode())) && TRAN_APPROVED.equals (tl.getInternalResultCode()); } In other words, to be deemed extractable by the AMEXExtractHandler, a tranlog record:
o Is an American Express Credit card transaction
o Has valid Store and PCI-compliant card data
o Has not been reversed
o Is a financial transaction (Purchase or Return)
o Was approved
d) Finally, we add private routines as required. For example, the writeRecord routine written to appear
in AMEXExtractHandler makes reference to three routines called writeHeaderRecord,
writeStoreRecord and writeTransactionRecord. These routines populate the TFH, TBT and TAB FSD
record schemas respectively. [NOTE: The TFS schema is populated by writeTotalsRecord, which is
called by Extract.java for each handler as part of its completion routine after examining all tranlog
records.] As an example, here’s the writeHeaderRecord routine:
private void writeHeaderRecord (TranLog tl, int seqno) throws JDOMException, MalformedURLException, ISOException, IOException { Date now = new Date(); FSDMsg m = new FSDMsg (AMEX_EXTRACT_SCHEMA); m.set ("record-id", "TFH"); m.set ("record-number", Integer.toString(seqno)); m.set ("submitter-ref-num", Long.toString(Math.abs(tl.getReconId()))); m.set ("file-creation-date", ISODate.formatDate (now, "yyyyMMdd")); m.set ("file-creation-time", ISODate.formatDate (now, "HHmmss")); ps.println (m.pack()); }
August 30, 2007 Page 24

OLS.Switch On-Boarding v1.1
4 Testing It 4.1 Build and Start It 4.1.1 Define variable values in a properties file
We maintain test and prod properties files which contain the values which get inserted (during the ‘build’
process) into the deploy files where we’ve noted variables bounded by the ‘@’ character. Continuing with
the AMEX example, here are two of the variables as they appear in the deploy file 10_amex_channel.xml:
<property name="host" value="@amex0.host@" /> <property name="port" value="@amex0.port@" />
In order to build and start a functioning test release, each of the variables defined in the deploy files will
require a data assignment in the test.properties file. For AMEX, we added the following lines:
amex0-monitor = AMEX1 AMEX IPC 01 amex1-monitor = AMEX3 AMEX NROC 01 amex0.host = xxx.xxx.xxx.xxx amex0.port = yyyyy amex1.host = xxx.xxx.xxx.xxx amex1.port = yyyyy saf-ax-id = saf-amex AMEX SAF 01 Status amex.logon.space = jdbm:amexlogon:log/amexlogon
Some comments:
• “xxx.xxx.xxx.xxx” and “yyyyy” designations are used here in order to distribute the documentation
without raising auditing concerns. In the actual properties file, you’d place the actual host:port
information.
• A similar properties file is required for production. In a multi-node application setting, you may have
(depending on the configuration) one properties file per application node, e.g., prod.properties
and prod02.properties.
• In this example, in the AMEX production configuration we connect to two separate AMEX data
centers called IPC and NROC. The test system connects only to IPC, so to make test look like prod,
we make two connections to the same host:port and call them “AMEX IPC 01” and “AMEX NROC
01.” We believe it’s important to have a test system that has the look and feel of prod.
• For the ‘monitor’ items, the first text (e.g., ‘AMEX1’) becomes the ‘id’ (column) of a new row added to
the ‘status’ table. The text to the right of the first break in the text (e.g., ‘AMEX IPC 01’) becomes the
contents of the ‘name’ column in this new row in the ‘status’ table.
4.1.2 Compile and build a release
Use Apache ‘ant’ to compile and build a new release. Any coding errors will be flagged during the
compilation process. You need to address all of these to successfully build a new release. Note that the
build won’t catch errors in the XML, misconfigured components or logic flaws that successfully compile.
August 30, 2007 Page 25

OLS.Switch On-Boarding v1.1
4.1.3 Install the new release in test and start the service
Use q2 to start the new release. Check the q2.log for errors and address them. You need a ‘clean’ start-
up where all deploy elements are loaded successfully without error. You can’t advance until all errors are
addressed. This step will catch and resolve errors in the ‘deploy’ file XML and misconfigured
components.
4.2 Run It 4.2.1 Run an online transaction
Continuing our example of configuring an AMEX interface, now’s the time to try an AMEX card from the
point-of-sale. Do the following:
• Make sure you’re got the TransactionManager ‘debug’ option set to ‘true’ (only do this in test).
• Make sure you’ve got tracing turned on for the outbound channels (you don’t want to go live like this,
but at this point you want to see the ‘real’ ISO8583-based content you’re sending to and receiving
from the provider).
• Run the transaction.
• Check out the results of the transaction in the q2 log and the tranlog.
4.2.2 Run an extract
Only advance to this step once you’ve assured yourself that online transactions are being processed
properly. Then, do the following:
• Kick off the extract.
• If it does not run to completion, examine the q2 log. The error will be described there.
• If it does run to completion, check out the output files and examine the contents vs. your
expectations. Address the following questions to your satisfaction:
o Did you output the ‘right’ records? In other words, did you successfully identify and generate
output for the approved, non-reversed, financial transactions related to the cards associated with
this extract?
o Are the records in the ‘right’ order? Look for store headers and trailers on ‘store breaks’, file
headers and trailers, conditional transaction addendum records, etc., if they apply.
o Are each of the records populated properly?
o Are the trailer totals (if applicable) tallied correctly?
o Did you ‘tag’ tranlog items properly? In other words, are ‘extractable’ items tagged as ‘extracted’
and ‘non-extractable’ items tagged as ‘examined but not extracted.’
August 30, 2007 Page 26

OLS.Switch On-Boarding v1.1
August 30, 2007 Page 27
NOTE: OLS.Switch uses an approach where extracted records are tagged with the +reconId
value in the reconId column, and un-extracted records are tagged with the –reconId value.
Records not yet examined have 0 (zero) in the reconId column.